AUDI A4 1998 B5 / 1.G Front End Workshop Manual
A4 1998 B5 / 1.G
AUDI
AUDI
https://www.carmanualsonline.info/img/6/885/w960_885-0.png
AUDI A4 1998 B5 / 1.G Front End Workshop Manual
Page 2 of 19
50-2
Repair Manual, Heating & Air Conditioning,
Repair Group 87
Notes:
Repair Manual, Suspension, Wheels, Steering,
Repair Group 48
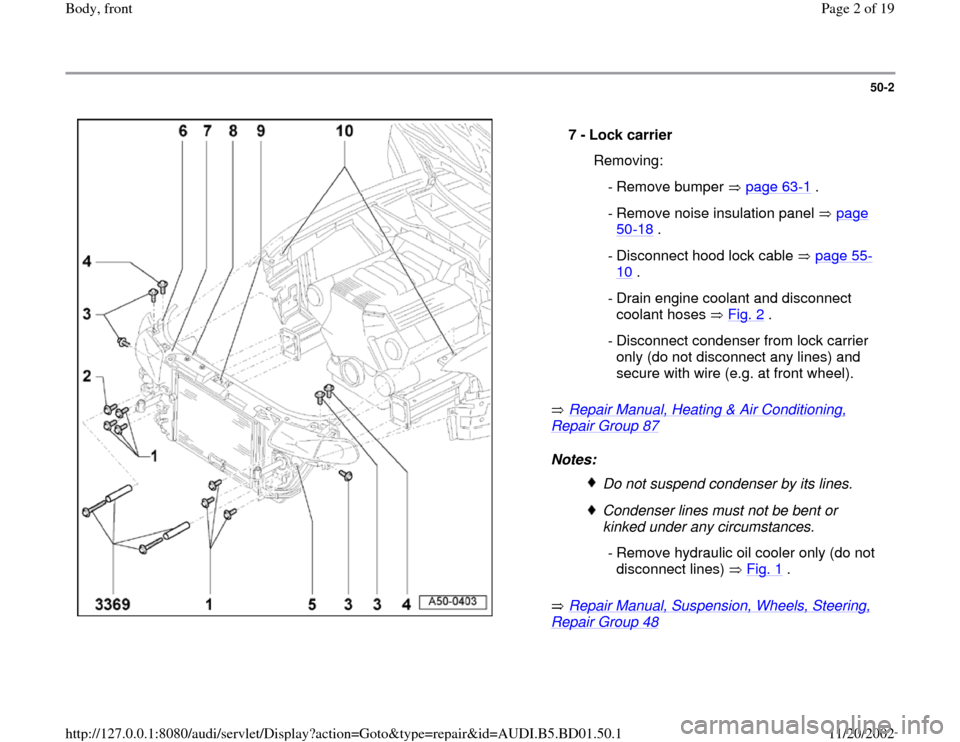
7 -
Lock carrier
Removing:
- Remove bumper page 63
-1 .
- Remove noise insulation panel page
50
-18
.
- Disconnect hood lock cable page 55
-
10
.
- Drain engine coolant and disconnect
coolant hoses Fig. 2
.
- Disconnect condenser from lock carrier
only (do not disconnect any lines) and
secure with wire (e.g. at front wheel).
Do not suspend condenser by its lines.Condenser lines must not be bent or
kinked under any circumstances.
- Remove hydraulic oil cooler only (do not
disconnect lines) Fig. 1
.
Pa
ge 2 of 19 Bod
y, front
11/20/2002 htt
p://127.0.0.1:8080/audi/servlet/Dis
play?action=Goto&t
yp
e=re
pair&id=AUDI.B5.BD01.50.1
Page 10 of 19
50-10
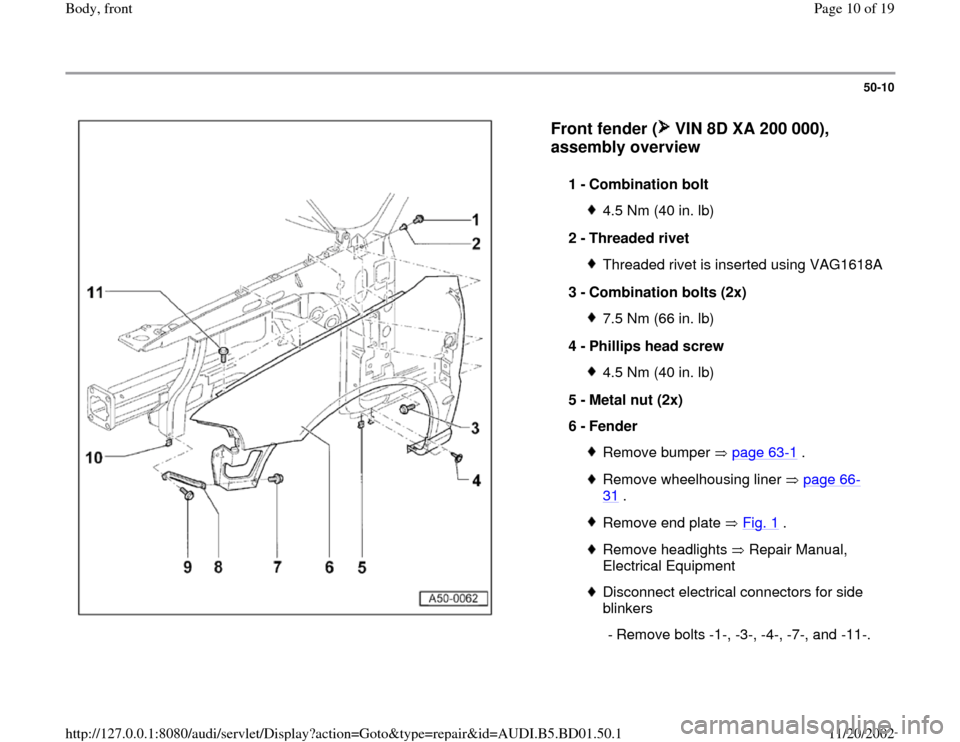
Front fender ( VIN 8D XA 200 000),
assembly overview
1 -
Combination bolt
4.5 Nm (40 in. lb)
2 -
Threaded rivet Threaded rivet is inserted using VAG1618A
3 -
Combination bolts (2x) 7.5 Nm (66 in. lb)
4 -
Phillips head screw 4.5 Nm (40 in. lb)
5 -
Metal nut (2x)
6 -
Fender Remove bumper page 63
-1 .
Remove wheelhousing liner page 66
-
31
.
Remove end plate Fig. 1
.
Remove headlights Repair Manual,
Electrical Equipment Disconnect electrical connectors for side
blinkers
- Remove bolts -1-, -3-, -4-, -7-, and -11-.
Pa
ge 10 of 19 Bod
y, front
11/20/2002 htt
p://127.0.0.1:8080/audi/servlet/Dis
play?action=Goto&t
yp
e=re
pair&id=AUDI.B5.BD01.50.1
Page 12 of 19
50-12
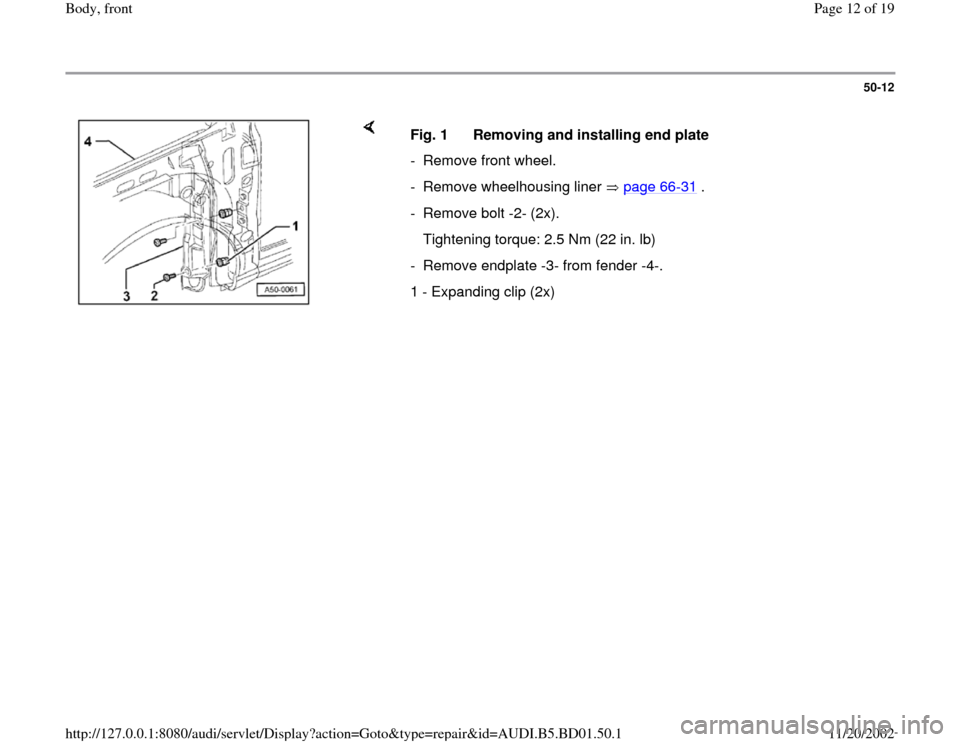
Fig. 1 Removing and installing end plate
- Remove front wheel.
- Remove wheelhousing liner page 66
-31
.
- Remove bolt -2- (2x).
Tightening torque: 2.5 Nm (22 in. lb)
- Remove endplate -3- from fender -4-.
1 - Expanding clip (2x)
Pa
ge 12 of 19 Bod
y, front
11/20/2002 htt
p://127.0.0.1:8080/audi/servlet/Dis
play?action=Goto&t
yp
e=re
pair&id=AUDI.B5.BD01.50.1
Page 14 of 19
50-14
Repair Manual, Electrical Equipment, Repair
Group 94, headlights, headlights, removing and installing.
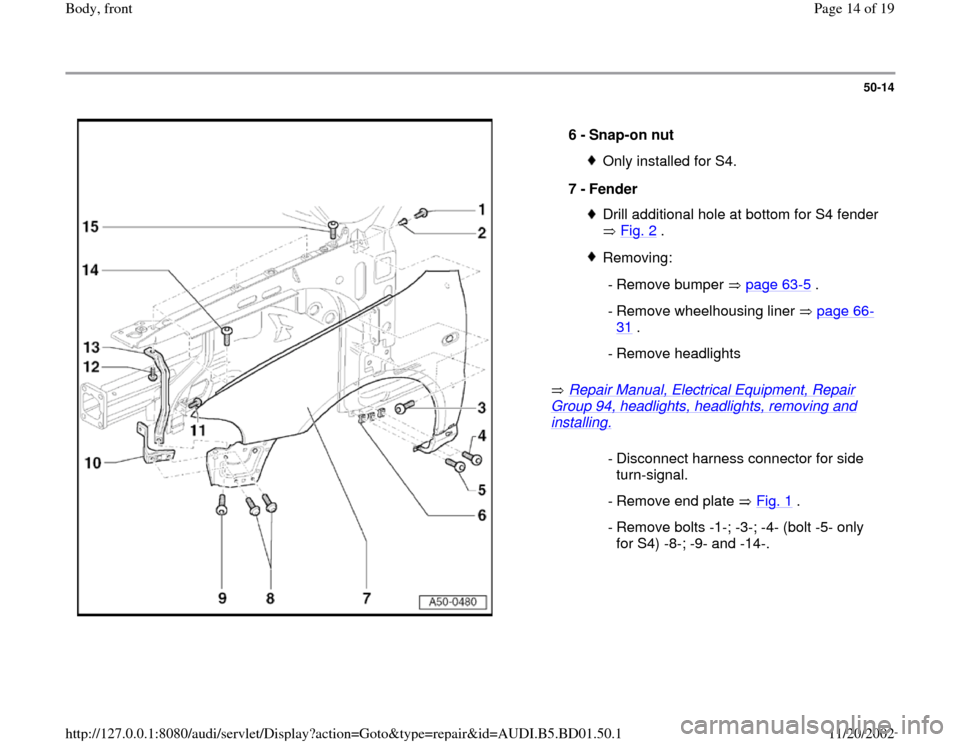
6 -
Snap-on nut Only installed for S4.
7 -
Fender Drill additional hole at bottom for S4 fender
Fig. 2
.
Removing:
- Remove bumper page 63
-5 .
- Remove wheelhousing liner page 66
-
31
.
- Remove headlights - Disconnect harness connector for side
turn-signal.
- Remove end plate Fig. 1
.
- Remove bolts -1-; -3-; -4- (bolt -5- only
for S4) -8-; -9- and -14-.
Pa
ge 14 of 19 Bod
y, front
11/20/2002 htt
p://127.0.0.1:8080/audi/servlet/Dis
play?action=Goto&t
yp
e=re
pair&id=AUDI.B5.BD01.50.1
Page 16 of 19
50-16
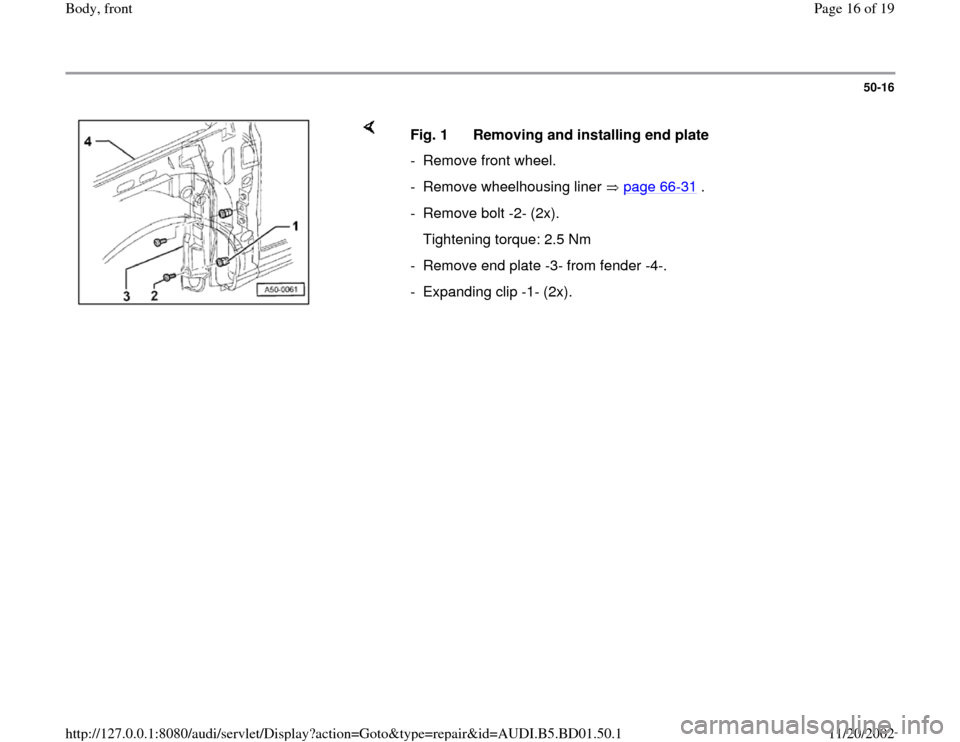
Fig. 1 Removing and installing end plate
- Remove front wheel.
- Remove wheelhousing liner page 66
-31
.
- Remove bolt -2- (2x).
Tightening torque: 2.5 Nm
- Remove end plate -3- from fender -4-.
- Expanding clip -1- (2x).
Pa
ge 16 of 19 Bod
y, front
11/20/2002 htt
p://127.0.0.1:8080/audi/servlet/Dis
play?action=Goto&t
yp
e=re
pair&id=AUDI.B5.BD01.50.1
Page 19 of 19
50-19
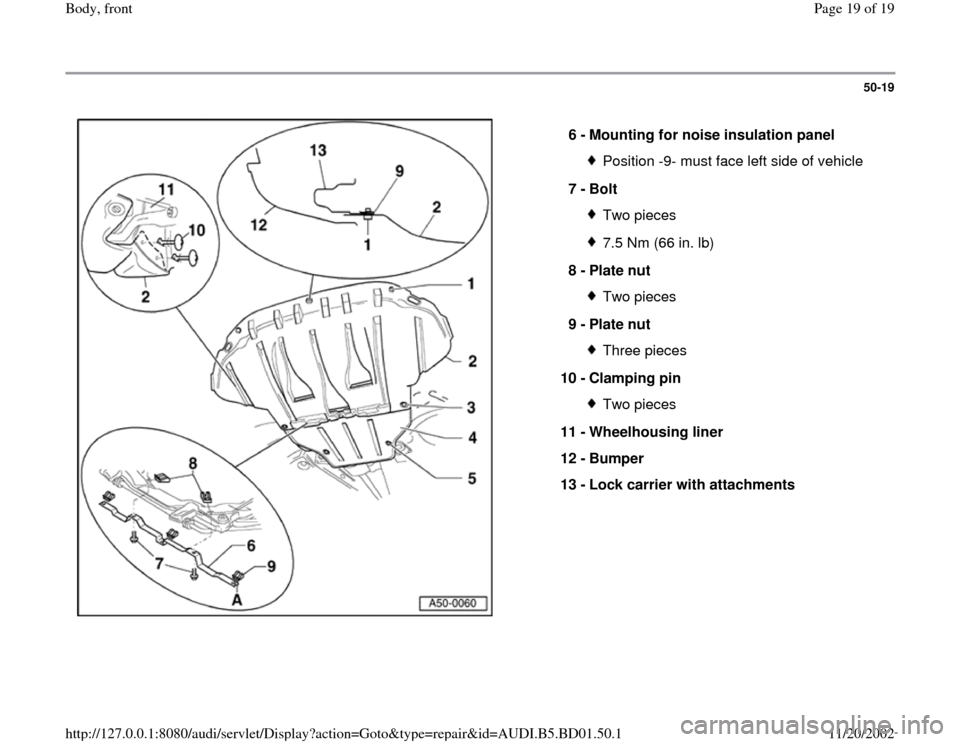
6 -
Mounting for noise insulation panel
Position -9- must face left side of vehicle
7 -
Bolt Two pieces7.5 Nm (66 in. lb)
8 -
Plate nut Two pieces
9 -
Plate nut Three pieces
10 -
Clamping pin Two pieces
11 -
Wheelhousing liner
12 -
Bumper
13 -
Lock carrier with attachments
Pa
ge 19 of 19 Bod
y, front
11/20/2002 htt
p://127.0.0.1:8080/audi/servlet/Dis
play?action=Goto&t
yp
e=re
pair&id=AUDI.B5.BD01.50.1
