air condition AUDI A4 1998 B5 / 1.G Heating And Ventilation System Servicing Workshop Manual
[x] Cancel search | Manufacturer: AUDI, Model Year: 1998, Model line: A4, Model: AUDI A4 1998 B5 / 1.GPages: 24, PDF Size: 0.49 MB
Page 9 of 24
87-159
Heater/air conditioner assembly
complete with instrument panel,
removing and installing (1996)
- Using VAG1551 function 03, initiate output
Diagnostic Test Mode (DTM) page 01
-42
.
CAUTION!
Before proceeding with removal of instrument panel and heater/air
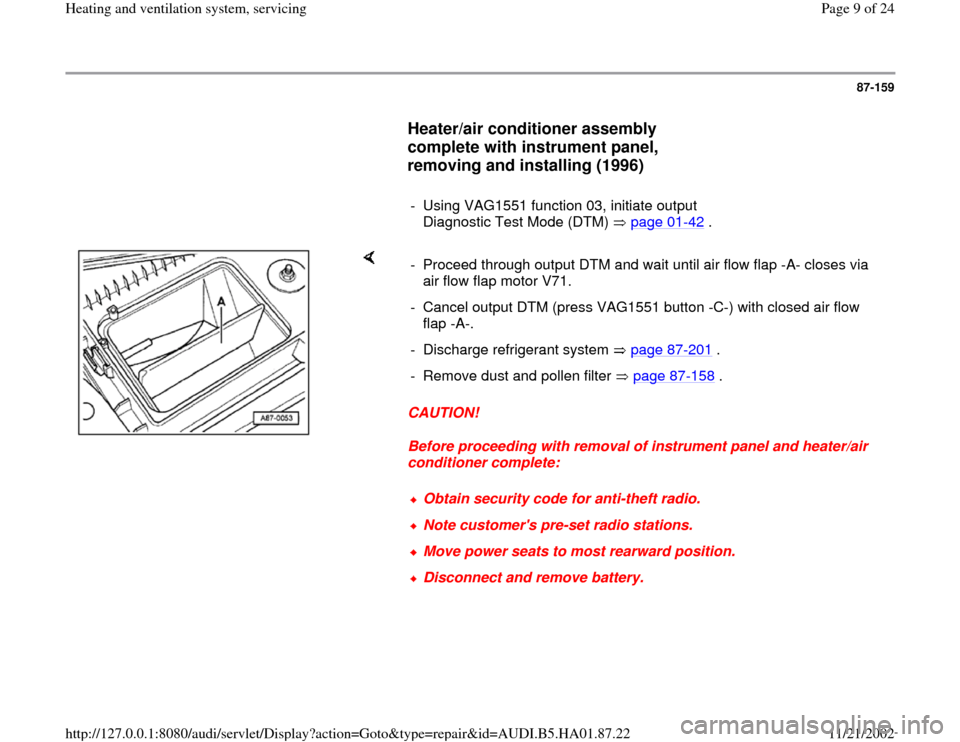
conditioner complete: - Proceed through output DTM and wait until air flow flap -A- closes via
air flow flap motor V71.
- Cancel output DTM (press VAG1551 button -C-) with closed air flow
flap -A-.
- Discharge refrigerant system page 87
-201
.
- Remove dust and pollen filter page 87
-158
.
Obtain security code for anti-theft radio.Note customer's pre-set radio stations.Move power seats to most rearward position.Disconnect and remove battery.
Pa
ge 9 of 24 Heatin
g and ventilation s
ystem, servicin
g
11/21/2002 htt
p://127.0.0.1:8080/audi/servlet/Dis
play?action=Goto&t
yp
e=re
pair&id=AUDI.B5.HA01.87.22
Page 13 of 24
87-163
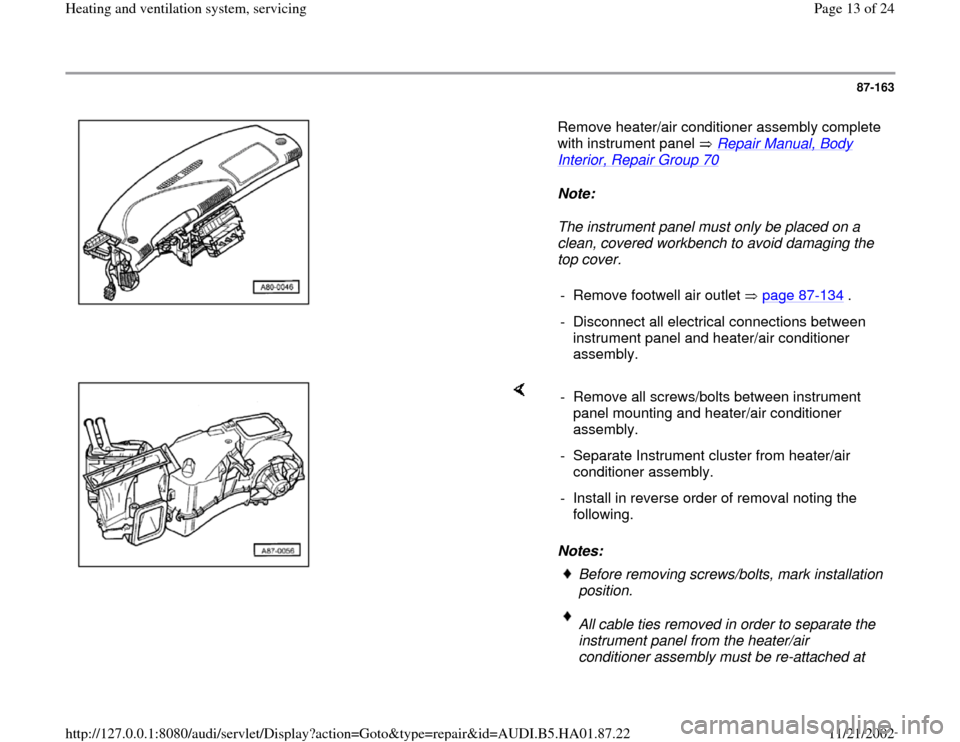
Remove heater/air conditioner assembly complete
with instrument panel Repair Manual, Body
Interior, Repair Group 70
Note:
The instrument panel must only be placed on a
clean, covered workbench to avoid damaging the
top cover.
- Remove footwell air outlet page 87
-134
.
- Disconnect all electrical connections between
instrument panel and heater/air conditioner
assembly.
Notes: - Remove all screws/bolts between instrument
panel mounting and heater/air conditioner
assembly.
- Separate Instrument cluster from heater/air
conditioner assembly.
- Install in reverse order of removal noting the
following.
Before removing screws/bolts, mark installation
position.
All cable ties removed in order to separate the
instrument panel from the heater/air
conditioner assembly must be re-attached at
Pa
ge 13 of 24 Heatin
g and ventilation s
ystem, servicin
g
11/21/2002 htt
p://127.0.0.1:8080/audi/servlet/Dis
play?action=Goto&t
yp
e=re
pair&id=AUDI.B5.HA01.87.22
Page 15 of 24
87-164
Notes:
When re-installing instrument panel and
heater/air conditioner assembly, ensure the A/C
system vacuum supply hose with heater core
fixture, and low pressure switch electrical
connector and evaporator fixture are inserted
together through the plenum chamber
openings.
Ensure evaporator drain is correctly positioned
page 87
-169
.
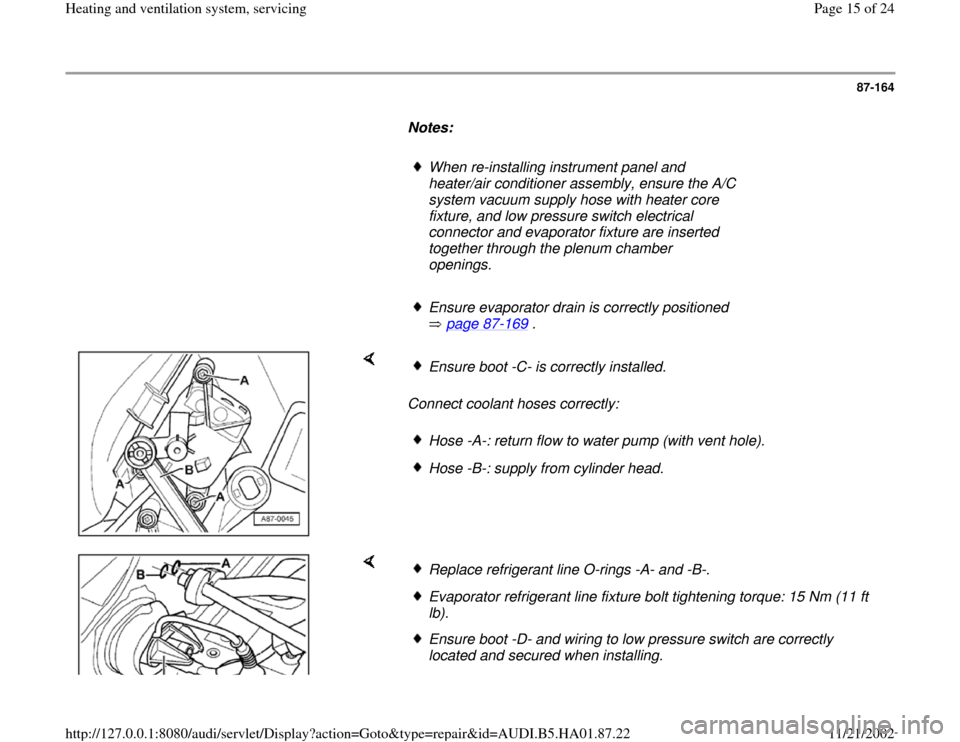
Connect coolant hoses correctly:
Ensure boot -C- is correctly installed.Hose -A-: return flow to water pump (with vent hole).Hose -B-: supply from cylinder head.
Replace refrigerant line O-rings -A- and -B-.Evaporator refrigerant line fixture bolt tightening torque: 15 Nm (11 ft
lb). Ensure boot -D- and wiring to low pressure switch are correctly
located and secured when installing.
Pa
ge 15 of 24 Heatin
g and ventilation s
ystem, servicin
g
11/21/2002 htt
p://127.0.0.1:8080/audi/servlet/Dis
play?action=Goto&t
yp
e=re
pair&id=AUDI.B5.HA01.87.22
Page 17 of 24
87-165
Heater/air conditioner assembly,
removing and installing (1997 )
CAUTION!
Obtain security code for anti-theft radio.
Note customer's pre-set radio stations.
Move power seats to most rearward
position.
Switch off ignition and disconnect battery
ground (GND) strap.
- Release pressure in coolant system by opening
cap at coolant expansion tank.
WARNING!
With hot engine, cooling system is under
pressure.
Coolant expansion tank cap must be
removed slowly.
Dispose of used coolant properly. Check
local regulations.
Pa
ge 17 of 24 Heatin
g and ventilation s
ystem, servicin
g
11/21/2002 htt
p://127.0.0.1:8080/audi/servlet/Dis
play?action=Goto&t
yp
e=re
pair&id=AUDI.B5.HA01.87.22
Page 19 of 24
87-166
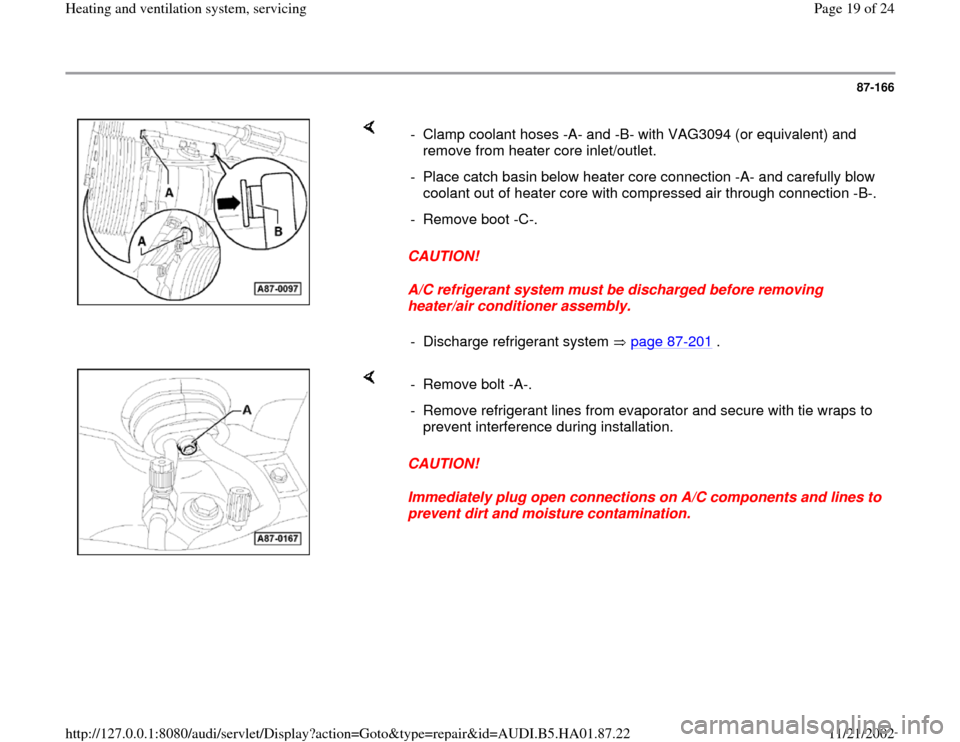
CAUTION!
A/C refrigerant system must be discharged before removing
heater/air conditioner assembly. - Clamp coolant hoses -A- and -B- with VAG3094 (or equivalent) and
remove from heater core inlet/outlet.
- Place catch basin below heater core connection -A- and carefully blow
coolant out of heater core with compressed air through connection -B-.
- Remove boot -C-.
- Discharge refrigerant system page 87
-201
.
CAUTION!
Immediately plug open connections on A/C components and lines to
prevent dirt and moisture contamination. - Remove bolt -A-.
- Remove refrigerant lines from evaporator and secure with tie wraps to
prevent interference during installation.
Pa
ge 19 of 24 Heatin
g and ventilation s
ystem, servicin
g
11/21/2002 htt
p://127.0.0.1:8080/audi/servlet/Dis
play?action=Goto&t
yp
e=re
pair&id=AUDI.B5.HA01.87.22
Page 20 of 24
87-167
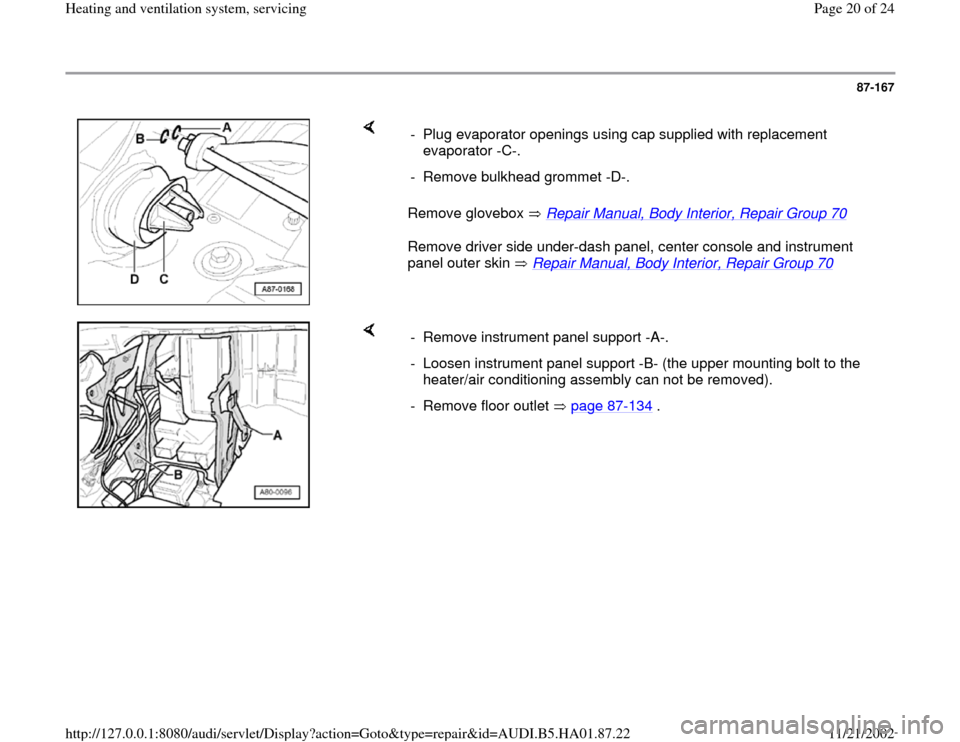
Remove glovebox Repair Manual, Body Interior, Repair Group 70
Remove driver side under-dash panel, center console and instrument
panel outer skin Repair Manual, Body Interior, Repair Group 70
- Plug evaporator openings using cap supplied with replacement
evaporator -C-.
- Remove bulkhead grommet -D-.
- Remove instrument panel support -A-.
- Loosen instrument panel support -B- (the upper mounting bolt to the
heater/air conditioning assembly can not be removed).
- Remove floor outlet page 87
-134
.
Pa
ge 20 of 24 Heatin
g and ventilation s
ystem, servicin
g
11/21/2002 htt
p://127.0.0.1:8080/audi/servlet/Dis
play?action=Goto&t
yp
e=re
pair&id=AUDI.B5.HA01.87.22
Page 21 of 24
87-168
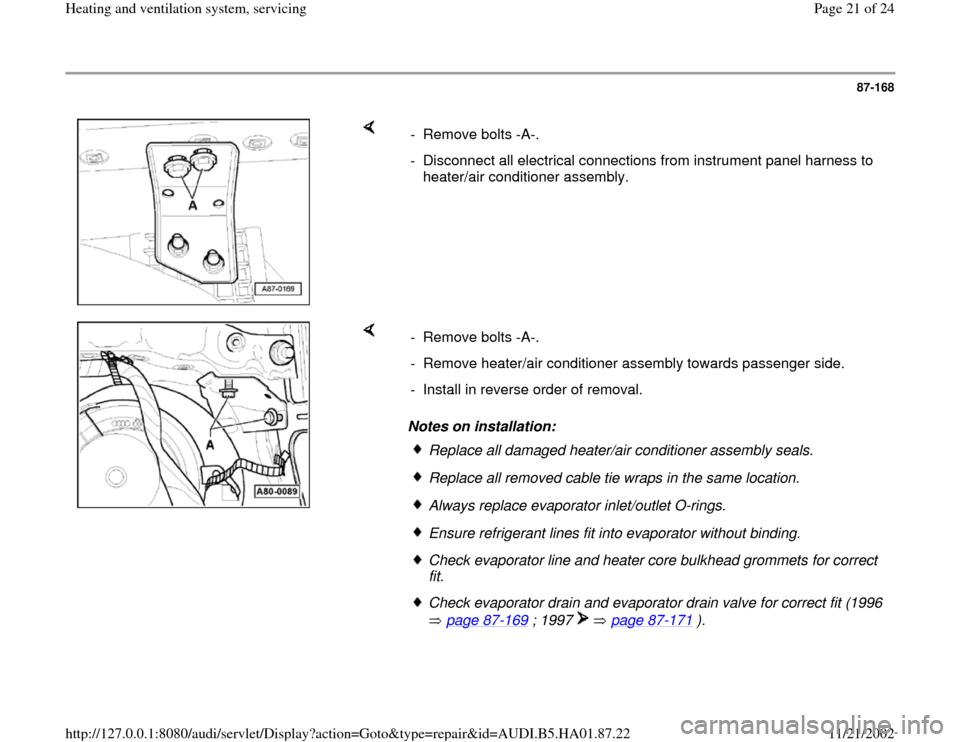
- Remove bolts -A-.
- Disconnect all electrical connections from instrument panel harness to
heater/air conditioner assembly.
Notes on installation: - Remove bolts -A-.
- Remove heater/air conditioner assembly towards passenger side.
- Install in reverse order of removal.
Replace all damaged heater/air conditioner assembly seals.Replace all removed cable tie wraps in the same location.Always replace evaporator inlet/outlet O-rings.Ensure refrigerant lines fit into evaporator without binding.Check evaporator line and heater core bulkhead grommets for correct
fit. Check evaporator drain and evaporator drain valve for correct fit (1996
page 87
-169
; 1997 page 87
-171
).
Pa
ge 21 of 24 Heatin
g and ventilation s
ystem, servicin
g
11/21/2002 htt
p://127.0.0.1:8080/audi/servlet/Dis
play?action=Goto&t
yp
e=re
pair&id=AUDI.B5.HA01.87.22
Page 23 of 24
87-170
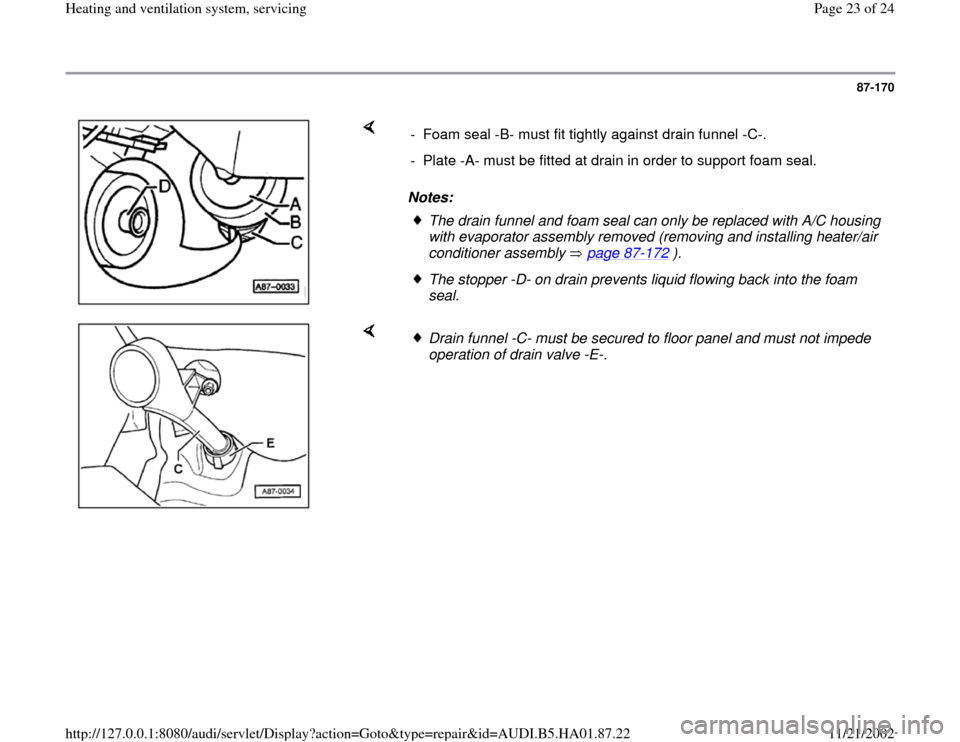
Notes: - Foam seal -B- must fit tightly against drain funnel -C-.
- Plate -A- must be fitted at drain in order to support foam seal.
The drain funnel and foam seal can only be replaced with A/C housing
with evaporator assembly removed (removing and installing heater/air
conditioner assembly page 87
-172
).
The stopper -D- on drain prevents liquid flowing back into the foam
seal.
Drain funnel -C- must be secured to floor panel and must not impede
operation of drain valve -E-.
Pa
ge 23 of 24 Heatin
g and ventilation s
ystem, servicin
g
11/21/2002 htt
p://127.0.0.1:8080/audi/servlet/Dis
play?action=Goto&t
yp
e=re
pair&id=AUDI.B5.HA01.87.22