AUDI A4 1998 B5 / 1.G Rear Door Trim User Guide
Manufacturer: AUDI, Model Year: 1998,
Model line: A4,
Model: AUDI A4 1998 B5 / 1.G
Pages: 17, PDF Size: 0.29 MB
AUDI A4 1998 B5 / 1.G Rear Door Trim User Guide
A4 1998 B5 / 1.G
AUDI
AUDI
https://www.carmanualsonline.info/img/6/896/w960_896-0.png
AUDI A4 1998 B5 / 1.G Rear Door Trim User Guide
Trending: light, warning lights, tow, door lock, lights, window, ECU
Page 11 of 17
70-33
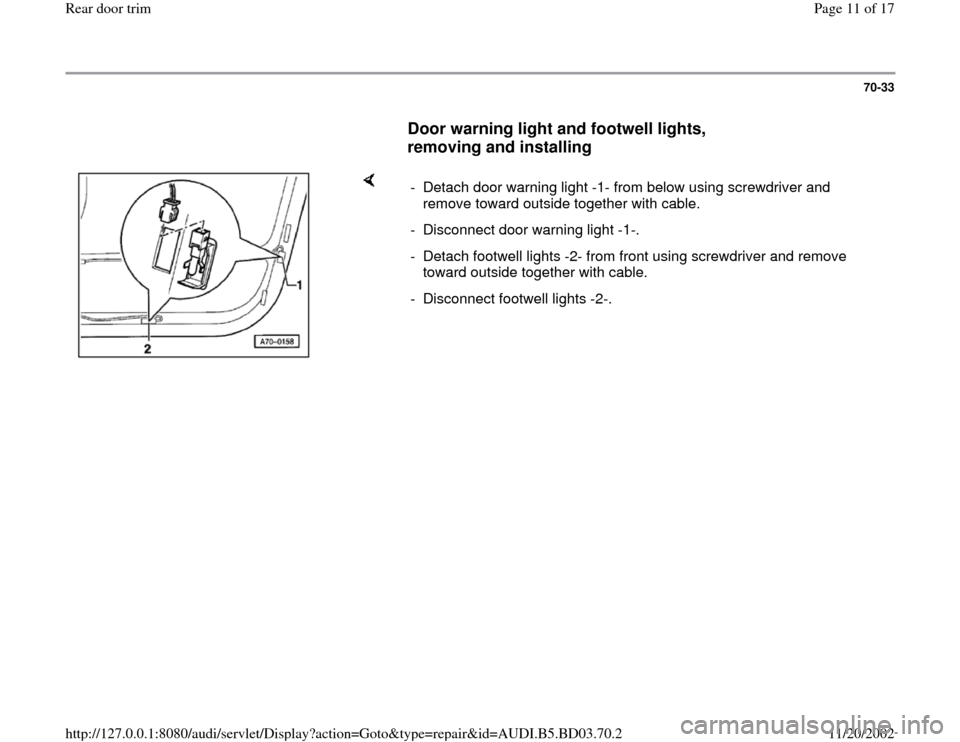
Door warning light and footwell lights,
removing and installing
- Detach door warning light -1- from below using screwdriver and
remove toward outside together with cable.
- Disconnect door warning light -1-.
- Detach footwell lights -2- from front using screwdriver and remove
toward outside together with cable.
- Disconnect footwell lights -2-.
Pa
ge 11 of 17 Rear door tri
m
11/20/2002 htt
p://127.0.0.1:8080/audi/servlet/Dis
play?action=Goto&t
yp
e=re
pair&id=AUDI.B5.BD03.70.2
Page 12 of 17
70-34
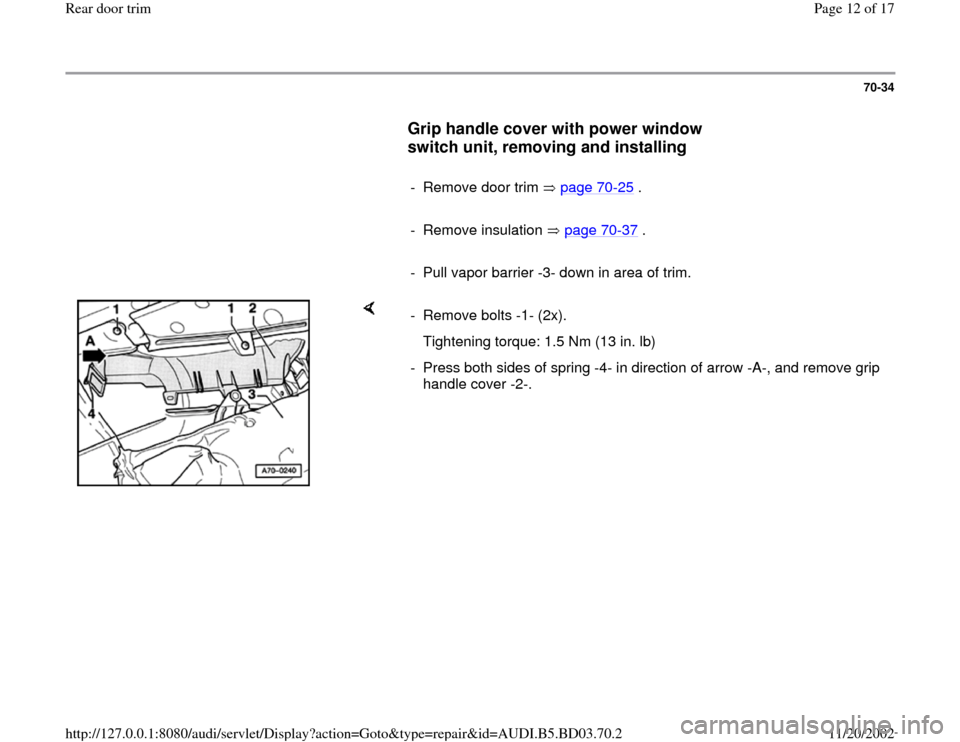
Grip handle cover with power window
switch unit, removing and installing
- Remove door trim page 70
-25
.
- Remove insulation page 70
-37
.
- Pull vapor barrier -3- down in area of trim.
- Remove bolts -1- (2x).
Tightening torque: 1.5 Nm (13 in. lb)
- Press both sides of spring -4- in direction of arrow -A-, and remove grip
handle cover -2-.
Pa
ge 12 of 17 Rear door tri
m
11/20/2002 htt
p://127.0.0.1:8080/audi/servlet/Dis
play?action=Goto&t
yp
e=re
pair&id=AUDI.B5.BD03.70.2
Page 13 of 17
70-35
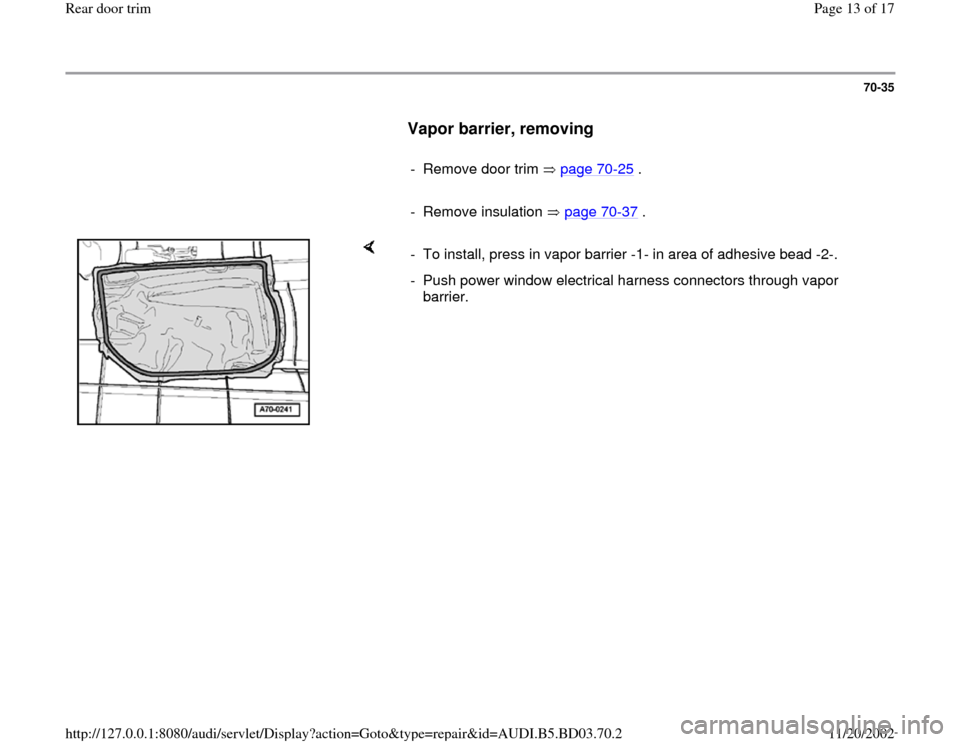
Vapor barrier, removing
- Remove door trim page 70
-25
.
- Remove insulation page 70
-37
.
- To install, press in vapor barrier -1- in area of adhesive bead -2-.
- Push power window electrical harness connectors through vapor
barrier.
Pa
ge 13 of 17 Rear door tri
m
11/20/2002 htt
p://127.0.0.1:8080/audi/servlet/Dis
play?action=Goto&t
yp
e=re
pair&id=AUDI.B5.BD03.70.2
Page 14 of 17
70-36
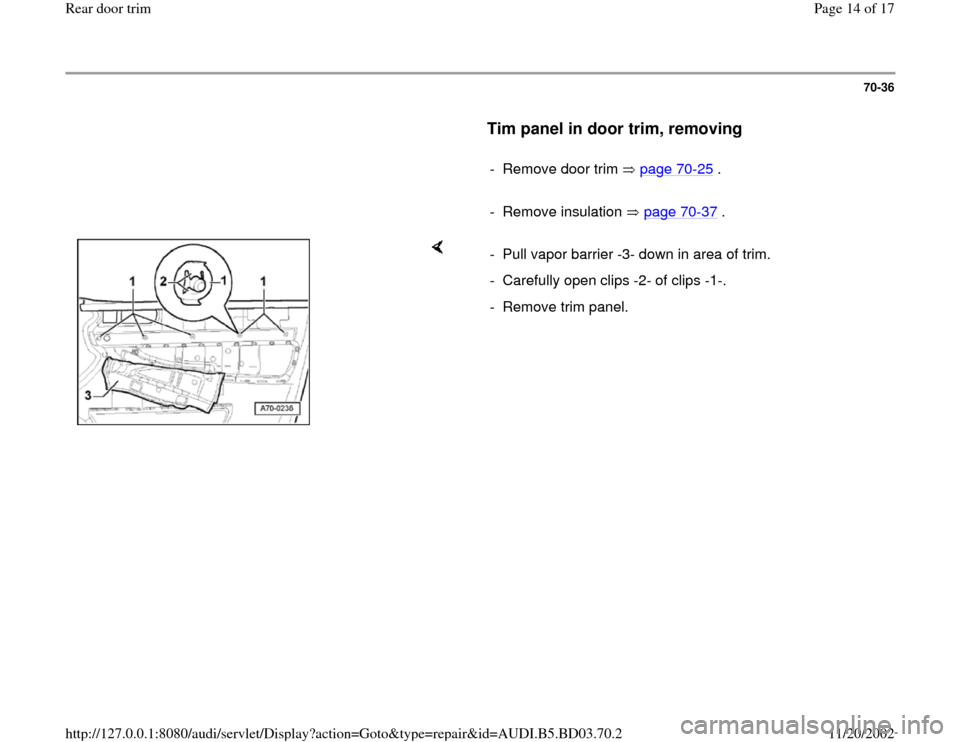
Tim panel in door trim, removing
- Remove door trim page 70
-25
.
- Remove insulation page 70
-37
.
- Pull vapor barrier -3- down in area of trim.
- Carefully open clips -2- of clips -1-.
- Remove trim panel.
Pa
ge 14 of 17 Rear door tri
m
11/20/2002 htt
p://127.0.0.1:8080/audi/servlet/Dis
play?action=Goto&t
yp
e=re
pair&id=AUDI.B5.BD03.70.2
Page 15 of 17
70-37
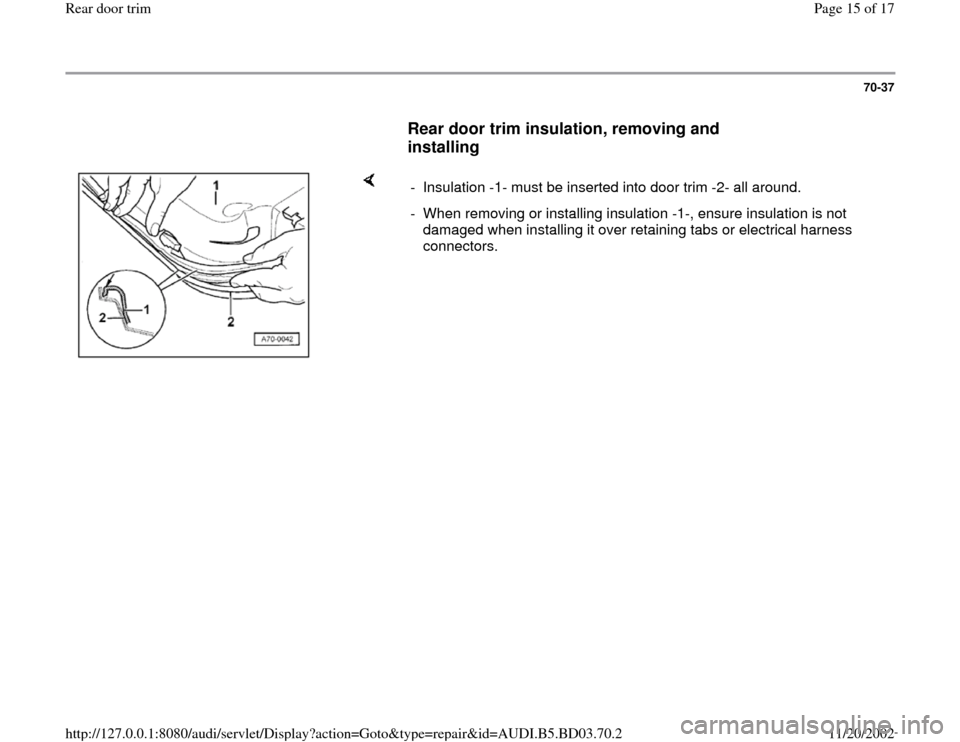
Rear door trim insulation, removing and
installing
- Insulation -1- must be inserted into door trim -2- all around.
- When removing or installing insulation -1-, ensure insulation is not
damaged when installing it over retaining tabs or electrical harness
connectors.
Pa
ge 15 of 17 Rear door tri
m
11/20/2002 htt
p://127.0.0.1:8080/audi/servlet/Dis
play?action=Goto&t
yp
e=re
pair&id=AUDI.B5.BD03.70.2
Page 16 of 17
70-38
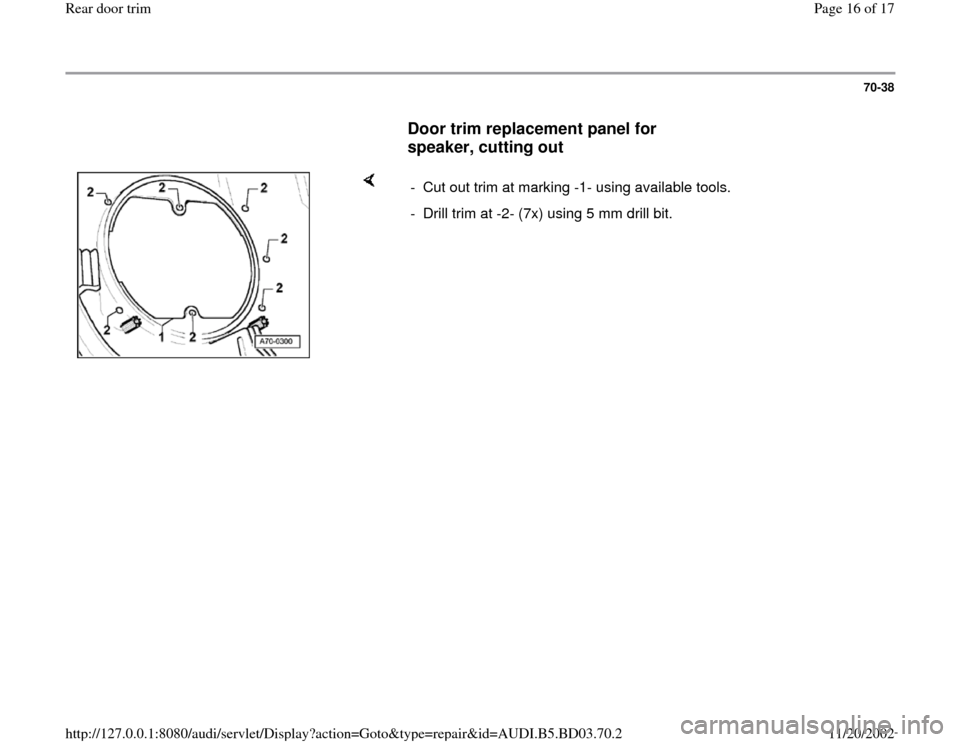
Door trim replacement panel for
speaker, cutting out
- Cut out trim at marking -1- using available tools.
- Drill trim at -2- (7x) using 5 mm drill bit.
Pa
ge 16 of 17 Rear door tri
m
11/20/2002 htt
p://127.0.0.1:8080/audi/servlet/Dis
play?action=Goto&t
yp
e=re
pair&id=AUDI.B5.BD03.70.2
Page 17 of 17
70-39
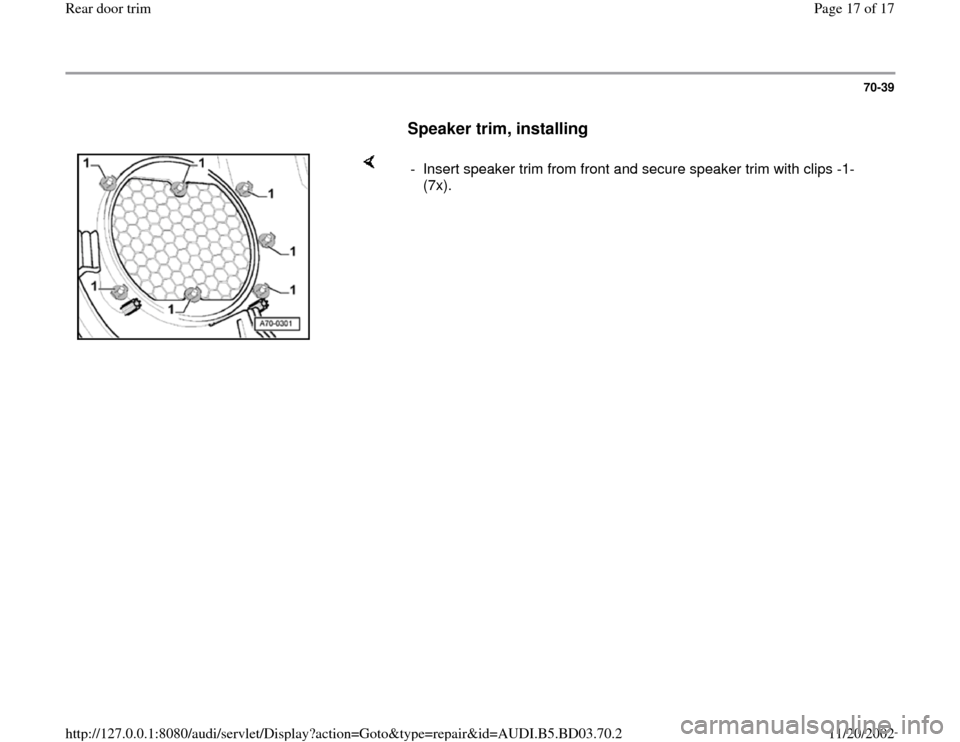
Speaker trim, installing
- Insert speaker trim from front and secure speaker trim with clips -1-
(7x).
Pa
ge 17 of 17 Rear door tri
m
11/20/2002 htt
p://127.0.0.1:8080/audi/servlet/Dis
play?action=Goto&t
yp
e=re
pair&id=AUDI.B5.BD03.70.2
Trending: window, ECU, warning, tow, light, mirror, ABS
