light AUDI A4 1998 B5 / 1.G Suspension Rear Axle Front Wheel Drive Workshop Manual
[x] Cancel search | Manufacturer: AUDI, Model Year: 1998, Model line: A4, Model: AUDI A4 1998 B5 / 1.GPages: 26, PDF Size: 0.49 MB
Page 5 of 26

42-4
Note:
A new guide bushing has been introduced for the
A4 Avant and sedan which replaces the old guide
bushing and balance weights. 12 -
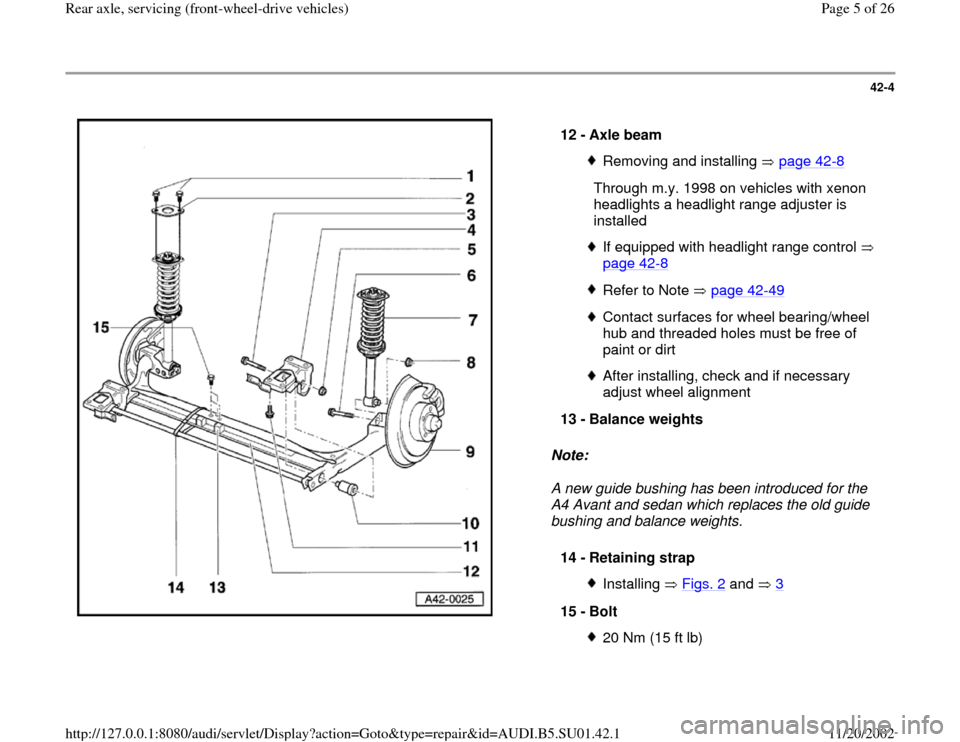
Axle beam
Removing and installing page 42
-8
Through m.y. 1998 on vehicles with xenon
headlights a headlight range adjuster is
installed
If equipped with headlight range control
page 42
-8
Refer to Note page 42
-49
Contact surfaces for wheel bearing/wheel
hub and threaded holes must be free of
paint or dirt After installing, check and if necessary
adjust wheel alignment
13 -
Balance weights
14 -
Retaining strap Installing Figs. 2
and 3
15 -
Bolt
20 Nm (15 ft lb)
Pa
ge 5 of 26 Rear axle, servicin
g (front-wheel-drive vehicles
)
11/20/2002 htt
p://127.0.0.1:8080/audi/servlet/Dis
play?action=Goto&t
yp
e=re
pair&id=AUDI.B5.SU01.42.1
Page 10 of 26

42-8
Rear axle, removing and installing
Removing
Vehicle must be standing on its wheels
above vehicle lift
Repair Manual, Brake System, Repair Group 47
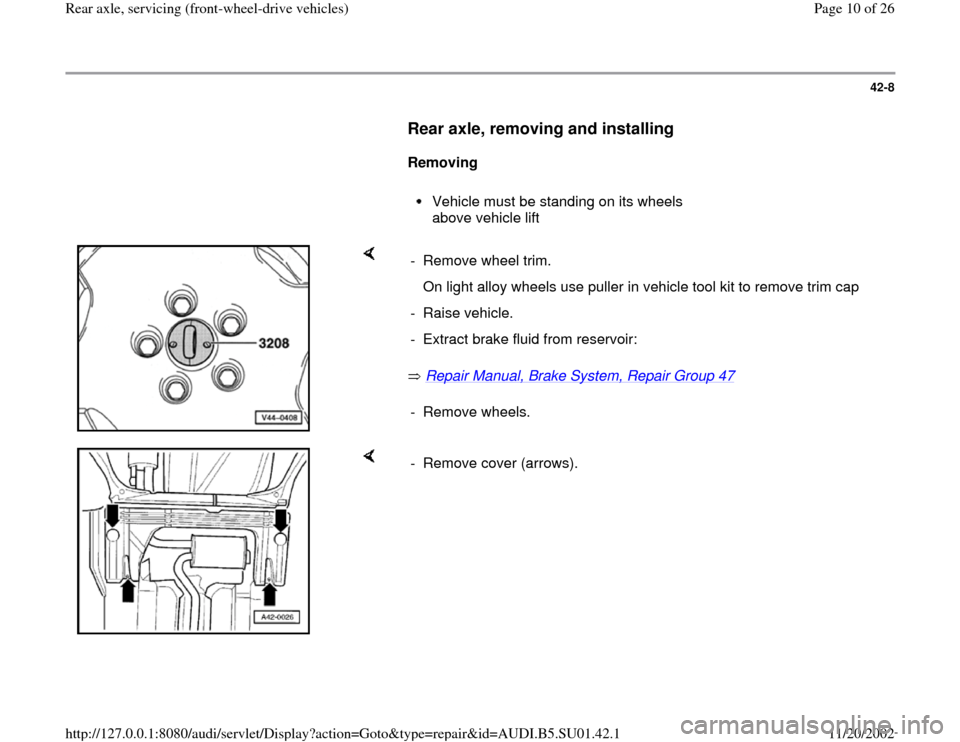
- Remove wheel trim.
On light alloy wheels use puller in vehicle tool kit to remove trim cap
- Raise vehicle.
- Extract brake fluid from reservoir:
- Remove wheels.
- Remove cover (arrows).
Pa
ge 10 of 26 Rear axle, servicin
g (front-wheel-drive vehicles
)
11/20/2002 htt
p://127.0.0.1:8080/audi/servlet/Dis
play?action=Goto&t
yp
e=re
pair&id=AUDI.B5.SU01.42.1
Page 12 of 26

42-10
- Remove locking plates -1- on left and right-sides, slightly loosen bolts -
2- for cable retaining plate, and remove cables from axle beam.
- Disconnect brake lines at rear axle (arrow) on both sides.
Pa
ge 12 of 26 Rear axle, servicin
g (front-wheel-drive vehicles
)
11/20/2002 htt
p://127.0.0.1:8080/audi/servlet/Dis
play?action=Goto&t
yp
e=re
pair&id=AUDI.B5.SU01.42.1
Page 13 of 26

42-11
- Pull ABS wheel speed sensors out of mounting
holes on both sides.
- Detach ABS wheel speed sensor wiring from
rear axle.
- On vehicles with headlight range control remove
linkage from axle beam.
Note:
Use VAG1383 gearbox lifter together with 1359/2
attachment for removing and installing the axle
beam.
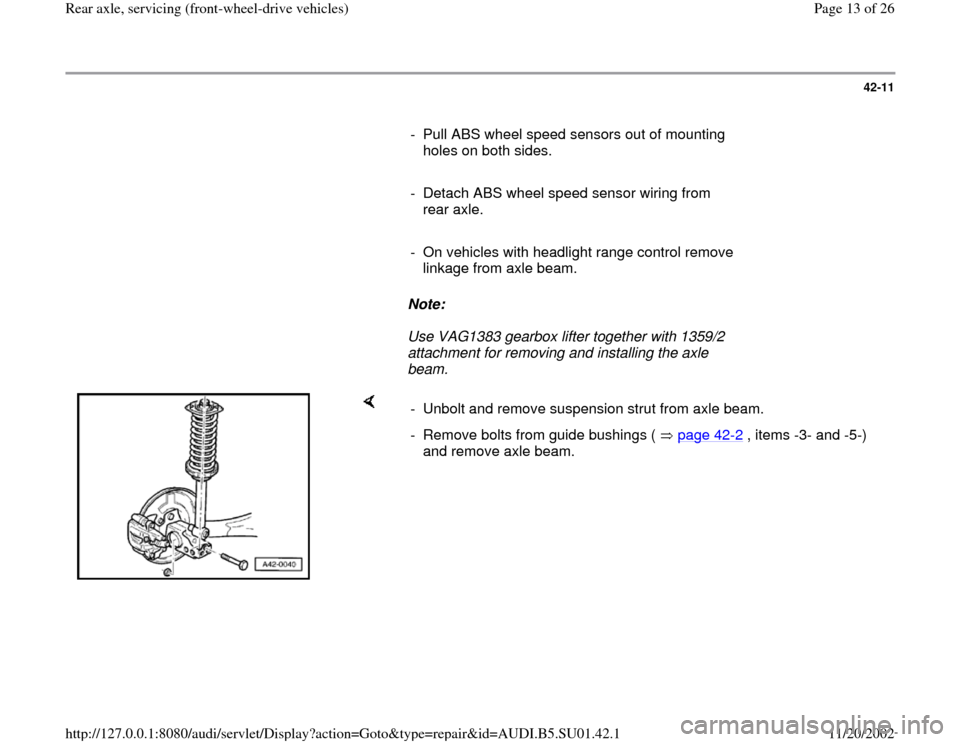
- Unbolt and remove suspension strut from axle beam.
- Remove bolts from guide bushings ( page 42
-2 , items -3- and -5-)
and remove axle beam.
Pa
ge 13 of 26 Rear axle, servicin
g (front-wheel-drive vehicles
)
11/20/2002 htt
p://127.0.0.1:8080/audi/servlet/Dis
play?action=Goto&t
yp
e=re
pair&id=AUDI.B5.SU01.42.1
Page 15 of 26

42-13
CAUTION!
Vehicle must be standing on its wheels when
tightening guide bushing to rear axle bolts.
Otherwise bonded rubber bushings will be
subjected to torsion resulting in shortened
service life
- Tighten guide bushing bolts ( page 42
-2 ,
items -3- and -5-).
Tightening torque: 80 Nm (59 ft lb) + 1/4-turn
(90 )
CAUTION!
Vehicle must be standing on its wheels when
tightening suspension strut to rear axle bolts.
Otherwise bonded rubber bushings will be
subjected to torsion resulting in shortened
service life
- Tighten suspension strut to axle beam bolts (
page 42
-2 , items -6- and -8-).
Tightening torque: 50 Nm (37 ft lb) + 1/4-turn
(90 )
-
On vehicles with headlight range control, tighten
bolted connection between headlight range
Pa
ge 15 of 26 Rear axle, servicin
g (front-wheel-drive vehicles
)
11/20/2002 htt
p://127.0.0.1:8080/audi/servlet/Dis
play?action=Goto&t
yp
e=re
pair&id=AUDI.B5.SU01.42.1
Page 17 of 26

42-14
Guide bushings, removing and installing
Lowering rear axle
- On vehicles with headlight range control remove linkage from axle
beam.
- Remove bolts from guide bushing mount and lower axle.
- Position VW552 guide piece to prevent brake lines from becoming
stressed.
Removing guide bushing
Pa
ge 17 of 26 Rear axle, servicin
g (front-wheel-drive vehicles
)
11/20/2002 htt
p://127.0.0.1:8080/audi/servlet/Dis
play?action=Goto&t
yp
e=re
pair&id=AUDI.B5.SU01.42.1