lock AUDI A4 1999 B5 / 1.G 01W Transmission Clutch Mechanism Servicing Workshop Manual
[x] Cancel search | Manufacturer: AUDI, Model Year: 1999, Model line: A4, Model: AUDI A4 1999 B5 / 1.GPages: 16, PDF Size: 0.39 MB
Page 2 of 16
30-2
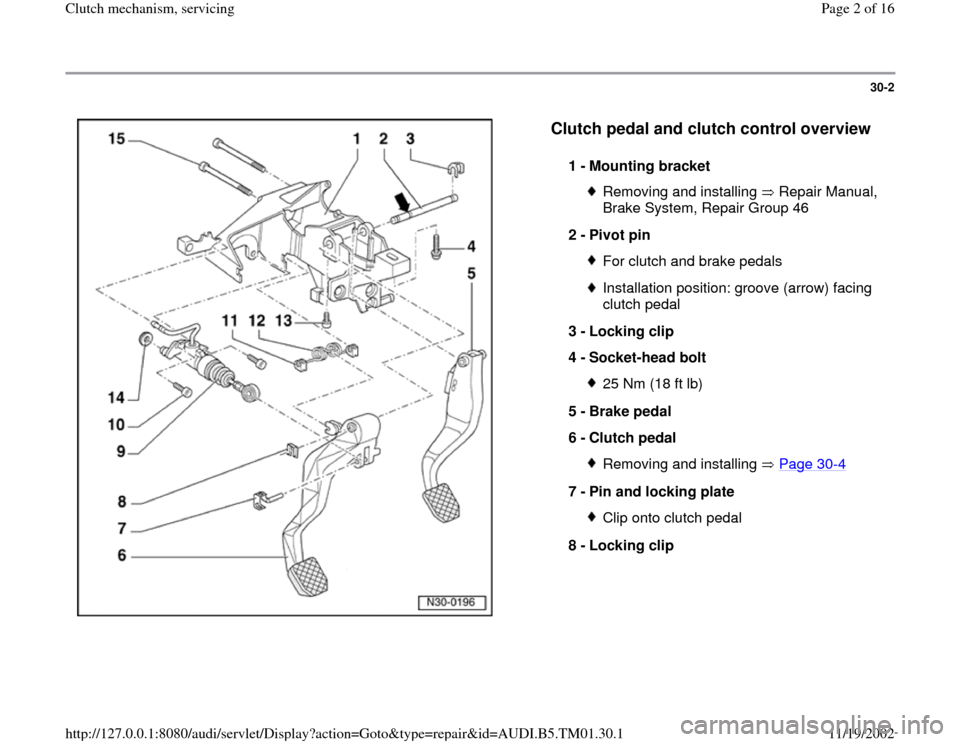
Clutch pedal and clutch control overview
1 -
Mounting bracket
Removing and installing Repair Manual,
Brake System, Repair Group 46
2 -
Pivot pin
For clutch and brake pedalsInstallation position: groove (arrow) facing
clutch pedal
3 -
Locking clip
4 -
Socket-head bolt 25 Nm (18 ft lb)
5 -
Brake pedal
6 -
Clutch pedal Removing and installing Page 30
-4
7 -
Pin and locking plate
Clip onto clutch pedal
8 -
Locking clip
Pa
ge 2 of 16 Clutch mechanism, servicin
g
11/19/2002 htt
p://127.0.0.1:8080/audi/servlet/Dis
play?action=Goto&t
yp
e=re
pair&id=AUDI.B5.TM01.30.1
Page 4 of 16
30-4
Clutch pedal and over-center spring,
removing and installing
Removing
- Remove driver's side storage compartment
Repair Manual, Body Interior, Repair Group 68.
- If installed, remove switch above clutch pedal.
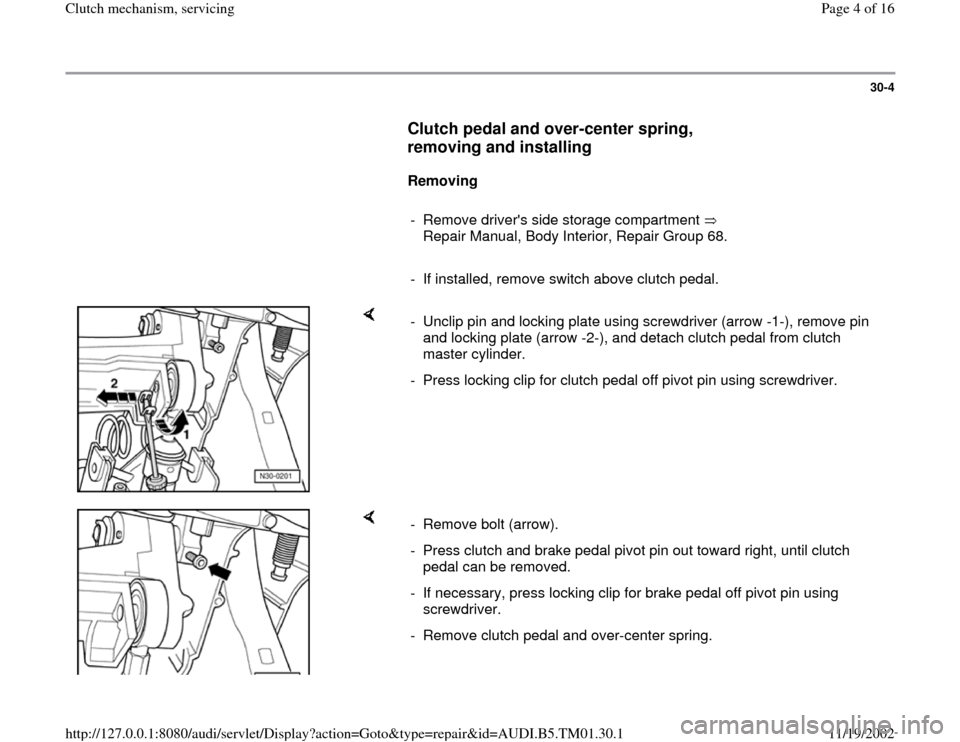
- Unclip pin and locking plate using screwdriver (arrow -1-), remove pin
and locking plate (arrow -2-), and detach clutch pedal from clutch
master cylinder.
- Press locking clip for clutch pedal off pivot pin using screwdriver.
- Remove bolt (arrow).
- Press clutch and brake pedal pivot pin out toward right, until clutch
pedal can be removed.
- If necessary, press locking clip for brake pedal off pivot pin using
screwdriver.
- Remove clutch pedal and over-center spring.
Pa
ge 4 of 16 Clutch mechanism, servicin
g
11/19/2002 htt
p://127.0.0.1:8080/audi/servlet/Dis
play?action=Goto&t
yp
e=re
pair&id=AUDI.B5.TM01.30.1
Page 5 of 16
30-5
Installing
Installation is the reverse of removal, note the
following:
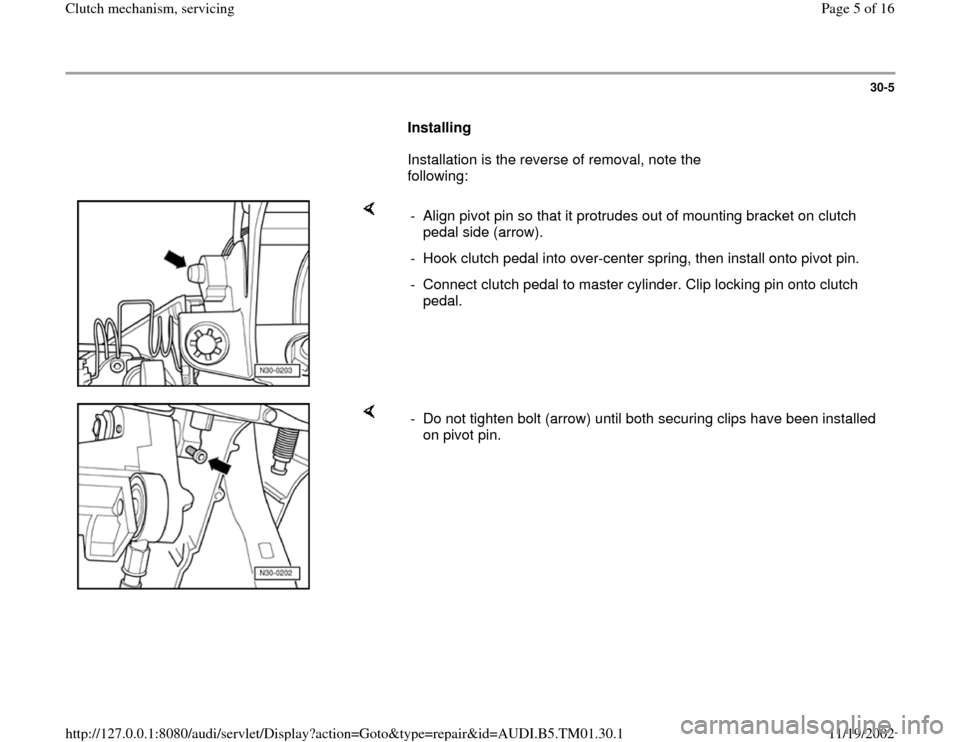
- Align pivot pin so that it protrudes out of mounting bracket on clutch
pedal side (arrow).
- Hook clutch pedal into over-center spring, then install onto pivot pin.
- Connect clutch pedal to master cylinder. Clip locking pin onto clutch
pedal.
- Do not tighten bolt (arrow) until both securing clips have been installed
on pivot pin.
Pa
ge 5 of 16 Clutch mechanism, servicin
g
11/19/2002 htt
p://127.0.0.1:8080/audi/servlet/Dis
play?action=Goto&t
yp
e=re
pair&id=AUDI.B5.TM01.30.1
Page 6 of 16
30-6
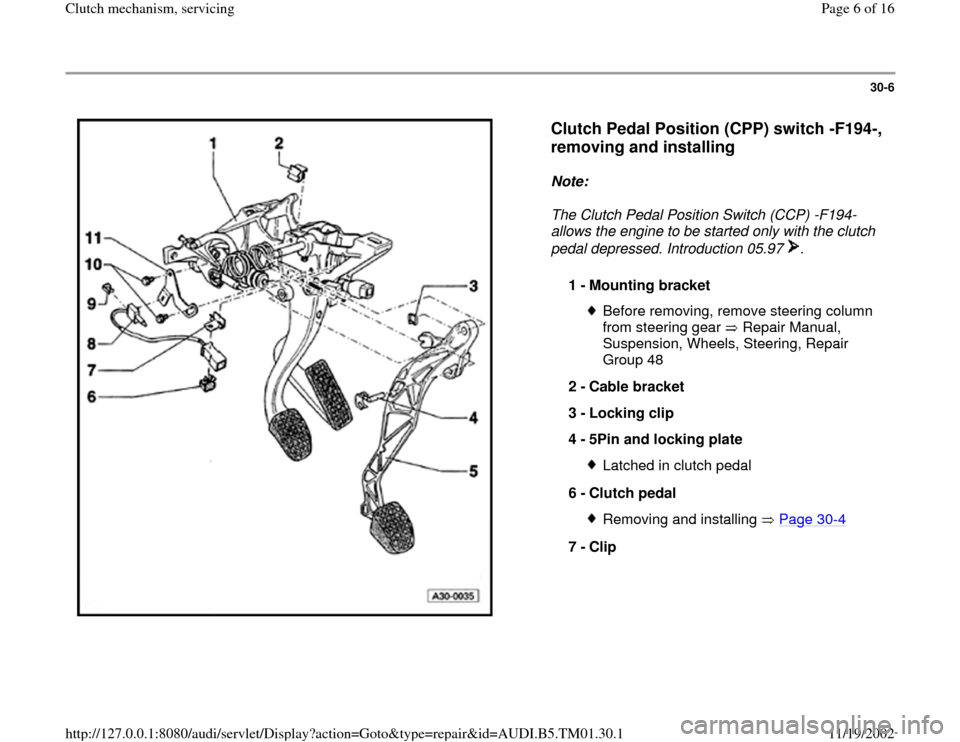
Clutch Pedal Position (CPP) switch -F194-,
removing and installing
Note:
The Clutch Pedal Position Switch (CCP) -F194-
allows the engine to be started only with the clutch
pedal depressed. Introduction 05.97 .
1 -
Mounting bracket
Before removing, remove steering column
from steering gear Repair Manual,
Suspension, Wheels, Steering, Repair
Group 48
2 -
Cable bracket
3 -
Locking clip
4 -
5Pin and locking plate
Latched in clutch pedal
6 -
Clutch pedal Removing and installing Page 30
-4
7 -
Clip
Pa
ge 6 of 16 Clutch mechanism, servicin
g
11/19/2002 htt
p://127.0.0.1:8080/audi/servlet/Dis
play?action=Goto&t
yp
e=re
pair&id=AUDI.B5.TM01.30.1
Page 9 of 16
30-9
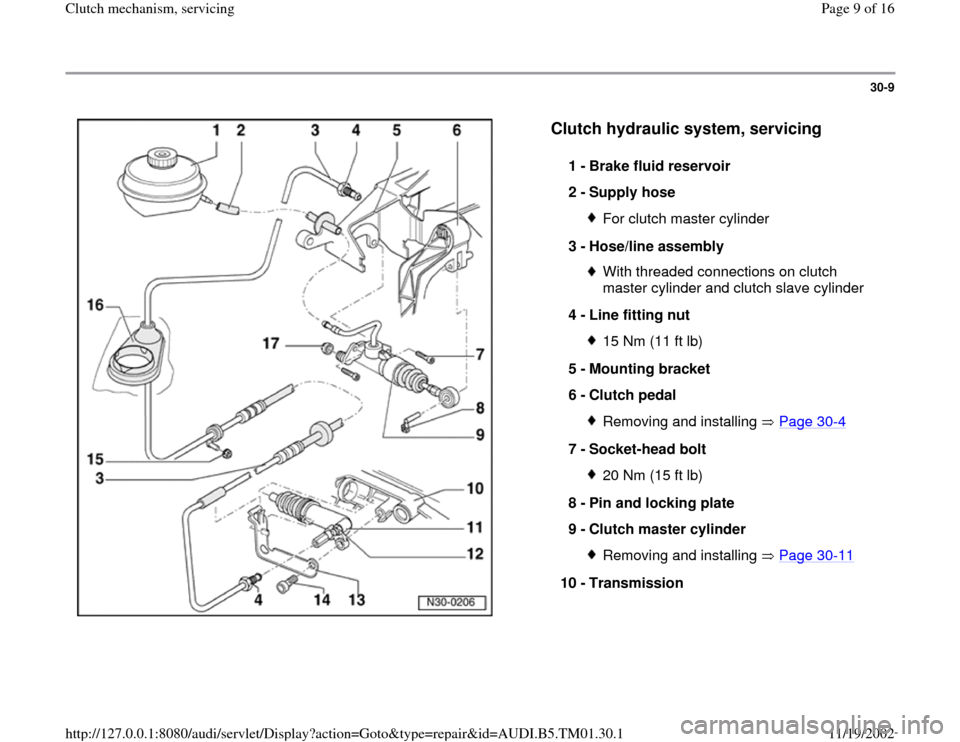
Clutch hydraulic system, servicing
1 -
Brake fluid reservoir
2 -
Supply hose
For clutch master cylinder
3 -
Hose/line assembly With threaded connections on clutch
master cylinder and clutch slave cylinder
4 -
Line fitting nut 15 Nm (11 ft lb)
5 -
Mounting bracket
6 -
Clutch pedal Removing and installing Page 30
-4
7 -
Socket-head bolt
20 Nm (15 ft lb)
8 -
Pin and locking plate
9 -
Clutch master cylinder Removing and installing Page 30
-11
10 -
Transmission
Pa
ge 9 of 16 Clutch mechanism, servicin
g
11/19/2002 htt
p://127.0.0.1:8080/audi/servlet/Dis
play?action=Goto&t
yp
e=re
pair&id=AUDI.B5.TM01.30.1
Page 14 of 16
30-14
- Connect clutch master cylinder to clutch pedal.
Secure pin and locking plate on clutch pedal.
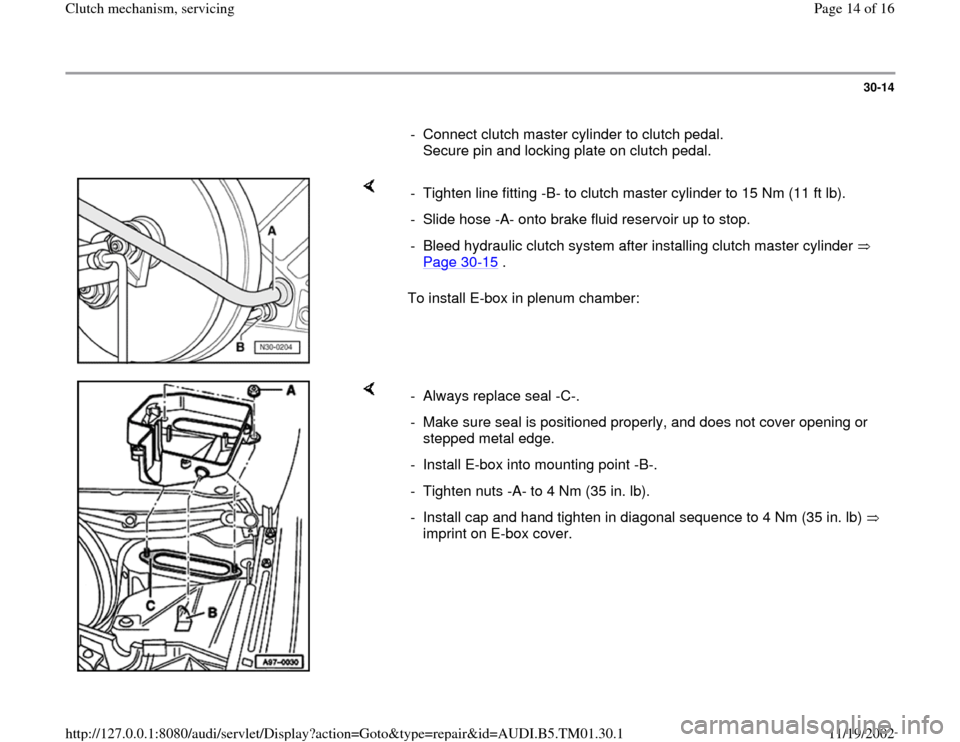
To install E-box in plenum chamber: - Tighten line fitting -B- to clutch master cylinder to 15 Nm (11 ft lb).
- Slide hose -A- onto brake fluid reservoir up to stop.
- Bleed hydraulic clutch system after installing clutch master cylinder
Page 30
-15
.
- Always replace seal -C-.
- Make sure seal is positioned properly, and does not cover opening or
stepped metal edge.
- Install E-box into mounting point -B-.
- Tighten nuts -A- to 4 Nm (35 in. lb).
- Install cap and hand tighten in diagonal sequence to 4 Nm (35 in. lb)
imprint on E-box cover.
Pa
ge 14 of 16 Clutch mechanism, servicin
g
11/19/2002 htt
p://127.0.0.1:8080/audi/servlet/Dis
play?action=Goto&t
yp
e=re
pair&id=AUDI.B5.TM01.30.1