oil AUDI A4 1999 B5 / 1.G AWM Engine Cooling System Components Workshop Manual
[x] Cancel search | Manufacturer: AUDI, Model Year: 1999, Model line: A4, Model: AUDI A4 1999 B5 / 1.GPages: 38, PDF Size: 0.7 MB
Page 4 of 38
19-3
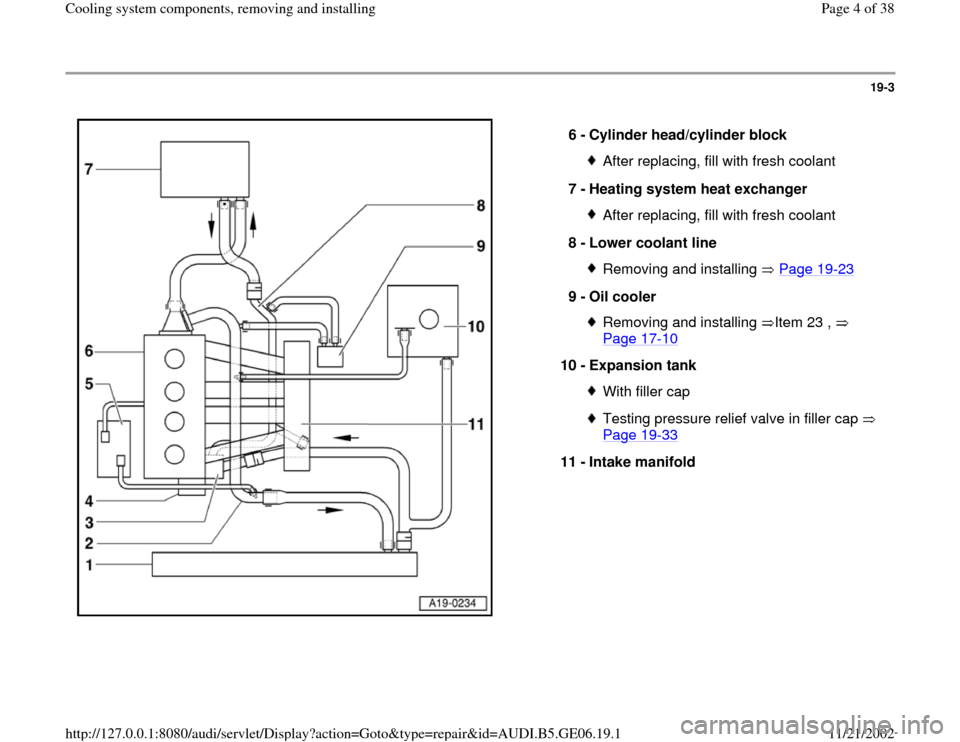
6 -
Cylinder head/cylinder block
After replacing, fill with fresh coolant
7 -
Heating system heat exchanger After replacing, fill with fresh coolant
8 -
Lower coolant line Removing and installing Page 19
-23
9 -
Oil cooler
Removing and installing Item 23 ,
Page 17
-10
10 -
Expansion tank
With filler capTesting pressure relief valve in filler cap
Page 19
-33
11 -
Intake manifold
Pa
ge 4 of 38 Coolin
g system com
ponents, removin
g and installin
g
11/21/2002 htt
p://127.0.0.1:8080/audi/servlet/Dis
play?action=Goto&t
yp
e=re
pair&id=AUDI.B5.GE06.19.1
Page 7 of 38
19-6
Note:
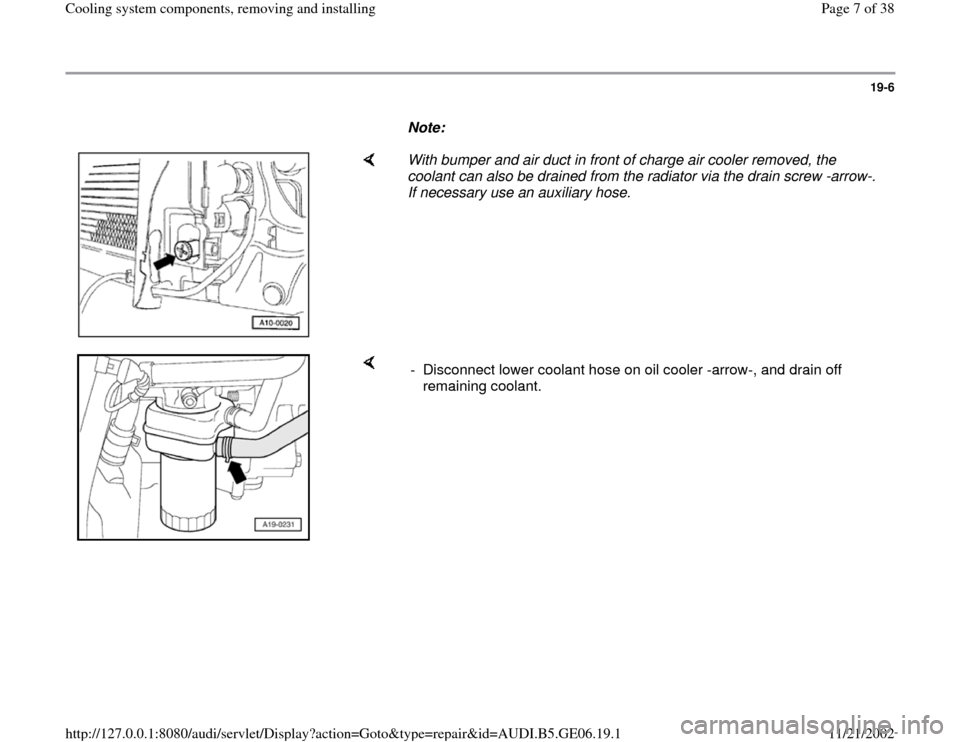
With bumper and air duct in front of charge air cooler removed, the
coolant can also be drained from the radiator via the drain screw -arrow-.
If necessary use an auxiliary hose.
- Disconnect lower coolant hose on oil cooler -arrow-, and drain off
remaining coolant.
Pa
ge 7 of 38 Coolin
g system com
ponents, removin
g and installin
g
11/21/2002 htt
p://127.0.0.1:8080/audi/servlet/Dis
play?action=Goto&t
yp
e=re
pair&id=AUDI.B5.GE06.19.1
Page 8 of 38
19-7
Filling
Note:
The cooling system is filled all year round with a
mixture of water and an antifreeze/corrosion
protection agent.
Only use coolant additive G 012 A8 D meeting
specification TL VW 774 D. Identification color:
red
CAUTION!
G 012 A8 D and other coolant additives
cannot be mixed. Otherwise, serious damage
to the engine may result.
If the fluid in the expansion tank is brown, this
means G 012 A8 D has been mixed with
another type of coolant. In this case, flush out
the cooling system and fill with fresh coolant. To
flush the system, fill it with clean water and run
the engine for about 2 minutes. This should
remove as much of the old coolant as possible.
G 012 A8 D and coolant additives marked
"meeting specification TL VW 774 D" prevent
frost and corrosion damage and stop scaling
while at the same time raising the boiling point
of the coolant. For these reasons the cooling
Pa
ge 8 of 38 Coolin
g system com
ponents, removin
g and installin
g
11/21/2002 htt
p://127.0.0.1:8080/audi/servlet/Dis
play?action=Goto&t
yp
e=re
pair&id=AUDI.B5.GE06.19.1
Page 10 of 38
19-8
Because of its high boiling point, the coolant
improves engine reliability under heavy loads,
particularly in countries with tropical climates.
Protection against frost must be assured to
about -25 C (in arctic climatic countries to
about -35 C).
The coolant concentration must not be reduced
by adding water, even in warmer seasons and
in warmer countries. The anti-freeze ratio must
be at least 40 %.
If greater frost protection is required in very cold
climates, the amount of G 012 A8 D can be
increased, but only up to 60% (this gives frost
protection to about -40 C). Otherwise, frost
protection is reduced again and cooling
effectiveness is also reduced.
Only use clean drinking water for mixing the
coolant.
If radiator, heat exchanger, cylinder head or
cylinder head gasket is replaced, do not reuse
old coolant.
Use special tool T10007 to check frost
protection of coolant additive G012 A8 D in
Pa
ge 10 of 38 Coolin
g system com
ponents, removin
g and installin
g
11/21/2002 htt
p://127.0.0.1:8080/audi/servlet/Dis
play?action=Goto&t
yp
e=re
pair&id=AUDI.B5.GE06.19.1
Page 27 of 38
19-24
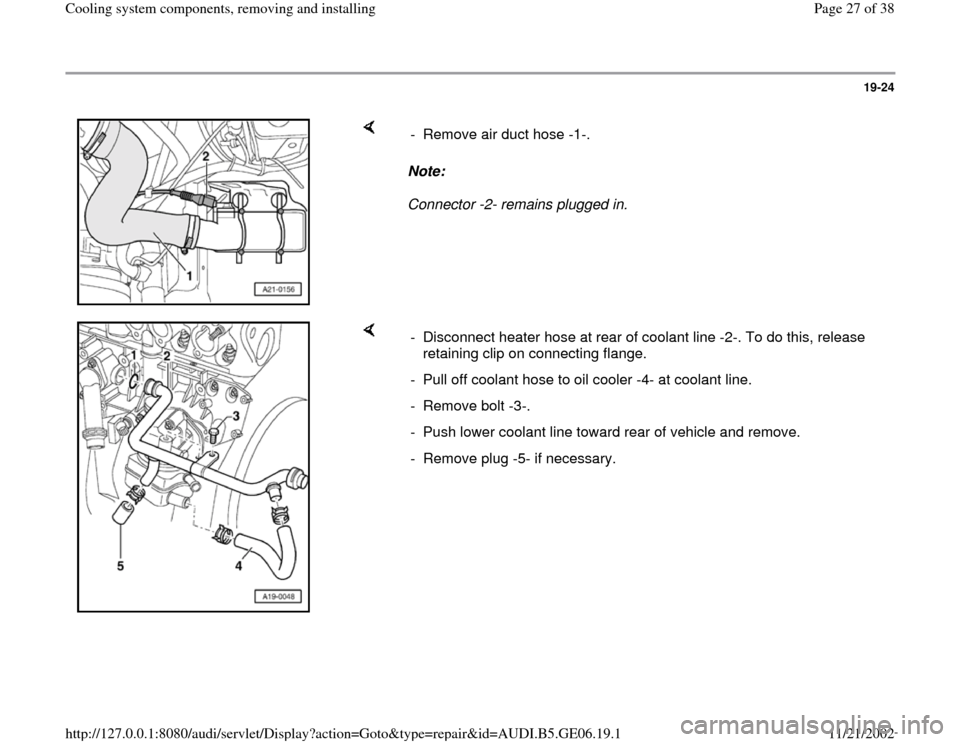
Note:
Connector -2- remains plugged in. - Remove air duct hose -1-.
- Disconnect heater hose at rear of coolant line -2-. To do this, release
retaining clip on connecting flange.
- Pull off coolant hose to oil cooler -4- at coolant line.
- Remove bolt -3-.
- Push lower coolant line toward rear of vehicle and remove.
- Remove plug -5- if necessary.
Pa
ge 27 of 38 Coolin
g system com
ponents, removin
g and installin
g
11/21/2002 htt
p://127.0.0.1:8080/audi/servlet/Dis
play?action=Goto&t
yp
e=re
pair&id=AUDI.B5.GE06.19.1
Page 28 of 38
19-25
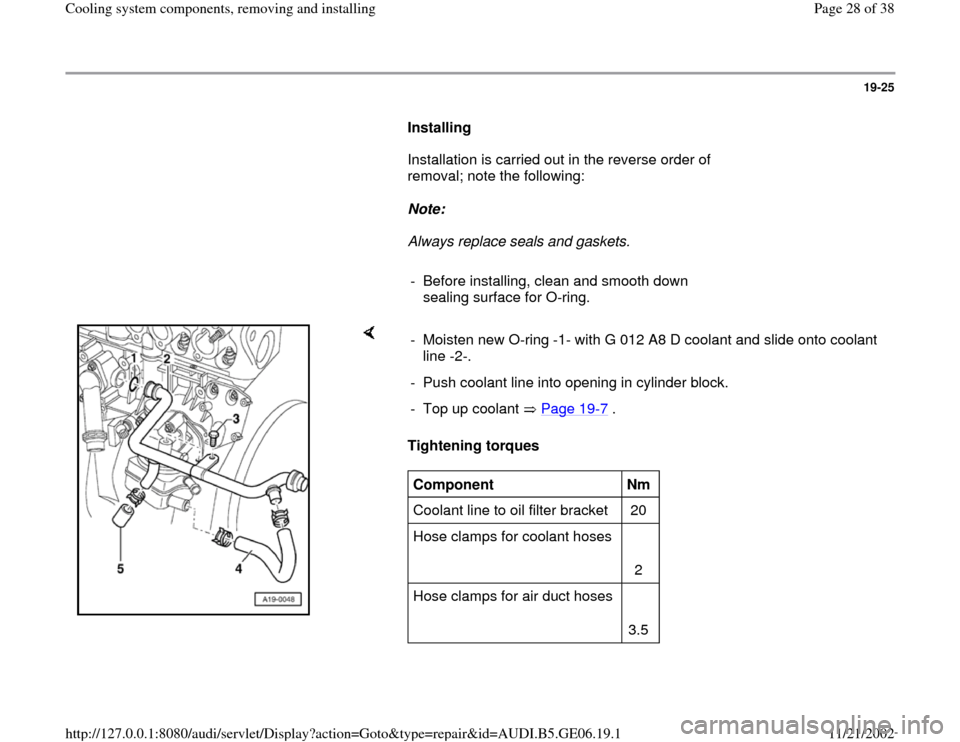
Installing
Installation is carried out in the reverse order of
removal; note the following:
Note:
Always replace seals and gaskets.
- Before installing, clean and smooth down
sealing surface for O-ring.
Tightening torques - Moisten new O-ring -1- with G 012 A8 D coolant and slide onto coolant
line -2-.
- Push coolant line into opening in cylinder block.
- Top up coolant Page 19
-7 .
Component
Nm
Coolant line to oil filter bracket 20
Hose clamps for coolant hoses
2
Hose clamps for air duct hoses
3.5
Pa
ge 28 of 38 Coolin
g system com
ponents, removin
g and installin
g
11/21/2002 htt
p://127.0.0.1:8080/audi/servlet/Dis
play?action=Goto&t
yp
e=re
pair&id=AUDI.B5.GE06.19.1
Page 32 of 38
19-29
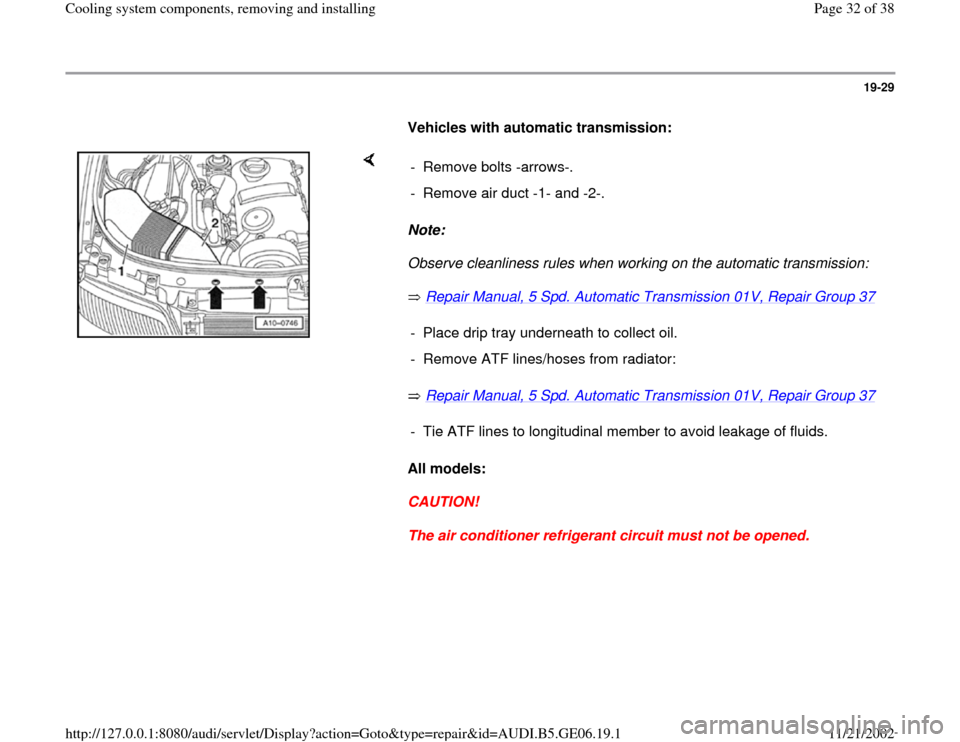
Vehicles with automatic transmission:
Note:
Observe cleanliness rules when working on the automatic transmission:
Repair Manual, 5 Spd. Automatic Transmission 01V, Repair Group 37
Repair Manual, 5 Spd. Automatic Transmission 01V, Repair Group 37
All models:
CAUTION!
The air conditioner refrigerant circuit must not be opened. - Remove bolts -arrows-.
- Remove air duct -1- and -2-.
- Place drip tray underneath to collect oil.
- Remove ATF lines/hoses from radiator:- Tie ATF lines to longitudinal member to avoid leakage of fluids.
Pa
ge 32 of 38 Coolin
g system com
ponents, removin
g and installin
g
11/21/2002 htt
p://127.0.0.1:8080/audi/servlet/Dis
play?action=Goto&t
yp
e=re
pair&id=AUDI.B5.GE06.19.1