check AUDI A4 1999 B5 / 1.G Engine Oil Level Checking Workshop Manual
[x] Cancel search | Manufacturer: AUDI, Model Year: 1999, Model line: A4, Model: AUDI A4 1999 B5 / 1.GPages: 111, PDF Size: 1.26 MB
Page 1 of 111
10
Description of work
Engine oil level, checking
After turning engine OFF, wait approximately 3
minutes to allow oil to flow back into oil pan.
- Remove dipstick, wipe with a lint free cloth, and
re-insert fully.
Note:
Please observe waste disposal requirements!
- Remove dipstick and read oil level:
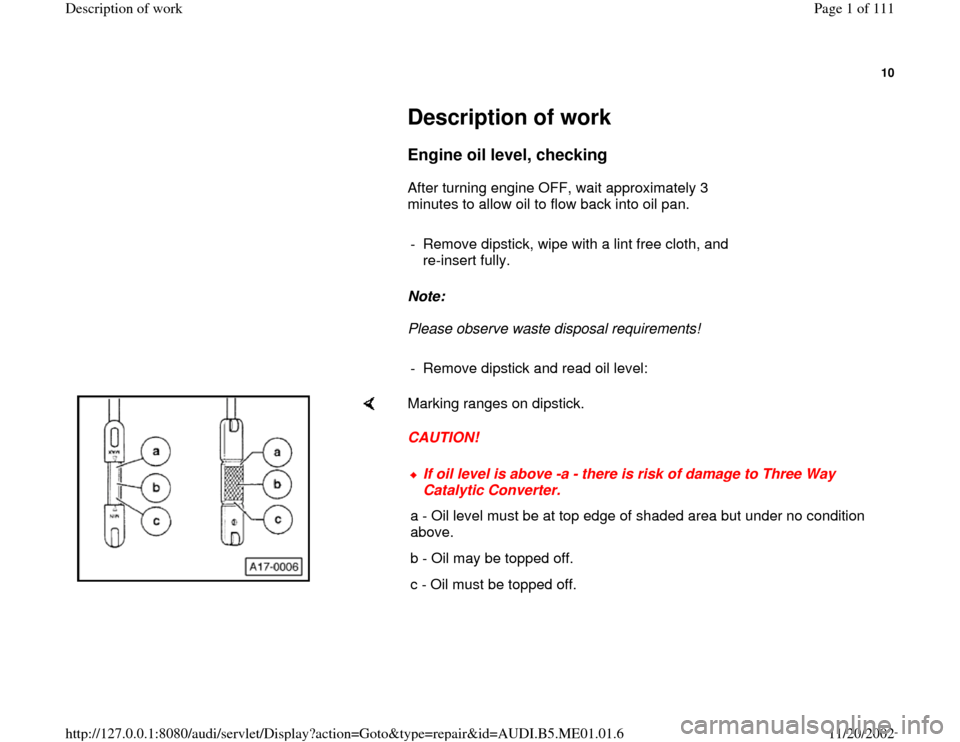
Marking ranges on dipstick.
CAUTION!
If oil level is above -a - there is risk of damage to Three Way
Catalytic Converter.
a - Oil level must be at top edge of shaded area but under no condition
above.
b - Oil may be topped off.
c - Oil must be topped off.
Pa
ge 1 of 111 Descri
ption of wor
k
11/20/2002 htt
p://127.0.0.1:8080/audi/servlet/Dis
play?action=Goto&t
yp
e=re
pair&id=AUDI.B5.ME01.01.6
Page 6 of 111
14
Cooling system antifreeze protection
and coolant level, checking
CAUTION!
Part numbers are for reference only. Always
check with your Parts Dept. for the latest
parts information.
Coolant antifreeze, Part No. G 11 prevents frost
and corrosion damage, lime deposits, and also
raises the boiling temperature. Cooling system
must be filled year round with antifreeze and
corrosion protection agent.
Concentration of coolant must not be reduced by
adding wa ter, even during summer or in warmer
climates. Coolant antifreeze percentage must be
at least 40%.
Because of its high boiling point, coolant
contributes to safe operation at high engine load,
especially in warmer climates.
- Check concentration of coolant antifreeze.
Antifreeze protection must be approximately
-25 C (-13 F) for US and -35 C (-31 F)
for Canada.
For antifreeze protection down to
Pa
ge 6 of 111 Descri
ption of wor
k
11/20/2002 htt
p://127.0.0.1:8080/audi/servlet/Dis
play?action=Goto&t
yp
e=re
pair&id=AUDI.B5.ME01.01.6
Page 9 of 111
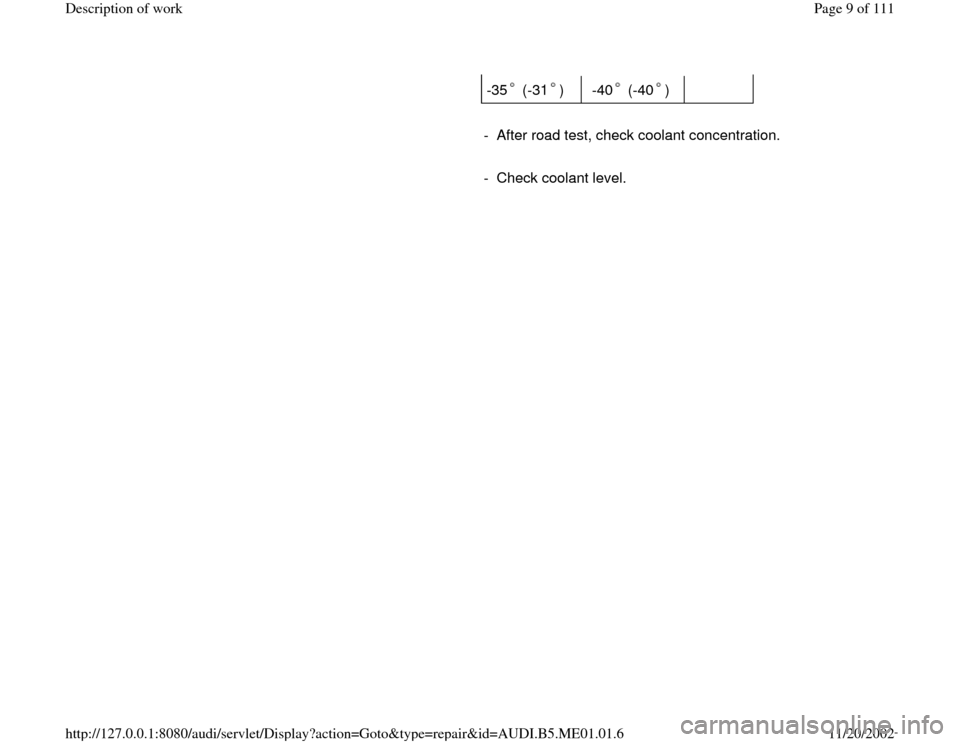
-35 (-31)
-40 (-40 )
- After road test, check coolant concentration.
- Check coolant level.
Pa
ge 9 of 111 Descri
ption of wor
k
11/20/2002 htt
p://127.0.0.1:8080/audi/servlet/Dis
play?action=Goto&t
yp
e=re
pair&id=AUDI.B5.ME01.01.6
Page 17 of 111
23
Plenum chamber and water drain valve,
checking for debris, cleaning if
necessary
- Check plenum chamber for signs of debris, e.g.
from leaves,clean If necessary.
- Check water drain valves for debris and proper
operation; clean or replace if necessary.
Note:
The water drain valves must not be blocked by
wax or undercoating, and must close properly.
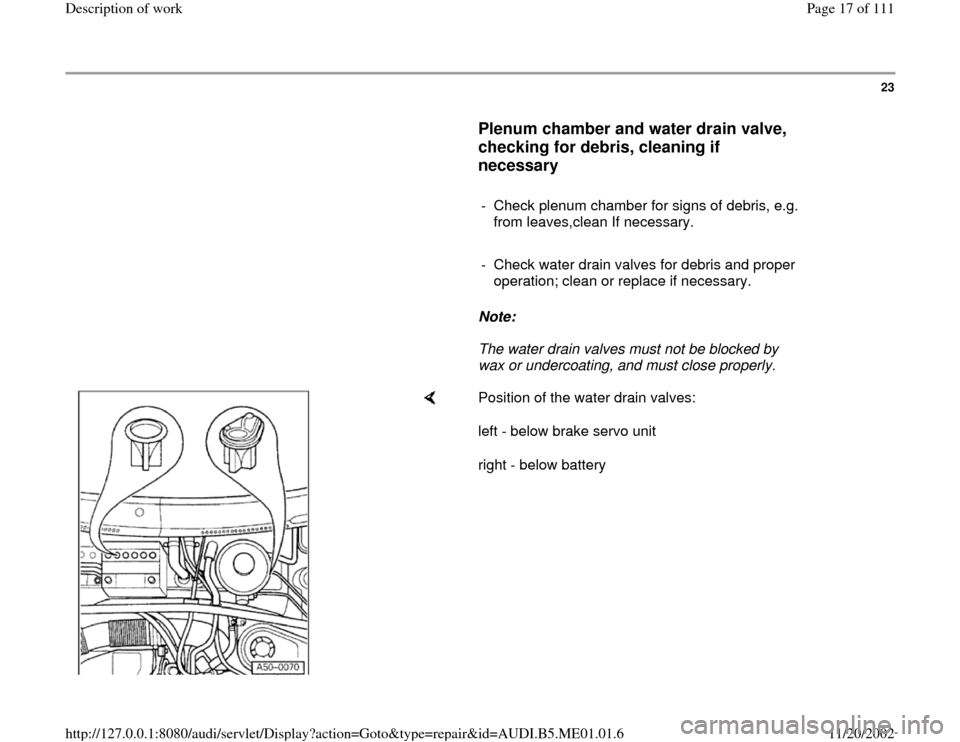
Position of the water drain valves:
left - below brake servo unit
right - below battery
Pa
ge 17 of 111 Descri
ption of wor
k
11/20/2002 htt
p://127.0.0.1:8080/audi/servlet/Dis
play?action=Goto&t
yp
e=re
pair&id=AUDI.B5.ME01.01.6
Page 20 of 111
26
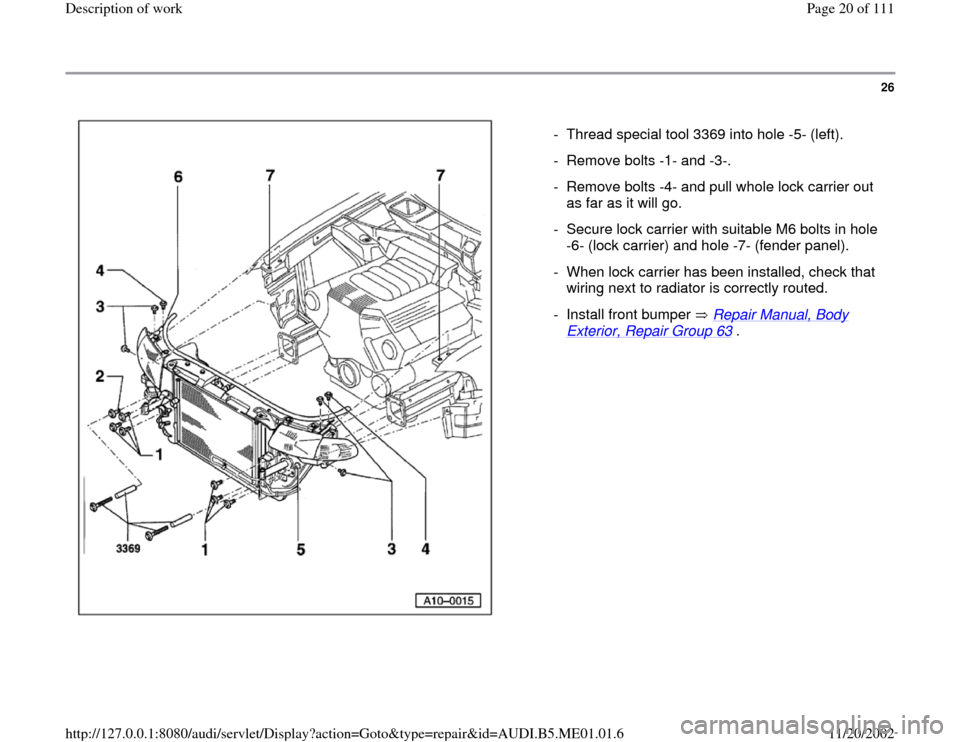
- Thread special tool 3369 into hole -5- (left).
- Remove bolts -1- and -3-.
- Remove bolts -4- and pull whole lock carrier out
as far as it will go.
- Secure lock carrier with suitable M6 bolts in hole
-6- (lock carrier) and hole -7- (fender panel).
- When lock carrier has been installed, check that
wiring next to radiator is correctly routed.
- Install front bumper Repair Manual, Body
Exterior, Repair Group 63
.
Pa
ge 20 of 111 Descri
ption of wor
k
11/20/2002 htt
p://127.0.0.1:8080/audi/servlet/Dis
play?action=Goto&t
yp
e=re
pair&id=AUDI.B5.ME01.01.6
Page 24 of 111
30
Note:
It is not possible to adjust the tension of the V-
belt for the coolant pump.
- Tighten viscous fan mounting to 45 Nm.
- Install ribbed belt over crankshaft pulley, viscous
fan pulley and power steering pump pulley. If
necessary, pull belt upward using a suitable tool.
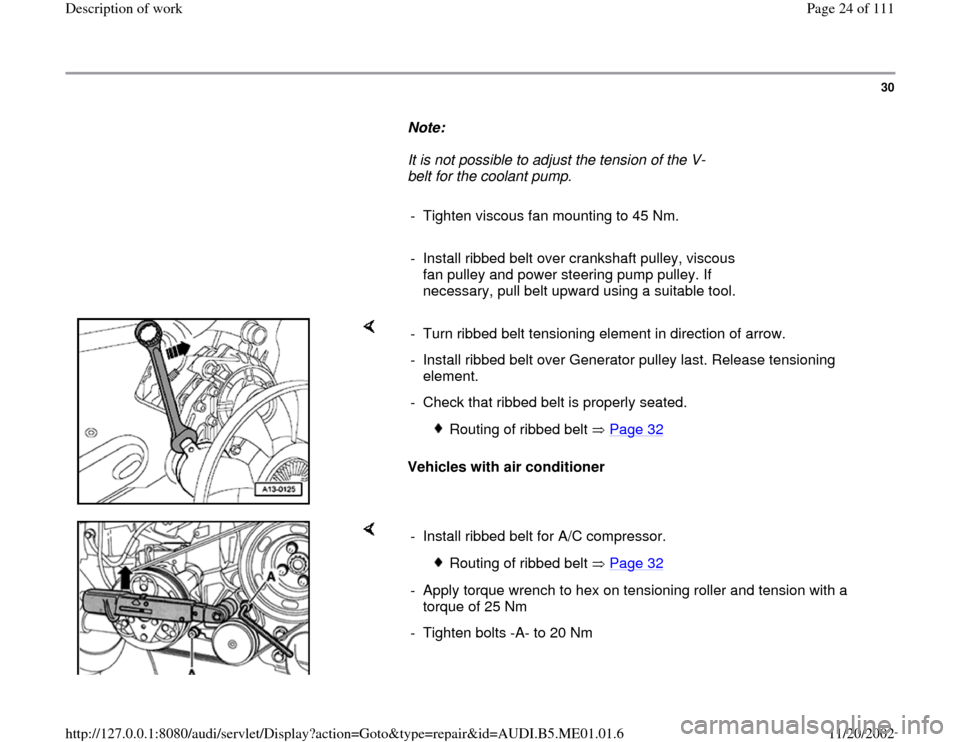
Vehicles with air conditioner - Turn ribbed belt tensioning element in direction of arrow.
- Install ribbed belt over Generator pulley last. Release tensioning
element.
- Check that ribbed belt is properly seated.
Routing of ribbed belt Page 32
- Install ribbed belt for A/C compressor.
Routing of ribbed belt Page 32
- Apply torque wrench to hex on tensioning roller and tension with a
torque of 25 Nm
- Tighten bolts -A- to 20 Nm
Pa
ge 24 of 111 Descri
ption of wor
k
11/20/2002 htt
p://127.0.0.1:8080/audi/servlet/Dis
play?action=Goto&t
yp
e=re
pair&id=AUDI.B5.ME01.01.6
Page 25 of 111
31
All models
- Start engine and check belt running.
- Check again to ensure that bolts for coolant
pump pulley are tightened to correct torque.
Pa
ge 25 of 111 Descri
ption of wor
k
11/20/2002 htt
p://127.0.0.1:8080/audi/servlet/Dis
play?action=Goto&t
yp
e=re
pair&id=AUDI.B5.ME01.01.6
Page 28 of 111
34
Poly-ribbed belt, checking, removing,
and replacing
Check condition of Poly-ribbed belt for:
Splits in base material (cracks, core
fractures, cross section fractures).
Separation of layers (top layer, tensile
cords).
Bursting on base material.
Fraying of cords.
Flank wear (material flaking, frayed flanks,
hardening of flanks (glassy surface), and
surface cracks).
Traces of oil and grease.
Note:
If defects exist, replace Poly-ribbed belt.
Poly-ribbed belt replacement interval
- Every 144,000 km (90,000 mi.)
Pa
ge 28 of 111 Descri
ption of wor
k
11/20/2002 htt
p://127.0.0.1:8080/audi/servlet/Dis
play?action=Goto&t
yp
e=re
pair&id=AUDI.B5.ME01.01.6
Page 31 of 111
36
Manual transmission/final drive oil level,
checking
5-speed manual transmission 012/01W
Special tools and equipment
Key 3357, or
Hex key socket attachment, 17 mm AF
Note:
The vehicle must be absolutely horizontal when
checking transmission oil level. This work is
best performed over an inspection pit or using a
four column lifting platform.
The prescribed oil level is to be adhered to
exactly; the transmission reacts very sensitively
to over-filling.
The oil filter plug is on the left of the
transmission below the speedometer sender; it
may be concealed by the heat shield for the
drive shaft.
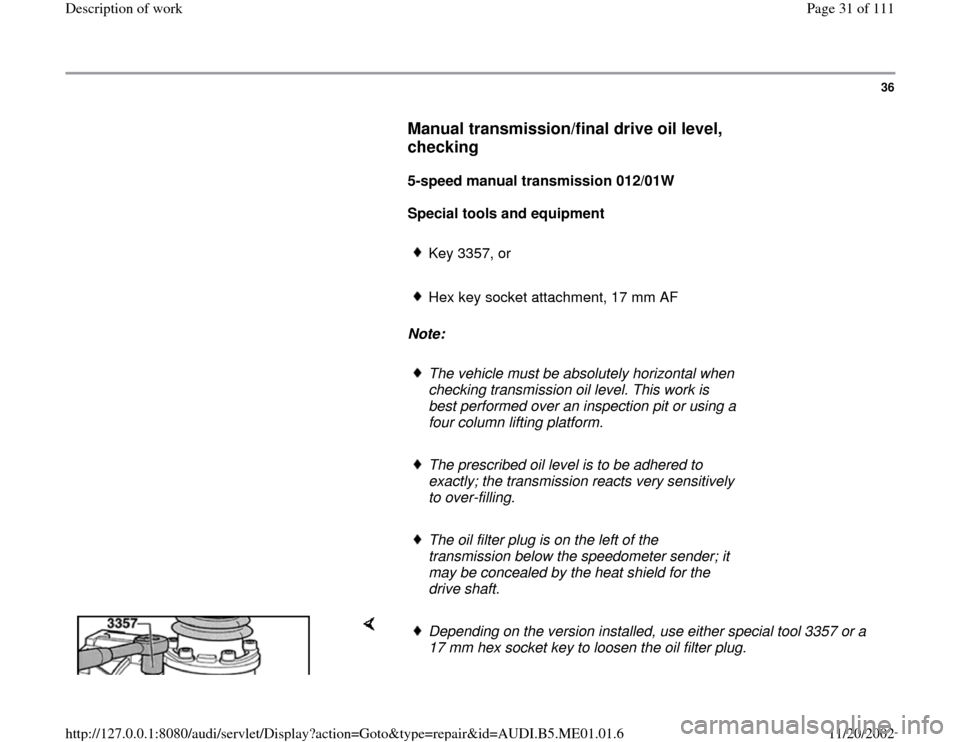
Depending on the version installed, use either special tool 3357 or a
17 mm hex socket key to loosen the oil filter plug.
Pa
ge 31 of 111 Descri
ption of wor
k
11/20/2002 htt
p://127.0.0.1:8080/audi/servlet/Dis
play?action=Goto&t
yp
e=re
pair&id=AUDI.B5.ME01.01.6
Page 32 of 111
37
CAUTION!
If the oil level is below the specified area, check the transmission for
leaks. It is not sufficient to top up with oil.
CAUTION!
Part numbers are for reference only. Always check with your Parts
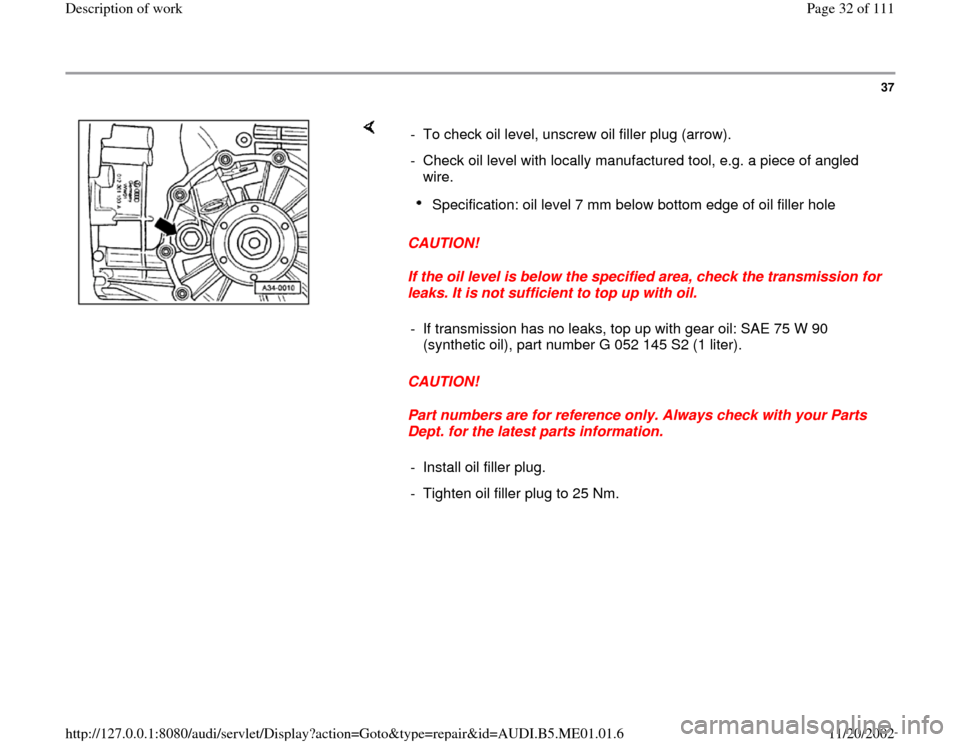
Dept. for the latest parts information. - To check oil level, unscrew oil filler plug (arrow).
- Check oil level with locally manufactured tool, e.g. a piece of angled
wire.
Specification: oil level 7 mm below bottom edge of oil filler hole
- If transmission has no leaks, top up with gear oil: SAE 75 W 90
(synthetic oil), part number G 052 145 S2 (1 liter).
- Install oil filler plug.
- Tighten oil filler plug to 25 Nm.
Pa
ge 32 of 111 Descri
ption of wor
k
11/20/2002 htt
p://127.0.0.1:8080/audi/servlet/Dis
play?action=Goto&t
yp
e=re
pair&id=AUDI.B5.ME01.01.6