ESP AUDI A4 2008 B8 / 4.G Workshop Manual
[x] Cancel search | Manufacturer: AUDI, Model Year: 2008, Model line: A4, Model: AUDI A4 2008 B8 / 4.GPages: 342, PDF Size: 13.14 MB
Page 171 of 342
Parking aid169
Controls
Safety
Driving tips
General maintenance
Self-help
Technical data
Parking aidApplies to vehicles: with Audi parking system/plus/advancedGeneral notesVarious systems are available to help you when parking or manoeu-
vring in tight spaces, depending on the equipment fitted on your
vehicle.
The Audi parking system gives an acoustic warning if there are any
obstacles behind the car ⇒page 169.
When you are parking, the Audi parking system plus warns you
acoustically and optically about obstacles in front of and behind the
vehicle ⇒page 170.
In conjunction with a reversing camera, the Audi parking system
advanced shows a picture of the area behind the vehicle. This
picture helps you to manoevre the vehicle backwards and sideways.
In addition, you are assisted by the acoustic signals and graphic
display of the parking aid ⇒page 171.
Note
To ensure that the acoustic parking aid works properly, the sensors
must be kept clean and free of snow and ice.Audi parking systemApplies to vehicles: with Audi parking systemDescription
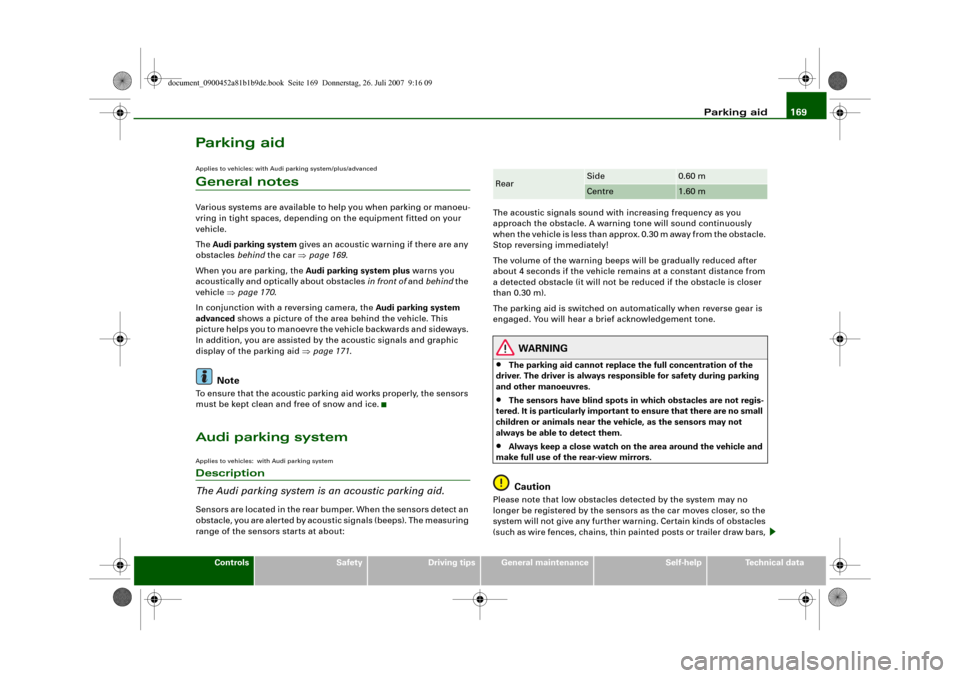
The Audi parking system is an acoustic parking aid.Sensors are located in the rear bumper. When the sensors detect an
obstacle, you are alerted by acoustic signals (beeps). The measuring
range of the sensors starts at about:The acoustic signals sound with increasing frequency as you
approach the obstacle. A warning tone will sound continuously
when the vehicle is less than approx. 0.30 m away from the obstacle.
Stop reversing immediately!
The volume of the warning beeps will be gradually reduced after
about 4 seconds if the vehicle remains at a constant distance from
a detected obstacle (it will not be reduced if the obstacle is closer
than 0.30 m).
The parking aid is switched on automatically when reverse gear is
engaged. You will hear a brief acknowledgement tone.
WARNING
•
The parking aid cannot replace the full concentration of the
driver. The driver is always responsible for safety during parking
and other manoeuvres.
•
The sensors have blind spots in which obstacles are not regis-
tered. It is particularly important to ensure that there are no small
children or animals near the vehicle, as the sensors may not
always be able to detect them.
•
Always keep a close watch on the area around the vehicle and
make full use of the rear-view mirrors.Caution
Please note that low obstacles detected by the system may no
longer be registered by the sensors as the car moves closer, so the
system will not give any further warning. Certain kinds of obstacles
(such as wire fences, chains, thin painted posts or trailer draw bars, Rear
Side
0.60 m
Centre
1.60 m
document_0900452a81b1b9de.book Seite 169 Donnerstag, 26. Juli 2007 9:16 09
Page 173 of 342
Parking aid171
Controls
Safety
Driving tips
General maintenance
Self-help
Technical data
– Press the switch
, or
– Switch off the ignition.
Segments in the graphic display
You can estimate the distance to an obstacle by referring to the red
segments at the front and rear of the vehicle ⇒page 170, fig. 186.
The closer the vehicle gets to the obstacle the closer the segments
move towards the vehicle in the graphic. At the latest when the
penultimate segment is highlighted the vehicle has reached the
danger (collision) zone. Stop moving immediately ⇒!
WARNING
•
The parking aid cannot replace the full concentration of the
driver. The driver is always responsible for safety during parking
and other manoeuvres.
•
The sensors have blind spots in which obstacles are not regis-
tered. It is particularly important to ensure that there are no small
children or animals near the vehicle, as the sensors may not
always be able to detect them.
•
Always keep a close watch on the area around the vehicle and
make full use of the rear-view mirrors.Caution
Please note that low obstacles detected by the system may no
longer be registered by the sensors as the car moves closer, so the
system will not give any further warning. Certain kinds of obstacles
(such as wire fences, chains, thin painted posts or trailer draw bars,
etc.) may not always be detected by the system, so take care not to
damage the vehicle in such cases.
Note
•
You can change the display and adjust the volume and pitch of
the beeps ⇒page 177.
•
Please refer to the notes on towing ⇒page 177.
•
There is a slight delay in the picture display.
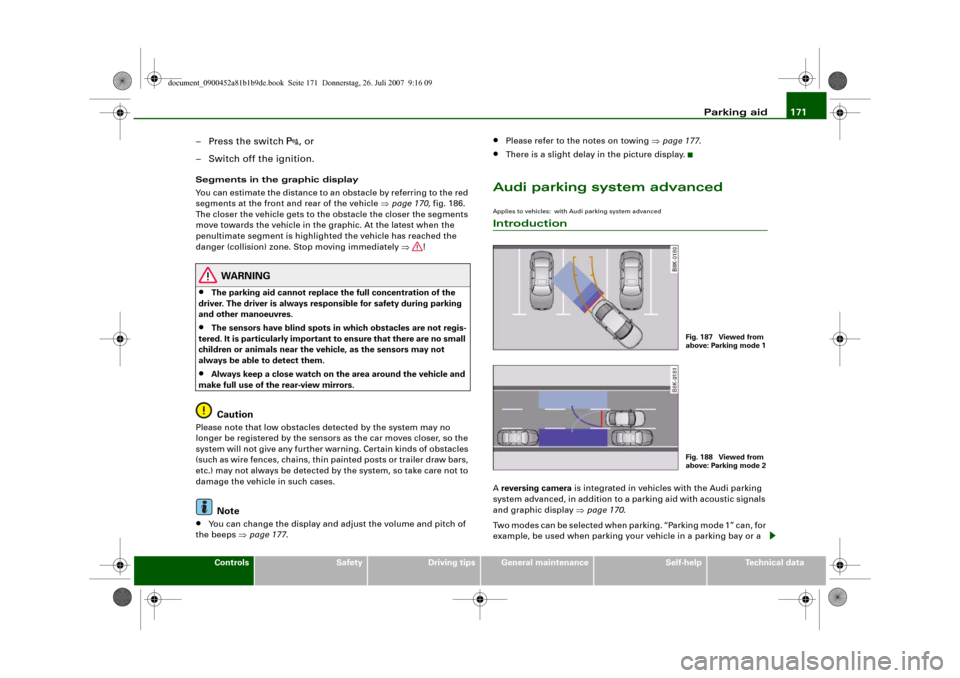
Audi parking system advancedApplies to vehicles: with Audi parking system advancedIntroductionA reversing camera is integrated in vehicles with the Audi parking
system advanced, in addition to a parking aid with acoustic signals
and graphic display ⇒page 170.
Two modes can be selected when parking. “Parking mode 1” can, for
example, be used when parking your vehicle in a parking bay or a
Fig. 187 Viewed from
above: Parking mode 1Fig. 188 Viewed from
above: Parking mode 2
document_0900452a81b1b9de.book Seite 171 Donnerstag, 26. Juli 2007 9:16 09
Page 175 of 342
Parking aid173
Controls
Safety
Driving tips
General maintenance
Self-help
Technical data
•
Moisten the lens using a commercially available, alcohol-based
glass cleaning agent and clean the lens with a dry cloth ⇒.
•
Use a small brush to remove snow and a de-icer spray to remove
ice ⇒.
WARNING
•
The parking aid cannot replace the full concentration of the
driver. The driver is always responsible for safety during parking
and other manoeuvres.
•
Always keep a close watch on the area around the vehicle and
make full use of the rear-view mirrors.
•
Do not allow the camera images in the MMI display to distract
you from watching the traffic.
•
For safety reasons, you should not use the system if the posi-
tion and installation angle of the camera have been changed, e.g.
in a rear-end collision. Have it checked by a qualified workshop.Caution
•
Please note that low obstacles detected by the system may no
longer be registered by the sensors as the car moves closer, so the
system will not give any further warning. Certain kinds of obstacles
(such as wire fences, chains, thin painted posts or trailer draw bars,
etc.) may not always be detected by the system, so take care not to
damage the vehicle in such cases.
•
Never remove snow and ice from the lens of the reversing
camera using warm or hot water - danger of cracks appearing on the
lens.
•
Never use abrasive cleaning agents on the lens.
Applies to vehicles: with Audi parking system advancedSwitching on/off
The reversing camera is automatically switched on
together with the acoustic signals and graphic display
when you select reverse gear.Switching on
– Switch on the MMI system.
– Engage reverse gear, or
– Press the switch
in the centre console ⇒page 170,
fig. 185. You will hear a brief acknowledgement tone and
the diode in the switch will light up.
Switching off
– Drive forwards faster than 10 km/h, or
– Press the switch
, or
– Switch off the ignition.
Changing display via MMI
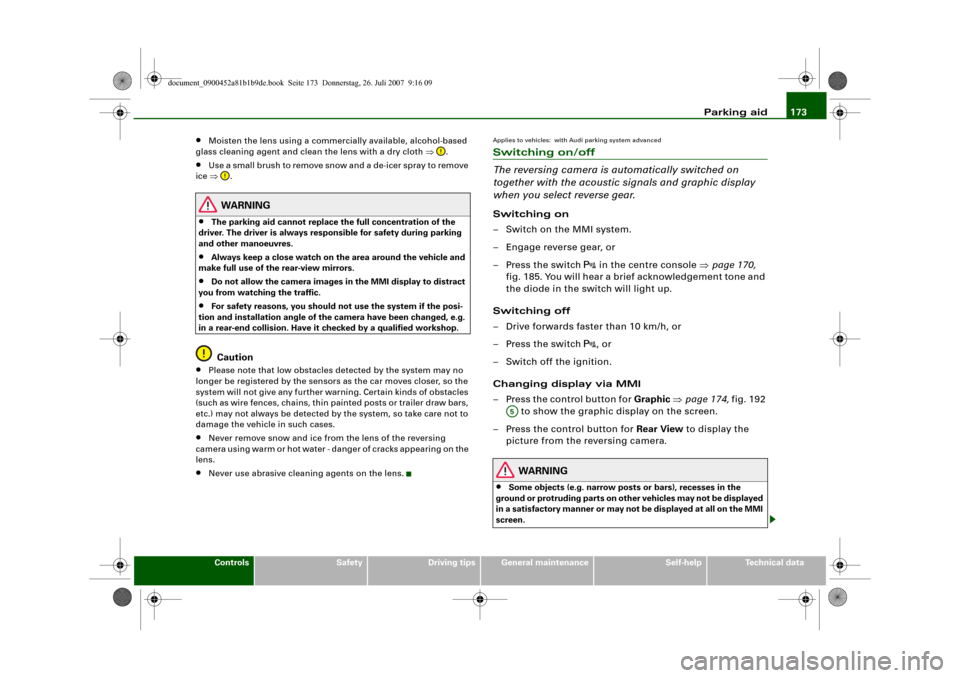
– Press the control button for Graphic ⇒page 174, fig. 192
to show the graphic display on the screen.
– Press the control button for Rear View to display the
picture from the reversing camera.
WARNING
•
Some objects (e.g. narrow posts or bars), recesses in the
ground or protruding parts on other vehicles may not be displayed
in a satisfactory manner or may not be displayed at all on the MMI
screen.A5
document_0900452a81b1b9de.book Seite 173 Donnerstag, 26. Juli 2007 9:16 09
Page 181 of 342

HomeLink179
Controls
Safety
Driving tips
General maintenance
Self-help
Technical data
HomeLinkUniversal transmitterApplies to vehicles: with HomeLinkDescription
The HomeLink universal transmitter can be programmed
to replace the hand-held controls of devices already in
use.HomeLink allows you to conveniently activate garage doors, estate
gates, security systems, home or office lighting and other electric
devices by means of control buttons inside your car.
HomeLink can replace up to three hand-held transmitters operating
existing devices on your property with a single universal trans-
mitter. This will be possible for most transmitters which control the
drive units for a garage door or external gates, etc. You can
programme the individual hand-held transmitters for your remote
control at or near the centre of the radiator grille. This is where the
control unit is located.
To be able to control systems with HomeLink, you need to perform
initial programming on the HomeLink transmitter first. If systems
fail to respond after the initial programming, check whether these
systems work with a "rolling code" (variable security code)
⇒page 180.
WARNING
When you are programming the HomeLink universal transmitter,
make sure that no persons or objects are close to the devices
receiving the transmitter signals. If a gate or door is inadvertently
set into motion during programming, persons might be injured or
other damage caused by moving parts.
Note
•
For additional information on HomeLink
® and/or products
compatible with HomeLink
®, please call the toll-free HomeLink
®
hotline (0) 08000466 35465 or alternatively +49 (0) 6838 907 277, or
visit the HomeLink
® website at: www.homelink.com
•
HomeLink
® is a registered trademark of Johnson Controls.
Applies to vehicles: with HomeLinkProgramming the universal transmitter
The HomeLink unit is programmed at the radiator grille.
Fig. 197 Operating
unit in headlinerFig. 198 Radiator grille
document_0900452a81b1b9de.book Seite 179 Donnerstag, 26. Juli 2007 9:16 09
Page 183 of 342
HomeLink181
Controls
Safety
Driving tips
General maintenance
Self-help
Technical data
Activating the garage door opener drive unit
– Locate the programming button on the garage door
drive. The exact location and colour of the button may
vary depending on the type of garage door opener.
– Press the programming button on the door drive unit
(this will normally cause a “programming mode indicator
lamp” on the unit to light up). You now have about 30
seconds to start and complete the programming of the
HomeLink control button on the operating unit.
Programming at the operating unit in the
headliner
– Press and release the already programmed HomeLink
button.
– Press the HomeLink button again to complete rolling
code programming.After programming at the operating unit in the headliner, the
garage door opener should recognize the HomeLink signal and
respond when the HomeLink button is pressed. Now the other
control buttons can be programmed as required.
Note
•
Having a second person assist you makes programming of the
rolling code easier and faster. For some makes of garage door
openers the HomeLink button may have to be pressed a third time
to complete the training sequence.
•
If you encounter problems programming the rolling code you
may find helpful information in the operating instructions of the
garage door opener or other device you wish to operate.
Applies to vehicles: with HomeLinkOperating HomeLink
The programmed devices are activated by means of the
HomeLink control buttons in the headliner.– Make sure that the ignition is on.
– Press the programmed HomeLink button ⇒page 179,
fig. 197. The device assigned to that button (e.g. garage
door) will be activated.The HomeLink indicator diode ⇒page 179, fig. 197 will light up
when you press the button.Applies to vehicles: with HomeLinkErasing the button programming
You can erase the complete HomeLink programming by
pressing the two outer buttons.– Switch on the ignition (do not start the engine).
– Press and hold down the two outer buttons until the indi-
cator diode starts to flash ⇒page 179, fig. 197.
– Then release the buttons.After the programming of the HomeLink buttons has been erased,
the system will return to the training mode and is ready to be re-
programmed at any time.
Note
•
Programmed buttons cannot be erased individually.
•
For security reasons it is advisable to erase the programming of
the HomeLink buttons prior to selling your vehicle.
document_0900452a81b1b9de.book Seite 181 Donnerstag, 26. Juli 2007 9:16 09
Page 188 of 342
Safe driving 186Safe drivingGeneral notesSafety is the first priority
Your safety is our first priority.This chapter contains important information, tips, sugges-
tions and warnings that you should read and observe for
your own safety and the safety of your passengers.
WARNING
•
The information in this chapter is important for the driver of
the vehicle and all passengers. The other chapters in this manual
(and, where applicable, in the other literature supplied with the
vehicle) contain further important notes which you should read
and observe for your own safety and that of your passengers.
•
Ensure that the complete vehicle wallet is always in the vehicle.
This is especially important when you lend or sell the vehicle to
others.
Safety features
The safety features listed here are part of the vehicle's
occupant restraint system. They work together to help
reduce the risk of injury in a wide variety of accident situ-
ations.Your safety and the safety of your passengers should not be left to
chance. In the event of an accident, the safety features incorporated
in your vehicle are capable of reducing the risk of injury. These are
just a few of the safety features in your Audi:•
Optimised three-point seat belts for all seats,
•
Belt force limiters for the front seats,
•
Belt pre-tensioners for the front seats,
•
Head restraints for all seats,
•
Optimised protection against injuries of the cervical vertebrae,
•
Front airbags,
•
Side airbags in the front seat backrests and on the outer rear
seats*,
•
Head-protection airbags (sideguard system),
•
“ISOFIX” mountings* for “ISOFIX” child safety seats on the rear
seats,
•
Height-adjustable head restraints on the seats,
•
Adjustable steering column.
These individual safety features are harmonised to provide you and
your passengers with the best possible protection in accident situ-
ations. However, they can only be effective if you and your passen-
gers sit in the correct position and adjust and use the safety equip-
ment properly.
For these reasons, this chapter explains why these safety features
are so important, how they can protect you, what you need to
remember when using them, and how you and your passengers can
gain the most benefit from them. There are also a number of impor-
tant safety warnings which you and your passengers should always
observe in order to minimise the risk of injury.
Safety is everyone's responsibility!
document_0900452a81b1b9de.book Seite 186 Donnerstag, 26. Juli 2007 9:16 09
Page 189 of 342
Safe driving187
Controls
Safety
Driving tips
General maintenance
Self-help
Technical data
Before every trip
The driver is responsible for the safety of the passengers
and the safe operation of the vehicle at all times.For your own safety and the safety of your passengers,
always note the following points before every trip:
– Make sure that all lights and turn signals are working
properly.
– Check the tyre pressures.
– Make sure that all windows are clean and give good visi-
bility to the outside.
– Secure all luggage and other items carefully ⇒page 79.
– Make sure that no objects can interfere with the pedals.
– Adjust the front seat, head restraint and mirrors
correctly.
– Make sure that the head restraints for all passengers are
adjusted to the correct position.
– Make sure that children are protected with suitable
safety seats and properly worn seat belts ⇒page 210.
– Sit in the correct position in your seat and make sure that
your passengers do the same. ⇒page 73.
– Fasten your seat belt correctly. Make sure that your
passengers do the same ⇒page 194.
What affects driving safety?
Safety on the road is directly related to how you drive, and
can also be affected by the passengers in the vehicle.The driver is responsible for the safety of the vehicle and all
its occupants. If your ability to drive is impaired in any way,
you endanger yourself and other road users ⇒. There-
fore:
– Do not let yourself be distracted by passengers or by
using a mobile phone, etc.
– Never drive when your driving ability is impaired (by
medication, alcohol, drugs, etc.).
– Obey all traffic regulations and speed limits and always
maintain a safe distance to the vehicle in front.
– Always adjust your speed to suit the road, traffic and
weather conditions.
– Take frequent breaks on long trips. Do not drive for more
than two hours without a stop.
– If possible, avoid driving when you are tired or stressed.
WARNING
•
Distractions while driving or any kind of impairment to your
driving ability increase the risk of accident and injury.
•
Do not store loose objects on the dashboard. These objects
could fly around the interior when the vehicle is moving (under
acceleration or whilst cornering) and distract the driver – this
could lead to an accident.
document_0900452a81b1b9de.book Seite 187 Donnerstag, 26. Juli 2007 9:16 09
Page 193 of 342
Safe driving191
Controls
Safety
Driving tips
General maintenance
Self-help
Technical data
Examples of incorrect sitting positions
Occupants can suffer severe or fatal injuries injuries if
they sit in an incorrect position while the vehicle is
moving.Seat belts can only provide maximum protection if the belt
webbing is positioned correctly. Sitting out of position
greatly reduces the effectiveness of the seat belts and
increases the risk of injury since the belt webbing is not
worn in the position for which it is designed. The driver is
responsible for the safety of all vehicle occupants, espe-
cially for children.
– Never allow anyone to sit out of position while the
vehicle is moving ⇒.The following list shows just some examples of incorrect sitting
positions which can be dangerous to all occupants. The list is not
complete, but will help to make you aware of possible dangers
which can be avoided.
Therefore, whenever the vehicle is moving:•
never stand up in the vehicle,
•
never stand on the seats,
•
never kneel on the seats,
•
never travel with the backrest reclined too far,
•
never lean against the dash panel,
•
never lie down on the rear seat,
•
never sit on the front edge of a seat,
•
never sit sideways,
•
never lean out of the window,
•
never put your feet out of the window,
•
never put your feet on the dash panel,
•
never put your feet on the seat cushion,
•
never ride in the footwell,
•
never travel on a seat without wearing the seat belt,
•
never climb into the luggage compartment.
WARNING
Sitting out of position increases the risk of severe injuries.•
Sitting out of position exposes the occupants to potentially
fatal injuries: if the airbags inflate they can strike any occupant
who is not in one of the designed seat positions.
•
Before starting a trip, sit in the correct position and stay in this
position as long as the vehicle is moving. Before every trip, make
sure all passengers are sitting in the correct positions and remain
correctly seated at all times ⇒page 73, “Seats and storage”.
Pedal are aPedal s
The pedals must always be free to move and must never
be obstructed by floor mats or any objects in the footwell.– Make sure that the accelerator, brake and clutch pedals
are not obstructed and can be pressed all the way down
to the floor.
– Make sure that all pedals are able to return freely to their
original positions.Only use floor mats which leave the pedal area free and can be
securely fastened in the footwell.
If one of the brake circuits should fail, increased brake pedal travel
will be required to bring the vehicle safely to a stop.
document_0900452a81b1b9de.book Seite 191 Donnerstag, 26. Juli 2007 9:16 09
Page 195 of 342
Safe driving193
Controls
Safety
Driving tips
General maintenance
Self-help
Technical data inside. In this case the child would be unable to get out of the
vehicle without help. This could have fatal consequences.
•
Never allow children to play in or around the vehicle. Always
close and lock the boot lid and all the doors when you leave the
vehicle.
•
Never let passengers ride in the luggage compartment. All
occupants must be properly restrained by the seat belts at all
times ⇒page 194.Note
•
Air circulation in the vehicle helps reduce fogging of the
windows. Used air escapes through ventilation slots in the rear of
the vehicle. Make sure that these ventilation slots are not
obstructed.
•
Suitable belts for securing loads to the fastening rings* are
commercially available.
Applies to vehicles: with fastening ringsFastening rings
Unsecured loads are a hazard to all vehicle occupants.There are fastening rings in the luggage compartment
which can be used to secure luggage and other objects
⇒page 79.
– Use the fastening rings to secure items safely in the
luggage compartment ⇒ in “Loading the luggage
compartment” on page 79.During a collision or an accident, even small and light objects can
possess so much energy that they can cause very severe injuries.
The amount of this “kinetic energy” depends on the speed of the vehicle and the weight of the object. The most significant factor,
however, is the speed of the vehicle.
An example: An object weighing 4.5 kg is lying unsecured in the
vehicle. During a frontal collision at a speed of 50 km/h, this object
generates a force corresponding to 20 times its weight. That means
that the effective weight of the object increases to about 90 kg. You
can imagine the severity of the injuries which might be sustained if
this “projectile” strikes an occupant as it flies through the
passenger compartment.
WARNING
If items of luggage or other objects are secured to the fastening
rings with inappropriate or damaged retaining cords, injuries
could result in the event of sudden braking or a collision.•
To prevent pieces of luggage or other objects from flying
forward, always use appropriate retaining cords which are prop-
erly secured to the fastening rings.
•
Never secure a child seat on the fastening rings.
WARNING (continued)
document_0900452a81b1b9de.book Seite 193 Donnerstag, 26. Juli 2007 9:16 09
Page 197 of 342
Seat belts195
Controls
Safety
Driving tips
General maintenance
Self-help
Technical data
Important safety instructions for using seat belts
There are a number of safety points concerning the seat
belts which you should remember. This will help to reduce
the risk of injury in an accident.
WARNING
•
The seat belts can only provide maximum protection if the
seats are adjusted properly ⇒page 73, “Seats and storage”.
•
To ensure proper protection, it is important to wear the seat
belts in the correct position ⇒page 197, “How to wear seat belts
properly”. Ensure that the seat belts are worn exactly as recom-
mended in this chapter. Belts which are not worn properly can
increase the risk of injury in accidents considerably.
•
Do not allow the seat belt to become twisted or jammed, or to
rub on any sharp edges.
•
Never allow two passengers (even children) to share the same
seat belt. It is especially dangerous to place a seat belt over a child
sitting on your lap.
•
Do not wear the belt over hard or fragile objects (such as
glasses or pens, etc.) because this can cause injuries.
•
Loose, bulky clothing (such as an overcoat over a jacket)
impairs the proper fit and function of the belts.
•
The belts must be kept clean, otherwise the retractors may not
work properly ⇒page 250, “Seat belts”.
•
The slot in the seat belt buckle must not be blocked with paper
or other objects, as this can prevent the latch plate from engaging
properly.
•
The latch plate of the belt must always be engaged in the
correct buckle for that seat, otherwise the belt will not be fully
effective.
•
Check the condition of the seat belts at regular intervals. If you
notice that the belt webbing, fittings, retractor mechanism or buckle of any of the belts is damaged, the belt must be replaced
by a qualified workshop.
•
The seat belts must not be removed or modified in any way. Do
not attempt to repair a damaged belt yourself.
•
Seat belts which have been worn in an accident and stretched
must be replaced by a qualified workshop. The belt anchorages
should also be checked.
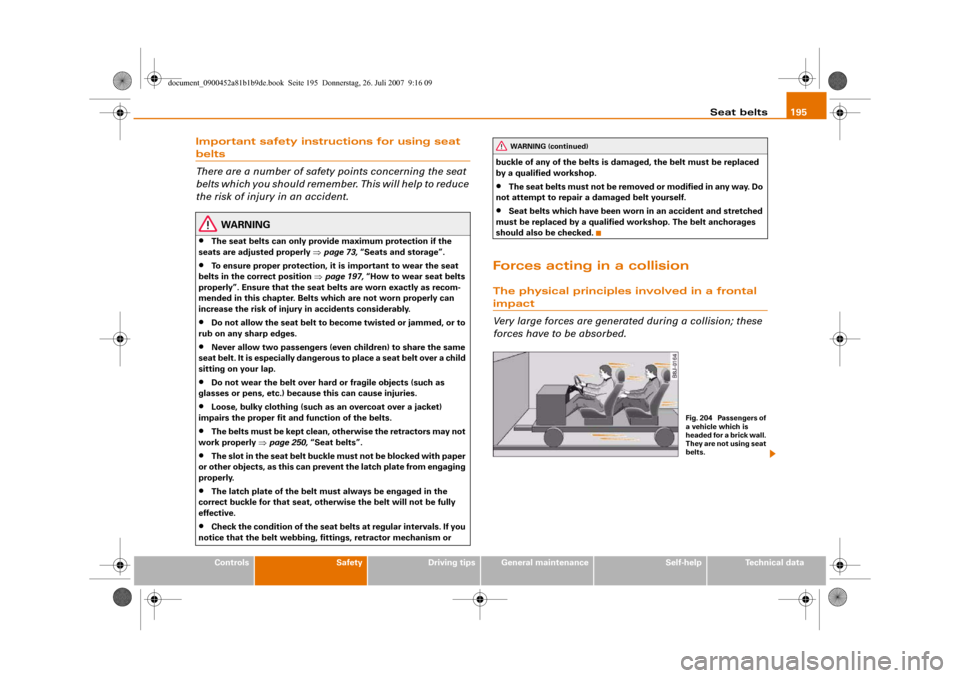
Forces acting in a collisionThe physical principles involved in a frontal impact
Very large forces are generated during a collision; these
forces have to be absorbed.
WARNING (continued)
Fig. 204 Passengers of
a vehicle which is
headed for a brick wall.
They are not using seat
belts.
document_0900452a81b1b9de.book Seite 195 Donnerstag, 26. Juli 2007 9:16 09