engine coolant AUDI A4 2016 User Guide
[x] Cancel search | Manufacturer: AUDI, Model Year: 2016, Model line: A4, Model: AUDI A4 2016Pages: 278, PDF Size: 70.26 MB
Page 210 of 278
Check ing and F illing
@ For the sake of the environment
- Under no circumstances can the oil come in
contact with the sewage network or the soil.
- Observe and fo llow legal regulations when
disposing of empty oil containers .
Changing the engine oil
We recommend that hove your oil changed by on
authorized Audi dealer or a qualified service sta
tion .
Before you che ck anything in the eng ine compart
ment,
always read and heed all WARNINGS ¢ A
in Working in the engine comportment on
page 203.
The engine oil must be changed according to the i n tervals specified in your Warranty
& Mainte
nance booklet . This is very important because the
lubricat ing propert ies of oil diminish gradually
during normal vehicle use.
Under some circ umstances the eng ine oi l sho uld
be changed more frequently. Change oil more of
ten if yo u drive most ly short distances, operate
the vehicle in dusty areas or under predominantly
stop-and-go traffic cond it ions , or have your vehi
cle where temperatures remain below freezing
for extended periods .
Detergent additives in the oil will make fresh oil
look dark after t he engine has been run ning for a
short t ime . T his is normal and is not a reason to
cha nge the oil mo re often than recommended .
Because of the prob lem of proper disposal, along
with the special tools and necessary expertise re
qu ired, we strongly recommend that you have
your oil c hanged by an aut ho rized
Audi dealer o r
a qualif ied se rvice station .
If you choose to change your o il yourself , please
note the following important informat ion:
A WARNING
To re duce the risk of pe rsonal injury if you
must c hange t he engine oil in your ve hicle
yo urs elf:
- W ear eye protection .
208
-
-To reduce the r is k of burns from hot engine
oil, let the engine cool down to the touch .
- W hen removing the oil drain plug with your
fingers, stay as far away as possible. Always
keep your forearm pa rallel to the ground to
he lp prevent hot oil from run ning down your
arm .
- Drain t he oil into a container designed for
this purpose, one large enough to hold at
leas t the tota l amou nt of oil in you r engine.
- Engi ne oil is poisonous . Keep it well out of
the reach of childre n.
- Continuous contact wit h used engine o il is
ha rmf ul to your skin. Always protect your
skin by washi ng oil
off thoroughly with soap
and wate r.
(D Note
Neve r mix oil additives with yo ur engine oil.
These additives can damage your e ngine and
adverse ly affect your A udi L imi ted New Vehi
cle Warranty .
@ For the sake of the environment
-Be fore chang ing you r oi l, first make sure
you know where you can properly dispose o f
t h e used oil.
- Always dispose of used e ngine o il pro perly .
Do not d ump it on garden so il, wooded
areas, into op en streams o r down sewage
drains.
- Recycle used e ngine o il by tak ing it to a used
eng ine oil collect io n fa cil ity in you r area, o r
c o nta ct a servi ce st ation .
Cooling system
Coolant '
The engine coolant performs two functions: it
keeps the engine from overheating and it pro
tects the engine from free zing in the winter.
The coolin g system is sealed and generally re
quires little attention .
The coo lin g sys tem h as been filled a t the fac to ry
wi th a pe rmanent coolan t which does not need to
be changed. The coo lant consists of a mixture of .,.
Page 211 of 278
..... N
0 ::..:: co .....
er's g lycol-bas edcoo lant additive Gl3 antifreeze
with anticorrosion additives (50% for USA mod
e ls; 60% for Canadian models). This m ixture
both assures the necessary frost protection and
protects metal components in the engine's cool
ing system from corrosion and scaling.
It also
raises the boiling point of the coolant .
Do not reduce the concentration of the coolant in
the summer by adding p lain water .
The propor
tion of coolant addit ive must be at l eas t 50° /4
but not more th an 60 %
to maintain antifreeze
p rotection and cooling effic iency. If the coolant
frost protec tion is too low, the coolant co uld
freeze and damage the vehicle heating and en
gine cooling system.
F or yea r-round driving, antifreeze is added at the
factory for temperatures down to :
- -31 °F (- 35 °C) USA
- -40 °F ( - 40 °C) Canada.
If you must add coolant, use a mixture of water
and coolant addit ive. Mixing the coolant additive
with d istilled water is recommended.
A WARNING
Before you check anything in the engine com
partment, always read and heed all WARN
INGS
Q &. in Working in the engine compart
ment on page 203.
(D Note
- Before winter sets in, have the coolant
checked to see if the coolant additive in your
vehicle is sufficient to meet the climate con
dit ions. This is especially important if you
li ve in a reg ion where the w inte r is ext reme
l y co ld. If ne cessary, in cre ase the proport io n
of coo lant add itive to 60%.
- When addi ng coolant addit ive to you r cool
i ng system, remember:
- We recommend using only coolant addi
tive Gl2 ++ or Gl3 for your ve hicle. T his
coolant additive is available at authorized
Audi dea lers. Othe r types of antifreeze can
significant ly reduce cor ros ion p rotection .
Ch eck ing and Filling
The resulting co rrosion can cause a loss of
coolant and serious engine damage.
- Do not add any type of radiator lea k sealant
to your vehicle's engine coolant. Adding ra
diator repair fluid may adversely affect the
function and performance of your cooling
system and cou ld resu lt in damage not cov
ered by your New Veh icle Limited Warranty.
Checking the engine coolant level
The engine coolant level can be checked with a
quick glance.
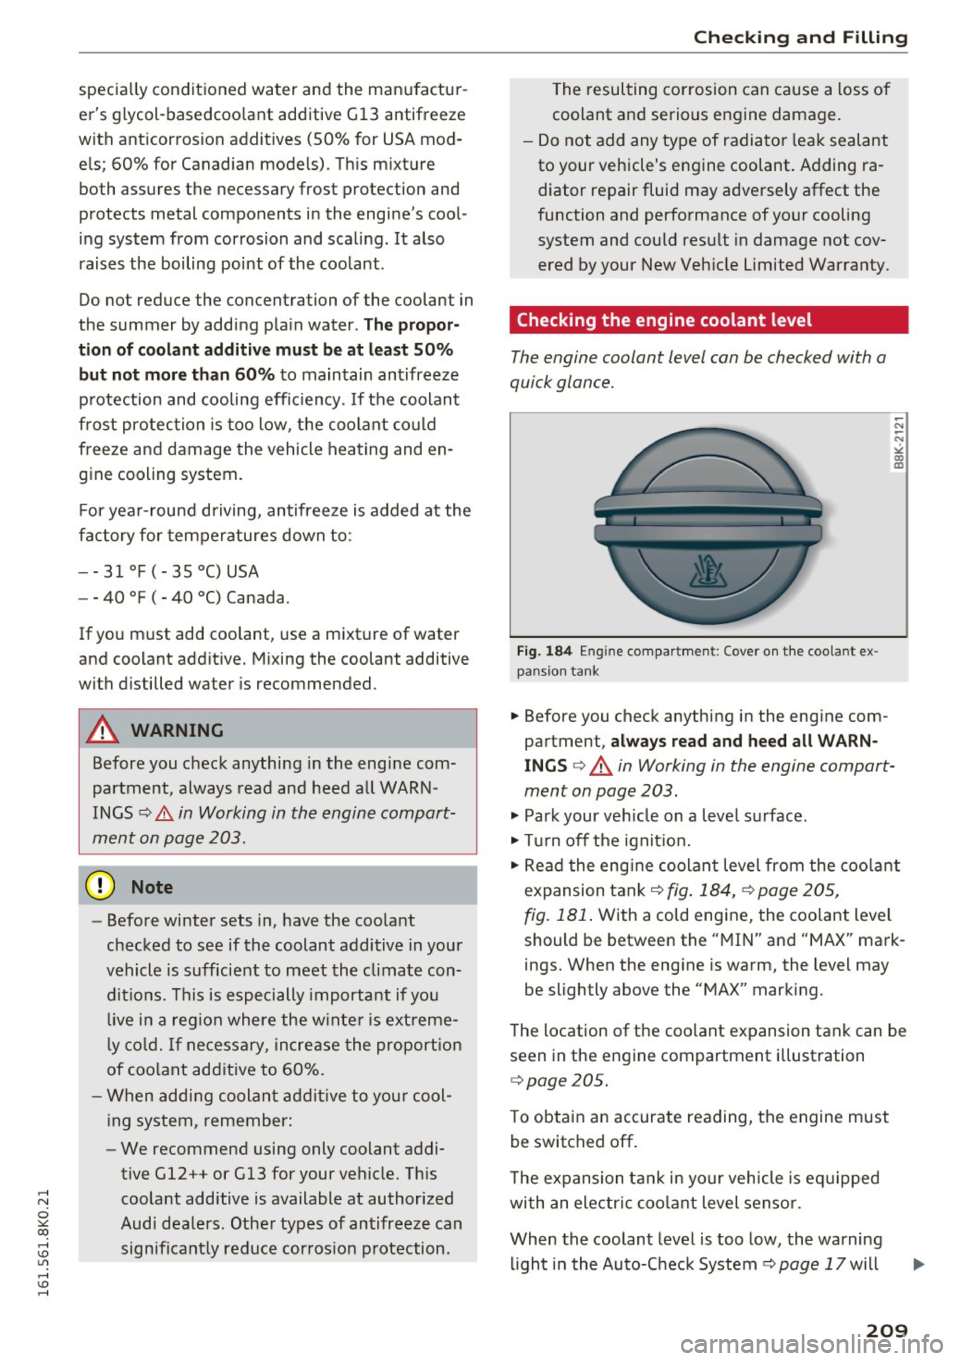
F ig. 184 En gin e co mpa rt men t: Cover o n the coo la nt ex
pans ion t ank
.. Before you check anything in the eng ine com
partment,
al ways read and heed all WARN
INGS
q ..&. in Working in the engine compart
ment on page 203 .
.. Park your ve hicle on a leve l sur face .
.. Tu rn off the ignit io n .
.. Read the eng ine coolan t level from the coo lant
expansion tank
q fig . 184, Q page 205,
fig. 181 .
With a cold engine, the coolant level
should be between the " MIN" and "MAX" mark
ings. When the engine is warm, the level may
be slightly above the "MAX" marking.
The location of the coo lant expansion tank can be
seen in the engine compartment illustration
q page 205.
To obtain an accurate reading, the engine must
be switched off.
T he expansion ta nk in your veh icle is eq uipped
with an electric coo lant level senso r.
When the coolant leve l is too low , the warning
light i n the Auto-Check System
Q page 17 will
209
Page 212 of 278
Check ing and F illing
blink until you add coolant and the level has been
restored to normal. Even though there is an e lec
tr ic coolant level sensor, we still recommend you
check the coo lant level from time to time.
Coolant los s
Coolant loss may indicate a l e ak in the cooling
system. In the event of coolant loss, the cooling
syst em should be insp ected immediately by your
authorized Audi dealer. It is not enough merely
to add coolant.
I n a
s e aled system, losses can occur only if the
boiling point of the coo lant is exceeded as a re
sult of overheating.
A WARNING
The cooling system is under pressure and can get very hot. Reduce the risk of scalding from
hot coolant by following these steps.
- Turn off the eng ine and allow it to cool
down .
- Protect your face, hands and arms from es
caping fluid and steam by covering the cap
with a large, thick rag.
- Turn the cap slowly and very carefully in a
counter-clockwise direction wh ile apply ing
l ight, downward pressure on the top of the
cap .
- To avo id being burned, do not sp ill anti
freeze or coolant on the exhaust system or
hot eng ine parts . Under certain conditions,
the ethy lene g lycol i n engine coolant can
catch fire.
{Q) Note
Do not add any type of radiator leak seala nt
to your veh icle's engine coolant . Adding radia
to r repa ir fluid may adversely affec t the func
tion and performance of yo ur cooling system
and could result in damage not covered by
your New Vehicle Limited Warranty.
Adding coolant
Be very careful when adding engine coolant.
Before you check anyth ing in the eng ine compart
ment,
a lwa ys re ad an d heed all WARNINGS
210
¢ A in Working in the engine compartment on
page 203.
Requireme nt: The re must be a res idual amount
of coo lant in the expans ion tank
~CD-
.,,. Turn off the engine .
.,,. Let the engine cool down.
.,,. Place a thick rag over the coolan t expa nsion
tank ¢ page 209, fig. 184 and
carefull y turn
the cap counter-clockwise ¢.&_ .
.,,. Add coo lant mixed in the correct ratio
~ page 208, Coolant up to the MAX marking.
.,,. Make sure that the fluid level remains stab le.
Add more coolant if necessary .
.,,. Twist the cap on aga in tightly.
Replacement engine coolant must conform to ex
act specifications ¢ page 208, Coolan t.
We recommend using only coo lant additive
G l2 +
+ , Gl3
or in an emergency Gl2+. Do not use a
different additive . In an emergency use plain wa
ter unt il you can get the correct addit ive and can
restore the correct rat io. Th is should be done as
soon as possible.
If you have lost a considerable amount of cool
ant, then you should add cold antifreeze and cold
water only when the engine is cold.
Always use new engine coo lant when refilling .
Do not fi ll coolant above the "MAX " mark. Excess
coolant will be forced out th rough the pressure
relief valve in the cap when the engine becomes
hot.
A WARNING
- The cooling system is under pressure and can get very hot. Reduce the risk of scalding
from hot coolant by following these steps.
- Turn off the engine and a llow it to cool
down.
- Protect your face, hands and arms from
escaping fluid and steam by covering the
cap with a large, thick rag.
- Turn the cap s low ly and very ca refully in a
counter-clo ckwise direction wh ile app ly ing
li ght, downward pressure on the top o f
the cap.
~
Page 213 of 278
,....,
N
0
""' CX) ,....,
I.Cl U"I ,....,
I.Cl ,....,
-To avoid being burned, do not spill anti
freeze or coolant on the exhaust system or hot engine parts. Under certain condi
tions, the ethylene glycol in engine cool ant can catch fire.
- Antifreeze is poisonous. Always store anti
freeze in its original container and well out
of the reach of children.
- If you drain the coolant, it must be caught
and safely stored in a proper container
clearly marked "poison".
(D Note
-Do not add coolant if the expansion tank is
empty . Air could enter the cooling system
and damage the engine. If this is the case,
do not continue driving. Seek professional
assistance.
- Coolant pollutes the environment and could
cause an engine fire. Excess coolant will be
forced out through the pressure relief valve
in the cap when the engine becomes hot.
- If, in an emergency, only water can be add
ed, the correct ratio between water and an
tifreeze
c::> page 208 must be restored as
soon as possible.
@) For the sake of the environment
Drained coolant should not be reused. Always
dispose of used coolant while observing all
environmental regulations.
Radiator fan
The radiator fan switches on automatically by it
self.
The radiator fan is driven by the engine via the V
belt . The viscous clutch regulates the speed of
the fan according to the temperature of the cool
ant.
An auxiliary electric radiator fan* switches on and
off depending on coolant temperature and other
vehicle operating conditions.
After you switch the engine off, the auxiliary fan
can continue running for up to 10 minutes -even
Checking and Filling
with the ignition off. It can even switch on again
later by itself
c::> & , if
- the temperature of the engine coolant rises due
to the heat build-up from the engine in the en
gine compartment, or
- the engine compartment heats up because the
vehicle is parked in intense sunlight.
A WARNING
-To reduce the risk of personal injury never
touch the radiator fan.
- The auxiliary electric fan is temperature
controlled and can switch on suddenly even
when the engine is not running.
- The auxiliary radiator fan switches on auto
matically when the engine coolant reaches a
certain temperature and will continue to run
until the coolant temperature drops.
Brake fluid
Checking brake fluid level
The broke fluid level con be checked with o quick
glance .
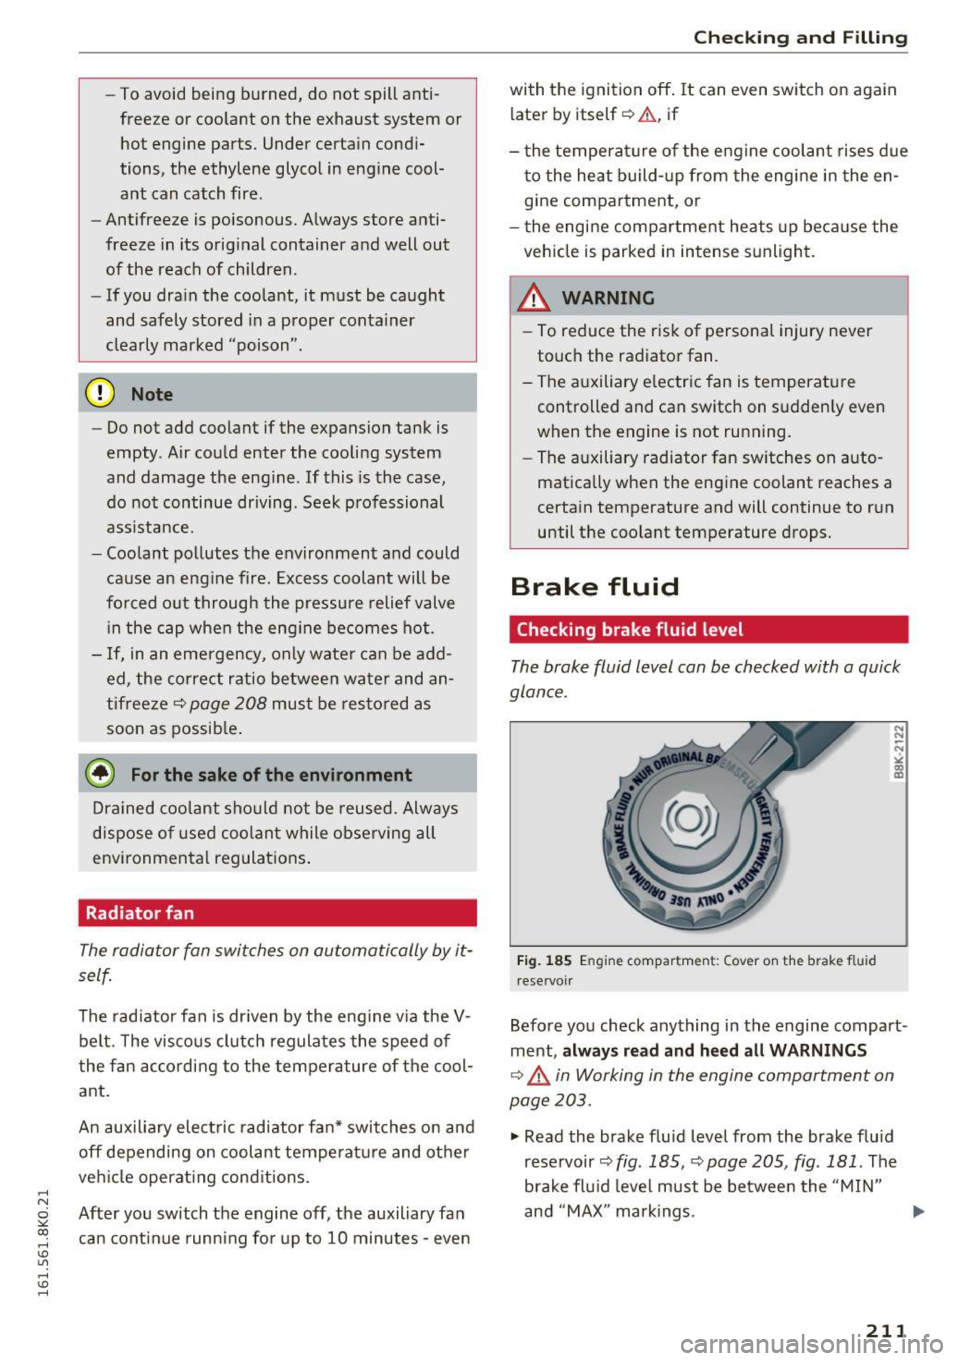
Fig. 185 En gi ne compartmen t: Cover on the b rake fl uid
reservoir
Before you check anything in the engine compart
ment,
always read and heed all WARNINGS
c::> _.& in Working in the engine comportment on
page 203.
.,. Read the brake fluid level from the brake fluid
reservoir
c::> fig. 185, c::> page 205, fig . 181 . The
brake fluid level must be between the "MIN"
and "MAX" markings.
211
Page 218 of 278
Checking and Filling
the energy m anag ement functions correctly after
replacing the battery.
I f it is not poss ible to use a battery of th is type,
the new battery must have the same capacity,
voltage (12 -volts), amperage, construction and
p lug sealing .
When insta lling the batte ry, make sure the igni
tion and all elec trical consumers are turned off.
CD Note
Ma ke sure the ventilation hose on the side of
t he batte ry is connected, othe rw ise f umes or
bat tery acid can lea k out.
@ For the sake of the environment
Because of the prob lem of proper dispo sal of
a ba tte ry, we recommen d your author ized
Audi de aler change the battery fo r you . Bat
teries contain su lf u ric acid and lea d and must
always be disposed of properly in compliance
w ith all environmental regu lations. D ispos ing
of vehicle batteries improperly is very danger
ous to the env ironment.
Windshield/headlight*
washer container
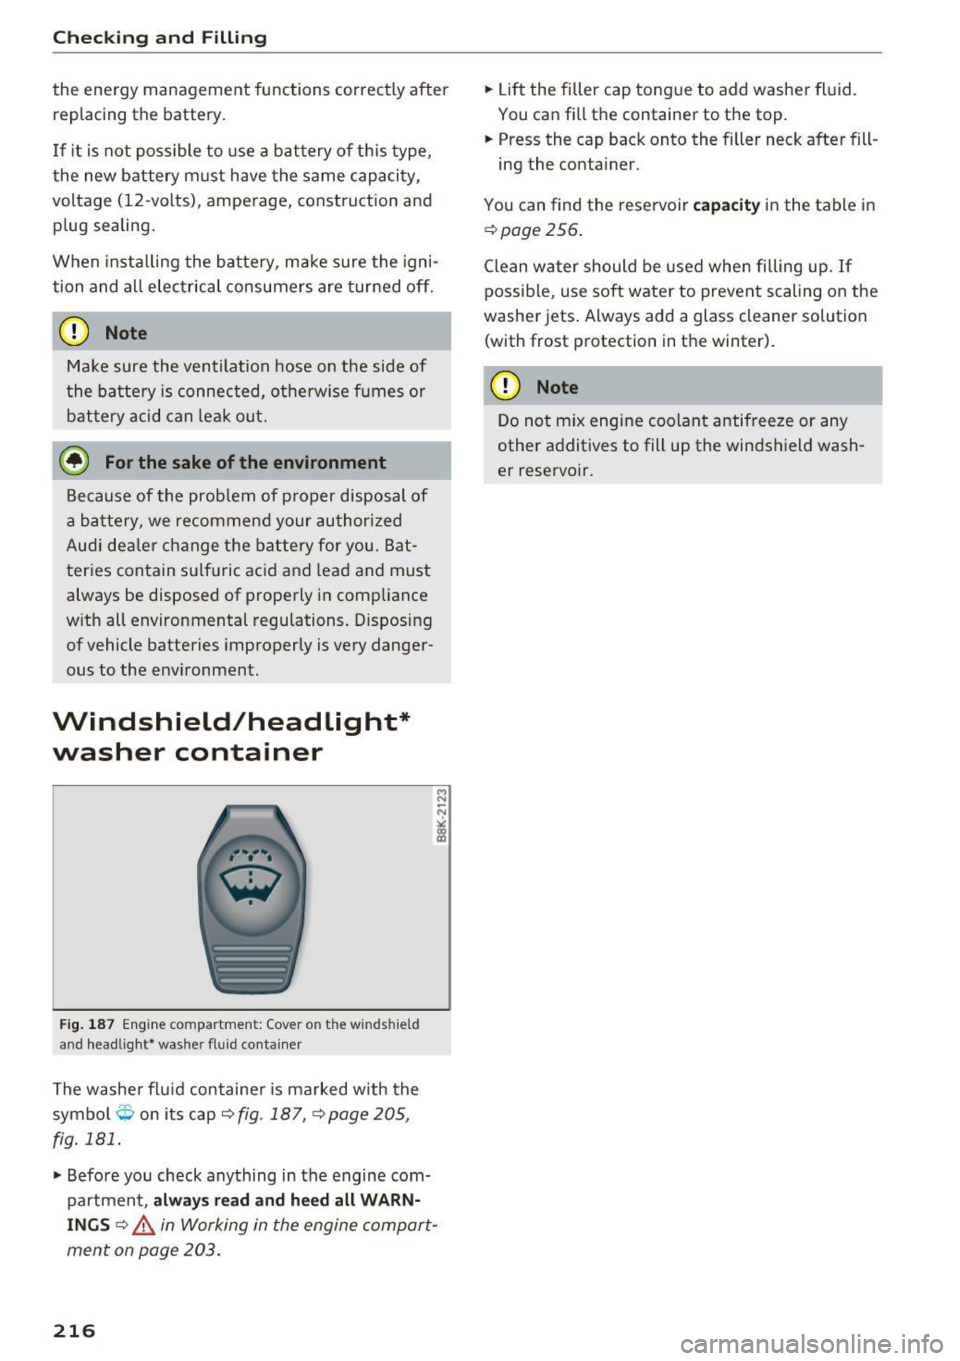
F ig. 1 87 Engine co mpar tment : Cove r o n th e w ind shie ld
and head lig ht ' was her fluid conta iner
The washer fl uid containe r is m arked with the
symbo l
O on its cap ~ fig. 187, ¢ page 205,
fig . 181 .
.,. Befo re yo u check anything in the engine com
partment,
alway s read and heed all WARN
INGS ¢,& in Working in the engine compor t
ment on page 203.
216
.,. Lift the filler cap tongue to add washe r fl uid.
You ca n fill the conta iner to the top.
.,. Press the cap back onto the filler neck after fill -
ing the container .
You can find the reservoir
capacit y in the table in
~ page 256.
Clean water should be used when filling up . If
possib le , use soft wate r to prevent scaling on the
washer jets. Always add a glass cleaner solution
(with frost p rotection in the winter) .
CD Note
Do not mix engine coolant antifreeze or any
other additives to fill up the winds hield wash
er reservoir.
Page 257 of 278
.... N
0
""' CX)
.... I.Cl U"I
.... I.Cl ....
Technical data
Vehicle identification
F ig . 2 18 Vehi cle Ident if icatio n Number (VlN) plate : loca·
t ion on dr iver 's side dash pane l
XXXXX XX -X -XX XX X XX XX
CD+ ~t :1:: xxxxxxxx xx x xx xxx xxx
TVP/fffl XXX XXX
XX XXXXXXX XX X X xx
XXX KW XXX
®i ~:J ·f lfils~~ XXXX XXX XXX
®-+ ~ N:a=i~l xxxx ; xxxx xx x ; xx
II. · AUSS, I OPTIONS
,__ __
EO A 7D 5
2E H J0Z
3FC
F O A
TL 6 3KA
lXW
7T6 C V7
3L4 lS A
4UB 6XM 5SG
llB lA S
S M U 7Xl
9G3 OG7 0YH
SE H UlA X 98
803 908 824
7 K0 4 X3 2K2
4KC 3Y0 413
7G8 01 A
5RW
18A
0JF
QZ7
020
502
4G0
XX . X XX X XX X XXXX
Fig. 219 Th e ve hicle ident ifica tion label: ins ide the l ug·
gage co mpartment
Veh icle Identification Number (VlN )
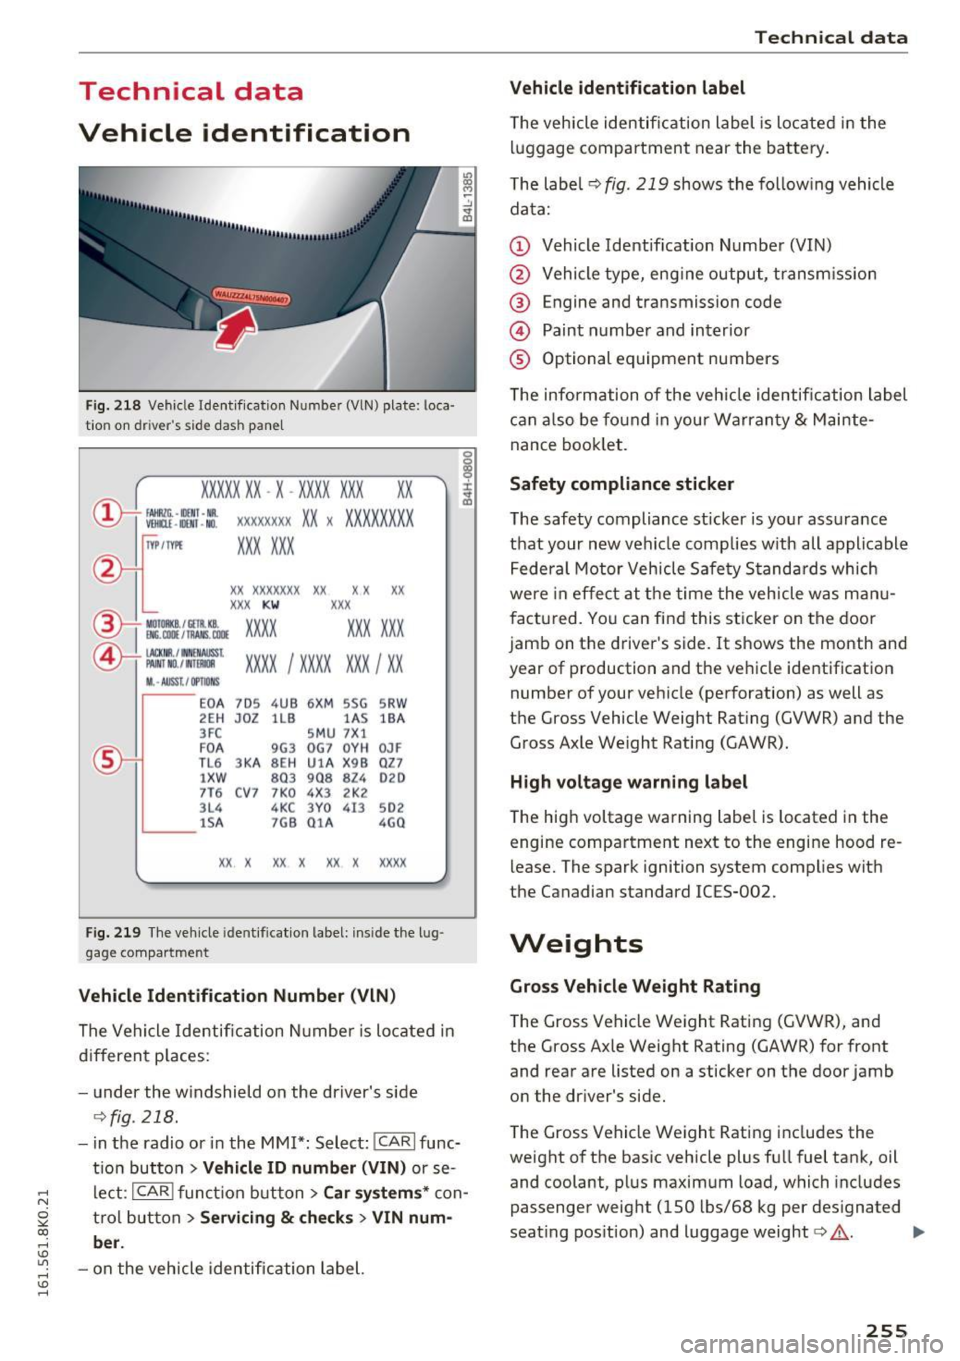
The Vehicle Identific ation N umbe r is lo cate d in
d if f eren t places:
- u nder the w indshield on the dr iver's side
~ fig. 218.
-in the radio or i n the MMI*: Select: !CAR! func
t io n but ton
> Vehicle ID number (VIN) or se
l e ct:
I CAR ! funct ion button > Car system s* con
t rol but ton
> Servicing & checks > VIN num
ber .
-on the vehicle identific ation label.
Technical data
Vehicle identification label
T he vehicle identi fica tion label is lo cate d in t he
l uggage compa rtment near the ba tte ry.
T he labe l
~ fig. 219 shows the fo llow ing vehicle
da ta:
(D Vehicle Identification Number (VIN)
@ Vehicle type, eng ine output, transm ission
@ Engine and transmission code
@ Paint numbe r and interior
® Optional equipment numbers
T he information of the veh icle identification label
c an also be fo und in your Warran ty
& Mainte
nance booklet.
Safety compliance sticker
The safety compliance sticker is yo ur ass urance
t h at your n ew vehi cle complies w ith all appli cable
Fede ral Motor Vehicle Safety Stand ard s which
we re in effe ct at the time the veh icle w as m anu
fac tured. Yo u ca n fi nd this sticker on the door
jamb on the driver 's side. It shows the month and
year of production and t he ve hicle identification
number of your ve hicle (perforation) as well as
t h e Gross Vehicle Weight Rat ing (GVWR) and the
G ross Axle We ight Rati ng (GAWR).
H igh vo ltage warning label
T he hig h voltage warning label is located in the
engine compa rtment ne xt to the engine hood re
lease. The spark ignition system complies with
the Canadian standard ICES-002.
Weights
Gross Vehicle W eight Rating
The Gross Vehicle Weight Rating (GVWR), and
the Gross Axle Weight Rating (GAWR) for front
and rear a re listed on a sticker on the door jamb
o n the dr iver 's side .
T he Gross Vehicle Weight Rating includes the
weight o f the basic vehicle plus fu ll fuel tank, oil
and coolant, p lus maxim um load, which includes
passenger weight (150 lbs/68 kg per des ignated
seat ing pos ition) and luggage weight
c:> .&, . .,.
255
Page 261 of 278
..... N
0 ::..:: co .....
scope of maintenance and repairs which can be
carried out by vehicle owners.
Also, safety and
environmental
concerns place very strict limits
on the nature of repairs and adjustments to en
gine and transmission parts which an owner can perform .
Maintenance, adjustments and repairs usually re
quire special tools, testing devices and other
equipment available to specially trained work
shop personnel in order to assure proper per
formance, reliability and safety of the vehicle and its many systems.
Improper maintenance, adjustments and repairs
can impair the operation and reliability of your
vehicle and even void your vehicle warranty .
Therefore, proof of servicing in accordance with
the maintenance schedule may be a condition for upholding a possible warranty claim made within
the warranty period.
Above all , operational safety can be adversely af
fected, creating unnecessary risks for you and
your passengers.
If in doubt about any servicing, have it done by
your authorized Audi dealer or any properly equipped and qualified workshop. We strongly urge you to give your authorized Audi dealer the
opportunity to perform all scheduled mainte nance and necessary repairs. Your dealer has the
facilities, original parts and trained specialists to keep your vehicle running properly .
Performing limited maintenance yourself
The following pages describe a limited number of
procedures which can be performed on your vehi
cle with ordinary tools, should the need arise and
trained personnel be unavailable. Before per
forming any of these procedures, always thor
oughly read all of the applicab le text and careful
ly follow the instructions given . Always rigorously
observe the
WARNINGS provided .
Before you check anything in the engine com
partment, always read and heed all WARNINGS
c::> .&. and c::> .&. in Working in the engine compart
ment on page 203 .
Consumer information
A WARNING
-Serious personal injury may occur as a result
of improperly performed maintenance, ad
justments or repairs .
- Always be extremely careful when working
on the vehicle. Always follow commonly ac
cepted safety practices and general com
mon sense. Never risk personal injury.
- Do not attempt any of the maintenance,
checks or repairs described on the following pages if you are not fully familiar with these
or other procedures with respect to the ve hicle, or are uncertain how to proceed.
- Do not do any work without the proper tools
and equipment. Have the necessary work
done by your authorized Audi dealer or any
properly equipped and qualified workshop.
- The engine compartment of any motor vehi
cle is a potentially hazardous area. Never
reach into the area around or touch the radi
ator fan. It is temperature controlled and
can switch on suddenly - even when the en
gine is off and the ignition key has been re
moved. The radiator fan switches on auto
matically when the coolant reaches a certain
temperature and will continue to run until
the coolant temperature drops.
- Always remove the ignition key before any
one gets under the vehicle.
-Always support your vehicle with safety
stands if it is necessary to work underneath
the vehicle. The jack supplied with the vehi
cle is not adequate for this purpose and
could collapse causing serious personal in
jury.
- If you must work underneath the vehicle
with the wheels on the ground, always make
sure the vehicle is on level ground, that the
wheels are always securely blocked and that
the engine cannot be started.
- Always make sure the transmission selector
lever (automatic transmission) is in "P"
(Park position) or Neutral (manual transmis-
sion) and the park brake is firmly applied . ..,.
259
Page 262 of 278
Consumer inf orm ation
@ For the sake of the env ironment
- Changing the engine settings wi ll adversely
affect emission levels. Th is is detrimental to
the environment and increases fuel con
sumption.
- A lways observe environmental regu lations
when disposing of old engine o il, used brake
fl ui d, d irty engine coolant, spent batteries
or worn out tires.
- Undeployed airbag modules and pretension
ers mig ht be classified as Perchlorate Mate
rial -special handl ing may apply, see
www.dtsc .ca.gov/hazardouswaste/perchlo
r ate. When the vehicle or parts of the re
straint system including airbag modu les
safety be lts wi th pretensioners are scrap
ped, all applicab le laws and regulations
must be observed. Your authorized Audi
dealer is familiar with these requirements
and we recommend that you have your deal er perform this service for you.
Accessories and technical changes
Additional accessories and parts replacement
Always consult an authorized Audi dealer before
purchasing accessories.
Your vehicle incorporates the latest safety design
features ensuring a high standard of active and passive safety.
This safety could be comp romised by non-ap
proved changes to the vehicle . For this reason, if
parts have to be replaced, please observe the fo l
lowing points when insta lling addit ional accesso
ries:
Approved Audi accessories and genuine Audi parts are available from author ized Audi dealer.
These dealers also have the necessary facilities,
too ls and trained specialists to install the parts
and accessories properly.
260
A WARNING
-
Using the wrong spare parts or using non-ap-
proved accessories can cause damage to the
vehicle and serious personal injury.
- Use only accessories expressly approved by
Aud i and genuine Audi spare parts
- These parts and accessor ies have been spe
cially designed to be used on your vehicle.
- Never install accessor ies such as telephone
cradles or beverage holders on airbag covers
or w ith in the airbag deployment zones. Do
ing so will increase the risk of injury if a ir
bags are triggered in an accident!
- Before you check anything in the eng ine
compartment, always read and heed all
WARN INGS
Qpage 203.
(D Note
-If items other than genu ine Audi spare
parts, add-on equipment and accessory
items are used or if repair wor k is not per
formed a ccording to specified methods, this
c an resul t in severe damage to you r vehi
cle's eng ine and body (such as corrosion)
and adve rsely af fect your vehicle's war ranty.
- I f emergency repai rs must be performed
elsewhere, have the vehicle exam ined by an
authorized A udi dealer as soon as possib le .
- T he manuf acture r ca nnot be held liable for
damage which occurs d ue to failure to com
ply with these stipulations.
Technical Modifications '
Our guidelines must be complied with when tech
nical modifications are made .
Always consult an a uthorized Audi de aler bef ore
sta rt ing work on any modifica tions.
This will help ensure that vehicle fu nction, per
fo rmance and safety are not impaired
Q ,& .
Attempting to work on electronic components
and the software used with them can cause mal
funct io ns. Because of the way elect ronic compo
nen ts a re interconnected with each othe r, such
malfunc tions c an also have an adverse affect on
othe r systems that are not d irectl y involved. This ..,.
Page 264 of 278
Index
A
A/C (automatic climate control) . . . . . . . . . . 77
Accessories . . . . . . . . . . . . . . . . . . . . . . . 64, 260
Active lane assist
Cleaning the camera area . . . . . . . . . . . . . 194
adaptive cruise control Vehicles with manual transmission . . . . . . 99
Adaptive cruise control. . . . . . . . . . . . . . . . . . 98
Cleaning the sensor . . . . . . . . . . . . . . . . . . 194
Messages . . . . . . . . . . . . . . . . . . . . . . . . . . 105
R equ est for driver interven tio n . . . . . . . . . 103
Setting the driving program . . . . . . . . . . . 103
Adaptive dampers . . . . . . . . . . . . . . . . . . . . . 111
Adaptive light . . . . . . . . . . . . . . . . . . . . . . . . . 48
Adaptive Lig ht (defective) . . . . . . . . . . . . . . . 21
Adding Engine coolant .. .. .. ...... ... .. .. .. .
Engine oil .. .. .. .. . ... .... .. ... .. .. .
W indshield washer fluid ............. .
Additional accessories
Additives Eng ine oil .... .. .. . .. .......... .. .. .
Adjustable steer ing column .......... .. . .
Adjusting 210
207
216
260
207
80
Air distribution (automat ic climate control) .78
Instrumen t illum inat ion . . . . . . . . . . . . . . . 51
Steering column . . . . . . . . . . . . . . . . . . . . . . 80
Temperatu re (automatic climate control) . 78
Airbag . . . . . . . . . . . . . . . . . . . . . . . . . . . . . . 138
Warning/indicator lights . . . . . . . . . . . . . . . 19
Ai rbag system . . . . . . . . . . . . . . . . . . . . . . . . 153
Advanced Airbag-System . . . . . . . . . . . . . . 142
Advanced Airbag System components . . . 144
Care . . . . . . . . . . . . . . . . . . . . . . . . . . . . . . 151
Ch ildren . . . . . . . . . . . . . . . . . . . . . . . . . . . 159
Child restraints . . . . . . . . . . . . . . . . . . . . . 160
Components (front airbags) . . . . . . . . . . . 144
Danger of fitting a child safety seat on the
front passenger seat . . . . . . . . . . . . . . . . . 139
D ispos al . . . . . . . . . . . . . . . . . . . . . . . . . . . 151
Fr ont airbags . . . . . . . . . . . . . . . . . . . 142, 143
How do the front airbags work? . . . . . . . . 146
H ow many airbags does my vehicle have? 144
H ow the Advanced Airbag System compo-
nents work together . . . . . . . . . . . . . . . . . 146
Important information . . . . . . . . . . . . . . . 138
Monitoring 148
262
PASSENGER AIR BAG OFF light . . . . . . . . . 148
Repairs . . . . . . . . . . . . . . . . . . . . . . . . . . . . 151
Safety instructions . . . . . . . . . . . . . . . . . . . 150
Side air bags . . . . . . . . . . . . . . . . . . . . . . . . 152
S ide curta in air bags . . . . . . . . . . . . . . . . . . 155
Warning/Indicator lights . . . . . . . . . . . . . 148
Weight-sensing mat . . . . . . . . . . . . . . . . . 159
When must the system be inspected? . . . 148
a ll- wheel drive . . . . . . . . . . . . . . . . . . . . . . . 182
All season tires . . . . . . . . . . . . . . . . . . . . . . . 232
Alternator
refer to Generator . . . . . . . . . . . . . . . . . . . . 16
Anti-freeze
refer to Eng ine coolant system . . . . . . . . . 208
Ant i-lock braking system
Warning/indicator lights . . . . . . . . . . . . 18, 19
Anti-Lock Braking System . . . . . . . . . . . . . . 177
Anti-slip regulation
Warning/indicator lights . . . . . . . . . . . . . . . 18
Anti-Slip Regulation . . . . . . . . . . . . . . . . . . . 177
Anti-theft alarm system . . . . . . . . . . . . . . . . . 31
Anti-theft systems
E le ctronic immobilizer................. 37
Armrest . . . . . . . . . . . . . . . . . . . . . . . . . . . . . . 61
Ashtray . . . . . . . . . . . . . . . . . . . . . . . . . . . . . . 64
Audi braking guard
refer to braking guard . . . . . . . . . . . . . . . . . 98
Audi drive select . . . . . . . . . . . . . . . . . . . . . . 111
Adaptive dampers . . . . . . . . . . . . . . . . . . . 111
Description . . . . . . . . . . . . . . . . . . . . . . . . . 111
Dynam ic steering . . . . . . . . . . . . . . . . . . . . 111
Setting the driving mode . . . . . . . . . . . . . . 112
Sport differential . . . . . . . . . . . . . . . . . . . . 111
Audi Se rvice Repair Manuals and Literature 258
AUTO Automatic climate control . . . . . . . . . . . . . . 78
Automa tic headl ights . . . . . . . . . . . . . . . . . 48
Automatic belt retractor . . . . . . . . . . . . . . . 133
Automatic climate control Air vents . . . . . . . . . . . . . . . . . . . . . . . . . . . . 78
Operation . . . . . . . . . . . . . . . . . . . . . . . . . . . 77
Setup . . . . . . . . . . . . . . . . . . . . . . . . . . . . . . 79
Automat ic Shift Lock (ASL) . . . . . . . . . . . . . . 92
Automatic transmission . . . . . . . . . . . . . . . . . 90
Automat ic Shift Lock (ASL) . . . . . . . . . . . . . 92
Driving . . . . . . . . . . . . . . . . . . . . . . . . . . . . . 92
Eme rgency mode . . . . . . . . . . . . . . . . . . . . . 96
Page 265 of 278
..... N
0 ::..:: co .....
Kick -down . . . . . . . . . . . . . . . . . . . . . . . . . . . 95
Manual shift program . . . . . . . . . . . . . . . . . 94
Removal lock (igni tion key) . . . . . . . . . . . . . 80
Selector lever . . . . . . . . . . . . . . . . . . . . . . . . 91
Automatic wipers . . . . . . . . . . . . . . . . . . . . . . 54
Auto Safety Hotline . . . . . . . . . . . . . . . . . . . 128
Average speed . . . . . . . . . . . . . . . . . . . . . . . . 24
Avoid damaging the vehicle . . . . . . . . . . . . . 185
B
Bag hooks . . . . . . . . . . . . . . . . . . . . . . . . . . . . 72
Battery . . . . . . . . . . . . . . . . . . . . . . . . . . . . . . 16
Ba ttery location inside the luggage compart-
ment .. ... ................... .... .. 213
Charge level . . . . . . . . . . . . . . . . . . . . . . . . 182
Charging . . . . . . . . . . . . . . . . . . . . . . . . . . . 214
Energy management . . . . . . . . . . . . . . . . . 182
I mportant warn ings when work ing on the
battery . . . . . . . . . . . . . . . . . . . . . . . . . . . . 213
Jump starting . . . . . . . . . . . . . . . . . . . . . . . 250
Replacing the battery . . . . . . . . . . . . . . . . 215
Working on the battery . . . . . . . . . . . . . . . 213
Before driving . . . . . . . . . . . . . . . . . . . . . . . . 121
Belt tensioners . . . . . . . . . . . . . . . . . . . . . . . 136
Bio-ethanol (Fuel) . . . . . . . . . . . . . . . . . . . . . 199
Blended gasoline . . . . . . . . . . . . . . . . . . . . . 198
Blower (automatic climate control) . . . . . . . . 78
Booster seats . . . . . . . . . . . . . . . . . . . . . . . . 166
Brake fluid
Changing the brake fluid . . . . . . . . . . . . . . 212
Checking the brake flu id level . . . . . . . . . . 211
Brake system Anti -lock brak ing system . . . . . . . . . . . . . . . 19
Brake fluid specifications for refill and re
p lacement . . . . . . . . . . . . . . . . . . . . . . . . . 212
Brake light defective . . . . . . . . . . . . . . . . . . 21
Brake power assist unit . . . . . . . . . . . . . . . 180
Brakes . . . . . . . . . . . . . . . . . . . . . . . . . . . . . 180
Ceramic brakes . . . . . . . . . . . . . . . . . . . . . . 180
Electromechanical parking brake . . . . . . . . 85
Warning/indicator lights . . . . . . . . . . . . . . . 15
Worn brake pads symbol . . . . . . . . . . . . . . . 20
Braking Brake assist . . . . . . . . . . . . . . . . . . . . . . . . 177
Emergency braking function . . . . . . . . . . . . 87
Index
braking guard . . . . . . . . . . . . . . . . . . . . . . . . . 98
Messages . . . . . . . . . . . . . . . . . . . . . . . . . . 105
Settings . . . . . . . . . . . . . . . . . . . . . . . . . . . 105
Break-in period
Brake pads . . . . . . . . . . . . . . . . . . . . . . . . . 180
T ires . . . . . . . . . . . . . . . . . . . . . . . . . . . . . . 185
Breaking in . . . . . . . . . . . . . . . . . . . . . . . . . . 185
New t ires . . . . . . . . . . . . . . . . . . . . . . . . . . 224
Bulbs . . . . . . . . . . . . . . . . . . . . . . . . . . . . . . . 249
C
California Proposition 65 Warning . . . . . . . 204
Battery specific . . . . . . . . . . . . . . . . . . . . . 214
Capacities . . . . . . . . . . . . . . . . . . . . . . . . . . . 256
Engine oil . . . . . . . . . . . . . . . . . . . . . . . . . . 205
Care . . . . . . . . . . . . . . . . . . . . . . . . . . . . . . . . 193
Cargo area
refer to Luggage compartment . . . . . . 69, 126
Catalytic converter . . . . . . . . . . . . . . . . . . . . 186
Center armrest . . . . . . . . . . . . . . . . . . . . . . . . 61
C entral locking . . . . . . . . . . . . . . . . . . . . . . . . 31
Central locking switch . . . . . . . . . . . . . . . . . 35
Convenien ce key . . . . . . . . . . . . . . . . . . . . . . 34
Remote control key . . . . . . . . . . . . . . . . . . . 34
Ceramic brake rotors
New brake pads . . . . . . . . . . . . . . . . . . . . . 180
Certification . . . . . . . . . . . . . . . . . . . . . . . . . 261
Changing engine oil . . . . . . . . . . . . . . . . . . . 208
Checking Engine coolant level . . . . . . . . . . . . . . . . . . 209
Child restraints
Danger of using child restraints in the front
seat . . . . . . . . . . . . . . . . . . . . . . . . . . . . . . . 139
Where can I get additional information
about child restraints and their use? . . . . 175
Child restraint system anchors . . . . . . . . . . 171
Child safety . . . . . . . . . . . . . . . . . . . . . . . . . . 158
Impor tan t safety ins tructions for using child
safety seats . . . . . . . . . . . . . . . . . . . . . . . . 161
Installing a child restraint using the LATCH
system . . . . . . . . . . . . . . . . . . . . . . . . . . . . 172
Lower anchorages . . . . . . . . . . . . . . . . . . . 172
Mounting and releas ing the anchorage
hook .............................. 172
Tether anchors . . . . . . . . . . . . . . . . . . . . . . 173
Tether straps . . . . . . . . . . . . . . . . . . . . . . . 173
263