automatic transmission AUDI A4 2017 Owners Manual
[x] Cancel search | Manufacturer: AUDI, Model Year: 2017, Model line: A4, Model: AUDI A4 2017Pages: 386, PDF Size: 96.32 MB
Page 4 of 386
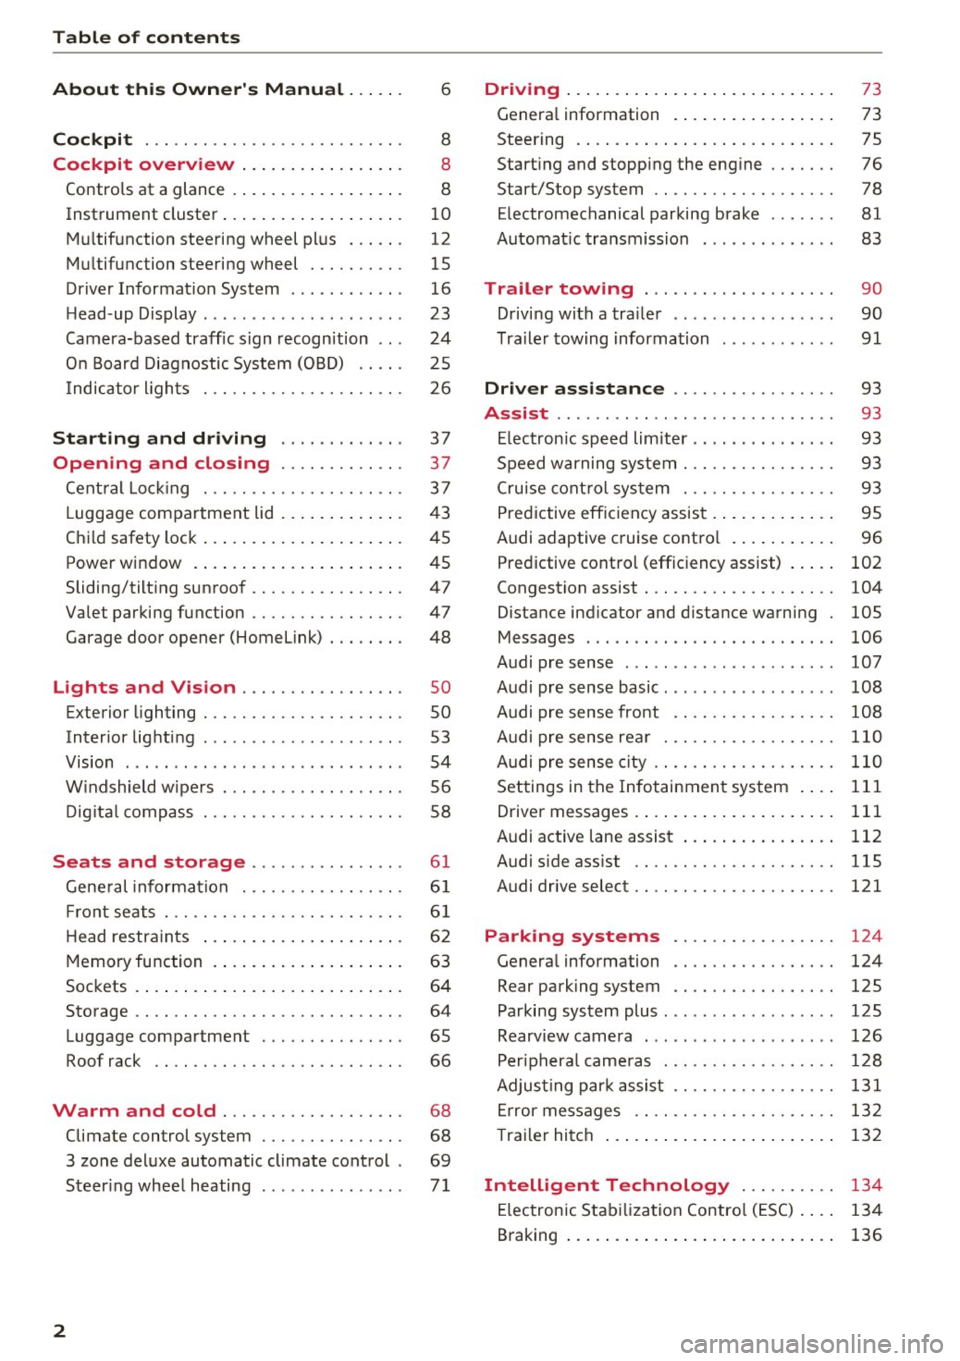
Table of contents
About this Owner's Manual ... .. .
Cockpit ... .. ............... .... .. .
Cockpit overview ................ .
Controls at a glance ... .......... .. .. .
Instrument cluster .. .......... .. .. .. .
Multifunction steering wheel plus ... .. .
Multifunction steering wheel ......... .
Driver Informat ion System ..... .. .... .
H ead-up Display .... .. .. ..... ... .. .. .
Camera-based traff ic sign recognition .. .
O n Board Diagnostic System (OBD) .... .
I ndicator l ights .............. .... .. .
Starting and driving
Opening and closing Cent ral Lock ing .............. .... .. .
L uggage compa rtment lid ... ..... .. .. .
Child safety lock .... .......... .. .. .. .
Power window ... .. .......... .. .. .. .
Sliding/tilting sunroof ......... .... .. .
Valet parking function ............. .. .
Garage door opener (Homelink) . .. .. .. .
L ights and Vision .............. .. .
Exterior lighting . .. . .......... .. .. .. .
Interior lighting ...... ........... ... .
V1s1on ....... .. ................ ... .
Windshield wipers . ... .... .... .. .. .. .
Digital compass . ............. .... .. .
Seats and storage ............ ... .
General information .......... .. .. .. . 6
8
8
8
10
12
15
16
23
24
25
26
37
37
3 7
43
45
45
47
47
48
so so
53
54
56
58
6 1
61
Front seats . . . . . . . . . . . . . . . . . . . . . . . . . 61
H ead restraints . . . . . . . . . . . . . . . . . . . . . 62
Memory function . . . . . . . . . . . . . . . . . . . . 63
Sockets . . . . . . . . . . . . . . . . . . . . . . . . . . . . 64
Storage . . . . . . . . . . . . . . . . . . . . . . . . . . . . 64
Luggage compartment . . . . . . . . . . . . . . . 65
Roof rack . . . . . . . . . . . . . . . . . . . . . . . . . . 66
Warm and cold . . . . . . . . . . . . . . . . . . . 68
Climate control system . . . . . . . . . . . . . . . 68
3 zone deluxe automatic climate control . 69
Steer ing whee l heating . . . . . . . . . . . . . . .
7 1
2
Driving ..... .. .. .. .. ... .......... . .
General information . ... ........... . .
Steering .......... .. .. . .......... . .
Start ing and stopping the eng ine ..... . .
Start/Stop system .. .. ............. . .
E le ctromechanical parking brake ...... .
Automat ic transmission
Trailer towing ... .. ... .. ..... ... . .
Driving with a trailer .. ........ ..... . .
Trailer towing information
Driver assistance .. ............ .. .
Assist ........... ... .............. .
Electronic speed limiter ... .. ... ... .. . . 73
73
75
76
78
81
83
90
90
91
93
93
93
Speed warning system . . . . . . . . . . . . . . . . 93
Cruise control system . . . . . . . . . . . . . . . . 93
Predictive efficiency assist . . . . . . . . . . . . . 95
Audi adaptive cruise control . . . . . . . . . . . 96
Predictive control (efficiency assist) . . . . .
102
Congestion assist . . . . . . . . . . . . . . . . . . . . 104
Distance ind icator and distance warning 105
Messages . . . . . . . . . . . . . . . . . . . . . . . . . . 106
Audi pre sense . . . . . . . . . . . . . . . . . . . . . . 107
Audi pre sense basic. . . . . . . . . . . . . . . . . . 108
Audi pre sense front . . . . . . . . . . . . . . . . . 108
Audi pre sense rear . . . . . . . . . . . . . . . . . . 110
Audi pre sense city . . . . . . . . . . . . . . . . . . . 110
Settings in the Infotainment system . . . . 111
Driver messages . . . . . . . . . . . . . . . . . . . . . 111
Audi active lane assist . . . . . . . . . . . . . . . . 112
Audi sid e ass ist . . . . . . . . . . . . . . . . . . . . . 115
Audi drive select . . . . . . . . . . . . . . . . . . . . . 121
Parking systems . . . . . . . . . . . . . . . . . 124
Genera l information . . . . . . . . . . . . . . . . . 124
Rear parking system . . . . . . . . . . . . . . . . . 125
Parking system plus . . . . . . . . . . . . . . . . . . 125
Rearview camera . . . . . . . . . . . . . . . . . . . . 126
Peripheral cameras . . . . . . . . . . . . . . . . . . 128
Adjusting park assist . . . . . . . . . . . . . . . . . 131
Error messages . . . . . . . . . . . . . . . . . . . . . 132
T railer hitch . . . . . . . . . . . . . . . . . . . . . . . . 132
Intelligent Technology . . . . . . . . . . 134
Electronic Stabilization Control (ESC) . . . . 134
Braking . . . . . . . . . . . . . . . . . . . . . . . . . . . . 136
Page 75 of 386
Driving
General information
Breaking in
A new vehicle must be broken in, and the break
in distance should be 1,000 mi les ( 1,500 km). Do
not drive at speeds that w ill exceed
2/3 of the
maximum permitted engine speed (RPM) for the
first 600 miles (1,000 km) , and avoid full accel
eration during this period . You may gradually
start increasing the RPM and the speed between
600 miles (1,000 km) and 1,000 miles (1,500 km).
During the first hours of use, the engine has a
higher internal friction than later on when all
moving parts have settled into place with each
other.
How the vehicle is driven during the first 1,000
miles (1,500 km) also affects the engine quality.
Drive at moderate engine speeds after the initial
break-in per iod, part icularly when running a cold
engine . This will reduce engine wear and improve
the mileage .
Do not drive at too
low of an engine speed (RPM).
Shift down when the engine no longer runs
"smoothly" . Extremely high engine speeds are
automatically reduced.
Avoid damaging the vehicle
When you are driving on poor roads, or over
curbs, steep ramps, etc., make certain that low
lying parts such as spoilers and exhaust system
parts do not bottom out and get damaged.
This is especially true for vehicles with low-slung
chassis (sports chassis)* and fully loaded
vehicles.
Driving through water on roads
Note the following to reduce the risk of vehicle
damage when driving through water, for examp le
<( on flooded roads : a, .... N
~ -The wate r must not be any higher than the bot-....
g tom of the vehicle body .
3 a,
Driving
- Do not drive faster than walking speed.
A WARNING
After driv ing through water or mud, the effec
tiveness of the brakes may be reduced due to moisture on the brake rotors and brake pads.
A few careful brake applications should dry
off the brakes .
(D Note
-Vehicle components such as the engine,
transmission, suspens ion or electrical sys
tem can be severely damaged by driving
through water .
- Always switch the Start/Stop system* off
when driving through water
r:';>page 78.
(D Tips
- Determine the depth before driving through
water.
- Do not stop the vehicle, drive in reverse or
switch the engine off when driving through
water.
- Keep in mind that oncoming vehicles may create waves that raise the water level and
make it too deep for your vehicle to drive
through safely.
- Avoid driving through salt water, because
this can cause corrosion .
Economical and environmentally-friendly
dr iving
T he amount of fuel consumpt ion, the environ
mental impact and the wear to the engine,
brakes and tires depends mostly on your driving
style. With an anticipatory and economic driving
style, fuel consumption can be reduced by ap
proximately 10-15%. The following tips will help
you conserve the environment and your money at
the same time .
Anticipatory driving
A vehicle uses the most fuel when accelerating.
When you drive with anticipation, you do not
need to brake as often and so you accelerate less .
When possible, let your vehicle coast with a
gear
engaged,
for example, when you notice that the ..,.
73
Page 85 of 386
slow your vehicle down as if you had made a
full braking maneuver. ESC and the associat
ed components (ABS, ASR, EDL) cannot over
come the laws of physics . In corners and
when road or weather conditions are bad , a
full brake application can cause the vehicle to skid or the rear end to swerve, which increas
es the risk of an accident.
Hill hold assist
Hill hold assist makes it easier to start on hills .
The system is activated when the brake pedal is pressed for a
few seco nds. The vehicle must be in
an uphill direction of travel.
After releasing the brake pedal , the brake power
is held for a
brief moment to prevent the vehicle
from rolling back when starting. During this
time , you can easily begin to
move your vehicle.
& WARNING
- If you did not begin moving immediately af
ter releasing the brake pedal, the vehicle
could begin to roll backward under certain
conditions . Press the brake pedal or set the
parking brake immediately .
-If the engine stalls, press the brake pedal or
set the parking brake immediately.
- To prevent the vehicle from rolling back un
intentionally when starting in stop-and-go
traffic, keep the brake pedal pressed for a
few seconds before you start driving.
- Switch the ignition off when you leave the
vehicle, even for a short period of time. Also
set the
parking brake to prevent the vehicle
from rolling unintentionally . This applies
particularly when children remain in the
ve
hicle, because there is the risk of an acci
dent .
Automatic transmission
Introduction
The automati c transmission is controlled elec
tronically . The transmission shifts up or down au
tomatically depending on which drive program is
selected .
Driving
When a moderate driving style is used, the
transmission selects the most economical driving
mode. The transmission shifts up at a lower RPM
and shifts down at a higher RPM to improve fuel
efficiency.
The transmission switches to a sporty mode after
a kick-down or when the driver uses a
sporty
driving style
characteri zed by quick accelerator
pedal movements, heavy acceleration, frequent
changes in speed and t raveling at the maximum
speed .
If desired, the driver can also select the gears
manually (tiptronic mode) ¢ page 86.
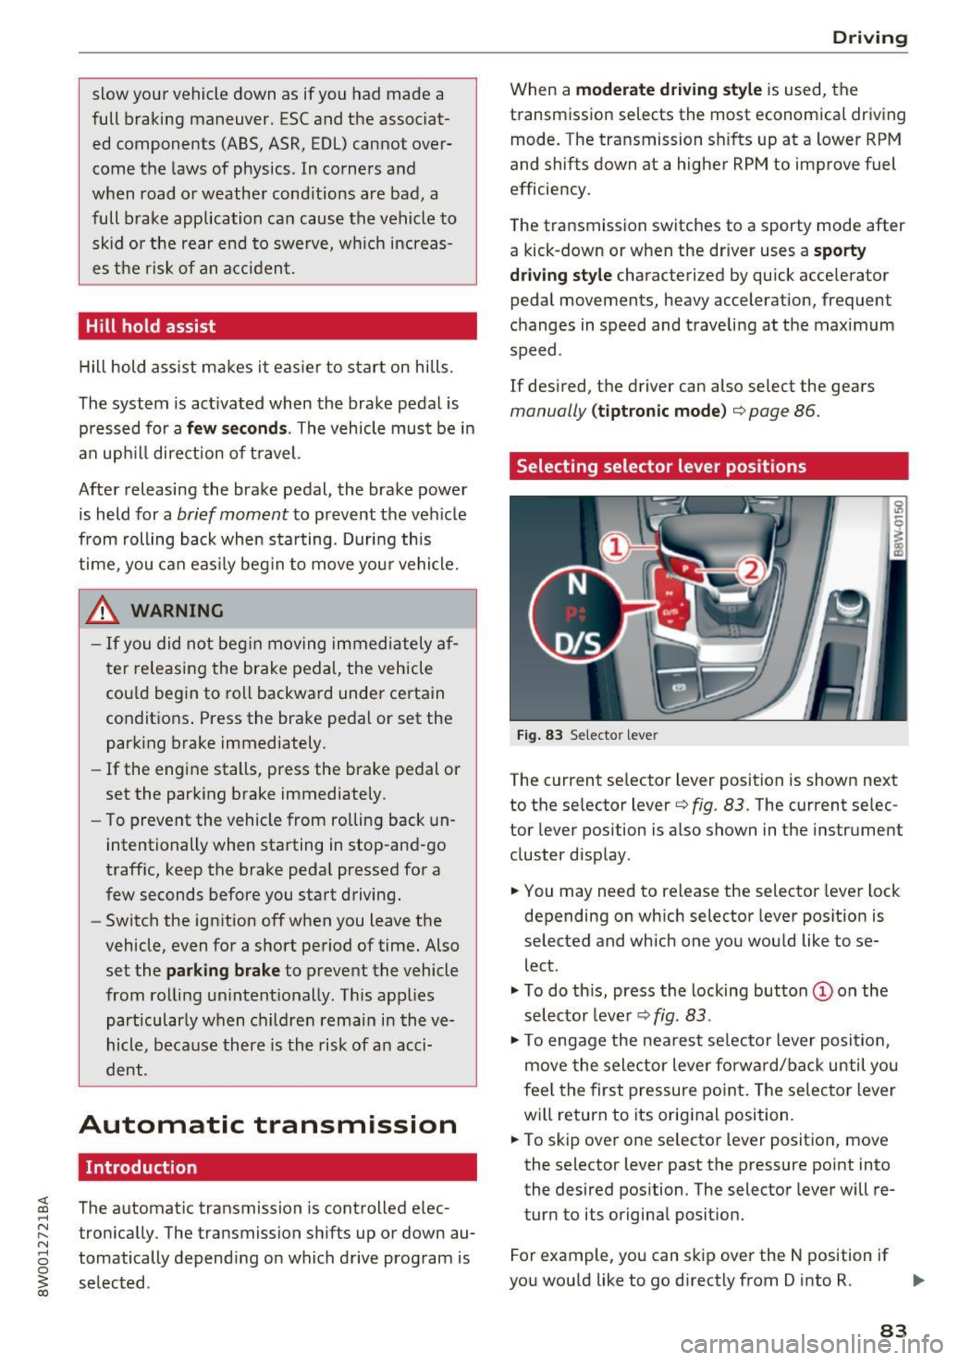
Selecting selector lever positions
Fig. 83 Selecto r lever
The current selector l ev e r pos ition is shown next
to the selector lever¢
fig. 83 . The current selec
tor lever position is also shown in the instrument
cluster d isplay .
.,. You may need to release the selector lever lock
depending on which selector lever position is
selected and which one you would like to se
lect .
.,. To do this, press the locking button (Don the
selector lever¢
fig. 83.
.,. To engage the nearest se lector lever position,
move the selector lever forward/back until you
feel the first pressure point. The selector lever
will return to its original position.
.,. To skip
over one selector lever position, move
the selecto r lever past the pressure point into
the desired position . The selector lever will re
turn to its original position.
For example, you can skip
over the N position if
you would like to go directly from D into R. ..,.
83
Page 87 of 386

-Power is st ill transmitted to the wheels
when the eng ine is r unning at idle. To pre
vent the veh icle from "creeping", you must
keep your foot on the brake in all selector
lever posi tions (except P and N) when the
engine is ru nning.
- Before opening the hood, se lect the P selec
tor leve r pos ition and set the parking bra ke.
T his redu ces the risk of an accid ent. Always
read and fo llow the appli cable warnings
¢ page 30 4, Wor king in the engine com
partment.
@ Tips
If you accidentally se lect N wh ile d riving, take
your foot off the a ccele rat or pedal an d wait
for the engine to s low down to idle before se
lect ing Dor S.
Driving tips
Starting the engine
.,. The P or N posi tion m ust be selected .
Starting from a stop
.,. Press and hold the brake pedal.
.,. Start the engi ne ¢
page 76.
.,. Press t he lo ck ing bu tton (D on the se le ctor lev
er and select the D, E, Sor R pos ition
¢ page 83.
.,. Wait a moment unti l the transmission shifts.
Yo u w ill notice a slight movement when the
gear engages .
.,. Release the brake pedal and press the acce lera
tor pedal ¢
A,.
Stopp ing temporarily
.,. Press t he brake peda l to stop the vehicle, fo r
example at a t raff ic light. Do not press the ac
ce le rator peda l when do ing this.
.,. To prevent the vehicle from rolling when you
sta rt driving, set the park ing brake when stop
ping on steep hill s¢
A, .
.,. The park ing bra ke w ill release automatically
;;§ and the vehi cle will s tart moving on ce you press ....
~ th e accelerator pedal.
N .... 0 0
3
Stopping /parking
If the selector lever is not in the P position when
yo u open the drive r's door, the vehicle cou ld ro ll.
.,. Press and hold the b rake pe dal¢
A, .
.,. Se t the par king bra ke.
.,. To sele ct the P se lec to r lever posit io n, press the
P button @on the selector lever¢
page 83,
fig. 83.
Un der certa in conditions , such as d riv ing i n the
moun tains o r whe n towi ng a t railer, it may be
helpful to swi tch to man ua l mode tempo rari ly
and shift
manually to adapt to the driv ing condi
t ions ¢
page 86 .
On hills, ac tivate the park ing brake fi rst and then
shi ft into the P position¢
page 81 . This preven ts
too much stress from being p laced on the locking
mechan ism .
A WARNING
----The vehicle can roll even when the eng ine is
sw itched off .
- Unintended vehicle movement can lead to
serio us inju ries .
- Do not press the acce le rator pedal when
chang ing the se lector lever position while
the vehicle is stationary and the engine is r u nning . This could result in a c rash .
- To reduce the r isk of an accident, never se
lect the R o r P positions while dr iv ing .
- Do not inadvertently p ress the accelerator
pedal when the vehicle is stationary. Other
wise the veh icle wi ll start to move immedi
ately , even i f the pa rking brake is set. This
could result in a c rash .
(D Tips
For safety reasons, the park ing bra ke only re
l eases automatically when the drive r's door is
closed .
Hill descent control
The hill descent control system assists the driver
when driving down hills .
Hill descent control activates when the t ransmis-
s io n is in the Dor 5 position and you press the ..,.
85
Page 88 of 386
Driving
brake pedal. The transmission automatically se
lects a gear that is suitable for the hill. Hi ll de
scent contro l tries to mainta in the speed ach
ieved at the time of b raking, within physical and
technical limitations. If may sti ll be necessary to
adjust the speed with the brake pedal.
H ill descent contro l switches off once the hill lev
els out or you press the accelerator peda l.
When operating the c ruise contro l system *
c::> page 93, hill descent control is also activated
when the speed is set.
A WARNING
H ill descent control cannot overcome p hys ica l
limitations, so it may not be able to maintain
a constant speed under all condit ions. Always
be ready to apply the brakes.
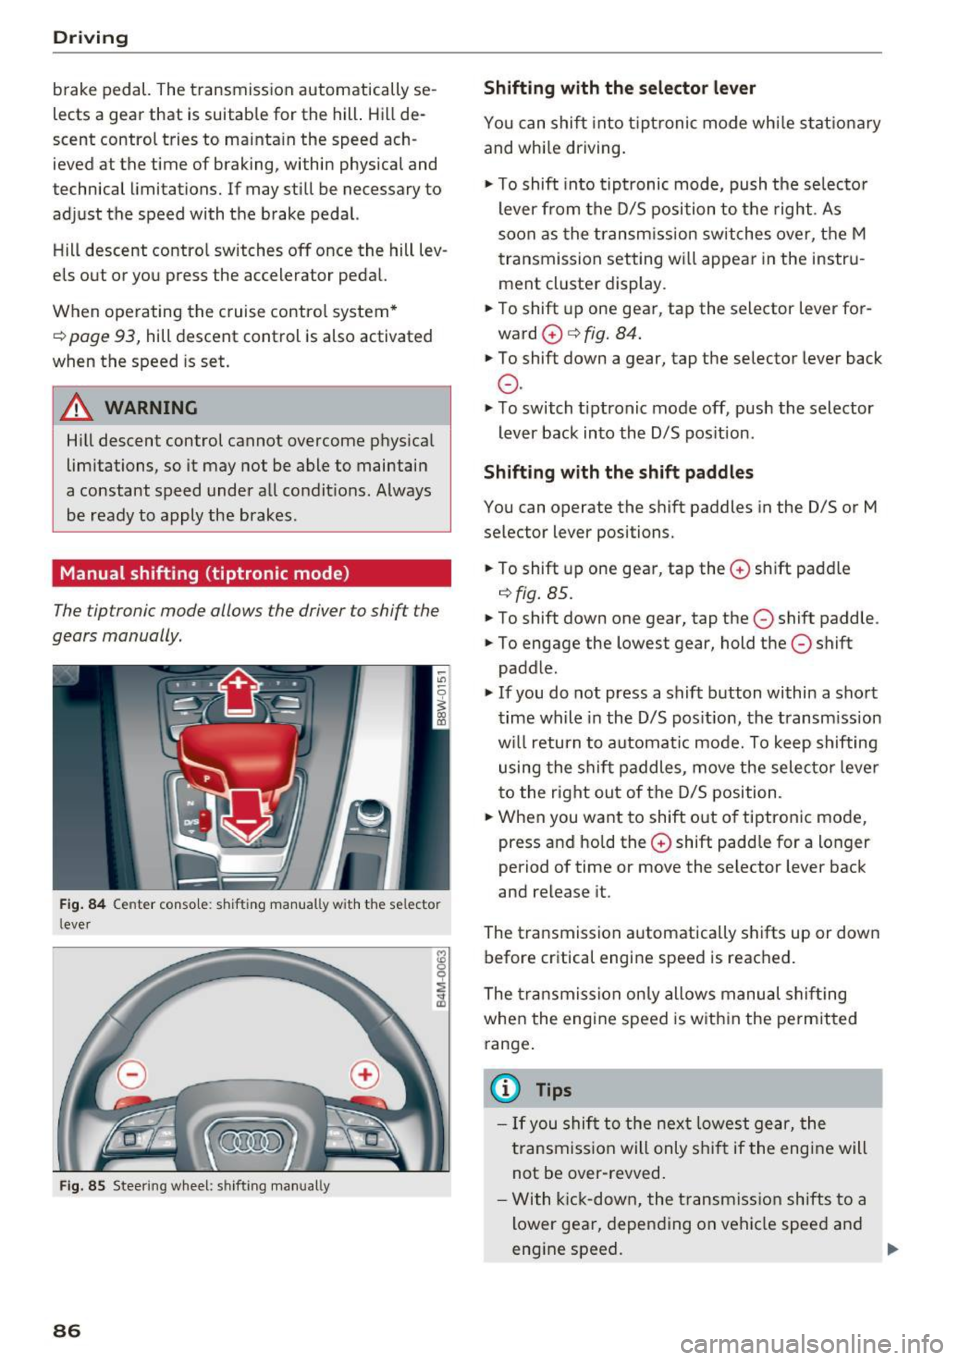
Manual shifting (tiptronic mode)
The tiptronic mode allows the driver to shift the
gears manually.
F ig. 84 Ce nte r conso le: shifting manua lly w it h th e se lector
l ever
F ig . 85 Steer ing w heel: shift ing man ually
86
Shifting with the selector lever
Yo u can shift into tipt ronic mode whi le s tat io na ry
and whi le driving.
.,. To shift into tip tronic mode, push the selec to r
lever from the D/S position to the right . As
soon as the tran sm ission switche s ove r, t he M
t ransmission setting w ill appear in the instru
ment cl uster display .
.,. To shift up one gea r, tap the selector lever for
ward
0 c:> fig. 84.
.,. To shift down a gear, tap the selector lever back
0 -
... To switch t iptronic mode off, push the selector
lever back into the D/S pos ition .
Shifting with the shift paddles
You can operate the s hif t paddles in the D/S or M
selector lever positions .
.. To shift up one gea r, tap the
0 sh ift padd le
<=> fig. 85 .
"'"To shift down one gear, tap the 0 shift paddle .
"'" To engage the lowest gear, hold the
0 shift
paddle .
.,. If you do not press a shift b utton within a sho rt
t ime wh ile in t he D/S pos it io n, the transm ission
w ill return to automa tic mode. To keep shifting
using the sh ift paddles , move the selecto r leve r
to the right out of the D/S position .
.. Whe n you want to shift o ut o f tiptronic mode,
press and ho ld the
0 shift padd le for a lo nger
period of time or move the selector lever back
and release it .
The transmission automatica lly shifts up or down
before critical engine speed is reac hed.
The transmission on ly allows manu al s hift ing
whe n the engi ne speed is w ith in the perm it ted
range .
@ Tips
- If you shi ft to the nex t lowe st ge ar, the
t ransmi ss ion will only s hift if the eng ine will
not be over -revved .
- With kick-down, the transmis sion shifts t o a
lower gear, depen ding on vehi cle spee d and
eng ine speed. .,.
Page 89 of 386

<( a, .... N ,....
N .... 0 0
3 a,
-tiptronic does not work if the transmission
is running in emergency mode.
Kick-down
Kick-down enables maximum acceleration.
When you press the accelerator pedal down be
yond the resistance point, the automatic trans
mission shifts down into a lower gear and the en
gine utilizes its full power, depending on vehicle
speed and engine RPM. It shifts up into the next
higher gear once the maximum specified engine
RPM is reached .
A WARNING
Please note that the wheels could spin on
slick or slippery roads when kick-down is ac
tive.
Launch control program
The launch control program provides the best
possible acceleration when starting from a stop.
Requirement: The engine must be at operating
temperature and the steering wheel must not be
turned .
~ Deactivate the Start/Stop system* ¢ page 80.
The LED in the 10 ml button turns on.
~ With the engine running, press the ~l.i; -o~FF =! but
ton briefly ¢
page 135. The II indicator light
turns on and the message
Stabilization control
(ESC): Sport. Warning! Restricted stability
ap
pears in the instrument cluster display.
~ Pull the selector lever back out of the D/S posi
tion briefly to select the S position or select the
Dynamic driving mode in drive select*
¢page 122.
~ Press the brake pedal firmly with your left food
and hold it all the way down for at least 1 sec
ond.
~ At the same time, press the gas pedal all the
way down with your right foot until the engine
reaches and stays at a high RPM level.
~ Remove your foot from the brake pedal within
S seconds ¢
,&..
Driving
A WARNING
-Always adapt your driving to the traffic flow.
- Only use the Launch control program when
road and traffic conditions allow it and oth
er drivers will not be endangered or both
ered by your driving and the vehicle's accel
eration.
- Please note that the drive wheels can spin
and the vehicle can break away when sport
mode is switched on, especially when the
road is slippery.
- Once the vehicle has started moving, press
the
1 .$ OFFI button briefly to turn the sport
mode off.
(D Tips
- The transmission temperature may increase
significantly after using the launch control
program. If that happens, the program may
not be available for a few minutes. It will be
available again after a cool-down period.
- When accelerating using the launch control
program, all vehicle parts are subject to
heavy loads. This can lead to increased
wear.
Transmission malfunction
• Transmission: too hot. Please stop vehicle
Do not continue driving . Select the P selector lev
er position and contact an authorized Audi dealer
or authorized Audi Service Facility for assistance.
• Transmission: malfunction! Please stop ve
hicle and shift to P
Do not continue driving . Select the P selector lev
er position and contact an authorized Audi dealer
or authorized Audi Service Facility for assistance.
@] Selector lever: malfunction! You may contin
ue driving. Please contact Service
There is a system malfunction in the transmis
sion. Drive to an authorized Audi dealer or au
thorized Audi Service Facility immediately to have
the malfunction corrected .
[O] P button: malfunction! Auto P when engine
off. Please contact Service ..,.
87
Page 90 of 386
Driving
There is a malfunction in the P button on these
lector lever. The transmission automatically en
gages in P when you switch off the engine . Drive
to an author iz ed Audi deale r or author iz ed Audi
Serv ice Facility immediately to have the malfunc
tion corrected .
[iJ Transmission : m alfun ction ! Sel. le ver pos.
can only be changed using both paddle le vers.
Ple ase contact Service
There is a system malfunction in the transmis
sion. You can contin ue driving with restricted
function . The selector lever is not working. Gears
can only be selected by tapping both sh ift pad
d les at the same time when the vehicle is station
ary ¢
page 86, fig. 85 . Pay attention to these
lected transm ission position i n the instrument
cluste r display . The park ing lock engages au to
mat ic all y w hen you t urn off the engine. Drive to
an author ized Audi dealer or author ized A udi
Service Facility immediately to have the malfunc
tion corrected.
[iJ Transmi ssion : plea se pre ss brake pedal and
se lect gear again
Press the brake pedal and se lect the desired se
lecto r leve r posit ion aga in. You can then continue
d riving.
[O] Transmi ssion : too hot . Plea se adapt dr iving
s tyle
The transm ission temperature has incre ased s ig
n ificantly due to the sporty driving manner . Drive
i n a less sporty ma nner until the temperature re
turns to the normal range and the indicator light
sw itches of .
[O] Transmi ssion : malfunct ion! You can contin
u e driving . See owner 's manual
There is a system malfunct ion in the transm is
sion . You may continue dr iving . Drive to your au
thor ized Audi dealer or authorized Audi Service
Facility soon to have the malfu nction corrected .
[O] Transmission : malfunct ion! You ma y contin
ue dri ving in D until engine off
There is a system malfunction in the transmis
sion . The transmission is switching to emergency
mode. If you turn the engine off, you will not be
88
able to se lect any othe r se lector lever positions
after starting the engine again . Drive to an au
thorized Audi dea ler or a uthorized Audi Service
Facility immediate ly to have the malfunction cor
rected .
[iJ Transmission: malfunction! You ma y contin
ue dr iving (limited functionality ). Please con
tact Serv ice
There is a system malfunction in the transmis
sion . The transmission is switching to emergency
mode. This mode only s hifts into certain gears or
will no longer shift at a ll. The eng ine may sta ll.
Drive to an authorized Audi dealer or authorized
Audi Service Facility immediate ly to have the
malfunction corrected .
[iJ Transmission: malfunction! You ma y contin
ue dr iving. No re verse gear
There is a system malfunction in the transmis
s ion. The transmission is switch ing to emergency
mode. This mode only s hifts into certain gears or
will no longer shift at a ll. The eng ine may sta ll.
You cannot engage the reverse gear . Dr ive to an
authorized Aud i dealer or a uth orized Aud i Serv ice
Facility immediate ly to have the malfunction cor
r ected .
[iJ Danger of rolling away! P not possible .
Pl ea se apply park ing brake
- The parking lock was re leased us ing the emer
gency release¢
page 89. Or
- The parking lock can no longer be engaged.
Dr ive to an authori zed Audi dealer or author
ized Aud i Service Facility immediately to have
the malfunction corrected .
[iJ Move selector lever to automatic position
There is a ma lfunction in the tiptron ic mode . End
tiptronic mode by pus hing the selector lever to
the left into the D/S position .
Page 123 of 386
<( a, .... N ,....
N .... 0 0
3 a,
The rear cross-traffi c assist is not ava ila ble . E i
ther the ESC is switched off, or the radar sensors may be covered by a b ike rack, stickers, leaves,
snow or other objects. Switch the ESC on, or
clean the area in front of the sensors if necessary
c> page 116, fig. 112 . If this message cont inues
to be d isplayed, d rive immed iate ly to an au thor
iz ed A udi dealer o r autho rized Audi Servi ce Fac ili
ty to have t he malfunc tion repa ired.
Audi drive select
Introduction
Applies to: vehicles with Audi drive select
Drive se lect makes it possible to experience dif
fe rent types of vehicle settings in one vehicle.
The dr ive r can se lect
Comfort , Auto a nd Dynamic
modes in the I nfota inme nt system to switch be
tween , fo r exa mple, a sporty and a co mfo rtable
d riving mo de. Settings ca n be ad justed to your
p e rs o nal pr efe ren ces in
Individual m ode. This
makes it poss ible to comb ine settings su ch as a
sporty eng ine setting w ith smooth stee ring.
Descript ion
Applies to: vehicles with Audi drive select
The fo llow ing systems, among other things, are
i nfluenced by drive select:
Engine and automatic transmission
D epending on the mode, the en gine and auto
mat ic transmission respond more quickly o r in a
mo re balanced ma nner to accelerator pe dal
movements . In the spo rty
Dynamic mode, the
transmission shifts at higher speed ranges.
Steering
The power s teering adapts. Ind irect s teer ing t hat
moves easi ly as in
comfort mode is espec ia lly
suited to long drives on highways . The
dynamic
mode p rovides sporty, d irect steering.
The fo llow ing applies to vehicles wi th dynam ic
steer ing* : the stee ring rat io chan ges base d on
ve hicle speed in or der to ma inta in optim um
steer ing effort for the drive r at all times. This
sets the steer ing to be less sensitive at higher
speeds i n order to prov ide improved vehicle con-
Assist
t ro l. At r educed spee ds, steeri ng is more direct in
o rder to kee p the steering effort as minima l as
poss ib le when the drive r is maneuvering t he vehi
cle. Dynam ic steer ing* also p rovides more re
spons ive steering performance at low and aver
age speeds .
Suspension control*
The ada ptive dampers * use sensors to reco rd in
f ormat ion regard ing steering movements, b rak
ing and accele ration operations by the dr iver,
road s urface, driving speed, and load. This makes
it possible to adapt damping to the d riv in g situa
t io n virtu ally in rea l ti me . Wi th drive select, you
can ad just th e adap tiv e dam pers to sporty
(Dy
nami c),
comfo rtable (Comfort ) or balan ced (Au
to ).
Cornering light*
T he co rne ring light adapts the high beams to the
direction of the curve de pending on the speed .
T he pivo ting ac tion and the lighting also a dapt to
t h e mode.
Adaptive cruise cont rol (ACC)*
The behavio r whe n accelerati ng ca n be adjusted
from comfortable to s porty, depending on the
dr ive selec t mode . Adap tive cruise control also
r espon ds to the dr iv ing behav ior of t he vehicle
ahea d in a m ore conse rv a tive or sporty m an ner.
Engine sound*
The eng ine sound adapts to the c urrent mode
and can be subtle to sporty .
(D Tips
The S selector leve r posit ion automatically en
gages whe n the
Dynamic mode is select ed.
121
Page 186 of 386
Audi connect emergen cy c all and servi ce
Audi connect emergency
call and service
Introduction
Applies to: ve hicles w ith Audi co nnect e merge ncy call a nd
service
Audi connect emergency ca ll and service includes
the following services:
- Emergency call¢
page 184.
- Online roads ide assistance~ page 185.
-Audi Service enquiry~ page 186.
@ Tips
-The services are provided through a SIM
card installed in the vehicle. The cost of the
ca ll and data connections is included in the
p rice for the se rvices. Services a re provided
assuming tha t the cell phone netwo rk re
qui red for the ins talled SIM c ard is fun ct ion
i ng and rea dy to operate . The available serv
i ces set by Aud i AG are only available within
the cell phone network cove rage area fo r
the cell phone service provider se lected by
Audi AG.
- You can read about the data that is trans
mitted at
www .audiusa .com /help/audi
connect .
-These serv ices cannot be deactivated using
the sett ings in the Infotainment system.
Emergency call
Description
Applies to: vehicles with Aud i connect emergency call and
service
You can request help whe n in an emergency or
dangerous situation using the emergency ca ll
f u nction
l) An emergency call is a combinat ion of
data transmission a nd a p ho ne c all. The da ta
tr ansmission from your veh icle forwar ds impor
tant information to the Audi emergency call cen
ter, such as the vehicle and position data.
1l Th e availab ility of the services offered depe nds on t he
c ountry and may change ove r time .
184
Making an emergency call
App lies to: vehicles with A udi connect emergency call and
serv ice
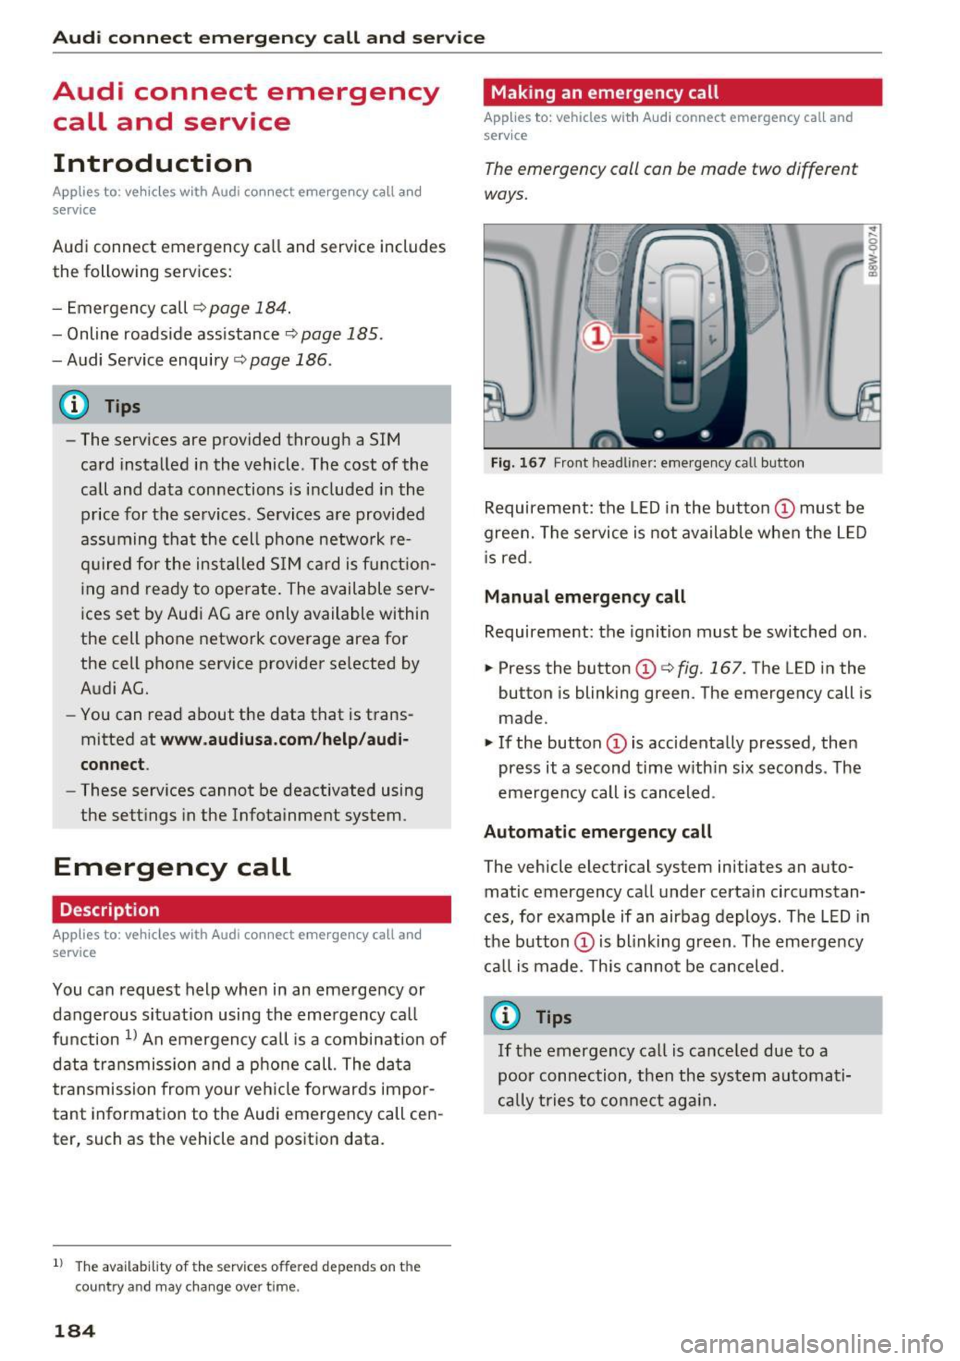
The emergency call can be made two different
ways.
Fi g. 1 67 Front head liner: emergency call butto n
Requireme nt: the LED in the button @must be
green. The se rvice is not available when the L ED
i s red.
Manual emergency call
Requireme nt: the ignition must be switched on.
.,. Press the button (D
¢fig. 167. The LED in the
button is blinking green. The emergency call is
made.
.. If the button (Dis accidenta lly pressed, then
press it a second time w ith in six seconds . The
emergency call is canceled .
Automatic emergency call
The vehicle electrical system initiates an auto
matic emergency call under certain circ umstan
ces, for example if an airbag deploys. The LED in
the button (Dis blink ing green. The eme rge ncy
ca ll is made. This cannot be canceled.
{!) Tips
If the emergency call is ca nce led due to a
poor conn ection, then th e system au toma ti
cally tries to con nect ag ain .
Page 187 of 386

Messages
Applies to: vehicl es wit h Aud i connect emergency ca ll and
service
II Em ergency call function : malfunction ! Re
s tri cted functionalit y. Please contact Service
If the indicator lig ht turns on and the message
appears, you can only make an emergency call
with restricted funct ion. For example, you cannot
call the emergency call center, but data may st ill
be transmitted under certa in circumstances/
D rive to an autho rized Aud i deale r o r a uthorized
Aud i Service Facility immediately to have t he
mal funct ion correcte d.
B Emergency call function : malfun ction! Fun c
tion unavailabl e. Plea se contact Serv ice
If the indicator light turns on and the message
appears, you cannot make an emergency call.
Drive to an authorized Aud i dea le r or authorized
Aud i Service Fac ility immediately to have the
malfunc tion cor rected.
Online roadside
assistance
Description
Appl ies to: veh icles with Audi connect emergency ca ll and
service
You can request help if you are in an accident or
breakdown situation us ing on line roadside ass is
tance
1> . A roads ide ass istance call is a comb ina
tion of data transmission and a phone call. The data transmission from your vehicle fo rwards im
portant information to the A udi service center,
such as the vehicle and position data.
1l The ava ilability of the services offered depends on the
country and may change over time.
Audi c onn ect emergency call and ser vic e
Calling online roadside assistance
Applies to: vehicles with A udi connect emergency call and
se rvic e
The roadside assistance call can be made two
different ways.
Fig . 1 68 Front headliner: roads ide assistance button
Calling roadside assistance manually
"' Press the button @ c:;, fig. 168 . The LED in the
button turns red . Roadside ass istance is ca lled .
"' If the button @ is pressed ac cidentally, the n
press the bu tton aga in. Or
"' Select and confirm
Cance l o r End call in the In-
fotainment system.
Automatic roadside assistance
A minor accident is detected by the vehicle elec
t rical system. You have the option of select ing
be twee n
Call online roads ide assist an ce or Call
emergenc y numb er.
"' Select one of the options and confirm it by
pressing the control knob.
(D Tips
If the roadside assistance ca ll is canceled due
to a poor connection, then the call must be
made aga in.
185