check oil AUDI A5 2008 8T / 1.G User Guide
[x] Cancel search | Manufacturer: AUDI, Model Year: 2008, Model line: A5, Model: AUDI A5 2008 8T / 1.GPages: 313, PDF Size: 12.13 MB
Page 236 of 313

Checking and topping up fluids 234Checking the oil levelChecking oil level
– Park your vehicle on a level surface.
– Allow the warm engine to run briefly at idling speed and
then switch off the ignition.
– Wait approx. 2 minutes.
– Pull out the dipstick. Wipe the dipstick with a clean cloth
and insert it again, pushing it in as far as it will go.– Then pull the dipstick out again and check the oil level
⇒fig. 224 or ⇒fig. 225. If the oil level is too low, add
more engine oil ⇒page 234.
Oil level in area
–Do not top up oil.
Oil level in area
–Oil can be topped up. After topping up the oil level should
be in area .
Oil level in area
–Oil must be topped up. After topping up the oil level
should be in area .
Depending on how you drive and the conditions in which the car is
used, oil consumption can be up to 0.5 ltr./1000 km. Oil consump-
tion is likely to be higher for the first 5000 km. You should therefore
check the oil level at regular intervals, ideally every time you fill the
tank, and also before setting off on a long trip.Topping up the engine oil
Fig. 224 Variant 1:
Markings on oil
dipstickFig. 225 Variant 2:
Markings on oil
dipstick
AaAb
Aa
AcAa
Fig. 226 Engine
compartment: Engine
oil filler cap
document_0900452a8179700c.book Seite 234 Donnerstag, 22. März 2007 10:19 10
Page 237 of 313
Checking and topping up fluids235
Controls
Safety
Driving tips
General maintenance
Self-help
Technical data
–Unscrew cap
from oil filler opening ⇒page 234,
fig. 226.
– Carefully put in the specified grade of oil ⇒page 295
0.5 litres at a time.
– After two minutes check the oil level once again
⇒page 234.
– If the oil level is too low, add more engine oil.
– Replace the oil filler cap carefully and push the dipstick
all the way in.
WARNING
•
Ensure that no oil comes into contact with hot engine compo-
nents when topping up: this could cause a fire.
•
Wash your skin thoroughly if it comes into contact with engine
oil.Caution
•
The oil level must never be above area , as this may result in
damage to the catalytic converter or to the engine. Contact a quali-
fied workshop to extract the engine oil if necessary.
•
No additives should be used with engine oil. Any damage caused
by the use of such additives would not be covered by the factory
warranty.For the sake of the environment
•
Never pour oil down drains or into the ground.
•
Always observe statutory requirements when disposing of
empty oil canisters.
Cooling systemCoolant
The purpose of the coolant is to carry heat away from the
engine. The correct amount of anti-freeze is important to
prevent the cooling system from freezing in winter.The cooling system is filled for life at the factory, so the coolant does
not need to be changed. The coolant consists of a mixture of water
and anti-freeze additive G12+. This is a glycol-based anti-freeze with
anti-corrosion additives.
Anti-freeze additive
The amount of anti-freeze additive required depends on the temper-
atures to be expected in the winter season. If the anti-freeze concen-
tration is too low the coolant can freeze, resulting in failure of the
cooling system and heater.
The cooling system is filled at the factory with the correct amount of
anti-freeze for the country concerned.
In most cases the mixture consists of 60% water and 40% additive.
This mixture gives the necessary antifreeze protection down to –
25 °C and protects the alloy parts of the cooling system against
corrosion. It also prevents scaling and raises the boiling point of the
coolant.
Countries with warm climate
The coolant concentration must not be reduced by adding plain
water, even in the summer or in warm climates. The concentration
of the anti-freeze additive must always be at least 40%.
Countries with cold climate
If greater anti-freeze protection is required in very cold climates, the
proportion of the anti-freeze additive G12+ can be increased. A
concentration of 60% offers protection down to about -40 °C. The
concentration of the antifreeze additive must not be more than 60%,
Aa
document_0900452a8179700c.book Seite 235 Donnerstag, 22. März 2007 10:19 10
Page 238 of 313

Checking and topping up fluids 236otherwise this would reduce the antifreeze protection. In addition,
the cooling effect will be adversely affected.
Vehicles for export to countries with a cold climate (such as Sweden,
Norway and Finland) are supplied with antifreeze protection down
to about -35 °C. The concentration of the antifreeze additive for
these countries should always be at least 50%.
Caution
•
It is advisable to have the cooling system checked before the
winter season to make sure that the antifreeze concentration is
adequate for the conditions to be expected. This applies particularly
if you intend to take the car into a colder climate zone. If necessary,
have the anti-freeze concentration increased to 50 - 60% as required.
•
Use only anti-freeze additive G12+, an additive meeting the spec-
ification “TL-VW 774 F ”. Other additives may give considerably infe-
rior corrosion protection. The resulting corrosion in the cooling
system can lead to a loss of coolant, causing serious damage to the
engine.
•
The coolant additive G12+ can be mixed only with additives G11
and G12.
Checking coolant level
The coolant level can be checked at a glance.
– Switch off the ignition.
– Read off coolant level on radiator expansion tank
⇒fig. 227. When the engine is cold it should be between
the “MIN” and “MAX” marks. When the engine is hot it
may be slightly above the “MAX” mark.The coolant level should be checked with the engine switched off.
The coolant level is monitored by a warning lamp in the instrument
cluster ⇒page 32. However, we recommend that it should be
checked occasionally.
Coolant losses
Any loss of coolant normally indicates a leak in the cooling system.
In this case the cooling system should be inspected by a qualified
workshop without delay. It is not sufficient merely to top up the
coolant.
If there are no leaks in the system, a loss of coolant can only occur
if the coolant boils and is forced out of the system as a result of
overheating.
Caution
Radiator sealants must not be added to the coolant. Such additives
could seriously impair the function of the cooling system.Topping up the coolant
Be careful when topping up coolant.– Switch off the engine.
– Wait for the engine to cool down.
– Cover the cap on the expansion tank ⇒fig. 227 with a
cloth, and carefully unscrew the cap anti-clockwise
⇒.
Fig. 227 Engine
compartment: Mark-
ings on radiator expan-
sion tank
document_0900452a8179700c.book Seite 236 Donnerstag, 22. März 2007 10:19 10
Page 240 of 313

Checking and topping up fluids 238Brake fluidChecking brake fluid level
The brake fluid level can be checked at a glance.– Check the fluid level on the brake fluid reservoir
⇒fig. 228. It should always be between the “MIN” and
“MAX” marks.In right-hand drive vehicles the brake fluid reservoir is on the other
side of the engine compartment.
The fluid level may drop slightly after a period of time due to the
automatic compensation for brake pad wear. This is quite normal.
However, if the level goes down noticeably in a short time, or drops
below the “MIN” mark, there may be a leak in the brake system. If
the fluid level in the reservoir is too low, this will be indicated by the
brake warning lamp ⇒page 31. If this should happen, take the car
to a qualified workshop immediately and have the brake system
inspected.
Changing brake fluid
When required, the brake fluid should be changed by a
competent mechanic with the proper equipment.Brake fluid gradually absorbs moisture from the atmosphere. If the
water content in the brake fluid is too high, this may cause corrosion
in the brake system over time. In addition, the boiling point of the
brake fluid will be considerably reduced. This could adversely affect
the braking ability in certain circumstances.
For this reason the brake fluid must be changed periodically.
Your vehicle's Service Schedule will tell you when the brake fluid has
to be changed.
It is advisable to have the brake fluid changed as part of a regular
Inspection Service at your Audi workshop. They are familiar with the
procedure and have the necessary special tools and spare parts as
well as the proper facilities for disposing of the old fluid.
Use only the genuine brake fluid specified by the factory Qualified
workshops know that the brake fluid “DOT 4” is approved by Audi.
The brake fluid must be fresh and unused.
WARNING
•
Brake fluid is poisonous; store it in the sealed original container
in a safe place out of reach of children.
•
Heavy use of the brakes may cause a vapour lock if the brake
fluid is left in the system for too long. This would seriously affect
the efficiency of the brakes and the safety of the car – risk of acci-
dent.Caution
Please note that brake fluid will attack the paintwork on contact.
Fig. 228 Engine
compartment: Mark-
ings on brake fluid
reservoir
document_0900452a8179700c.book Seite 238 Donnerstag, 22. März 2007 10:19 10
Page 245 of 313
Wheels and tyres243
Controls
Safety
Driving tips
General maintenance
Self-help
Technical data
Wheels and tyresWheelsGeneral notes–When driving with new tyres, be especially careful during
the first 500 km.
– If you have to drive over a kerb or similar obstacle, drive
very slowly and as near as possible at a right angle to the
kerb.
– Inspect the tyres regularly for damage (cuts, cracks or
blisters, etc.). Remove any foreign bodies embedded in
the treads.
– Damaged wheels and tyres must be replaced immedi-
ately.
– Keep grease, oil and fuel off the tyres.
– Replace any missing valve caps as soon as possible.
– Mark the wheels before taking them off so that they
rotate in the same direction when put back.
– When removed, the wheels or tyres should be stored in a
cool, dry and preferably dark place.New tyres
New tyres do not give maximum grip straight away and should
therefore be “run in” by driving carefully and at moderate speeds for
about the first 500 km. This will also help to make the tyres last
longer.
The tread depth of new tyres may vary, according to the type and
make of tyre and the tread pattern.Concealed damage
Damage to tyres and rims is often not readily visible. If you notice
unusual vibration or the car pulling to one side, this may indicate
that one of the tyres is damaged. Reduce speed immediately if there
is any reason to suspect that damage may have occurred. Inspect
the tyres for damage. If no external damage is visible, drive slowly
and carefully to the nearest qualified workshop and have the car
inspected.
Tyres with directional tread pattern
An arrow on the tyre sidewall indicates the direction of rotation on
tyres with directional tread. Always note the direction of rotation
indicated when mounting the wheel. This guarantees optimum grip
and helps to avoid aquaplaning, excessive noise and wear.
Tyre service life
Correct inflation pressures and sensible driving habits
will increase the service life of your tyres.– Check the tyre pressures at least once a month.
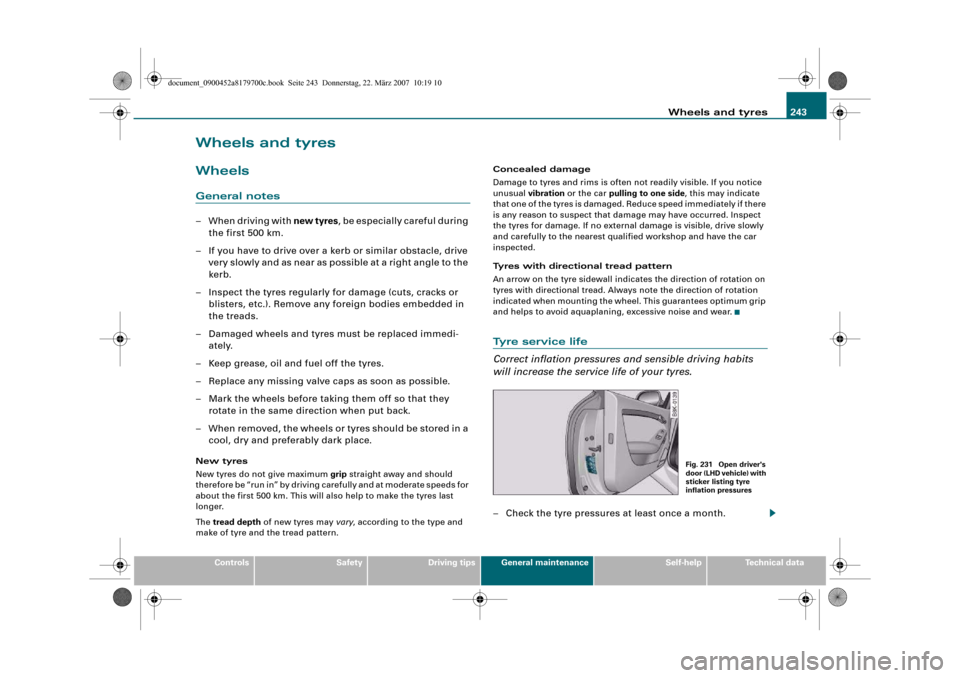
Fig. 231 Open driver's
door (LHD vehicle) with
sticker listing tyre
inflation pressures
document_0900452a8179700c.book Seite 243 Donnerstag, 22. März 2007 10:19 10
Page 261 of 313
Self-help259
Controls
Safety
Driving tips
General maintenance
Self-help
Technical data
– Check whether a repair is possible using the Tyre
Mobility System ⇒page 257.
– Ensure that all passengers leave the vehicle and move
away from the danger area ⇒.
– Take the tyre sealant can and the electric compressor out
of the luggage compartment ⇒page 255.
– Fix the sticker “max. 80 km/h”, which is included with the
tyre sealant can, onto the instrument cluster where the
driver will see it.
Filling the tyre
– Shake the tyre sealant can well.
– Screw the enclosed filling hose onto the sealant can as
far as it will go. This will automatically pierce the foil
sealing the can.
– Take the valve cap off the tyre valve and use the enclosed
valve insert tool to unscrew the valve insert ⇒page 258,
fig. 240.
– Place the valve insert onto a clean surface.
– Remove the sealing plug from the filling hose and insert
the hose into the tyre valve.
– Hold the tyre sealant can upside down and fill the
complete contents of the can into the tyre.
– Then disconnect the hose and screw the valve insert
firmly back into the tyre valve.Inflating the tyre
– Screw the filling hose of the electric compressor onto the
tyre valve and plug the connector into the cigarette
lighter.
– Pump the tyre up to 2.0 to 2.5 bar and monitor the pres-
sure shown on the pressure gauge.
– If the tyre pressure remains lower than the value speci-
fied above drive the vehicle approx. 10 metres forwards
or backwards, so that the sealant can spread evenly in
the tyre. If the pressure is still lower than the specifica-
tion the tyre is too badly damaged and cannot be
repaired using the tyre sealant.
Final checks
– After about 10 minutes stop to check the tyre pressure.
– If tyre pressure is less than 1.3 bar, the tyre is too badly
damaged. Do not drive on. You should obtain profes-
sional assistance.
WARNING
•
If you have a puncture in moving traffic, switch on the hazard
warning lights and place the warning triangle in a visible location.
This is for your own safety and also warns other road users.
•
Make sure your passengers wait in a safe place (for instance
behind the roadside crash barrier).
•
Please observe the manufacturers' safety notes on the
compressor and the instructions supplied with the tyre sealant
can.
•
If it was not possible to build up a tyre pressure of 2.0 bar
within 6 minutes this means that the tyre is too badly damaged.
Do not drive on.
document_0900452a8179700c.book Seite 259 Donnerstag, 22. März 2007 10:19 10
Page 306 of 313

Index 304Convenience open function . . . . . . . . . . . 50
Cooling system
Anti-freeze additive . . . . . . . . . . . . . . . 235
Checking coolant level . . . . . . . . . . . . 236
Coolant . . . . . . . . . . . . . . . . . . . . . . . . . 235
Coolant temperature gauge . . . . . . . . . 11
Malfunction . . . . . . . . . . . . . . . . . . . . . . 32
Radiator fan . . . . . . . . . . . . . . . . . . . . . 237
Topping up coolant . . . . . . . . . . . . . . 236
Cruise control system
Adjusting speed . . . . . . . . . . . . . . . . . 127
Control lever on steering wheel . . . . 125
Cruise mode . . . . . . . . . . . . . . . . . . . . 126
Indicator lamp . . . . . . . . . . . . . . . . . . . . 17
Introduction . . . . . . . . . . . . . . . . . . . . . 125
Pre-selecting a speed . . . . . . . . . . . . . 128
Resuming cruise control . . . . . . . . . . 128
Safety notes . . . . . . . . . . . . . . . . . . . . . 125
Switching off . . . . . . . . . . . . . . . . . . . . 129
Switching off temporarily . . . . . . . . . 128
Cup holders . . . . . . . . . . . . . . . . . . . . . . . . . 85
Current fuel consumption . . . . . . . . . . . . . 25DDate display . . . . . . . . . . . . . . . . . . . . . . . . 13
Daytime running lights . . . . . . . . . . . . . . . 56
DCP
SeeDynamic gear control program . 133
Deactivating front passenger's airbag . . 183
Deadlock mechanism . . . . . . . . . . . . . . 43, 46
Defrosting windows . . . . . . . . . . . . . . 98, 107Deluxe automatic air conditioner . . . . . . . 93
Air distribution . . . . . . . . . . . . . . . . . . . 97
Air outlets . . . . . . . . . . . . . . . . . . . . . . . . 99
Air outlets for rear passengers . . . . . . 99
Air recirculation mode . . . . . . . . . . . . . 97
Automatic mode . . . . . . . . . . . . . . . . . . 95
Basic settings . . . . . . . . . . . . . . . . . . . 100
Blower . . . . . . . . . . . . . . . . . . . . . . . . . . 96
Controls . . . . . . . . . . . . . . . . . . . . . . . . . 94
Defrosting . . . . . . . . . . . . . . . . . . . . . . . 98
Description . . . . . . . . . . . . . . . . . . . . . . . 93
Economical operation . . . . . . . . . . . . . 100
Heated rear window . . . . . . . . . . . . . . . 98
Seat heating, front . . . . . . . . . . . . . . . 115
Supplementary heater . . . . . . . . . . . . 101
Switching on and off . . . . . . . . . . . . . . 95
Temperature . . . . . . . . . . . . . . . . . . . . . 96
Deluxe automatic air conditioner plus . . 101
AC mode . . . . . . . . . . . . . . . . . . . . . . . . 107
Air distribution . . . . . . . . . . . . . . . . . . 106
Air outlets . . . . . . . . . . . . . . . . . . . . . . . 108
Air outlets for rear passengers . . . . . 108
Air recirculation mode . . . . . . . . . . . . 106
Automatic mode . . . . . . . . . . . . . . . . . 104
Automatic recirculation . . . . . . . . . . . 110
Auxiliary heating . . . . . . . . . . . . . . . . . 111
Auxiliary heating - remote control . . 114
Auxiliary heating - running time . . . . 113
Basic settings . . . . . . . . . . . . . . . . . . . 109
Blower . . . . . . . . . . . . . . . . . . . . . . . . . 105
Controls . . . . . . . . . . . . . . . . . . . . . . . . 103
Defrosting . . . . . . . . . . . . . . . . . . . . . . 107
Description . . . . . . . . . . . . . . . . . . . . . . 101
Economical operation . . . . . . . . . . . . . 109Heated rear window . . . . . . . . . . . . . . 107
Supplementary heater . . . . . . . . . . . . 110
Switching on and off . . . . . . . . . . . . . . 104
Synchronisation . . . . . . . . . . . . . . . . . 110
Temperature . . . . . . . . . . . . . . . . . . . . 104
Diesel . . . . . . . . . . . . . . . . . . . . . . . . . . . . . 227
Diesel particulate filter . . . . . . . . . . . . 37, 205
Engine oil . . . . . . . . . . . . . . . . . . . . . . . 233
Digital clock . . . . . . . . . . . . . . . . . . . . . . . . . 13
Digital compass . . . . . . . . . . . . . . . . . . . . . 68
Digital speedometer . . . . . . . . . . . . . . . . . . 22
Dimensions . . . . . . . . . . . . . . . . . . . . . . . . 292
Dipped headlights . . . . . . . . . . . . . . . . . . . 54
Defective . . . . . . . . . . . . . . . . . . . . . . . . . 36
DIS
SeeDriver information system . . . . . . 20
Door catches/boot lid warning . . . . . . . . . 23
Doors
Manual locking . . . . . . . . . . . . . . . . . . . 48
Driver
SeeSitting position . . . . . . . . . . . . . . . 164
Driver information system . . . . . . . . . . . . . 20
Auto-check control . . . . . . . . . . . . . . . . 29
Bulb monitor . . . . . . . . . . . . . . . . . . . . . 36
CD and radio display . . . . . . . . . . . . . . . 21
Digital speedometer . . . . . . . . . . . . . . . 22
Door catches/boot lid warning . . . . . . 23
Driver messages . . . . . . . . . . . . . . . . . . 30
On-board computer . . . . . . . . . . . . . . . . 25
Outside temperature display . . . . . . . . 21
Red symbols . . . . . . . . . . . . . . . . . . . . . 30
Service interval display . . . . . . . . . . . . . 23
document_0900452a8179700c.book Seite 304 Donnerstag, 22. März 2007 10:19 10
Page 307 of 313
Index305
Controls
Safety
Driving tips
General maintenance
Self-help
Technical data Speed warning . . . . . . . . . . . . . . . . . . . . 28
Yellow symbols . . . . . . . . . . . . . . . . . . . 34
Driver messages . . . . . . . . . . . . . . . . . . . . . 30
Driving abroad . . . . . . . . . . . . . . . . . . . . . . 205
Headlights . . . . . . . . . . . . . . . . . . . . . . 205
Unleaded fuel . . . . . . . . . . . . . . . . . . . . 205
Driving away from a standstill . . . . . . . . . 122
Driving away when towing a trailer . . . . 123
Driving safety . . . . . . . . . . . . . . . . . . . . . . 163
Driving time . . . . . . . . . . . . . . . . . . . . . . . . . 25
Dust filter
Deluxe automatic air conditioner . . . . 93
Deluxe automatic air conditioner plus . .
101
DVD player . . . . . . . . . . . . . . . . . . . . . . . . . . 79
Dynamic gear control program . . . . . . . . 133
EEasy-entry function . . . . . . . . . . . . . . . . 71, 73
Economical driving . . . . . . . . . . . . . . . . . . 206
EDL
SeeElectronic differential lock . . . . . . . 18
Electric seat adjustment
SeeSeat adjustment . . . . . . . . . . . . . . . 72
Electric windows . . . . . . . . . . . . . . . . . . . . . 50
Central locking system . . . . . . . . . . . . . 50
Controls . . . . . . . . . . . . . . . . . . . . . . . . . 50
Convenience open/close function . . . . 50
Malfunctions . . . . . . . . . . . . . . . . . . . . . 51
Settings . . . . . . . . . . . . . . . . . . . . . . . . . 51
Electrical accessories
SeeElectrical socket . . . . . . . . . . . . . . . 88Electrical socket . . . . . . . . . . . . . . . . . . 87, 88
Electro-mechanical parking brake . . . . . . 124
Auto release function . . . . . . . . . . . . . 122
Driving away from a standstill . . . . . . 122
Driving away when towing a trailer . . 123
Emergency braking function . . . . . . . 123
Malfunction . . . . . . . . . . . . . . . . . . . . . 123
Operation . . . . . . . . . . . . . . . . . . . . . . . 121
Parking . . . . . . . . . . . . . . . . . . . . . . . . . 122
Releasing and applying . . . . . . . . . . . . 121
Warning lamp . . . . . . . . . . . . . . . . . . 18, 19
Electronic differential lock
How the system works . . . . . . . . . . . . 199
Warning lamp . . . . . . . . . . . . . . . . . . . . . 18
Electronic immobiliser . . . . . . . . . . . . . . . . 14
Electronic stabilisation program
How the system works . . . . . . . . . . . . 196
Warning lamp . . . . . . . . . . . . . . . . . . . . . 16
Emergency braking function . . . . . . . . . . 123
Emergency key . . . . . . . . . . . . . . . . . . . . . . 41
Emergency release
Ignition key . . . . . . . . . . . . . . . . . . . . . . . 41
Emission control systems
Catalytic converter . . . . . . . . . . . . . . . . 205
Diesel particulate filter . . . . . . . . . . . . 205
Emissions . . . . . . . . . . . . . . . . . . . . . . . . . . 293
Engine compartment
Safety notes . . . . . . . . . . . . . . . . . . . . . 231
Engine compartment layout . . . . . . . . . . 232
Engine data
SeePerformance, weights and
dimensions . . . . . . . . . . . . . . . . . . . . 295Engine hood
SeeBonnet . . . . . . . . . . . . . . . . . . . . . . 230
Engine management
(EPC) warning lamp . . . . . . . . . . . . . . . . 15
Engine oil . . . . . . . . . . . . . . . . . . . . . . . . . . 233
Checking oil level . . . . . . . . . . . . . . . . . 234
Consumption . . . . . . . . . . . . . . . . . . . . 234
LongLife Service . . . . . . . . . . . . . . . . . . 233
Topping up . . . . . . . . . . . . . . . . . . . . . . 234
See alsoPerformance, weights and
dimensions . . . . . . . . . . . . . . . . . . . . 295
Engine oil capacity
SeePerformance, weights and
dimensions . . . . . . . . . . . . . . . . . . . . 295
Engine oil pressure
Warning lamp . . . . . . . . . . . . . . . . . . . . . 33
Engine oil sensor
Malfunction . . . . . . . . . . . . . . . . . . . . . . 37
Environmental compatibility . . . . . . . . . . 207
Environmental tips
Filling the tank . . . . . . . . . . . . . . . . . . . 228
Heated rear window . . . . . . . . . . . 98, 107
Leaks . . . . . . . . . . . . . . . . . . . . . . . . . . . 231
Roof carrier . . . . . . . . . . . . . . . . . . . . . . . 85
EPC
SeeEngine management . . . . . . . . . . . 15
ESP
SeeElectronic stabilisation program . . 16
Ethanol fuel . . . . . . . . . . . . . . . . . . . . . . . . 227
Exterior mirrors . . . . . . . . . . . . . . . . . . . . . . 67
document_0900452a8179700c.book Seite 305 Donnerstag, 22. März 2007 10:19 10