oil pressure AUDI A5 COUPE 2011 Owners Manual
[x] Cancel search | Manufacturer: AUDI, Model Year: 2011, Model line: A5 COUPE, Model: AUDI A5 COUPE 2011Pages: 362, PDF Size: 84.88 MB
Page 5 of 362
Stowing Luggage ........... ... 177
Repor ting Safe ty Defects . . . . . . . 179
Safety be lts . . . . . . . . . . . . . . . . . . . 181
General no tes ........ ......... 181
Why safety belts? . . . . . . . . . . . . . 182
Safety belts . . . . . . . . . . . . . . . . . . 185
Safety belt pretensioners . . . . . . . 188
Airbag system ................ 190
Important th ings to know ...... 190
Front airbags ................. 194
Mon ito ring the Advanced A irbag
System ...................... 201
Knee ai rbags . . . . . . . . . . . . . . . . . . 206
Side airbags . . . . . . . . . . . . . . . . . . 209
Side curtain airbags ......... ... 212
Chil d Safe ty ................... 215
I mportant things to know ...... 215
Child safety seats ............. 221
Installing a child safety seat . . . . 225
LATCH Lowe r ancho rages and
tether for children . . . . . . . . . . . . . 229
Add it ional Informat ion
234
Vehicle operation ...... 236
Intelligent technology . . . . . . . . 236
Notice abo ut data recorded by
vehicle contro l modu les . . . . . . . . 236
E lect ronic s tab iliza tion Program
(ESP) . . . . . . . . . . . . . . . . . . . . . . . . 236
Braking ...................... 239
Servotronic ® -advanced power
steer ing sys tem . . . . . . . . . . . . . . . 242
Dr iving with your quattro ® . . . . . . 242
Energy management . . . . . . . . . . . 243
Controls and equip
ment Safety first
Driving
and environment ..... 246
The first 1,000 miles (1,500 km)
and afterwards . . . . . . . . . . . . . . . 246
Avoid damaging the vehicle 247
Dr iving through water on roads . 247
Ca talytic conve rter . . . . . . . . . . . . 247
Operate your veh icle economica lly
and m inimize po llution . . . . . . . . 24 8
Trailer towing . . . . . . . . . . . . . . . . 251
Dr iving wi th a trailer . . . . . . . . . . . 251
T railer tow ing tips . . . . . . . . . . . . . 253
Vehicle care .............. 2s6
Clea nin g and protect ion ...... 256
General information . . . . . . . . . . . 256
Care of exterior . . . . . . . . . . . . . . . 256
Care of interior . . . . . . . . . . . . . . . 263
Fuel supply and filling your fuel
tank .......................... 269
Gasol ine . . . . . . . . . . . . . . . . . . . . . 269
F u el tank .................... . 270
Checking and filling . . . . . . . . . . . 274
Eng ine hood . . . . . . . . . . . . . . . . . . 274
Engine compartment . . . . . . . . . . 276
Engine oil . . . . . . . . . . . . . . . . . . . . 277
Engine cooling system . . . . . . . . . 281
Brake fluid . . . . . . . . . . . . . . . . . . . 284
Bat tery . . . . . . . . . . . . . . . . . . . . . . 285
W indshield/headlight* washer
container . . . . . . . . . . . . . . . . . . . . 290
Tires and wheels .............. 291
Tires 291
T ir e pressure monitor ing system 310
Table of contents
Do-it-yourself service
What do I do now? .......... .
Vehic le tool k it ........ ...... .
Space -saving spare tire (compact
spare tire)* ....... ........ ... .
Cha nging a whee l ........... . .
Fuses and bulbs ......... .... .
Fu ses ... ......... .......... .
Bulbs ...................... .
Emergency situations ....... .
General . ........... ......... .
Starti ng by pushing or towi ng ..
Starting with jumper cables ... .
Use of jumper cables ......... .
Emergency towing w ith
commercial tow truck ........ .
Lif ting vehicle ............... .
Technical data
General information
Explana tion of technica l da ta .. .
Vehicle ident ification ......... .
Weights .................... .
Dimensions ................. .
Data ................ ... ...... .
211 hp, 2.0 Liter 4-cyl. engine .. .
Consumer Information ...... .
Warranty coverages .......... .
Operating your vehicle outside the
U.S.A . or Canada ............. .
Audi Service Repair Manuals and
Literature ................... .
Maintenance ............... . . 314
314
314
314
316
323
323
327
328
328
328
328
329
331
333
336
336
336
336
337
337
339
339
340
340
340
340
340
Vehicle operation
Vehicle care Do-it-yourself service Technical data
Page 34 of 362
Driver information display
For example, if the transmission selector lever is not in the P position
when the engine is turned off, the following message appears:
Shift to P, otherwise vehicle can roll away. Doors do not lock if
lever is not in P.
The ignition key can only be removed with the selector in this posi
tion. This and other messages are brought up if a function cannot be
carried out.
Driver messages and red symbols
If a red symbol appears in the display, a driver message is also
displayed automatically.
For example, the symbol for a problem with engine oil pressure
Switch off engine and check oil level
The driver message in the display goes out after about 5 seconds. The
driver message can be displayed again by briefly pressing the
[ SET]
button ;;;:> page 31, fig. 24.
Driver messages and yellow symbols
If a yellow symbol appears in the display, a driver message is also
displayed automatically.
For example, the symbol appears in the display, indicating low
windshield washer fluid level. The following message also appears :
Please top up washer fluid
The driver message disappears after a few seconds. The driver
message can be displayed again by briefly pressing the
[SETj
button. •
Red symbols
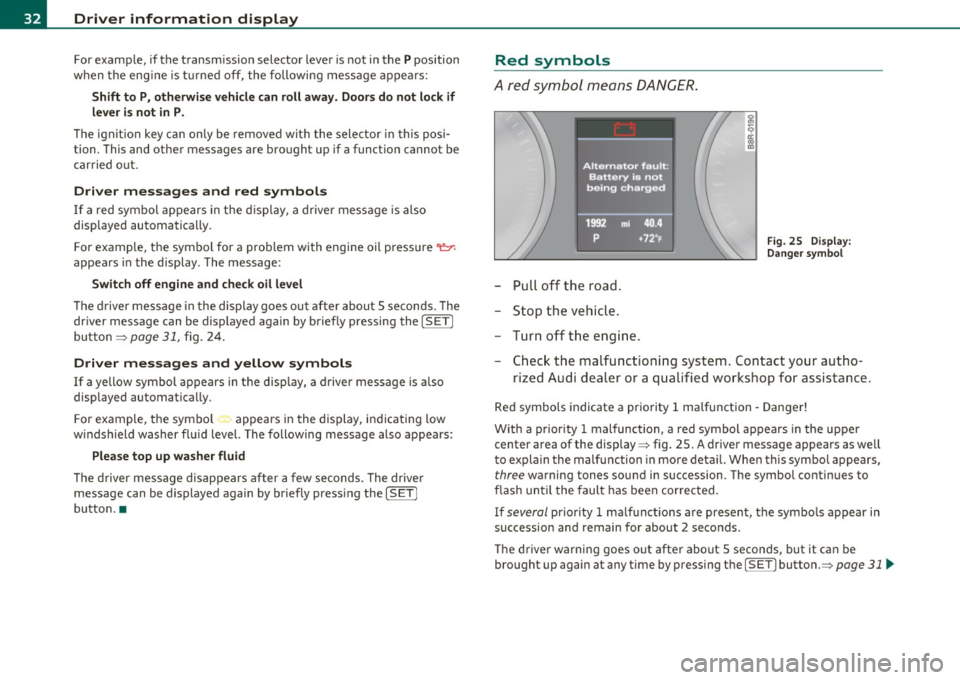
A red symbol means DANCER.
Fig. 25 Display:
Danger symbol
- Pull off the road.
- Stop the vehicle.
- Turn off the engine .
- Check the malfunctioning system. Contact your autho-
rized Audi dealer or a qualified workshop for assistance.
Red symbols indicate a priority 1 malfunction -Danger!
With a priority 1 malfunction, a red symbol appears in the upper
center area of the display~ fig. 25. A driver message appears as well
to explain the malfunction in more detail. When this symbol appears,
three warning tones sound in succession. The symbol continues to
flash until the fault has been corrected.
If
several priority 1 malfunctions are present, the symbols appear in
succession and remain for about 2 seconds.
The driver warning goes out after about 5 seconds, but it can be
brought up again at anytime by pressing the
[SET ] button.=> page 31 .,_
Page 35 of 362
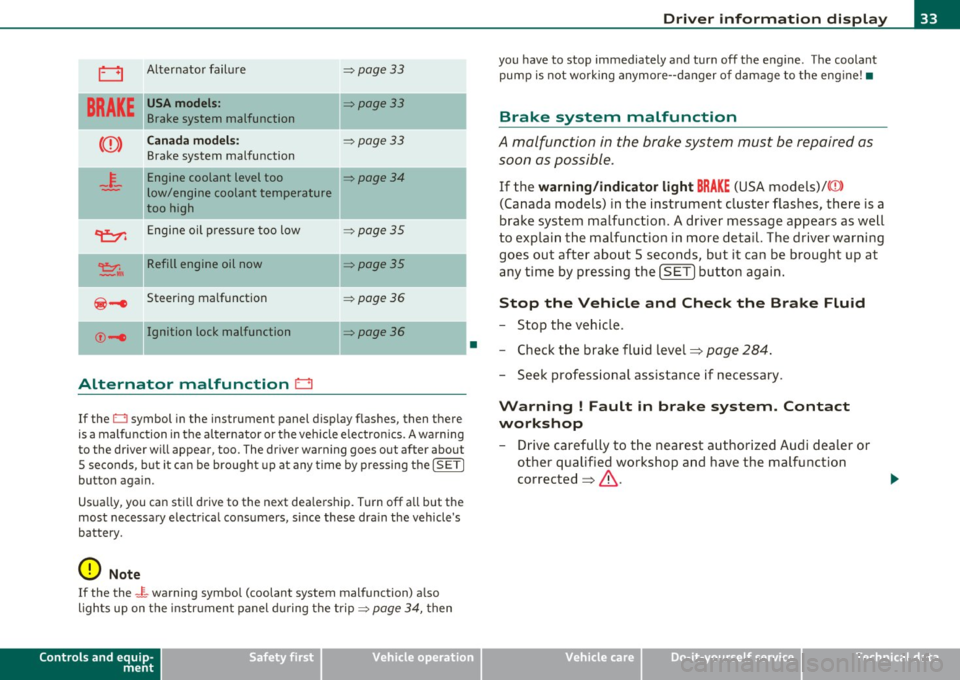
0 Alternator failure => page 33
BRAKE
USA models: =:>page 33
Brake system malfunction
Canada models: =:>page 33
Brake system malfunction
- -
4-
Engine coolant level too =:>page 34
low/engine coolant temperature
too high
~ Engine oil pressure too low =:>page 35
~ II Refill engine oil now =:>page 35
@-e Steering malfunction =:> page 36
©-1 Ignition lock malfunction ::::>poge36
-
Alternator malfunction 0
If the O symbol in the instrument panel display flashes, then there
is a malfunction in the alternator or the vehicle electron ics . A warning
to the driver will appear, too . The driver warning goes out after about
5 seconds, but it can be brought up at any time by pressing the
!SETI
button again.
Usua lly, you can sti ll drive to the next dea lership. Turn off all but the
most necessary e lectr ica l consumers, s ince these dra in the vehicle's
battery.
0 Note
If the the _ f_ warning symbol (coolant system malfunction) a lso
lights up on the instr ument panel during the trip =>
page 34, then
Controls and equip
ment Safety first
•
Driver information display
you
have to stop immediately and turn off the engine . The coolant
pump is not work ing anymore--danger of damage to the engine! •
Brake system malfunction
A malfunction in the brake system must be repaired as
soon as possible.
If the warning/indicator light BRAKE (USA models)/((D )
(Canada models) in the instrument cluster flashes, there is a
brake system malfunction . A driver message appears as well
to explain the malfunction in more detail. The driver warning
goes out after about 5 seconds, but it can be brought up at
any time by pressing the
[SET] button again.
Stop the Vehicle and Check the Brake Fluid
-Stop the vehicle .
- Check the brake fluid level=>
page 284.
-Seek professional assistance if necessary .
Warning ! Fault in brake system. Contact
workshop
- Drive carefully to the nearest authorized Audi dealer or
other qualified workshop and have the malfunction
corrected =>
&.
Vehicle care Technical data
Page 37 of 362
& WARNING
• If your vehicle should break down for mechan ical or oth er
rea sons , park at a safe di stan ce fr om moving traffi c, turn off the
e ngine and turn on the hazard warning lights=>
page 62, "Emer
gency flashers A".
• Never open the hood if you s ee or hear steam or coolant
esc aping from the engine compartment -you ri sk being scalded.
Wa it until you can no longer see or hear steam or coolant
escaping.
• The engine compartment of any vehicle is a dangerou s area .
Before you perform any work in the engine compartment, turn of
the engine and allow it to cool. Follow the warning sti ckers
=> page 267 , "Engine compartment ".
0 Note
Do not cont in ue dr iving if the J_ symbol ill uminates. There is a
ma lfunct io n in the engine coo ling system -yo u could damage your
engine .•
Engine oil pressure malfunction ~
The red e ngi ne oil pressure warni ng symbol requires
immediate servic e or repair. Driving with a low oil pres
sur e indication is likely to caus e severe engine damage.
If the ~ symbol on t he disp lay flashes , the engi ne oil pres
s u re is too low . A dr iver message appears as we ll to explain
t h e ma lfun ction in mo re detail. The driver wa rning goes out
a fte r about 5 seco nds, but it can be brought up at any tim e by
press ing t he
[SET] but ton aga in .
Switch off engine ! Oil pressure too low
- Sto p the veh icle .
Controls and equip
ment Safety first
Driver information display
- Tu rn the engine off .
- Check t he eng ine oi l level=>
page 279 .
-Contact your authorized Aud i dea ler if necessa ry.
Engine oil level too low
If the eng ine oil leve l is too low, add e ngine oil=> page 2 79.
Engine oil level correct
If the symbo l~ flashes even though the engi ne oil level is cor rect,
please seek professional assistance. Do not continue driv ing. Do not
leave t he eng ine runn ing
idle, either .
[I) Tips
• The engine oil pres sure symbol ~ is not an indi cator for a low
engine oil level. Do not rely on it . Instead , check the oil level in your
engine at regular intervals , preferably each time you refuel, and
always before going on a long trip.
• The yellow oil level warning indication.,.... requires oil refill or
workshop service without delay. Do not wait until the red oil pres
s ure warning ~ starts to flash before you re spond to the low oil
level warning . By then, your engine may already have suffered
serious damage. •
Fill engine oil now~
~-Plea se replenish oil now
If the ~ .. symbo l lights up, then t he oil has to be replen is hed right
now =>
page 279. •
Vehicle care Technical data
Page 39 of 362
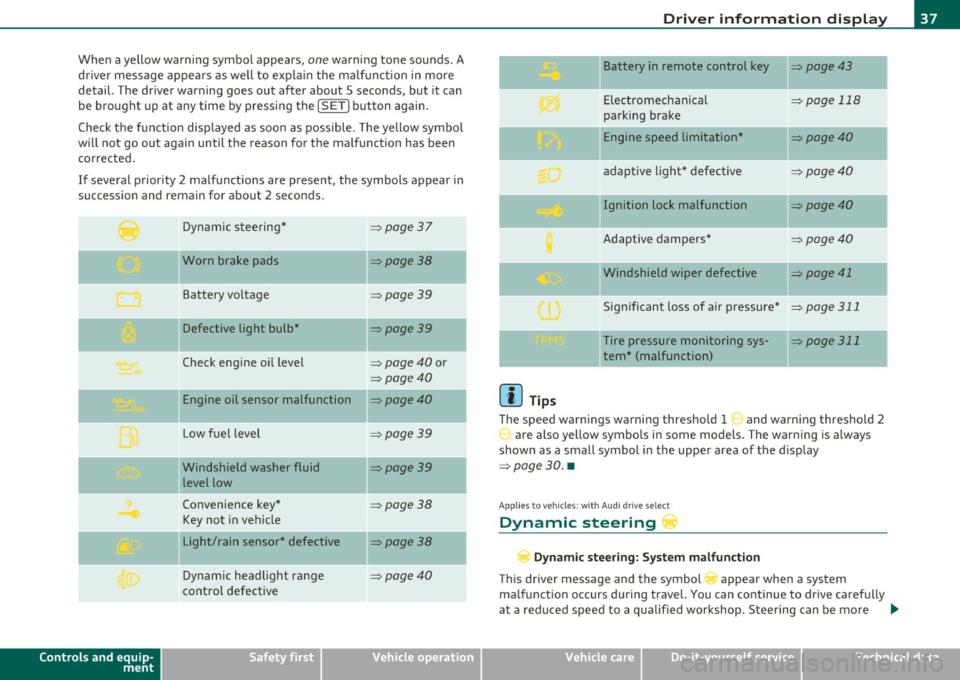
When a yellow warning symbol appears, one warning tone sounds. A
driver message appea rs as well to expla in the ma lf u nction in more
detail. The driver warning goes out after about 5 second s, but it can
be brought up at any time by pressing the
! SETI button again.
Check t he function displayed as soon as possible . T he yellow symbol
wi ll not go out again until the reason for the malfunct ion has been
corrected.
I f several priority 2 malfunctions are present , the symbols appear in
succession and remain for about 2 seconds .
Dynamic steering*
=:> page37
Worn brake pads =>page 38
Battery voltage =>page39
IIDefective light bulb* =>page39
Check engine oil level => page 40 or
=> page40
Engine oil sensor malfunction =>page40
Low f uel level => page 39
I
-
Controls and equip
ment
jl Windshield washer fluid
level low
Convenience key*
Key not in vehicle
Light/rain sensor* defective
Dynamic headlight range
control defective
Safety first
=> page 39
=> page 38
=>page 38
=>page40
Dri ver information display
II Battery in remote control key =>page43
-
Electromechanical => page 118
parking brake
-Engine speed limitation* =>page40
adaptive light* defective =>page40
Ignition lock malfunction =>page40
Adaptive dampers* =>page40
"Windshield wiper defective => page 41
-
Significant loss of a ir pressure* => page 311
Tire pressure monitoring sys-=> page 311
tern * (malfunction)
W Tips
The speed warn ings warning threshold 1 and warn ing threshold 2
r are also yellow symbols in some models. The warning is a lways
shown as a small symbol in the upper area of the d isplay
=> page 30. •
App lies to ve hicle s: wit h Aud i d ri ve sele ct
Dynamic steering'"'
Dynamic ste ering: S ystem mal fu ncti on
This d river message and the symbol appear when a system
ma lfunction occurs dur ing travel. You can continue to drive ca refu lly
at a reduced speed to a qualified workshop. Steering can be more _,.
Vehicle care Technical data
Page 114 of 362

-On the road .,.,..___ ______________ _
Ignition Lock and ignition switch
Starting engine with the key
The ignition is switched on and the engine started with
the ignition key.
Fig. 107 Ignition key
-Insert the key into the ignition lock.
-fvtanual transmission: Fully depress the clutch pedal and
move the shift lever to the neutral position.
-Automatic transmission*: Step on the brake pedal and
move the selector lever to the
P or N position.
- Press the key=> fig. 107 -the engine will start .
By pressing the key without stepping on the clutch or the brake, the
ign ition is switched on and off. With the ignition on, the steering
wheel is unlocked.
You can only remove the key with the ignition switched off . To do this,
you have to press on the key again. With an automatic transmiss ion,
the selector lever must be in the
P position.
When starting the engine, major electrical loads are switched off
temporarily . After
starting a cold engine, there may be a brief period of increased
noise because the oil pressure must first build up in the hydraulic
valve adjusters . This is normal and not a cause for concern .
If the engine should not start immediately, the starting process is
automatically stopped after a short time. Repeat starting procedure.
Driver message in the instrument cluster display
Press brake pedal to start engine
This message appears if you do not step on the brake pedal to start
the engine on a vehicle w ith an automatic transmission .
Press clutch pedal to start engine
This message appears if you do not step on the clutch pedal to start
th e engine on a vehicle with a manual transmission.
Engage N or P to start engine
This message appears when attempting to start the engine if the
selector lever for the automatic transmission is not in the
P or N posi
tion . The engine can only be started with the selector in these posi
tions.
Shift to P, otherwise vehicle can roll away. Doors do not lock if lever
is not in P.
Thi s message appears for safety reasons along with a warning signal.
It appears if the selector lever for the automatic transmission is not
in the
P position after the ignition is switched off . Move the selector
lever to the
P position, otherw ise the vehicle is not secured against
rolling away. You also cannot lock the vehicle using the locking
button on the door handle or using the remote key.
& WARNING
• Always take the key with you whenever you leave your vehicle.
Otherwise, the engine could be started or electrical equipment
such as the power windows could be operated. This can lead to
serious injury.
Page 116 of 362

llffl..__O_ n_ t_h _e_ r_o _ a_ d _________________________________________________ _
Starting and stopping the engine
with convenience key
A pplies to veh ic le s: with conven ience ke y
Starting the engine with the
[START ENGINE S TOP] button
This button switches on the ignition and starts the
engine.
Fig. 108 Convenience
key: START ENGINE
STOP button
-Manual transmission: Fully depress the clutch pedal and
move the shift lever to the neutral position.
- Automatic transmission*: Step on the brake pedal and
move the selector lever to
P or N ==> & .
- Press on the [START ENGINE STOP) button==> fig. 108 -
the engine will start.
By pressing the [START ENGINE STOP I button without depressing
the clutch or the brake peal, the ignition is switched on and switched off by pressing it again.
If the engine does not start immediately, stop trying after 10 seconds
and then try to restart the engine about 30 seconds later. After a cold engine is started, there may be a brief period of
increased
noise because oil pressure must first build up in the hydraulic valve
adjusters. This is normal and not a cause for concern.
Driver message in the instrument cluster display
No key identified
This message appears when the !START ENGINE STOP! button is
pressed if there is no master key inside the vehicle or if the system
does not recognize it. For example, the master key cannot be recog
nized if it is covered by an object (e .g. aluminum brief case) which
screens the radio signal. Electronic devices such as cell phones can
also interfere with the radio signal.
Press brake pedal to start engine
This message appears ifyou pressthe!START ENGINE STOP!
button to start the engine and do not depress the brake pedal. The
engine can only be started if the brake pedal is depressed.
Press clutch pedal to start engine
Th is message appears with a manual transmission when you press
the [START
ENGINE STOP ! button to start the engine and do not
depress the clutch pedal. The engine can only be started when the
clutch pedal is depressed.
Engage N or P to start engine
This message appears when attempting to start the engine if the
selector lever for the autom atic transmission is not in the
P or N posi
tion. The engine can only be started with the selector in these posi
tions.
Key not in vehicle
This message appears along with the symbol if the master key is
removed from the vehicle with the engine running. It is intended to
remind you (e.g. when changing drivers) not to continue the journey
without the master key.
If the master key is no longer in the vehicle, you cannot switch on the
ig nition after stopping the engine and you also cannot start the .,_
Page 242 of 362
Intelligent technology
'-------------------------------------------------
Corrosion
T he re may be a te ndency fo r d irt to build u p on the bra ke pads and
co rrosion to form on the d iscs if the car is not dr iven reg ularly o r only
for short trips with litt le use of the bra kes .
If the brakes a re not used freq uen tly, or if co rrosion has formed o n
the discs, it is advisable to clean off the pads and discs by braking
fir mly a few times from a mode rat ely h igh spee d~ & .
Faults in the brake system
If yo u sh ou ld noti ce a sudden increase in b rake peda l trave l, then one
of the two brake circu its may have failed~& .
Low brake fluid level
Ma lfunctions can occ ur in t he brake system if the brake fluid level is
t oo low. The bra ke f lu id level is moni tore d elec tron ically.
Brake lin ing wear status
Brake lin ing wear may be checked by v isua l inspect ion of the condi
tion of the brake pads throu gh the open ings in the whee l.
If neces
sary, the whe el may be removed fo r thi s insp ection~
page 3 16,
"Changing a w hee l".
& WARNING
• You should perform braking maneuvers for the purpose of
cleaning the brake system only if road conditions permit. Other
road users must not be put at risk - you may cau se an accident!
• Before descending a steep grade, reduce speed and shift trans
mission into a lower gear or lower driving range. Do not ride the
brakes or hold the pedal down too long or too often . This could
cause the brakes to get hot and diminish braking efficiency.
• Do not "ride the brakes " by resting your foot on the pedal when
you do not intend to brake . This may cause the brakes to overheat ,
premature wear and increased stopping distance.
• Under certain climatic and operating condition s such as
passing through water , driving in heavy rain or after washing the
& WARNING (co ntinued )
vehicle, the effectiveness of the brakes can be reduced . In winter,
ice can ac cumulate on the brake pads, linings, dis cs and drums.
Carefully apply brakes for a test. Brakes will dry and ice coatings
will be cleaned off after a few careful brake appli cations.
• Driving for an extended period of time on salt-covered roads
without u sing your brakes can also affect braking efficiency . Clean
off accumulated salt coating from b rake discs and pads with a few
careful brake applic ations.
• If you damage the front spoiler, or if you install a different
spoiler, be sure the air flow to the front brakes i s not obstructed .
Otherwise the brake system could overheat reducing the effective
ness of the entire brake system.
• Failure of one brake circuit will impair the braking capability
resulting in an increased stopping di stance. Avoid driving the
vehicle and have it towed to the nearest authorized Audi dealer or
qualified workshop.
n
Brake booster
The b roke boost er odds extra broking po wer.
The bra ke boos ter wor ks wi th v acuum pressure whi ch is crea ted o nly
when the eng ine is ru nning~ &.
& WARNING
• Never let the vehicle roll to a stop with the engine shut off.
• If the brake booster is not working, for example when towing
your vehicle , or because the brake booster has somehow been
damaged, the brake pedal mu st be pressed considerably harder to
make up for the lack of booster assistance. •
Page 281 of 362
___________________________________________ C_ h _ e_c _k _ i_n -=g ~ a_n _ d_ f_i _ll _i _ n -=g =--- ......J•
0 Note
Dr iv ing with an insufficient oil level is likely to cause severe damage
to the engine .
[ i ] Tips
• The oil pressure warning display~ is not an indicator of the oil
level. Do not rely on it. Instead , check the oil level in your engine at
regular intervals, preferably each time you refuel, and always
before going on a long trip .
• If you have the impression your engine consumes excessive
amounts of oil, we recommend that you consult an authorized Audi
dealer to have the cause of your concern properly diagnosed. Keep in
m ind that the accurate measurement of o il consumption requires
great care and may take some time. An authorized Audi dealer has
instructions about how to measure oil consumption accurately .•
Checking the engine oil level
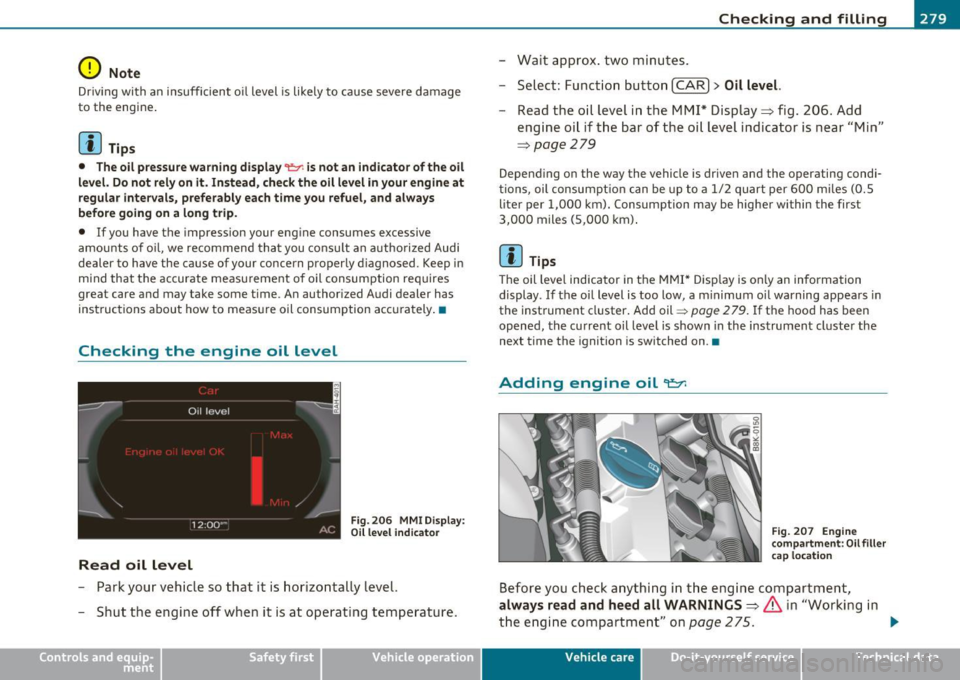
Fig. 206 MMI Display:
Oil leve l ind icator
Read oil level
-Park your vehicle so that it is horizontally level.
- Shut the engine off when it is at operating temperature.
Vehicle OP-eration
-Wait approx . two minutes.
- Select: Function button
[CAR]> Oil level.
- Read the oil level in the MMI* Display => fig. 206. Add
engine oil if the bar of the oil level indicator is near "Min"
=>
page 279
Depending on the way the vehicle is driven and the operating condi
tions, oil consumpt ion can be up to a 1/2 quart per 600 mi les (0.5
liter per 1,000 km). Consumption may be higher within the first
3,000 miles (5,000 km) .
[ i ] Tips
Th e oil level indicator in the MMI* Display is on ly an information
display.
If the oi l level is too low, a m inimum o il warning appears in
the instrument cluster. Add oil=>
page 2 79. If the hood has been
opened, the current oil level is shown in the instrument cluster the
next time the ignition is switched on .•
Adding engine oil
com partment: Oil filler
cap location
Before you check anything in the engine compartment,
always read and heed all WARNINGS=> & in "Working in
the engine compartment" on
page 275. .,,_
Vehicle care Do-it-yourselt service iTechnical data
Page 284 of 362
___ C_h_ e_c _k _i_n -=g :a,__ a_n_ d_ f_ i_ l _li _n _,g;._ __________________________________________ _
0 Note
• Before w inter sets in, have the coolant checked to see if the
coolant additive in your vehicle is sufficient to meet the climate
conditions. This is especially important if yo u live in a region where
the winter is extremely cold.
If necessary, increase the proportion of
coolant additive to 60% .
• When adding coolant additive to your cooling system, remember :
- We recommend using only coolant additive G12++ (check the
label) for your vehicle. This coolant additive is available at autho
r iz ed Audi dealers. Other types of antifreeze can s ignificantly
reduce corrosion protection. The resulting corrosion can cause a
loss of coolant and serious engine damage.
• Do not add any type of radiator leak sealant to your vehicle 's
engine coolant. Adding radiator repair flu id may adversely affect the
function and performance of your cooling system and cou ld result in
damage not covered by your New Vehicle Limited Warranty .•
Checking the engine coolant Level
The engine coolant level can be checked with a quick
glance.
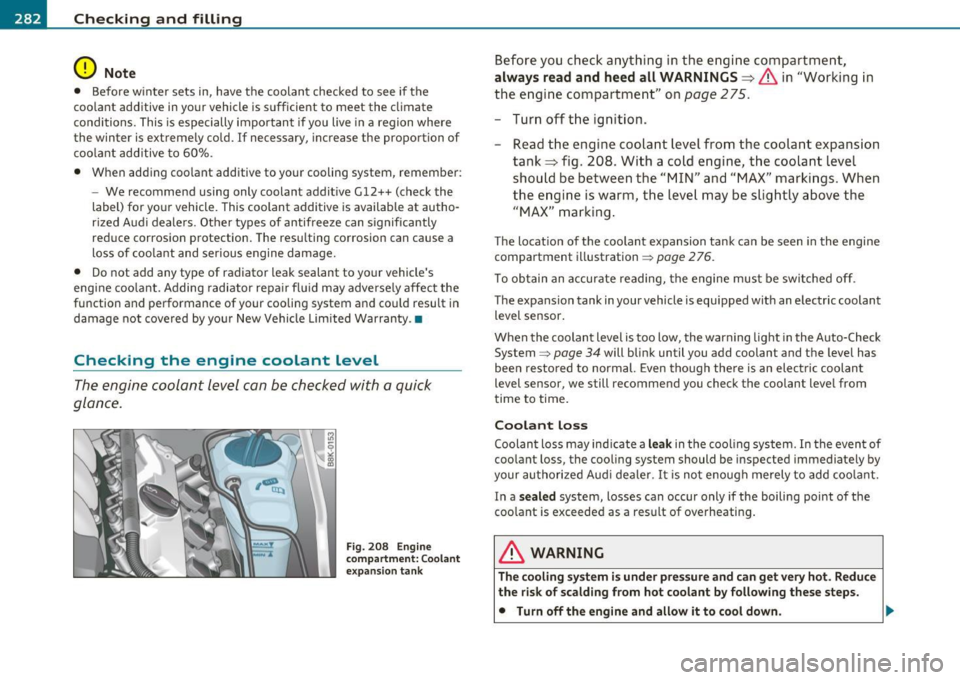
Fig. 208 Engine
co mpartment : Coolant
expansion tank
Before you check anything in the engine compartment,
always read and heed all WARNINGS~ & in "Working in
the engine compartment" on
page 275.
-Turn off the ignition.
- Read the engine coolant level from the coolant expansion
tank~ fig. 208 . With a cold engine, the coolant level
should be between the "MIN" and "MAX" markings. When
the engine is warm, the level may be slightly above the
"MAX" marking.
The locat io n of the coolant expansion tank can be seen in the engine
compartment illustration~
page 276.
To obtain an accurate reading, the engine must be switched off.
The expansion tank in your vehicle is equipped with an electric coolant level sensor.
When the coolant level is too low, the warning light in the Auto-Check
System =>
page 34 will blink until you add coolant and the level has
been resto red to normal. Even though there is an electric coolant
level sensor, we still recommend you check the coolant level from
time to time.
Coolant loss
Coolant loss may indicate a leak in the coo ling system. In the event of
coolant loss, the cooling system should be inspected immediately by
your authorized Audi dealer. It is not enough merely to add coolant.
In a
sealed system, losses can occur only if the boiling point of the
coo lant is exceeded as a result of overheating .
& WARNING
The cooling system is under pressure and can get very hot. Reduce
the risk of scalding from hot coolant by following these steps.
• Turn off the engine and allow it to cool down.