roof rack AUDI A5 COUPE 2011 Owners Manual
[x] Cancel search | Manufacturer: AUDI, Model Year: 2011, Model line: A5 COUPE, Model: AUDI A5 COUPE 2011Pages: 362, PDF Size: 84.88 MB
Page 4 of 362
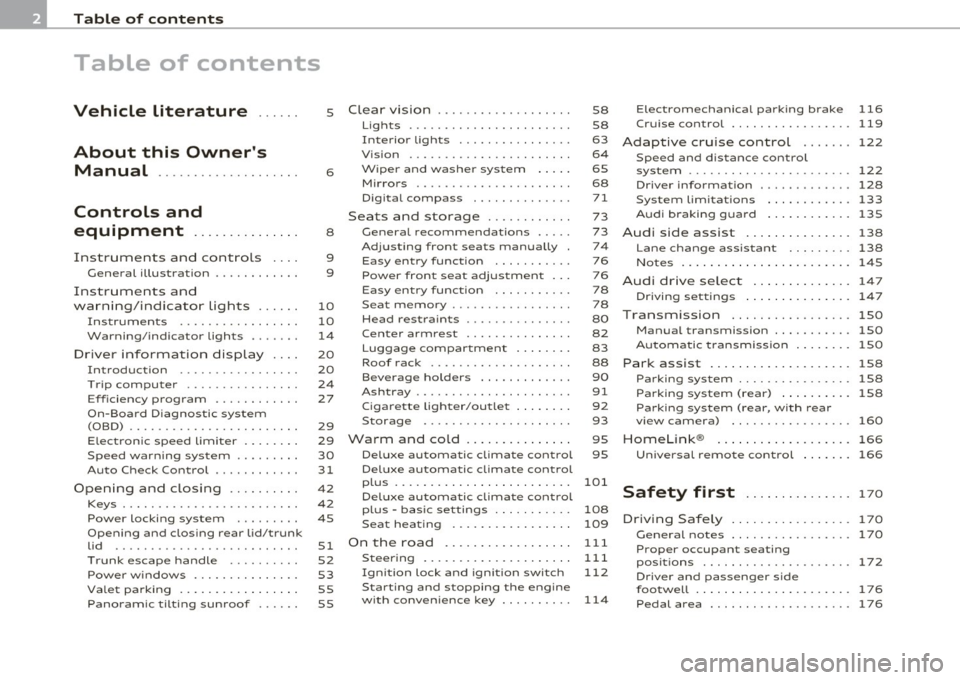
Table of contents
Table of contents
Vehicle literature ..... .
About this Owner's Manual ............. ...... .
Controls and
equipment .............. .
Instruments and controls ... .
General illustration ........... .
Instruments and
warning/indicator Lights ..... .
Instruments ................ .
Warning/indicator ligh ts ..... . .
Driver information display ... .
Introduction .......... ..... . .
Tri p com puter ......... ...... .
Eff iciency program ........... .
On-Board Diagnostic system (OBD) ....................... .
E lectronic speed limiter ....... .
Speed warning system ........ .
Auto Check Control ........... .
Opening and closing ......... .
Keys ........................ .
Powe r locking system ........ .
Opening and closing rear lid/trunk
lid ................... ...... .
T runk escape handle
Power w indows .............. .
Valet parking ................ .
Panoram ic tilting sunroof ..... .
5
6
8
9
9
10
10
1 4
20
20
24
27
29
29
30
31
42
4 2
45
51
52
53
55
55
Clear vision .................. .
Lights ...................... .
Interior lights ............... .
V is ion ...................... .
Wiper and washer system .... .
Mirrors . .............. ...... .
D igital compass ............. .
Seats and storage ........... .
General recommendat ions .... .
Adjust ing front seats manually .
Easy entry function .......... .
Power front seat adjustment .. .
Easy entry funct ion .......... .
S eat memory ............... . .
H ead restra ints ........ ...... .
Center armrest .............. .
Luggage compartment ....... .
Roof rack ................... .
B eve rage hold ers ............ .
Ash tray ..................... .
C igarette lighter/outlet ....... .
Storage ............. ....... .
Warm and cold ........ ...... .
Deluxe automatic climate control
Deluxe automati c climate control
plus ........................ .
Deluxe automatic climate control
plus -basic settings .......... .
Seat heating ........ ........ .
On the road ................. .
Steering .................... .
I gn ition lock and ign ition switch
S tarti ng and stopping the engine
w ith convenience key ......... . 58
58
63
64
65
68
71
73
73
74
7 6
76
78
78
80
82
83
88
90
91
92
93
95
95
101
1 08
109
111
111
112
11 4 Electromechanical park
ing brake 116
Cruise control . . . . . . . . . . . . . . . . . 119
Adaptive cruise control 122
Speed and d istance control
system ................... .... 122
Driver informat ion ............. 128
System limitations ............ 133
Audi braking guard ............ 135
Audi side assist ............. .. 138
Lan e change assis tant ....... .. 138
Notes ................. ....... 145
Audi drive select .............. 14 7
Driving settings ............ ... 147
Transmission ................. 150
Manual transmission . . . . . . . . . . . 150
Automatic transmission .... .... 150
Park assist . . . . . . . . . . . . . . . . . . . . 158
Parking sys tem . . . . . . . . . . . . . . . . 158
Pa rking system (rear) ....... ... 1 58
Park ing sys tem (rear, with rear
view camera) . . . . . . . . . . . . . . . . . 160
Homelink ®
Universa l remote control 1
66
166
Safety first . . . . . . . . . . . . . . . 1 7 0
Driving Safely ................. 170
General notes . . . . . . . . . . . . . . . . . 170
P roper occupant seating
positions . . . . . . . . . . . . . . . . . . . . . 172
Driv er and pass enger side
footwell . . . . . . . . . . . . . . . . . . . . . . 1 76
Pedal area . . . . . . . . . . . . . . . . . . . . 176
Page 90 of 362
Seats and storage
-Close the rear lid .
_6 WARNING
Objects must only be tran sported in th e ski sack s ince the ski sack
can be secured. Indi vidual objects ca nnot be secured . There is a
ri sk of injur y.
[I] Tips
• You can open the pass-thro ugh from the luggage compartment.
Push the release button down and push the cover forward .
• T he pass- through can be locked and unlocked with the vehicle
mechanical key=>
page 87, fig. 86 . •
App lies to vehicles : w ith ski s ac k
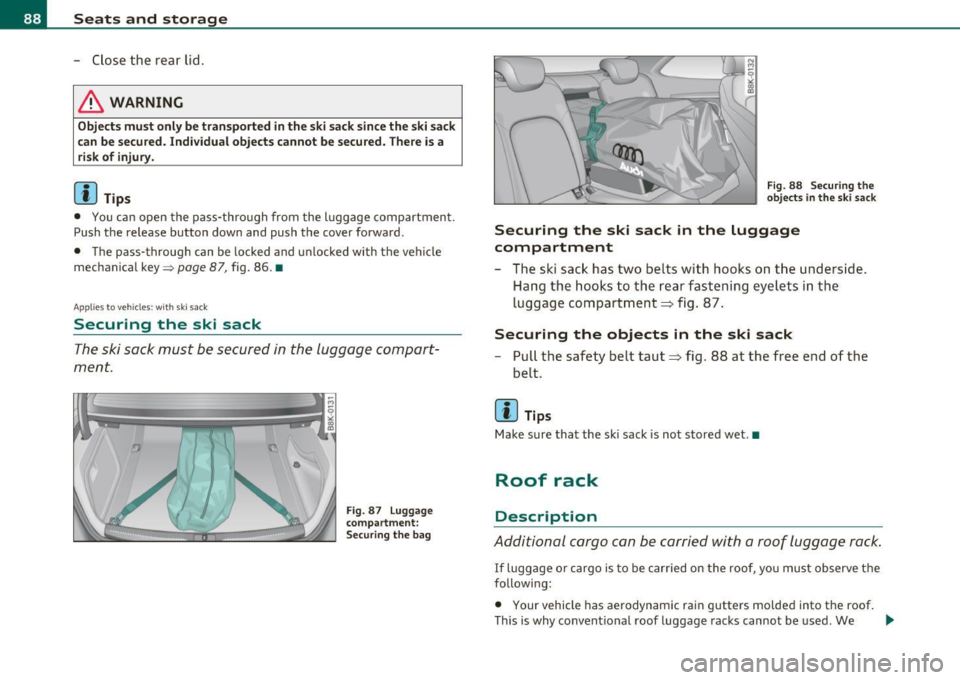
Securing the ski sack
The ski sack must be secured in the luggage compart
ment .
Fig. 87 L uggage
co mpa rt m ent :
Secu ring th e b ag Fig. 8
8 Securing the
o bjects in the s ki sack
Securing the ski sack in the luggage
compartment
- The ski sack has two be lts with hooks on the unders ide .
Hang the hooks to the rear fastening eyelets in the
luggag e compar tm ent => fig . 87.
Securing the objects in the ski sack
- Pull the safety belt taut::::> fig. 88 at the free e nd of the
belt.
[I] Tips
Make sure that the sk i sack is not stored wet .•
Roof rack
Description
Additional cargo can be carried with a roof luggage rack .
If luggage or cargo is to be carried on the roof, you must observe the
following:
• Your vehicle has aerodynam ic rai n gutters molded into the roof.
T his is why co nvent ional roof luggage racks cannot be used . We .._
Page 91 of 362
recommend using roof racks from the Audi original accessories
program.
• These approved roof racks are the basis for a complete roof rack
system . Additional attachments for the basic roof rack are necessary
to safe ly transport luggage, bicycles, surf boards, skis or small boats.
All necessary hardware for these systems is available at your autho
rized Audi dealer.
• We recommend that you keep the installation instructions for
your roof rack system together with your Owner's literature in the
vehicle .
When should the roof rack be removed?
• Before going thro ugh an automat ic car wash (it is best to ask the
car wash operator for advice).
• When not in use, to reduce fuel consumpt io n, w ind noise and to
guard against theft.
& WARNING
• Use of an unapproved roof rack or incorrect mounting of an
approved roof rack can cause the roof rack or the items attached
to it to fall off the roof onto the road.
• Objects falling from the roof of a vehicle can cause a crash and
personal injury .
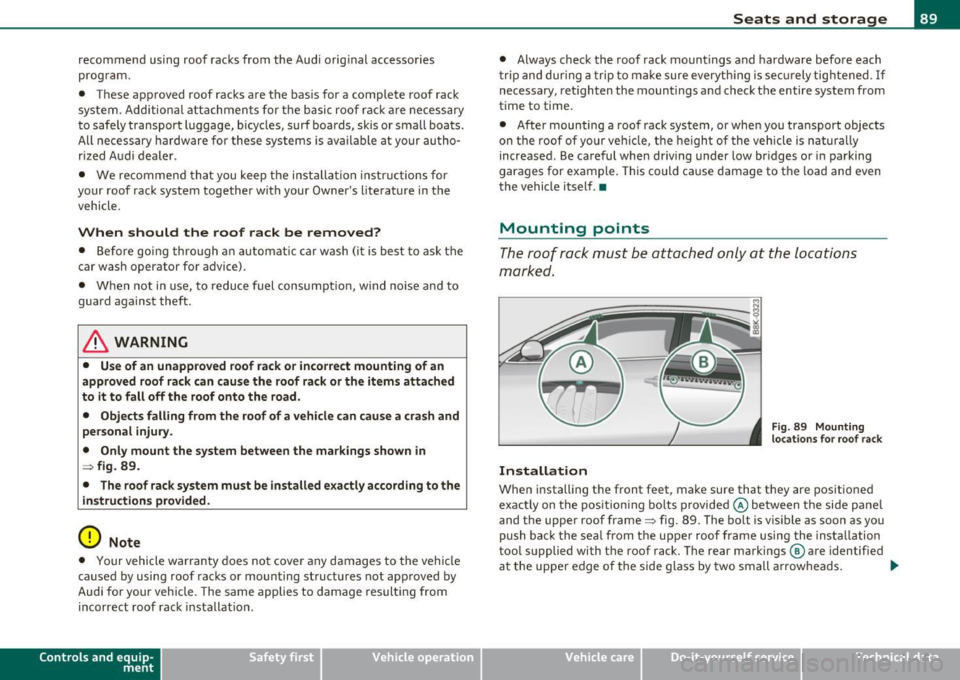
• Only mount the system between the markings shown in
~ fig. 89.
• The roof rack system must be installed exactly according to the
instructions provided.
0 Note
• Your vehicle warranty does not cover any damages to the vehicle
caused by using roof racks or mounting structures not approved by
Audi for your veh icle. The same applies to damage resulting from
incorrect roof rack installat ion .
Con tro ls a nd e quip
m en t Vehicle
OP-eration
Seats and storage
• Always check the roof rack mount ings and hardware before each
trip and during a trip to make sure everyth ing is securely tightened. If
necessary, retighten the mountings and check the entire system from
time to time .
• After mounting a roof rack system, or when you transport objects
on the roof of your veh icle, the height of the vehicle is natura lly
increased . Be careful when driving under low bridges or in parking
garages for example. This could cause damage to the load and even
the vehicle itself . •
Mounting points
The roof rack must be attached only at the locations
marked.
Installation
Fig. 89 Mounting
locations for roof rack
When installing the front feet, make sure that they are positioned
exactly on the positioning bolts provided @between the side pane l
and the upper roof frame~ fig. 89. The bo lt is visible as soon as you
push back the seal from the upper roof frame using the insta llation
tool supplied with the roof rack. The rear markings ® are identified
at the uppe r edge of the side glass by two small arrowheads. .,,.
Vehicle care Do-it-yourselt service iTechnical data
Page 92 of 362
![AUDI A5 COUPE 2011 Owners Manual Seats and storage
& WARNING
After traveling several miles, ensure that the roof rack is secure.
[ i ] Tips
The roof rack ind icates whether it is to be mounted in the front or
AUDI A5 COUPE 2011 Owners Manual Seats and storage
& WARNING
After traveling several miles, ensure that the roof rack is secure.
[ i ] Tips
The roof rack ind icates whether it is to be mounted in the front or](/img/6/57583/w960_57583-91.png)
Seats and storage
& WARNING
After traveling several miles, ensure that the roof rack is secure.
[ i ] Tips
The roof rack ind icates whether it is to be mounted in the front or
back .a
Roof load
T h e cargo on the roof must be securely attached.
H andling characteristics change when cargo is trans
p orted.
The pe rmissible roof load for yo ur vehicle is 165 lb s. (75 kg ). The
roof load is a combination of the weight of the carrier system and the
c argo .
When using roof rack systems with a lower load capacity , you cannot
use the maximum permissib le roof load. In t his case, the roof rac k
can o nly be loaded to the weight limit g iven in the insta llation g uide .
& WARNING
• The cargo must be securely attached on the roof rack , other
wise you ri sk an accident .
• You must under no ci rcumstances exceed the permissible roof
load, the permissible axle loads and the permissible overall
weight of your vehicle· risk of an accident .
• Consider that when transporting heavy objects
or one with a
large surface, the handling characteristics change due to shift in
the center of gravity or the greater surface exposed to the wind. So
adapt your driving and your speed to prevailing conditions .
W For the sake of the environment
As a result of the increase wind resistance created by a roof rac k, yo ur
vehicle is using fue l unnecessari ly. So remove the roof rack after
using i t.•
Beverage holders
Front beverage holders
Fig. 90 Cent er
console : Front
bev erag e holder s
Fig. 91 Be verage
storage in th e rear
a rmrest
- You can accommodate two beverages in t his sto rage
=> fig . 9 0.
Page 199 of 362

_______________________________________________ A_ ir_ b_ a_,,,g '--- s.:.y _s _t_ e _ m ___ ffl'II
& WARNING (co ntinued )
• The inflating airbag will hit the child safety seat or infant
carrier with great force and will smash the child safety seat and
c hild against the backrest, center arm rest , door, or roof .
• Always install rearwa rd-facing child restraints in the back seat.
• If you must install a rearward facing child safety seat on the
front passenger seat because of except ional circumstances and
the PASSENGER AIR BAG OFF light does not come on and stay on ,
immediately install the rear-facing child safety seat in a rear
seating position and have the airbag system inspected by your
authorized Audi dealer.
& WARNING
If, in except ional circumstances, you must install a forward-facing
child re straint on the front pa ssenger's seat:
• Always make sure the forward-facing seat has been designed
and certified by its manufacturer for us e on a front seat with a
passenger front and s ide airbag.
• Never put the forward-facing child restraint up again st or very
near the instrument panel.
• Always move the passenger seat into its rearmost position
in
the seat's fore and aft adjustment range, as far away from the
airbag a s po ssible, before installing the forward-facing child
restraint. The backrest must be adjusted to an upr ight position.
• Make sure that the PASSENGER AIR BAG OFF light comes on
and stays on all the time whenever the ignition is switched on .•
Advanced Airbag System components
Th e front passenger seat i n your ve hicle has a lot of very im portant
parts o f th e Ad van ced A irbag System in it. These parts include t he
we ight-sens ing mat, sensors, wir ing, brackets, and mo re . The func-
Controls and equip
ment Safety first Vehicle operation
tion of the system
in the front passenger seat is checked by the elec
t ronic contro l unit whe n t he ignit io n is on. The con tro l u nit mon itors
t he Advanced A irbag System and tu rns th e airbag indicator light on
when a malfunction in the system components is detected. The func
tion of the a irbag indicator light is descr ibed in greater deta il below.
Beca use the front passen ger seat contains importa nt parts of the
Advance d Ai rbag System, you mus t take care to p revent i t fro m be ing
dama ged. Damage to the seat may prevent t he Advance d Airbag for
t he front p assenge r seat fro m d oin g its job in a cra sh.
The front Advanced Airbag System consists of the
following:
• Cras h sensors in the front of the vehicle t hat measure vehicle
acc ele ra tio n/d ecele ration to prov ide info rmat io n t o the Adva nced
Airbag System about t he severity of the crash.
• An elec tron ic con tro l unit, w it h i nteg rated crash senso rs fo r front
and side impacts . The contro l unit " dec ides" w het her to fire the front
a irbag s base d on th e informa tion re ceived from t he cr ash sensors.
The control unit also "decides" whether the safety be lt pretens ioners
s ho uld b e activa ted.
• An Advanced Airbag with gas generator and cont rol va lve for the
dr ive r inside t he st eer ing whee l hub .
• An Advanced Air ba g with gas gene rator and control valve inside
t he inst rume nt pan el for the front pass enger.
• A weig ht-sensing mat unde r the upholste ry paddin g of the front
passenger seat c ushi on that measures the tota l weigh t on the seat .
T he information registe red is se nt co ntin u ously to the electronic
cont rol uni t t o reg ulate deployment of t he front Advanc ed A irbag o n
the passenger side .
• An a irbag mon itoring system and ind icator light in the inst rume nt
cluster =>
page 201.
• A sensor in each fro nt seat reg isters the distance between t he
res pective seat and the s teer ing whee l o r i nst rume nt pane l. The
information reg iste red is sent co ntin uously to the e lectro nic cont rol
uni t to reg ulate dep loyment o f the front Advanced Airbags . .,_
Vehicle care Do-it-yourself service Technical data
Page 259 of 362

____________________________________________ C_l_e _a_ n_ i n--= g=--- a_n_ d----' p,__ r_o _t_ e_ c_ t_ i _o_ n __ lffll
Under certain circumstances, weekly washing may be necessary .
Under other conditions, a monthly washing and waxing may be
adequate.
After the winter, the underside of the vehicle shou ld be thoroughly
washed, p referably in a profess ional car wash.
& WARNING
Always read and heed all WARNINGS and other information
~page 256. •
Automatic car wash
The vehicle can be washed in almost any modern auto
matic car wash.
Th e vehicle paint is so durable that the vehicle can normally be
washed without problems in an automatic car wash . However, the
effect on the paint depends to a lar ge exten t on the design of the
facility, the filtering of the wash water, the type of wash and care material, etc. If the paint has a dull appearance after going through
the car wash or is scratched, bring this to the attention of the oper
ator immediately . If necessary, use a different car wash.
Before going thro ugh a car wash, be sure to take the usual precau
tions such as closing the windows and the roof. Factory installed
antennas must not be removed.
If you have installed additional accessories on the vehicle -such as
spoilers, roof rack, etc. - it is best to ask the car wash operator if these
should be removed.
& WARNING
Always read and heed all WARNINGS and other information
~page 256. •
Safety first
Washing the vehicle by hand
A lot of water is needed when washing a vehicle by hand.
-Before you star t washing, make sure you have read and
understood the WARNINGS~
& in "General informa
tion" on
page 256.
- First soak all dried dirt until it is soft, then rinse it off .
- As you clean your vehicle, start with the roof and work your
way down to the bottom, using a sponge, a sponge glove
or a clean brush.
- Rinse the sponge or the sponge glove often, flush ing it
clean each time .
- Use special car shampoo only for very persistent dirt.
- Rinse the car thoroughly with water.
- Use a chamois leather to gently wipe the exterior dry.
Use a separate sponge for cleaning the wheels, door sills and other
regions exposed to road dirt. In this way, you will not scratch the
paint with coa rse particles imbedded in the sponge the next time you
wash the car.
& WARNING
• Do not clean the underside of the chassis, fenders, wheel
covers, or other hard to reach parts without protecting your hands
and arms. You may cut yourself on sharp-edged metal parts.
• Always read and heed all WARNINGS and other information
~page 256. _..
Vehicle care Technical data
Page 263 of 362
____________________________________________ C_l_e _a_ n_ i n--= g=--- a_n_ d----' p,__ r_o _t_ e_ c_ t_ i _o_ n __ _
The best way to remove snow from windows and mirrors is to use a
brush. Use a non-abrasive
plastic ice scraper -better still, a spray
deicer -to remove
ice from windows and mirrors.
Th e windows must not be cleaned with insect remover or wax since
these can interfere with the function of the windshie ld wipe r blades
(chatter).
Oil , grease, or silicone residue can be removed with
glass cleaner or
silicone remover. However, wax residue requires the use of a specially
formulated solvent . P lease contact your authorized Audi dea le r for
advice on safe products for wax removal.
Windows should also be cleaned on the inside at regular intervals .
Never dry windows w ith the same chamo is that you use to dry painted
surfaces. Wax residue on the chamois can impair vision through the
windows.
& WARNING
• Always read and heed all WARNINGS and other information
=> page 256.
• The windshield must not be treated with water-repellent
materials. They can increase glare under poor visibility conditions
such as wetness, darkness, or when the sun is low on the horizon.
In addition, they can cause the windshield wipers to chatter.
0 Note
• Never use warm or hot water to remove snow and ice from
windows and mir rors . This could cause the glass to crack.
• To prevent damage to the wires of the rear defogger, do not place
any adhesive stickers on the inside of the rear window over the wires.
• T o help prevent dirt from scratching the window, a lways scrape in
a forward direction -pushing the scraper away from you -never back
and forth.
• Water leaking from the inside of the rear windows may damage
sensitive e lectrica l components located either under the rear parce l
Safety first
shelf or in the rear trunk area. Always ensure that water never leaks
t hrough the body section of the vehicle . You can do this by using
waterproof protection over the vehicle's electrical components (e .g.
when installing window tinting).
• Damage or malfunct ion of electrical components due to water
damage or any other outside influence is not covered by the Audi New
Vehicle Limited Warranty. See your Warranty
& Ma intenance booklet
for additional details about your warranty .•
Weatherstrips
Complete car care includes the weatherstrips as well.
-Apply a suitable rubber conditioner to the weatherstrips
from time to t ime.
To be able seal properly, the weatherstrips around the hood, doors,
rear lid, etc. must remain pliable. Spray the weatherstrips with sili
cone or coat them with talcum powder or glycerin to reta in the flexi
bility of the rubber and to protect them against freezing in the
wi nter.
& WARNING
Always read and heed all WARNINGS and other information
=> page 256.
[ i ] Tips
Keep silicone sprays off the windshield to avoid wiper smear in rain .•
Cast (Light) alloy wheels
Cast (light) alloy wheels require special care.
- Wash the wheels with a sponge or hose brush every other
week. _,.
Vehicle care Technical data
Page 295 of 362
________________________________________________ T_i_re _ s_ a _ n_d_ w_ h_ e_ e_l_s __ _
Groove
means the spa ce between two ad jacen t tread ribs .
Load rating (code)
mea ns the max imu m load th at a tir e is ra te d to c arry fo r a give n infla
tion pressure. You may not find this information on all t ires beca use
i t is no t required by law .
Maximum load rat ing
me ans the load r ati ng for a t ire at th e maxi mum p ermis sib le in flation
pressure for that tire.
Maximum loaded vehicle weight
means the sum of:
(a) Curb weight
(b) Accessory weig ht
(c) Vehicle ca pacity we ight, and
(d) Pro duct ion op tions weigh t
Maximum (permissible) inflation pressure
means the m aximu m cold infla tio n pr essur e to whi ch a t ire may be
inflated . Also called "maximum inflat ion press ure."
Normal occupant weight
means 150 lbs. (68 k ilog rams) times t he num ber of occupants seate d
in t he vehi cle up to the total sea ting cap aci ty of yo ur vehicl e.
Occupant distribution
means d is tribut ion of occ upan ts i n a vehicle.
Outer diameter
means the ove rall d iameter of an inflated new tire.
Overall width
means the linear distance betwee n the exter iors of the s idewalls of
a n in flated tire, in cludi ng eleva tions due to la beling, dec ora tions, o r
protective bands or ribs.
Safety first
Ply
means a layer o f rubbe r-coate d para llel co rds.
Production options we ight
me ans the co m bine d we ight of tho se in stalled regu lar pr oduction
options weighi ng over 5 lbs. (2.3 kg) in excess of t hose standard
i t ems w hic h they replace, not previously considere d in c urb we igh t o r
accessory weight, includ ing heavy duty brakes , ride levelers, roof
rack, heavy duty battery, and s pecial tr im.
Radial ply tire
me ans a pneuma tic tir e in wh ich the pl y cords that extend to t he
beads are laid at substantially 90 degrees to the centerline of the
t rea d.
Recommended inflation pressure
see => page 292, "C old tire in fla tion pr essu re".
Reinforced tire
mea ns a t ire desig n to operate at h ig her loads and at h igher i nflat io n
pressures tha n the corresponding standard tire . Re inforced tires may
be iden tifi ed as " XL", "x l", "E X TR A LOA D", or "RF " on t he sidew all.
Rim
means a metal suppo rt fo r a tire or a tire and tube assemb ly up on
wh ic h the t ire beads are seated.
Rim diameter
means nom inal d iameter of the bead seat . If you change yo ur whee l
si ze, yo u w ill have to purchase new tires to ma tc h the new r im diam
eter .
Rim size designation
means r im diamete r and width.
Rim width
mea ns nom inal dis tance be twee n rim flanges.
Vehicle care Technical data
Page 357 of 362
Alphabetical index -________________ fNi'II
Release lever for hood ...... .. .. .. .. . 274 Safety belts .... ..... ... ......... ... 185
Remote control garage door opener Cleaning ... ................ ..... 267
(Homel ink ®) ........... .... ... . 166 Danger to passengers who do not wear a
Remote control key safety belt ..................... 183
Unlocking and locking ... .. .. ....... 47 Fastening .... .. .... .. ........... 185
Remote rear lid release ........... .. .. 51 Improperly worn · · · · . · · · · · · · · .... 188
Repair manuals ................ ..... 340 Not worn · · · · · · · · · · · · · · · · · · · · · · · 183
Safety belt position ............. .. 186
Repairs
Airbag system .................. . 204
Rep lacing bulbs ........ .... .. .. .. .. . 327
Replacing tires and wheels ......... .. . 303
Replacing windshield wiper blades ...... 67
Reporting Safety Defects ........ 179, 180
Reset button .......... ...... .. .. .. .. 13
Retractor ....... .. .... .. ... ... ..... 185
Rims Cast alloy .............. .. .... .. . 261
Roof luggage rack Mounting points .................. 89
Roof rack ............. ...... ... . .. .. 88
Roof load . ............. ...... .. .. 90
See also Roof luggage rack .......... 88
s
Safe dr iving habits ............... ... 170
Safety belt position .. .. .. ........ .... 186
Safety belts worn by pregnant women . ..
187
Safety belt pretensioner .. .. ... .... ... 188
Service and disposal ............. . 189
Safety belt warning light . . . . . . . . . 16, 181 Safety instructions
.. .. .. ...... .. . 184
Securing child safety seats . ........ 225
Special considerat ions for pregnant
women ........................ 187
Unfastening .. ................... 188
Warning/indicator light .. ....... .. 181
Why YOU MUST wear them ......... 181
Worn properly .. ..... ......... .. . 183
Safety compliance sticker ............. 336
Safety equipment .... ............. .. 170
Safety features for occupant restraint and
protection ................... .. 170
Safety guidelines Seat adjustment .................. 73
Safety instructions
Engine compartment ... .......... 275
for side curtain airbags ... .. .. ..... 213
for using child safety seats ....... .. 218
for using safety bel ts ...... ...... .. 184
Monitoring the Advanced Airbag System .
203
Seat adjustment Driver's seat .... ....... .... ...... . 73
Easy entry funct ion ............. .. . 78
Easy entry manual function ......... 76
For-and-aft manually .. .. .. ........ 7 5 Front passenger's seat .
... .. .. .. ... 7 4
Front seats ...... ................. 73
Head restraints ................ .. 17 4
Manual . ........... .. .... .. .. .. .. 74
Power ............. .. .... .... .. .. 76
Seat back angle manual ly ....... .. .. 75
Seat height manually ............ .. 75
Seat belts
See Safety belts .................. 181
Seat heating
Front seats ...................... 109
Seat memory ... ...... ............... 78
Seat symmetry ... .. .. ... ... .. .. ... .. 80
Seating capacity ............. ....... 181
Seat ing position
Driver ............. .. .. .. .... .. . 172
Front passenger .. .. ............. . 173
How to adjust the front seats ....... 173
Incorrect seat position . ........... 175
Occupants .................... .. 172
Rear passengers ................. 174
Seats Number of seats . .. ............. . 181
Selective unlock feature ............... 47
Selector lever . ... .. .. ............ .. 152
Emergency release ............... 156
Service and disposal Safety belt pretensioner .......... . 189
Service interval display ................ 23
Service position for windshie ld wipers ... 66
Servotron ic
Power steering ........... ... ... .. 242
SET button . ...... .... .. .. .. .. .. .. .. 11
Controls and equip
ment Safety first Vehicle operation
Vehicle care Do-it-yourself service Technical data