fold seats AUDI A5 COUPE 2012 Owners Manual
[x] Cancel search | Manufacturer: AUDI, Model Year: 2012, Model line: A5 COUPE, Model: AUDI A5 COUPE 2012Pages: 316, PDF Size: 78.59 MB
Page 65 of 316

A WARNING
-Adjust the driver's seat only when the ve
hicle is stationary . You risk an accident
otherwise .
- Exercise caution when adjusting the
seats. Adjusting the seat carelessly or
without checking can pinch hands and
fingers.
- While the vehicle is moving, the seat
backs of the front seats must not be in
clined too far to the rear because the ef
fectiveness of the safety belts and the
airbag system is severely compromised -
there is a risk of injury.
Easy entry function
Applies to vehicles: with man ually adjustable seats
The easy entry function makes it easier for
the rear passengers to enter and leave the ve
hicle.
Fig. 67 Driver's seat: Latch on the seatback
Tilt the seatback forward and push the
front seats forward
~ Lift the latch c::> fig. 67.
~ Hold the latch and tilt the seatback for
wa rd.
~ Re lease the latch and push the seat for
ward .
Push the front seats back and fold the
seatback up
~ Push the front seat back before you fold the
seat backs up. Otherwise the seat cannot be
pushed back to its original position.
Seats and storage 63
A WARNING
Always be certain that the front seats are
upright and securely latched when you
drive.
Power front seat
adjustment
Seat adjustment controls
App lies to vehicles: wit h powe r adjustable seats
The operating logic for the switches corre
sponds to the construction and function of
the seat.
Fig. 68 Front seat: Controls for seat ad justment
The switches to adjust the seat cush ion and
the seatback correspond to the layout , the de
sign and the function of the seat. Th e seats
are adjusted by moving the switches following
this logic.
Controls
@ Lumbar support*
@ Seat adjustment
© Seat back and head restraint height ad
justment*
@ Upper thigh support*
Adjusting the seat
Appl ies to vehicles: wi th power adjustable seats
Position, angle and shape of the seat can be
adjusted electrically to ensure safe and com
fortable seating.
Read and fo llow the warning notices c::> .&. be
fore you adjust your seat.
Page 66 of 316

64 Seats and storage
Adjusting the curvature of the lumbar
s up port *
• Push the switch plate @forward or back
ward to increase or reduce the curvature .
Adjusting the height of the lumbar
s uppo rt*
• Push the switch plate @ up or down to po
sition the curvature higher or lower.
Fore -and-aft adjustment
• Push the sw itch @ forward or backward
r=;, pag e 63, fig . 68.
Adjusting seat height
• Pull or push the switch @ up or down .
Front seat cush ion up / down
• Press the sw itch @ at the front up or down.
Rear s eat cushion up / down
• Press the sw itch @ at the rear up o r down .
Adjusting seatback angle
• Push the sw itch © forward or backward .
Head restr aint height adjustm ent*
• Press the switch © from up to down or the
other way .
Lengthen ing or short enin g upper thigh
s uppo rt *
• Lift the button @ under the seat cushion.
The front seat cushion moves forward under
spring force.
• Push the seat cush ion back whe n you have
finished using it .
_& WARNING
-Adjust the d river's seat only when the ve
hicle is s tat ionary. You r isk an acc iden t
otherwise.
- T he power adjustment for the front seats
also wo rks w ith the ignition switched off
or with the igni tion key removed . For this
reason, children sho uld never be left un
attended in t he veh icle -they could be in
jured! -
Exerc ise caution when adjusting the seat
he ight. Unsupervised or careless seat ad
justment can pinch fingers or hands
causing injuries .
- W hile the vehicle is mov ing, the seat
backs of the front seats must not be in
clined too far to the rear because the ef
fectiveness of the safety be lts and the
airbag system is seve rely comp romised -
there is a risk of injury.
Easy entry function
App lies to vehicles: wit h power adjustable seats
The easy entry function makes it easier for
the rear passengers ta enter and leave the ve
hicle.
Fig . 69 D river 's sea t: Co ntro ls for eas y entry ass ist
Folding down th e front seat back s
• Lift the latch ¢ fig. 69.
• Tilt the seatback forward.
Moving the front seats forward
• Press and hold the sw itch @ unti l the seat
has reached the desired position .
Moving front seats back
• Press and hold the sw itch @ until the seat
has reached the desired position . T he seat
s tops automatically when i t has reac hed its
s tarting posi tion again.
To make it eas ier to enter and leave the rear
seat, the seatbacks of the fro nt seats can be
folded fo rward and the head restraints are au
tomat ica lly lowered . At the same time, the
front seats can be moved forward and back.
Page 67 of 316

When the front seats are moved forward,
their origina l position is stored . When it is
moved back, the seat automatically stops in
this position. To move the seat even further
back, you have to release the switch @ and re
activate it.
The head restraints from the front seats, de
pending on the seat height that has been set,
are automatically retracted when the seat
backs are folded down . They return to their
or iginal pos ition aga in when the seatbacks for
the front seats are raised .
(D Tips
With the driver's or passenger's door
closed, the correspond ing switch to move
the seat is inoperative.
Seat memory
Memory for driver's seat
Applies to vehicles: with seat memo ry
The seat adjustment settings for two drivers
can be stored using the memory buttons in
the driver's door.
Fig. 70 Drive r's door: Seat memory
In addition to the setting for the driver's seat ,
the exterior rear view mirror setting can be
stored and recalled through seat memory if
the vehicle is properly equipped.
Storing and recalling settings
With the help of the memory buttons 1 and 2
c:> fig. 70 the settings for two different drivers
can be stored and recalled
c:> page 65.
The current settings are also automatically as signed to the remote control key being used
Seats and storage 65
when the vehicle is locked . When the vehicle
is un locked, the settings assigned to the re
mote control key being used are automatica lly
recalled.
Turning seat memory on and off
If the I ON/OFF I switch is depressed, the seat
memory is inoperative. The word
OFF in the
I ON/O FF I switch illuminates.
Al l the stored sett ings are retained. We rec
ommend using the
ION/O FF I switch and deac
tivating the seat memory if the vehicle is only
going to be used
temporarily by a driver
whose settings are not going to be stored.
Storing and recalling settings
Applies to vehicles : with seat memory
Before you can store or recall your settings,
the
ION/OFF I switch on the seat memory must
be engaged (not ra ised) .
Storing settings
.,. Adjust the driver's seat .
.,. Adjust the two exterior mirrors.
.,. Press the
ISETI button and hold it down . In
addition, press one of the memory buttons
for at least one second .
.,. Release the buttons . The settings are now
sto red under the corresponding memory
button.
Recalling settings
.,. If the driver's door is open, tap the corre
sponding memory button briefly .
.,. If the driver's door is closed, press the ap
propriate memory button until the stored
position is reached.
Successful storage is confirmed audibly and by the light in the
ISETI button i llum inating
c:> page 65, fig. 70 .
When the vehicle is locked , the current set
tings are stored and assigned to the remote control key. But the settings stored under
memo ry buttons 1 to 2 are not deleted. They
can be recalled at any time. When the vehicle ..,.
Page 70 of 316

68 Seats and storage
R emoving the h ead re straint s
.,. Fold the backrest forward
Q page 70.
.,. Move the head restraint upward as far as it
can go.
.,. Press the release @
Q fig. 74 with the me
chanical key
Q page 39 and the button @
r:::> fig. 73. Pull the head restraint out of the
backrest at the same timer:::>&_ .
I n st all ing th e head re st ra ints
.,. Slide the posts on the head restra int down
into the guides until you feel the posts click
into place.
.,. Press the button @
Q fig. 73 and slide the
head restraint all the way down. You shou ld
not be able to pull the head restra int out of
the backrest .
So that the driver can have a better view to
the rear, the head restraints should be pushed
down completely when the rear seats are not
occupied.
A WARNING
- Only remove the rear seat head restraints
when necessa ry in order to i nstall a chi ld
seat. Install the head restraint again im
mediately once the child seat is removed.
Driv ing without head restraints or with
head restraints that are not properly ad
justed increases the risk of serious or fa
tal neck injury dramatically .
- Read and heed all WARNINGS
r:::>page 147.
@ Tips
Correctly adjusted head restraints and
safety belts are an extremely effective
comb inat ion of safety features.
Center armrest
The center armrest can be adjusted to several
levels.
0 g ~
"' "' a,
F ig. 75 Arm rest between the driver's/front passenger's
seats.
A dj usting the cent er arm rest
.,. To adjust the ang le, raise the arm rest from
the starting position
r:::> fig . 75 detent by de
tent.
.. To bring the armrest back into the starting
position, raise it out of the top detent and
fold it back down.
The armrest can slide forward and back.
Luggage compartment
Loading luggage compartment
Items of luggage must be stowed securely.
Fig. 76 Place heavy objects as far forward as possib le.
Note the following to preserve the ve hicle's
good handling charac teristics .
.,. Distribute the load as evenly as possible .
.,. Place heavy objects as far forward as poss i-
ble
Q fig . 76. .,.
Page 72 of 316
70 Seats and storage
A WARNING
For reasons of strength, only objects with
a maximum weight of 5 kg should be car
ried in the storage net. Heavier objects are
not adequately secured. There is risk of
personal injury.
Enlarging cargo capacity of the vehicle
interior
Appl ies to vehicles: with folding rear seatback
The seat backs can be folded forward to en
large the cargo capacity.
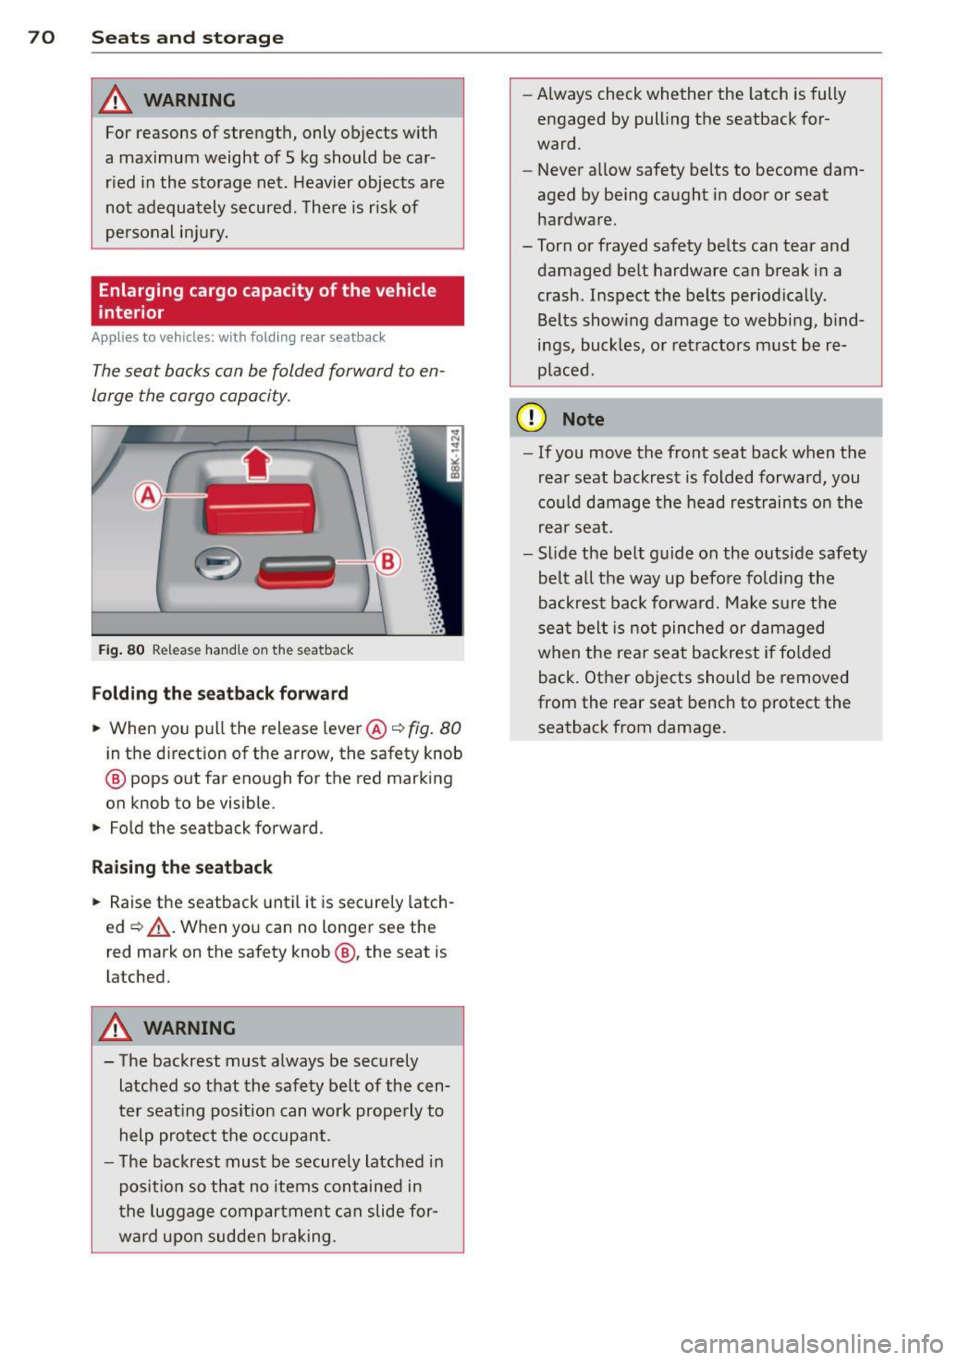
Fig. 80 Release handle on the seatback
Folding the seatback forward
., When you pull the release lever @ c::> fig. 80
in the direction of the arrow, the safety knob
@ pops out far enough for the red marking
on knob to be visible .
., Fold the seatback forward.
Raising the seatback
., Raise the seatback until it is securely latch
ed ~,&.. . When you can no longer see the
red mark on the safety knob@, the seat is
latched.
A WARNING
- The backrest must always be securely
latched so that the safety belt of the cen
ter seating position can work properly to
help protect the occupant.
- The backrest must be securely latched in
position so that no items contained in
the luggage compartment can slide for
ward upon sudden braking . -
Always check whether the latch is fully
engaged by pulling the seatback for
ward.
- Never allow safety belts to become dam
aged by being caught in door or seat hardware.
-Torn or frayed safety belts can tear and
damaged belt hardware can break in a
crash . Inspect the belts periodically.
Belts showing damage to webbing, bind
ings, buckles, or retractors must be re
placed.
(D Note
- If you move the front seat back when the
rear seat backrest is folded forward, you
could damage the head restraints on the
rear seat.
- Slide the belt guide on the outside safety
belt all the way up before folding the
backrest back forward. Make sure the
seat belt is not pinched or damaged
when the rear seat backrest if folded
back. Other objects should be removed
from the rear seat bench to protect the
seatback from damage.
Page 73 of 316
Enlarging cargo capacity of the luggage
compartment
Applies to vehicles: with fold ing rear sea tback
The seat backs can be folded forward to en
large the cargo capacity .
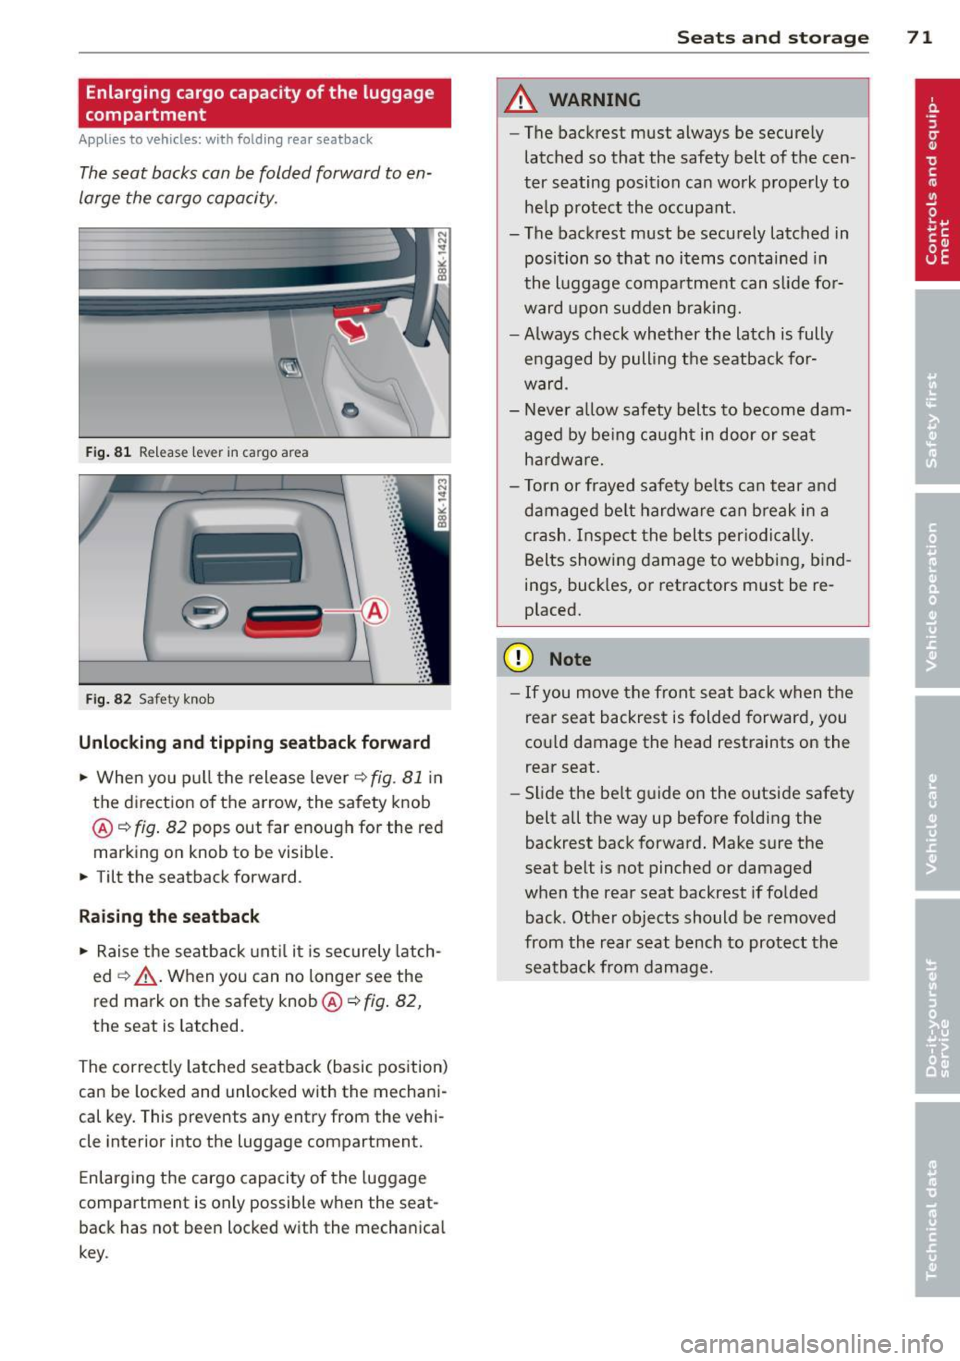
Fig. 81 Release lever in cargo area
'
-
-
. -~ .
Fig. 82 Safety knob
•
·:: ·:: ·:: · : : ·::
· ::
... : :·: ·::
· ::
·:: ·:: · ::
· ::
· :: ·:: ~: :
· ::
· ::
· ::
· :: ... .. ...
Unlocking and tipping seatback forward
.. When you pu ll the release lever c::> fig . 81 in
the direction of the arrow, the safety knob
@ c::>
fig. 82 pops out far enough for the red
marking on knob to be visible.
.. Tilt the seatback forward .
Raising the seatback
.. Raise the seatback until it is securely latch
ed
c::> _& . When you can no longer see the
red mark on the safety knob @c::>
fig. 82,
the seat is Latched.
The correct ly Latched seatback (basic pos ition)
can be Locked and unlocked with the mechani
cal key. This prevents any entry from the vehi
cle inter ior into the Luggage compartment.
Enlarging the cargo capacity of the luggage
compartment is only possible when the seat back has not been locked with the mechanical
key .
Seats and storage 71
A WARNING
-The backrest must always be secure ly
latched so that the safety belt of th e cen
ter seating position can work properly to
he lp protect the occupant.
- The backrest must be securely Latched in
position so that no items contained in
the Luggage compartment can slide fo r
ward upon sudden braking.
- Always check whether the Latch is fully
e ngaged by pull ing the seatback for
ward.
- Never allow safety belts to become dam
aged by being caught in door or seat
hardware.
- Torn or frayed safety be lts can tear and
damaged belt hardware can break in a
crash. Inspect the belts periodically.
Belts showing damage to webbing, bind
ings, buckles, or retractors must be re
placed.
(D Note
- If you move the front seat back when the
rear seat backrest is folded forward, you
co uld damage the head restraints on the
rear seat .
- Slide the be lt guide on the outside safety
belt all the way up before folding the
backrest back forward. Make sure the
seat belt is not pinched or damaged
when the rear seat backrest if folded
back . Other objects should be removed
from the rear seat bench to protect the
seatback from damage.
Page 74 of 316
7 2 Seats and storage
locking the seatback
Appli es to vehicles: with fold ing rear seatback
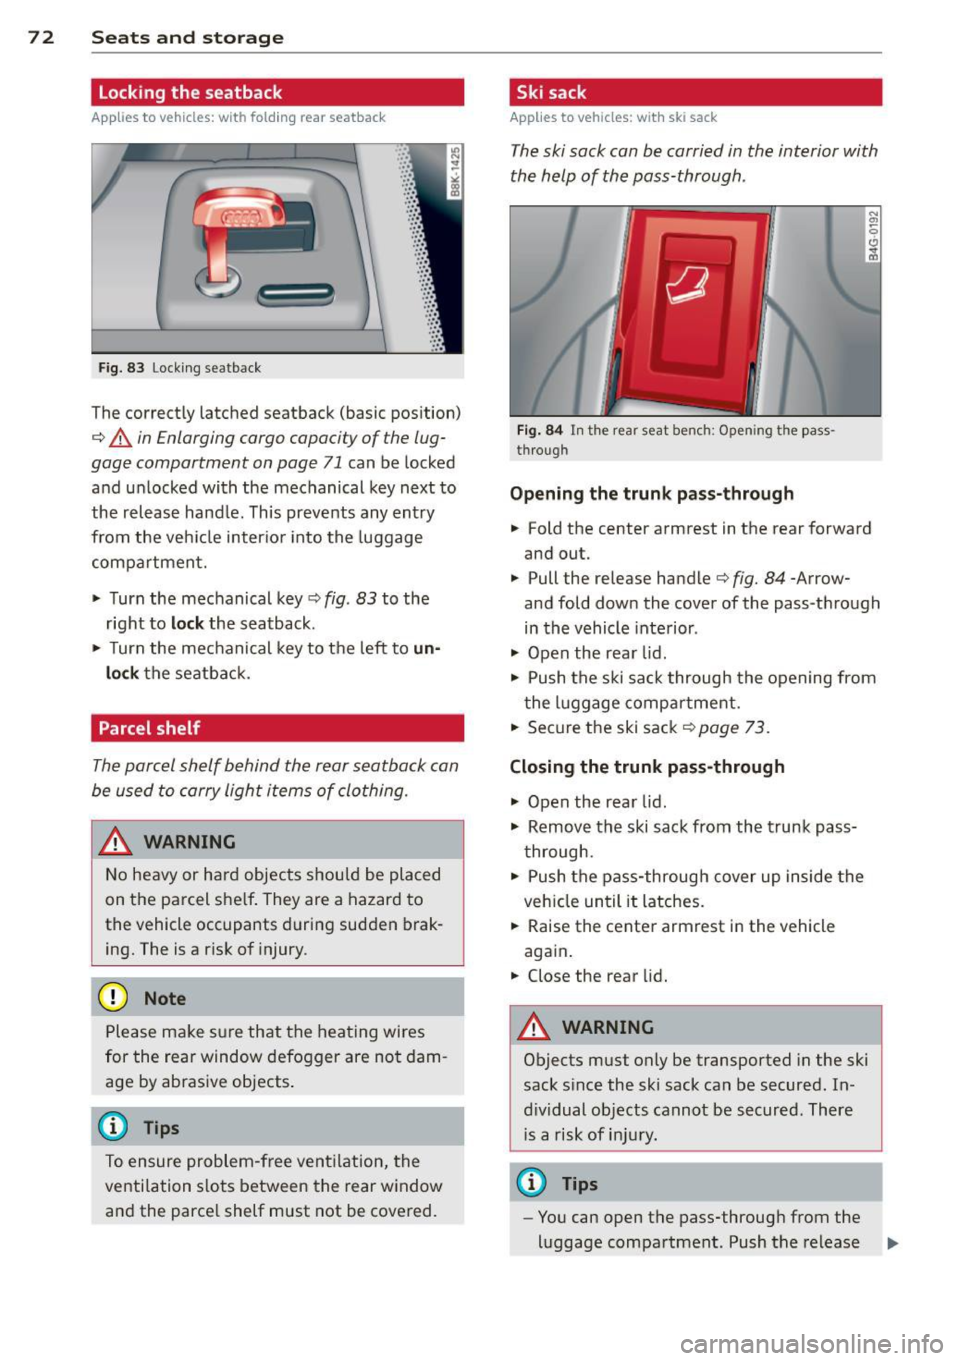
Fig. 83 Lock ing seatback
.. ... ,:: ·:: ·: : ·:: • :: ... ,: ·: ... .. ·::
· ::
•: : ·:: · :: ·:: · ::
· ::
· ::
· :: ·:: ·:: · :: ...
The correctly latched seatback (basic pos ition)
¢ A in Enlarging cargo capacity of the lug
gage compartment on page 71
can be locked
and unlocked with the mechanical key next to
the release hand le . This prevents any entry
from the vehi cle inter io r i nto the luggage
compartment.
.. Turn the mechanical key¢
fig. 83 to the
r ight to
loc k the seatback .
.. Turn the mec hani cal key to the left to
un
lock
the seatba ck.
Parcel shelf
The parcel shelf behind the rear seatback can
be used to carry light items of clothing.
A WARNING
N o heavy or ha rd objec ts shou ld be placed
on the parcel she lf . They are a hazard to
the vehicle occupants during sudden brak
ing. The is a r is k of injury .
(D Note
Please ma ke s ure that the heating wires
for the rear window defogger are no t dam
age by abrasive objects .
@ Tips
To ensure problem-free ventilation, the
ventilation s lots between the rear window
and the parce l shelf must not be cove red.
Ski sack
Applies to vehicles: w ith ski sack
The ski sack can be carried in the interior with
the help of the pass-through .
Fig . 84 In t he rear seat bench: Opening the pass
through
Opening the trunk p ass-through
.. Fold the center armrest in the rear forward
and out.
.. Pull the release handle¢
fig. 84 -Arrow
and fold dow n the cover of the pass -through
in the vehicle inte rior .
.. Open the rea r lid.
.. Push the ski sa ck through the opening from
the l uggage compar tment.
.. Secure the ski sack¢
page 73.
Closing the trunk pass -through
.. Open the rear lid .
.. Remove the ski sack from the trunk pass
through .
.. Push the pass-through cover up inside the
veh icle until it latches.
.. Raise the center armrest in the vehicle
aga in .
.. Close the rear lid.
A WARNING
=
Objects must only be transported in the ski
sack s ince the ski sack can be secured. In
d iv idual objects cannot be secured. There
i s a risk of in ju ry.
@ Tips
- You can open the pass-through from the
luggage compartment. Push the release
II>
Page 148 of 316
146 Driving Safely
• Always keep both feet in the footwell so
that you are in control of the vehicle at all
times.
For detailed information on how to adjust the
driver's seat, see
¢ page 63.
A WARNING
Drivers who are unbelted, out of position
or too close to the airbag can be seriously
injured by an airbag as it unfolds. To help
reduce the risk of serious personal injury:
- Always adjust the driver's seat and the
steering wheel so that there are at least
10 inches (25 cm) between your breast
bone and the steering wheel.
- Always hold the steering wheel on the
outside of the steering wheel rim with
your hands at the 9 o'clock and 3 o'clock positions to help reduce the risk of per
sonal injury if the driver's airbag inflates.
- Never hold the steering wheel at the
12 o'clock position or with your hands at
other positions inside the steering wheel
rim or on the steering wheel hub. Hold
ing the steering wheel the wrong way
can cause serious injuries to the hands,
arms and head if the driver's airbag de
ploys.
- Pointing the steering wheel toward your
face decreases the ability of the supple
mental driver 's airbag to protect you in a
collision .
- Always sit in an upright position and nev
er lean against or place any part of your
body too close to the area where the air
bags are located.
- Before driving, always adjust the front
seats and head restraints properly and
make sure that all passengers are prop
erly restrained.
- Never adjust the seats while the vehicle
is moving . Your seat may move unexpect
edly and you could lose control of the ve
hicle.
- Never drive with the backrest reclined or
tilted far back! The farther the backrests
are tilted back, the greater the risk of in- jury due to incorrect positioning of the
safety belt and improper seating posi
tion.
- Children must always ride in child safety
seats ¢
page 186. Special precautions
apply when installing a child safety seat
on the front passenger seat¢
page 162 .
Proper seating position for the front
passenger
The proper front passenger seating position
is important for safe, relaxed driving .
For your own safety and to reduce the risk of
injury in the event of an accident, we recom
mend that you adjust the seat for the front
passenger to the following position :
• Move the front passenger seat back as far
as possible . There must be a minimum of
10 inches (25 cm) between the breastbone
and the instrument panel¢,&. .
• Adjust the angle of the seatback so that it is
in an upright position and your back comes
in full contact with it whenever the vehicle is
moving.
• Applies to vehicles with adjustable head re
straints: Adjust the head restraint so the up
per edge is as even as possible with the top
of your head. If tha t is not possible, try to
adjust the head restraint so that it is as
close to this position as possible.
• Keep both feet flat on the floor in front of
the front passenger seat.
• Fasten and wear safety belts correctly
¢page 157.
For detailed information on how to adjust the
front passenger's seat, see
¢ page 61.
A WARNING
-
Front seat passengers who are unbelted,
out of position or too close to the airbag
can be seriously injured or killed by the air
bag as it unfolds. To help reduce the risk of
serious personal injury:
Page 149 of 316
-Passengers must always sit in an upright
position and never lean against or place
any part of their body too close to the
area where the airbags are located.
- Passengers who are unbelted, out of po
sition or too close to the airbag can be
seriously injured by an airbag as it un
folds with great force in the blink of an
eye .
- Always make sure that there are at least
10 inches (25 cm) between the front
passenger's breastbone and the instru
ment panel.
- Each passenger must always sit on a seat
of their own and properly fasten and
wear the safety belt belonging to that seat.
- Before driving, always adjust the front
passenger seat and head restraint prop
erly.
- Always keep your feet on the floor in
front of the seat. Never rest them on the
seat, instrument panel, out of the win
dow, etc. The airbag system and safety
belt will not be able to protect you prop
erly and can even increase the risk of in
jury in a crash .
- Never drive with the backrest reclined or
tilted far back! The farther the backrests
are tilted back, the greater the risk of in
jury due to incorrect positioning of the
safety belt and improper seating posi
tion.
- Children must always ride in child safety
seats <=:>
page 186 . Special precautions
apply when installing a child safety seat
on the front passenger seat
<=:> page 162.
Proper seating positions for passengers
in rear seats
Rear seat passengers must sit upright with
both feet on the floor consistent with their
physical size and be properly restrained
whenever the vehicle is in use.
To reduce the risk of injury caused by an incor
rect seating position in the event of a sudden
braking maneuver or an accident, your pas-
Driving Safely 147
sengers on the rear bench seat must always
observe the following:
.,. Make sure that the seatback is securely
latched in the upright position<=:>
page 70.
.,. Keep both feet flat in the footwell in front
of the rear seat.
.,. Fasten and wear safety belts properly
<=:>page 157 .
.,. Make sure that children are always properly
restrained in a child restraint that is appro
priate for their size and age
Q page 186.
A WARNING
Passengers who are improperly seated on
the rear seat can be seriously injured in a
crash.
- Each passenger must always sit on a seat
of their own and properly fasten and
wear the safety belt belonging to that
seat.
- Safety belts only offer maximum protec
tion when the seatback is securely latch
ed in the upright position and the safety
belts are properly positioned on the
body. By not sitting upright, a rear seat
passenger increases the risk of personal
injury from improperly positioned safety
belts!
- Always adjust the head restraint properly
so that it can give maximum protection .
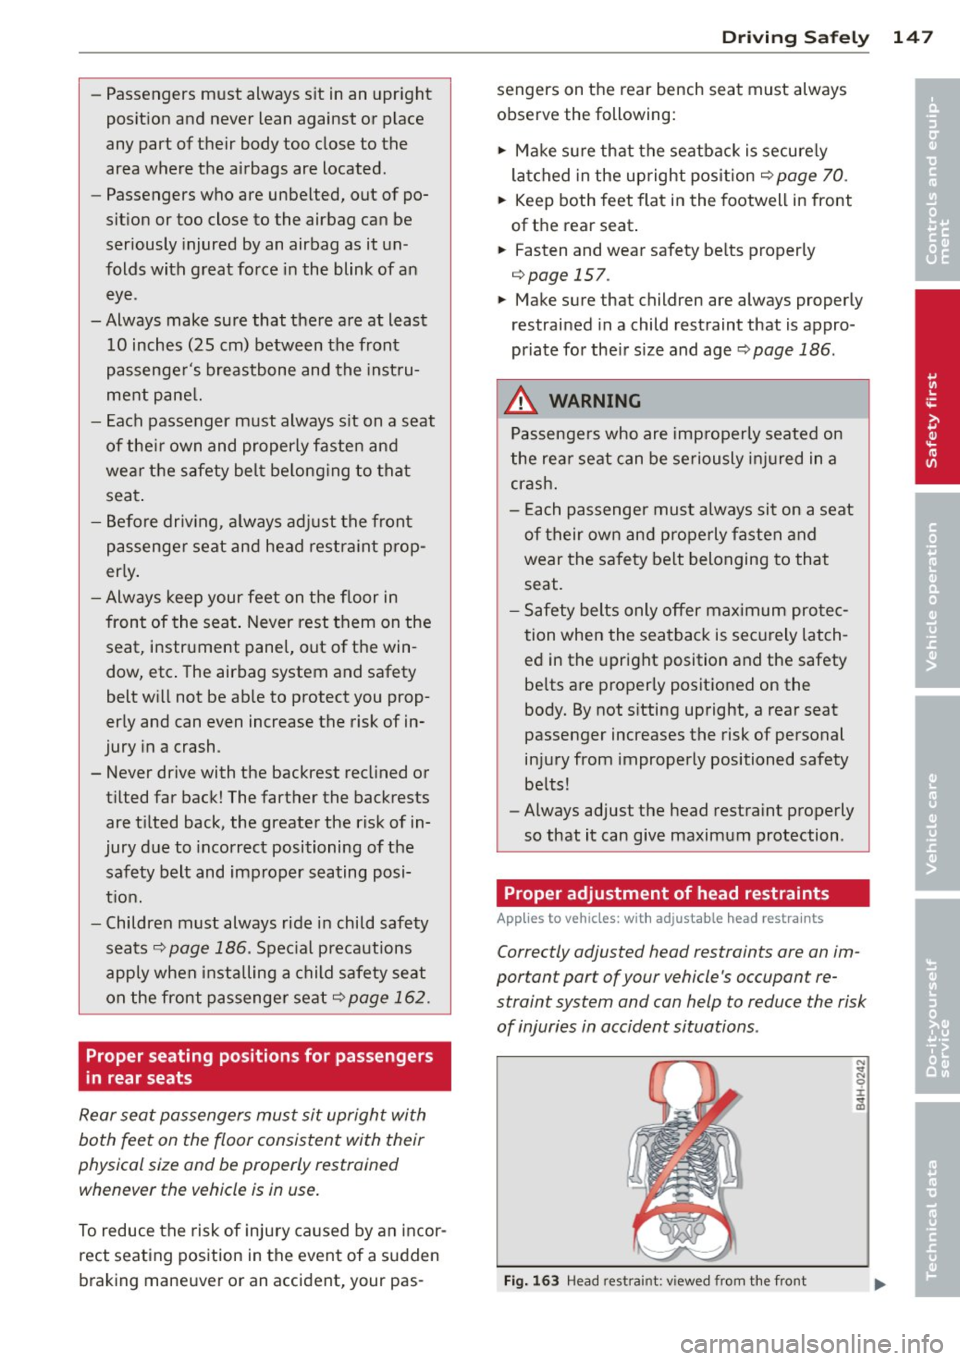
Proper adjustment of head restraints
Applies to vehicles: with adjustable head restra ints
Correctly adjusted head restraints ore on im
portant por t of your vehicle 's occupant re
straint system and con help to reduce the risk
of injuries in occident situations .
Fig. 163 Head restra int: v iewed from the front
"' ...
"' 0 ±
~
•
•
Page 174 of 316
172 Airbag system
must always sit in an upright position,
must not lean against or place any part
of their body too close to the area where
the airbags are located .
- Occupants who are unbelted, out of posi
tion or too close to the airbag can be se riously injured by an airbag as it unfolds
with great force in the blink of an eye
~page 163.
A WARNING
A child in a rearward-facing child safety
seat installed on the front passenger seat
will be seriously injured and can be killed if
the front airbag inflates -even with an Ad
vanced Airbag System.
- The inflating airbag will hit the child
safety seat or infant carrier with great
force and will smash the child safety seat
and child against the backrest, center
armrest, door or roof.
- Always install rear-facing child safety
seats on the rear seat.
- If you must install a rearward facing
child safety seat on the front passenger
seat because of exceptional circumstan
ces and the
PASSENGER AIR BAG OFF
light does not come on and stay on, im
mediately install the rear-facing child
safety seat in a rear seating position and
have the airbag system inspected by your
authorized Audi dealer.
A WARNING
Objects between you and the airbag will
increase the risk of injury in a crash by in
terfering with the way the airbag unfolds
or by being pushed into you as the airbag
inflates.
- Never hold things in your hands or on
your lap when the vehicle is in use.
- Never transport items on or in the area of the front passenger seat. Objects
could move into the area of the front air
bags during braking or other sudden ma
neuver and become dangerous projec- tiles that can cause serious personal in
jury if the airbags inflate.
- Never place or attach accessories or oth
er objects (such as cupholders, tele phone brackets, large, heavy or bulky ob
jects) on the doors, over or near the area marked "AIRBAG" on the steering wheel,
instrument panel, seat backrests or be
tween those areas and yourself. These
objects could cause injury in a crash, es
pecially when the airbags inflate.
- Never recline the front passenger's seat
to transport objects. Items can also
move into the area of the side airbag or
the front airbag during braking or in a
sudden maneuver. Objects near the air
bags can become projectiles and cause
injury, particularly when the seat is re
clined.
A WARNING
'-
The fine dust created when airbags deploy
can cause breathing problems for people
with a history of asthma or other breath
ing conditions.
- To reduce the risk of breathing problems, those with asthma or other respiratory
conditions should get fresh air right
away by getting out of the vehicle or
opening windows or doors.
- If you are in a collision in which airbags
deploy, wash your hands and face with
mild soap and water before eating.
- Be careful not to get the dust into your
eyes, or into any cuts or scratches.
- If the residue should get into your eyes,
flush them with water.