airbag AUDI A5 COUPE 2014 Owners Manual
[x] Cancel search | Manufacturer: AUDI, Model Year: 2014, Model line: A5 COUPE, Model: AUDI A5 COUPE 2014Pages: 286, PDF Size: 70.99 MB
Page 5 of 286
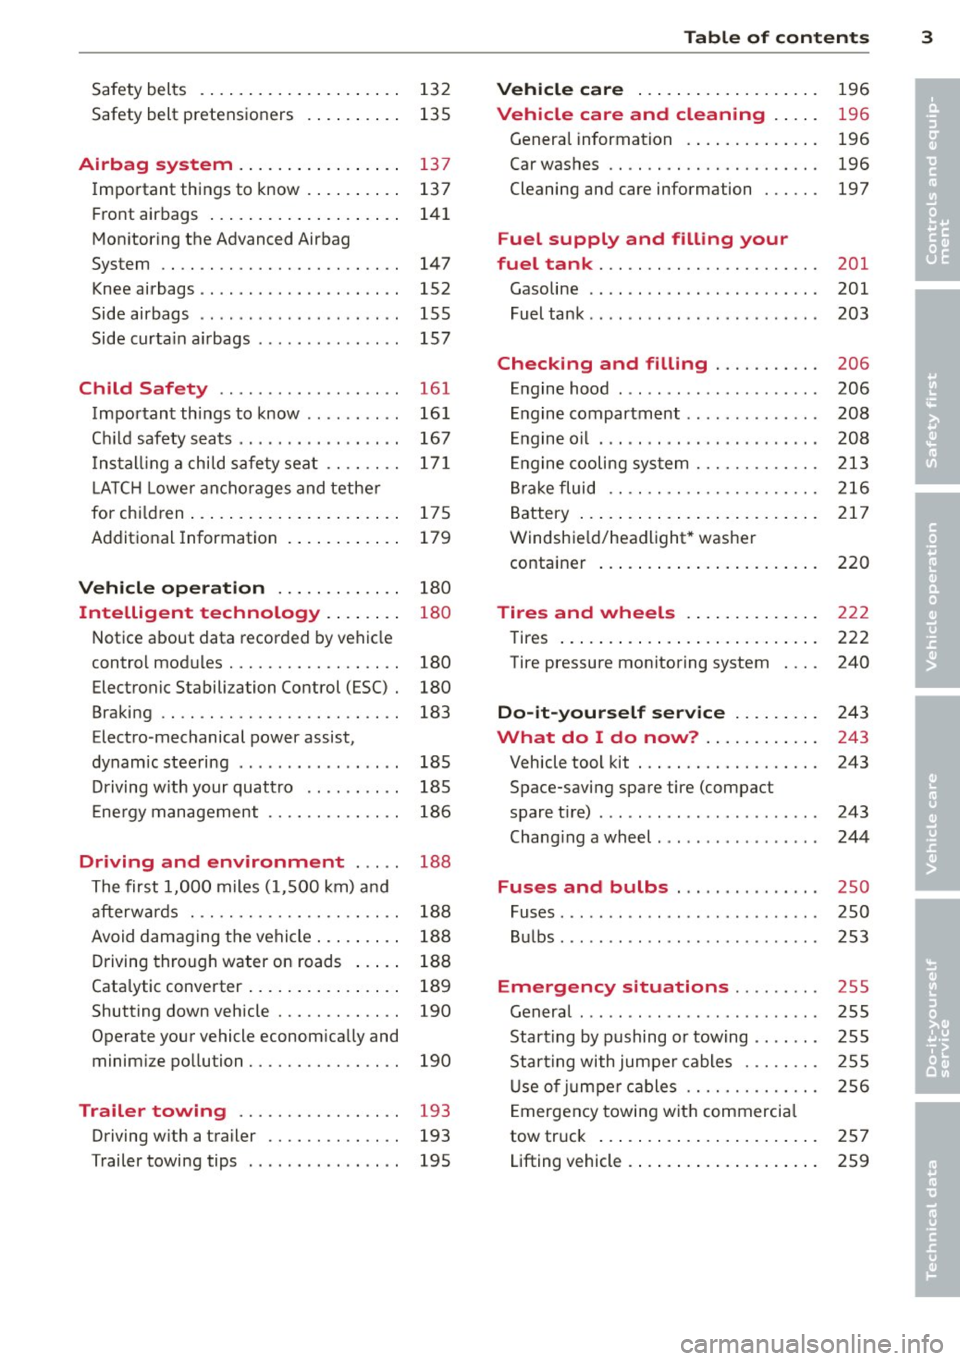
Safety belts . . . . . . . . . . . . . . . . . . . . . 132
Safety belt pretens ioners . . . . . . . . . . 135
Airbag system .. .... ... .. .. .. .. 137
I mportant th ings to know . . . . . . . . . . 137
Fr ont airbags . . . . . . . . . . . . . . . . . . . . 141
Mon itor ing the Advanced Airbag
System . . . . . . . . . . . . . . . . . . . . . . . . . 147
Knee airbags . . . . . . . . . . . . . . . . . . . . . 152
Side airbags . . . . . . . . . . . . . . . . . . . . . 155
Side curta in a irbags . . . . . . . . . . . . . . . 157
Ch ild Safety ........ .... ... ... .
Important things to know ....... .. .
C hil d safety s eats .... ... .. .. .. .. . .
I n st all ing a chi ld safe ty seat .. .. .. . .
L A TC H Lowe r ancho rages and tethe r
for ch ild ren ..... ...... ... .. .. .. . .
A ddit ional Information 161
16
1
167
17 1
175
179
Vehicle operation . . . . . . . . . . . . . 180
Intelligent technology . . . . . . . . 180
N ot ice about data recorded by veh icle
contro l mod ules . . . . . . . . . . . . . . . . . . 180
Electronic Stabili zation Control (ESC) . 180
Braking . . . . . . . . . . . . . . . . . . . . . . . . . 183
Elect ro -mechanical power assist,
dynam ic stee ring . . . . . . . . . . . . . . . . . 185
Dr iving w ith your quattro . . . . . . . . . . 185
E ne rgy management . . . . . . . . . . . . . . 186
Driving and environment . . . . . 188
T he first 1, 000 miles (1, 500 km) a nd
afterw ards . . . . . . . . . . . . . . . . . . . . . . 18 8
Avoid damaging the vehi cle . . . . . . . . . 188
D riving through water on roads . . . . . 188
Cata lytic converter . . . . . . . . . . . . . . . . 189
Shutting down vehicle . . . . . . . . . . . . . 190
Operate your vehicle econom ica lly and
minim ize po lluti on . . . . . . . . . . . . . . . . 190
Trailer towing . . . . . . . . . . . . . . . . . 193
Driving w ith a tra iler . . . . . . . . . . . . . . 193
T railer towing tips . . . . . . . . . . . . . . . . 195
Table of contents 3
Vehicle care . . . . . . . . . . . . . . . . . . .
196
Vehicle care and cleaning . . . . . 196
Genera l information . . . . . . . . . . . . . . 196
Car washes . . . . . . . . . . . . . . . . . . . . . . 196
Cleaning and care information . . . . . . 197
Fuel supply and filling your
fuel tank . . . . . . . . . . . . . . . . . . . . . . .
201
Gasoline . . . . . . . . . . . . . . . . . . . . . . . . 201
Fuel tank . . . . . . . . . . . . . . . . . . . . . . . . 203
Checking and filling . . . . . . . . . . . 206
E n gine hood . . . . . . . . . . . . . . . . . . . . . 206
E ngine compartment . . . . . . . . . . . . . . 208
E ngine o il . . . . . . . . . . . . . . . . . . . . . . . 20 8
En gine cooling sy stem . . . . . . . . . . . . . 213
Br ake fluid . . . . . . . . . . . . . . . . . . . . . . 216
B attery . . . . . . . . . . . . . . . . . . . . . . . . . 217
Windshie ld/headlight* was her
containe r . . . . . . . . . . . . . . . . . . . . . . . 220
Tires and wheels . . . . . . . . . . . . . . 222
Tires . . . . . . . . . . . . . . . . . . . . . . . . . . . 222
Tire pressure monitor ing system 240
Do-it-yourself service . . . . . . . . . 243
What do I do now? . . . . . . . . . . . . 243
Vehicle tool kit . . . . . . . . . . . . . . . . . . . 243
Space-saving spare tire (compact
spare t ire) . . . . . . . . . . . . . . . . . . . . . . . 243
Chang ing a wheel . . . . . . . . . . . . . . . . . 244
Fuses and bulbs . . . . . . . . . . . . . . . 250
Fuses ... .. .. .. .. .. . .. .... .... .. . 250
B ul bs. . . . . . . . . . . . . . . . . . . . . . . . . . . 253
Emergency situations . . . . . . . . . 255
Genera l . . . . . . . . . . . . . . . . . . . . . . . . . 255
Start ing by pushing or towing . . . . . . . 255
Star ting with jumpe r cables . . . . . . . . 255
U se o f jumpe r ca bles . . . . . . . . . . . . . . 256
E mergency towing wit h commerci al
tow truck . . . . . . . . . . . . . . . . . . . . . . . 257
Lifting vehicle . . . . . . . . . . . . . . . . . . . . 259
•
•
Page 11 of 286
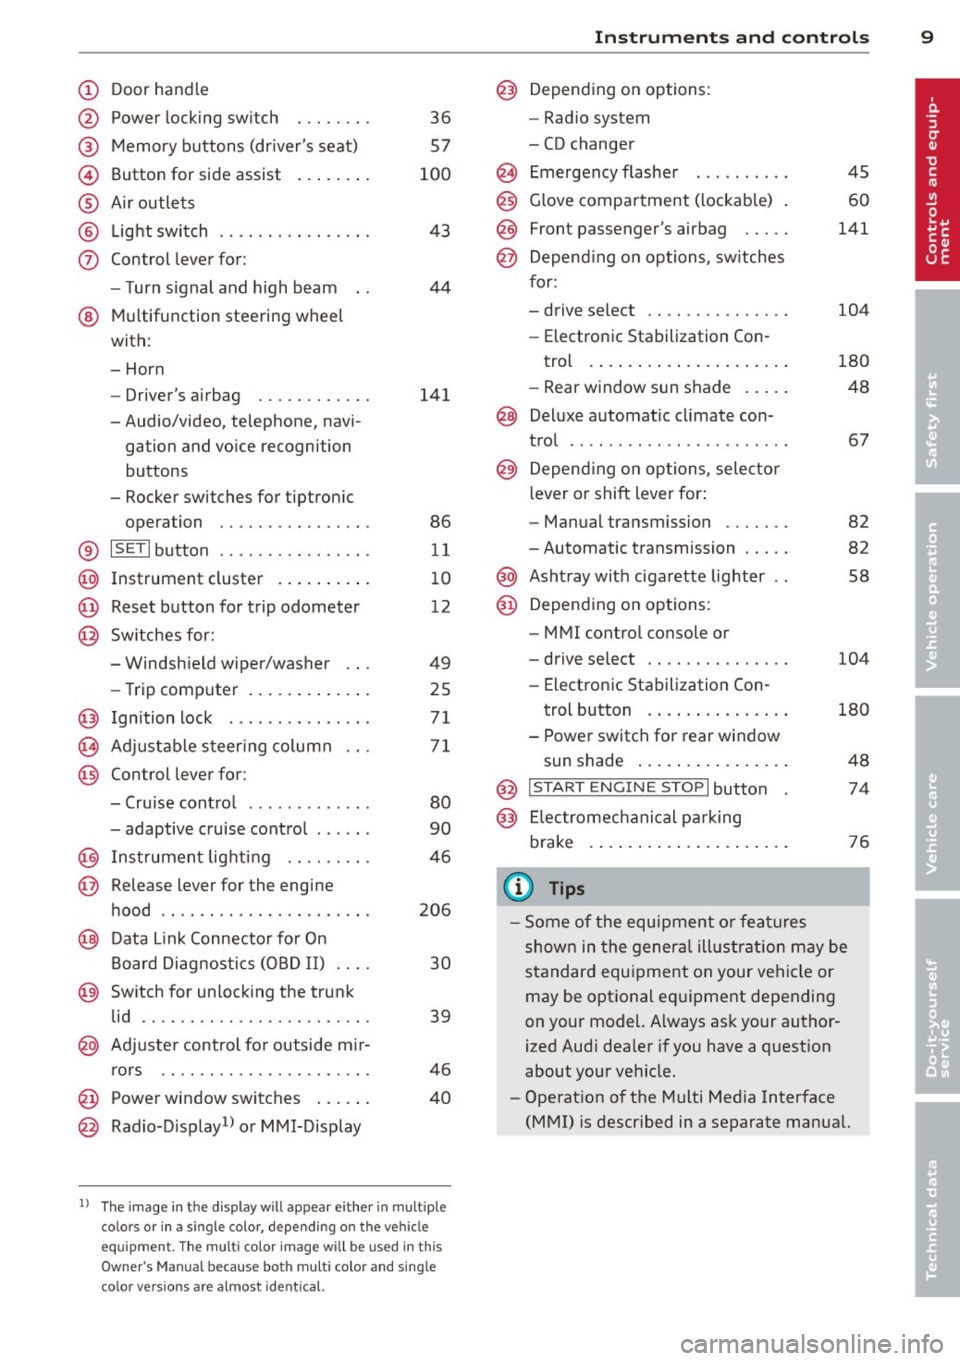
CD
@
®
©
®
®
(j)
Door handle
Power locking sw it ch
Memory buttons (dr iver's seat)
Button for side ass ist
A ir outlets
L ight switch
Control lever for :
- T urn signal and high beam
@ Multifunction steering wheel
with:
- Horn
- Driver's airbag
- Audio/video, telephone, navi-
gation and vo ice recogni tion
buttons
- Rocker switches for tiptroni c
opera tion ........... .... .
® ISET I button .... .... ... .... .
@ Instrument cluster .. ...... . .
@ Reset button for trip odometer
@ Sw itches for:
- Windshield wiper/washer
- Trip computer ..... ... ... . .
@ Ignition lock .............. .
(8) Adjustable steering column
@ Con trol lever for :
- Cruise contro l ......... ... .
- adaptive cruise control ..... .
@ Instrument lighting .... .. .. .
@ Release lever for the engine
hood .. .. .. .. ........... .. .
@ Data L ink Connector for On
Board Diag nostics (OBD II) . .. .
@ Switch for unlocking the trunk
lid .. .. .. ...... ..... ...... .
@ Adjuste r control fo r outside m ir-
r ors .. .. .. .. ........... .. .
@ Power window switches ... .. .
@ Rad io-Display1l or MMI-Display
36
57
100
43
44
141
86
11
10
12
49
25
71
71
80
90
46
206
30
39
46
40
l) T he image in t he d is pl ay will app ea r e ither in mu lt ipl e
col ors or in a singl e co lor , de pen din g o n th e vehicl e
e q ui pment. T he m ulti co lo r im age w ill b e used i n this
O w ner's M anual becau se bo th mu lt i co lo r and sin gle
c o lor ver sio ns are almost iden tic al.
In strument s and control s 9
@) Depending on options:
- Rad io system
- CD changer
Emergency flasher
G love compartment (lockab le)
Front passenger's airbag .....
Depend ing o n options, sw itches
for:
- drive select .. .. .......... .
- Electronic Stabilization Con-
trol . ... .. .. .. . .. ... .... .
- Rear window sun shade .. .. .
@ Deluxe automat ic cl imate con-
trol ...... .. .... .......... .
@) Depending on options, selecto r
lever or shift lever for :
- Manual transmission ...... .
- Automatic transmission .... .
@ Ashtray with cigarette lighter
@ Depend ing on options:
- MMI contro l console or
- drive select .. .... ........ .
- Electronic Stab ilizat ion Con-
45
60
141
104
180
48
67
82
82
58
104
trol button . . . . . . . . . . . . . . . 180
- Power switch for rear window sun shade . . . . . . . . . . . . . . . . 48
@ I START ENG IN E STOPI button 74
@) Electromec hanical pa rking
brake . . . . . . . . . . . . . . . . . . . . . 76
(D Tips
-Some of the equipment o r feat ures
show n in the genera l ill ustration may be
standard equ ipment on your vehicle or
may be optional eq uipment depending
on your model. Always as k your author
ized Aud i dea ler if you have a question
about your vehicle.
- Operat ion of the Multi Med ia Interface
(MMI) is described in a separate manual.
Page 34 of 286
32 Openin g and clo sing
Opening and closing
Power locking system
General description
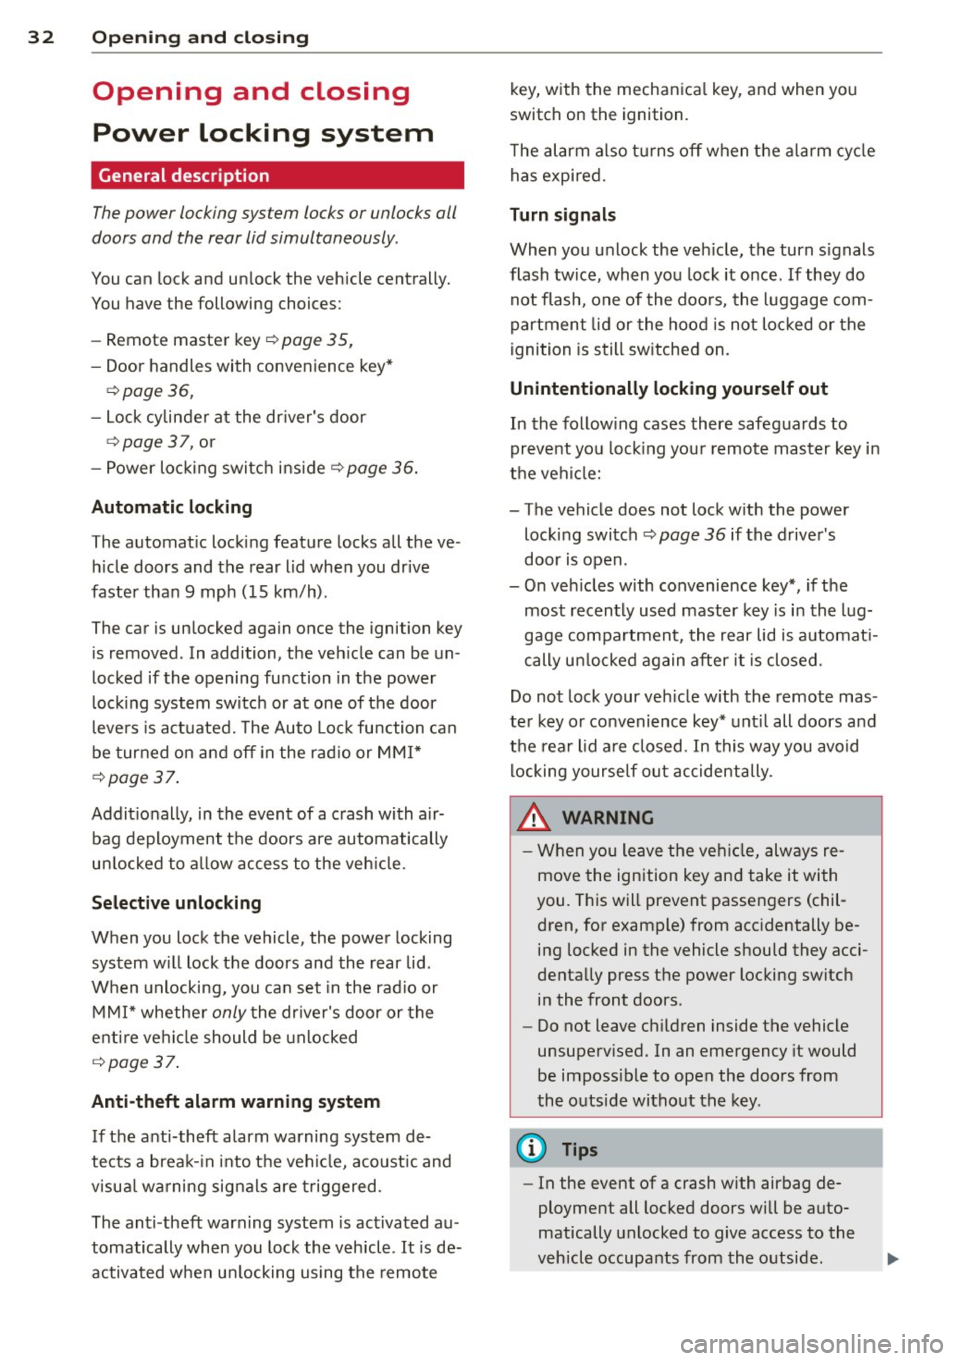
The power locking system locks or unlocks all
doors and the rear lid simultaneously.
You can lock and unlock the vehicle centrally.
You have the following choices:
- Remote master key~
page 35,
-Door handles with convenience key*
~page 36,
-Lock cy linder at the dr iver's door
~ page 37, or
- Power loc king switch inside
~ page 36.
Automatic l ocking
The automatic locking feature locks all the ve
h icle doors and the rear lid when you drive
faster than 9 mph ( 15 km/h) .
The car is unlocked again once the ignition key is removed. In addition, the veh icle can be un
locked if the opening function in the power
lock ing system switch or at one of the door
leve rs is actuated. The Auto Loc k function can
be turned on and off in the rad io or
MMI*
~ page 37.
Addit ionally, in the event of a crash with a ir
bag deployment the doors are automatically
un locked to allow access to the veh icle.
Selective unlocking
When you lock the vehicle, the power locking
system w ill lock the doors and the rear lid .
When unlocking, you can set in the rad io or
MMI* whether
only the dr iver's door or the
enti re ve hicle should be unlocked
~ page 37.
Anti -th eft alarm warning system
If the anti-theft alarm warning system de
tects a break- in into the vehicle, acoust ic and
visua l wa rning signals are triggered.
The anti -theft warn ing system is act ivated au
tomatically when you lock the vehicle .
It is de
activated when u nlocking using the remote key, with the mechanica
l key, and when yo u
switch on the ignition.
T he alarm a lso t urns off when t he a la rm cycle
has expired.
Turn signals
When you u nlock the veh icle, the turn s ignals
flash twice , when you lock it once . If they do
not flash, one of the doo rs, the luggage com
partment lid or the hood is not locked or the
ignition is s till sw itched on.
Unint entionally locking yourself out
In the follow ing cases there safegua rds to
prevent you lock ing you r remote master key in
the vehicle:
- The vehicle does not lock w ith the power
lock ing switch ~
page 36 if the drive r's
door is open .
- On veh ides with convenience key*, if the
most recently used master key is in the lug
gage compa rtment, the rear lid is automat i
cally un locked again after it is closed.
Do not lock your veh icle w ith the remote mas
ter key or convenience key* unt il all doors and
the rea r lid a re closed . In this way you avoid
locking yourself out accidentally .
_& WARNING
-
-When you leave the veh icle, alw ays re
move the ignition key and take it with
you . This will prevent passengers (chil
dren, for example) from acc identally be
ing locked in the vehicle should they acci
dentally press the power locking switch in the front doors .
- Do not leave ch ildren inside the vehicle
unsuperv ised. In an emergency it would
be imposs ible to open the doors from
the o utside without the key .
(D Tips
- In the event of a crash with airbag de
ployment all locked doors will be auto
matically unlocked to give access to the
vehicle occupants from the outside.
Page 39 of 286
- You cannot open the doors or the rear lid
from the
outside (increased security, for ex
amp le when you are stopped at a red light).
- The diodes in the power locking switc h illu
minate when all the doors are closed and
locked.
- You can unlock and open the doors from the
i nside by pul ling on the door hand le .
- If you have a crash and the airbag is activat
ed , the doors automatically un lock .
_& WARNING
- The power locking switch works with the
ignition off and automatically locks the
entire vehicle when it is actuated .
- On a vehicle locked from the outside the
power locking system switch is inopera
t ive.
- locked doors make it more difficult for
emergency workers to get into the vehi
cle, which puts lives at risk . Do not leave
anyone behind in the veh icle, especially
children .
@ Tips
Your vehicle is locked automatically at a
speed of 9 mph (15 km/h) (Auto lock)
¢page 32. You can un lock the vehicle
aga in using the opening function in the
powe r locking system switch~-
Setting power locking
In the radio/MM!*, you can set which doors
the centrol locking system will unlock .
~ Select: I CAR I function button > Central lock
ing .
Or
~ Select: ~IC_A_R~I funct ion button> Car systems *
control button > Vehicle settings > (C entral
locking )* .
Sin gle door unlocki ng /Unl ock door s* -
you
can specify which doors u nlock when you open
the vehicle .
- Se lecting
off / All and pressing the Ii button
on the remote control key unlocks the entire
vehicle.
Opening and clo sin g 3 7
- Select ing o n/Dri ver and pressing the~ but
ton on the remote control key once u nlocks
only the driver's door . In vehicles w ith a con
ven ience key*, only the door whose handle
you pull w ill unlock . If you press the @! but
ton tw ice, the entire vehicle will u nlock . If
you press the [@] button, t he e ntire ve hicle
w ill always lock .
Luggage comp. lock /Lock e xterio r trunk han
dl e -
If you select On , you can no longer open
the luggage compartment us ing the rear lid
hand le ¢
page 39, fig. 28 . In this case, the
r ear lid can be opened with the
l""I bu tton on
the maste r key ¢
poge 35, fig. 22 or with the
l"" I* button in the driver's door ¢ page 39,
fig .
27 .
Ton e when lo cking -if you select On, a tone
will sound when yo u loc k the vehicle .
Auto Lock /Lock when dri ving -if you select
On, the enti re ve hicle w ill lock automatica lly
when the speed reaches 9 mph (15 km/h).
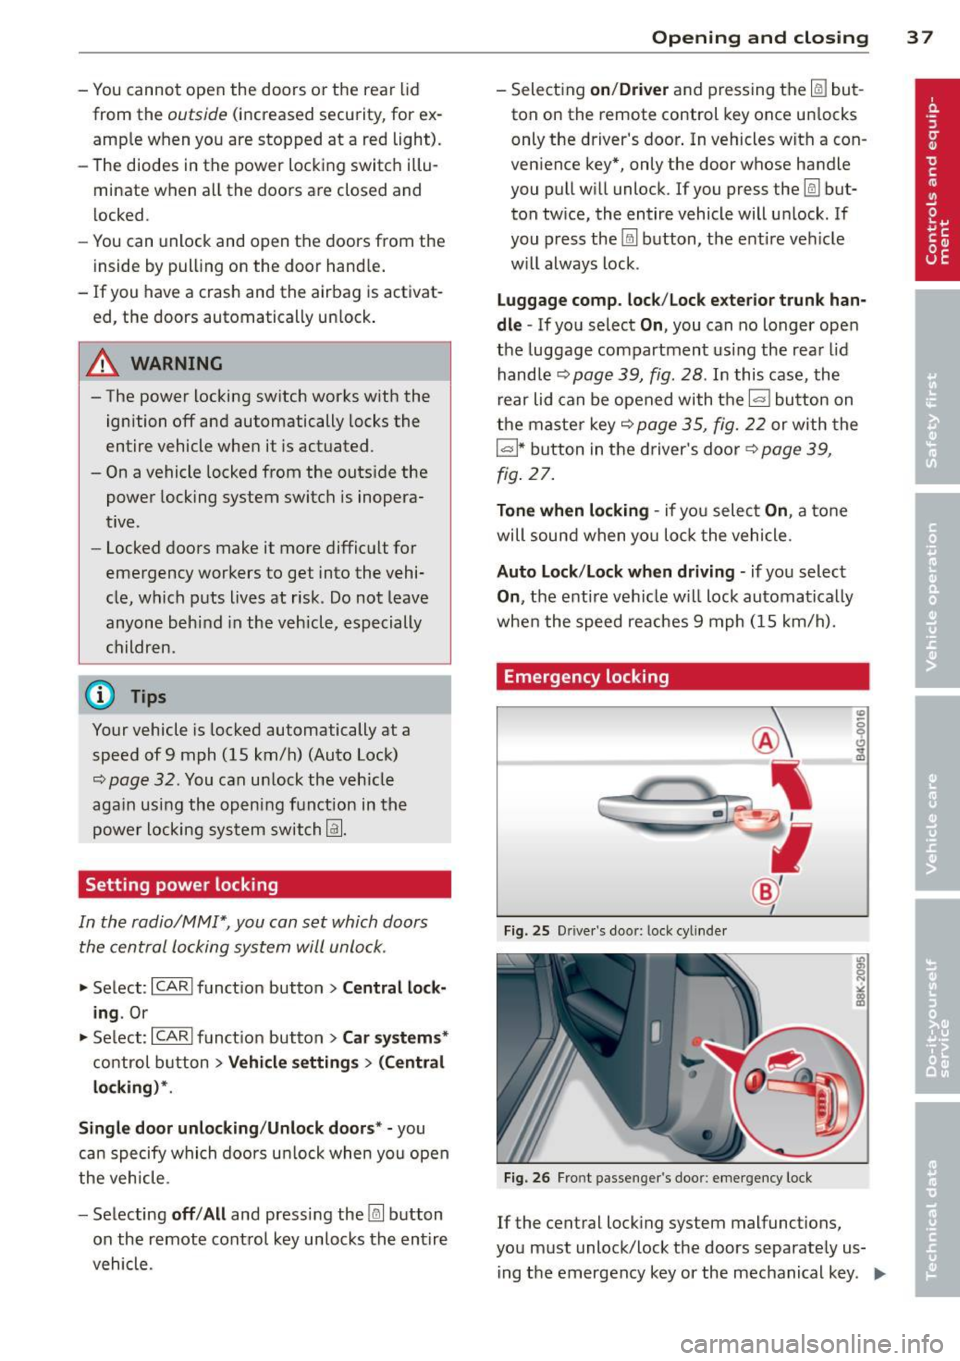
Emergency locking
Fi g. 25 Drive r's doo r: lock cylinde r
Fig. 26 Fro nt passenger 's doo r: emergency lock
If the central lock ing system malfunct ions,
you must unlock/lock the doors separate ly us
ing t he emergency key or the mechanical key .
IJJJ,
Page 47 of 286
The leavin g home function il luminates the
area around the vehicle when unlocking it.
This function can be switched on and off.
The
c o ming h om e and lea ving home func
tions on ly operate when it is dark and the
light switch is in the AUTO position
¢ page 43, fig. 34.
Auto headlight s*
When the light switch is in the A UTO
¢ page 43 position, the switch-on po int of the
lights can be changed in the automatic driving
light function.
Daytime running lights
USA m odel s:
You can switch the dayt ime run
ni ng lights
on and o ff .
Canada mod els:
The function cannot be
turned off .
It is activated a utomat ica lly each
time the ignition is switched on.
Travel mode*
The headlight beam is asymmetrical. This pro
v ides stronger illum ination on the side of the
road on wh ich you are driving .
If you are driv
i ng in a count ry that d rives on the opposite
side of the road from your own country, th is
will cau se glare for on coming dr ivers. To pre
vent glare:
- Trave l mode must be selected in vehicles
with Xenon headlights*.
- In veh icles with halogen headlights, ce rtain
areas of the head light lenses must be cov
ered w ith wate rproof adhesive covers that
prevent light from passing thro ugh. Fo r
more information, please see your author
ized Audi dea ler or author ized repa ir faci lity .
(D Tips
When trave l mode is activated, a display in
the dr iver information system indicates
this each time you switch the ignit io n on.
Clear vi sion 45
Emergency flashers
F ig. 36 Center console: emergency flasher switch
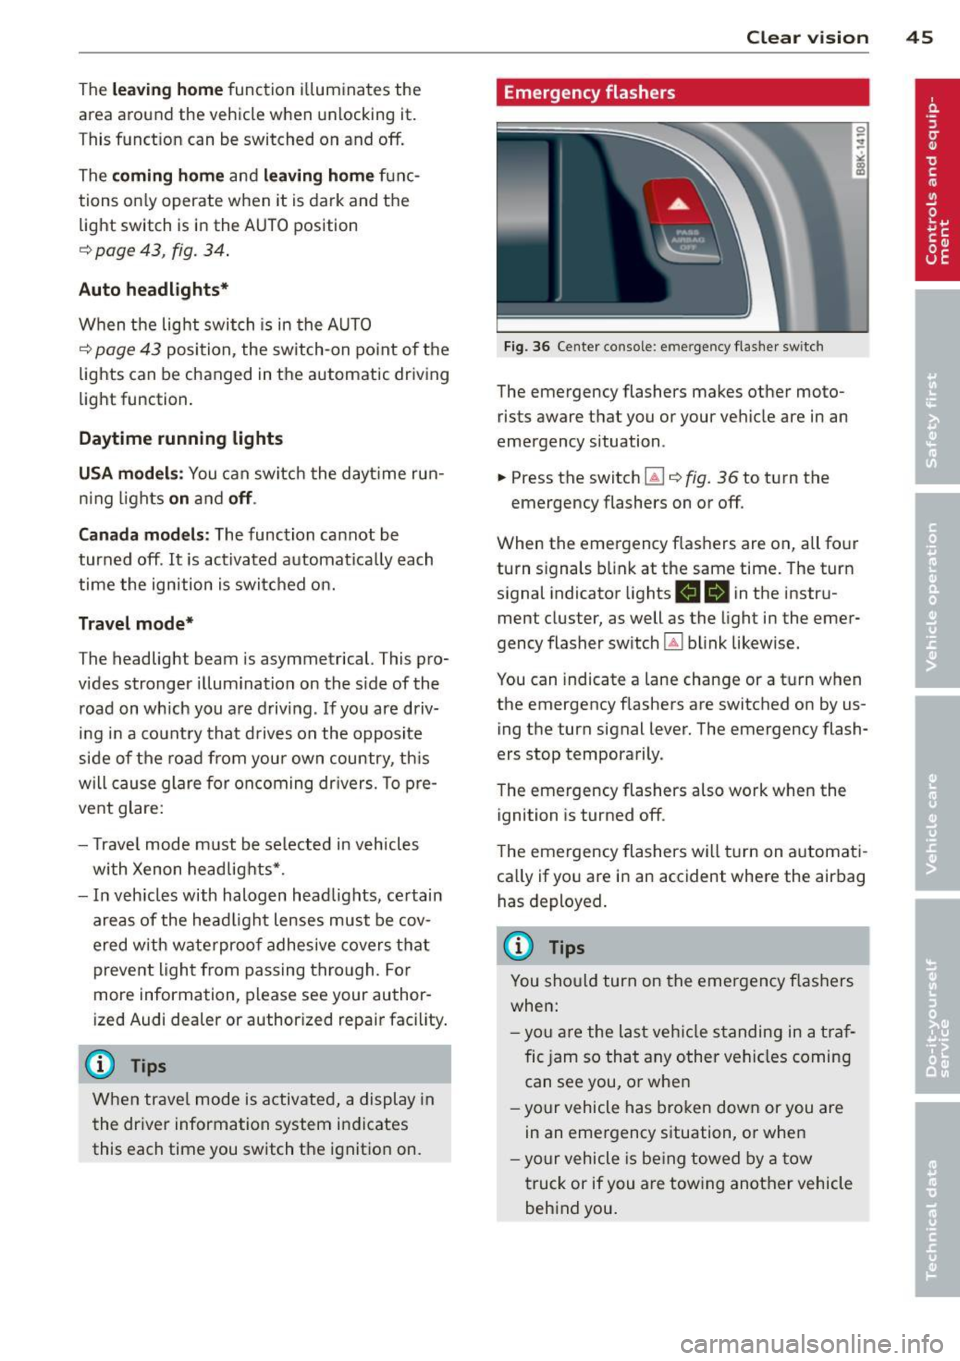
The emergency flashers makes other moto
rists aware that you or your vehicle are in an
emergency situation .
.. Press the switch
Gil¢ fig. 36 to turn the
emergency flashers on or off.
When the emergency flas hers are on, all four
turn signals b link at the same time. The turn
s ignal indicator lights .
1B in the instru
ment cluster, as well as the light in the emer
gency flasher switch ~ blink likewise.
You can indicate a lane change or a tu rn w hen
the emergency flashers are switched on by us
ing the turn signal lever. The emergency flash
ers stop temporarily.
T he emergency flashers also work when the
ignition is turned off.
T he emergency flashers w ill turn on a utomat i
ca lly if yo u are in an accident where the airbag
has deployed.
(D Tips
You sho uld turn on the emergency f las hers
when:
- yo u are the last veh icle standing in a t raf
fic jam so that any other vehi cles coming
can see you, or whe n
- yo ur vehicle has bro ken down or you are
in an eme rgency s ituation, or when
- yo ur vehicle is be ing towed by a tow
truck or if you are tow ing another vehicle
beh ind you.
Page 55 of 286
Seats and storage
General recommen
dations
Why is your seat adjustment so important?
The safety belts and the airbag system can
only provide maximum protection if the front
seats are correctly adjusted.
There are various ways of adjusting the front
seats to provide safe and comfortable support
for the driver and the front passenger. Adjust
your seat properly so that :
- you can easily and quick ly reach all the
switches and controls in the instrument
panel
- your body is properly supported thus reduc ing physical stress and fatigue
- the safety belts and airbag system can offe r
maximum protection
¢ page 137.
In the following sections, you will see exactly
how you can best adjust your seats .
There are special regulations and instructions
for installing a child safety seat on the front passenger's seat. Always follow the informa
tion regard ing child safety provided in
¢ page 161, Child Safety.
.&_ WARNING
-
Refer to ¢ page 119, Driving Safely for
important information, tips, suggestions
and warnings that you should read and fol
low for your own safety and the safety of
your passengers.
.&_ WARNING
Incorrect seating position of the driver and
all other passengers can result in serious
personal injury.
- Always keep your feet on the floor when
the vehicle is in motion -never put your
feet on top of the instrument panel, out of the w indow or on top of the seat cush
ion. This app lies especially to the passen-
S eat s an d sto rage 53
gers . If your seating position is incorrect,
you increase the risk of injury in the case
of sudden braking or an accident . If the
airbag inflates and the seating position
is incorrect, this cou ld result in pe rsonal
in jury or even death.
- It is important for both the driver and front passenger to keep a distance of at least 10 inches (25 cm) between them
selves and the steering wheel and/or in
strumen t panel. If you're s itting any
closer than th is, the airbag system can
not protect you properly. In addition, the
front seats and head restraints m ust be
adj usted to your body height so that they
can give you max imum protect ion.
- Always try to keep as much distance as
possible between yourself and the steer
ing wheel or instrument panel.
- Do not adjust the driver's or front pas senger's seat whi le the vehicle is moving.
Your seat may move unexpectedly, caus
ing sudden loss of veh icle control and
pe rsonal injury. If you adjust you r seat
while the veh icle is moving, you are ou t
of posit ion.
Driver's seat
The correct seat position is important for safe
and relaxed driving .
We recommend that you adjust the dr iver's
seat in the follow ing manner:
.., Adjust the seat in fore and aft direction so
that you can easily push the pedals to the
floor wh ile keeping your knees slightly bent
¢ .&, in Why is your seat adjustment so im
portant? on page 53.
"" Adjust the seatback so that when you sit
w ith your back against the seatback , you can
s ti ll grasp the top of t he steering wheel.
... App lies to vehicles with adjustab le head re
straints: Adjust the head restraint so the up
per edge is as even as possible wit h the top
of your head. If that is not possib le, try to
adjust the head restraint so that it is as .,.
Page 56 of 286
54 Seats and storage
close to this position as possib le
¢ page 56.
A WARNING
Never place any objects in the driver's foot
well. An object could get into the pedal area and interfere with pedal function. In
case of sudden braking or an accident, you
wou ld not be ab le to brake or accelerate .
Front passenger's seat
Always move the front passenger seat into
the rearmost position .
To avoid contact with the airbag whi le it is de
ploying, do not sit any closer to the instru
ment panel than necessary and always wear
the three-point safety belt provided adjusted correctly . We recommend that you adjust the
passenger's seat in the following ma nner:
• Bring the backrest up to an (almost) upr ight
pos it ion. Do not ride with the seat reclined .
• Applies to vehicles with adjustable head re
stra ints: Adjust the head restrain t so the up
per edge is as even as possible with the top
of your head . If that is not possible, try to
adjust the head restra int so that it is as
close to this position as possible
¢ page 56.
• Place your feet on the floor in front of the
passenger's seat.
Front seats
Power seat adjustment
Applies to vehicles: with power adjustab le seats
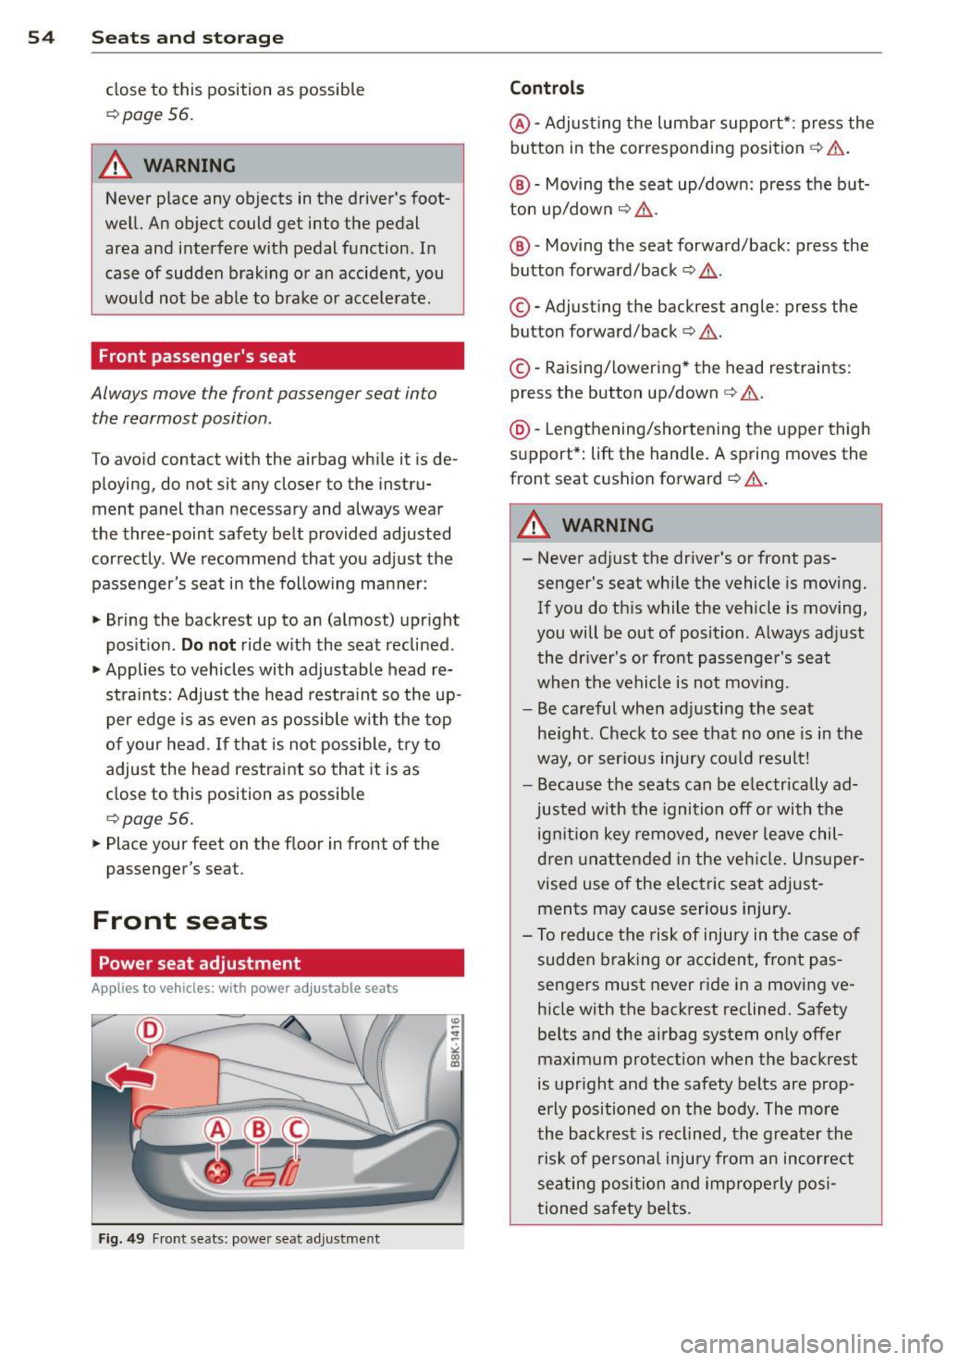
Fig. 4 9 Fr ont seats: powe r seat adjustme nt
Controls
@ -Adjust ing the lumbar support *: press the
button in the corresponding position ¢ .&, .
@ -Moving the seat up/down: press the b ut
ton up/down ¢ .&, .
@ -Moving the seat forward/back : press the
button forward/back ¢.&, .
©-Adjust ing the backrest angle : press the
button forward/back ¢.&, .
©-Raising/lowering * the head restraints:
press the button up/down¢.&, .
@ -Lengthening/shortening the upper thigh
s u pport* : lift the hand le. A spring moves the
front seat c ushion forward ¢ .&, .
A WARNING
--- Never ad just the driver's or front pas
senger's seat whi le the vehicle is moving.
If you do th is while the veh icle is moving,
you will be out of position . A lways ad just
the dr iver's or front passenger's s eat
when t he vehicle is not mov ing.
- Be ca reful when ad justing the seat
he ight . C hec k to see that no one is in the
way, or serio us inju ry co uld resu lt!
- Because the seats can be e lectrically ad
justed w ith the ignition off o r with the
ig nit ion key removed, never le ave chil
d ren una ttended in the veh icle. Unsuper
vised use of the elec tric seat adjust
ments may cause serious injury.
- T o reduce the risk of injury in t he c ase o f
sudden braking o r acciden t, front pas
sengers must never ride in a movi ng ve
h icle with the back rest reclined. Safety
be lts and the airbag system only offer
maximum protection when the backrest
is upr ight and the safety belts are prop
erly positioned on the bo dy. The more
the backrest is r eclined, the greater the
ris k of persona l inju ry from an incorrect
sea tin g po sit ion and improperly pos i
tioned safety belts .
Page 63 of 286
cannot fall out into the footwells. In case
of sudden braking you would not be able
to brake or accelerate.
- Any articles of clothing that you have
hung up must not interfere with the driv
er's v iew. The coat hooks are designed
only for lightweight clothing. Never hang any clothing w ith hard, pointed or heavy
objects in the pockets on the coat hooks.
During sudden braking or in an accident -
especially if the airbag is deployed -
these objects cou ld injure any passen
gers inside the vehicle .
- To reduce the r isk of personal injury in an
accident or sudden stop, always keep the
glove compartment closed while driving.
- Read and fo llow all WARN INGS
¢ page 156, Important safety instruc
tions on the side airbag system.
- Hang clothes in such a way that they do
not impair the driver's vision .
- T he coat hooks must only be used for
lightweight clothing. Do not leave any
heavy or sharp edged objects in the pock
ets which may interfere with the side cur
tain airbag deployment and can cause personal injury in a crash.
- Do not use coat hangers for hanging clothing on the coat hooks as this can in
terfere with proper deployment of the
side curtain airbags in an accident.
- Do not hang heavy objects on the coat
hooks, as they could cause personal in
jury in a sudde n stop.
- Always keep the compartment above the
rearview mirror closed while driving to
reduce the risk of injury in the event of
sudden braking maneuvers or a col lision.
(D Note
Objects located on the rear shelf that rub
aga inst the rear w indow cou ld damage the
heating wires for t he rear w indow defog
ger.
S ea ts a nd s to rage 61
@ Tips
-A vent slot is located between the shelf
and the rear w indow . Do not block the
vent with any items you may place on the
rear window she lf.
- Do not place bu lky items on the rear win
dow shelf as they could restrict or block
the driver's vision in the rear view m irror.
Roof rack
Description and mounting location s
Additional cargo can be carried with a roof
luggage rack.
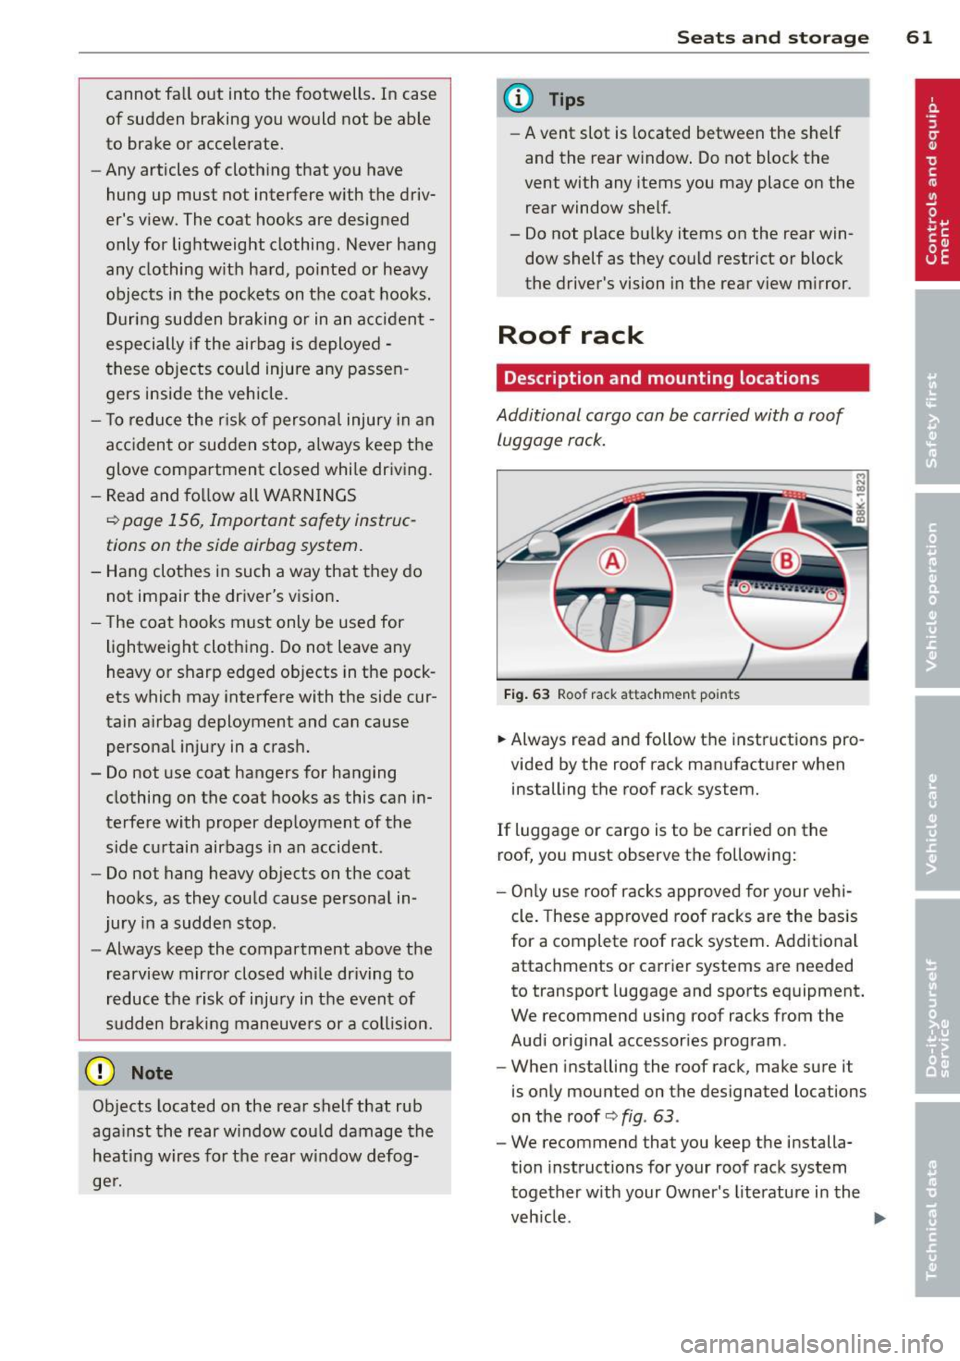
F ig . 63 Roof rack attachmen t po ints
.,. Always read and follow the instructions pro
vided by the roof rack manufacturer when
installing the roof rack system.
If luggage or cargo is to be carried on the
roof, you must observe the fo llowing:
- On ly use roof racks approved for your vehi
cle. These approved roof racks are the basis
for a complete roof rack system . Additiona l
attachments or carrier systems are needed
to transport luggage and sports equipment. We recommend using roof racks from the
Audi original accessories program .
- When installing the roof rack, make sure it
is only mounted on the designated locations
on the roof ¢
fig. 63 .
-We recommend that you keep the installa
tion instructions for your roof rack system
together w ith your Owner's literature i n the
veh icle.
Page 73 of 286
On the road
Steering
Manually adjustable steering wheel
The steering wheel position is fully adjustable
up and down and forward and back .
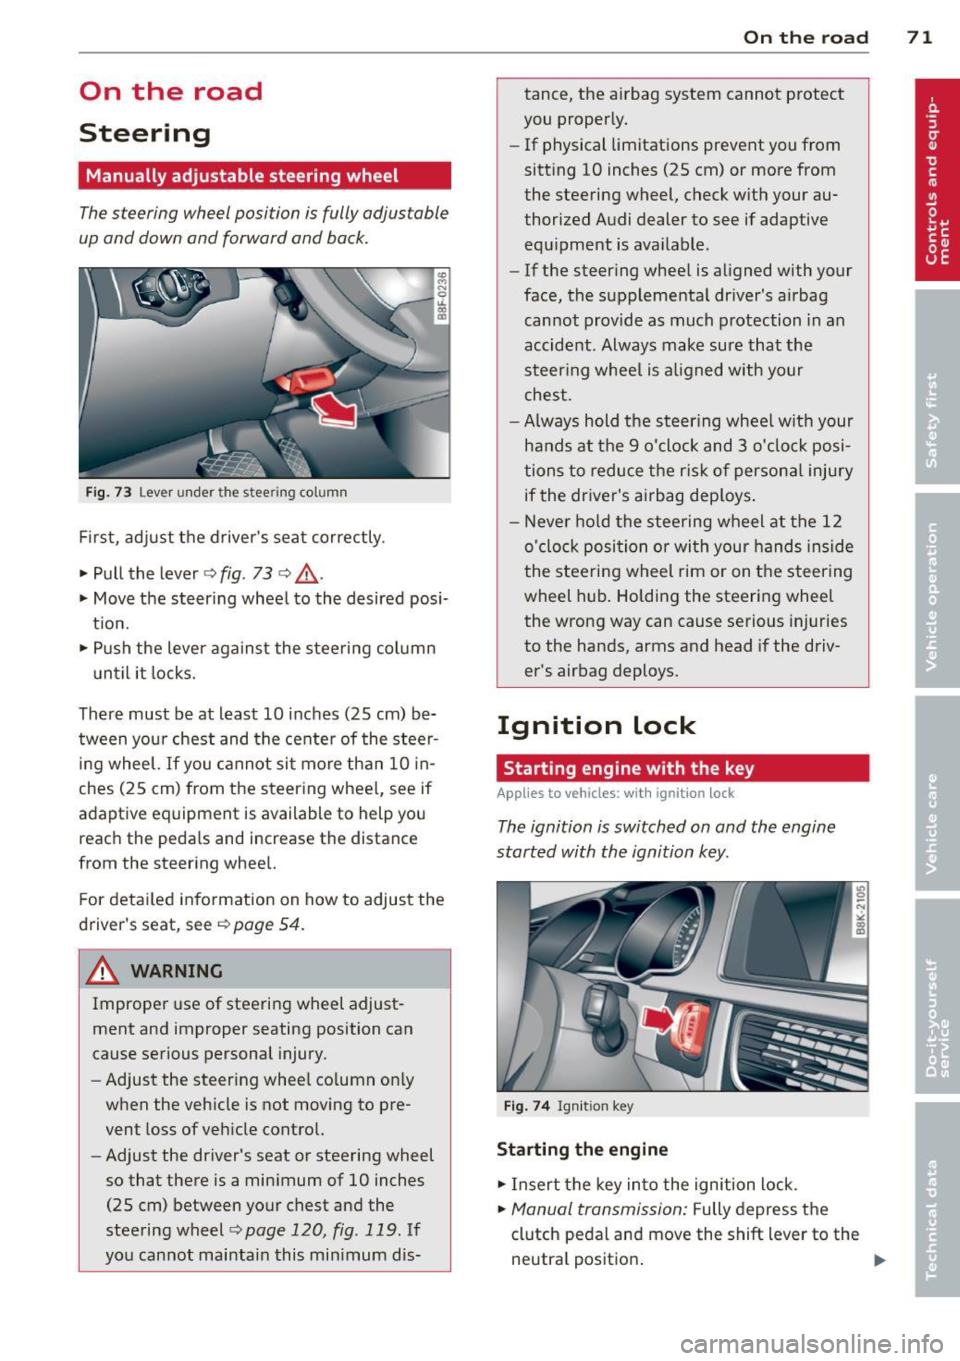
Fig. 73 Lever under the stee ring column
First, adjust the driver's seat correctly.
• Pull the lever
c> fig . 73 c> ,& .
• Move the steering wheel to the desired posi
t ion.
• Push the lever against the steering column
until it locks.
There must be at least 10 inches (25 cm) be
tween your chest and the center of the stee~
ing wheel.
If you cannot sit more than 10 in
ches (25 cm) from the steering wheel, see if
adaptive equipment is available to help you
reach the pedals and increase the distance
from the steering wheel.
For detailed information on how to adjust the
driver's seat, see
c> page 54.
& WARNING
Improper use of steering wheel adjust
ment and improper seating position can
cause serious personal injury.
- Adjust the steering wheel column only
when the vehicle is not moving to pre
vent loss of vehicle control.
- Adjust the driver's seat or steering wheel
so that there is a minimum of 10 inches
(25 cm) between your chest and the
steering wheel
c> page 120 , fig . 119. If
you cannot maintain this minimum dis-
On the road 71
tance, the airbag system cannot protect
you properly.
- If physical limitations prevent you from
sitting 10 inches (25 cm) or more from
the steering wheel, check with your au
thorized Audi dealer to see if adaptive equipment is available .
- If the steering wheel is aligned with your
face, the supplemental driver's airbag
cannot provide as much protection in an
accident . Always make sure that the
steer ing whee l is aligned with your
chest .
- Always hold the steering whee l w ith your
hands at the 9 o'clock and 3 o'clock posi
tions to reduce the risk of persona l injury
if the driver's airbag dep loys .
- Never hold the steering wheel at the 12
o'clock position or with your hands inside
the steeri ng wheel rim or on the steering
wheel hub. Holding the steering wheel
the wrong way can cause serious injuries
to the hands, arms and head if the driv
er's airbag deploys.
Ignition lock
Starting engine with the key
Applies to veh icles : w it h ig ni tio n lock
The ignition is switched on and the engine
started with the ignition key .
Fig. 74 Igni tion key
Starting the engine
• Insert the key into the ignition lock .
• Manual transmission: Fully depress the
clutch pedal and move the shift lever to the
neutral position .
Page 121 of 286
Driving Safely
General notes
Safe driving habits
Please remember -safety first!
This chapter contains important information,
tips, instructions and warnings that you need
to read and observe for your own safety, the
safety of your passengers and others . We have
summarized here what you need to know
about safety belts, airbags, child restraints as
well as child safety. Your safety is for us
priori
ty number 1.
Always observe the information
and warnings in this section - for your own
safety as well as that of your passengers.
The information in this section applies to all
model versions of your vehicle . Some of the
features described in this sections may be
standard equipment on some models, or may
be optional equipment on others. If you are
not sure, ask your authorized Audi dealer.
A WARNING
- Always make sure that you follow the in
structions and heed the WARNINGS in
this Manual. It is in your interest and in
the interest of your passengers.
- Always keep the complete Owner's Liter
ature in your Audi when you lend or sell
your vehicle so that this important infor
mation will always be available to the
driver and passengers.
- Always keep the Owner's literature handy
so that you can find it easily if you have
questions.
Safety equipment
The safety features are part of the occupant
restraint system and work together to help
reduce the risk of injury in a wide variety of
accident situations .
Your safety and the safety of your passengers
should not be left to chance. Advances in
technology have made a variety of features
available to help reduce the risk of injury in an
Driving Safely 119
accident. The following is a list of just a few of
the safety features in your Audi :
- sophisticated safety belts for driver and all
passenger seating positions,
- belt force limiters for the front seats,
- belt pretensioners for the seats,
- head restraints for each seating position,
- front airbags,
- side airbags in the front seats,
- side curtain airbags ,
- special LATCH anchorages for child re-
straints,
- adjustable steering column.
These individual safety features, can work to
gether as a system to help protect you and
your passengers in a wide range of accidents.
These features cannot work as a system if
they are not always correctly adjusted and cor
rectly used.
Safety is everybody's responsibility!
Important things to do before driving
Safety is everybody's job! Vehicle and occu
pant safety always depends on the informed and careful driver.
For your safety and the safety of your passen
gers,
before driving always:
"'Make sure that all lights and signals are op
erating correctly .
"' Make sure that the tire pressure is correct.
"'Make sure that all windows are clean and af
ford good visibility to the outside.
"'Secure all luggage and other items carefully
qpage59.
"'Make sure that nothing can interfere with
the pedals.
"'Adjust front seat, head restraint and mirrors
correctly for your height .
"'Instruct rear seat passengers to adjust the
head restraints according to their height.
"' Make sure to use the right child restraint
correctly to protect children
q page 161,
and~~fy. ~
•
•