manual transmission AUDI A5 COUPE 2015 Owners Manual
[x] Cancel search | Manufacturer: AUDI, Model Year: 2015, Model line: A5 COUPE, Model: AUDI A5 COUPE 2015Pages: 264, PDF Size: 66.83 MB
Page 4 of 264
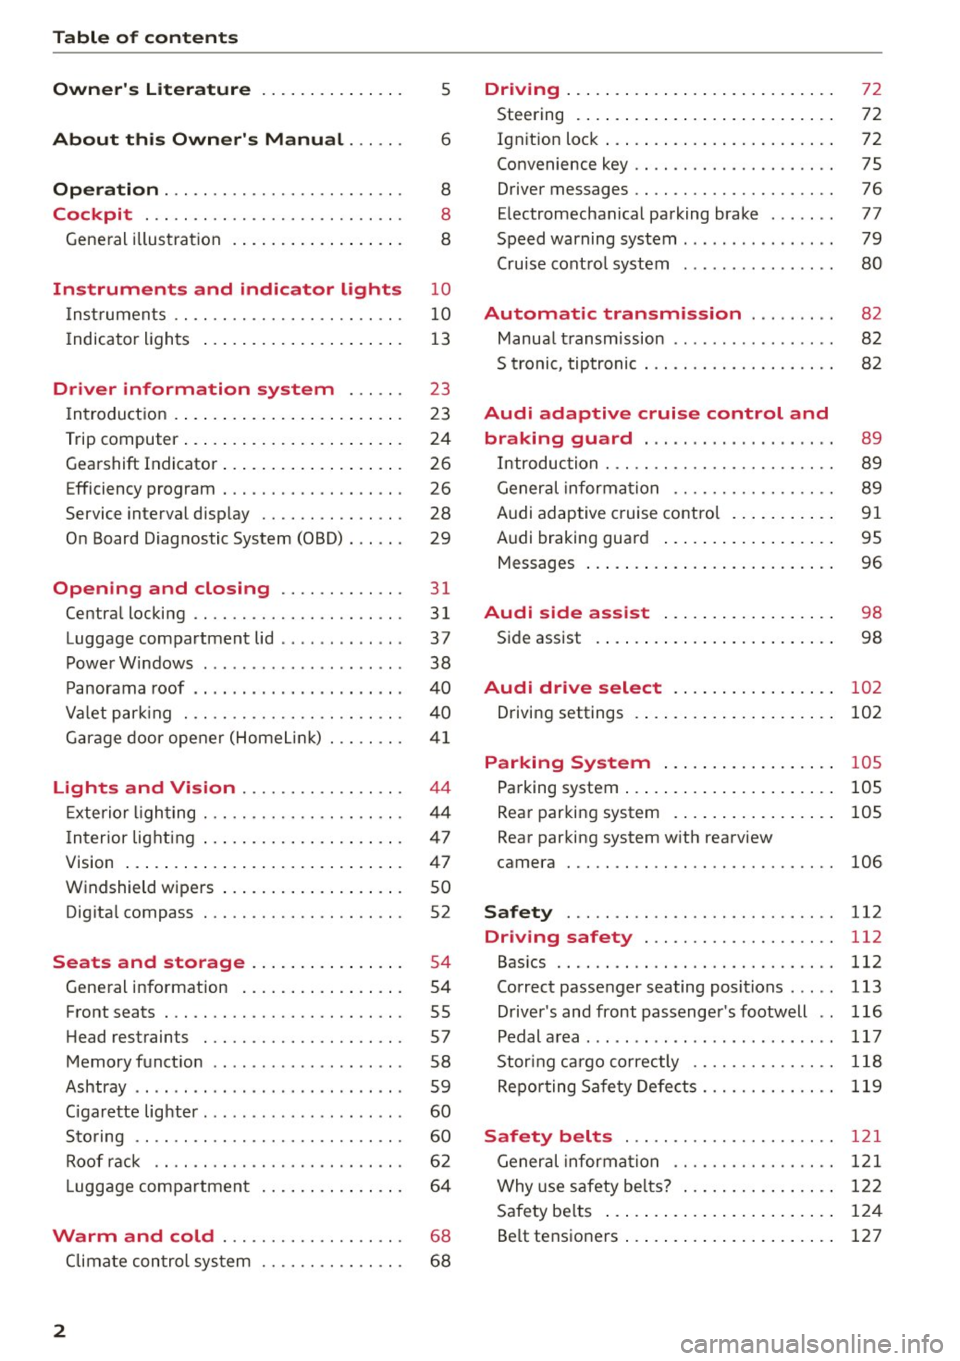
Table of contents
Owner's Literature
About this Owner's Manual ... .. .
Operation ....... ........... .. .. .. .
Cockpit ... .. ............... .. .. .. .
Gene ral illus tra tion . ..... ... .. .. .. .. . 5
6
8
8
8
Instrument
s and indicator lights 10
Instruments . . . . . . . . . . . . . . . . . . . . . . . . 10
Indicator ligh ts . . . . . . . . . . . . . . . . . . . . . 1 3
Driver information system . . . . . . 23
I n troduct ion . . . . . . . . . . . . . . . . . . . . . . . . 23
Trip computer . . . . . . . . . . . . . . . . . . . . . . .
24
Gearshift Indicator . . . . . . . . . . . . . . . . . . . 26
E fficiency program . . . . . . . . . . . . . . . . . . . 26
Service interval disp lay . . . . . . . . . . . . . . . 28
O n Board Diag nostic System (OBD) . . . . . . 29
Open ing and closing . . . . . . . . . . . . . 31
Centra l locking . . . . . . . . . . . . . . . . . . . . . . 31
Luggage compartment lid . . . . . . . . . . . . . 37
Powe r W indows . . . . . . . . . . . . . . . . . . . . . 38
P anorama roof . . . . . . . . . . . . . . . . . . . . . . 40
Va let par king . . . . . . . . . . . . . . . . . . . . . . . 40
G arage door ope ner (Home Link) . . . . . . . .
4 1
Lights and Vision . . . . . . . . . . . . . . . . . 44
E xte rior ligh ting . . . . . . . . . . . . . . . . . . . . .
4 4
Interior lighting . . . . . . . . . . . . . . . . . . . . . 47
V1s1on ... .... ... .. .. ..... ... .. .. .. .
Windshield wipers .. ..... ... .. .. .. .. .
Dig ita l compass ... ........... .. .. .. . 4
7
so
52
Seats and storage . . . . . . . . . . . . . . . . 54
Gene ral i nfo rmation . . . . . . . . . . . . . . . . . 54
Front seats . . . . . . . . . . . . . . . . . . . . . . . . . 55
H ead restraints . . . . . . . . . . . . . . . . . . . . . 57
Memory funct ion . . . . . . . . . . . . . . . . . . . .
58
Ashtray . . . . . . . . . . . . . . . . . . . . . . . . . . . . 59
Ciga rette lig hte r. . . . . . . . . . . . . . . . . . . . .
60
Sto ring . . . . . . . . . . . . . . . . . . . . . . . . . . . . 60
Roof rac k . . . . . . . . . . . . . . . . . . . . . . . . . . 6 2
L uggage compartmen t . . . . . . . . . . . . . . . 64
Warm and cold . . . . . . . . . . . . . . . . . . . 68
Climate con tro l sys tem . . . . . . . . . . . . . . . 6 8
2
Driving .... . .... .. .. ... . .. .... ... . .
Steering . ... .... .. .. .. .. .. .... ... . .
72
72
Ign it ion loc k . . . . . . . . . . . . . . . . . . . . . . . . 72
Convenience key . . . . . . . . . . . . . . . . . . . . . 75
Driver messages . . . . . . . . . . . . . . . . . . . . . 76
E lectromechan ical pa rking brake . . . . . . .
77
Speed warning system . . . . . . . . . . . . . . . . 79
Cru ise cont ro l system . . . . . . . . . . . . . . . .
80
Automatic transmission . . . . . . . . . 82
Manua l transm ission . . . . . . . . . . . . . . . . . 82
5 tronic , tiptronic . . . . . . . . . . . . . . . . . . . . 82
Audi adaptive cruise control and
braking guard . . . . . . . . . . . . . . . . . . . .
89
Introduc tion . . . . . . . . . . . . . . . . . . . . . . . . 89
Gener al informa tion . . . . . . . . . . . . . . . . . 89
Audi adaptive cruise contro l . . . . . . . . . . .
91
Audi braking guard . . . . . . . . . . . . . . . . . . 95
Messages . . . . . . . . . . . . . . . . . . . . . . . . . . 96
Audi side assi st . . . . . . . . . . . . . . . . . . 98
Side assist . . . . . . . . . . . . . . . . . . . . . . . . . 98
Audi drive select . . . . . . . . . . . . . . . . . 102
Driving settings . . . . . . . . . . . . . . . . . . . . . 102
Parking System . . . . . . . . . . . . . . . . . . 105
Pa rking system . . . . . . . . . . . . . . . . . . . . . . 105
Rear par king system . . . . . . . . . . . . . . . . . 105
Rear parking system w ith rearview
camera
106
Safety 112
Driving safety . . . . . . . . . . . . . . . . . . . . 112
Bas ics . . . . . . . . . . . . . . . . . . . . . . . . . . . . . 112
Correc t passenger seating positions . . . . . 113
D river 's and front passenger 's footwell . . 116
Pedal area . . . . . . . . . . . . . . . . . . . . . . . . . . 117
Stor ing cargo co rrectly . . . . . . . . . . . . . . . 118
Repo rting Sa fe ty Defe cts.......... .. .. 119
Safety belts . . . . . . . . . . . . . . . . . . . . . . 121
General informa tion . . . . . . . . . . . . . . . . . 1 2 1
Why use safety bel ts? . . . . . . . . . . . . . . . . 122
Safety be lts . . . . . . . . . . . . . . . . . . . . . . . . 12 4
Be lt tensioners . . . . . . . . . . . . . . . . . . . . . . 127
Page 11 of 264
M N
i? co ,...., \!) ..,.,
N l/'I ,....,
CD
@
®
©
®
®
(j)
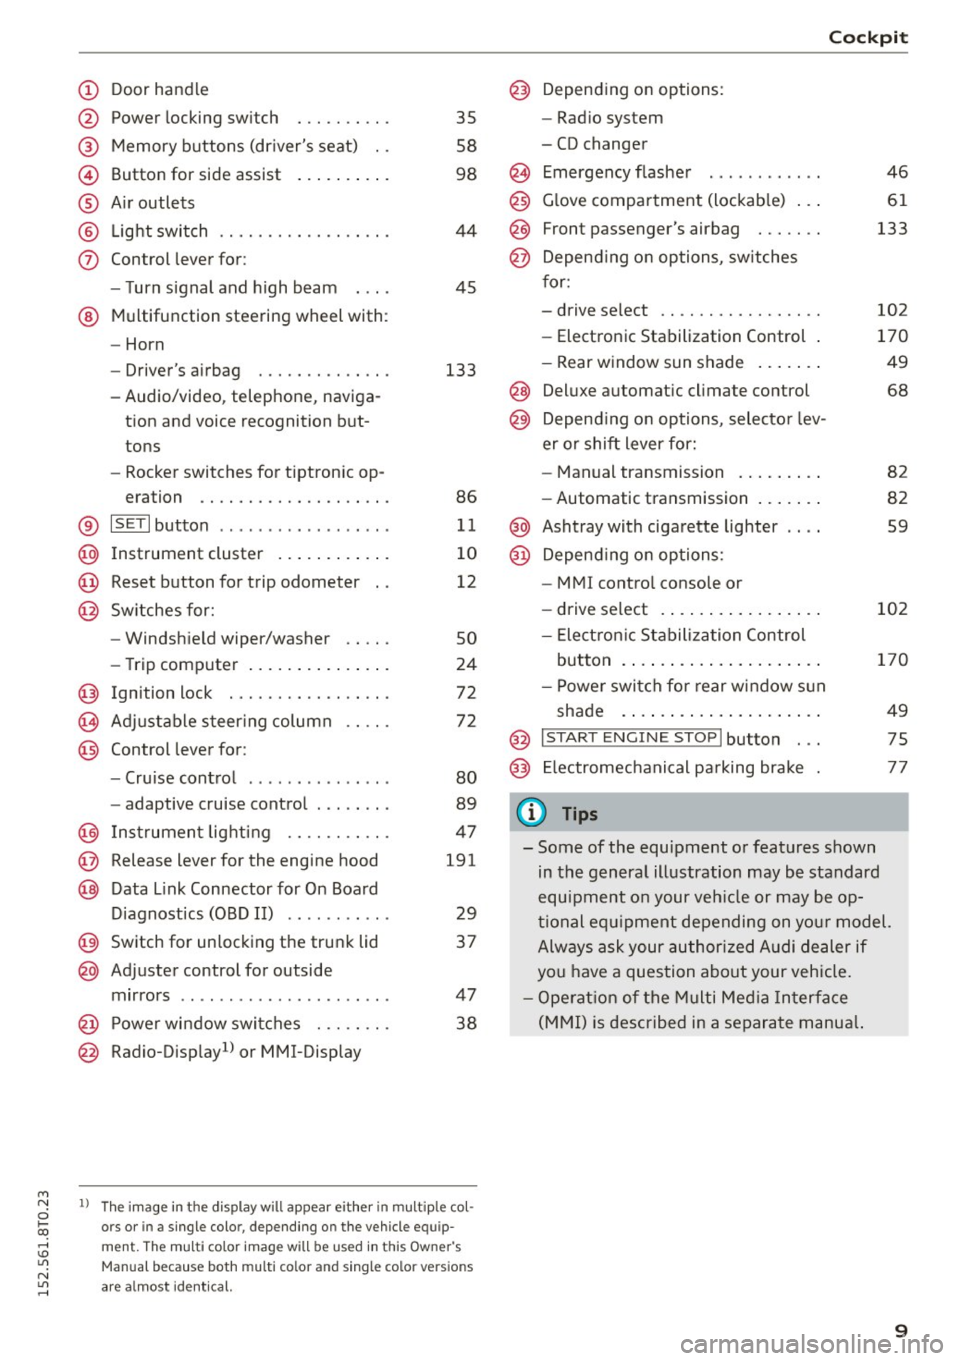
Door handle
Power locking swi tch
Memory buttons (driver's seat) . .
Button for side assist
A ir outlets
Light switch
Control lever for:
- Turn signal and high beam
@ Multifunction steering wheel with :
- Horn
- Driver' s airbag ....... .. .. .. .
- Audio/video , telephone, naviga-
tion and voice recognition but
tons
- Rocker switches for tiptronic op-
eration ............. .... .. .
® IS ETI button ................. .
@ Instrument cluster ........ ... .
@ Reset button for trip odometer
@ Switches for:
- Windshield wiper/washer
- Trip computer .............. .
Ignition lock . .......... ... .. .
Adjustable steering column
Control lever for:
- Cruise control ............ .. .
- adaptive cruise control ..... .. .
@ Instrument lighting ...... .. .. .
@ Release lever for the engine hood
@ Data Link Connector for On Board
Diagnostics (OBD II) ..... ... .. .
@ Switch for unlocking the trunk lid
@ Adjuster control for outside
mirrors ................ ... .. .
@ Power window switches . .. .. .. .
@ Radio-Display1l or MMI-Display
35
58
98
44
45
133
86
11
10
12
so
24
72
72
80
89
47
191
29
37
47 38
l) Th e im age in t he d ispl ay will app ea r e ither in mult ipl e col
or s or in a s ingle color, depending on the vehicle e quip
m ent. The mul ti color image w ill b e used in this Ow ne r's
Man ual bec ause both multi co lo r an d single color vers io n s
are a lmo st i de nti cal.
Cockpit
Depending on options:
- Radio system
- CD changer
Emergency flasher
Glove compartment (lockable) .. .
F ront p assenger's airbag . .. .. . .
Depend ing on options, switches
for:
- drive select .. ........... .. . .
- Electronic Stabilization Control .
- Rear window sun shade ...... .
@ Deluxe automa tic climate control
@) Depend ing on options, selector lev
er or shift lever for:
- Manual transmission ........ .
- Automatic transmission ...... .
@ Ashtray with cigarette lighter
@ Depend ing on options:
- MM I control console or
- drive select . ............... .
- Electron ic Stabilization Control
button . ..... .............. .
- Power switch for rear window sun
shade .... .. .............. .
@ I START ENG IN E STOPI button . . .
@) Electromechanical parking brake
(D Tips
46
61
133
102
170
49
68
82
82
59
102
170
49
75
77
- Some of the equipment or features shown
in the general illustration may be standard
equipment on your veh icle or may be op
tional equ ipment depending on your model.
Always ask your author ized Audi dealer if
you have a question about your vehicle.
- Operation of the Multi Media Interface
(MMI) is described in a separate manua l.
9
Page 28 of 264
Drive r in formation syste m
information w ill not be shown in the display. The
information will continue to be ca lculated by the
tr ip computer and can be turned back
On at any
time.
(D Tips
- This function is not availab le on a ll vehicles.
- The driving information in the efficiency
program is also reset to zero with the sin
gle-tr ip memory.
Gearshift Indicator
Applies to vehicles: with manual transmission and gearsh ift
indicator
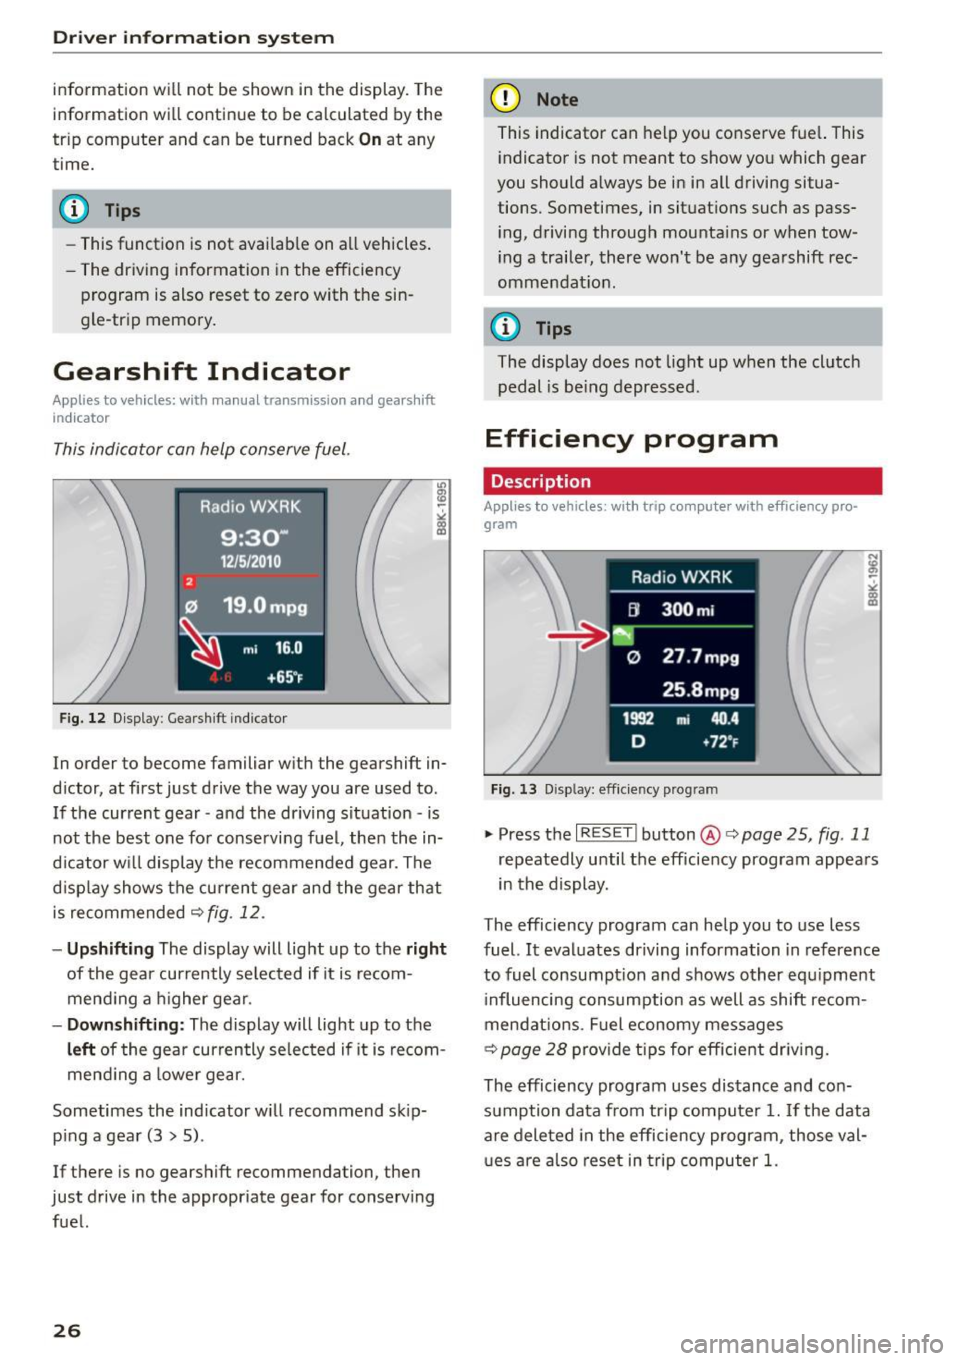
This indicator con help conserve fuel.
Fig. 12 Display: Gearshift indic ator
In order to become familiar with the gearshift in
d ictor, at first just drive the way you are used to .
If the current gear -and the dr iving situation -is
not the best one for conserving fuel , then the in
dicator wi ll display the recommended gear . The
d isp lay shows the cu rrent gear and the gear that
is recommended
¢ fig . 12 .
-Up shifting The display will light up to the r ight
of the gear currently se lected if it is recom
mend ing a h igher gear .
-Dow nshifting : The display will light up to the
left of the gear currently se lected if it is recom
mend ing a lower gear.
Sometimes the indicator w ill recommend sk ip
p ing a gear (3
> 5) .
If there is no gearshift recommendation, then
just drive in the appropriate gear for conserving fuel.
26
(D Note
This indicator can help you conserve fue l. This
i ndicator is not meant to show you which gear
you should always be in in all driving situa
tions. Sometimes, in situations such as pass
i ng, driving through mounta ins or when tow
ing a trailer, there won't be any gearshift rec
ommendation .
(0 Tips
The display does not light up when the clutch
pedal is be ing depressed.
Efficiency program
Description
Applies to vehicles: with trip compute r with efficiency pro·
gram
Fig. 13 Disp lay: eff icie ncy prog ram
"'"Press the I RESET ! button ®¢ page 25, fig . 11
repeatedly until the efficiency program appears
in the display.
T he efficiency program can help you to use less
fuel. It eval uates driving information in reference
to fuel consumpt ion and shows other equ ipment
i nfluencing consumption as well as shift recom
mendat ions . Fuel economy messages
¢ page 28 provide tips for efficient dr iv ing .
The efficiency program uses distance and con sumption data from trip computer
1. If the data
are deleted in the efficiency program, those val
u es are also reset in trip computer
1.
Page 29 of 264
M N
0 loo
rl I.O
"' N
"' rl
Enhanced shift indicator
Applies to vehicles: with manual transmission and trip com
p uter with eff iciency program
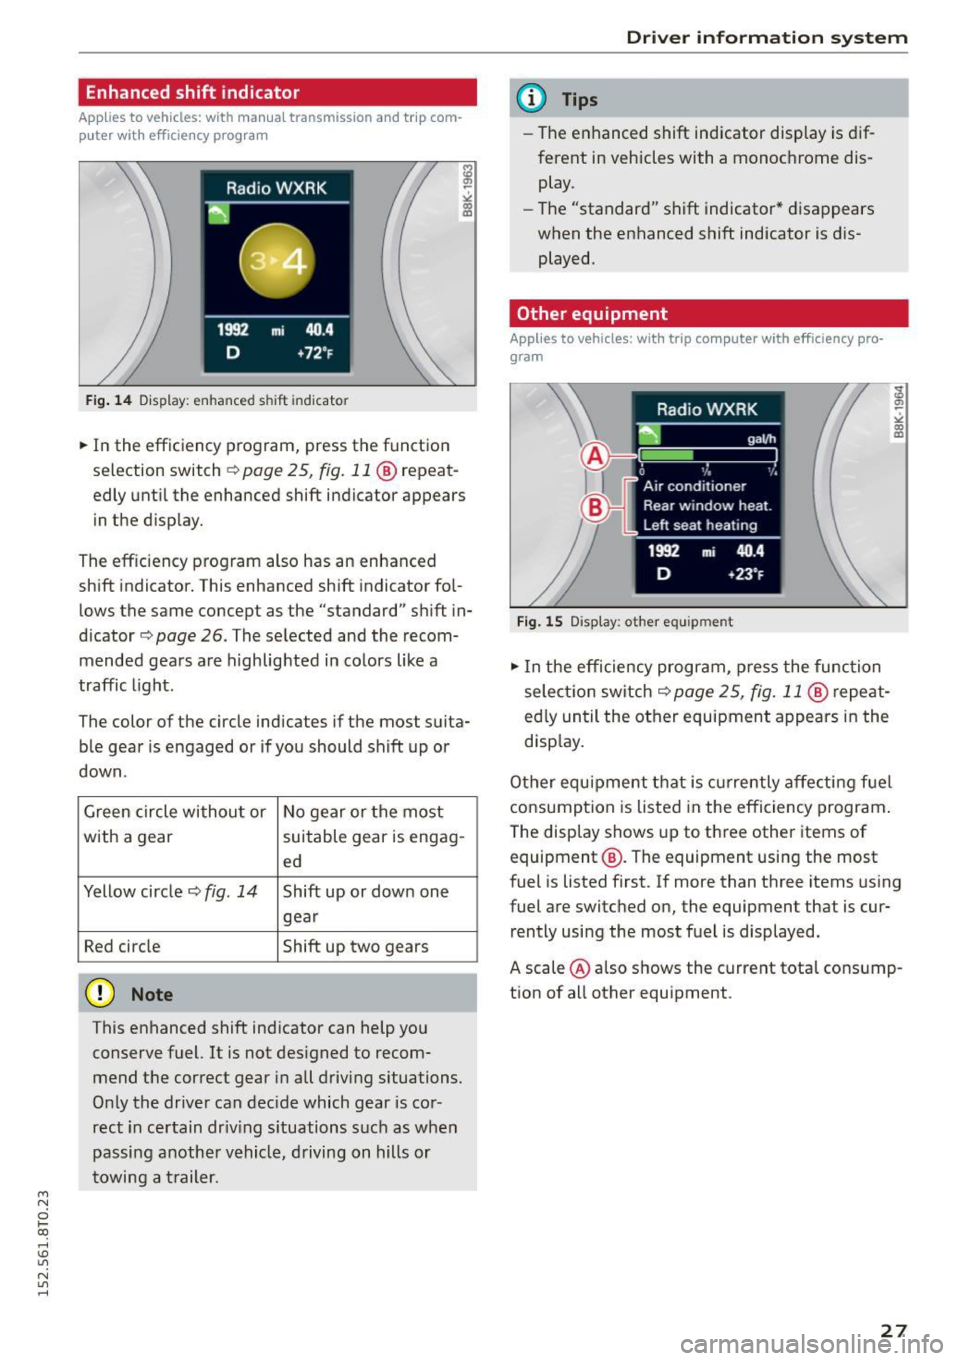
Fig . 14 Display: enhanced shift indicator
"'In the efficiency program, press the function
selection switch¢
page 25, fig. 11@ repeat
edly until the enhanced shift indicator appears
in the disp lay.
The eff ic iency program also has an enhanced
shift indicator. This enhanced shift indicator fol
lows the same concept as the "standard" shift in
dicator¢
page 26. The se lected and the recom
mended gears are highlighted in colors like a
traffic light.
The color of the circle indicates if the most suita b le gear is engaged or if you should shift up or
down.
Green circle withou t or No gear or the most
with a gear suitable gear is engag-
ed
Yellow circle¢
fig. 14 Shift up or down one
gear
Red circle Shift up two gears
(D Note
This enhanced shift indicator can help you
conserve fuel. It is not des igned to recom
mend the correct gear in all driving situations.
Only the drive r can decide which gear is cor
rect in certain dr iving situations such as when
passing another vehicle, driving on hills or
towing a trailer.
Dri ver information system
(D Tips
- The enhanced shift indicator display is dif
ferent in vehicles with a monochrome dis
play.
- Th e "standard" shift indicator* disappears
when the enhanced shift indicator is dis
played.
Other equipment
Applies to vehicles: with trip computer with efficiency pro
gram
Fig. 15 Display: othe r equ ipm ent
"'In the efficiency program, press the function
select ion switch ¢
page 25, fig. 11 @ repeat
ed ly until the other equipment appears in the
disp lay.
Other equ ipment that is currently affecting fuel
consumption is listed in the efficiency program .
The display shows up to three other items of
equipment @. The equipment using the most
fuel i s listed first. If more than three items using
fuel are switched on, the equipment that is cur rently using the most fuel is displayed.
A scale @also shows the current total consump
tion of all other equipment.
27
Page 74 of 264
Driving
Driving
Steering
Manually adjustable steering wheel
The steering wheel position is fully adjustable up
and down and forward and back .
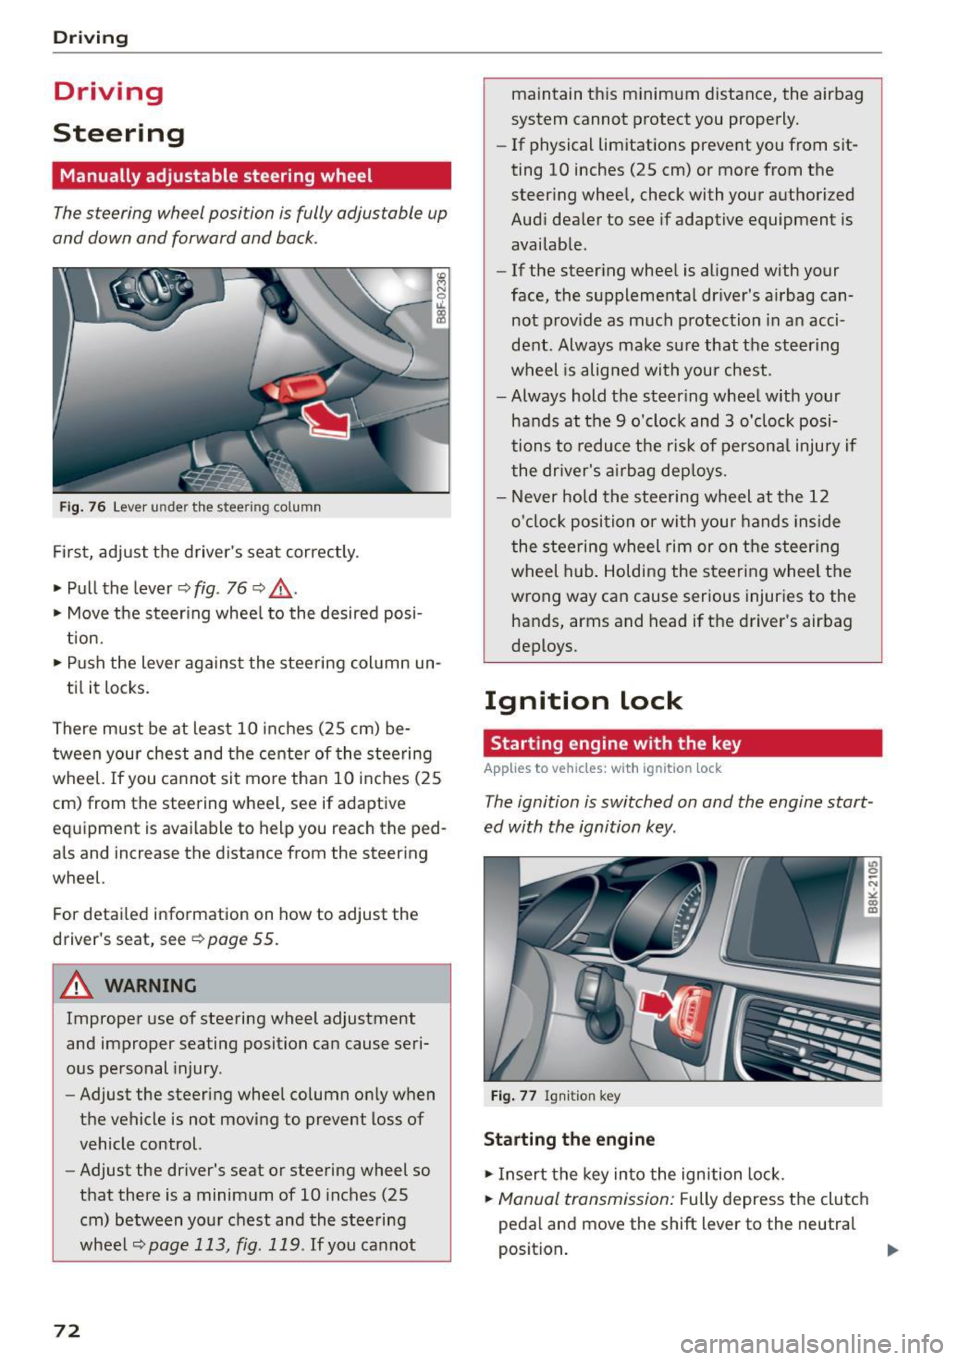
Fig. 76 Lever under the steering column
Firs t, adjust the driver 's seat cor rectly .
• Pull the lever ¢
fig. 76 ¢ .&_.
• Move the steer ing whee l to the desired posi
t ion.
• Push the lever agains t the steering col umn un-
ti l it locks.
There must be at least 10 inches (25 cm) be
tween your chest and the cente r of the steering
wheel.
If you ca nnot sit mo re than 10 i nch es (25
cm) from the steering wheel, see if adaptive
eq uipment is available to help you reach the ped
als and increase the distance from the steering
wheel.
For detai led information on how to adjust the
driver's seat, see
¢ page 55.
A WARNING
Improper use of steering wheel adjustment
and improper seating position can cause seri
ous pe rsonal injury .
- Adjust the steering wheel column on ly when
the vehicle is not moving t o prevent loss of
vehicle control.
- Adjust the driver's seat or steering wheel so
that there is a minim um of 10 inches (25
cm) between your chest and the steering
wheel
¢page 113, fig. 1 19 . If you cannot
72
maintain t his minimum distance, the airbag
system cannot p rotect you properly.
- If physical limitations prevent you from sit
ting 10 inches (25 cm) or more from the
steer ing whee l, check with your authorized
Audi dea ler to see if adaptive equipment is
availab le.
- If the steer ing whee l is aligned with your
face, the supplementa l driver 's a irbag can
not prov ide as much p rotection in a n acci
dent. Always make su re that the steering
wheel is alig ned with your chest.
- Always hold the steer ing wheel w ith your
hands at the 9 o'clock and 3 o'clock posi
tions to reduce the ris k of persona l injury if
the dr iver's air bag dep loys.
- N ever hold the stee ring wheel at the 12
o'cloc k position o r with your hand s inside
the steering wheel rim or on t he steering
wheel hub . Holding the steeri ng whee l the
wrong way can cause serious injuries to the
hands, arms and head if the driver's airbag
deploys.
Ignition lock
Starting engine with the key
App lies to vehicles : wi th ignition lock
The ignition is switched on and the engine start
ed with the ignition key .
Fig . 7 7 Ign iti on key
Starting the engine
• Insert the key into the ignition lock .
• Manual transmission: Fully depress the clutch
pedal an d move the shift lever to the neutral
position . ..,.
Page 77 of 264
M N
0 loo
rl I.O
"' N
"' rl
CD Note
If the engine has been under heavy load for
an extended period, heat builds up in the en
gine compartment after the engine is switch
ed off -there is a risk of damaging the engine .
Allow the engine to run at idle for about two
minutes before switching it off.
Convenience key
Starting the engine
Applies to vehicles: with conve nien ce key
The I STAR T ENGINE ST OP I button switches the
ignition on and starts the engine.
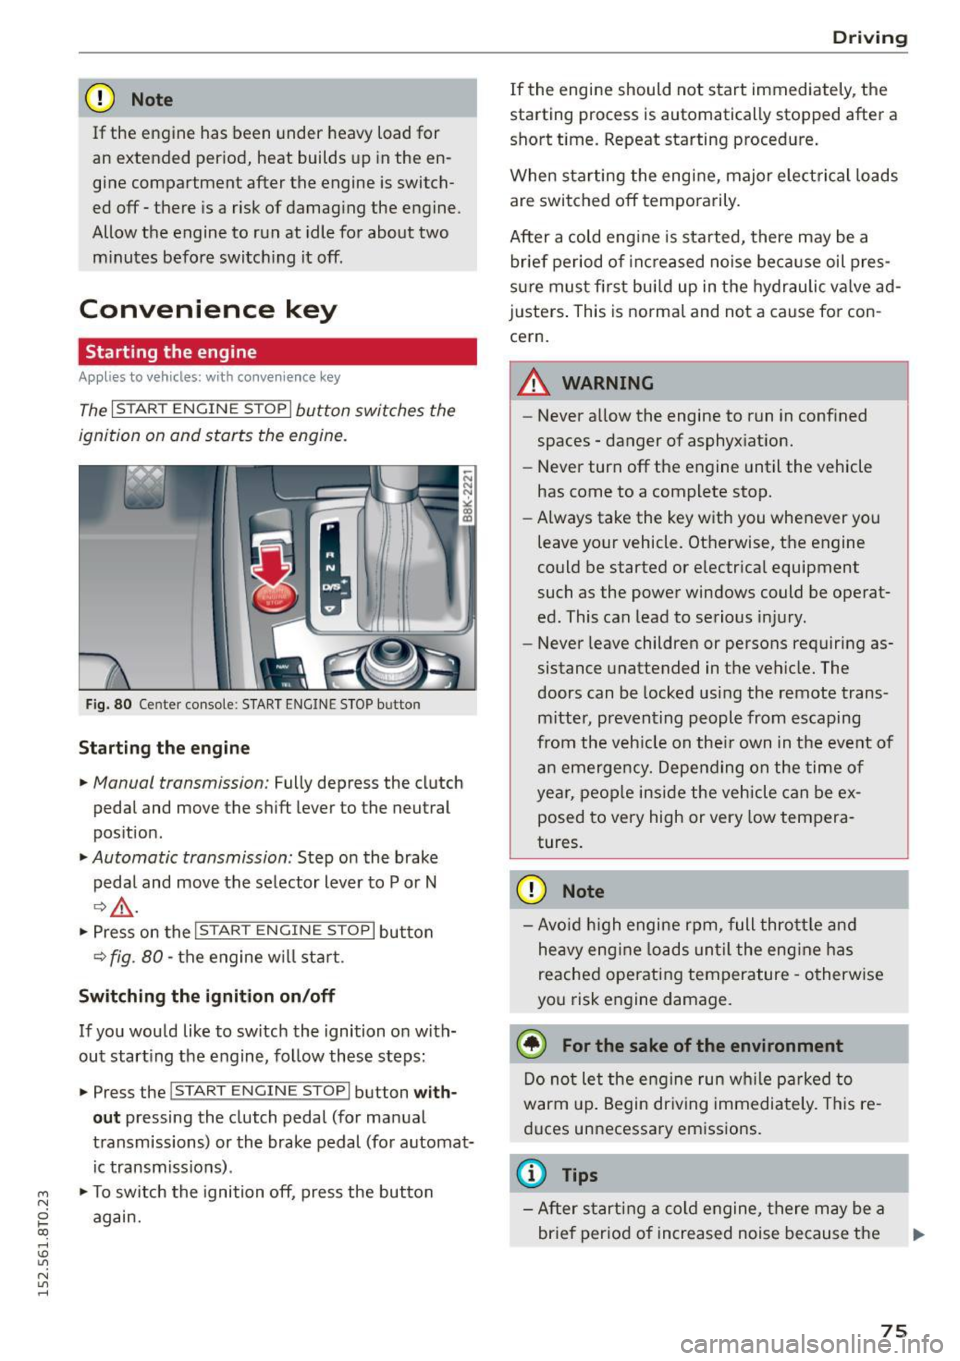
Fig. 80 Ce nter console: START ENGINE STOP b utto n
Starting the engine
• Manual transmission: Fully depress the clutch
pedal and move the shift lever to the neutral
position.
• Automatic transmission: Step on the brake
pedal and move the selector lever to P or N
¢.&., .
.. Press on the I STAR T ENGINE ST OP I button
¢ fig . 80 -the engine w ill sta rt .
Switching the ignition on/off
If you would like to switch the ignition on with
out starting the engine, follow these steps:
• Press the
!START E NGINE STOPI button with
out pressing the clutch pedal (for manual
transmissions) or the brake pedal (for automat
ic transmissions) .
• To switch the ignition off, press the button
again.
Driving
If the engine should not start immediately, the
starting process is automatically stopped after a
short time. Repeat starting procedure.
When starting the engine, major elect rical loads
are switched off temporarily .
After a cold engine is started, there may be a
brief period of increased noise because oil pres
sure must fi rst bui ld up in the hydraulic valve ad
justers. This is normal and not a cause for con
cern.
.&_ WARNING
-~ ·
-Never allow the engine to run in confined
spaces - danger of asphyxiation.
- Never turn off the engine until the vehicle
has come to a complete stop.
- Always take the key with you whenever you
leave your vehicle. Otherwise, the engine
could be started or electrical equipment
such as the power windows could be operat
ed . This can lead to serious injury.
- Never leave children or persons requiring as
sistance unattended in the vehicle. The
doors can be locked using the remote trans
mitter, preventing people from escaping
from the vehicle on the ir own in the event of
an emergency. Depending on the time of
year, people inside the vehicle can be ex
posed to very high or very low tempera
tures.
CD Note
- Avo id high engine rpm, full throttle and
heavy eng ine loads until the engine has
reached operating temperature -otherwise
you risk engine damage.
@ For the sake of the environment
Do not let the engine run wh ile parked to
warm up. Begin driving immediately. This re
duces unnecessary emissions .
@ Tips
-After starting a cold engine, there may be a
brief period of increased noise because the
75
Page 78 of 264
Driving
oil pressure must first build up in the hy
draulic va lve adjusters. This is normal and
not a cause for concern .
- If yo u leave the vehicle with the ign ition
switched on, the ignition will switch off af
ter a certa in period o f time . P lease note that
electr ica l equipment suc h as exterior lights
will switch off as well when that happens.
Switching engine off
Applies to vehicles: w ith conven ience key
" Bring your veh icle to a complete stop .
" Automat ic transm iss ion: Move the se lector lev
er to the P or N pos ition .
" Press the
!S TAR T ENGINE STOPI bu tton
~page 75, fig. 80 .
Steering lock
The steering locks when you tu rn the engine off
using the
! STA RT E NG IN E STOP I button and open
the dr iver's door . The locked stee ring helps pre
vent vehicle theft .
Emergency off
If necessary, the eng ine can be sw itched off with
the selector lever in the R o r D/S pos itions . T he
engine stops if you press and hold the
I S TAR T ENGIN E ST OP I button at speeds be low
6 mph ( 10 km/h) and p ress the brake pedal.
A WARNING
- Never turn off the engine be fore the veh icle
has come to a comp lete stop. The f ull func
t ion of the b rake booster and the power
steering is not guaranteed. Yo u must use
more force to turn or bra ke if necessa ry. Be
ca use you cannot steer and b ra ke as you
usually wou ld, this could lead to c rashes
and serious injur ies .
- For safety reasons , you should always park
yo ur vehicle wi th the selec to r l ever in P . Oth
erwise, t he vehicle could inadve rten tly roll
away .
- T he rad iator fan ca n con tinue to run for up
to 10 m inutes eve n after yo u have tur ned
o ff the engine and removed the igni tion key .
T he r adiator fan c an also turn on ag ai n if t he
76
engine coolant heats up because of intense
sunlight or heat b uild- up in the eng ine com
partme nt.
- Always take the key w ith you whenever yo u
leave your vehicle . Otherwise, the engine
could be started or electrical equipment
such as the powe r windows could be operat
ed. This can lead to serio us i njur y.
(D Note
If the engine has been under heavy load for
an extended pe riod, heat bu ilds up in the en
gine compartment after the eng ine is switch
ed off -there is a risk of damaging the engine .
A llow the engi ne to run at id le for about two
m in utes before swit ching i t off.
Driver messages
Ignition is on
This message appears and a warning tone sound s
i f you open the d river's door when the ign ition is
switched on .
No key ident ified
This message appears when the
I S TAR T ENGINE ST OP I butto n is pressed if there
i s no maste r key ins ide the ve hicle or if the sys
tem does not recogni ze it. For examp le, the mas
ter key cannot be recogn ized if it is covered by an
object (e .g . a luminum brief case) wh ich
screens
the radio signal. Elect ro n ic dev ices such as cell
phon es can a lso inte rfe re with the radio signal.
Press brake pedal to start eng ine
This message appears if yo u do not press the
brake pedal to start the eng ine in a vehicle with
an a utomat ic transm ission.
Pre ss clutch pedal to start engine
This message appears if yo u do no t press the
cl utc h ped al to sta rt the eng ine in a ve hicle w it h
a manual transmission.
Shift to N or P to start eng ine
This message appears when attempt ing to star t
t h e engine if the selecto r lever for the automat ic
transmission is not in the P o r
N position. T he ..,.
Page 83 of 264
M N
i? co
-For reas ons of safety, cruise contro l should
not be used in the city, in stop-and-go traf
fic, on twisting roads and when road condi
t ions are poor (such as ice, fog, gravel,
heavy rain and hydrop laning) -risk of acci
dent .
- Turn off the cruise control temporari ly when
enter ing turn lanes, highway exit lanes or in
construction zones.
- Please note that inadvertent ly "rest ing"
yo ur foot on the accelerator peda l causes
the cruise control not to brake. This is be
c a use the cruise co ntro l is ove rri dden by the
dr iver's acceleration .
-If a brake system malfunc tion such as ove r
he ating occu rs when the c ruise control sys
tem is switche d on, the braking func tion in
the system may be switche d off . The other
c ruise control functions remain active as
long as the indicator light
[lj;(i)~i~ (US mod
els)
! Iii (Canadian mode ls) is on.
(D Tips
- Vehicles with manua l t ransmission: You can
attain the set speed only if the gear t hat is
currently engaged will allow it, or if it does
not tax t he engine and allows it to run
smooth ly. Therefore shift i nto a higher or
l ower gear in a time ly ma nner.
- The brake lights illuminate as soon as the
brakes app ly automatically .
Changing speed
.,. To increase/dec rease the speed in increments,
tap the lever i n the
010 dir ection ¢ page 80,
fig. 83.
.,. To inc rease/de crease the s peed q uickly, hol d
the leve r in the
010 direction until the de
sired speed is displayed.
You c an a lso press the acceler ator peda l down to
increase your spee d, e .g . if you want to pass
someone . The speed you saved ea rlier will re
sume as soo n as yo u let off of the accelerator
pedal.
~ If , however, yo u exceed your saved speed by 1.1'1
~ 6 mph (1 0 km/h) for longe r than 5 mi nutes, the
......
Dri ving
cruise control will be turned off tempora rily. The
green symbo l in the d isp lay turns wh ite . The
saved speed rema ins the same .
Presetting your speed
You can preset your desired speed while the vehi
cle is not moving.
.,. Switch on the ign ition.
.,. Pull leve r into position
(D ¢ page 80, fig . 83 .
.,. Press the leve r in t he 0 o r O direction to in -
crease or decrease your speed .
.,. Release the lever t o save that speed .
This function makes it possib le, for examp le, to
save the speed you want before dr iving on the
highway. Once on the highway, activate the cru ise
control by p ulling the lever toward
(D .
Switching off
Temporary deactivation
.,. Press the brake pedal, or
.,. Manual transmission: Keep the clutch pedal
pressed down
longer, o r
.,. Press the leve r into posit ion @ (not clicked into
p lace) ¢
page 80, fig. 83, or
.,. Dr ive fo r longer t han 5 mi nutes a t more t han
6 mph (1 0 km/h) above the s tore d speed.
Switching off completely
.,. Press lever into position @ (clicked into place),
or
.,. Sw itch t he ignit ion off .
T he speed you saved will be retai ned if the cru ise
co ntrol has been switched off tempora rily . T o re
s u me the saved speed, let up on the brake or
cl utch pedal and pull the lever to position
(D .
Swi tch ing the ignition off erases the saved speed .
A WARNING
--
You should only re turn to the saved speed if it
i s not too f ast for the curren t traff ic condi
ti ons -ris k of an accident!
81
Page 84 of 264
Automatic transmission
Automatic transmission
Manual transmission
Gearshift lever
Applies to vehicles: with manual transmission
The clutch pedal must be depressed all the way
before you can start the engine .
The manual transmission in your Audi is equipped
with an
interlock-feature.
• Depress the clutch pedal all the way.
• Start the engine with the gearshift lever in Neu
tral and the clutch pedal depressed.
(D Note
Always depress the clutch pedal fully when
changing gears . Do not hold the vehicle on a
hill with the clutch pedal partially depressed.
This may cause premature clutch wear or damage.
@ Tips
- Resting your hand on the gearshift lever
knob while driving will cause premature
wear in the transmission.
- The back-up lights go on when you sh ift into
Reverse with the ignit ion on.
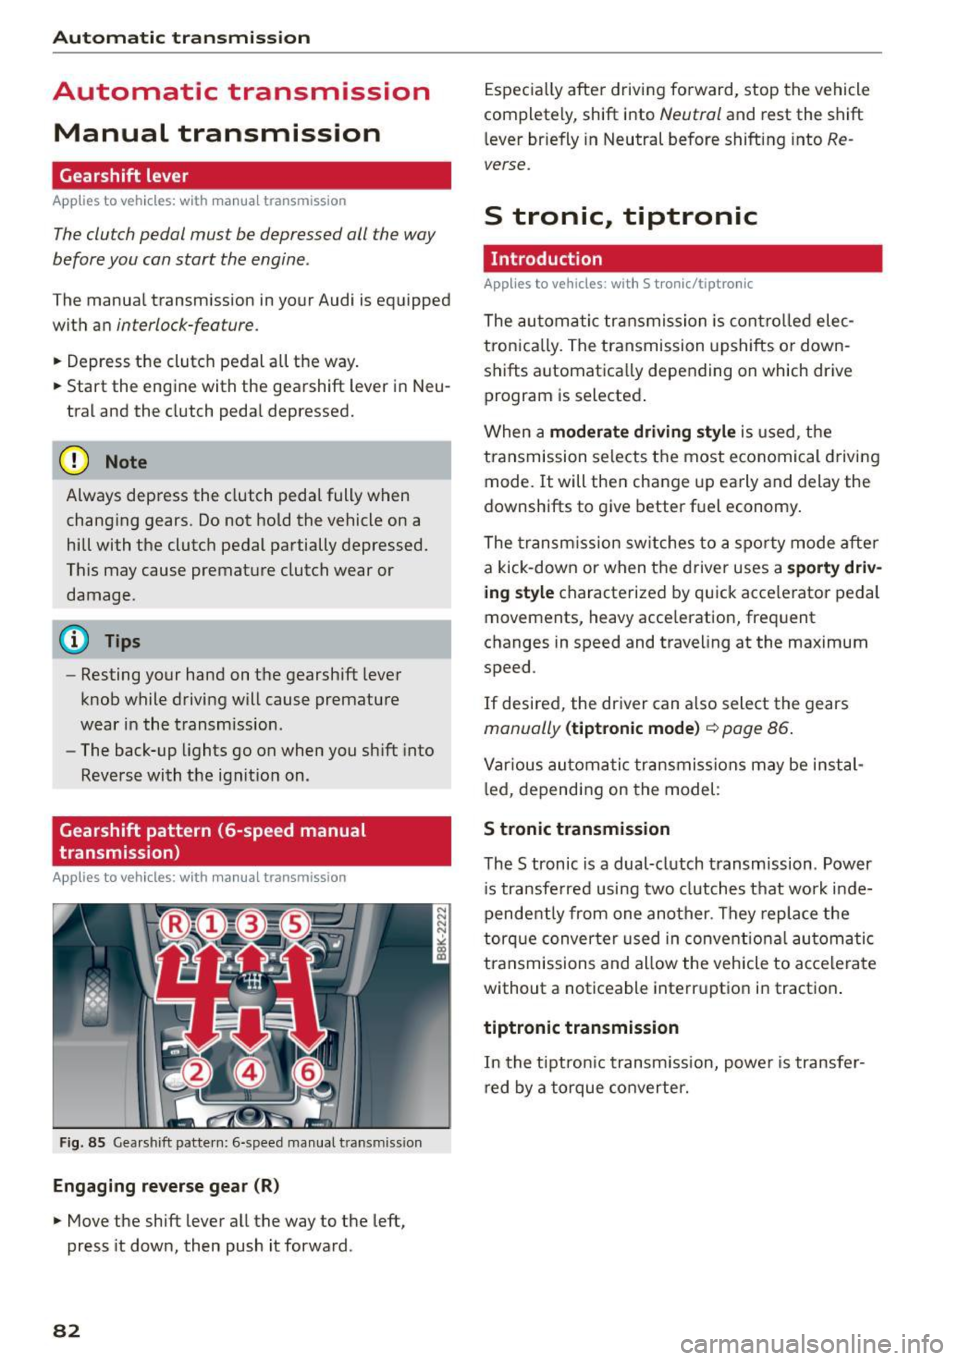
Gearshift pattern (6-speed manual
transmission)
Applies to vehicles: with manual transmission
Fig. 85 Gearshift pattern: 6-speed manual transmiss ion
Engaging reverse gear (R)
• Move the shift lever all the way to the left,
press it down, then push it forward .
82
Especially after driving forward, stop the vehicle
completely, shift into
Neutral and rest the shift
lever briefly in Neutral before shifting into
Re
verse.
S tronic, tiptronic
Introduction
Applies to vehicles: with S tronic/tiptronic
The automatic transmission is controlled elec
tron ically. The transmission upshifts or down
shifts automatica lly depending on which drive
program is selected .
When a
moderate driving style is used, the
transmission selects the most economical driving
mode. It will then change up early and delay the
downshifts to give better fuel economy.
The transmission switches to a sporty mode after
a kick-down or when the driver uses a
sporty driv
ing style
characterized by quick acce lerator pedal
movements, heavy acce leration, frequent
changes in speed and traveling at the maximum
speed .
If desired, the driver can a lso select the gears
manually (tiptronic mode) c::> page 86.
Various automatic transmissions may be instal
l ed, depending on the model :
S tronic transmission
The S tronic is a dual-clutch transmission . Power
i s transferred using two clutches that work inde
pendently from one another . They replace the
torque converter used in conventio nal automatic
transmissions and allow the vehicle to accelerate
without a noticeable interruption in traction .
tiptronic transmission
In the tiptronic t ransm ission, power is transfer
red by a torque converter.
Page 87 of 264
M N
i? co ,...., \!) 1.1'1
N 1.1'1 ,....,
~ Wait briefly until the transmission has shifted (you will feel a slight movement) .
~ Remove your foot from the brake pedal and ac
celerate.
Stopp ing tempo raril y
~ Keep the vehicle stationary using the b raking
pedal, for examp le at traffic lights.
~ Do not press the accelerator pedal when doing
this .
~ To prevent the vehicle from rolling when you
start driving , se t the parking brake when stop
ping on steep inclines¢&,. .
~ The parking brake will release automatically
and the vehicle will start moving once you press
the accelerator pedal.
Stopp ing /p ar kin g
If the selector lever is not in the P position when
you open the driver 's door, the veh icle could roll.
The message
Tr ansmi ssion : Car m ay roll ! Shift
t o park!
appears .
~ Press and hold the brake pedal until the vehicle
has come to a complete stop .
~ Apply the parking brake¢ page 78, Parking.
~ Select the P selector lever pos ition ¢ .&_.
Stopp ing on an incline
~ Always press the brake pedal to hold the vehi
cle in place and prevent it from "rolling back"
¢ &,. . Do
not try to prevent the vehicle from
"rolling back" when a gear is engaged by in
creasing the engine speed ¢0 .
Startin g on an incline
~ Activate the parking br ake.
~ With the driving gear selected, press the accel
erator pedal carefully . The parking brake will re
lease automat ically if you r seat belt is fastened.
Under certain circumstances, such as driv ing in
the mountains, it may be useful to switch tempo
rarily to the manual shift program in orde r to ad
just the gears to the d riving conditions by hand
¢ page 86.
On slopes, activate the parking brake first and
then move the selector lever to the P posit ion.
Aut omatic transm issio n
This prevents too much stress from being placed
on the locking mechanism .
A WARNING ,-
-The vehicle can also roll when the engine is
stopped.
- Unintended vehicle movement can cause se
rio us injury.
- Never leave your vehicle with the engine
running while in gear . If you must leave your
veh icle when the engine is running, activate
the park ing brake and move the selector lev
er to P .
- Power is still transmitted to the wheels
when the engine is runn ing at idle . To pre
vent the vehicle from "creep ing", you must
keep your foot on the brake when the eng ine
is running and the se lector lever is in D/S or
R or "tiptronic" mode is selected.
- Do not press the accelerator pedal when
changing the se lector lever position while
the vehicle is stationary and the eng ine is
r u nning .
- Never sh ift into R or P while driving ,
- Before driving down a steep s lope, reduce
your speed and sh ift into a lower gear with
" t ipt ronic ".
- Do not ride the brakes or press the brake pedal too ofte n or too long whe n driving
down a hi ll. Constant brak ing causes the
b rakes to overhea t and substantially re
duces braking performance, increases brak ing distance or causes comp lete fai lure of
the brake system.
- To prevent the vehicle from ro lling back
when stopping on inclines, always ho ld it in
p lace with the brake pedal or parking brake.
- Never hold the vehicle on an incline with a
slipping clutch. The clutch opens automati
cally when it becomes too hot from the
overload. An ind icator lamp@] illuminates
and a driver message appears¢
page 87
when the clutch is overloaded .
-If the engine must remain running, never
have any dr iving posit ion engaged when
checking under the hood . Make sure these
lecto r lever has secu rely engaged and is
locked in P with the parking brake set
85