park assist AUDI A5 COUPE 2016 Owners Manual
[x] Cancel search | Manufacturer: AUDI, Model Year: 2016, Model line: A5 COUPE, Model: AUDI A5 COUPE 2016Pages: 264, PDF Size: 66.92 MB
Page 4 of 264
Table of contents
Owner's Literature
About this Owner's Manual ... .. .
Operation .. ................... .. .
Cockpit ..... .. ............. .... .. .
General illustration . .. ..... ..... .. .. .
5
6
8
8
8
Instruments and indicator lights 10
Instruments . . . . . . . . . . . . . . . . . . . . . . . . 10
Indicator ligh ts . . . . . . . . . . . . . . . . . . . . . 13
Driver information system . . . . . . 23
I n tr oduc tion . . . . . . . . . . . . . . . . . . . . . . . . 23
Trip computer . . . . . . . . . . . . . . . . . . . . . .
24
Gearshift Indicator . . . . . . . . . . . . . . . . . . 26
Eff iciency program . . . . . . . . . . . . . . . . . . . 26
Service interval display . . . . . . . . . . . . . . . 28
O n Board Diagnostic System (OBD) . . . . . 29
Open ing and clo sing . . . . . . . . . . . . . 31
Central locking . . . . . . . . . . . . . . . . . . . . . . 31
Luggage compa rtment lid . . . . . . . . . . . . . 37
Power Windows . . . . . . . . . . . . . . . . . . . . . 38
Panorama roof . . . . . . . . . . . . . . . . . . . . . . 40
Valet parking . . . . . . . . . . . . . . . . . . . . . . . 40
Garage door opener (Home link) . . . . . . . .
41
Light and Vision . . . . . . . . . . . . . . . . . . 44
E xte rior lighting . . . . . . . . . . . . . . . . . . . . .
44
Interior lighting . . . . . . . . . . . . . . . . . . . . . 47
V1s1on ... .... ... .. .......... .. .. .. .
Windshield wipers .. .......... .. .. .. .
Dig ita l compass ... . .......... .. .. .. . 47
so
52
Seat
s and storage . . . . . . . . . . . . . . . . 54
Gene ral information . . . . . . . . . . . . . . . . . 54
Front seats . . . . . . . . . . . . . . . . . . . . . . . . . 55
H ead restra ints . . . . . . . . . . . . . . . . . . . . . 57
Memory function . . . . . . . . . . . . . . . . . . . . 58
Ashtray . . . . . . . . . . . . . . . . . . . . . . . . . . . . 59
Ciga rette li ghter . . . . . . . . . . . . . . . . . . . .
60
Storing . . . . . . . . . . . . . . . . . . . . . . . . . . . . 60
Roof rack . . . . . . . . . . . . . . . . . . . . . . . . . . 62
L uggage compartment . . . . . . . . . . . . . . . 64
Warm and cold .. .......... ....... 68
Climate con trol system . . . . . . . . . . . . . . . 68
2
Driving .... . .. .. .. .. ... . .. .... ... . .
Steering . ... .. .. .. .. .. .. .. .... ... . .
72
72
Ign it ion lock . . . . . . . . . . . . . . . . . . . . . . . . 72
Convenience key . . . . . . . . . . . . . . . . . . . . . 75
D river messages . . . . . . . . . . . . . . . . . . . . . 76
E le ctromechanical parking brake . . . . . . .
77
Speed warning system . . . . . . . . . . . . . . . . 79
Cruise control system . . . . . . . . . . . . . . . . 80
Automatic transmiss ion . . . . . . . . . 82
Manual transmission . . . . . . . . . . . . . . . . . 82
5 tronic, tiptronic . . . . . . . . . . . . . . . . . . . . 82
Audi adaptive cruise control and
braking guard . . . . . . . . . . . . . . . . . . . .
89
Introduction . . . . . . . . . . . . . . . . . . . . . . . . 89
General informat ion . . . . . . . . . . . . . . . . . 89
Audi adaptive cruise control . . . . . . . . . . .
91
Audi braking guard . . . . . . . . . . . . . . . . . . 95
Messages . . . . . . . . . . . . . . . . . . . . . . . . . . 96
Audi side a ssi st . . . . . . . . . . . . . . . . . . 98
Side assist . . . . . . . . . . . . . . . . . . . . . . . . . 98
Audi drive select . . . . . . . . . . . . . . . . . 102
Driving settings . . . . . . . . . . . . . . . . . . . . . 102
Parking Sy stem . . . . . . . . . . . . . . . . . . 105
Parking system . . . . . . . . . . . . . . . . . . . . . . 105
Rear parking system . . . . . . . . . . . . . . . . . 105
Rear parking system with rearview
camera
106
Safety 112
Driving safety . . . . . . . . . . . . . . . . . . . . 112
Bas ics . . . . . . . . . . . . . . . . . . . . . . . . . . . . . 112
Correct passenger seat ing positions . . . . . 113
Driver 's and front passenger's footwell . . 116
Pedal area . . . . . . . . . . . . . . . . . . . . . . . . . . 117
Storing cargo correctly . . . . . . . . . . . . . . . 118
Reporting Safety Defec ts . . . . . . . . . . . . . . 119
Safety belts . . . . . . . . . . . . . . . . . . . . . . 121
General information . . . . . . . . . . . . . . . . . 121
Why use safety belts? . . . . . . . . . . . . . . . . 122
Safety belts . . . . . . . . . . . . . . . . . . . . . . . . 124
Be lt tensioners . . . . . . . . . . . . . . . . . . . . . . 127
Page 11 of 264
.... N
0 Ico ....
@
®
©
®
®
(j)
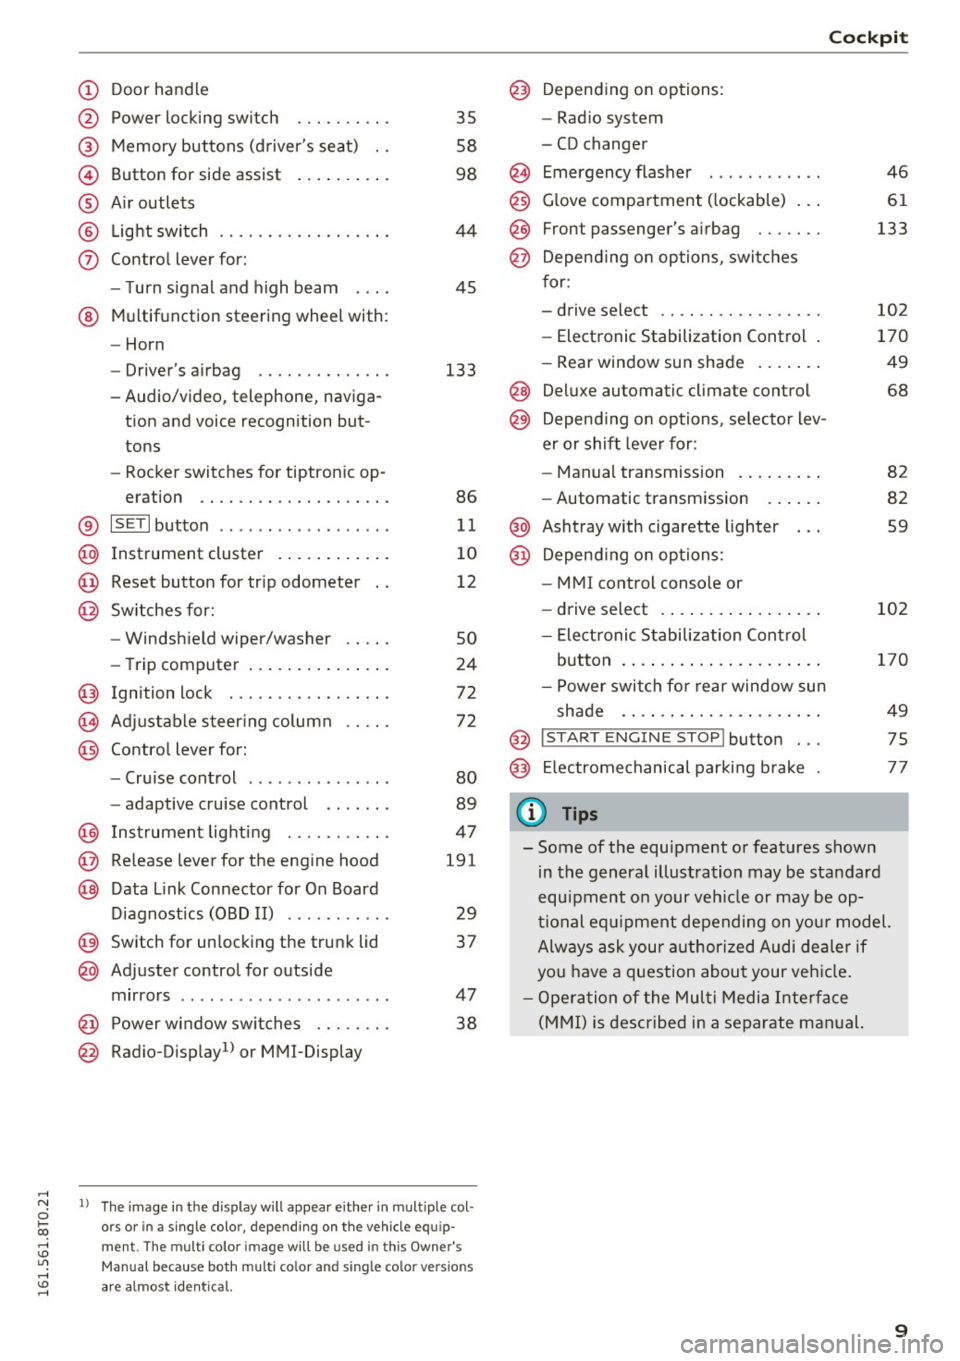
Door handle
Power locking switch
Memory buttons (driver's seat) . .
Button for side assist
A ir outlets
Light switch
Control lever for:
- T urn signal and high beam
® Multifunction steering wheel with :
- Horn
- Driver's airbag ......... .. .. .
- Audio/video, telephone, naviga-
tion and voice recognition but
tons
- Rocker switches for tiptron ic op-
eration .. ............... .. .
® IS ETI button ................. .
@ Instrument cluster .......... . .
@ Reset button for trip odometer
@ Sw itches for:
@
@
- Windshield wiper/washer
- Trip computer .............. .
Ignition lock . ... ..... ... .. .. .
Adjustable steer ing column
Contro l lever for:
- Cruise control .............. .
- adaptive cruise control
I nstrument lighting .......... .
Release lever for the engine hood
Data Link Connector for On Board
Diagnostics (OBD II) ..... ..... .
Switch for unlocking the trunk lid
Adjuster control for outside
mirrors ................ ..... .
Power window switches ..... .. .
Radio-Display
1> or MMI-Display
35
58
98
44
45
133
86
11
10
12
so
24
72
72
80
89
47
191
29
37
47 38
ll The image in t he d is pl ay wil l appear either in m ultiple c ol
o rs or in a single colo r, depending on the vehicle e quip
m ent. The mult i co lor im ag e will b e used in th is Owne r's
M an ua l bec ause both multi co lor and single co lo r v ersio ns
ar e al m ost identica l.
Cockpit
Depending on options:
- Radio system
- CD changer
Emergency flasher
G love compartment ( lockable) .. .
Front passenger's airbag ...... .
Depend ing on options, switches
for:
- drive select .. .............. .
- Electronic Stabilization Control .
- Rear window sun shade ...... .
@ Deluxe automatic climate control
@ Depending on options , se lector lev
er or shift lever for:
@
@
- Manual transmission ........ .
- Automatic transmission
Ashtray with cigarette lighter Depend ing on options:
- MM I control console or
- drive select . ... ............ .
- Electronic Stabilization Control
46
61
133
102
170
49
68
82
82
59
102
button . . . . . . . . . . . . . . . . . . . . . 170
- Power switch for rear window sun
shade . . . . . . . . . . . . . . . . . . . . . 49
@ I START ENGIN E STOP ! button . . . 75
@) Electromechanical parking brake 77
(D Tips
- Some of the equipment or features shown
in the general illustration may be standard
equipment on your veh icle or may be op
tional equipment depending on your model.
Always ask your authorized Audi dealer if
you have a question about your vehicle.
- Operation of the Multi Media Interface
(MMI) is described in a separate manual.
9
Page 17 of 264
.... N
0 I-co ....
c:> page 91
Adaptive cr uise control*
c:> page 91
High beam
c:> page45
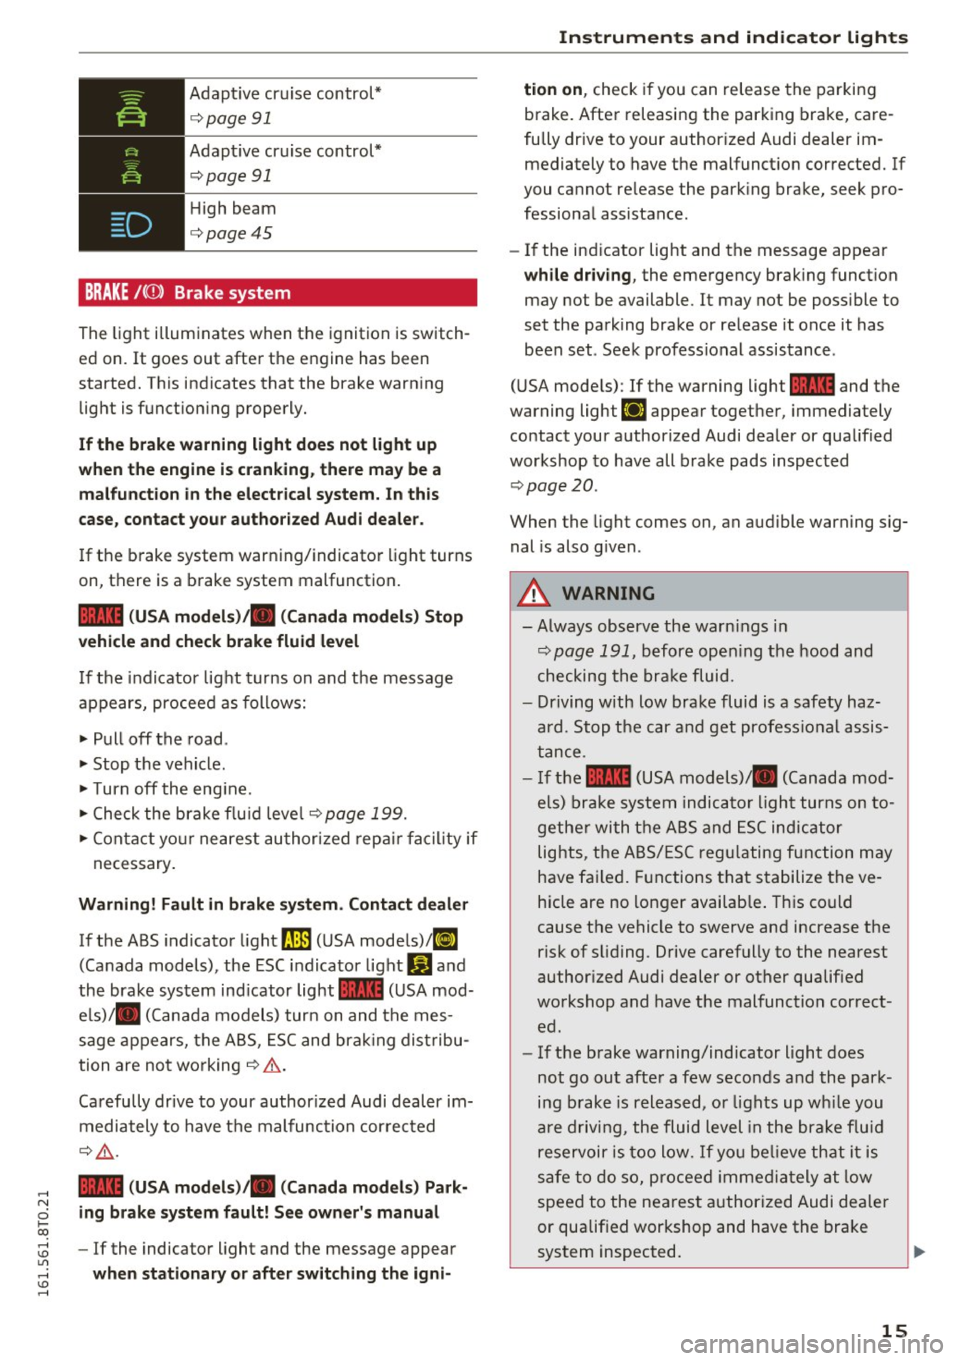
BRAKE /((J)) Brake system
The light illuminates when the ignition is switch
ed on.
It goes out afte r the engine has been
started. T his indicates that the brake warn ing
light is f unct ion ing properly.
If the brake warning light does not light up
when the engine i s crank ing , there may be a
malfunction in the electrical system. In th is
case , contact your author ized Audi dealer .
If the b rake system warn ing/indicato r light turns
on, there is a b rake system malfunction.
1111 ( USA models )/. (Canada models) Stop
vehicle and check brake fluid level
I f the in dicator lig ht t urns on and t he message
appears, procee d as follows:
.,. Pull off the road .
.. Stop t he vehicle .
.,. Turn off the eng ine .
.,. Check the brake flu id leve l
c:> page 199.
.,. Con tact yo ur nearest au thor ized rep air f aci lity if
ne cessary.
Warning! Fault in brake system. Contact dealer
If the ABS indicato r light fJIE) (U SA mode ls)/ li]
(Canada models), the ESC indica tor light Wand
the brake sys tem ind icator light
1111 (USA mod
e ls)/ . (C anada models) tur n on and the mes
sage appears, t he A BS, ES C and bra king dis tribu
tion are no t wo rking
c:> .&. .
Ca refully drive to your author ized Audi dealer im
m ediately to have t he m alf unc tion cor rec ted
¢ .&, .
1111 (USA models )/. (Canada models ) Park
ing brake system fault! See owner's manual
- If the indicator light and the message appear
when stationary or after switching the igni-
Instruments and ind icator lights
tion on , check if you can rele ase the parki ng
brake. After releasing the par king brake, care
fully dr ive to your author ized Audi dealer im
mediately to have the malfunct ion corrected. If
you cannot re lease the park ing bra ke, seek pro
fessiona l assistance.
- If the ind icator light and the message appear
while driving , the emergency brak ing funct ion
may not be available. It may not be poss ible to
set the pa rk ing brake or re lease it once it has
been set . See k profess ional assis tance.
( U SA mode ls) : If the warning light
1111 and the
warning light
EiJ appear togethe r, immediately
contact your author ized Audi dea ler or qualified
workshop to have all b rake pads inspec ted
c:> page20 .
When the light comes on, an audible warning sig
nal is also g iven .
A WARNING
--Always observe the warn ings in
c:> pag e 191, befo re open ing the hood and
checking the bra ke fluid.
- Driving with low bra ke fluid is a safety haz
ard . Stop the car an d get profess io nal assis
t a nce .
- I f the
1111 (USA models)/ . (Canada mo d
els) brake sys te m indic at or li ght tur ns on to
ge the r with the A BS and ESC indic ator
lig hts , the A BS/ES C regu latin g fun ction m ay
h ave fa iled . Functions t hat s ta b ilize the ve
hicle are no longer availab le . T his co uld
cause t he ve hicle to swerve an d increase the
risk of s liding. Drive carefully to the nearest
author ized Audi dealer or ot her qualified
wo rkshop and have t he malfunc tion c orrect
e d .
- If the b rake warning/indicator light does
not go ou t aft er a f ew seco nds and th e park
ing b rake is r eleased, o r lights up wh ile you
a re drivi ng, the flui d level in the bra ke f lu id
rese rv o ir i s too lo w.
If yo u be lieve th at it is
saf e to do so, proceed immedia tely at lo w
speed to the ne ares t au thorized Au di de aler
or qualified workshop and have the bra ke
sys tem inspected .
15
Page 34 of 264
Opening and clo sin g
- If the power locking system should fail, you
can still open the fuel tank flap in an emer
gency ¢
page 190.
-You are well advised not to keep val uables
inside an unatte nded vehicle, v is ible or not.
Even a properly locked vehicle cannot pro
v ide the security of a safe.
- If the LED in the upper edge of the driver's
door panel comes on for about 30 seconds
after t he vehicle is locked, there is a mal
funct ion in the power lock ing or the anti
theft warning system . Have the malf unct io n
cor rected by an authorized Audi dealership
or q ualified repair facility.
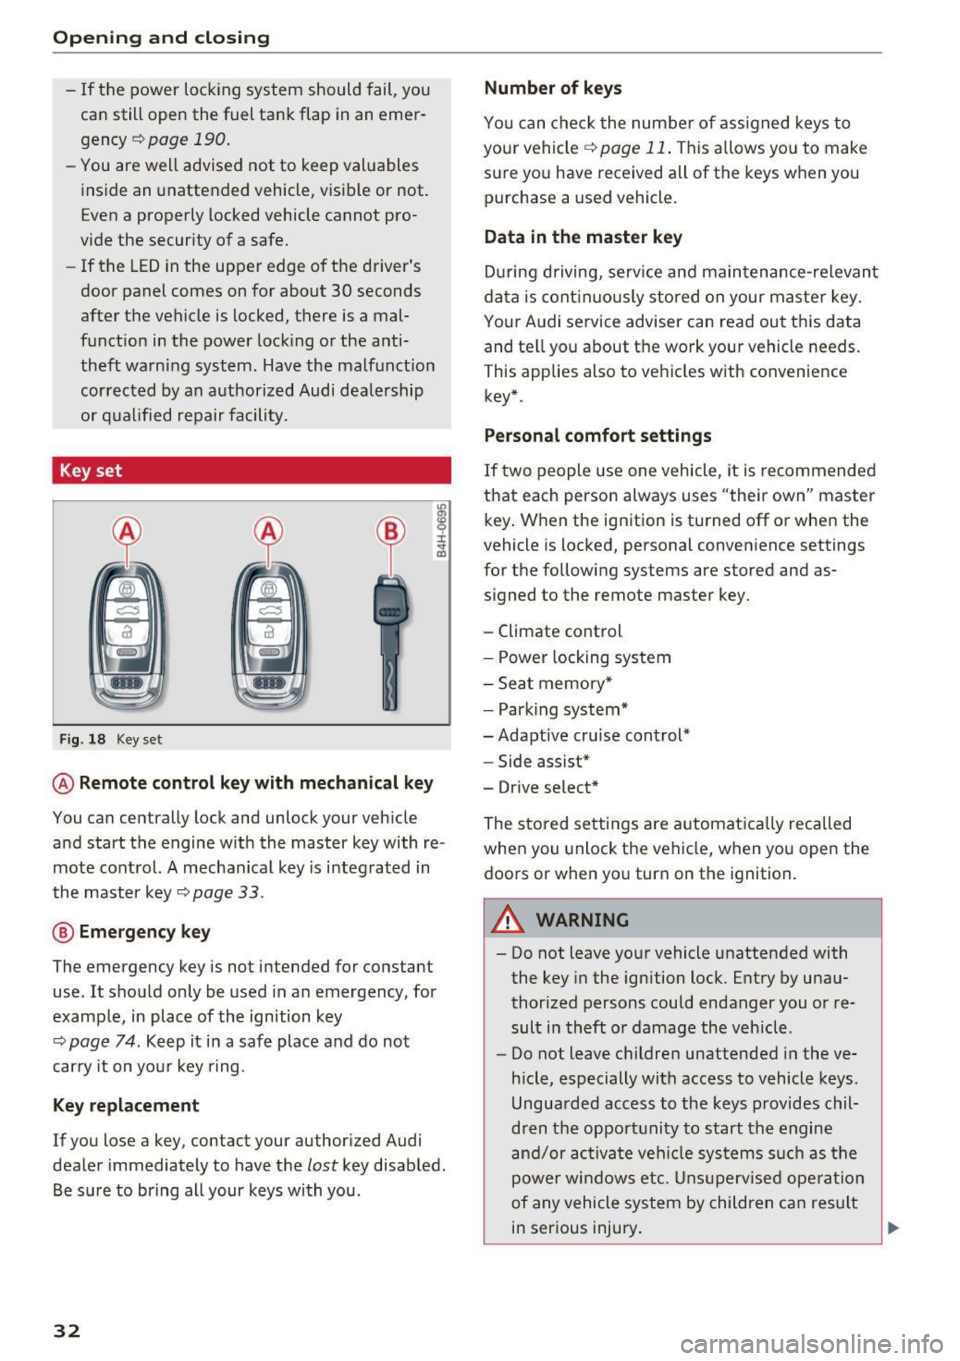
Key set
F ig . 18 Key set
m 0 ±
~
@ Remote control key with mechanical key
You can centrally lock and unlock your veh icle
and start the engine w it h the master key with re
mote cont rol. A mecha nical key is i nteg rated in
the master key ¢
page 33.
@ Eme rgency key
The emergency key is not intended for constant
use . It shou ld only be used in an emergency, for
example, in place of the ign ition key
¢
page 74 . Ke ep it in a safe place and do not
car ry it on yo ur key r ing.
Key replacement
If you lose a key, contact your author ized Audi
dealer immediately to have the
lost key disab led .
Be s ure to bring all your keys with you .
32
Number of keys
You can chec k the number of assigned keys to
your vehicle
r=;, page 11 . This a llows yo u to make
sure yo u have received all of the keys when you
purchase a used vehicle .
Data in the master key
During driving, serv ice and maintenance-re levan t
da ta is cont inuo usly stored on your master key.
You r A udi service adviser can read out this data
and te ll yo u about the work you r vehicle needs.
This applies also to veh icles with convenience
key* .
Personal comfort settings
If two people use one vehicle, it is recommended
that each person always uses "their own" maste r
k ey . W hen the ignit ion is turned off or when the
vehicle is loc ked, personal conven ience settings
for the following systems are stored and as
signed to the remote master key.
- Climate control
- Power locking system
- Sea t memory *
- Park ing system*
-Adaptive cr uise control*
- Side assist*
- Drive select*
The stored settings are a utomat ica lly rec alled
when you unlock t he vehicle, when yo u ope n the
doo rs or when yo u turn on the ignition.
A WARNING
- Do not leave you r vehicle unattended with
the key in the ignition lock. Entry by una u
thor ized persons could endanger you or re
sult i n theft o r damage the vehicle .
- Do not leave childre n unattended i n the ve
hicle, especially with access to vehicle keys .
Ungua rded access to the keys provides chil
dren t he oppor tunity to start the engine
an d/or activa te ve hicl e sys tems s uch as the
powe r windows etc. Unsupervised ope ration
of any vehicle system by children c an res ult
in ser ious injury.
.
Page 79 of 264
..... N
0 1-CX)
engine can only be star ted with the se lector in
these positions .
!I Is the key in the v ehicle?
This message appears if the master key is re
moved from the vehicle with the engine run ning .
If the maste r key is no longer in the veh icle, you
cannot swi tch on the ignition after stopping the
engine and yo u also cannot start the engine
again. Moreover, you cannot lock the vehicle
from the outside with the key .
Shift to P otherwise vehicle can roll away . Door s
do not lo ck if l ever i s not in
P.
This message appears fo r safety reasons a long
with a warning signal. It appears if the selec to r
l eve r fo r th e automatic transmission is not in the
P posit ion when switching off the ignition . M ove
the selector leve r to the P position, otherwise the
ve hicle is not secured against rolling away. You
also cannot lock the vehicle using the locking button* on the door handle or using the remote
key.
Con venien ce key d efectiv e! Use ignition lo ck
This message appea rs if the engine mus t be
s t arted or stopped us ing t he igni tion key and no t
the
! START ENGINE STOPI button .
Electromechanical
parking brake
Operation
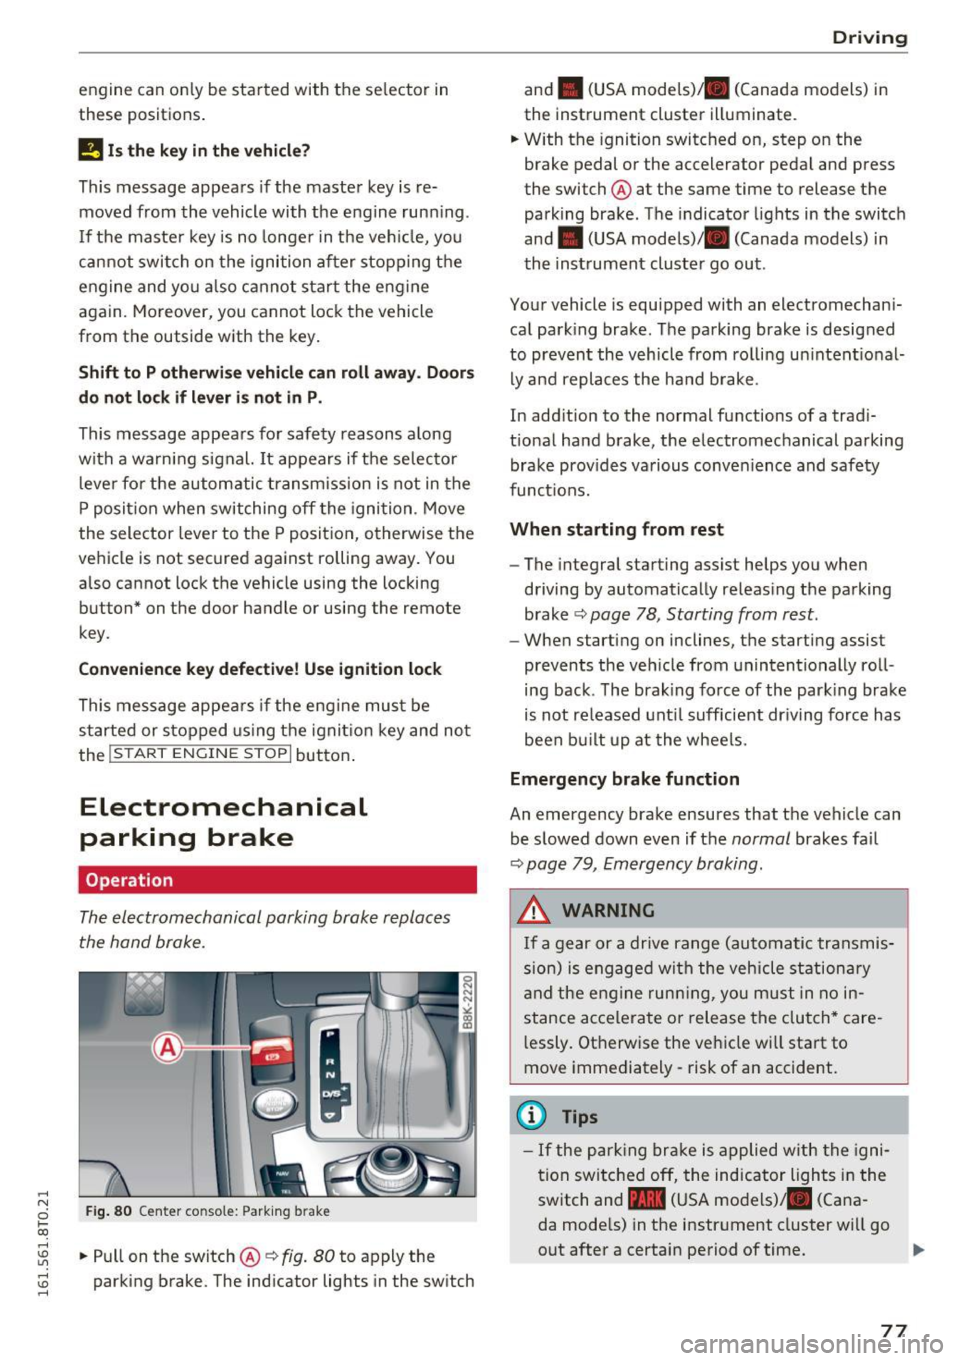
The electromechanical parking brake replaces
the hand brake.
Fig . 8 0 Center co nsole: Park ing b rake
rl
~ .. Pull on the switch@~ fig. 80 to apply the
~ parking brake. The ind icator lights in the sw itch ......
D rivi ng
and . (USA mode ls)/ . (Canada models) in
the instrument cluster illuminate.
.. W ith the ignition switc hed on, step on the
brake pedal or the accelerator pedal and press
the switch @ at the same time to release the
parking brake . The indicator lights in the switch
and . (USA models)/ . (Canada models) in
the instrument cluster go out .
Your vehicle is equipped with an electromechani
cal park ing brake. The parking brake is designed
to prevent the vehicle from rolling un intent ional
ly and replaces the ha nd b rake .
In add ition to the normal functions of a trad i
t ional ha nd brake, the electromechanical parking
brake prov ides va rious conven ience and safety
funct ions.
When starting from rest
- The integral starting assist helps you when
driving by automatically releas ing the parking
brake ~
page 78 , Starting from rest.
- When start ing on inclines, the starting assist
prevents the veh icle from unintentionally roll
ing back . T he brak ing force of the park ing brake
is not re leased unt il sufficient dr iving force has
been bu ilt up at the whee ls.
Emergency brake function
An emergency brake ensures that the veh icle can
be slowed down even if the
normal brakes fa il
~ page 79, Emergency braking .
A WARNING
If a gear or a drive range (automatic transmis
s ion) is engaged wi th the vehicle stationa ry
a nd the engine runn ing, you must in no in
stance acce lera te or release the clutch* care
l essly. Otherwise the vehicle wi ll sta rt to
move immediately- risk of an accident.
(1) Tips
- If the pa rk ing br ake is a pplied with the igni
tion swi tche d off, the indicator lights i n the
switch and -(USA models) . (Cana
da mode ls) in the instr ument cluster wi ll go
out after a certain period of time.
77
Page 80 of 264
Driving
- Occasional noises when the parking brake is
applied and released are normal and are not
a cause for concern.
- When the vehicle is parked, the parking
brake goes through a self-test cycle at regu
lar intervals. Any associated noises are nor
mal.
Parking
.,. Press the brake pedal to stop the vehicle .
.,. Pull the switch @¢
page 77, fig. 80 to set the
parking brake .
.,. Automatic transmission: Move the selector lev-
er to P.
.. Turn the engine off¢.&, .
.. Manual transmission: Shift into 1st gear.
.. When on inclines or declines, turn the steering
wheel so that the vehicle will roll into the curb
if it begins to move.
A WARNING
-
-When you leave your vehicle -even if only
briefly -always remove the ignition key. This
applies particularly when children remain in
the vehicle. Otherwise the children could
start the engine, release the parking brake
or operate electrical equipment (e.g. power
windows). There is the risk of an accident.
- When the vehicle is locked, no one -particu
larly not children should remain in the vehi
cle. Locked doors make it more difficult for
emergency workers to get into the vehicle -
putting lives at risk.
Starting from rest
The starting assist function ensures that the
parking broke is released automatically upon
starting .
Stopping and applying parking brake
.. Pull the switch @¢ page 77, fig. 80 to apply
the parking brake.
78
Starting and automatically releasing the parking brake
.. When you start to drive as usual, the parking
brake is automatically released and your vehicle
begins to move.
When stopping at a traffic signal or stopping in city traffic on vehicles with an automatic trans
mission, the parking brake can be applied. The
vehicle does not have to be held with the foot brake. The parking brake eliminates the tendency
to creep with a drive range engaged . As soon as
you drive off as usual, the parking brake is re leased automatically and the vehicle starts to
move .
Starting on slopes
When starting on inclines, the starting assist pre
vents the vehicle from unintentionally rolling back. The braking force of the parking brake is
not released until sufficient driving force has
been built up at the wheels.
(D Tips
For safety reasons, the parking brake is re
leased automatically only when the driver's
safety belt is engaged in the buckle.
Starting off with a trailer
To prevent rolling back unintentionally on an in
cline, do the following:
.. Keep the switch @¢ page 77, fig. 80 pulled
and depress the accelerator. The parking brake
stays applied and prevents the vehicle from
rolling backward.
.,. You can release the switch @once you are sure
that you are developing enough driving force at
the wheels by depressing the accelerator.
Depending on the weight of the rig (vehicle and
trailer) and the severity of the incline, you may
roll backwards as you start. You can prevent roll
ing backwards by holding the parking brake
switch @pulled out and accelerating -just as
you would when starting on a hill with a conven
tional hand brake .
Page 88 of 264
Automatic transmission
¢ page 191. Otherwise, any increase in en
gine speed may set the vehicle in motion,
even with the parking brake applied.
(D Note
-When stopping on an incline, do not try to
hold the vehicle in place by pressing the ac
celerator pedal while a driving gear is se lected . This can cause the transmission to
overheat and can damage it. Activate the
parking brake or press the brake pedal to
prevent the vehicle from rolling .
- Allowing the vehicle to roll when the eng ine
i s stopped and the selector lever is in N w ill
damage the transmission because it is not
l ub ricated under those circumstances .
@ Tips
For safety reasons, the parking brake is re
leased automatically only when the dr iver's
safety belt is engaged in the buckle.
Hill descent control
Applies to veh icles: w ith S tronic/tiptron ic
The hill descent control system assists the driver
when driving down declines.
Hill descent contro l is activated when the selec
tor lever is in D/S and you press the brake pedal.
The transm ission automatically selects a gear
that is suitable for the incline. Hill descent con
trol tries to mainta in the speed achieved at the
time of braking, within physical and technical
limitations.
It may still be necessary to adjust the
speed with the brakes .
Hill descent control switches off once the decline
levels out or you press the accelerator peda l.
On veh icles w ith the cruise contro l system*
¢ page 80, hill descent control is also activated
when the speed is set.
& WARNING
Hill descent control cannot overcome physica l
limitations, so it may not be able to maintain
a constant speed under all condit ions . Always
be ready to apply the brakes.
86
Manual sh ift program
App lies to vehicles: with S tronic/tiptronic
Using the manual shift program you can man
ually select gears.
'
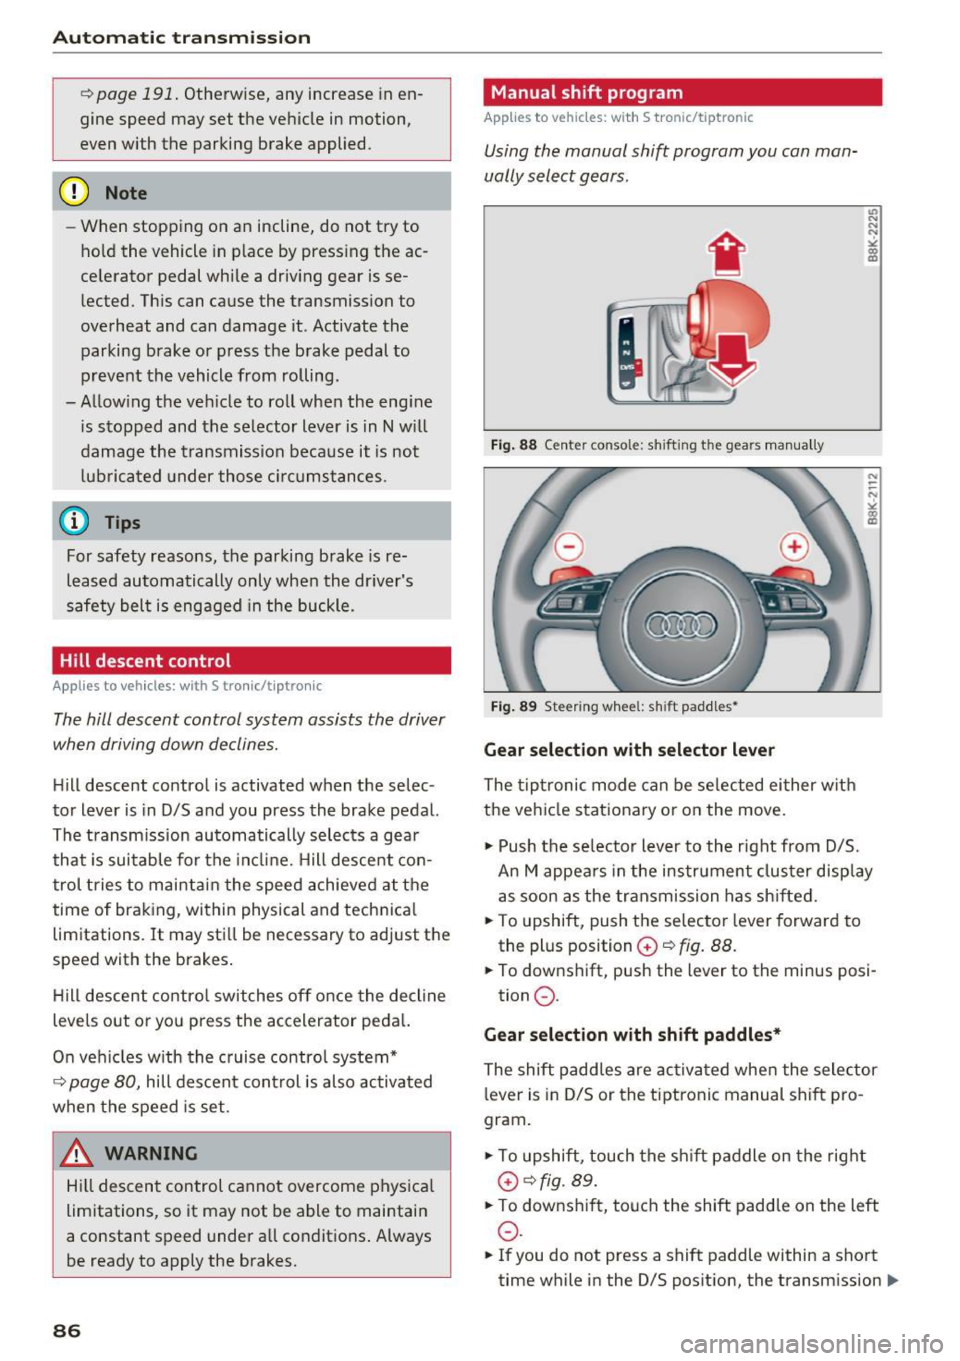
Fig. 88 Center console: shift ing the gears manua lly
Fig. 89 Steering whee l: sh ift paddles•
Gear selection with selector lever
The tiptronic mode can be selected either w ith
the vehicle stationary or on the move.
.,. Push the se lector lever to the right from D/5.
An M appea rs in the instrument clus ter disp lay
as soon as the transmission has shifted.
.. To upshift, push the selector lever forward to
the plus position
G) ~ fig. 88.
.. To downshift, push the lever to the minus posi-
tion
0 .
Gear selection with shift paddles*
The shift paddles are activated when the selector
lever is in D/S or the tiptronic manual shift pro
gram.
.,. To upshift, touch the shift paddle on the right
G)¢fig. 89.
.. To downsh ift, touch the shift paddle on the left
0 .
.. If you do not press a shift paddle within a short
time while in the 0/5 position, the transmission
II>
Page 107 of 264

.... N
0 Ico ....
Parking system
Applies to vehicles: with park in g system
Different park assist systems may be used for
parking or maneuvering, depending on the vehi
cle's features.
Parking sy stem (rear )* :
For the parking system (rear), the aco ustic par k
assist system is installed in the rea r of the veh icle
¢ page 105.
The rear parking assis t sys tem uses ultrason ic
sensors to dete rm ine the distance of the veh icle
from a detected obstacle . There are a tota l of
four sensors located on the rea r bumpe r (two in
the middle and two on t he sides).
Parking system (rear , with rear view
came ra)*:
For the parking system (rear, with rear view cam
era),
the rear acoustic park assist system is i nte
g rated in the rear of the ve hicle and the rear view
camera is integrated in the rear lid ¢page 108.
The parking system (rear, with rear view camera)
uses ultrasonic sensors to dete rm ine the distance
of the vehicle from a detected obstacle. There are
a tota l of four senso rs located on the rear bump
er (two in the midd le and two on the sides) .
A WARNING
-
Make sure the senso rs are no t cov ered by
s t ick ers, depos its o r any othe r obstr uctions as
i t may imp air th e sensor f unction. For infor
mation on clea ning, refe r to¢
p age 18 4.
Rear parking system
Rear acoustic park assist
Applies to vehicles: with park in g system (rear)
The rear acoustic park assist warns you of obsta
cles or objects behind your car.
Description
T h e rea r a cous tic par king assist system deter
mines t he d ista nce o f the ve hicle from an obsta -
Parking System
cle using ultrasonic senso rs . T here are 4 sensors
in the rear bumper .
T he ra nge a t whi ch the sensors sta rt to me asure
is
about :
To the s ide 2 ft (0.60 m)
Cente r rear 5.2 ft (1. 60 m)
Activation
Acoustic parking assist is act ivated automatica lly
whe n
reverse gear is engaged. A b rief to ne con
firm s th at t he system is a ct ivate d.
Warning tones
Dista nce warn ing is given by warn ing tones wh ich
are ge nerated by t he rear sig nal ge nerator . The
vo lume and t he p itch of the wa rn ing tones can be
adjus ted in the M MI*
¢ page 10 6.
Reversing
Dista nce warn ing when reversing starts when a n
obstacle is detected in the range of the pa rking
ass ist system . As the distance dec reases, the
t ime interva l between the aud ib le ton es becom es
s h ort er.
When the distance is less tha n 1ft (0.30 m), the
tone becomes cont inuous. At t h is point you
shou ld sto p bac king up.
Please note that low objects already s ignalled by
a war ning can d isappear from the system's detec
t io n range and w ill not cont inue to be s ignalled .
If the distance to an obstacle remains the same,
the volume of the distance warn ing is gradually
reduced afte r abo ut 4 seconds (t his does not ap
ply in the conti nous to ne range). App roaching an
othe r obstacle will result in th e distance war ning
sounding at the normal volume aga in.
Malfunctions in the system
If a warning to ne is aud ib le for about five sec
o n ds when you turn on the ignition, there is a
malfu nction in t he sys tem. Have the prob lem
cor rec ted by you r auth o riz ed Aud i dea le r.
Keep the sensors in t he rear bumper clean and
free from ice so t hat the acoustic park ass ist sys-
tem can function prope rly . .,..
105
Page 108 of 264

Parking System
_& WARNING
-Sensors have dead spaces in which ob jects
cannot be detected. Be especially alert for
small chi ldren and animals, since they are
not always detected by the sensors.
- The acoustic parking system is not a substi
tute for the driver's own caution and alert
ness. Ultimate responsibility always remains
with the driver during parking and simi lar
maneuvers . Always watch where you are
dr iv ing .
- Yo u should always adjust the volume and
frequency of the warning tones so that you
can eas ily hea r the acoustic distance warn
ing
even if the radio is p lay ing, the air-cond i
t ioner blower is on High or there is a high
level of outs ide noise .
- Chec k the settings whenever anyone e lse
has driven t he veh icle before you.
(D Note
- Remember that low obstacles for which a
warning has already been issued may "dive"
below the system 's sens ing zone if the vehi
cle is being backed up closer. In this case,
the warn ing sound shutting off does
not in
dicate that you have cleared the obstacle .
Ins tead, impact is imm inent.
- Objects such as tra ile r hitches , cha ins, nar
r ow posts or fences
cove red by a th in layer
of pa int may no t always be dete cte d by the
system. T hey can still damage your vehicle
wi tho ut warn ing.
@ Tips
Keep the senso rs in the rea r bumpe r clean
an d free of snow a nd ice so that the ac ous tic
parking assi st system can f unction properly .
Adjusting the warning tones
Applies to vehicles: with parking system (rear)
The warning tones can be adjusted in the MMI*.
• Select : ICARlfunct ion button> Parking syst em .
Or
• Se lect : ICARI funct ion button >
Car system s*
control bu tton > Driver assist > Parking aid .
106
-Rear volume -rear sensor volume
-Rear fr equen cy -rear sensor freque ncy
- Music volume whi le parking -when the pa rk-
ing sys tem is switched on, the vo lume of the
ac tive audio source is lowered.
The newly ad justed va lue is briefly heard from
the sig nal generator. The set tings are automati
ca lly stored and ass igned to the mas ter key with
remote cont rol.
Rear parking system
with rearview camera
Introduction
App lies to vehicles: with parking system (rear, with rear view
camera)
F ig. 1 10 Park in g m ode 1: reverse parking
Fi g. 111 Park in g m ode 2: p arallel p ark in g
.... .... 0
-
"' :8
Vehicles with the park ing system are equipped
with a
rear view camera in addition to the a cous
tic parking system.
You can choose between two modes to assist you
with parking. For example, you can use "parking mode
l" when parking in a parking spa ce or ga
rage
c;, fig. 110 . When you want to park paralle l
to t he edge of the street, se lect "parking mode
2 "
c::;;, fig . 111 . ...
Page 109 of 264

,-1 N
0 1-CX)
,-1 I.Cl U"I
,-1 I.Cl ......
The rear acoustic park assist system is integrated in the rear of the vehicle and the rear view cam
era is integrated in the rear lid~
page 108 .
.&_ WARNING
-
- The rear view camera has blind spots, in
which objects cannot be detected. Be espec ially careful to check for small ch ildren and
animals before back ing up. Small children
and animals wi ll not a lways be detected by
the sensors.
General Information
App lies to vehicles: with parking system (rear, with rear view
camera)
F ig . 112 Cove red area (D and uncovered area@of the rear
v iew camera
0
0
Fig. 113 T runk lid: Locat ion of the rear view came ra
Sensors in the bumper
Sensors are located in the rear bumpers . If these
detect an obstacle, audible s ignals war n you. The
r ange at which the se nsors begin to measure is
a pprox imately:
To the side 2 ft (0.60 m)
Center rear 5.2
ft (1.60 m)
D istance warning when reversing sta rts when an
obstacle is detected in the range of the parking
Parking S ystem
ass ist system. As the distance dec reases, the
time interva l between the audible tones becomes
shorter.
When the distan ce is less than 1 ft (0.30 m), the
tone becomes cont inuous . At th is point you
shou ld stop backing up .
If the distance to an obstacle stays the same, the
vo lume of the dis tance signal ch ime is gr adually
reduced after abo ut
4 seconds (does not affect
the continuous signal tone). Approaching anoth er obstacle w ill ca use the distance s ignal to
sound again at the normal volume.
Rear view camera co verag e ar ea
The M MI display shows the a rea cove red by the
rea r view camera ¢
fig. 112 @. Objects that are
not in the area covered @are not shown on the
MMI display.
We recommend that you practice parking with
the rear view camera in a traffic-free location o r
parking lot to become fami lia r with the system,
the or ientat ion lines, and their function . When
doing t his, there shou ld be good light and weath
er conditions.
In the MMI display, objects or vehicles appear
closer or further away if:
- you a re dr iv ing in reve rse gear from a leve l su r
face onto an incline, or a downward slope,
- you are dr iving in reve rse gear toward p ro tr ud
ing objects,
- t he vehicle is car rying too m uch load in the
rear.
T he accuracy of the orientat ion lines and bl ue
s ur faces dim inishes if:
- the rear v iew camera does not provide a reliab le
image, fo r example, in poor visib il ity condi tions
or if the lens is dirty,
- the image on the screen is not visible due to
sun glare and reflect ion .
Caring for the rear v iew camera len s
The rear view camera is located above the rear li
cense p late bracket. For the parking assist to op-
erate, the lens ¢
fig. 113 must be kept clean: liJJ>
107