AUDI A6 1999 C5 / 2.G 01E Transmission Housing Service User Guide
Manufacturer: AUDI, Model Year: 1999,
Model line: A6,
Model: AUDI A6 1999 C5 / 2.G
Pages: 21, PDF Size: 0.44 MB
AUDI A6 1999 C5 / 2.G 01E Transmission Housing Service User Guide
A6 1999 C5 / 2.G
AUDI
AUDI
https://www.carmanualsonline.info/img/6/1310/w960_1310-0.png
AUDI A6 1999 C5 / 2.G 01E Transmission Housing Service User Guide
Trending: torque, light, ECU, lights, transmission oil, oil, differential
Page 11 of 21
34-136
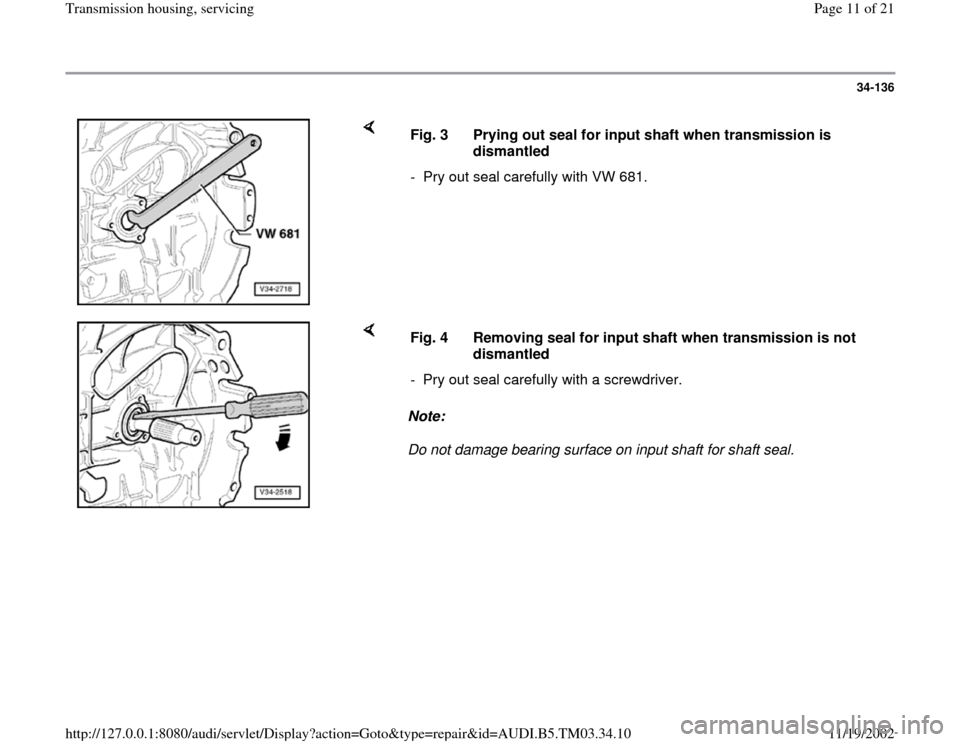
Fig. 3 Prying out seal for input shaft when transmission is
dismantled
- Pry out seal carefully with VW 681.
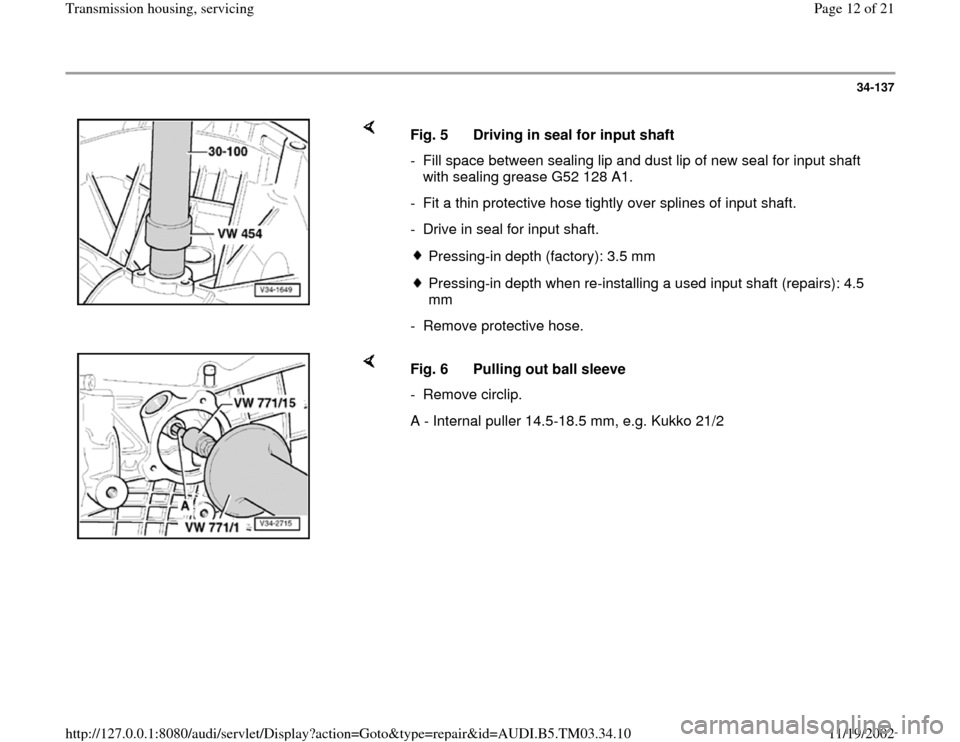
Note:
Do not damage bearing surface on input shaft for shaft seal. Fig. 4 Removing seal for input shaft when transmission is not
dismantled
- Pry out seal carefully with a screwdriver.
Pa
ge 11 of 21 Transmission housin
g, servicin
g
11/19/2002 htt
p://127.0.0.1:8080/audi/servlet/Dis
play?action=Goto&t
yp
e=re
pair&id=AUDI.B5.TM03.34.10
Page 12 of 21
34-137
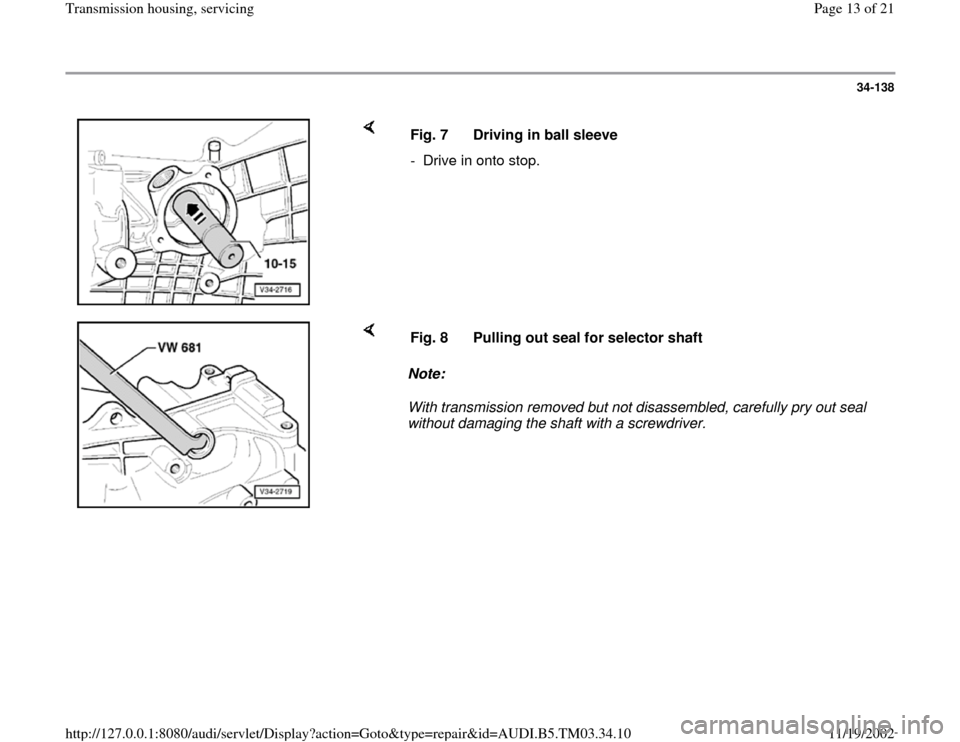
Fig. 5 Driving in seal for input shaft
- Fill space between sealing lip and dust lip of new seal for input shaft
with sealing grease G52 128 A1.
- Fit a thin protective hose tightly over splines of input shaft.
- Drive in seal for input shaft.
Pressing-in depth (factory): 3.5 mmPressing-in depth when re-installing a used input shaft (repairs): 4.5
mm
- Remove protective hose.
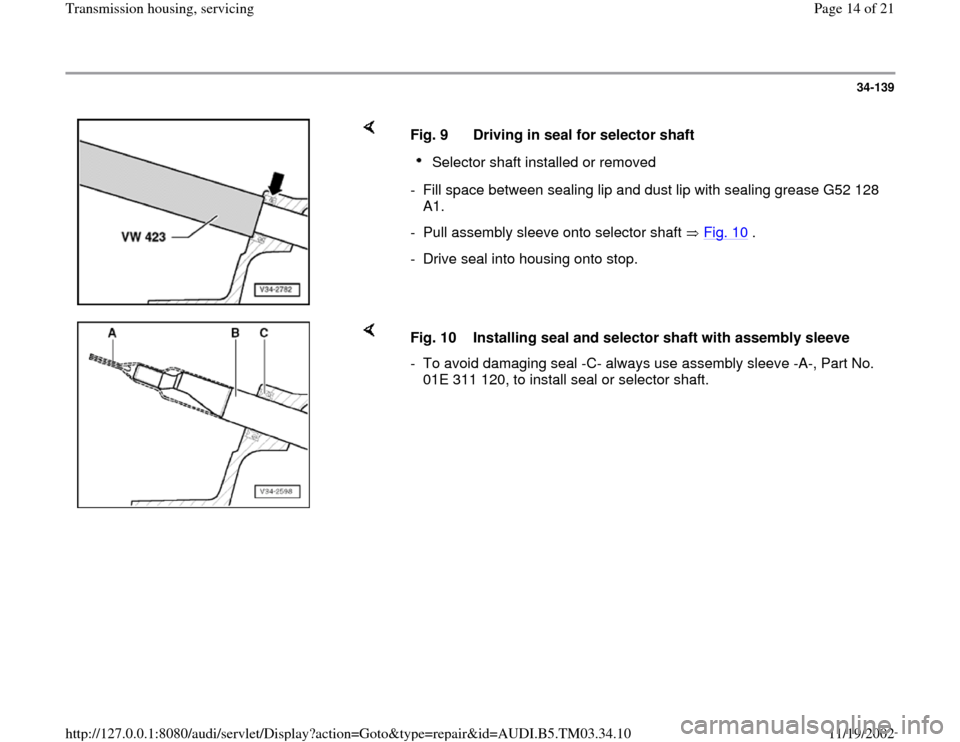
Fig. 6 Pulling out ball sleeve
- Remove circlip.
A - Internal puller 14.5-18.5 mm, e.g. Kukko 21/2
Pa
ge 12 of 21 Transmission housin
g, servicin
g
11/19/2002 htt
p://127.0.0.1:8080/audi/servlet/Dis
play?action=Goto&t
yp
e=re
pair&id=AUDI.B5.TM03.34.10
Page 13 of 21
34-138
Fig. 7 Driving in ball sleeve
- Drive in onto stop.
Note:
With transmission removed but not disassembled, carefully pry out seal
without damaging the shaft with a screwdriver. Fig. 8 Pulling out seal for selector shaft
Pa
ge 13 of 21 Transmission housin
g, servicin
g
11/19/2002 htt
p://127.0.0.1:8080/audi/servlet/Dis
play?action=Goto&t
yp
e=re
pair&id=AUDI.B5.TM03.34.10
Page 14 of 21
34-139
Fig. 9 Driving in seal for selector shaft
Selector shaft installed or removed
- Fill space between sealing lip and dust lip with sealing grease G52 128
A1.
- Pull assembly sleeve onto selector shaft Fig. 10
.
- Drive seal into housing onto stop.
Fig. 10 Installing seal and selector shaft with assembly sleeve
- To avoid damaging seal -C- always use assembly sleeve -A-, Part No.
01E 311 120, to install seal or selector shaft.
Pa
ge 14 of 21 Transmission housin
g, servicin
g
11/19/2002 htt
p://127.0.0.1:8080/audi/servlet/Dis
play?action=Goto&t
yp
e=re
pair&id=AUDI.B5.TM03.34.10
Page 15 of 21
34-140
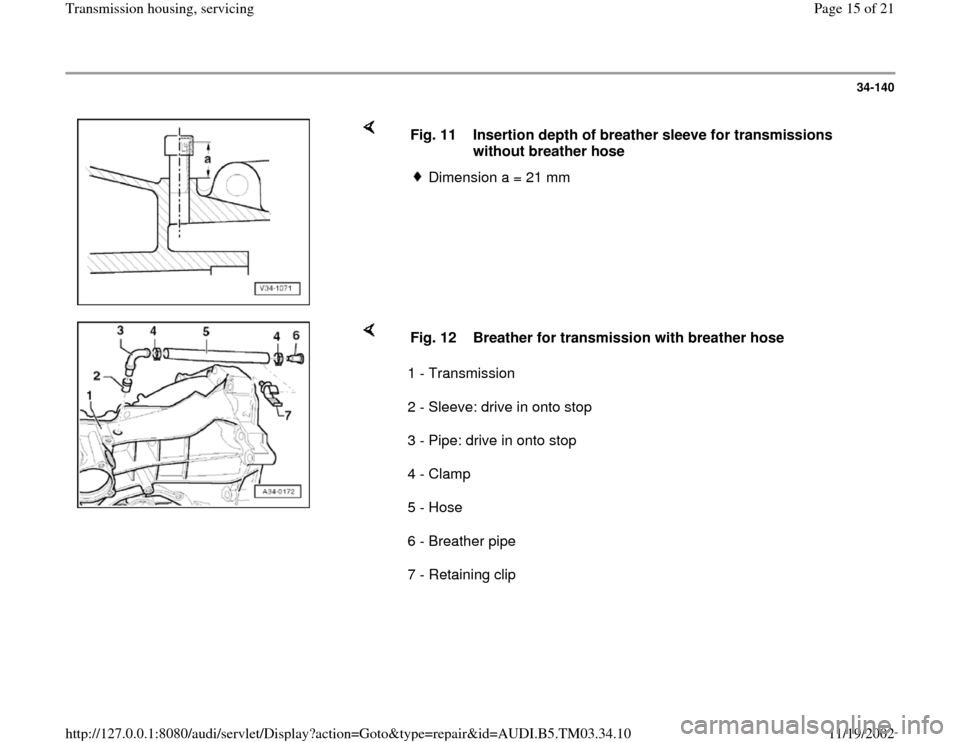
Fig. 11 Insertion depth of breather sleeve for transmissions
without breather hose
Dimension a = 21 mm
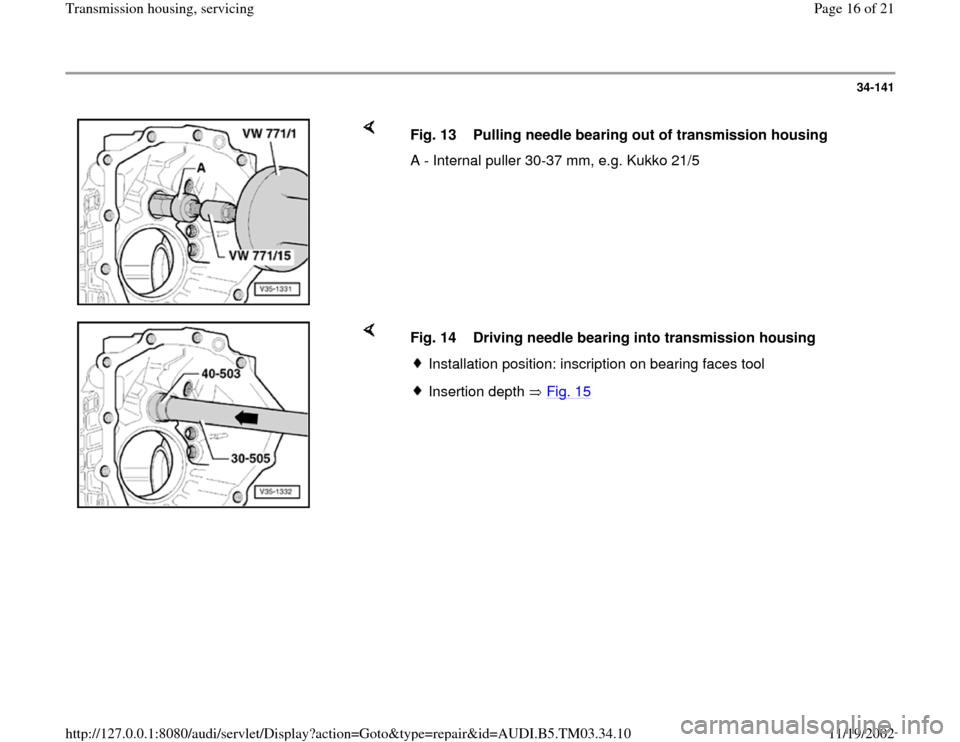
1 - Transmission
2 - Sleeve: drive in onto stop
3 - Pipe: drive in onto stop
4 - Clamp
5 - Hose
6 - Breather pipe
7 - Retaining clip Fig. 12 Breather for transmission with breather hose
Pa
ge 15 of 21 Transmission housin
g, servicin
g
11/19/2002 htt
p://127.0.0.1:8080/audi/servlet/Dis
play?action=Goto&t
yp
e=re
pair&id=AUDI.B5.TM03.34.10
Page 16 of 21
34-141
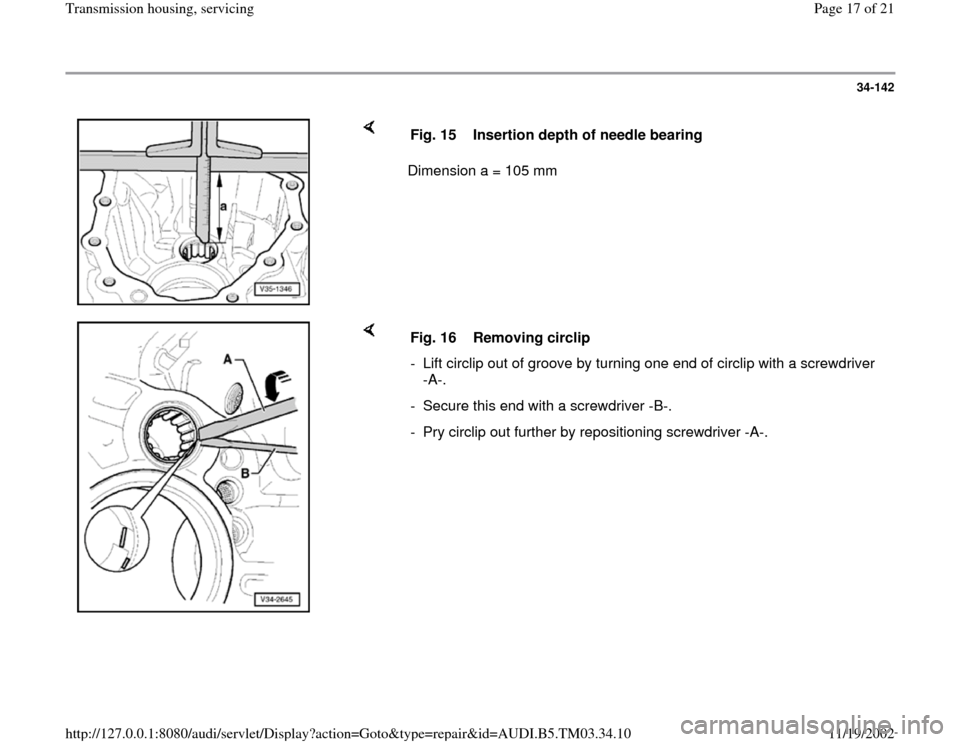
Fig. 13 Pulling needle bearing out of transmission housing
A - Internal puller 30-37 mm, e.g. Kukko 21/5
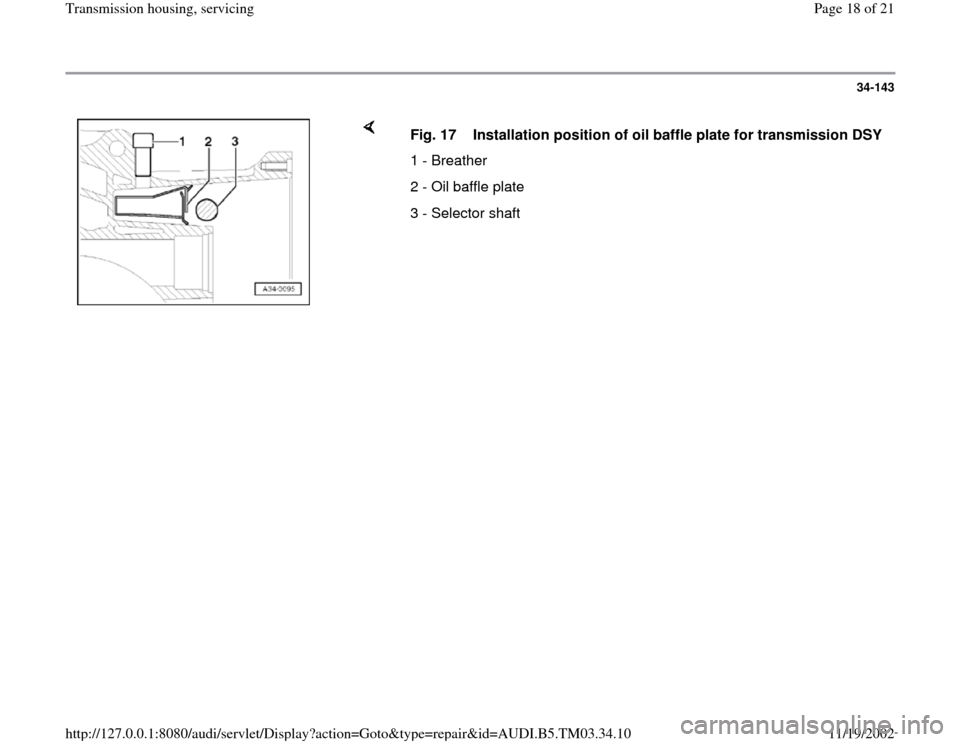
Fig. 14 Driving needle bearing into transmission housing
Installation position: inscription on bearing faces toolInsertion depth Fig. 15
Pa
ge 16 of 21 Transmission housin
g, servicin
g
11/19/2002 htt
p://127.0.0.1:8080/audi/servlet/Dis
play?action=Goto&t
yp
e=re
pair&id=AUDI.B5.TM03.34.10
Page 17 of 21
34-142
Dimension a = 105 mm Fig. 15 Insertion depth of needle bearing
Fig. 16 Removing circlip
- Lift circlip out of groove by turning one end of circlip with a screwdriver
-A-.
- Secure this end with a screwdriver -B-.
- Pry circlip out further by repositioning screwdriver -A-.
Pa
ge 17 of 21 Transmission housin
g, servicin
g
11/19/2002 htt
p://127.0.0.1:8080/audi/servlet/Dis
play?action=Goto&t
yp
e=re
pair&id=AUDI.B5.TM03.34.10
Page 18 of 21
34-143
Fig. 17 Installation position of oil baffle plate for transmission DSY
1 - Breather
2 - Oil baffle plate
3 - Selector shaft
Pa
ge 18 of 21 Transmission housin
g, servicin
g
11/19/2002 htt
p://127.0.0.1:8080/audi/servlet/Dis
play?action=Goto&t
yp
e=re
pair&id=AUDI.B5.TM03.34.10
Page 19 of 21
34-144
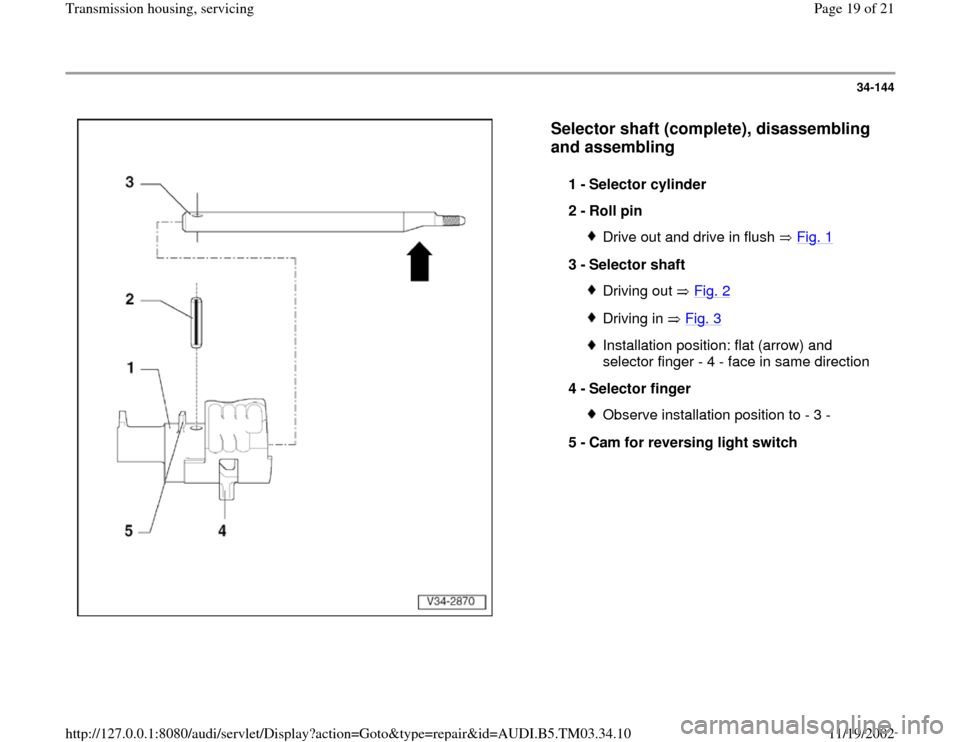
Selector shaft (complete), disassembling
and assembling
1 -
Selector cylinder
2 -
Roll pin
Drive out and drive in flush Fig. 1
3 -
Selector shaft
Driving out Fig. 2Driving in Fig. 3Installation position: flat (arrow) and
selector finger - 4 - face in same direction
4 -
Selector finger Observe installation position to - 3 -
5 -
Cam for reversing light switch
Pa
ge 19 of 21 Transmission housin
g, servicin
g
11/19/2002 htt
p://127.0.0.1:8080/audi/servlet/Dis
play?action=Goto&t
yp
e=re
pair&id=AUDI.B5.TM03.34.10
Page 20 of 21
34-145
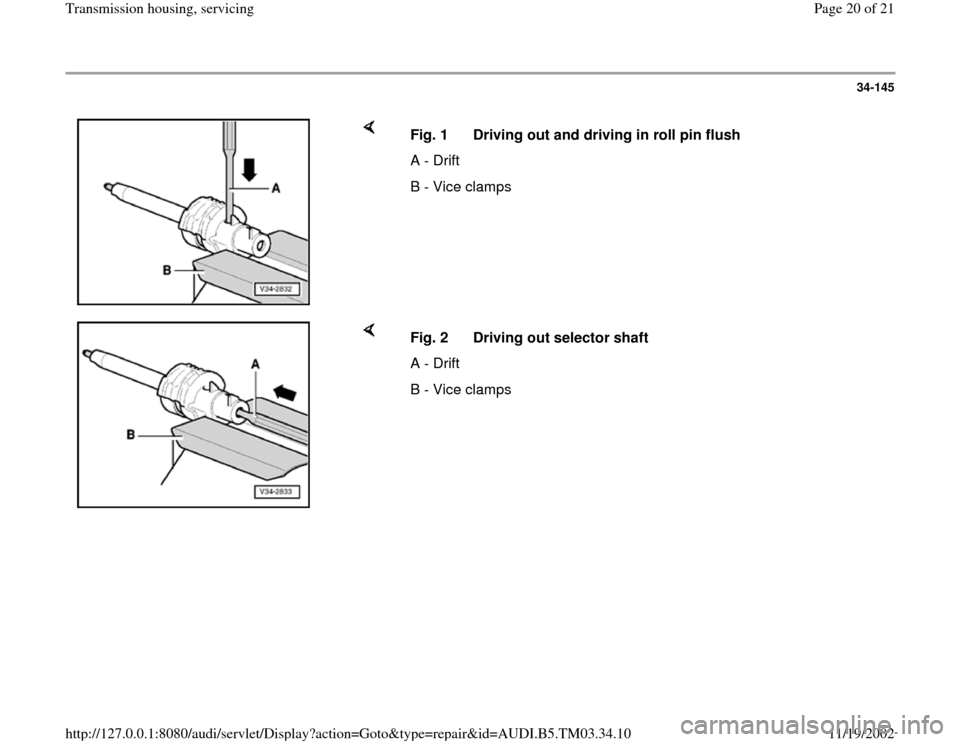
Fig. 1 Driving out and driving in roll pin flush
A - Drift
B - Vice clamps
Fig. 2 Driving out selector shaft
A - Drift
B - Vice clamps
Pa
ge 20 of 21 Transmission housin
g, servicin
g
11/19/2002 htt
p://127.0.0.1:8080/audi/servlet/Dis
play?action=Goto&t
yp
e=re
pair&id=AUDI.B5.TM03.34.10
Trending: transmission oil, lock, ECU, torque, oil, lights, light
