AUDI A6 1999 C5 / 2.G 01E Transmission Input Shaft Assembly Workshop Manual
A6 1999 C5 / 2.G
AUDI
AUDI
https://www.carmanualsonline.info/img/6/1311/w960_1311-0.png
AUDI A6 1999 C5 / 2.G 01E Transmission Input Shaft Assembly Workshop Manual
Page 2 of 12
35-2
Note:
When installing new gears Page 00
-3 , Technical
data
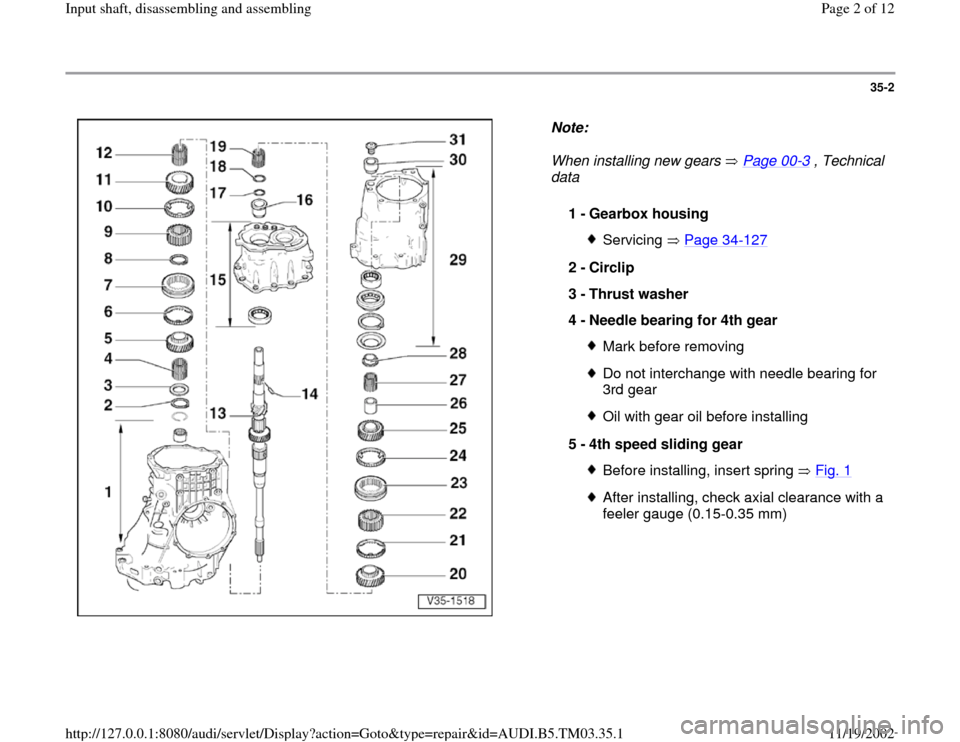
1 -
Gearbox housing
Servicing Page 34
-127
2 -
Circlip
3 -
Thrust washer
4 -
Needle bearing for 4th gear
Mark before removingDo not interchange with needle bearing for
3rd gear Oil with gear oil before installing
5 -
4th speed sliding gear Before installing, insert spring Fig. 1After installing, check axial clearance with a
feeler gauge (0.15-0.35 mm)
Pa
ge 2 of 12 In
put shaft, disassemblin
g and assemblin
g
11/19/2002 htt
p://127.0.0.1:8080/audi/servlet/Dis
play?action=Goto&t
yp
e=re
pair&id=AUDI.B5.TM03.35.1
Page 4 of 12
35-4
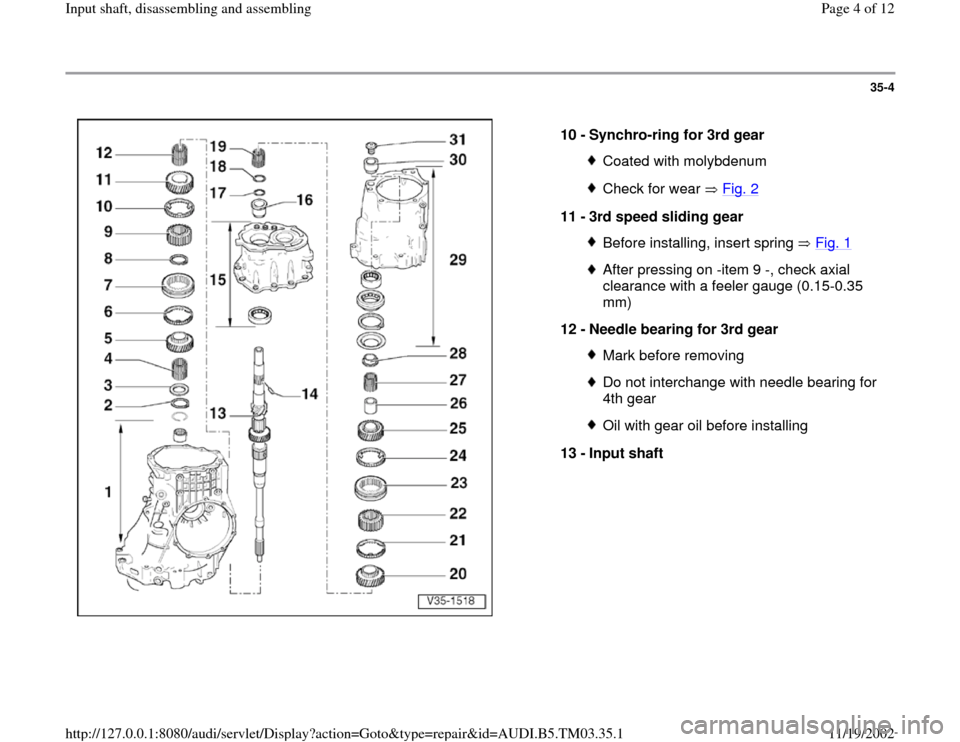
10 -
Synchro-ring for 3rd gear
Coated with molybdenumCheck for wear Fig. 2
11 -
3rd speed sliding gear
Before installing, insert spring Fig. 1After pressing on -item 9 -, check axial
clearance with a feeler gauge (0.15-0.35
mm)
12 -
Needle bearing for 3rd gear Mark before removingDo not interchange with needle bearing for
4th gear Oil with gear oil before installing
13 -
Input shaft
Pa
ge 4 of 12 In
put shaft, disassemblin
g and assemblin
g
11/19/2002 htt
p://127.0.0.1:8080/audi/servlet/Dis
play?action=Goto&t
yp
e=re
pair&id=AUDI.B5.TM03.35.1
Page 6 of 12
35-6
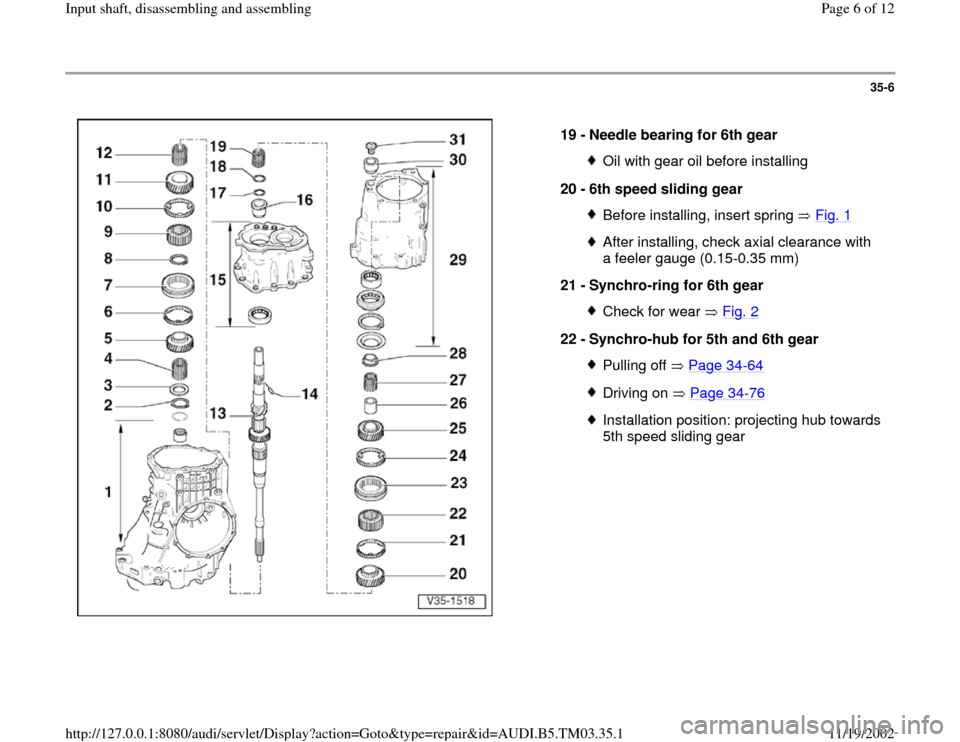
19 -
Needle bearing for 6th gear
Oil with gear oil before installing
20 -
6th speed sliding gear Before installing, insert spring Fig. 1After installing, check axial clearance with
a feeler gauge (0.15-0.35 mm)
21 -
Synchro-ring for 6th gear Check for wear Fig. 2
22 -
Synchro-hub for 5th and 6th gear
Pulling off Page 34
-64
Driving on Page 34
-76
Installation position: projecting hub towards
5th speed sliding gear
Pa
ge 6 of 12 In
put shaft, disassemblin
g and assemblin
g
11/19/2002 htt
p://127.0.0.1:8080/audi/servlet/Dis
play?action=Goto&t
yp
e=re
pair&id=AUDI.B5.TM03.35.1
Page 8 of 12
35-8
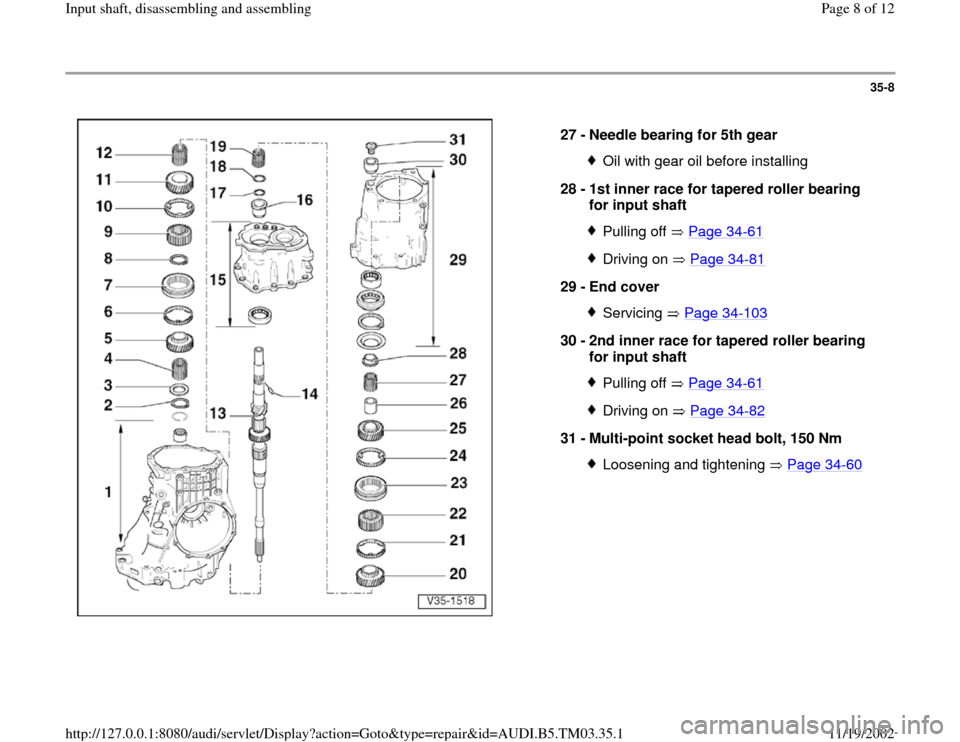
27 -
Needle bearing for 5th gear
Oil with gear oil before installing
28 -
1st inner race for tapered roller bearing
for input shaft Pulling off Page 34
-61
Driving on Page 34
-81
29 -
End cover
Servicing Page 34
-103
30 -
2nd inner race for tapered roller bearing
for input shaft
Pulling off Page 34
-61
Driving on Page 34
-82
31 -
Multi-point socket head bolt, 150 Nm
Loosening and tightening Page 34
-60
Pa
ge 8 of 12 In
put shaft, disassemblin
g and assemblin
g
11/19/2002 htt
p://127.0.0.1:8080/audi/servlet/Dis
play?action=Goto&t
yp
e=re
pair&id=AUDI.B5.TM03.35.1
Page 11 of 12
35-11
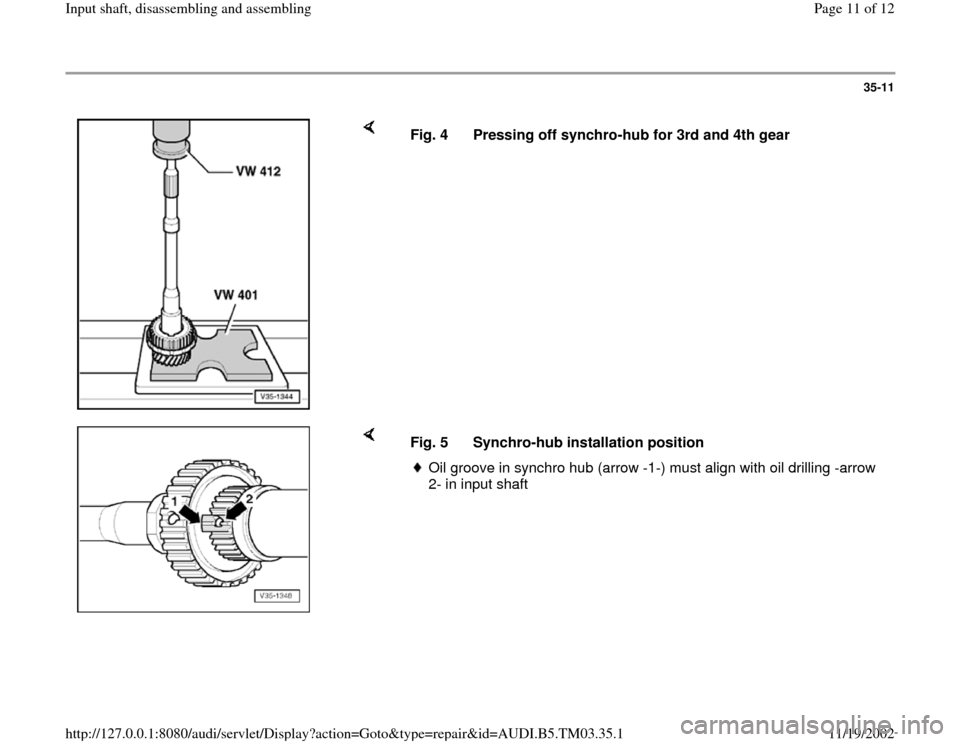
Fig. 4 Pressing off synchro-hub for 3rd and 4th gear
Fig. 5 Synchro-hub installation position
Oil groove in synchro hub (arrow -1-) must align with oil drilling -arrow
2- in input shaft
Pa
ge 11 of 12 In
put shaft, disassemblin
g and assemblin
g
11/19/2002 htt
p://127.0.0.1:8080/audi/servlet/Dis
play?action=Goto&t
yp
e=re
pair&id=AUDI.B5.TM03.35.1
Page 12 of 12
35-12
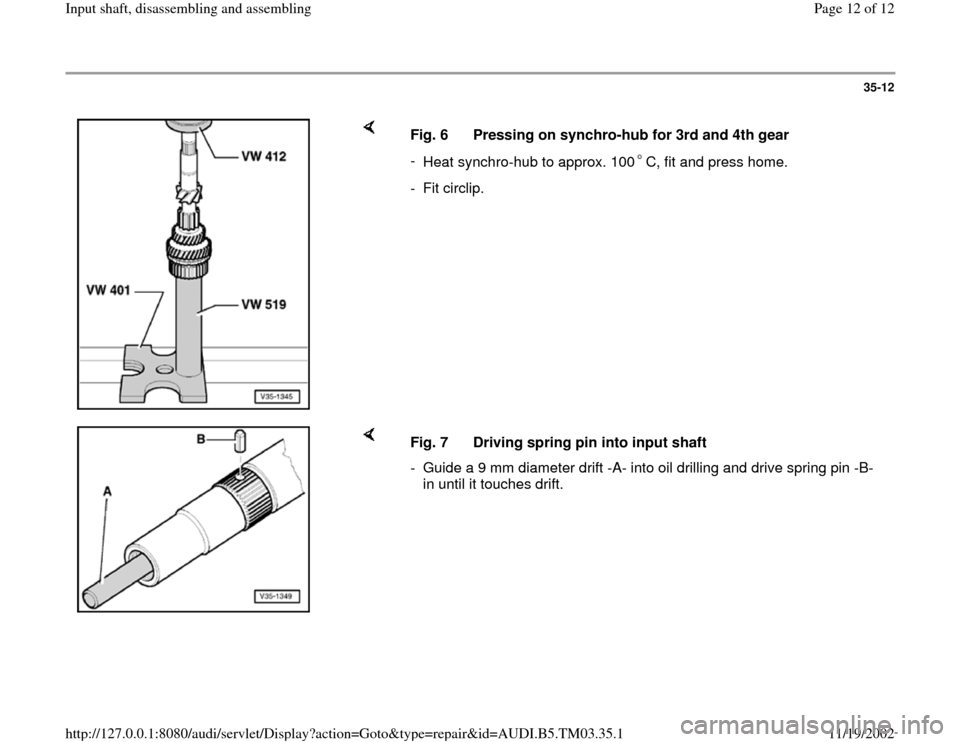
Fig. 6 Pressing on synchro-hub for 3rd and 4th gear
-
Heat synchro-hub to approx. 100 C, fit and press home.- Fit circlip.
Fig. 7 Driving spring pin into input shaft
- Guide a 9 mm diameter drift -A- into oil drilling and drive spring pin -B-
in until it touches drift.
Pa
ge 12 of 12 In
put shaft, disassemblin
g and assemblin
g
11/19/2002 htt
p://127.0.0.1:8080/audi/servlet/Dis
play?action=Goto&t
yp
e=re
pair&id=AUDI.B5.TM03.35.1
