oil AUDI A6 2001 C5 / 2.G 01V Transmission Remove And Install Workshop Manual
[x] Cancel search | Manufacturer: AUDI, Model Year: 2001, Model line: A6, Model: AUDI A6 2001 C5 / 2.GPages: 64, PDF Size: 1.44 MB
Page 9 of 64
37-79
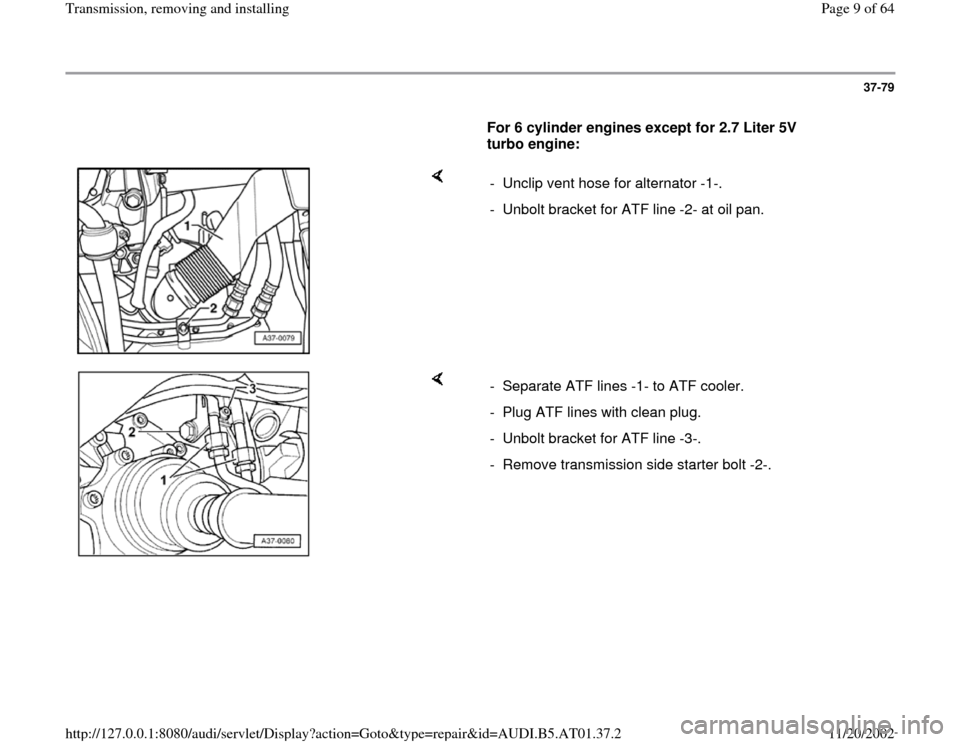
For 6 cylinder engines except for 2.7 Liter 5V
turbo engine:
- Unclip vent hose for alternator -1-.
- Unbolt bracket for ATF line -2- at oil pan.
- Separate ATF lines -1- to ATF cooler.
- Plug ATF lines with clean plug.
- Unbolt bracket for ATF line -3-.
- Remove transmission side starter bolt -2-.
Pa
ge 9 of 64 Transmission, removin
g and installin
g
11/20/2002 htt
p://127.0.0.1:8080/audi/servlet/Dis
play?action=Goto&t
yp
e=re
pair&id=AUDI.B5.AT01.37.2
Page 25 of 64

37-95
- Only perform vehicle alignment if necessary.
Repair Manual, Suspension, Wheels,
Steering, Repair Group 44; Vehicle alignment
- Install transmission supports at left and right with
transmission mount page 37
-125
Bolt torque converter to drive plate
For vehicles with hex bolts: - Remove bolt -A- after transmission is bolted to engine.
- Apply corrosion protection to contact surface between bolt -A- and oil
pan.
- Bolt torque converter to drive plate via 3 bolts using special tool V175
(turn crank shaft an additional 1/3 turn every time).
Pa
ge 25 of 64 Transmission, removin
g and installin
g
11/20/2002 htt
p://127.0.0.1:8080/audi/servlet/Dis
play?action=Goto&t
yp
e=re
pair&id=AUDI.B5.AT01.37.2
Page 28 of 64
37-98
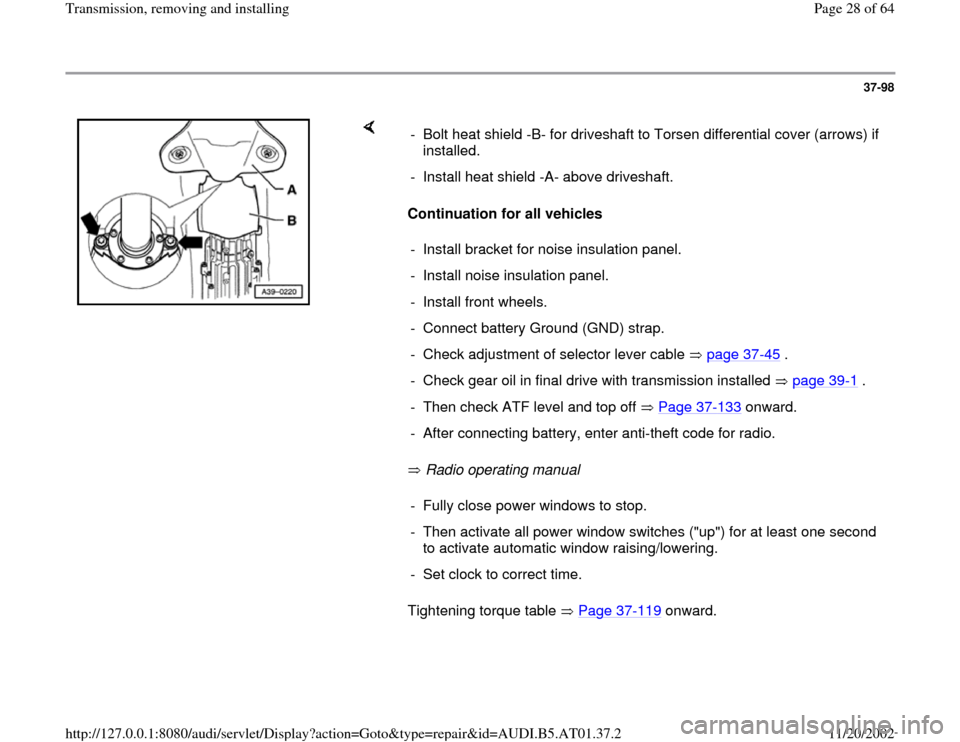
Continuation for all vehicles
Radio operating manual
Tightening torque table Page 37
-119
onward. - Bolt heat shield -B- for driveshaft to Torsen differential cover (arrows) if
installed.
- Install heat shield -A- above driveshaft.
- Install bracket for noise insulation panel.
- Install noise insulation panel.
- Install front wheels.
- Connect battery Ground (GND) strap.
- Check adjustment of selector lever cable page 37
-45
.
- Check gear oil in final drive with transmission installed page 39
-1 .
- Then check ATF level and top off Page 37
-133
onward.
- After connecting battery, enter anti-theft code for radio.- Fully close power windows to stop.
- Then activate all power window switches ("up") for at least one second
to activate automatic window raising/lowering.
- Set clock to correct time.
Pa
ge 28 of 64 Transmission, removin
g and installin
g
11/20/2002 htt
p://127.0.0.1:8080/audi/servlet/Dis
play?action=Goto&t
yp
e=re
pair&id=AUDI.B5.AT01.37.2
Page 34 of 64
37-104
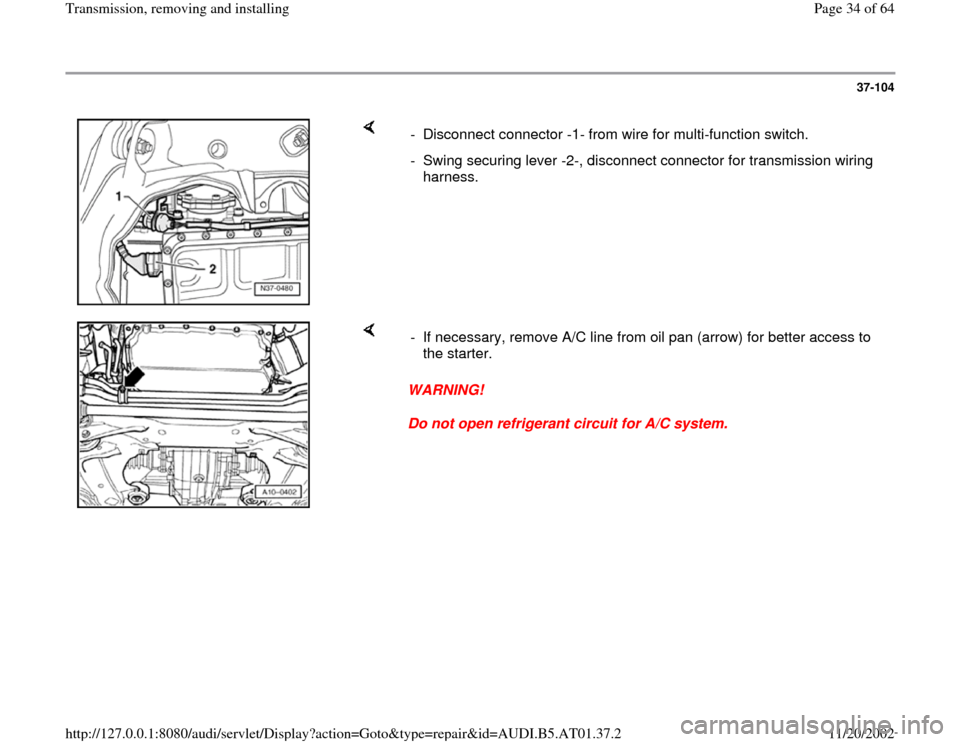
- Disconnect connector -1- from wire for multi-function switch.
- Swing securing lever -2-, disconnect connector for transmission wiring
harness.
WARNING!
Do not open refrigerant circuit for A/C system. - If necessary, remove A/C line from oil pan (arrow) for better access to
the starter.
Pa
ge 34 of 64 Transmission, removin
g and installin
g
11/20/2002 htt
p://127.0.0.1:8080/audi/servlet/Dis
play?action=Goto&t
yp
e=re
pair&id=AUDI.B5.AT01.37.2
Page 47 of 64
37-117
Repair Manual, Suspension, Wheels, Steering, Repair Group 40;
Subframe, removing and installing
Repair Manual, Suspension, Wheels, Steering, Repair Group 44,
Vehicle alignment
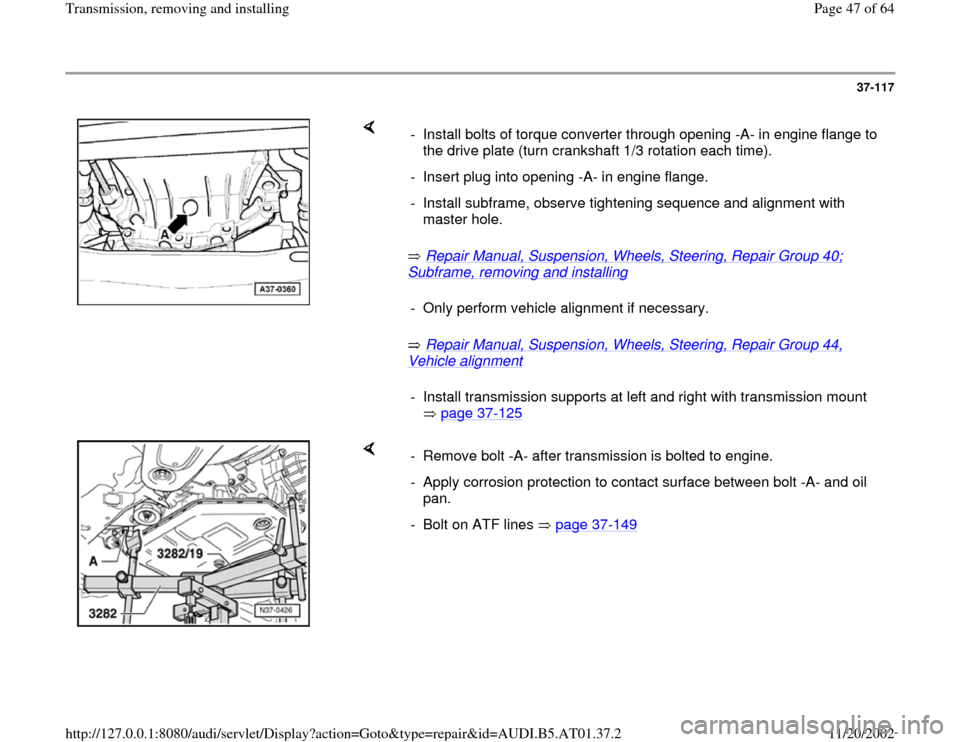
- Install bolts of torque converter through opening -A- in engine flange to
the drive plate (turn crankshaft 1/3 rotation each time).
- Insert plug into opening -A- in engine flange.
- Install subframe, observe tightening sequence and alignment with
master hole.
- Only perform vehicle alignment if necessary.- Install transmission supports at left and right with transmission mount
page 37
-125
- Remove bolt -A- after transmission is bolted to engine.
- Apply corrosion protection to contact surface between bolt -A- and oil
pan.
- Bolt on ATF lines page 37
-149
Pa
ge 47 of 64 Transmission, removin
g and installin
g
11/20/2002 htt
p://127.0.0.1:8080/audi/servlet/Dis
play?action=Goto&t
yp
e=re
pair&id=AUDI.B5.AT01.37.2
Page 48 of 64
37-118
- Bolt drive axles to transmission flanges.
Repair Manual, Suspension, Wheels,
Steering, Repair Group 40
- Bolt driveshaft to transmission flange page
39
-79
, Driveshaft, removing and installing.
- After connecting battery, enter anti-theft code for
radio.
Radio operating manual
- Check adjustment of selector lever cable
page 37
-45
.
- Check gear oil in final drive with transmission
installed page 39
-1 .
- Then check ATF level and top off Page 37
-
133
onward.
- Fully close power windows to stop.
Pa
ge 48 of 64 Transmission, removin
g and installin
g
11/20/2002 htt
p://127.0.0.1:8080/audi/servlet/Dis
play?action=Goto&t
yp
e=re
pair&id=AUDI.B5.AT01.37.2
Page 50 of 64
37-119
Tightening torques
Notes:
Tightening torques are valid only for nuts and
bolts that are lightly greased, oiled, covered
with a thin coat of phosphate or blackened.
Other lubricants are permitted, e.g. engine oil or
transmission fluid, however they may not
contain graphite.
Do not use any degreased parts.
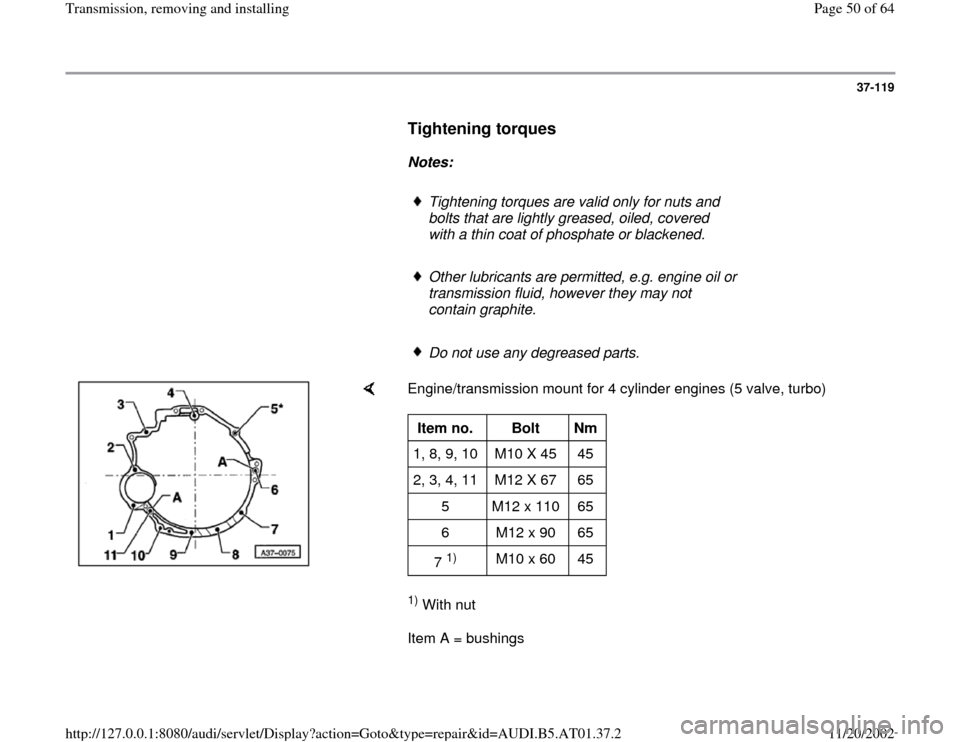
Engine/transmission mount for 4 cylinder engines (5 valve, turbo) 1) With nut
Item A = bushings Item no.
Bolt
Nm
1, 8, 9, 10 M10 X 45 45
2, 3, 4, 11 M12 X 67 65
5 M12 x 110 65
6 M12 x 90 65
7
1)
M10 x 60 45
Pa
ge 50 of 64 Transmission, removin
g and installin
g
11/20/2002 htt
p://127.0.0.1:8080/audi/servlet/Dis
play?action=Goto&t
yp
e=re
pair&id=AUDI.B5.AT01.37.2
Page 64 of 64
37-132
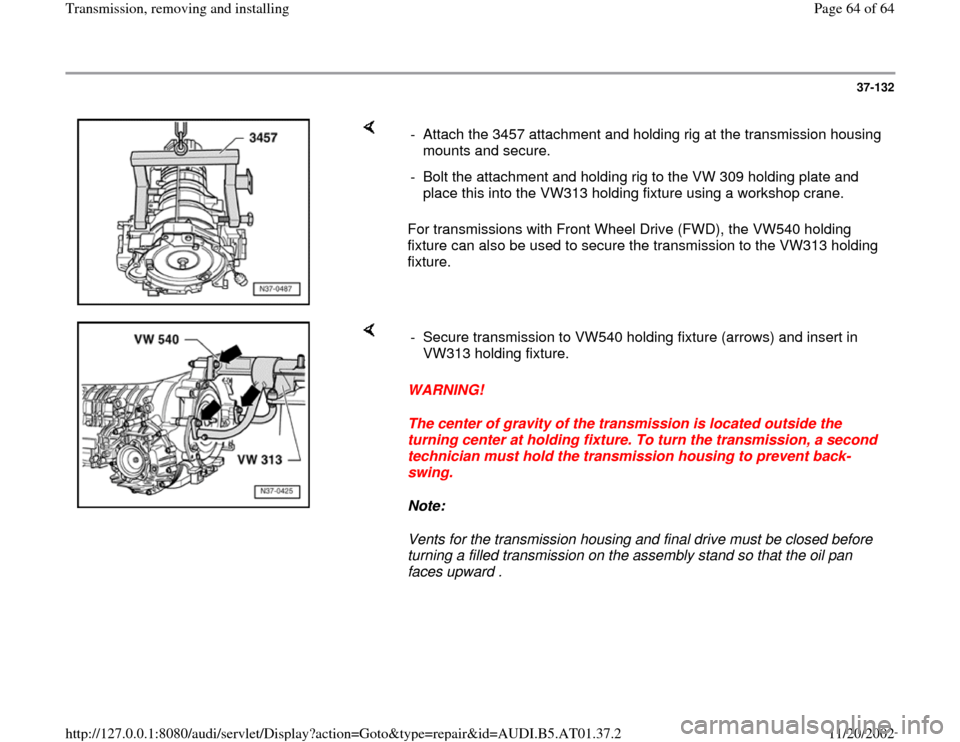
For transmissions with Front Wheel Drive (FWD), the VW540 holding
fixture can also be used to secure the transmission to the VW313 holding
fixture. - Attach the 3457 attachment and holding rig at the transmission housing
mounts and secure.
- Bolt the attachment and holding rig to the VW 309 holding plate and
place this into the VW313 holding fixture using a workshop crane.
WARNING!
The center of gravity of the transmission is located outside the
turning center at holding fixture. To turn the transmission, a second
technician must hold the transmission housing to prevent back-
swing.
Note:
Vents for the transmission housing and final drive must be closed before
turning a filled transmission on the assembly stand so that the oil pan
faces upward . - Secure transmission to VW540 holding fixture (arrows) and insert in
VW313 holding fixture.
Pa
ge 64 of 64 Transmission, removin
g and installin
g
11/20/2002 htt
p://127.0.0.1:8080/audi/servlet/Dis
play?action=Goto&t
yp
e=re
pair&id=AUDI.B5.AT01.37.2