climate control AUDI A6 2013 Owners Manual
[x] Cancel search | Manufacturer: AUDI, Model Year: 2013, Model line: A6, Model: AUDI A6 2013Pages: 306, PDF Size: 76.92 MB
Page 4 of 306
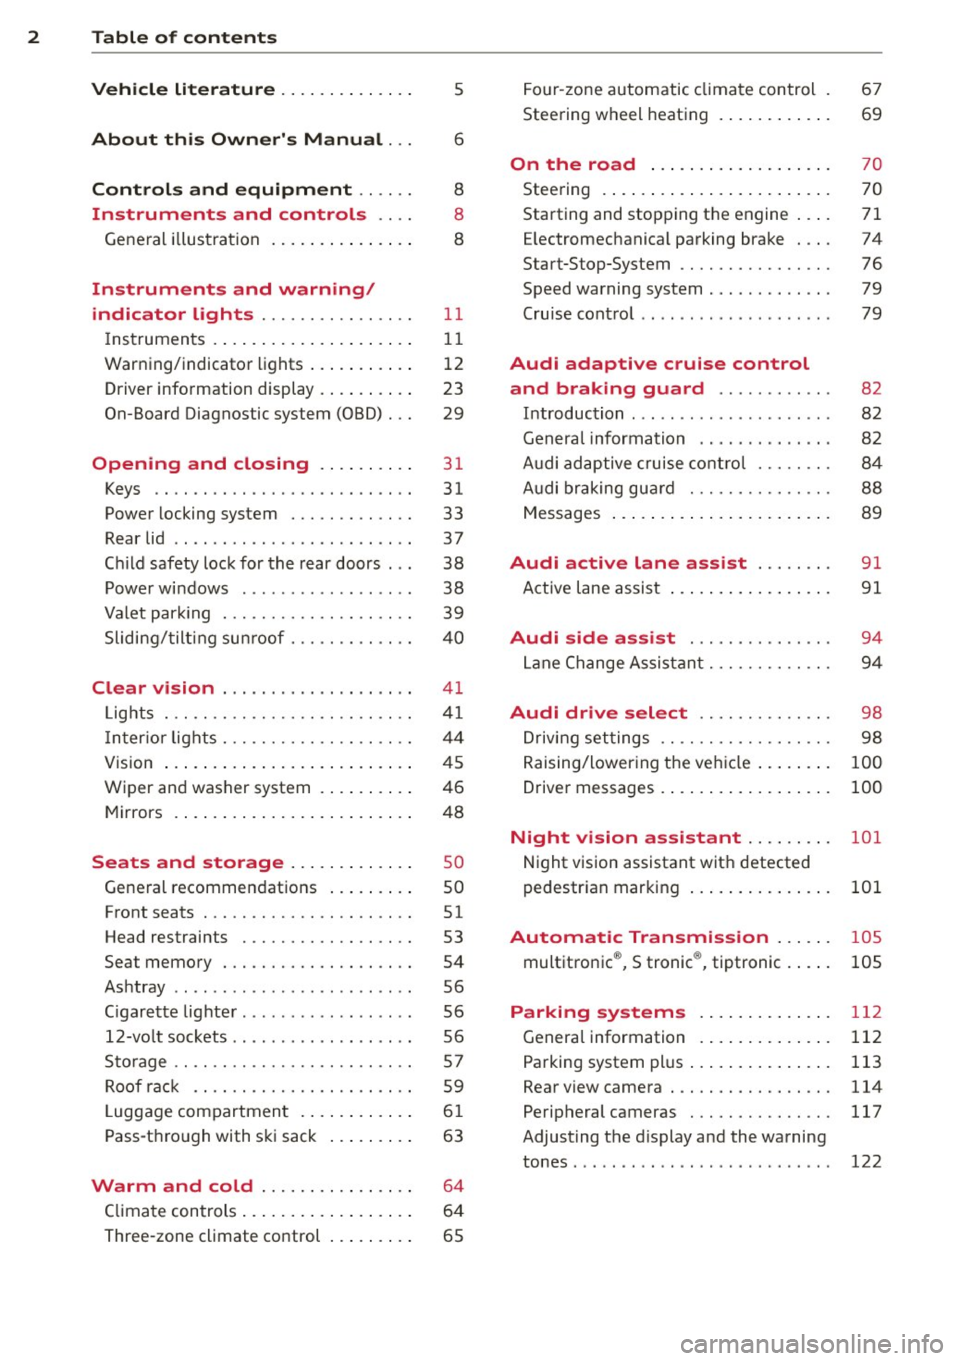
2 Table of contents Vehicle literature .. .. .. .. .. ... .
5
About this Owner's Manual . . . 6
Controls and equipment .. ... .
Instruments and controls .. . .
General illustration ......... .. ... .
Instruments and warning/
indicator lights ........ .. .. .. . .
Instruments ............ ... .. ... .
Warning/indicator lights .......... .
Driver information display .. .. .. ... .
On-Board Diagnostic system (OBD) . . .
Opening and closing .. .. .... . .
Keys .. ...... ........... .. .. ... .
Power locking system ..... .. .. .. . .
Rear lid .. .. ........ ..... .. ..... .
Child safety lock for the rear doors .. .
Power windows . .......... ... .. . .
Valet park ing . ........... .. .. ... .
Sliding/tilting sun roof ... .. .. .. .. . .
Clear vision .. ....... ... .. .. ... .
Lights . .. .. .. . .......... .. .. .. . .
I nter ior lights ............ .. .. .. . .
V1s 1on .......... ......... ... ... .
Wiper and washer system ... .... .. . 8
8
8
11
11
12
23
29
31
31
33
37
38
38
39
40
41
41
44
45
46
Mirrors . . . . . . . . . . . . . . . . . . . . . . . . . 48
Seats and storage ......... ... .
General recommendations ... .... . .
Front seats .............. .. .. ... .
Head restraints .............. ... .
Seat memory . ........... .... ... .
Ashtray .. .. ... .... ...... .. .. .. . .
C igarette lighter .............. .. . .
12-vo lt sockets ... ..... ... .. .. .. . .
Storage ................. .. .. ... .
Roof rack ............... .. .. .. . .
L uggage compartment ........... .
Pass-through with ski sack ... .. ... .
so
so
51
53
54
56
56
56
57
59
6 1
63
Warm and cold . . . . . . . . . . . . . . . . 64
Climate controls . . . . . . . . . . . . . . . . . . 64
Three-zone climate control . . . . . . . . . 65 Four-zone
automatic climate control .
Steering wheel heating ........... . 67
69
On the road
. . . . . . . . . . . . . . . . . . . 70
Steering . . . . . . . . . . . . . . . . . . . . . . . . 70
Starting and stopping the engine . . . . 71
E lectromechanical parking brake . . . . 74
Start-Stop-System . . . . . . . . . . . . . . . . 76
Speed warning system . . . . . . . . . . . . . 79
Cruise control . . . . . . . . . . . . . . . . . . . . 79
Audi adaptive cruise control
and braking guard . . . . . . . . . . . .
8 2
Introduction . . . . . . . . . . . . . . . . . . . . . 82
Genera l information . . . . . . . . . . . . . . 82
Audi adaptive cruise control . . . . . . . . 84
Audi braking gua rd . . . . . . . . . . . . . . . 88
Messages . . . . . . . . . . . . . . . . . . . . . . . 89
Audi active lane assist . . . . . . . . 91
Active lane assist . . . . . . . . . . . . . . . . . 91
Audi side assist . . . . . . . . . . . . . . . 94
Lane Change Assistant. . . . . . . . . . . . . 94
Audi drive select . . . . . . . . . . . . . . 98
Driving settings . . . . . . . . . . . . . . . . . . 98
Raising/lowering the vehicle . . . . . . . . 100
Driver messages . . . . . . . . . . . . . . . . . . 100
Night vision assistant . . . . . . . . . 101
Night vision assistant with detected
pedestrian marking . . . . . . . . . . . . . . . 101
Automatic Transmission . . . . . . 105
multitronic ®, S tronic ®, tiptronic . . . . . 105
Parking systems . . . . . . . . . . . . . . 112
General information . . . . . . . . . . . . . . 112
Parking system plus . . . . . . . . . . . . . . . 113
Rear view camera . . . . . . . . . . . . . . . . . 114
Peripheral cameras . . . . . . . . . . . . . . . 117
Adjusting the d isplay and the warning
tones. . . . . . . . . . . . . . . . . . . . . . . . . . . 122
Page 11 of 306
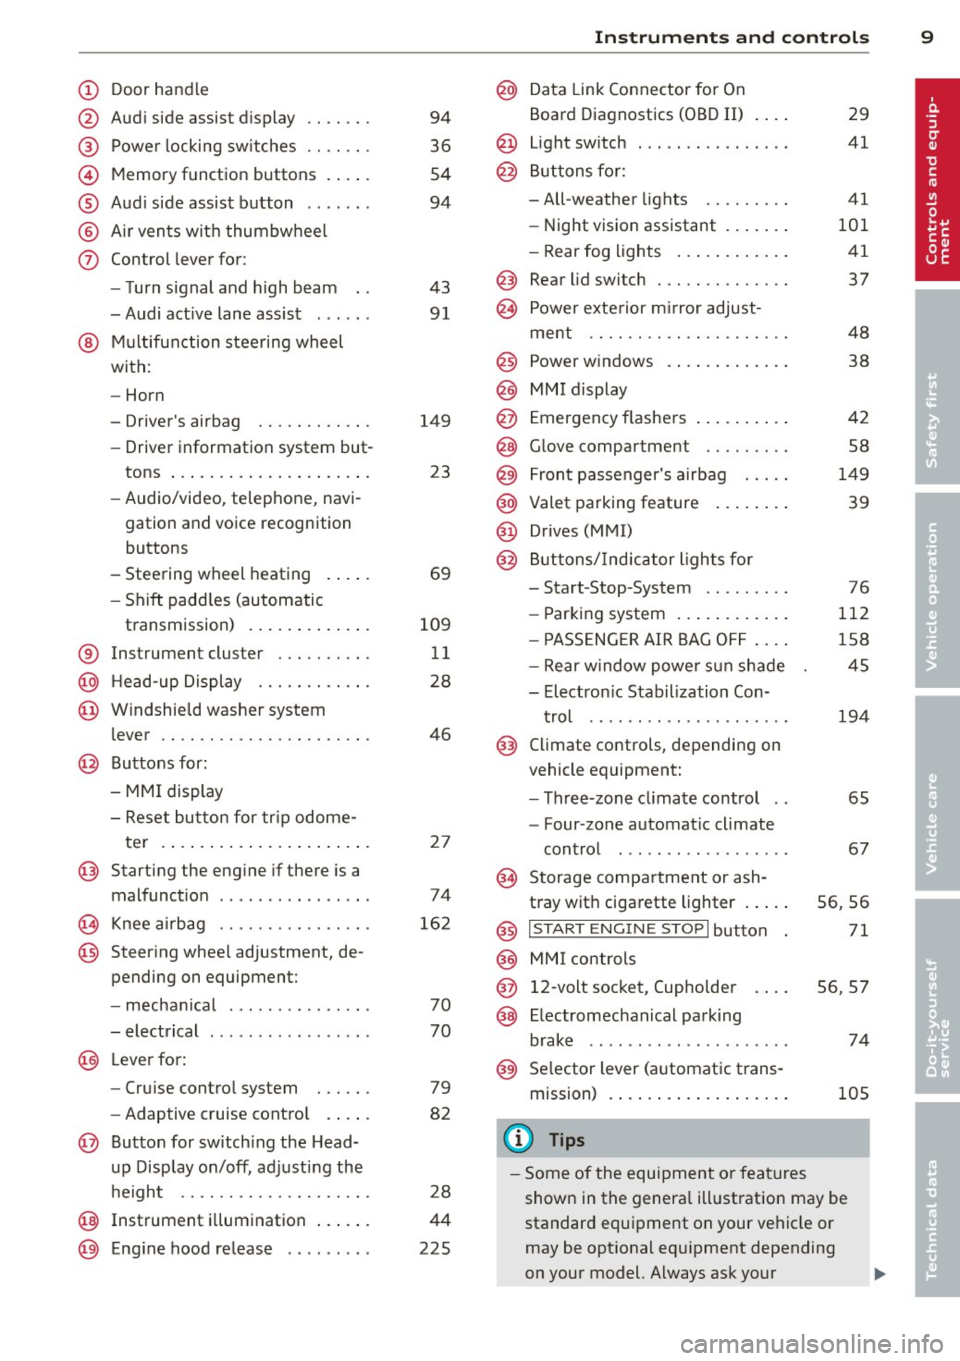
CD
@
®
©
®
®
(j)
Door handle
Audi side assist display
Power locking sw itches
Memory function buttons .. .. .
Aud i side assist button ...... .
A ir vents with thumbwheel
Control lever for:
- T urn signal and high beam
- Audi act ive lane assist . .. .. .
@ Mu ltifunction steering wheel
with:
- Horn
- Driver's airbag
- Driver information system but-
tons ... ..... ....... ... .. .
- Audio/video , telephone, navi
gation and voice recognition
buttons
- Steering wheel heating . ... .
- Shift padd les (automatic
transmission) ..... ... ... . .
® Instrument cluster ......... .
@ Head-up Display ........... .
@ Windshield washer system
lever ..................... .
@ Buttons for:
- MMI display
- Reset bu tton for tr ip odome-
te r .. .. ... .. ..... ... .. .. .
@ Starting the engine if there is a
malfunction ............... .
~ Knee airbag ........... .. .. .
@ Steer ing whee l adjustment, de
pending on equipment:
- mechan ical .......... .. .. .
- electrical .... .. ..... ... .. .
@ Leve r for:
- Cru ise control system ... .. .
- Adaptive cruise contro l .. .. .
@ Button for sw itch ing the Head
up Disp lay on/off, adjusting the
h eight .. ............. .. .. .
@ Instrument illumination ... .. .
@ Eng ine hood release ........ . 94
36
54
94
43 91
149 23
69
109 11
28
46
2 7
74
16 2
70
70
79
82
28
44
225
In strument s and control s 9
@ Data Link Connector for On
Board Diagnostics (OBD II)
@ Light switch ... .. . .. .... ... .
@ Buttons for :
- All-weather lights
- Night vision assistant .... .. .
- Rear fog lights .. .. .. ..... .
@ Rear lid switch ............. .
~ Power exterior m irror adjust- 29
41
41
101 41
37
ment . . . . . . . . . . . . . . . . . . . . . 48
@ Power w indows . . . . . . . . . . . . . 38
@ MMI display
@ Emergency flashe rs . . . . . . . . . . 42
@ Glove compartment . . . . . . . . . 58
@) Front passenger's airbag . . . . . 149
@ Valet parking feature . . . . . . . . 39
@ Drives (MMI)
@ Buttons/Indicator lights fo r
- Start-Stop-System . . . . . . . . . 76
- Parking system . . . . . . . . . . . . 112
- PASSENG ER AIR BAG OF F . . . . 1S8
- Rear w indow powe r sun shade 4S
- Electron ic Stabilization Con-
t rol . . . . . . . . . . . . . . . . . . . . . 19 4
@ Climate controls, depending on
vehicle equipment:
- Three-zone cl imate control . . 6S
- F our-zone automatic climate
cont rol . . . . . . . . . . . . . . . . . . 67
@ Storage compartment or ash-
t ray wit h cigarette lighter . . . . . S6, 56
@ I ST ART ENGINE STOPI button 71
@ MM I controls
@ 12-volt socket, (upho lder 56, 57
@ E lectromechanical parking
brake . . . . . . . . . . . . . . . . . . . . . 74
@ Selector lever (a utomatic trans-
mission) 105
(D Tips
-Some of the equipment or fea tures
show n in the genera l ill ustration may be
standard equipment on your vehicle or
may be opt ional eq uipment depending
on your model. Always ask your
ll>
Page 33 of 306
Opening and closing Keys
Key set
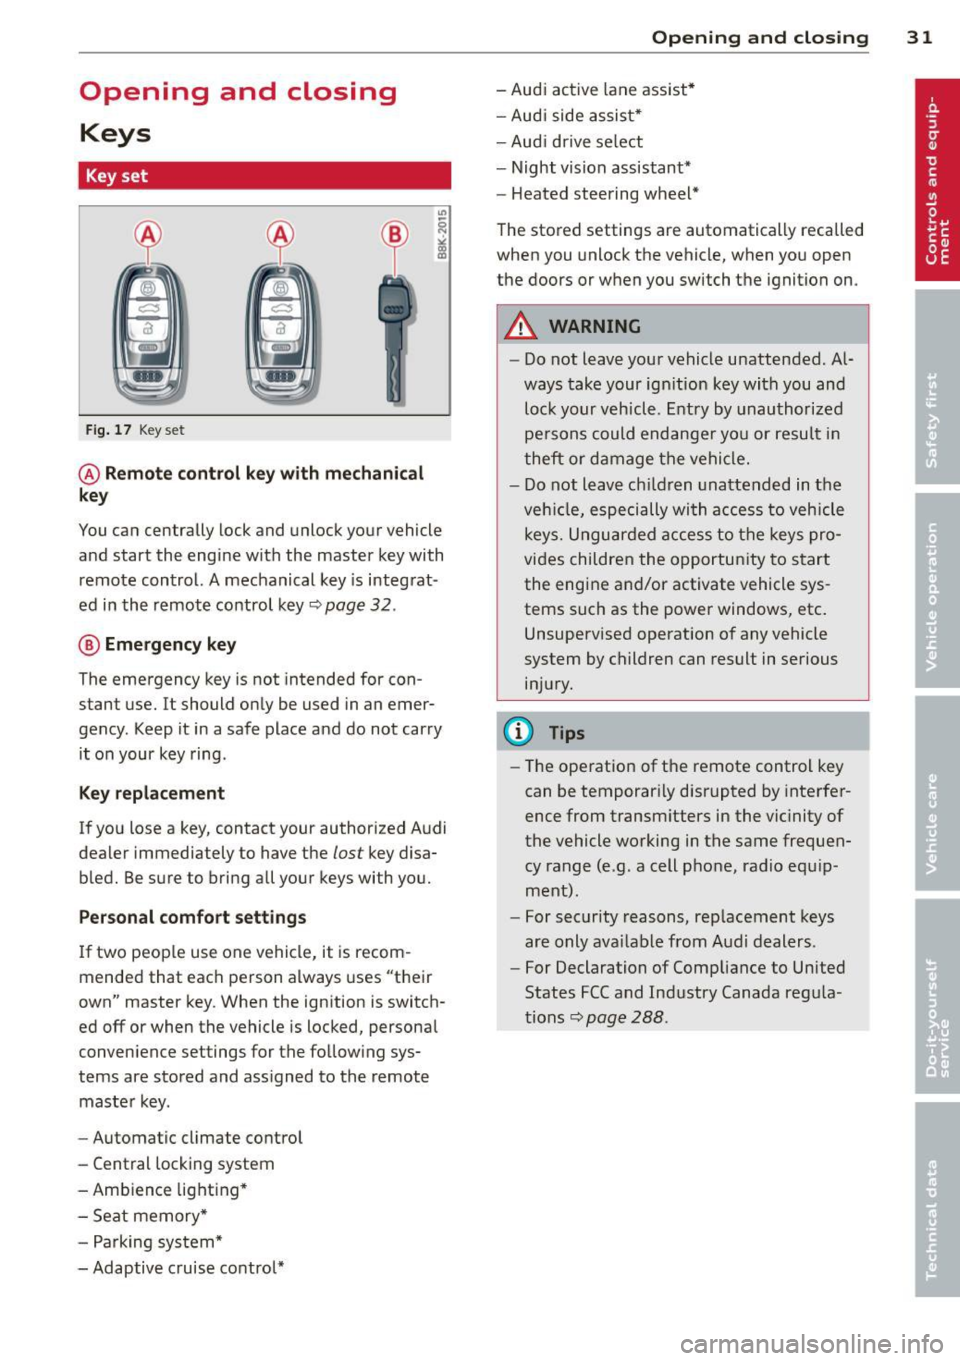
Fig. 17 Key set
@ Remote control key with mechanical
key
You can centrally lock and unlock your vehicle
and start the engine with the master key with
remote control. A mechanical key is integrat
ed in the remote control key~ page
32 .
® Emergency key
The emergency key is not intended for con
stant use.
It should only be used in an emer
gency . Keep it in a safe place and do not carry
it on your key ring .
Key replacement
If you lose a key, contact your authorized Audi
dealer immediately to have the
lost key disa
bled. Be sure to bring all your keys with you.
Personal comfort settings
If two people use one vehicle, it is recom
mended that each person always uses "their
own" master key. When the ignition is switch
ed off or when the vehicle is locked, personal
convenience settings for the following sys
tems are stored and assigned to the remote
master key.
- Automatic climate control
- Central locking system
- Ambience lighting*
- Seat memory*
- Parking system*
- Adaptive cruise control*
Opening and closing 31
- Audi active lane assist*
- Audi side assist*
-Audi drive select
- Night vision assistant*
- Heated steering wheel*
The stored settings are automatically recalled
when you unlock the vehicle, when you open
the doors or when you switch the ignition on.
A WARNING
- Do not leave your vehicle unattended. Al
ways take your ignition key with you and
lock your vehicle. Entry by unauthorized
persons could endanger you or result in
theft or damage the vehicle.
- Do not leave children unattended in the
vehicle, especially with access to vehicle
keys. Unguarded access to the keys pro
vides children the opportunity to start
the engine and/or activate vehicle sys
tems such as the power windows, etc.
Unsupervised operation of any vehicle
system by children can result in serious
injury.
(D Tips
- The operation of the remote control key
can be temporarily disrupted by interfer
ence from transmitters in the vicinity of
the vehicle working in the same frequen
cy range (e.g . a cell phone, radio equip
ment).
- For security reasons, replacement keys
are only available from Audi dealers.
- For Declaration of Compliance to United
States FCC and Industry Canada regula
tions~ page
288.
Page 66 of 306
64 Warm and cold
Warm and cold
Climate controls
Description
A pplies to vehicles: with three-zone cl imate cont ro l or
four-zone a uto mat ic climate contro l
The climate control system warms, cools and
adds humidity to the air in the vehicle interior. It is the most effective when the windows and
sunroof* are closed .
If the temperature inside
the parked veh icle becomes very warm, open
ing the w indow br iefly will speed up the cool
ing process.
In all heating mode functions except
defrost,
the blower on ly switches to a highe r speed
once the engine coolant has reached a certain
temperature.
Condensat ion from the cooling system can
d rip and form a puddle of wate r under the ve
h icle. This is normal and does not mean there
is a leak .
Pollutant filt er
The pollutant filter removes pollutants such
as dust and po llen from the air.
The air pollutants filter must be changed at
the intervals spec ified in your Warranty
&
Maintenance booklet, so that the air condi
tioner can properly work .
If you drive your vehicle in an area with high
a ir pollution, the filter may need to be
changed more freq uently than specified in
your Aud i Warranty & Ma intenance booklet. If
i n doubt, as k your author ized Audi Se rvice Ad
visor for adv ice.
K ey coded setting s
Three-zone climate control: The blower set
ting and air distribution are stored automati
cally and assigned to the remote control key
that is in use.
Four-zone automatic climate control: The cli
mate control settings are automatica lly stor
ed and assigned to the remote control key
that is in use.
A WARNING
Reduced visibility is dangerous and can
cause accidents.
-
- For safe driving it is very important that
all windows be free of ice, snow and con
densat ion .
- Comp lete ly fami liarize yourse lf with the
proper use and funct ion of the heat ing
and ventilation system and especially
how to defog and defrost the w indows.
- Never use the windshield wiper/washer system in freez ing weather unt il you
have wa rmed the windshie ld first, using
the heating and ventilation system. The
washer sol ution may freeze on the w ind
shie ld and red uce visib ility.
(D Note
- If you suspect that the air conditioner
has been damaged, switch the system
off to avoid further d amage and have i t
inspected by a q uali fied dealership .
- Repairs to the Audi air conditioner re
quire speci al technical know ledge and
special tools. Contact an authorized Audi
dea ler fo r ass istance.
@ For the sake of the environment
By reducing the amount of f uel you use,
you also red uce the amount of pollutants
emitted into the air.
(D Tips
- Keep the air intake s lo ts (in front o f the
windshield) free from ice, snow and de
bris in order to maintain the proper func
tion of the climate control system.
- The energy management system may
switch the seat heating* or rear window
defroster off temporar ily. These systems
are available again as soon as the energy
balance has been restored .
-Air escapes through vents under the rear
w indow. When plac ing items of cloth ing
on the luggage compartment cover, en
sure that the openings are not covered.
Page 67 of 306
Warm and cold 65
Three-zone climate control
Operation
Applies to vehicles: with three-zone climate control
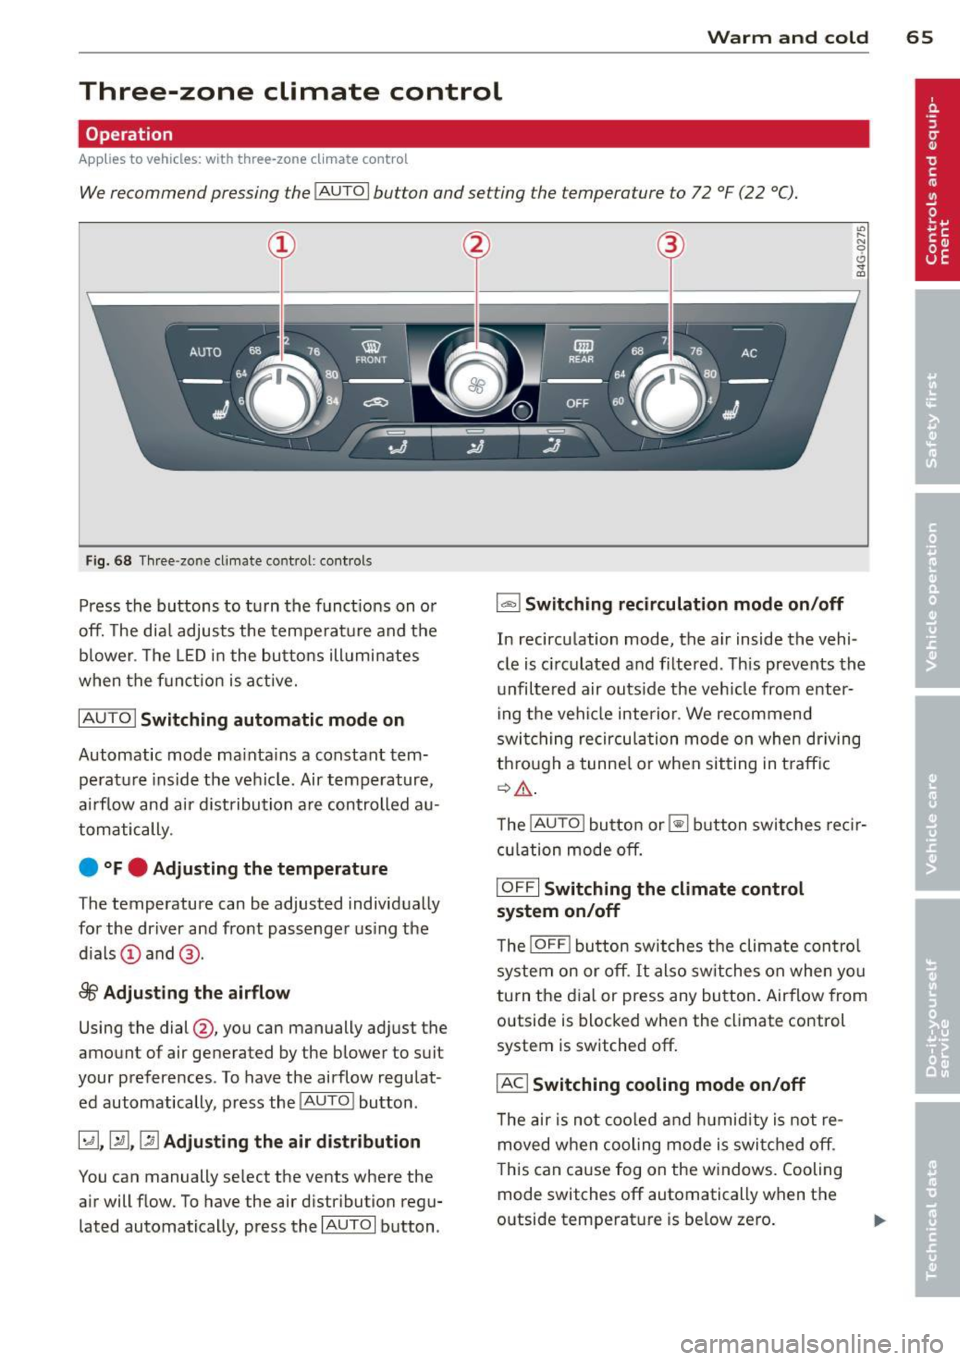
We recommend pressing the !AUTOI button and setting the temperature to 72 °F (22 °C).
F ig. 68 Three -zone cl imate control : controls
Press the buttons to turn the funct ions on or
off. The dial adjusts the temperature and the
blower . The LED in the buttons illuminates
when the funct ion is active.
IAUTO I Switching automatic mode on
Automatic mode mainta ins a constant tem
peratu re inside the vehicle. Air temperature,
airflow and air d istribution are controlled au
tomatically.
e °F e Adjusting the temperature
The temperature can be adjusted individually
for the driver and front passenger using the
d ials (!) and @.
~ Adjusting the airflow
Using the dial@, you can manually adjust the
amount of air generated by the blower to suit
your preferences . To have the airflow regulat
ed automatically, press the
! AUTO ! button.
~. rill, [2] Adjusting the air distribution
You can manually se lect the vents where the
air will flow. To have the air distribution regu lated automatically, press the
!AUTOI button .
l""" I Switching recirculation mode on/off
In recirculation mode, the air inside the vehi
cle is circulated and filtered. This prevents the
unfiltered air outside the veh icle from enter
ing the vehicle interior . We recommend
switching recirculation mode on when dr iving
through a tunnel or when sitting in traffic
~.& -
The !AUTO ! button or~ button switches recir
cu lation mode off.
I OFFI Switching the climate control
system on/off
The ! O FF! button switches the climate con trol
system on or off.
It also switches on when yo u
turn the dial or press any button. Airflow from
outside is blocked when the climate control
system is switched off.
IACI Switching cooling mode on/off
The air is not coo led and humidity is not re
moved when cooling mode is switched off .
This can cause fog on the w indows. Cooling
mode switches off automatically when the
outside temperature is be low zero.
Page 69 of 306
Warm and cold 67
Four-zone automatic climate control
Operation
Applies to vehicles: with four -zone a utomat ic climate control
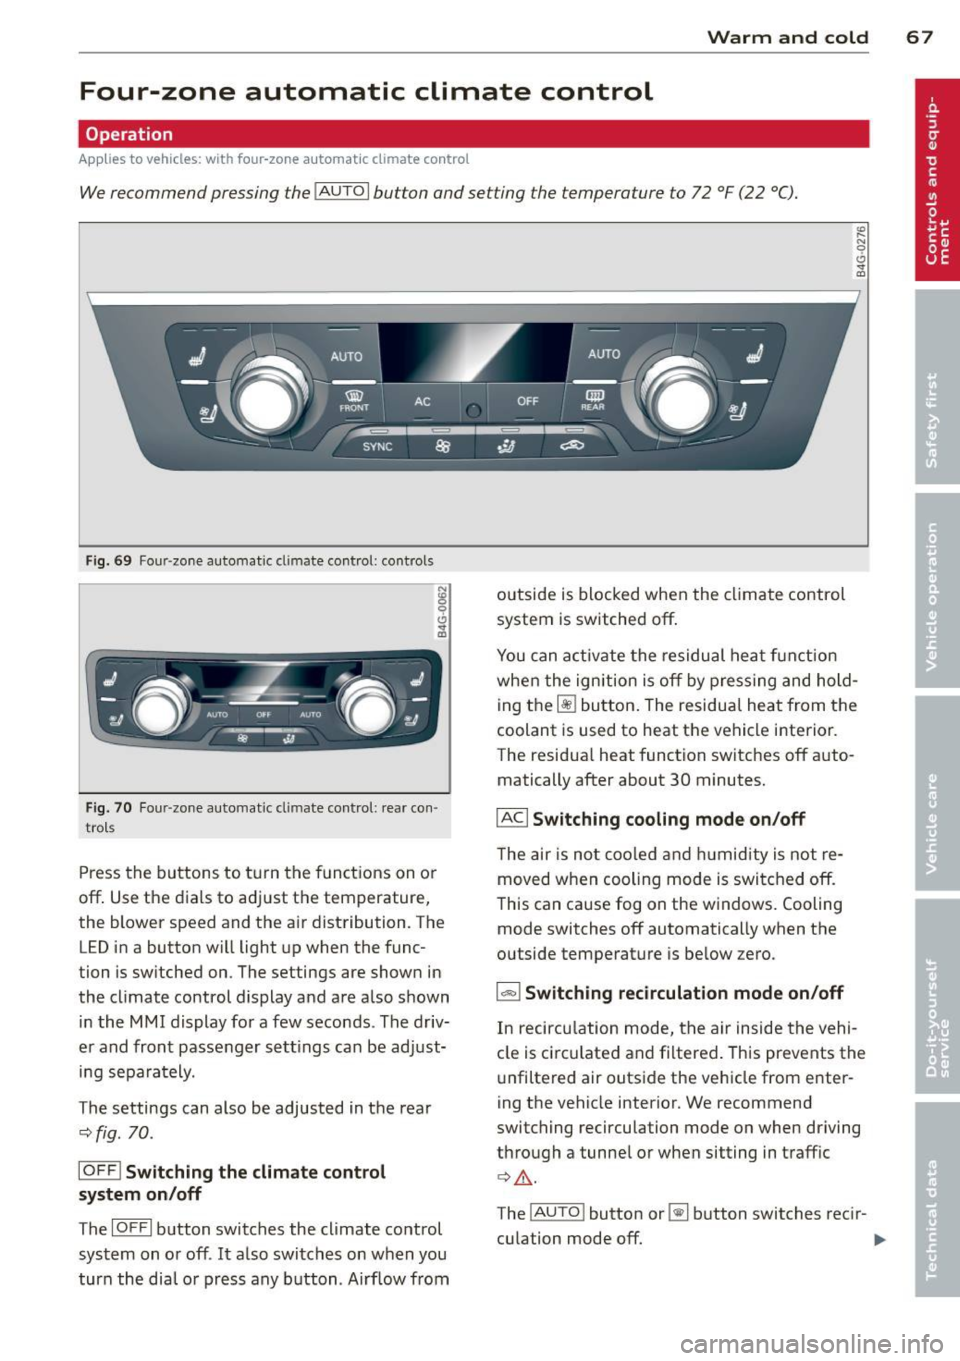
We recommend pressing the IAUTOI button and setting the temperature to 72 °F (22 °C).
F ig. 69 Four -zone automat ic climate control: controls
Fig. 70 F our -zone automat ic climate control: rear con·
trols
Press the buttons to turn the functions on or
off. Use the dials to adjust the temperature,
the blower speed and the air distribution. The
LED in a button will light up when the func
tion is switched on. The settings are shown in
the climate control display and are also shown in the MMI display for a few seconds . The driv
er and front passenger settings can be adjust·
ing separately.
The settings can also be adjusted in the rea r
<::>fig.
70.
IOFF l Switching the climate control
system on/off
The IOFFI button switches the climate control
system on or off .
It also switches on when you
turn the dial or press any button. Airf low from outside is blocked when the
climate control
system is switched off.
You can activate the residual heat funct ion
when the ignition is off by pressing and hold
ing the ~ button. The residual heat from the
coolant is used to heat the vehicle interior.
The residua l heat function switches off auto
matically after about 30 minutes.
IACI Switching cooling mode on /off
T he air is not coo led and humidity is not re
moved when cooling mode is switched off.
This can cause fog on the windows. Cooling
mode switches off automatically when the
outside temperature is below zero.
1- 1 Switching recirculation mode on/off
In recircu lation mode, the air inside the vehi
cle is circ ulated and filtered. This prevents the
unfiltered air outside the vehicle from enter
ing the vehicle interior. We recommend
switching recirculation mode on when driving
through a tunnel or when sitting in traffic
¢ Li). .
The !AUTO ! button or~ button switches recir-
culation mode off. .,..
Page 70 of 306
68 Warm and cold
IAUTO I Switching automatic mode on
Automatic mode m ainta ins a constant tem
perat ure inside the vehi cle. Air tempera ture,
airflow and air d istribution a re controlled a u
tomatically.
Adjusting the temperature
T empe ratu res between 60 °F (+16 °C) and
84 °F ( +28 ° C) c an be se t. O uts ide of this
range,
lo or hi w ill appear in the climate con
trol system disp lay. At both of these settings,
the cl imate control system r uns continuously
at max imum cooling or heat ing power. There
is no temperature regu lation.
~ Adjusting the airflow
You can a djust the airf low manually to s uit
your needs . To have the airf low reg ulated a u
tomatically, press the
! AUTO ! button.
~ Adjusting the air distribution
You can manu ally se lect the ve nts w here the
a ir will flow. To have the air d istribu tion reg u
l ated automatically, press the
IAUTOI bu tton.
~ I~ * Adjusting seat heating/
ventilat ion*
Pr ess ing the button swi tches the sea t heat
ing/ventilation on at the highest sett ing ( leve l
3). The LEDs indicate the heating/venti lat ion
leve l. To reduce the heating/vent ilation, press
the butto n aga in. To switch the seat heat ing/
ve nti lation off, press the button repeatedly
u ntil the LED turns off.
After 10 minutes, the seat heating automati
cally switches from leve l 3 to level 2.
l <;j) FRON T I Switch the defroster on/off
The win dsh ield and s ide windows are defrost
e d or cleared of con densation as quickly as
possib le. The max imum amo unt of air flows
mainly from the vents be low the windshield.
Recirculation mode switches off.
The
IAUTOI bu tton switches the defroster off.
lliiil REAR ! Switching rear window heater
on /off
T he rea r window heate r only operates w hen
the engine is running. It sw itches off auto
matically after 10 to 20 minutes, depending
o n the outside temperature.
T o p revent the rea r window heate r from
switching off automatically, p ress and ho ld
t h e ~ button for more than 2 seconds. Th is
rema ins stored until the ignition is switched
off .
ISYNC I Synchronization*
When synchronization is switched on, the
same settings are applied to bot h the dr iver
and fr ont passenger, except for the seat heat
i ng/venti lation *. The rear zo ne is also
synchronized. Synchronization switches off
whe n the se ttings for the front passenge r side
o r r ear are ad justed.
You can also switch synchronizati on o n by
pressing and holding a dial. For example, if
you press and hold t he di al on the front pas
senger si de, the setti ngs for that s ide a re
t ran sfer red to t he d rive r si de. The same ap
plies to the re ar.
Air vents
You can open o r close the center and ou ter
vents i n the cockpit and the vents in the rear
c ente r console and doo r pillars us ing t he
ridged t humbwheels. The levers adjust the d i
r ect ion o f the airfl ow from the vents.
A WARNING
-Do not use t he recirc ulation for ex tended
pe riods of time . The windows could fo g
up since no f resh a ir can enter the vehi
cle. If the windows fog up, p ress the air
recirc ulation butto n again immediately
to switch off the air reci rcu latio n fu nc
tion o r se lect defros t.
- Individ uals w it h reduced se nsitivity to
pa in or te mperature cou ld deve lop burns
when us ing the s eat heating fu nction . To
re duc e the risk of i nju ry, these i nd iv idu-
als should n ot us e sea t heating.
~
Page 71 of 306
(D Note
To avoid damage to the heating elements in the seats, do not kneel on the seats or
place heavy loads on a small area of the
seat.
Setup
App lies to vehicles: with four-zone a utomat ic climate con·
tro t
The climate con trol system setup is accessed
through the MMI.
" Select: ICARI function button > ( Car) * sys-
tems con trol button > AC.
Rear cabin settings*
When this function is selected, all settings for
the rear can be adjusted through the climate
control system in the cockpit. The climate
control system settings cannot be adjusted in
the rear seat at the same time. This function
switches
off after a certain period of time or
when one of the dials in the cockpit is press
ed .
Auto recirculation*
The sensitivity level of the automatic rec ircu
la tion mode can be set at various leve ls from
off to sensitive. The recirculation mode is con
trolled automat ica lly. You must press the~
button if fog forms on the windows.
Footwell temperature
You can adjust the footwell temperature so
that it is cooler or warmer.
AC mode
The strength of the airflow can be adjusted to
light, med ium or strong.
Warm and cold 69
Steering wheel heating
Applies to vehicles: wit h hea ted stee ring wheel
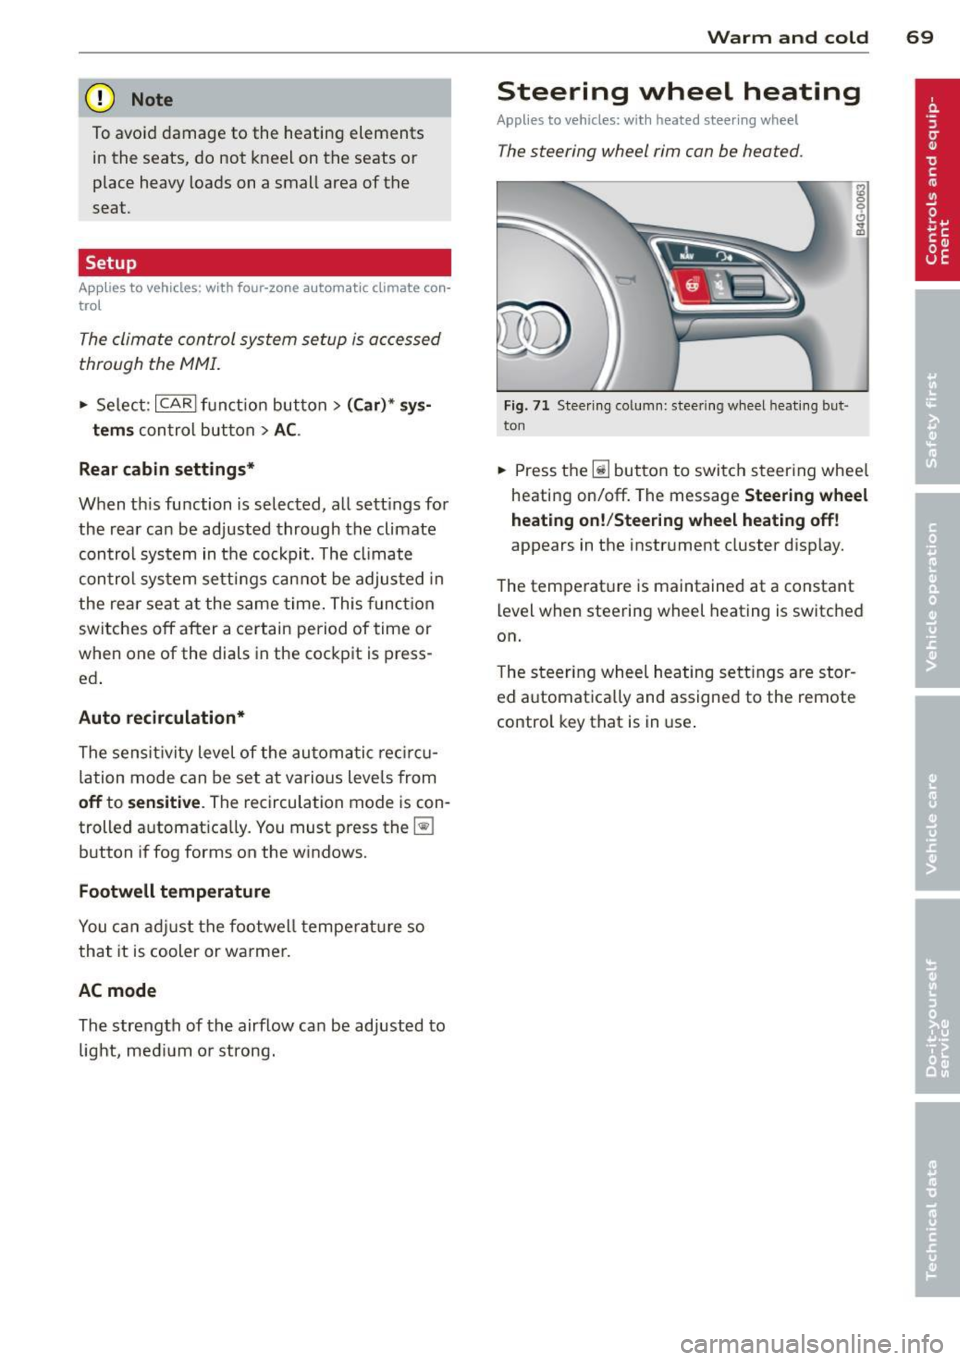
The steering wheel rim con be heated .
Fig. 71 Steering column: steering wheel hea tin g but ·
ton
.. Press the lil button to switch steering whee l
heating on/off. The message
Steering wheel
heating on! /Steering wheel heating off!
appears in the instrument cluster disp lay.
The temperat ure is maintained at a constant
level when steering wheel heating is switched
on.
T he steer ing wheel heating settings are stor
ed automat ica lly and assigned to the remote
control key that is in use .
Page 256 of 306
254 Tires and wheels
-If the spare tire is not the same as the
tires that are mounted on the vehicle -
for example with winter tires -only use
the spare tire for a short period of time
and drive with extra care. Refit the nor
mal road wheel as soon as safely possi
ble.
- Never drive faster than the maximum
speed for which the tires on your vehicle
are rated because tires that are driven
faster than their rated speed can fail
suddenly.
- Overloading tires cause heat build-up,
sudden tire failure, including a blowout
and sudden deflation and loss of control.
- Temperature grades apply to tires that
are properly inflated and not over or un
derinflated.
- For technical reasons it is not always
possible to use wheels from other
vehicles -in some cases not even wheels
from the same vehicle model.
- If you install wheel trim discs on the ve
hicle wheels, make sure that the air flow
to the brakes is not blocked. Reduced air
flow to the brakes can them to overheat,
increasing stopping distances and caus
ing a collision.
- Run flat tires may only be used on
vehicles that were equipped with them
at the factory. The vehicle must have a
chassis designed for run flat tires. Incor
rect use of run flat tires can lead to vehi
cle damage or accidents. Check with an
authorized Audi dealer or tire specialist
to see if your vehicle can be equipped
with run flat tires. If run flat tires are
used, they must be installed on all four
wheels. Mixing tire types is not permit
ted.
- For technical reasons, it is not generally
possible to use the wheel rims from oth
er vehicles. This can hold true for wheels
of the same vehicle type.
- If the spare tire is different from the
tires that you have mounted on your ve- hicle (for example winter tires or wide
profile tires), then use the spare tire for a
short period of time only and drive with
extra care. Replace
the flat tire with the
tire matching the others on your vehicle
as soon as possible.
- Never drive without the valve stem cap.
The valves could get damaged.
@ For the sake of the environment
Dispose of old tires in accordance with the
local requirements.
Uniform tire quality grading
-Tread wear
- Traction AA A B C
- Temperature ABC
Quality grades can be found where applicable
on the tire side wall between tread shoulder
and maximum section width
~fig. 195.
For example: Tread wear 200 , Traction AA,
Temperature A.
All passenger car tires must conform to Feder
al Safety Requirements in addition to these
grades .
Tread wear
The tread wear grade is a comparative rating
based on the wear rate of the tire when tested
under controlled conditions on a specified
government test course.
Fo r example, a tire graded 150 would wear
one and one half (1 1/2) times as well on the
government course as a tire graded 100.
The relative performance of tires depends
upon the actual conditions of their use, how
ever, and may depart significantly from the
norm due to variations in driving habits, serv
ice practices and differences in road character
istics and climate.
Traction
The traction grades, from highest to lowest,
are AA, A, Band
C. Those grades represent the
tire's ability to stop on wet pavement as ..,.
Page 273 of 306
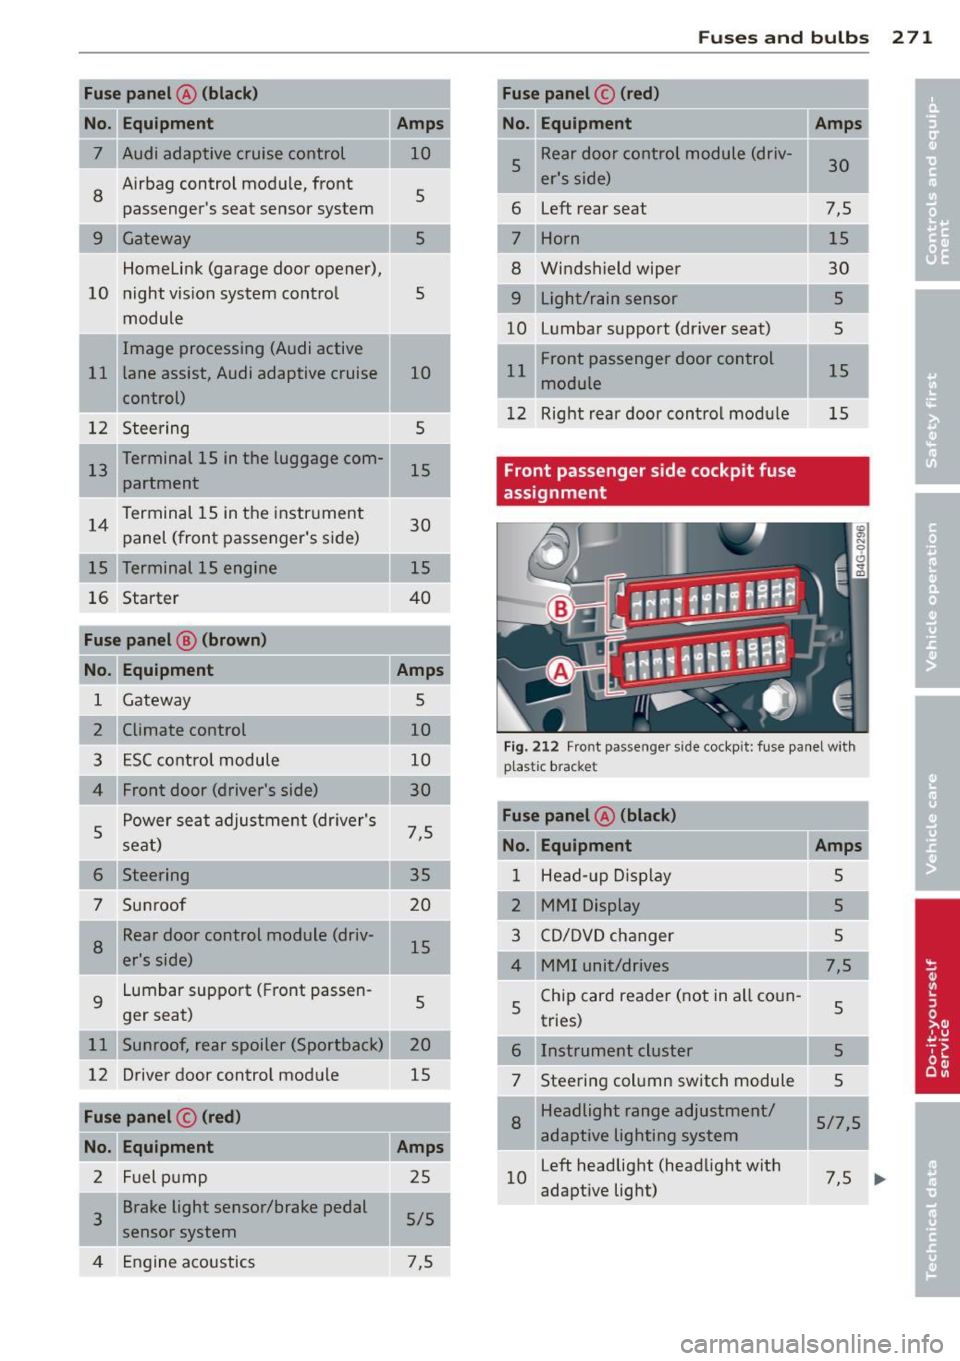
Fuse panel@ (black )
No. Equipment Amps
= = 7 Audi adaptive cruise control 10
8
Airbag control module, front
5
passenger's seat sensor system
Gateway 5
Homelink (garage door opener),
10 night vision system control
5
module
Image processing (Audi active
11 lane assist, Audi adaptive cruise
10
control)
12 Steering 5
1 13 Terminal 15 in the luggage com-
15
partment
14 Terminal 15 in the
instrument
30
panel (front passenger's side)
15 Terminal 15 engine 15
16 Starter 40
Fuse panel
B (brown)
No. Equipment Amps
1 Gateway 5
2 Climate control 10
3 ESC control module 10
Front door (driver's side) 30
s
Power seat adjustment (driver's
7,5
seat)
6 Steering 35
7 Sunroof 20
8
Rear door control module (driv-
15
er's side)
9 Lumbar support (Front passen
-
5
ger seat)
11 Sunroof, rear spoiler (Sportback) 20
12 Driver door control module
15
Fuse panel
c (red)
No. Equipment Amps
2 Fuel pump 25
3 Brake light sensor/brake pedal
sensor system 5/5
4 Engine acoustics 7,5
Fuses and bulbs
-Fuse panel © (red)
No.
u Equipment
5 Rear door
control module (driv-
er's side)
6 Left
rear seat
Horn
Windshield wiper
9 Light/rain sensor
10 L
umbar support (driver seat)
11 Front passenger door control
module
12 Right rear door control modu le
Front passenger side cockpit fuse
assignment Amps
30
7,5 15
30 5
5
15
15
Fig. 212 Front passenger side cockpit: fuse panel wit h
p last ic bracket
Fuse panel A (black)
No. Equipment
Amps
1 Head-up Display 5
2 MMI Display 5
3 CD/DVD changer 5
4 MMI unit/drives
7,5
5 Chip card reader (not in all coun
-
5
tries)
6 Instrument cluster
5
7 Steering column switch module
5
8
Headlight range adjustment/
5/7,5
adaptive lighting system
10 Left
headlight (headlight with
7,5
adaptive light)
I
271
...