AUDI A6 2015 Owners Manual
Manufacturer: AUDI, Model Year: 2015, Model line: A6, Model: AUDI A6 2015Pages: 314, PDF Size: 77.57 MB
Page 211 of 314
M N
0 <.J 'SI: ,...., \!) ..,.,
,...., ..,., ,....,
Vehicle care and clean ing
General information
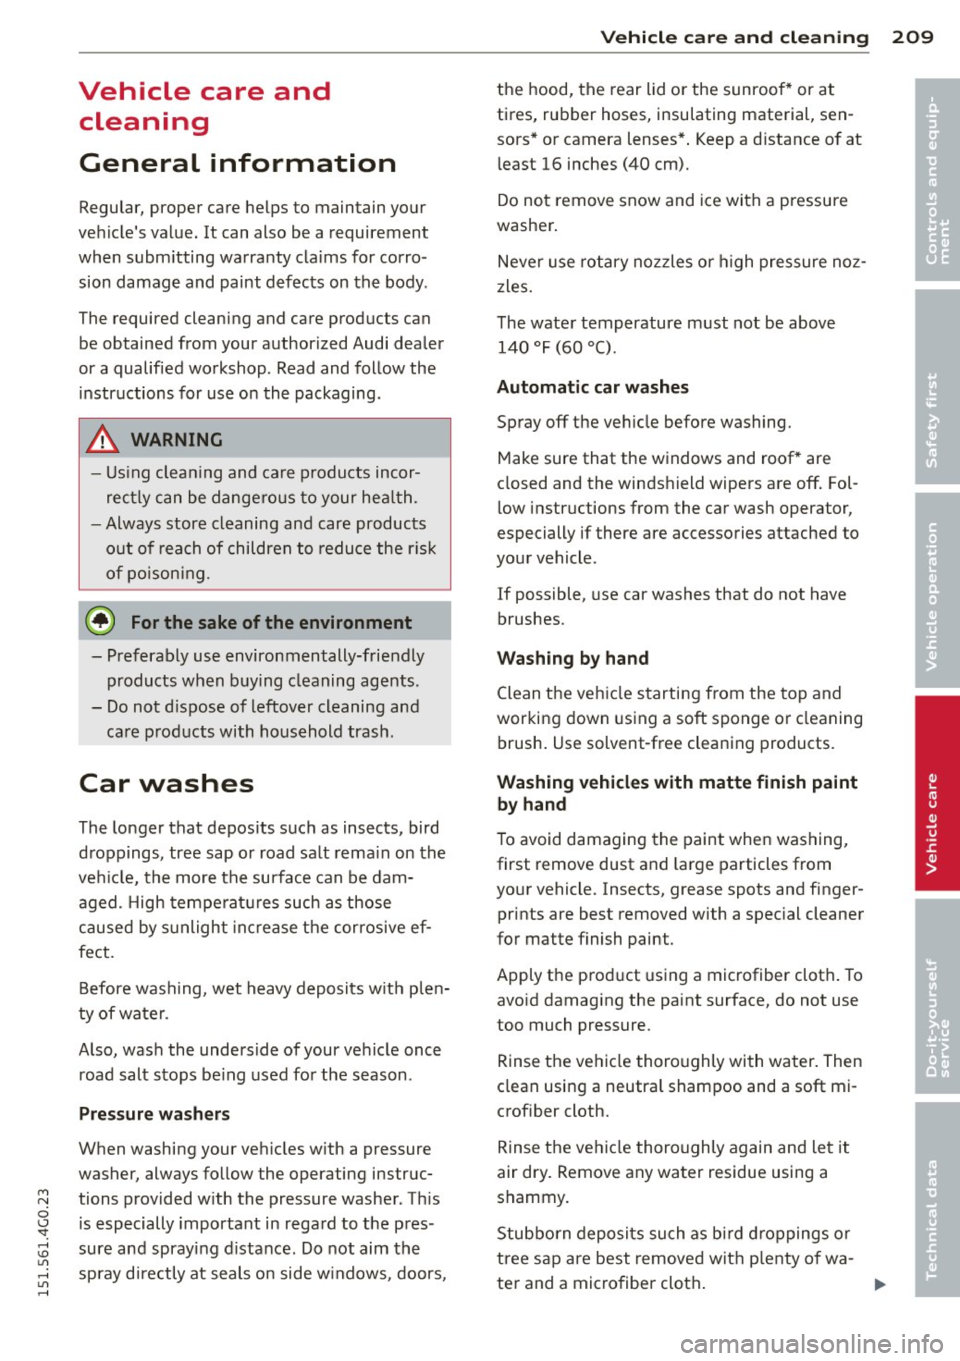
Regular, proper care helps to maintain your
vehicle 's value. It can also be a requirement
when submitting warranty claims for corro
sion damage and paint defects on the body .
The required cleaning and care products can
be obtained from your authorized Audi dealer
or a qualified workshop . Read and follow the
instructions for use on the packaging.
A WARNING
-Us ing clean ing and care products incor
rectly can be dangerous to your hea lth.
- Always store cleaning and care products
out of reach of children to reduce the risk
of poisoning.
@) For the sake of the environment
-Preferably use environmentally-friendly
products when buying cleaning agents.
- Do not d ispose of leftover cleaning and
care products with household trash .
Car washes
-
The longer that deposits such as insects, bird
droppings, tree sap or road salt remain on the
vehicle, the more the surface can be dam aged. High temperatures such as those
caused by sunlight increase the corrosive ef
fect.
Before washing, wet heavy deposits w ith plen
ty of water.
Also, wash the underside of your vehicle once road salt stops be ing used for the season.
Pressure washers
When washing your vehicles with a pressure
washer, always follow the operating instruc
tions provided w ith the pressure washer . Th is
is especially important in regard to the pres
sure and spraying distance. Do not aim the
spray directly at seals on side w indows, doors,
Vehicle care and cleaning 209
the hood, the rear lid or the sunroof* or at
tires, rubber hoses, insulating material, sen sors* or camera lenses* . Keep a distance of at
least 16 inches (40 cm).
Do not remove snow and ice with a pressure
washer.
Never use rotary nozzles or high pressure noz
zles.
The water temperature must not be above
140 °F (60 °C) .
Automatic car washes
Spray off the vehicle before washing.
Make sure that the windows and roof* are
closed and the windshield wipers are
off. Fol
low instructions from the car wash operator,
especially if there are accessories attached to
your vehicle.
If possible, use car washes that do not have
brushes .
Washing by hand
Clean the vehicle starting from the top and
working down using a soft sponge or cleaning
brush. Use solvent-free cleaning products.
Washing vehicles with matte finish paint
by hand
To avoid damaging the paint when washing,
first remove dust and large particles from
your vehicle. Insects, grease spots and finger prints are best removed with a special cleaner
for matte finish paint.
Apply the product using a microfiber cloth. To
avoid damaging the paint surface, do not use
too much pressure .
Rinse the vehicle thoroughly with water. Then
clean using a neutral shampoo and a soft mi
crof iber cloth.
Rinse the vehicle thoroughly again and let it
air dry . Remove any water residue using a
shammy.
Stubborn deposits such as bi rd droppings or
tree sap are best removed with plenty of wa-
ter and a microfiber cloth.
Ill-
•
•
Page 212 of 314

210 Vehicle care and cleaning
A WARNING
-Only wash the vehicle when the ignition
is off and follow the instructions from
the car wash operator to reduce the risk
of accidents .
- To reduce the risk of cuts, protect your
self from sharp metal components when
washing the underbody or the inside of
the wheel housings.
- After washing the vehicle, the braking ef
fect may be delayed due to moisture on
the brake rotors or ice in the winter. The
brakes must be dried first with a few
careful brake applications.
(!;) Note
- If you wash the vehicle in an automatic
car wash, you must retract the rear spoil
er if necessary, and fold the exterior mir
rors in to reduce the risk of damage.
Power folding exterior mirrors* must on
ly be folded in and out using the power
folding function.
- To prevent paint damage, do not wash
the vehicle in direct sunlight. -
To reduce the risk of damage to the sur
face, do not use insect removing spong
es, kitchen sponges or similar items.
- Matte finish painted vehicle compo
nents:
- To reduce the risk of damage to the
surface, do not use polishing agents or
hard wax.
- Never use car wash cycles that apply
protective wax.
It can destroy the
matte finish effect.
- Do not place any stickers or magnetic
signs on vehicle parts painted with matte finish paint. The paint could be
damaged when the stickers or magnets
are removed.
@ For the sake of the environment
Only wash the vehicle in facilities specially
designed for that purpose. This will reduce
the risk of dirty water contaminated with
oil from entering the sewer system.
Cleaning and care information
When cleaning and caring for individual vehi
cle components, refer to the following table.
The information contained there is simply rec
ommendations . For questions or for compo- nents that are not listed, refer to an author
ized
Audi dealer or a qualified workshop. Also
follow the information found in¢,& .
Cleaning exterior
Component Situation Solution
Wiper blades
Dirty ¢ page 49, Cleaning windshield wiper blades
Headlights/ Dirty Soft sponge with a mild soap solutiona>
tail lights
Sensors/
Dirty Sensors: soft cloth with a solvent-free cleaning product
camera lenses Camera lenses: soft cloth with an alcohol-free cleaning
solution
Snow/ice Hand brush/solvent-free de-icing spray
Wheels Road salt Water
Brake dust Acid-free special cleaning solution
Exhaust tail Road salt Water, cleaning solution suitable for stainless steel,
if
pipes necessary
Page 213 of 314
M N
0 <.J 'SI: ,...., \!) 1.1'1 ,...., 1.1'1 ,....,
Vehicl e ca re a nd cl eanin g 211
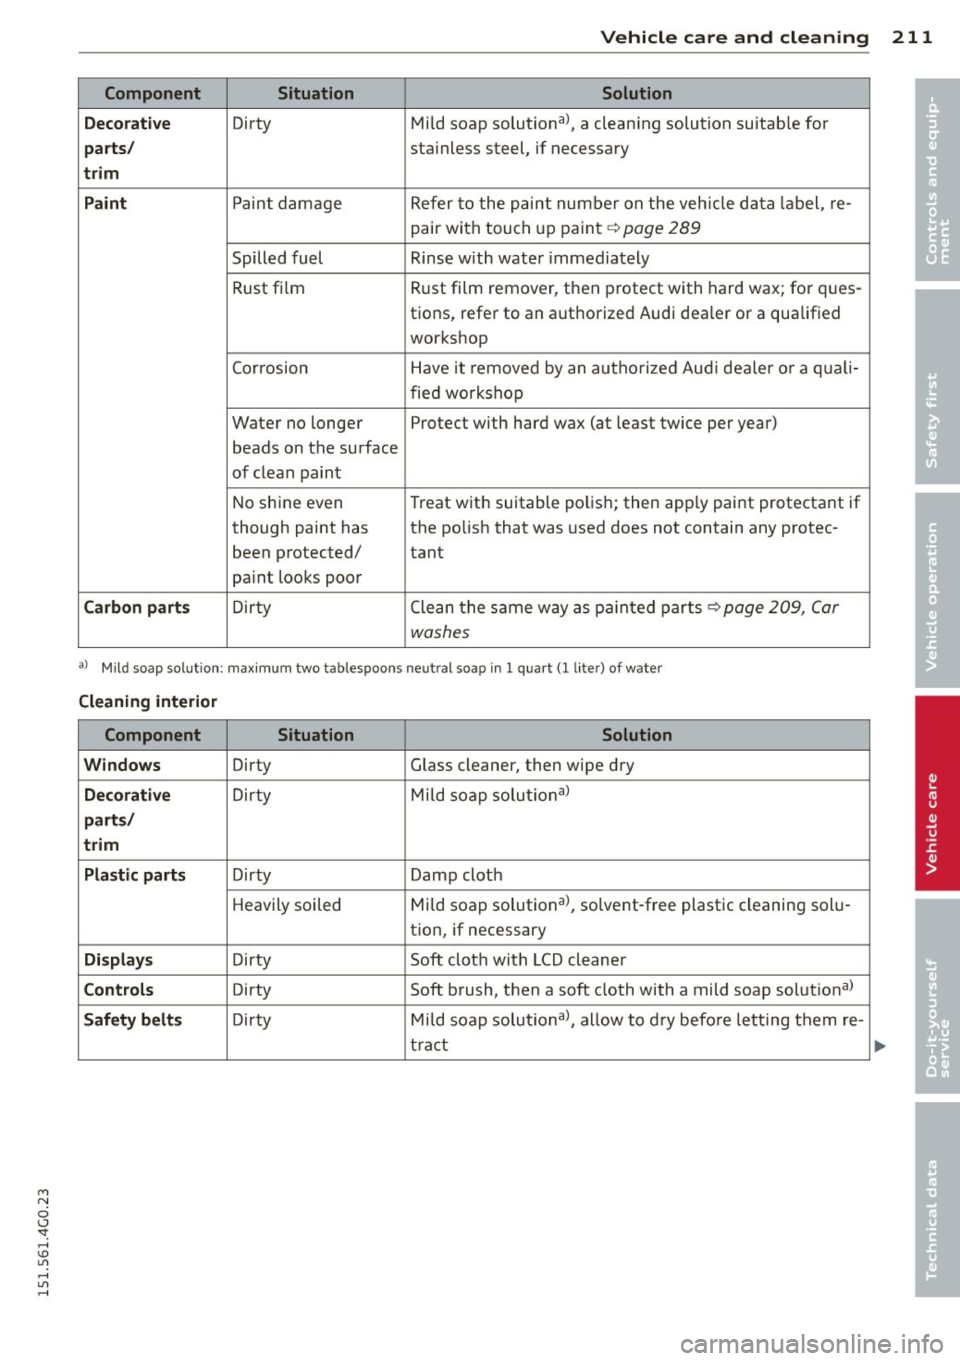
Component Situat ion Solution
Deco ra ti ve
Dirty Mild soap solutional, a cleaning solution suitab le for
p art s/ stainless steel, if necessary
tri m
P ai nt
Paint damage Refer to the paint number on the vehicle data label, re-
pair with touch up paint
c::> page 289
Spilled fuel Rinse with water immediately
Rust film Rust film1 remover, then protect with hard wax; for ques-
tions, refer to an authorized Audi dea ler or a qualified
workshop
Corrosion Have it removed by an authorized Audi dealer or a qua li-
fied workshop
Water no longer Protect with hard wax (at least twice per year)
beads on the surface
of clean paint
No shine even Treat
with suitable polish; then apply paint protectant if
though paint has the polish that was used does not contain any protec-
been protected/ tant
paint looks poor
Carbo n pa rts Dirty Clean the same way as pa inted parts c:>page 209, Car
washes
al Mild soap solut ion: max im um two tablespoons neutral soap in l quart (l l iter) of water
C le aning int erior
Component Situ ation Solution
W indo ws
Dirty Glass cleaner, then wipe dry
Deco rativ e Dirty Mi
ld soap solutional
parts/
trim
Pl as tic p art s
Dirty Damp cloth
Heavily soiled Mild soap solutional, solvent-free plastic cleaning solu -
tion, if necessary
Di sp lays Dirty Soft cloth with LCD cleaner
Cont rols Dirty Soft brush, then a soft cloth with a mild soap solut iona)
S af ety belts Dirty Mild soap solutional, allow to dry befo re letting them re -
tract
•
•
Page 214 of 314

212 Vehicle care and cleaning
Component Situation Solution
T ex tile s,
Stains adhering to Vacuum cleaner
Vin yl, the surface
A lcan ta ra Water -based stains Absorbent cloth and mild soap solutiona>
such as coffee, tea,
blood, etc.
O il-based stains Apply a mild soap solutiona>, blot away the d issolved oil
such as oil, make- or dye, treat afterward w ith water, if necessary
up, etc.
Special stains such Special stain remover, blot with absorbent material,
as ballpoint pen, treat afterward with mild soap solutiona>, if necessary
na il polish, latex
pa int, shoe po lish,
etc.
N atu ral leather Fresh stains Cotton cloth with a mild soap solutiona>
Water-based stains Fresh stains: absorbent cloth
such as coffee, tea, Dr ied stains: sta in remover suitable for leather
blood, etc.
Oi l-based stains Fresh stains: absorbent cloth and sta in remover suitable
such as oil, make- for leather
up, etc. dried stains: Oil cleaning spray
Special stains such Stain remover suitable for leather
as ballpo int pen,
na il polish, latex
pa int, shoe polish,
etc.
Care Regular
ly apply condit ioning c ream that protec ts from
light a nd penetrates into the materia l. Use specially-col-
ored conditioning cream, if necessary.
Carbon part s Dirty Clean tlhe same way as plastic parts
a) Mi ld soap so lut ion : maximum two tablespoons neut ra l soap in 1 quart (I lite r) of water
& WARNING
The windshie ld may not be treated with
water -repe lling windshield coating agents .
Unfavorab le conditions such as wetness,
darkness, or low sun can result in in
creased glare. W iper blade chatter is a lso
possible .
(V Note
-Headlights /tail lights
- Never clean headlights or tail lights
w it h a dry cloth or sponge. -
Do not use any cleaning product that
contains alcohol, because they could
cause cracks to form.
-Wheels
- Never use any paint polish or other
abrasive mater ials.
- Damage to the protective layer on the
rims such as stone chips or scratc hes
must be repa ired immediately.
- Sensor s/camera len ses
- Never use warm or hot water to re-
move snow or ice from the camera
le ns. This could cause th e lens to crack . ""
Page 215 of 314
M N
0 <.J 'SI: ,...., \!) 1.1'1 ,...., 1.1'1 ,....,
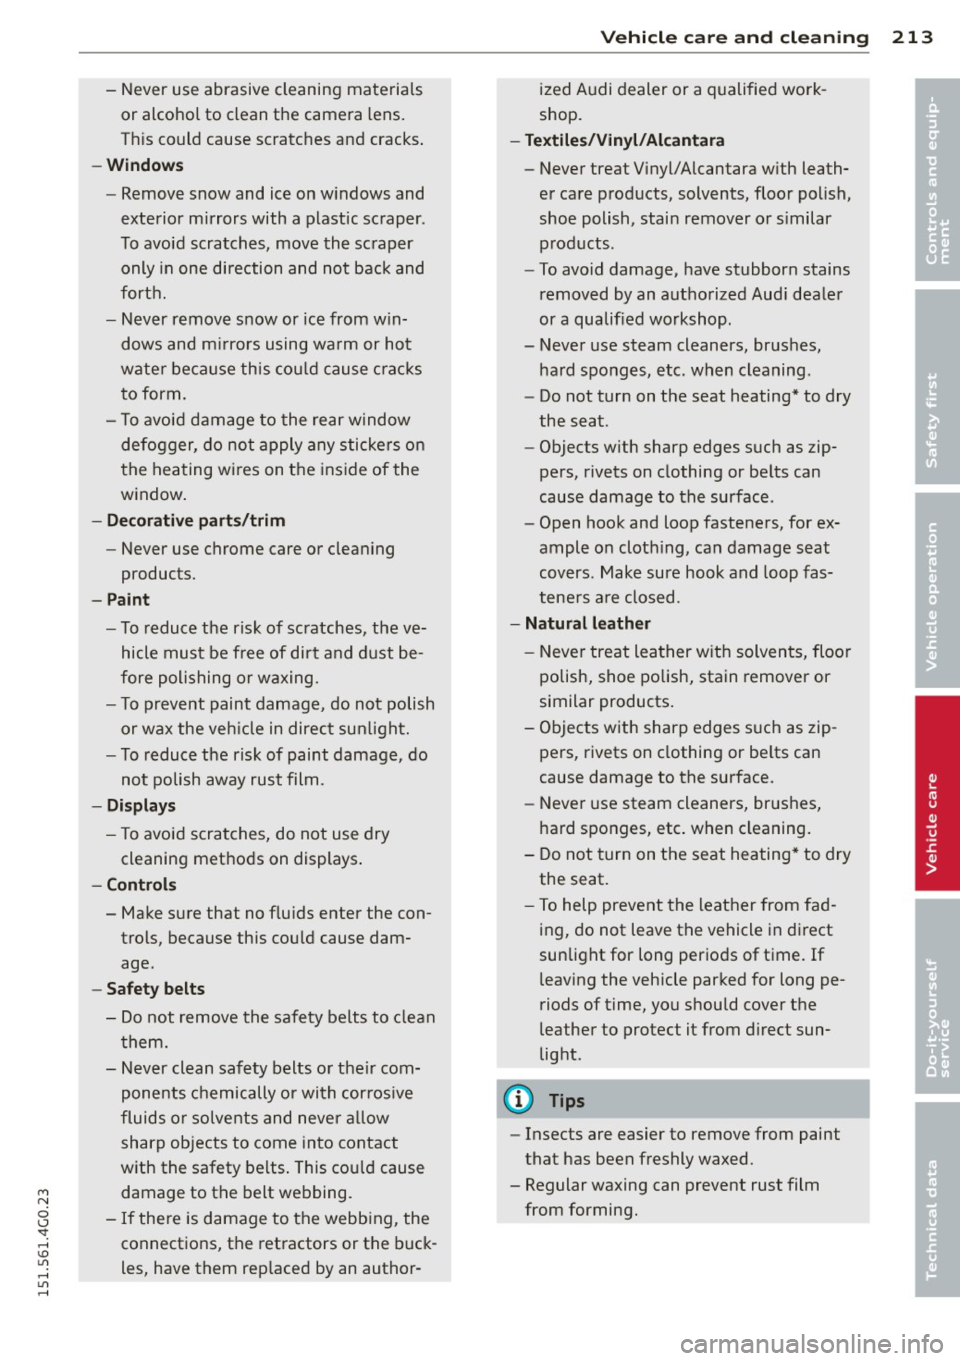
-Never use abrasive cleaning materials
or alcohol to clean the camera lens.
Th is could cause scratches and cracks .
-Window s
-Remove snow and ice on w indows and
exterior mirrors with a plastic scraper.
To avoid scratches, move the scraper only in one direction and not back and
forth.
- Never remove snow or ice from w in
dows and m irrors using wa rm or hot
wate r because this cou ld cause crac ks
to form.
- To avoid damage to the rear window
defogger, do not apply any stickers on
the heating wires on the inside of the
w indow .
-Dec or ati ve p arts /trim
-Never use chrome care or cleaning
products.
-Paint
-To reduce the risk of scratches, the ve-
hicle must be free of dirt and dust be
fore polishing or waxing.
- To prevent paint damage, do not polish
or wax the veh icle in direct sunlight.
- To reduce the risk of paint damage, do
no t polish away rust film .
-Di splay s
-To avoid scratches, do not use dry
cleaning methods on displays .
-Controls
- Make sure that no flu ids enter the con-
trols, because this cou ld cause dam
age .
-Safet y belts
- Do not remove the safety belts to clean
t hem.
- Never clean safety belts or their com
ponents chemically or with cor ros ive
fluids or solvents and never a llow
sharp objects to come into contact
with the safety belts . This cou ld cause
damage to the belt webbing.
- If the re is damage to the webb ing, the
connections, the retractors or the buck
les, have them rep laced by an author-
V ehicl e ca re a nd cl eanin g 213
ized A udi dealer or a qualified work
shop.
- Te xtile s/Vin yl/ Alcant ara
- Never treat Vinyl/Alcantara w ith leath-
er care products, solvents, floor polish,
shoe polish, stain remover or s imilar
p rod ucts.
- To avoid damage, have stubborn stains
removed by an authorized Aud i deale r
or a qualif ied workshop.
- Never use steam cleaners, brushes,
hard sponges, etc. when cleaning.
- Do not turn on the seat heating * to dry
the seat.
- Objects with sharp edges such as zip
pers, rivets on clothing or be lts can
cause damage to the surface.
- Open hook and loop fasteners, for ex
ample on cloth ing, can damage seat
covers. Make sure hook and loop fas
tene rs a re closed.
- Natural leather
- Neve r treat leather w ith solven ts, floo r
polish, shoe polish, stain remover or
similar products.
- Objects with sharp edges such as zip
pers, rivets on clothing or be lts can
cause damage to the surface.
- Never use steam cleaners, brushes,
hard sponges, etc . when cleaning.
- Do not turn on the seat heating* to dry
the seat.
- To help prevent the leather from fad
ing, do not leave the vehicle in direct
sunlight for long periods of time. If leaving the vehicle parked for long pe
riods of time, you should cover the
leather to protect it from d irect sun
light.
(D Tips
- Insects are easier to remove from paint
that has been freshly waxed.
- Regular waxing can prevent rust film
from forming.
•
•
Page 216 of 314
214 Fuel supply and filling your fuel tank
Fuel supply and filling
your fuel tank
Gasoline
Fuel supply
Appl ies to vehicles: with gasoline engine
Using the right fuel helps keep the environ
ment clean and prevents engine damage .
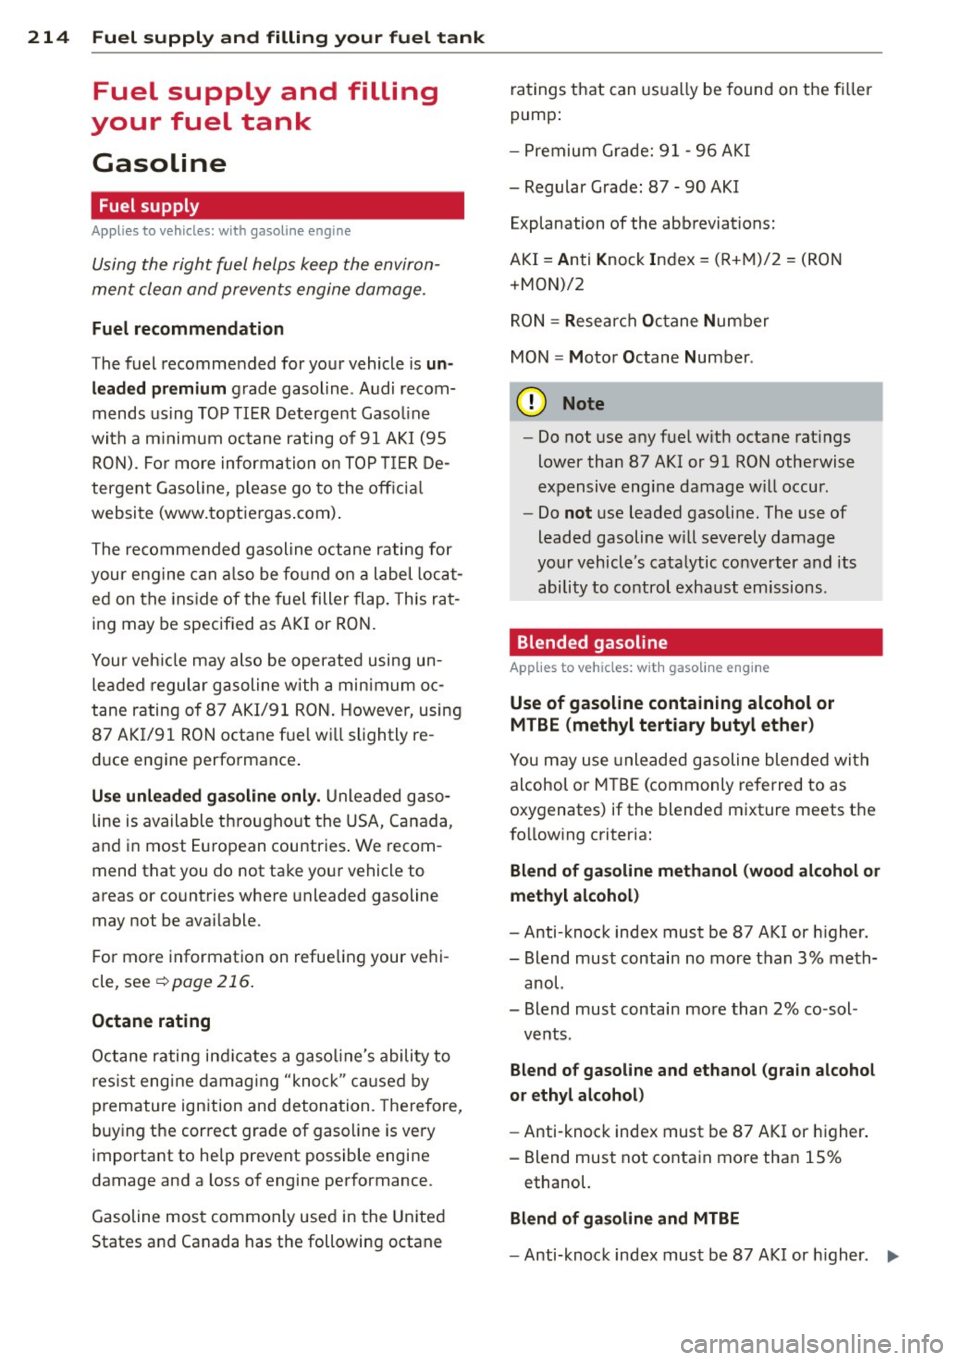
Fuel recommendation
The fuel recommended for yo ur vehicle is un
l e aded premium
grade gasoline . Audi recom
mends using TO P TI ER D ete rgent Gaso line
wi th a m inimum octane ra ting o f 91 A KI ( 95
RO N). Fo r more informa tio n o n TOP TIER De
tergent Gasoline, p lease go to the o fficia l
websi te (www. topt iergas .com) .
The re commended gasoline octane rati ng for
your engine can a lso be fo und o n a label loc at
ed on the ins ide of the fuel filler flap . This ra t
ing may be specif ied as AK I or RO N.
Your veh icle may also be operated using un
l eaded regular gasoline with a minimum oc
tane rating of 87 AKI/91 RO N. However, using
87 A KI/91 RON octa ne fue l wi ll slightly re
d uce eng ine perfo rmance .
Use unleaded ga soline only. U nleaded g aso
l ine is available th rougho ut the USA, Canada,
a nd i n most E uropean countries . We recom
mend that you do not ta ke yo ur vehicle to
areas or co untries where unleaded gasoline
may not be ava ilable.
F or mo re informat io n on refue ling your ve hi
cle, see~
page 216.
Octane rating
Octane rating ind icates a gaso line's abili ty to
res ist eng ine dam ag ing "knoc k" ca use d by
premature ign ition and detona tion. Therefore,
buy ing the correct grade of gaso line is very
important to he lp prevent possible engine
damage and a loss of engine performance.
Gasoline mos t commonly used in the Unite d
States and Canada has the following octane r
atings t hat can usu a lly be found on the fi ller
pump:
- Premium Gra de: 91 -96 A KI
- Regular Grade : 87 -90 AKI
Explanation of the abbreviations:
AKI = Anti K nock In d ex = (R+M )/2 = (RON
+ MON)/2
R ON= Resear ch Octane Numb er
MON = Motor Octane Num ber .
(D Note
-Do not use a ny fue l w it h o ctane rat ings
lower tha n 87 A KI or 91 RO N othe rwise
expensive engi ne damage w ill occur.
- Do
not use leaded gasoli ne. The use of
leaded gasoline w ill severely damage
yo ur v ehicle's cata lytic co nve rter and its
ability to co ntrol exha ust em issions .
Blended gasoline
Applies to vehicles: with gasoline engine
Use of gasoline containing alcohol or
MTBE (methyl tertiary butyl ether )
You may use unleaded g asoline blende d wi th
alcohol o r MTBE (commonly referred to as
oxygenates) if the blende d mixture meets t he
f o llow ing criteria:
Blend of gasoline methanol (wood alcohol or
methyl alcohol)
- Anti -kno ck index must be 87 A KI or higher.
- Blend must contain no more t han 3% meth-
anol.
- Blend must contain more than 2% co -sol -
vents.
Blend of gasoline and ethanol (grain alcohol
or ethyl alcohol)
- Anti -knock index must be 87 AKI or higher .
- Blend must not conta in mo re tha n 15%
ethanol.
Blend of ga soline and MTBE
- Anti-knock index must be 87 AKI or higher. IJll,
Page 217 of 314
M N
0 <.J 'SI: ,...., \!) ..,.,
,...., ..,., ,....,
-Blend must contain not more than 15%
MTBE.
Seasonally adjusted gasoline
Many gasoline grades are blended to perform
espec ially we ll for winter or summer driving.
During seasonal change-over, we suggest that
you fill up at busy gas stat ions where the sea
sonal adjustment is more likely to be made in
time .
(D Note
-Methanol fuels which do not meet these
requirements may cause corrosion and
damage to plastic and rubber compo
nents in the fuel system .
- Do not use fue ls that fail to meet the
specified criter ia in this chapter.
- If you are unable to determine whether
or not a particular fue l blend meets the
specifications, ask your service station or
its fuel supp lier.
- Do not use fuel for which the contents
cannot be identified.
- Fuel system damage and performance
problems resulting from the use of fuels
different from those specified are not
the responsibility of Audi and are not
covered under the New Vehicle or the Emission Control System Warranties.
- If you experience a loss of fuel economy
or driveability and performance prob l ems due to the use of one of these fuel
blends, we recommend that you switch
to unblended fuel.
Gasoline additives
A major concern among many auto manufac
turers is carbon deposit build- up caused by
the type of gasoline you use.
Although gasoline grades differ from one manufacturer to another , they have certain
things in common. All gasoline grades contain
substances that can cause deposits to collect
on vital engine parts, such as fuel injectors
and intake valves. Although most gasoline brands include additives to keep engine and
Fuel supply and filling your fuel tank 215
fuel systems clean, they are not equally effec
tive .
A udi recommends using TOP TIER Detergent
Gasoline. For more info rmation on TOP TIER
Detergent Gasoline, please go to the official
website (www.toptiergas.com).
After an extended period of using inadeq uate
fuels, carbon deposit build-ups can rob your
engine of peak performance.
Q) Note
Damage or malfunction due to poor fue l
quality is not covered by the Aud i New Ve
hicle Limited Warranty.
Diesel fuel
Applies to veh icles: w ith diese l eng ine
Always use ULSD (Ultra Low Sulfur Diesel)
No. 2. The ULS D No. 2 meets the ASTM D975.
D iesel fuel w ith concentrations of biodiese l
highe r than 5 % such as Bll, B2O or BlOO are
strictly prohib ited.
Serv ice stat ion fuel pumps are labeled with
the correct fuel informat ion for easy recogn i
t ion by the user. If the diesel fuel pump is not
labeled ask the station operator what fuel is
being dispensed before filling up your vehicle.
ULSD No. 2 may not be available outside the
USA and Canada. Be sure to check before trav
eling to other countries.
ULSD No. 2 can become thicker in very cold
temperatures, and this can impair the en gine's start ing and running. Depending on the
season, gas stat ions provide ULSD No. 2 that
flows better in cold temperatures so that you
can continue operating your vehicle as usua l.
(D Note
-Your vehicle's diesel engine was de
signed soley for use with ULSD No. 2.
Th erefore, never use gasoline, heating
oil, other f uels or flow improvers . These
contain substances that wi ll severely
damage the fuel system and the engine. .,.
•
•
Page 218 of 314
216 Fuel supply and filling your fuel tank
Such damage will not be covered by your
New Vehicle Limited Warranty.
- If you p ut any amount of incorrect fuel in
the fue l tank, do not start the engi ne un
der any circumstances. Immediately con
tact the nearest authorized Audi dealer
or authorized Audi Service Facility for as
s istance. These fuels contain substances
that can severely damage the fuel sys
tem and the engine if the engine is start ed.
Fuel tank
Fuel filler neck
The fuel filler neck is located on the right rear
side panel behind the fuel filler flap.
If the power locking system should fa il, you
can st ill open the flap manually -for detailed
instructions see
c;, page 218.
You can find the fue l tank capacity of your ve
hicle in
c;, page 290.
The label on the inside of the fue l filler flap
tells you the cor rect fuel for your vehicle . Fo r
more information about fuel specifications,
see
c;, page 214.
Your veh icle fuel tank has an onboard refue l
ling vapor recovery system. This feature helps
to prevent fuel vapors from escaping from the
tank and polluting the environment while you refuel your vehicle. In order to fill the tank
properly whi le protecting the env ironment,
please follow this refueling procedure careful
ly .
A WARNING
Under normal operating conditions, neve r
carry additiona l fuel containers in you r car.
Gas canisters and other containers used to
transport fuel can be dangerous. Such con
tainers, full or empty, may leak and could
cause a fire in a collision. If you must
transport fue l to use for yo ur lawn mower,
snow blower, etc., be very careful and al
ways observe local and state laws regard
ing the use, transportation and storage of such
fuel containers . Make certain the con
tainer meets industry standards (ANSI/
ASTM F852 -86).
(D Note
Never drive your vehicle until the fue l tank
is completely empty. The irregu lar supply
of fue l can cause misfiring. Gasoline could
enter the exhaust system and damage the
catalytic converter .
Refuelling
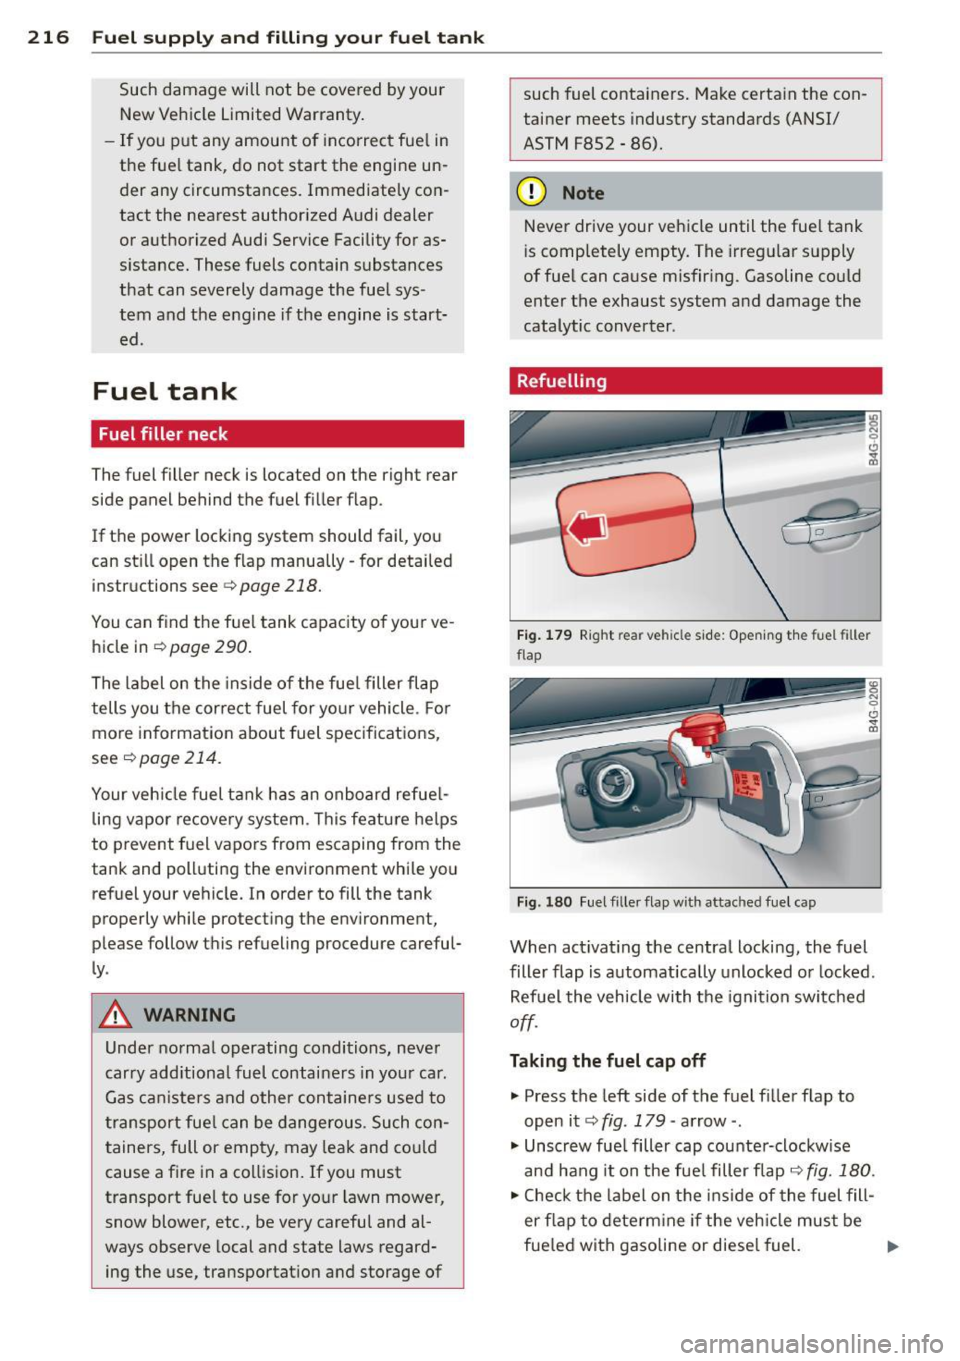
Fig. 179 Right rea r veh icle side: Opening the fuel filler
flap
Fig . 180 Fu el filler flap with attac hed fuel cap
When act ivat ing the central locking, the fuel
filler flap is automatically unlocked or locked.
Refuel the vehicle with the ignition switched
off.
Taking the fuel cap off
" Press the left side of the fuel filler flap to
open it
c;, fig. 179 -arrow -.
" Unscrew fuel filler cap counter-clockwise
and hang it on the fue l filler flap
c;, fig. 180.
"Check the label on the inside of the fuel fill
er f lap to determine if the veh icle must be
fue led with gasoline or diesel fuel.
Ill>
Page 219 of 314
M N
0 <.J 'SI: ,...., \!) 1.1"1 ,...., 1.1"1 ,....,
Refuelling procedure
"'Insert the fuel nozz le from the gasoline
pump into the fue l filler neck as far as it will
go.
"' Se lect a medium refuelling rate so that the
noz zle switches off automatically when the
tank is full.
Putting the fuel cap back on
"'After filling your tank, twist the fuel fi ller
cap clockwise as far as it will go.
"' Close the fuel filler flap .
To avoid fuel spi lling or evaporating from the
fuel tank always close fuel fi ller cap properly
and comp letely. An improperly closed fuel fill
er cap may also cause the MIL lamp¢
page 29
to come on.
A WARNING
Improper refueling or handling of fuel can
cause fire, explosion and severe burns .
- Fuel is highly flammable and can cause
severe burns and other injuries .
- Failure to shut the eng ine off while refu
eling and/or to insert the pump nozzle
fully into the fuel f iller neck could cause
fuel to spray out of filler neck or to over
flow. Fuel spray and ove rflow ing fuel can
cause a fire.
- Never use a cellular telephone while re
fueling. The elect romagnetic radiation
can cause sparks that can ignite fue l va
pors and cause a fire.
- Never get back into you r vehicle while re
fueling. If in exceptiona l circumstances
yo u must get back in your vehicle wh ile
refueling, make certain that you close
the door and touch metal to discharge
static electricity before touching the fill
er nozzle again. Static electricity can
cause sparks that can ignite fuel vapors
released during refueling.
- Never smoke or have an open flame any
where in or near you r vehicle when refu
eling or filling a portable fuel container .
- For your safety, we strongly recommend
that you do not travel w ith a portable
Fuel supply and filling your fuel tank 217
fuel container in your vehicle. The con
tainer, full or empty may leak and could
cause a fire, especially in a crash.
- If, under exceptional circumstances, you
must transport a portable fuel container,
please observe the following:
- Never fill a portable fuel container
while it is anywhere in or on the vehicle
(for example, in the luggage compart
ment, or on the trunk) . Static electrici
ty can build up while filling and can ig
nite fuel vapors causing a fire.
- Always place a portab le fue l conta iner
on the ground before fi lling.
- Always keep the filler nozzle complete
l y inside the portable container before
and during filling.
- If filling a portab le container made of
metal, the fi ller nozzle must always be
i n contact with the conta iner. This will
help prevent static electric ity from dis
charging and cause a fire .
- Never spill fuel inside the vehicle or
luggage compartment. Fuel vapors are
highly flammable .
- Always observe local and state/provin
cial laws regarding the use, storage
and transportation of fuel containers .
- Make certain the fuel container meets
industry standards (ANSI/ ASTM
F8S2 -86) .
(D Note
If any fuel has spilled onto the car, it
should be removed immediately to prevent
damage to the paint .
@) For the sake of the environment
As soon as the correctly operated nozzle
switches off automatically for the first
time, the tank is full. Do not try to add
more fuel because fuel may spill out . In
addition , the expansion space in the fuel
tank will be filled -causing the fuel to
overflow when it becomes warm and pol
l ute the environment . •
•
Page 220 of 314
218 Fuel supply and filling your fuel tank
@ Tips
-Running your engine while refuelling
may cause vapors to escape or even
cause fue l to spill out of the tank. This
would then shut off the fuel nozzle be
fore the tank is full.
- Do not refuel your vehicle w ith the igni
tion switched on. The fuel gauge may
otherwise not indicate the correct fuel
level after refuelling.
- Diesel vehicles* are equipped with a die
sel m isfueling protector. It allows the
vehicle to be fueled only w ith a diesel
fuel pump nozzle. A worn or damaged
nozzle or a nozzle that is too small may
not be able to open the diesel misfueling
protector . If this is the case, try turning
the nozz le before inserting it in the fue l
filler neck, use a different fuel pump or see your authorized Audi dealer or au
thorized repair facility for assistance.
- The fuel filler flap of your vehicle is not
locked when you lock the vehicle from
the inside.
Fuel filler flap emergency release
You can open the fuel filler flap by hand if the
power locking system should fail.
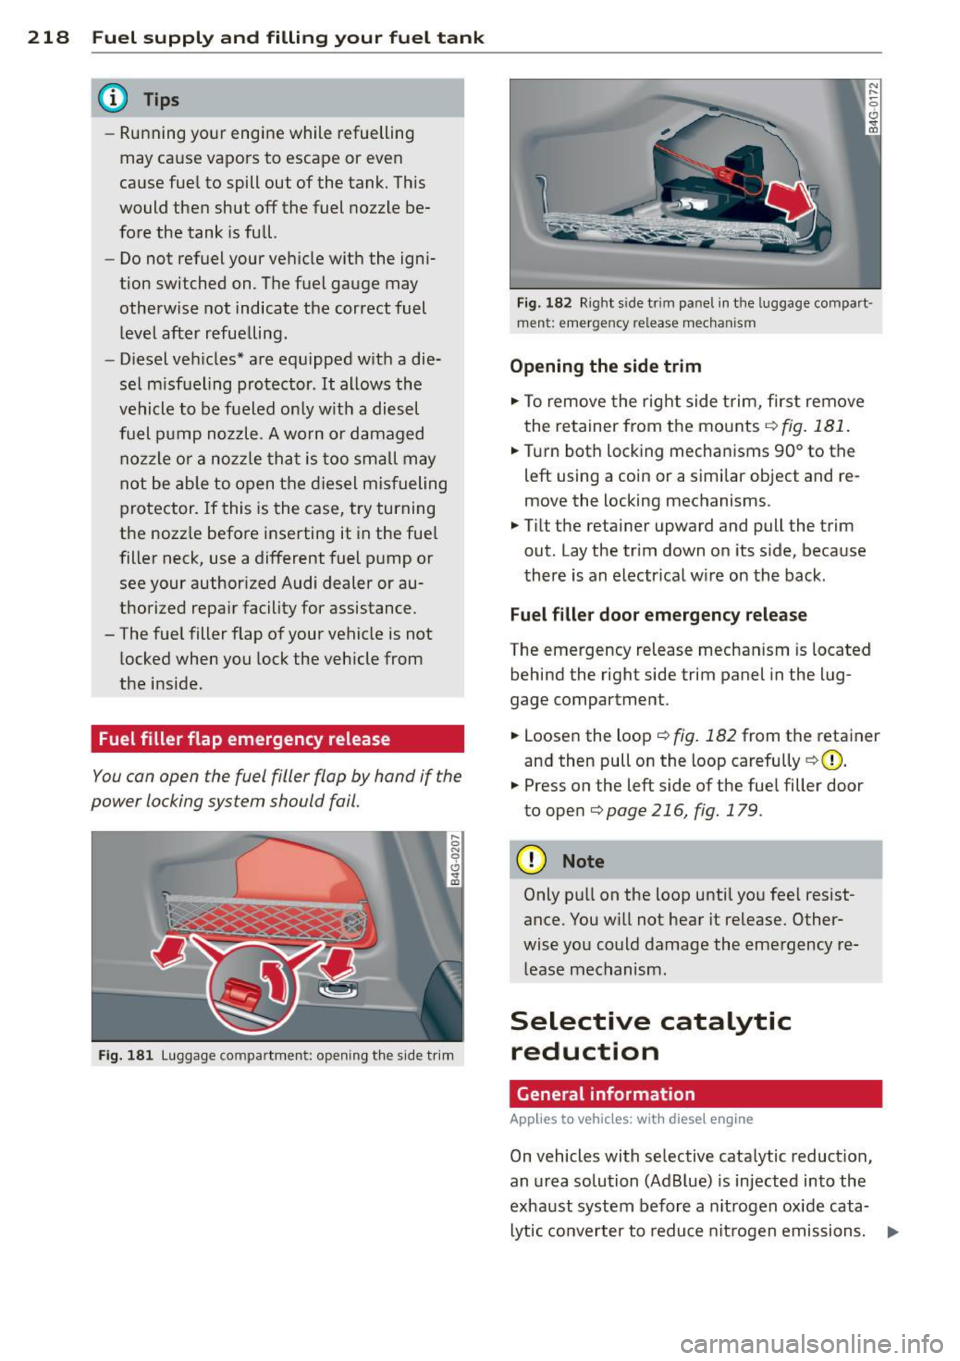
Fig. 181 Luggage compartment: opening the side t rim
Fig. 182 R ight sid e tr im panel in t he luggage compart ·
men t: emergency release mechanism
Opening the side trim
.. To remove the right side trim, first remove
the retainer from the mounts ¢
fig. 181.
.. Turn both locking mechanisms 90° to the
left using a coin or a similar object and re
move the locking mechanisms.
.. Tilt the retainer upward and pull the trim
out. Lay the trim down on its side, because
there is an electr ical wire on the back.
Fuel filler door emergency release
The emergency release mechanism is located
behind the right side trim panel in the lug
gage compartment .
.. Loosen the loop¢
fig. 182 from the retainer
and then pull on the loop carefully
¢ (D .
.. Press on the left side of the fuel filler door
to open
¢ page 216, fig. 179 .
(D Note
Only pull on the loop until you feel resist
ance. You w ill not hear it release. Other
wise you could damage the emergency re
lease mechanism.
Selective catalytic
reduction
General information
Applies to vehicles : wit h diese l eng ine
On vehicles with selective catalytic reduction,
an urea solution (AdBlue) is injected into the
exhaust system before a nitrogen oxide cata
lytic converter to reduce nitrogen emissions. ..,.