air condition AUDI A7 2014 Owners Manual
[x] Cancel search | Manufacturer: AUDI, Model Year: 2014, Model line: A7, Model: AUDI A7 2014Pages: 306, PDF Size: 76.83 MB
Page 7 of 306
In addition to t his Owner's Ma nual, your A udi
comes w ith t he
- MMI Oper ating In st ru cti ons
- Warranty
& Ma intenance boo klet.
If you are m iss ing one of these publicat ions,
or if you believ e that the information is not
comp lete, contact you r auth orized Audi dea le r
for assistanc e.
MMI Operating Instructions
contain detailed desc ription of the Aud i M ulti
Media Interface (MMI) including t he nav iga
tion system, the so und system and the ha nd
h e ld pho ne.
The Warranty & Maintenance booklet
explains how yo u can keep your A udi in top
driving condition by hav ing it serviced regular
l y and conta ins detai led info rmat ion about
the wa rra nties covering your Aud i. Always
h ave the boo klet with yo u when yo u take your
ve hicl e to a n author ized Audi dealer for serv
i ce. Y our Audi Servi ce A dvis or will re cord each
sche duled service and can an swe r any ques
tions you may have rega rding how to ma in tain
your ve hicle.
In Canada,
the veh icle lite rat ure is also avai lab le in
Fr ench . T o ob tain a cop y, contact your dea le r
or wri te to:
Au Canada, on peut se p rocure r un exemp la ire
e n fr an<;ais de ce do cument aupres du conces
sio nnair e ou de:
Volkswagen Canada Inc.
C lient Assistance
Assis tance a la Clientele
7 77 Bayly S tree t, Wes t,
A jax, On tario LlS 7G 7
If you sell your Audi
all lite ratu re should be left in the ve hicle to
make th e Warranty terms as we ll as a ll oper
ating, safety and m aintenan ce inform ation
a vaila ble to the nex t owne r.
Vehicle literature 5
If you change your address or if you
bought this Audi used
be s ure to send in a "Notice of Add ress
Change"/ " Notice of Used Car Purchase" post
card. T his card can be fo und in the Warranty
&
Maintenance booklet or obtained from your
autho rized Aud i dea ler .
It is in your own interest that we are able to
contact you should the need arise .
•
•
Page 21 of 306

Instruments and warning/indicator lights 19
II! Engine start system fault. Please con
tact dealer
If the indicator light turns on and the mes
sage appears, there is a ma lfunction in the en
gine start system.
Drive to your authorized Aud i dea le r immedi
ately to have the malfunction corrected.
~ Air suspension
Appl ies to vehicles: with air suspension
• Air suspension: system fault. Can contin
ue slowly with max. 35 mph .
There is a malfunct ion that can result in re
stricted dr iv ing stab ility.
Carefully drive at a maximum speed of 35
mph (60 km/h) to your authorized Audi dealer
or qua lified workshop to have the malfunction
cor rected.
• Air suspension: service mode. Vehicle
can only be moved with restrictions
Carefully drive to your authorized Audi dealer
or qualified workshop immediately to have
the service mode deactivated .
II Air suspension fault
There is a system ma lfunction that can result
in restricted driving stability or reduced
ground clearance.
Dr ive to your a uthorized Audi dealer immedi
ately to have the malfunction corrected .
II Air suspension: vehicle too low. Ground
clearance reduced
The ground clearance is very low due to a sys
tem malfunct ion . Wait until the air suspen
sion system has restored normal ground clear
ance. Otherwise, conditions such as an uneven
road surface can lead to vehicle damage.
G:;/ !f Safety systems
The fl (USA models) ;EI (Canada models) in
dicator light monitors the safety systems (e.g .
airbags, pretensioners) and illuminates for a few
seconds each time you switch the ignition
on .
If the fl (USA models);EI (Canada models)
indicator light does not go out, or if it illumi
nates while you are driving, or if it starts to
blink, then there is a malfunction somewhere
in the system.
If the light does not illum inate
when you switch the ign ition on, th is also
means there is a malfunct ion.
A WARNING
If you have a malfunction in the safety sys
tems, contact your authorized Audi dealer immediately. Otherwise the safety sys
tems may not work properly in an acc i
dent.
& Central indicator light
If the indicator light. or n turns on, check
the message in the instrument cluster .
nlft Electronic Stabilization Control
(ESC)
If the JjJ indicator light blinks while driving,
the ESC or ASR (Anti-Slip Regulation) is active
ly regulating.
If the
$.J indicator light turns on, the system
has switched the ESC off. In this case, you can
switch the ign ition off and then on to switch
the ESC on aga in. The indicator light turns off
when the system is functioning fu lly.
If the
1B indicator light turns on, ESC was re
stricted using the
1 .$ OFF I button c> page 196.
Stabilization control (ESC/ABS): Fault! See
owner's manual
If the G) indicator light and the ABS indicator
light
fJ] (USA mode ls) ;flJ (Canada models)
turn on and the message appears, the ABS or electronic differential lock is malfunctioning.
This also causes the ESC to malfunction . The
brakes still function with their normal power,
but ABS is not active .
liJI,
Page 32 of 306

30 Instruments and warning/indicator lights
Display brightness
You can adjust the display brightness in the
MMI. The display brightness decreases auto
matica lly as the amo unt of light decreases.
The basic leve l of brightness is adjusted with
the instrument illumination
c:> page 47.
(D Note
To prevent scratches on the glass covering
the Head-up Disp lay, do not place any ob
jects in the projection opening.
@ Tips
- Sunglasses with polarization fi lters and
unfavorable lighting conditions can af
fect the display.
- A specia l windshield is needed for the
Head-up Display function.
- For information on cleaning, refer to
c:> table on poge 215.
On-Board Diagnostic
system (OBD)
Malfunction Indicator Lamp (MIL)
The Malfunction Indicator Lamp (MIL) II! in
the instrument cluster is part of the On-Board
Diagnostic (OBD II) system.
The warning/indicator light illuminates when
the ignition is switched on and goes o ut after
the engine starts and the idle has stabilized.
This indicates that the MIL is working proper
ly .
If the light does not go out after the engine
is started, or illuminates while you are driv
ing, a ma lfunction may exist in the engine sys
tem. If the light illuminates, the catalytic con
verter could be damaged.
Continue driving
with reduced power (avoid
ing sustained high speeds and/or rapid accel
erations) and have the condition corrected.
Contact your authorized Audi dealer .
If the light illuminates, the electronic speed
limiter may also be malfunctioning. For more information
r=.> page 31,
Electronic speed
limiter .
An improperly closed fuel filler cap may also
cause the MIL light to illuminate
c:> page 221.
On-Board Diagnostics
Fig. 16 Locat ion of Data L ink Con nector (DLC)
On-Board D iagnost ics monitors the compo
nents of your em iss ion control system . Each
monitored component in your engine system
has been assigned a code . In case of a mal
function, the component will be identified
and the fault stored as a code in the control
module memory.
T he MIL light may also illuminate if there is a
leak in the on-board fuel vapor recovery sys
tem.
If the light illum inates after a refuelling,
stop the vehicle and make sure the fuel filler
cap is properly closed
c:> page 221.
In order to make an accurate diagnosis, the
stored data can only be displayed using spe
cial diagnostic equipment (generic scan tool
for OBD).
In order to connect the special diagnostic
equipment, push the plug into the Data Link
Connector (DLC). The DLC is located to the
right of the hood release
r=.> fig . 16 .
Your authorized Audi dea ler or a qualified
serv ice station can interpret the code and per
form the necessary repair.
A WARNING
Do not use the diagnostic connector for
personal use. Incorrect usage can cause
Page 47 of 306
_& WARNING
-Automatic headlights are only intended
to assist the driver . They do not relieve
the driver of his responsibility to check
the headlights and to turn them on man
ually according to the current light and
visibility conditions. For example, fog
cannot be detected by the light sensors.
So always switch on the headlights
io
under these weather conditions and
when driving in the dark.
- Crashes can happen when you cannot see
the road ahead and when you cannot be
seen by other motorists. Always turn on
the headlights so that you can see ahead
and so that others can see your car from
the back.
- Please observe legal regulations when
using the lighting systems described.
(D Note
The rear fog lights should only be turned
on in accordance with traffic regulation, as
the lights are bright for following traffic.
(D Tips
- The light sensor* for automatic head
light range control* is located in the rear
view mirror mount. You should therefore not apply any stickers to the windshield
in this area in order to prevent malfunc
tions or failures.
- In the event of a light sensor malfunc
tion, the driver is notified in the instru
ment cluster display ~
page 23 .
-You will hear a warning tone if you open
the driver door when the exterior lights
are switched on.
- In cool or damp weather, the inside of
the headlights, turn signals and tail
lights can fog over due to the tempera
ture difference between the inside and
outside. They will clear shortly after
switching them on. This does not affect
the service life of the lighting.
Clear vision 45
Emergency flasher
The emergency flasher makes other motorists
aware that you or your vehicle are in an emer
gency situation .
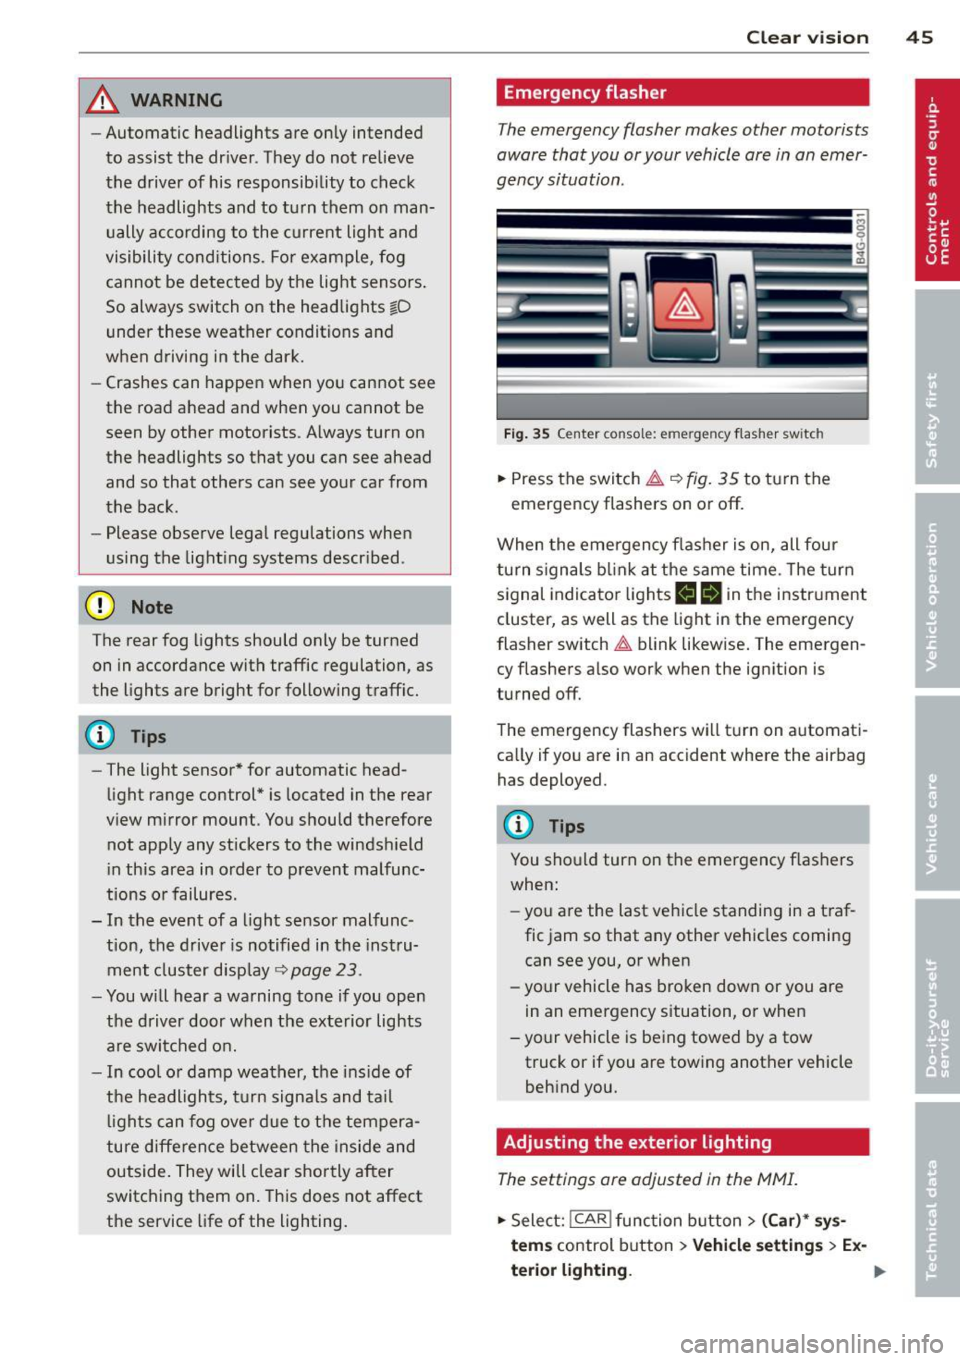
Fig. 35 Center consol e: eme rge ncy flash er sw itc h
.,. Press the switch & ~ fig. 35 to turn the
emergency flashers on or off.
When the emergency flasher is on, all four
turn signals blink at the same time. The turn
signal indicator lights
II Nin the instrument
cluster, as well as the light in the emergency
flasher switch
& blink likewise. The emergen
cy flashers also work when the ignition is
turned off.
The emergency flashers will turn on automati
cally if you are in an accident where the airbag has deployed.
@ Tips
You should turn on the emergency flashers
when:
- you a re the last vehicle standing in a traf
fic jam so that any other vehicles coming
can see you, or when
- your vehicle has broken down or you are
in an emergency situation, or when
- your vehicle is being towed by a tow
truck or if you are towing another vehicle
behind you.
Adjusting the exterior lighting
The settings ore adjusted in the MMI.
.,. Select: !CAR ! function button> (Car)* sys
tems control button > Vehicle settings > Ex-
terior lighting. ..,.
Page 51 of 306
©-Single wipe. If you hold the lever in this
position longer, the wipers switch from slow
wiping to fast wiping.
® -Clean the windshield . The wipers wipe
one time after several seconds of driving to
remove water droplets. You can switch this
function off by moving the lever to position ®
within 10 seconds after the afterwipe. The af
terw ipe funct ion is reactivated the next time
you switch the ignition on.
Cleaning the headlights*. The headlight wash
er system * operates only when the headlights
are on. If you move the lever to position @,
the headlights and the night vision assistant
camera* are washed in intervals.
A WARNING
-The rain sensor is only designed to assist
and support the driver.
It remains entire
ly the driver's responsibility to monitor
outside weather conditions and to man
ually activate the wipers as soon as rain
or drizzle reduces visibility through the
windshield.
- The windshield must not be treated with
water-repellent materials. They can in
crease glare under poor visibility condi
tions such as wetness, darkness, or when
the sun is low on the horizon. In addi
tion, they can cause the windshield wip
ers to chatter.
- Properly functioning windshield wiper blades are required for a clear view and
safe driving~
page 49, Replacing
windshield wiper blades.
0 Note
- In the case of frost, check whether the
windshield wiper blades are frozen to
the windshield. Switching on the wind
shield wipers can damage the wiper blades!
- Prior to using a car wash, the windshield
wiper system must be switched off (lever in position @). This helps to prevent un
intentional switching on and damage to
the windshield wiper system.
Clear vision 49
-Do not use the wipers to clear a frosted
window. Using the wipers as a conven
ient ice scraper will destroy the wiper
blades.
(D Tips
- The windshield wipers are switched off
when the ignition is off. Activate the
windshield wipers after the ignition is
switched back on by moving the wind
shield wiper lever to any position.
- Worn or dirty windshield wiper blades
result in streaking. This can affect the
rain sensor function. Check your wind
shield wiper blades regularly.
- The washer fluid nozzles of the wind
shield washer system are heated at low
temperatures when the ignition is on.
- When stopping temporarily, e .g. at a
traffic light, the set speed of the wind
shield wipers is automatically reduced by
one speed.
Cleaning windshield wiper blades
Clean the windshield wiper blades when they
begin to leave streaks.
.,. Place the windshield wiper arms in the serv
ice position. Refer to~
page 50.
.,. Use a soft cloth and glass cleaner to clean
the windshield wiper blades.
A WARNING
Dirty windshield wiper blades can impair
your view. This can lead to accidents.
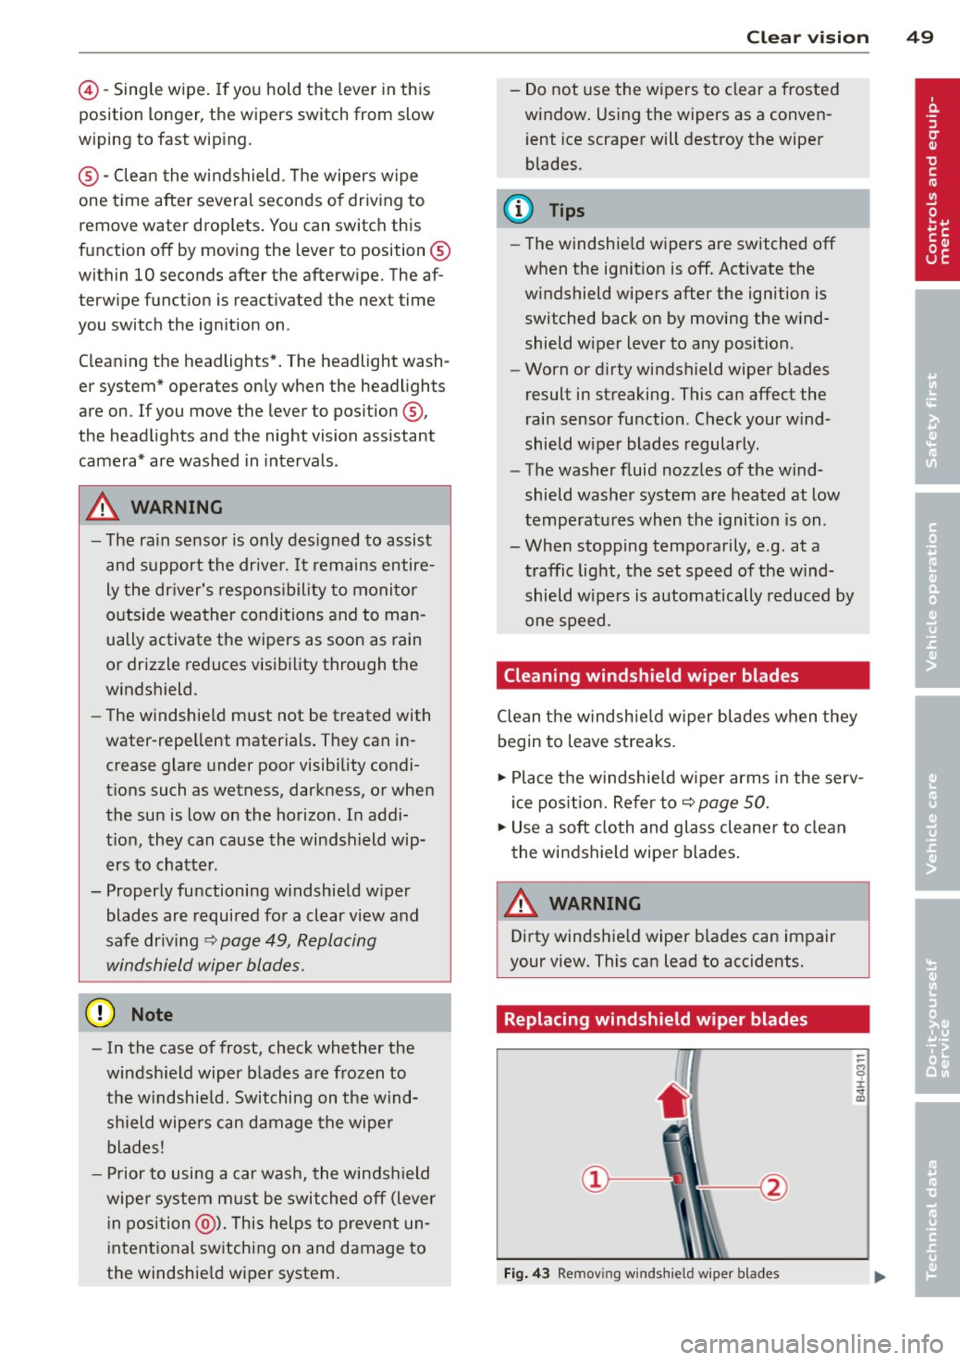
Replacing windshield wiper blades
Fig. 43 Remov ing windshie ld wiper blades
-
Page 71 of 306

Warm and cold Climate controls
Description
App lies to vehicles: with three -zone cl imate contro l or
four -zone a uto mat ic climate contro l
The climate control system warms, cools and
adds humidity to the air in the vehicle interior .
It is the most effective when the windows and
sunroof* are closed . If the temperature inside
the parked veh icle becomes very warm, open
i ng the w indow br iefly will speed up the cool
ing process.
In all heating mode functions except
defrost,
the blower on ly switches to a higher speed
once the engine coolant has reached a certain
temperature.
Condensat ion from the cooling system can
drip and form a puddle of wate r under the ve
h icle. This is normal and does not mean there
is a leak .
Pollutant filt er
The pollutant filter removes pollutants such
as dust and po llen from the air.
The air pollutants filter must be changed at
the intervals specified in your Warranty
&
Maintenance booklet, so that the air condi
tioner can properly work .
If you drive your vehicle in an area with high
a ir pollution, the filter may need to be
changed more frequently than specified in
your Aud i Warranty
& Ma intenance booklet. If
i n doubt, ask your authori zed Audi Service Ad
visor for adv ice.
K ey coded settings
Three-zone climate control: T he b lower set
ting and air d istribution are stored automati
cally and ass igned to the remote control key
that is in use .
Four-zone automatic climate control: The cli
mate contro l settings are automatica lly stor
ed and assigned to the remote control key
that is in use .
Warm and c old 69
A WARNING
-
Reduced visibi lity is dangerous and can
cause acc idents .
- For safe driving it is very important that
all windows be free of ice, snow and con
densat ion.
- Comp letely fam il iarize yourse lf with the
proper use and funct ion of the heat ing
a nd ventilation system and especially
how to defog and defrost the w indows.
- Never use the windshield wiper/washer system in freez ing weathe r unt il you
have wa rmed the windshie ld first, using
the heating and ventilation system. The
washer sol ution may freeze on the wind
shie ld and red uce visibi lity.
CJ) Note
- If you s uspect that the air conditioner
has been damaged, switch the system
off to avoid furt her damage and have it
inspected by a qualified dea lership .
- Repairs to the Audi air conditioner re
quire specia l technical know ledge and
special tools. Contact an authorized Audi
dealer fo r ass istance.
@ For the sake of the envi ronment
By reducing the amount of f uel you use,
you also red uce the amount of pollutants
emitted into the air.
(D Tips
- Keep the air intake s lo ts ( in front of the
w indshield) free from ice, snow and de
bris in order to maintain the proper func
tion of the climate control system.
- The energy ma nagement system may
switch the seat heating* or rear window defroster off temporar ily. These systems
are available again as soon as the energy
balance has been restored .
- Air escapes through vents under the rear window. When plac ing items of cloth ing
on the luggage compartment cover, en
sure that the openings are not covered.
Page 85 of 306

-The windshield is being defrosted
r=>page 71, r::!;> page 73 .
-The brake peda l is pressed several times in a
row.
- Th e battery charge level becomes too low.
- High power consumption .
Switching the ignition automatically
To prevent the battery from draining, the igni
tion will switch off
automatically when all of
the following conditions have been met:
- The vehicle has already been driven .
- The engine has been turned off by the Start-
Stop-System*.
- The driver's door is opened .
- The driver's seat belt is removed.
- The bra ke peda l is not pressed down.
- The vehicle is stationary.
In this case, the activated low beam will be re
placed by the side marker lights. The side
marker lights will switch off after approx i
mately 30 minutes or when you lock the vehi
cle .
If the Start-Stop System has
not turned off
the engine or if you have switched the Start
Stop system off manually, the ignition w ill
not
be automatically switched off and the engine
will continue to run
r::!;> ,&.
& WARNING
Never allow the engine to run in confined
spaces -danger of asphyxiation.
(0 Tips
If you shift into the D, N or S positions af
ter shifting into reverse, the vehicle must
be driven faster than 6 mph (10 km/h) in
order for the engine to switch off again .
On the road 83
Switching the Start-Stop-System on/off
manually
Applies to veh icles: w ith Star t-Stop-Sys te m
If you do not wish to use the system, you can
switch it off manually.
=~-
-~ ---
' I~ -
--
Fig. 84 Center console: Start-Stop-System button
.,. To switch the Start-Stop-System off/on
manually, press the
1 (1() ~·1 button. The LED in
the button turns on when the system is
switched off.
(D Tips
If you switch the system off during a stop phase, the engine will start again auto
matically.
Messages in the instrument cluster
display
A pp lies to veh icles : w ith S tart-Stop -Sys tem
Start-Stop system deactivated: Please re
start engine manually
This message appears when spec ific condi
tions are not met during a stop phase and the
Start-Stop-System will
not be able to restart
the engine . If the Dor R selector lever posi
tions were engaged, P will be selected auto
matically. The engine must be started with
the
I START ENGINE STOP! button.
Start-Stop system: System fault! Function
unavailable
T here is a malfunction in the Start-Stop-Sys
tem . Drive the vehicle to an authorized repair
facility for servicing as soon as possible to cor
rect the malfunction.
Page 116 of 306
114 Automatic Transmission
Launch Control Program
Applies to vehicles: with S tro nic
The Launch Control Program provides the
best acceleration possible when starting from
a stop .
Requirement: The engine must be at operat
ing temperature and the steering wheel must
not be turned .
.. Press the
I~ O FFI button 9 page 198 while
the engine is running. The
II indicator light
illuminates in the instrument cluster and
Stabilization control (ESC): Off Warning!
Reduced stability
appears in the driver in
formation system display.
.. Move the selector lever to position D/S to
select sport mode (5) or select
Dynamic
mode in Audi drive select ¢page 103.
.. Press the brake peda l strongly with your left
foot and hold it down for at least
1 second.
.. At the same t ime, press the accelera tor ped
al down completely w ith your r ight foot un
t il the engine reaches and maintains a high
RPM.
.. Remove your foot from the brake pedal
within S seconds ¢
Li)..
.&_ WARNING
-Always adapt your driving to the traffic
flow .
- Only use the Launch Control Program
when road and traffic conditions allow it
and other drivers will not be endangered
or annoyed by yo ur driving and the vehi
cle's acce lerat ion.
- Please note that the driving wheels can
spin and the vehicle can break away
when sport mode is sw itched on, espe
c ially when the road is slippery .
- Once yo u have accelerated, you should
switch sport mode off by pressing the
j .i, OFF I button.
- The transmission temperat ure may in
crease significantly after using the
Launch Control Program . If that hap- pens,
the program may not be available
for a few minutes . It will be available
again after a cool-down period.
- When accelerating using the Launch
Contro l Program, a ll vehicle parts are
subject to heavy loads. This can result in
increased wear.
Transmission malfunction
Applies to vehicles: wit h S tronic/tiptro nic
[O] Transmission: Press brake pedal and se
lect gear again
Press the brake pedal and select the desired
selector lever position again. You can then continue driving .
[O] Transmission overheating: Please drive
conservatively
The transmission temperature has increased
s ignificantly due to the sporty driving manner .
Drive in a less sporty manner until the tem
perature returns to the normal range and the
indicator light switches of.
[O] Transmission malfunction: You can con
tinue driving
T he re is a system mal function in the transmis
sion . You may continue driving. Drive to your
authorized Audi dea ler or qualified repair fa
cility soon to have the malfunction corrected.
[O] [O] Transmission malfunction: You can
continue driving with limited functionality
There is a system malfunction in the transmis
s ion. The transmission is switching to emer
gency mode. This mode on ly shifts into cer
tain gears or will no longer shift at all. The en
gine may sta ll. Drive to your authorized Audi
dealer or qualified repair facility immediately
to have the malfunction corrected.
[O] Iii Transmission malfunction: No reverse
gear. You can continue driving
S tronic transmission: There is a system mal
fu nct ion in the transm ission. The transmis
sion is switching to emergency mode . This
mode only shifts into certain gears or will no
l onger shift at a ll. The engine may stall. You .,..
Page 133 of 306
.. Make sure to use the right child rest raint
correct ly to protect children
Q page 175,
Child Safety .
.. Sit properly in your seat and make sure that
your passengers do the same¢
page 53,
General recommendations .
.. Fasten your safety belt and wear it properly.
Also instruct your passengers to fasten their
safety belts properly ¢
page 140 .
What impairs driving safety?
Safe driving is directly related to the condi
tion of the vehicle, the driver as well as the
driver 's ability to concentrate on the road
without being distracted.
The driver is respons ible for the safety of the
veh icle and all of its occupants.
If your ability
to drive is impai red, safety r isks for everybody
in the vehicle increase and you also become a
hazard to everyone else on the road ¢
A.
Therefore:
.. Do not let yourself be distracted by passen
gers or by using a cellular telephone.
.. NEVER drive when your driving ability is im
paired (by medications, alcohol, drugs, etc.).
.. Observe all traffic laws, rules of the road
and speed limits and plain common sense .
.. ALWAYS adjust your speed to road, traff ic
and weather conditions .
.,. Take frequent breaks on long trips. Do not
drive for more than two hours at a stretch.
.. Do NOT drive when you are t ired, under
pressure or when you are stressed.
A WARNING
Impaired driving safety increases the risk
of serious personal injury and death when
ever a vehicle is being used.
Driving Safely 131
Proper occupant
seating positions
Proper seating position for the driver
The proper driver seating position is impor
tant for safe, relaxed driving .
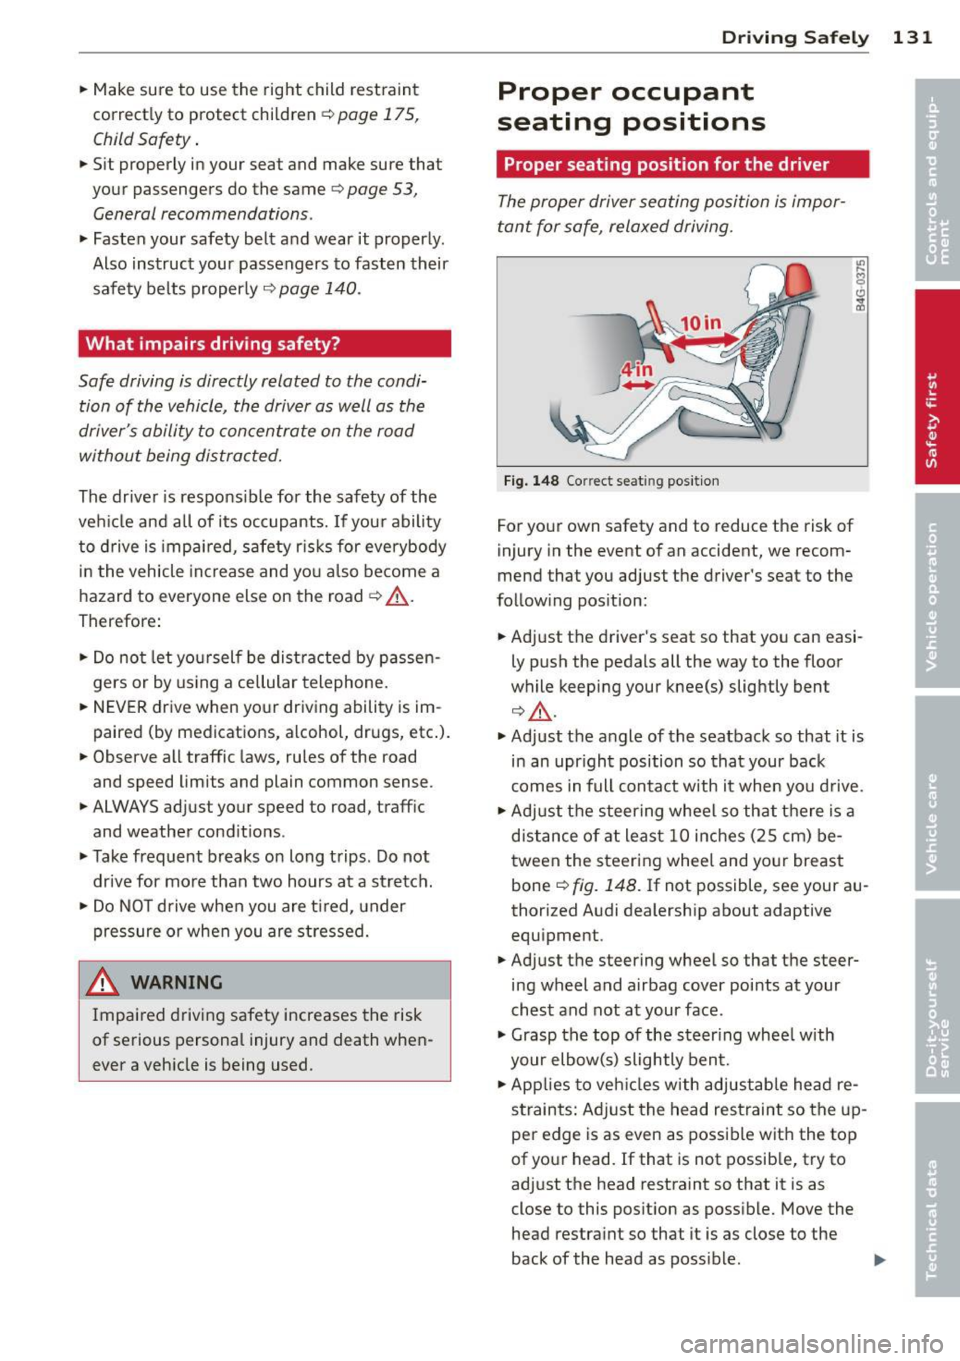
Fig. 148 Correct seat ing pos it ion
For your own safety and to reduce the risk of
injury in the event of an accident, we recom
mend that you adjust the driver's seat to the
follow ing pos ition:
.. Adjust the driver's seat so that you can easi
ly push the pedals all the way to the floor
wh ile keeping your knee(s) slightly bent
¢.&_ .
.. Adjust the angle of the seatback so that it is
in an upr ight position so that your back
comes in full contact w ith it when you drive.
.. Adjust the steering wheel so that th ere is a
distance of at least 10 inches (25 cm) be
tween the steering wheel and yo ur breast
bone
Q fig. 148. If not possible, see your au
thorized Audi dealership about adaptive
equipment .
.. Adjust the steering wheel so that the steer
ing wheel and airbag cover points at your
chest and not at your face.
.,. Grasp the top of the steering wheel with
your elbow(s) slightly bent.
.. App lies to veh icles with adjustable head re
straints: Ad just the head restraint so the up
per edge is as even as possible with the top
of your head. If that is not possible, try to
adjust the head restraint so that it is as
close to this posit ion as possible. Move the
head restraint so that it is as close to the
back of the head as poss ible. .,.
Page 139 of 306
A WARNING
To help prevent poisonous exhaust gas
from being drawn into the vehicle, always keep the rear lid closed while driving .
- Never transport objects larger than
those fitting completely into the luggage
area because the rear lid cannot be fully
closed.
- If you absolutely must drive with the rear
lid open, observe the following notes to
reduce the risk of poisoning:
- Close all windows,
- Close the power roof*,
- Open all air outlets in the instrument
panel,
- Switch off the air recirculation,
- Set the fresh air fan to the highest
speed.
A WARNING
Always make sure that the doors, all win dows, the power roof* and the rear lid are
securely closed and locked to reduce the
risk of injury when the vehicle is not being
used.
- After closing the rear lid, always make
sure that it is properly closed and locked.
- Never leave your vehicle unattended es
pecially with the rear lid left open. A
child could crawl into the vehicle through
the luggage compartment and close the
rear lid becoming trapped and unable to
get out. Being trapped in a vehicle can
lead to serious personal injury.
- Never let children play in or around the
vehicle .
- Never let passengers ride in the luggage
compartment. Vehicle occupants must
always be properly restrained in one of
the vehicle's seating positions.
Gj) Tips
-Air circulation helps to reduce window
fogging. Stale air escapes to the outside
through vents in the trim panel. Be sure
to keep these slots free and open .
-
Driving Safely 137
-The tire pressure must correspond to the
load. The tire pressure is shown on the
tire pressure label. The tire pressure la
bel is located on the driver's side B-pillar.
The tire pressure label lists the recom
mended cold tire inflation pressures for
the vehicle at its maximum capacity
weight and the tires that were on your
vehicle at the time it was manufactured.
For recommended tire pressures for nor
mal load conditions, please see chapter
~page 247.
Tie-downs
The luggage compartment is equipped with
four tie-downs to secure luggage and other
items.
Use the tie-downs to secure your cargo prop
erly~
page 136, Loading the luggage com
partment.
In a collision, the laws of physics mean that
even smaller items that are loose in the vehi
cle will become heavy missiles that can cause
serious injury. Items in the vehicle possess en
ergy which vary with vehicle speed and the
weight of the item. Vehicle speed is the most
significant factor.
For example , in a frontal collision at a speed
of 30 mph (48 km/h), the forces acting on a
10-lb (4.5 kg) object are about 20 times the
normal weight of the item. This means that
the weight of the item would suddenly be about 200 lbs. (90 kg) . You can imagine the
injuries that a 200 lbs . (90 kg) item flying
freely through the passenger compartment
could cause in a collision like this.
A WARNING
Weak, damaged or improper straps used
to secure items to tie-downs can fail dur
ing hard braking or in a collision and cause
serious personal injury.
-Always use suitable mounting straps and properly secure items to the tie-downs in
.
•
•