warning AUDI A7 2015 Workshop Manual
[x] Cancel search | Manufacturer: AUDI, Model Year: 2015, Model line: A7, Model: AUDI A7 2015Pages: 316, PDF Size: 78.09 MB
Page 67 of 316

M N <( I.J "". rl I.O
"' rl
"' rl
Removing the cover in the rear lid
• Remove the knobs CD c::> fig. 65 from the ball
mounts.
• Pull the cover @out of the retainers@ in
the direct ion of the arrow .
Installing the cover in the rear lid
• Slide the cover upward into the retainers @.
• Press the knobs
CD onto the ball mounts.
Removing the cover behind th e rear bench
seat
• Pull the cover ¢ fig. 66 back.
• Pull the cover upward to release.
Installing the cover behind the rear bench
seat
• Insert the left and right sides of the cover
into the mounts on the side trim .
• Slide the cover forward until it locks into
place .
A WARNING
-To prevent accidents, never install the
luggage compartment cover unsecured.
- The luggage compartment cover is not a
surface for storing objects. Objects
placed on the cover could endanger all
vehicle occupants during sudden braking
maneuvers or in a crash.
(D Note
Objects located on the rear shelf that rub
aga inst the rear window could damage the
heating wires for the rear window defog
ger.
Seats and storage 65
Enlarging cargo capacity of the vehicle
, interior
The seat backs can be folded forward to en
large the cargo capacity.
Fig. 67 Release handle on th e seatback
Folding the seatback forward
• When you pull the release lever @<=:> fig. 67
in the direction of the arrow, the safety knob
® pops out far enough for the red marking
on knob to be visib le.
.,. Fold the seatback forward.
Raising the seatback
.,. Raise the seatback until it is secure ly latch
ed¢ &,.. When you can no longer see the
red mark on the safety knob@, the seat is
latched.
_& WARNING
-
- The backrest must always be securely
latched so that the safety belt of the cen
ter seating position can work properly to he lp protect the occupant.
- The backrest must be securely latched in
position so that no items contained in
the luggage compartment can s lide for
ward upon sudden braking.
- Always check whether the latch is fully
engaged by pulling the seatback for
ward .
- N ever a llow safety belts to become dam
aged by being caught in door or seat
hardware .
- Torn or frayed safety belts can tear and
damaged be lt hardware can break in a
crash. Inspect the belts periodical ly.
Page 68 of 316

66 Seats and st o rage
Belts showing damage to webbing, bind
ings, buckles, or retractors must be re
placed.
(D Note
- If you move the front seat back when the
rear seat backrest is fo lded forward, you
could damage the head restraints on the
rear seat.
- Slide the belt guide on the outside safety
belt all the way up before folding the
backrest back forward. Make sure the
seat belt is not p inched or damaged
when the rear seat backrest if folded
back. Other objects shou ld be removed
from the rear seat bench to protect the
seatbac k from d amage.
Tie -downs and cargo net
The cargo net" prevents small objects from
sliding.
Fig . 68 Locat ion of the tie-downs in the luggage com
partment
Fig. 69 Luggage compartme nt: ca rgo net*
... To secure objects with the luggage compa rt
ment net*, fold the tie-down bracket up
ward
c:::> fig. 68.
... Insert the hooks on the luggage compart
ment net* into the tie-downs
c:::> fig . 69.
... Read and heed all WARNINGS
c:::> page 134,
Stowing luggage.
In a collision, the laws of physics mean that
even smaller items that are loose in the vehi
cle wi ll turn into heavy missi les that can cause
serious injury. Items in the vehicle pick up ki
netic energy which varies with the veh icle and
the weight of the item . Vehicle speed is the
most sign ificant factor .
For example, in a frontal collision at a speed
of 30 mph (48 km/h), the forces acti ng on a
10-lb (5 kg) object are about
20 times the
normal we ight of the item . This means that
the weight of the item would sudden ly be the
equivalent of abo ut 200 lbs (90 kg). One can
easily imagine the injuries that an item of that
weight flying freely through the passenge r
compartment ca n cause in a collision at a
speed considered relatively low.
A WARNING
-
Weak, damaged or improper straps used
to secure items to tie-downs can fail dur
ing hard braking or in a collision and cause
serious personal injury.
- Always use suitable retaining straps and
properly secure items to the tie-downs in
the l uggage compartment to help pre
vent items from shift ing or fly ing for
ward.
- Never attach a chi ld seat tether strap to
a tie-down.
- For strength-related reasons, the mou nt
ing hooks can only be used to secure ob
jects weigh ing up to 10 lb. (5 kg). Heavi
er objects will not be adequ ately sec ured
- there is a risk of injury.
Page 69 of 316

M N <( I.J ""'. rl I.O
"' rl
"' rl
Bag hooks
Light objects can be secured on the hooks.
Fig. 70 Luggage compartme nt: bag hooks
You can also use the hooks to hang light purs
es,bags, etc.
A WARNING
The hooks can hold a maximum weight of
3 kg. Heavier objects are not adequately
secured. There is risk of personal injury .
Luggage compartment covering
(reversible mat )
Applies to vehicles: with luggage compartment carpeting
The reversible luggage compartment covering
should be used when transporting dirty or
wet objects.
Fig. 71 Luggage compartment carpeting with seatback
folded dow n: sp read out over the bumper
The lugg age compartment carpeting can be
used w ith the dirt resistant s ide or the decora
tive side, depending on what is needed .
@ Tips
The protective mat should be folded up
only when dry.
Seats and storage 67
Pass-through with ski
sack
Preparing the pass-through
Applies to vehicles: wi th ski sack
Long objects such as skis can be transported
in the ski sack*.
Fig. 72 Rear bench seat: opening the pass -through
Opening the trunk pass-through
.. Fold the center armrest in the rear forward
and out .
.. Pull the release handle
c::> fig. 72 and fold
down the cover of the pass-through in the
vehicle interior.
.. Open the rear lid .
.,. Push the ski sack* through the opening from
the luggage compartment.
.,. Secure the ski sack
c::> page 68 .
Closing the trunk pass-through
.,. Open the rear lid .
.,. Remove the ski sack from the trunk pass
through .
.. Push the pass-through cover up inside the
veh icle until it latches .
.,. Raise the center armrest in the vehicle
again.
.. Close the rear lid.
A WARNING ~
Objects must only be transported in the ski
sack since the ski sack can be secured. In
dividual objects cannot be secured. There is a risk of injury .
Page 70 of 316

68 Seats and storage
@ Tips
You can a lso open the pass-through from
the luggage compartment. Push the re
lease button down and p ush the cover for
ward.
Securing the ski sack
App lies to vehicles: with sk i sack
The ski sock must be secured in the luggage
compar tmen t.
Fig. 73 Lu ggage compartme nt: Sec uri ng th e bag
Fig. 7 4 Securin g th e o bjects in t he s ki s ack
Securing the ski sack in the luggage
compartment
.. The ski sack has two be lts with hooks o n the
unders ide
r::;, fig. 73@. Hang the hooks to
t h e rear fastening eye lets in the luggage
compartment .
Securing the objects in the ski sack
.. The re is also a securi ng strap r::;, fig . 74 @ in
the sack . Pu ll the strap taut using the free
end of the s trap.
& WARNING
- Th e ski sac k is intended only fo r the
t ransportation of skis and ot her ligh t ob- jects
. To reduce the risk of serio us per
sonal injury, never transport heavy or
pointed objects in the sk i sack.
- When braking rapid ly or during an acci
dent, the load could be d isplaced and
cause injury to occupa nts .
- Sharp edges on the load must be covered
for protection. A lways fasten the belt
tightly around the sack and its contents
r::;, fig. 74.
(D Tips
- Never stow the ski sack away when it is
st ill wet or damp (for example, snow
me lting from skis) . Allow it to dry com
pletely before stow ing it away .
- Pos ition skis in the sk i sack with the
pointed ends facing the front and ski
poles with the pointed ends facing the
rear.
Page 71 of 316
M N <( (.J
'SI: ,...., \!) 1.1'1 ,...., 1.1'1 ,....,
Warm and cold Climate controls
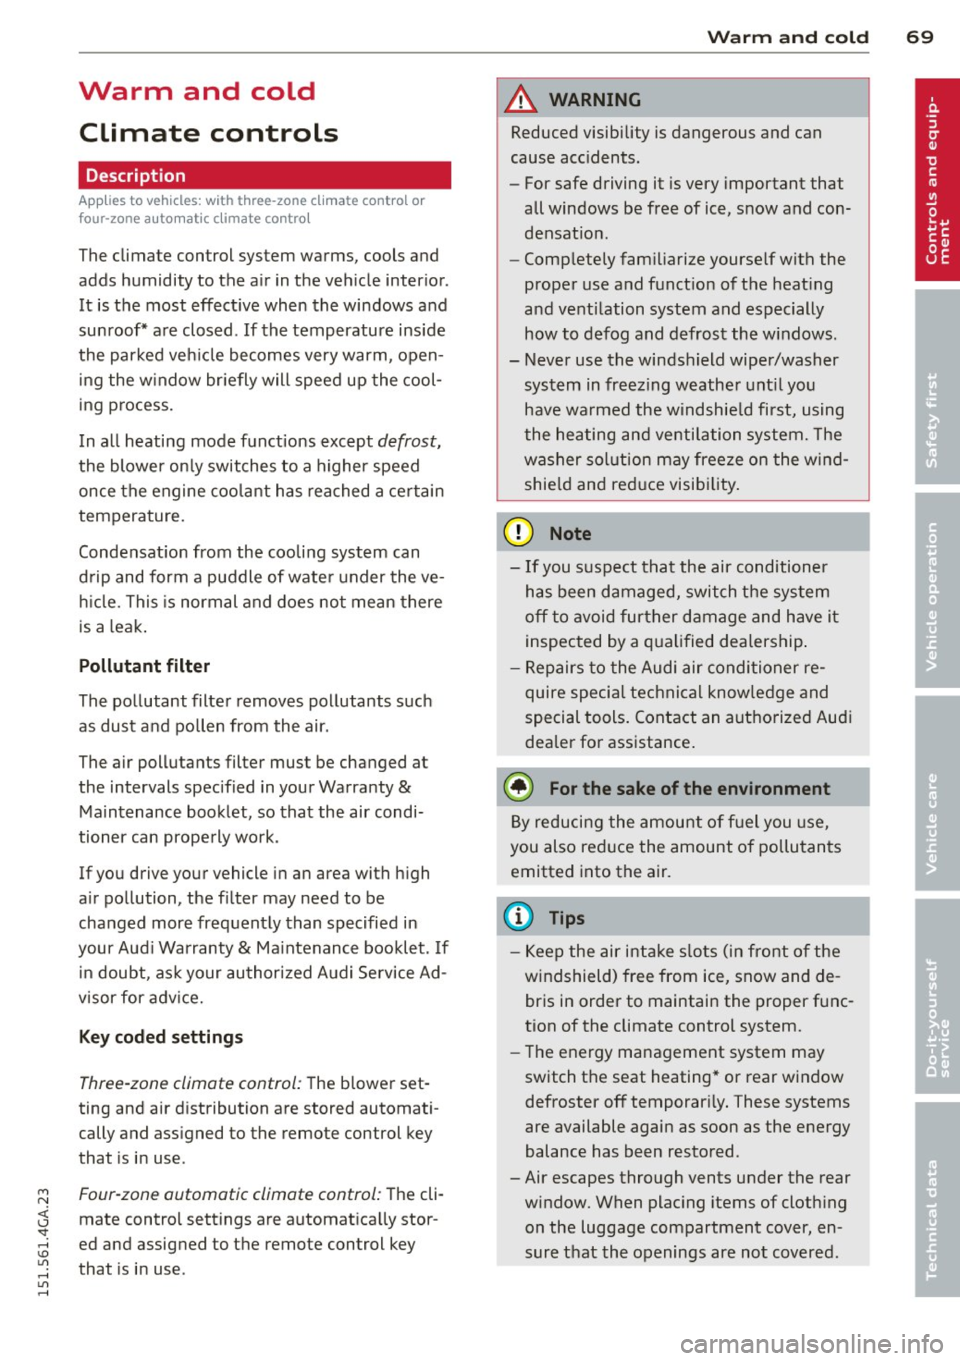
Description
App lies to vehicles: with three -zone cl imate contro l or
four -zone a uto mat ic climate contro l
The climate control system warms, cools and
adds humidity to the air in the vehicle interior.
It is the most effective when the windows and
sunroof* are closed . If the temperature inside
the parked veh icle becomes very warm, open
i ng the w indow br iefly will speed up the cool
ing process.
In all heating mode functions except
defrost,
the blower on ly switches to a higher speed
once the engine coolant has reached a certain
temperature.
Condensat ion from the cooling system can
drip and form a puddle of wate r under the ve
h icle. This is normal and does not mean there
is a leak .
Pollutant filt er
The pollutant filter removes pollutants such
as dust and po llen from the air.
The air pollutants filter must be changed at
the intervals specified in your Warranty
&
Maintenance booklet, so that the air condi
tioner can properly work .
If you drive your vehicle in an area with high
a ir pollution, the filter may need to be
changed more frequently than specified in
your Aud i Warranty
& Ma intenance booklet. If
i n doubt, ask your authori zed Audi Service Ad
visor for adv ice.
K ey coded settings
Three-zone climate control: T he b lower set
ting and air d istribution are stored automati
cally and ass igned to the remote control key
that is in use .
Four-zone automatic climate control: The cli
mate contro l settings are automatica lly stor
ed and assigned to the remote control key
that is in use .
Warm and c old 69
A WARNING
-
Reduced visibi lity is dangerous and can
cause acc idents .
- For safe driving it is very important that
all windows be free of ice, snow and con
densat ion.
- Comp letely fam il iarize yourse lf with the
proper use and funct ion of the heat ing
a nd ventilation system and especially
how to defog and defrost the w indows.
- Never use the windshield wiper/washer system in freez ing weathe r unt il you
have wa rmed the windshie ld first, using
the heating and ventilation system. The
washer sol ution may freeze on the wind
shie ld and red uce visibi lity.
CJ) Note
- If you s uspect that the air conditioner
has been damaged, switch the system
off to avoid furt her damage and have it
inspected by a qualified dea lership .
- Repairs to the Audi air conditioner re
quire specia l technical know ledge and
special tools. Contact an authorized Audi
dealer fo r ass istance.
@ For the sake of the envi ronment
By reducing the amount of f uel you use,
you also red uce the amount of pollutants
emitted into the air.
(D Tips
- Keep the air intake s lo ts ( in front of the
w indshield) free from ice, snow and de
bris in order to maintain the proper func
tion of the climate control system.
- The energy ma nagement system may
switch the seat heating* or rear window defroster off temporar ily. These systems
are available again as soon as the energy
balance has been restored .
- Air escapes through vents under the rear window. When plac ing items of cloth ing
on the luggage compartment cover, en
sure that the openings are not covered.
Page 73 of 316

M N <( (.J
'SI: ,...., \!) 1.1'1 ,...., 1.1'1 ,....,
l
ed or cleared of condensation as quickly as
possib le. The maximum amount of air flows
mainly from the vents be low the windshield.
Recirculation mode switches off. The tempera
ture should be set to approximately 72 °F (22
°() .
The IAUTOI button switches the defroster off.
IQil REAR I Switching rear window heater
on/off
The rear window heater only operates when
the engine is running.
It switches off auto
matica lly after a few minutes, depending on
the outside temperature.
To prevent the rear window heater from
switch ing off automatica lly, press and hold
the
!llill REARI button for more than 2 seconds.
This remains stored until the ignition is
sw itched off.
QJ Adjusting seat heating
Pressing the button switches the seat heating
on at the highest setting ( leve l 3) . The LEDs
indicate the temperature level. To reduce the
temperature, press the button again. To
switch the seat heating off, press the button repeatedly until the LE D turns off .
After 10 minutes, the seat heating automati
cally switches from leve l 3 to level 2.
The seat heating for both outer rear seats * is
adj usted using the buttons in the center con
sole.
Warm and cold 71
Air vents
You can open or close the center and outer
vents in the cockpit and the vents in the rear
center console using the ridged thumbwheels.
The levers adjust the direction of the airflow
from the vents.
T he air temperature in the rear can be adjust
ed so that it is warmer or co lder by turning
the knob to the red or blue area.
A WARNING
- Do not use the recirc ulation for extended
periods of time. The windows could fog
up since no fresh a ir can enter the vehi
cle. If the windows fog up, press the air
recirc ulat ion button again immed iately
to switch off the air recirculation func
tion or select defrost.
- Individuals with reduced sensitivity to
pa in or temperature could develop burns
when using the seat heating function . To
red uce the risk of injury, these individu
a ls shou ld not use seat heating.
(D Note
To avoid damage to the heating elements
in the seats, do not kneel on the seats or
place heavy loads on a small area of the
seat.
Page 75 of 316
M N <( (.J
'SI: ,...., \!) 1.1'1 ,...., 1.1'1 ,....,
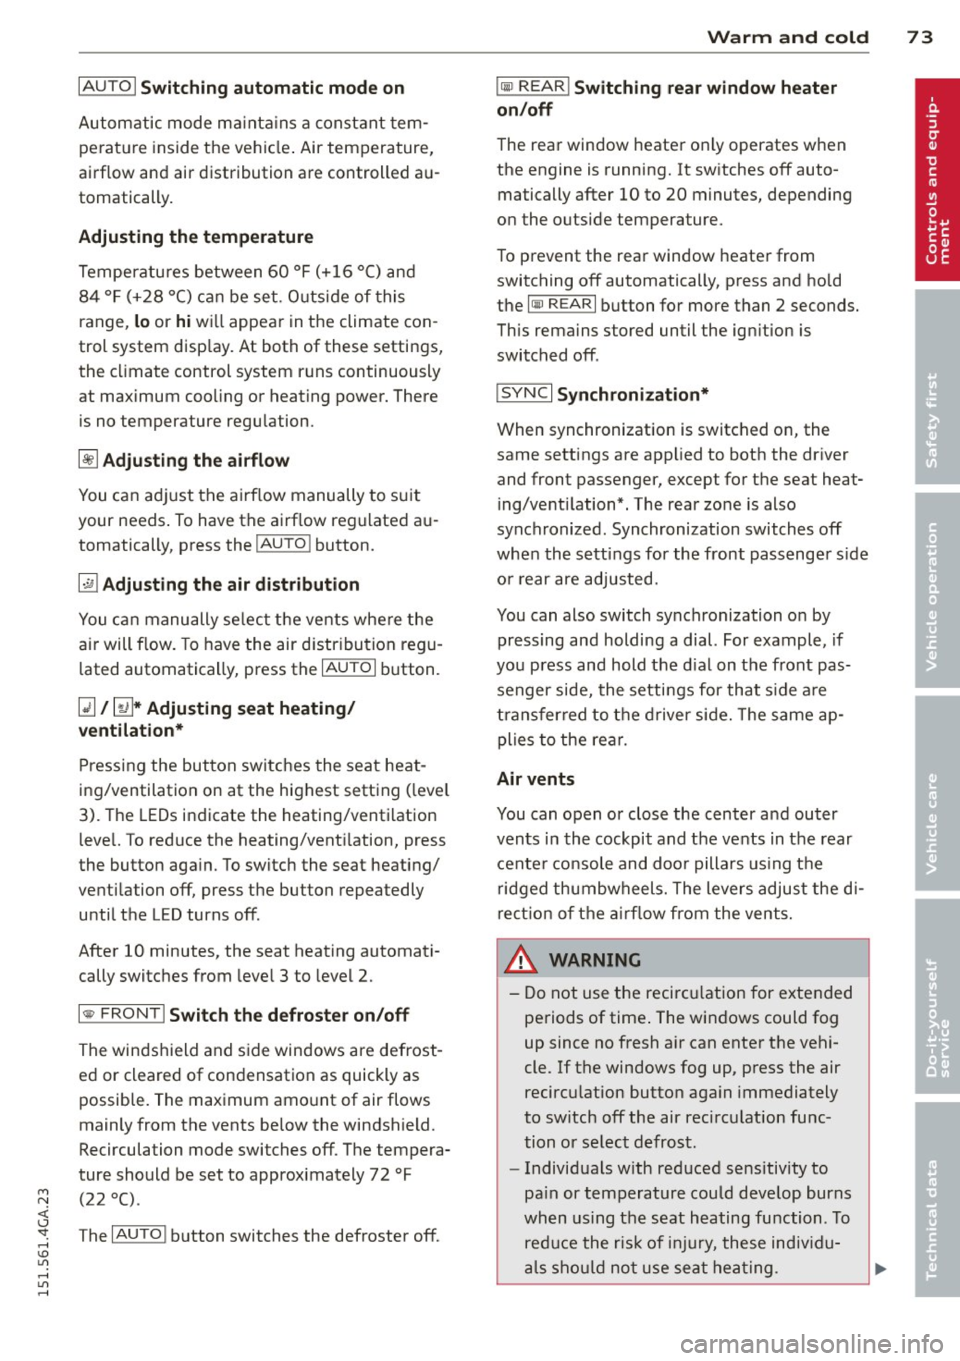
IAUTO I Switching automatic mode on
Automatic mode maintains a constant tem
perature inside the vehicle. Air temperature,
airflow and air distribution are controlled au
tomatically.
Adjusting the temperature
Temperatu res between 60 °F (+16 °C) and
84 °F ( +28 °C) can be set. O uts ide of this
range,
lo or hi wi ll appear in the climate con
trol system disp lay. At both of these settings,
the climate control system runs continuously
at maximum cooling or heating power. There
is no temperature regu lation.
~ Adjusting the airflow
You can adjust the airf low manually to suit
your needs . To have the airf low regulated au
tomatically, press the
I AUTO j button.
li!J Adjusting the air distribution
You can manually se lect the vents where the
air will flow. To have the air distribution regu
lated automatically, press the
IAUTOI button .
~I~ * Adjusting seat heating/
ventilation*
Pressing the button switches the seat heat
ing/ventilation on at the highest setting ( level
3). The LEDs indicate the heating/ventilation
level. To reduce the heating/venti lation, press
the button again. To switch the seat heating/
ventilation off, press the button repeatedly
until the LED turns off.
After 10 minutes, the seat heating automati
cally switches from level 3 to level 2.
l
ed or cleared of condensation as quickly as
possible. The maximum amount of air flows
mainly from the vents below the windshield.
Recircula tion mode switches off. The tempera
ture should be set to approximately 72 °F (22
°() .
The IAUTO I button switches the defroster off.
Warm and cold 73
liiii REAR! Switching rear window heater
on/off
The rear window heater only operates when
the engine is running. It switches off auto matically after 10 to 20 minutes, depending
o n the outside temperature.
To prevent the rear window heater from
switching off automatically, press and ho ld
the
l liiil REARI button for more than 2 seconds.
This remains stored until the ign ition is
switched off .
I SYNC I Synchronization*
When synchronization is switched on, the
same settings are applied to both the driver
and front passenger, except for the seat heat
ing/ventilation*. The rear zone is also
synchronized. Synchronization switches off
when the settings for the front passenger s ide
o r rear are adjusted.
You can also switch synchronization on by pressing and holding a dial. For example, if
you press and hold the dial on the front pas
senger side, the settings for that s ide are
transferred to the driver side. The same ap
plies to the rear.
Air vents
You can open or close the center and outer
vents in the cockpit and the vents in the rear
cente r console and door pillars using the
ridged thumbwheels. The levers adjust the di
rection of the airflow from the vents.
&_ WARNING
-=
-Do not use the recirc ulation for extended
periods of time . The windows could fog
up since no fresh air can enter the vehi
cle. If the windows fog up, press the air recirculation butto n aga in immediately
to switch off the air recirculation func
tion or se lect defrost.
- Individuals w ith reduced sensitivity to
pa in or temperature could deve lop burns
when using the seat heating function . To
red uce the risk of injur y, these individu-
als should not use seat heating . ..,.
Page 77 of 316
M N <( I.J "". rl I.O
"' rl
"' rl
On the road
Steering
Manually adjustable steering wheel
Applies to vehicles: with manu ally adjustable steering
w hee l
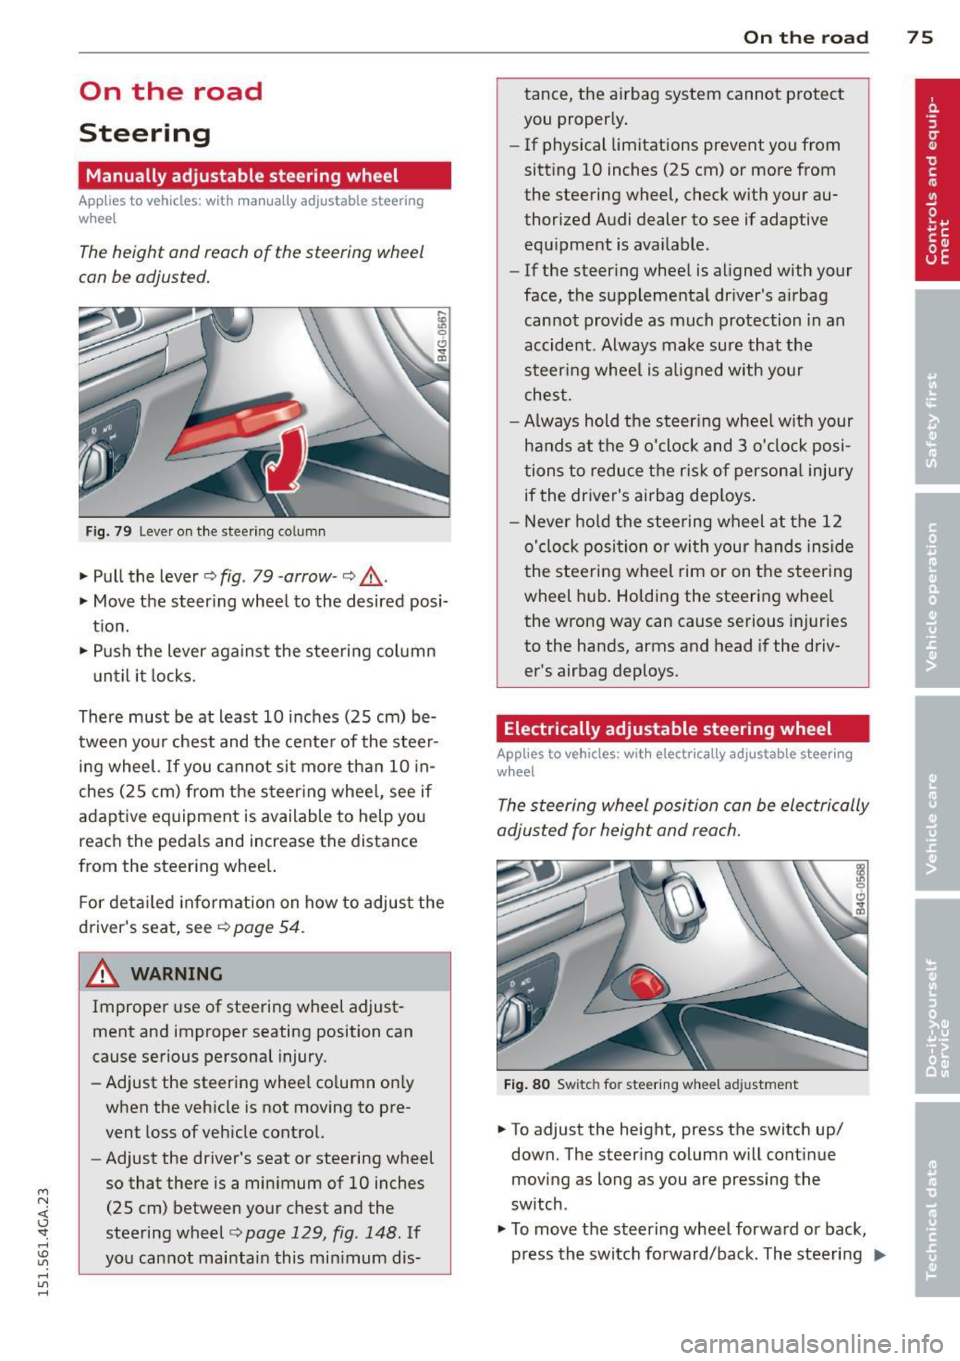
The height and reach of the steering wheel
can be adjusted.
Fig. 79 Lever on the steering column
" Pull the lever¢ fig. 79 -arrow -¢_&..
"Move the steering wheel to the desired posi
tion.
" Push the lever against the steering column
u ntil it locks.
There must be at least 10 inches (25 cm) be
tween your chest and the center of the steer ing wheel.
If you cannot sit more than 10 in
ches (25 cm) from the steer ing wheel, see if
adaptive equipment is available to help you
reach the pedals and increase the distance
from the steering whee l.
F or detailed information on how to adjust the
driver's seat, see
Q page 54.
_& WARNING
Improper use of steering wheel adjust
ment and improper seating position can
cause serious personal injury.
- Adjust the steering whee l column on ly
when the vehicle is not moving to pre
vent loss of veh icle control.
-
- Adjust the driver's seat or steering wheel
so that there is a minimum of 10 inches
(25 cm) between your chest and the
steering wheel¢
page 129, fig . 148. If
you cannot maintain this minimum dis-
On the road 75
tance, the airbag system cannot protect
you properly.
- If physical limitations prevent you from
sitting 10 inches (25 cm) or more from
the steering wheel, check with your au
thorized Audi dealer to see if adaptive
equipment is available.
- If the steering wheel is aligned with your
face, the supplementa l driver's a irbag
cannot provide as much protection in an
accident . Always make sure that the
steering wheel is aligned with your
chest.
- Always hold the steering wheel w ith your
hands at the 9 o'clock and 3 o'clock posi
tions to reduce the risk of personal injury
if the driver's airbag deploys.
-Never hold the steering wheel at the 12
o'clock position or wi th your hands inside
the stee ring wheel rim or on the steering
wheel hub. Holding the steering wheel
the wrong way can cause serious injuries
to the hands, arms and head if the driv
er's airbag deploys.
Electrically adjustable steering wheel
App lies to vehicles: wi th electrica lly ad justable stee ring
w heel
The steering wheel position can be electrically
adjusted for height and reach.
Fig. 80 Switch for steering w heel adjustme nt
"To adjust the height, press the switch up/
down. The steer ing column w ill cont inue
moving as long as you are pressing the
switch .
" To
move the steering wheel forward or back,
press the switch forward/back. The steering
I),-
Page 78 of 316
76 On the road
column will continue moving as long as you
are pressing the switch.
There must be at least 10 inc hes (25 cm) be
tween you r chest and the center of the steer
ing whee l.
If you cannot sit more than 10 in
ches (25 cm) from the steering whee l, see if
adapt ive equipment is available to help you
reach the pedals and increase the distance
from the steer ing wheel.
F or detai led information on how to adjust the
driver's seat, see
<::> page 54 .
In vehicles with the memory f unction* , the
steering column settings are stored together
with the seat position.
A WARNING
Improper use of steering wheel adjust
ment and improper seating position can
cause se rious personal injury.
- Adjust the steer ing whee l column on ly
when the vehicle is not moving to pre
vent loss of veh icle cont rol.
-
- Adjust the driver's seat or steering wheel
so that the re is a min imum of 10 inches
(25 cm) between your chest and the
steering wheel ¢
page 129, fig. 148. If
you can not maintain this min imum dis
tan ce, the airbag system cannot protect
yo u properly.
- If p hys ica l limi tations prevent y ou from
sitting 10 in ches (25 cm) o r more from
the steering wheel, check with yo ur au
tho rized Aud i dealer to see if adaptive
equipment is availab le .
- If the steerin g wheel is aligned wi th you r
face, the supp lemental drive r's airbag
cannot prov ide as much protect ion in an
acc ident. A lways make sure that the
steering wheel is aligned with your
chest.
- Always hold the steering wheel with your
hands at the 9 o'clock and 3 o'clock posi
t ions to reduce the risk of pe rsonal injury
if the d river 's airbag deploys.
- Never hold the steer ing whee l at the 12
o'clock posit ion or w it h your hands i nside the steering wheel rim or on the steering
wheel hub. Hold
ing the steer ing wheel
the wrong way can cause serious injuries
to the hands, arms and head if the driv
er 's airbag deploys.
Easy entry feature
Applies to vehicles: with electrically adjustable steering
wheel
The easy entry feature makes it easier to en
ter and exit the vehicle by automatically ad
justing the steering wheel.
.. Select in the MM I: ICAR I fu nction button>
(Car )* sys tem s control b utton > V ehicle set
ting s
> Seat s > Driver 's seat > Easy entry >
On .
When the easy ent ry feature is turned on, the
steering wheel moves up to the park position
when you switch
off the ignition. After you en
ter the veh icle, the steering wheel moves to
the stored position as soon as you sw itch on
the ignit ion.
Starting and stopping
the engine
Starting the engine
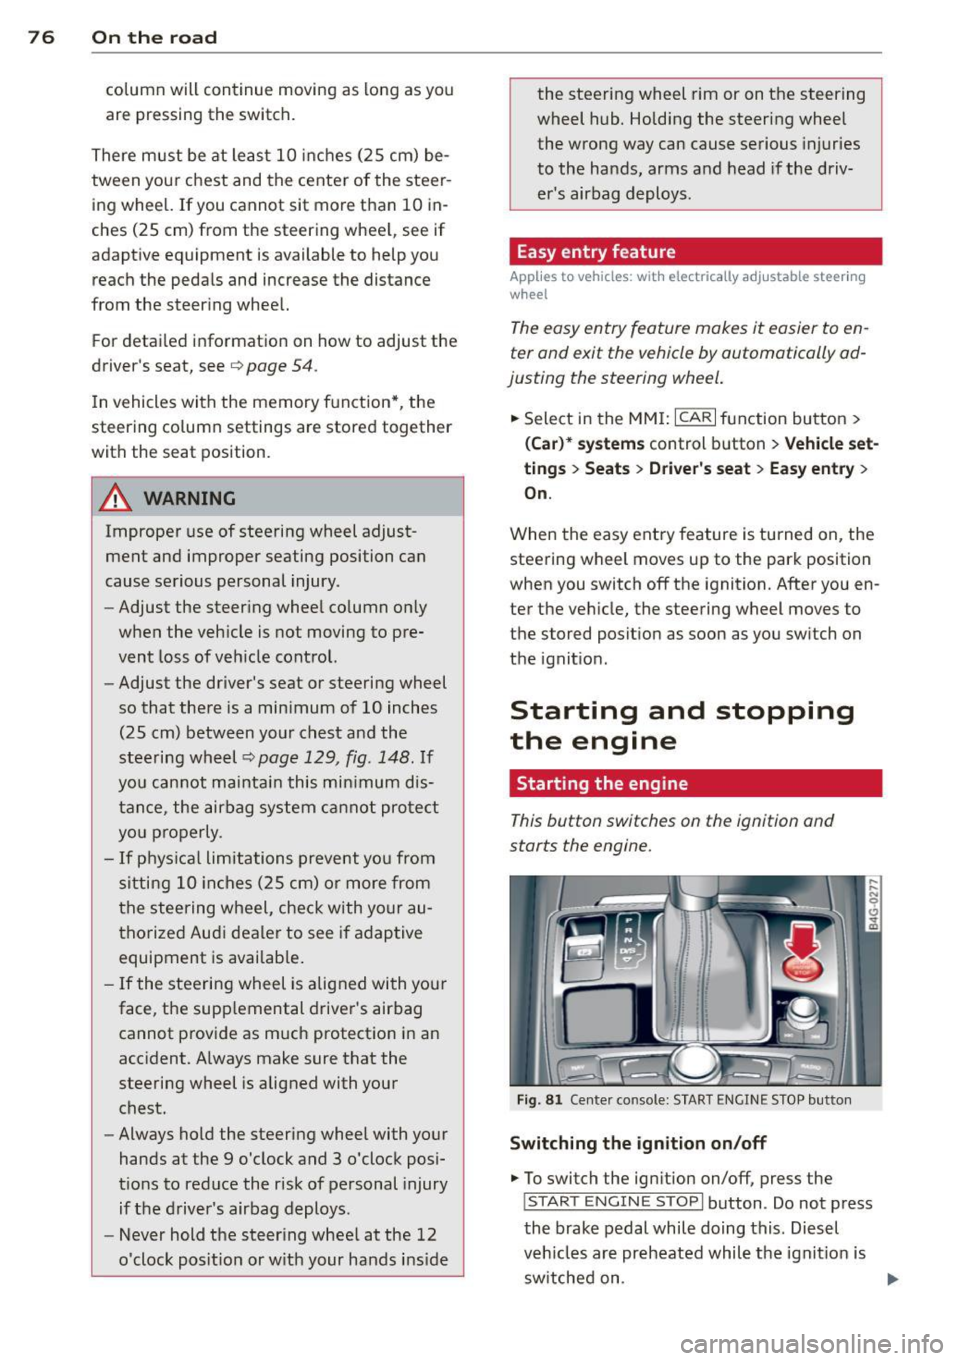
This button switches on the ignition and
starts the engine.
Fig . 81 Ce nter console: S TART ENGINE S TOP b utto n
Switching the ign ition on /off
• To switch the ign ition on/off, press the
I STAR T ENGINE ST OPI button . Do not p ress
the brake pedal while doing this . Diesel
veh icles are preheated while the ignit ion is
sw itched on . ..,.
Page 79 of 316
M N <( (.J
'SI: ,...., \!) ..,.,
,...., ..,., ,....,
Starting th e engin e
"'Pre ss the brake peda l c::> _&..
"'Press the !START ENGINE STOP I button
c::> fig. 81. The engi ne will start .
"' It is possible that the re wi ll be a slight de lay
when starting the engine for diesel vehicles
in colder temperatures. Therefore, you must
hold the brake pedal down until the eng ine
starts. The indicator lamp
Ii illuminates
when the eng ine is preheated.
If the engine should not start immediately,
the starting process is automatically stopped
after a short time . Repeat starting procedure .
Start-Stop-Sy stem *:
Note the information on c::> page 81, Start
Stop-Sys tem.
A WARNING
- Never allow the engine to run in confined
spaces -danger of asphyxiation .
- Never turn off the eng ine unti l the vehi
cle has come to a complete stop .
- The brake booster and power steer ing
only work when the engine is running .
If
the engine is off, you have to use more
force when steering or braking. Because
you cannot stee r and brake as you usua l
ly wou ld, this could lead to crashes and
ser ious injur ies.
- Avoid high engine rpm, fu ll throttle and
heavy engine loads unti l the engine has
reached operating temperat ure - ot her
wise yo u risk eng ine dam age.
- The eng ine ca nnot be started by pushing
or tow ing the veh icle.
(D Tips
- After a cold engine is sta rted, there may
be a brief period of increased noise be
ca use oil p ress ure mus t fi rs t bu ild up in
the hyd raulic valve adjus ters. This is nor
mal and not a ca use for concern .
-If yo u leave the vehicle with t he ignit ion
switched on, the ignition will switch off
On th e ro ad 77
after a cer tain per iod of t ime. Please
note that electrical eq uipment such as
exterior lights will sw itch off as well
when that happens.
Stopping the engine
"' Bring your vehicle to a complete stop.
"' Move the selector lever to the P or N posi
tion .
"' Press the
I STA RT E NGINE ST OP I button
c::> page 76, fig. 81.
Steering lock
The steer ing locks when you tur n the engine
off using the
I STAR T ENGINE ST OP I button
and open the d river's door . The locked steer
ing helps prevent vehicle theft.
Eme rgency off
If necessa ry, the engine can be switched off
with the selector lever in the R or D/S posi
t ion . The engine stops if you press the
I S TART ENG INE STOPI button at speeds below
6 mph (10 km/h) .
A WARNING
-Never tur n off the engine unti l the vehi
cle has come to a complete stop .
- T he b rake booster and powe r stee ring
only work w he n the eng ine is r unning. If
the engine is off, you have to use more
force when steering or braking. Because
you cannot steer and brake as you usual
ly would, th is co uld lead to crashes and
serio us injuries.
- For safety reasons, you sho uld a lways
park your vehicle w ith the selector lever
in P. Otherwise, the vehicle could inad
vertently roll away .
- After the eng ine has been switched off,
the radiator fa n can cont inue to run for
up to 10 minutes - even with the ignition
sw itche d off .
It can also sw itch on again
after some t ime if the coolant tempera
ture r ises as the resu lt of a hea t buildup
.
or if the engine is hot and the engine .,..