radiator AUDI A7 2015 Owners Manual
[x] Cancel search | Manufacturer: AUDI, Model Year: 2015, Model line: A7, Model: AUDI A7 2015Pages: 316, PDF Size: 78.09 MB
Page 18 of 316
16 Instrum ent s and w arn ing /indic ato r light s
-If the brake warning/indicator light does
not go out after a few seconds and the
park ing brake is released, or lights up
wh ile you are driving, the fluid level in
the brake fluid reservoir is too low .
If you
believe that it is safe to do so, proceed
immediately at low speed to the nearest
authori zed Aud i dealer o r qualified repa ir
f acili ty and have the brake system in
spected.
- Always keep in m ind that after several
brake applicat ions, yo u will need greater
pressure on the brake peda l to stop your
vehicle. Do not re ly on strained brakes to
respond with maxim um stopp ing power
in critical situations. You must allow for
increased brak ing distances . The extra
distance used up by fad ing brakes could
lead to an acc ident.
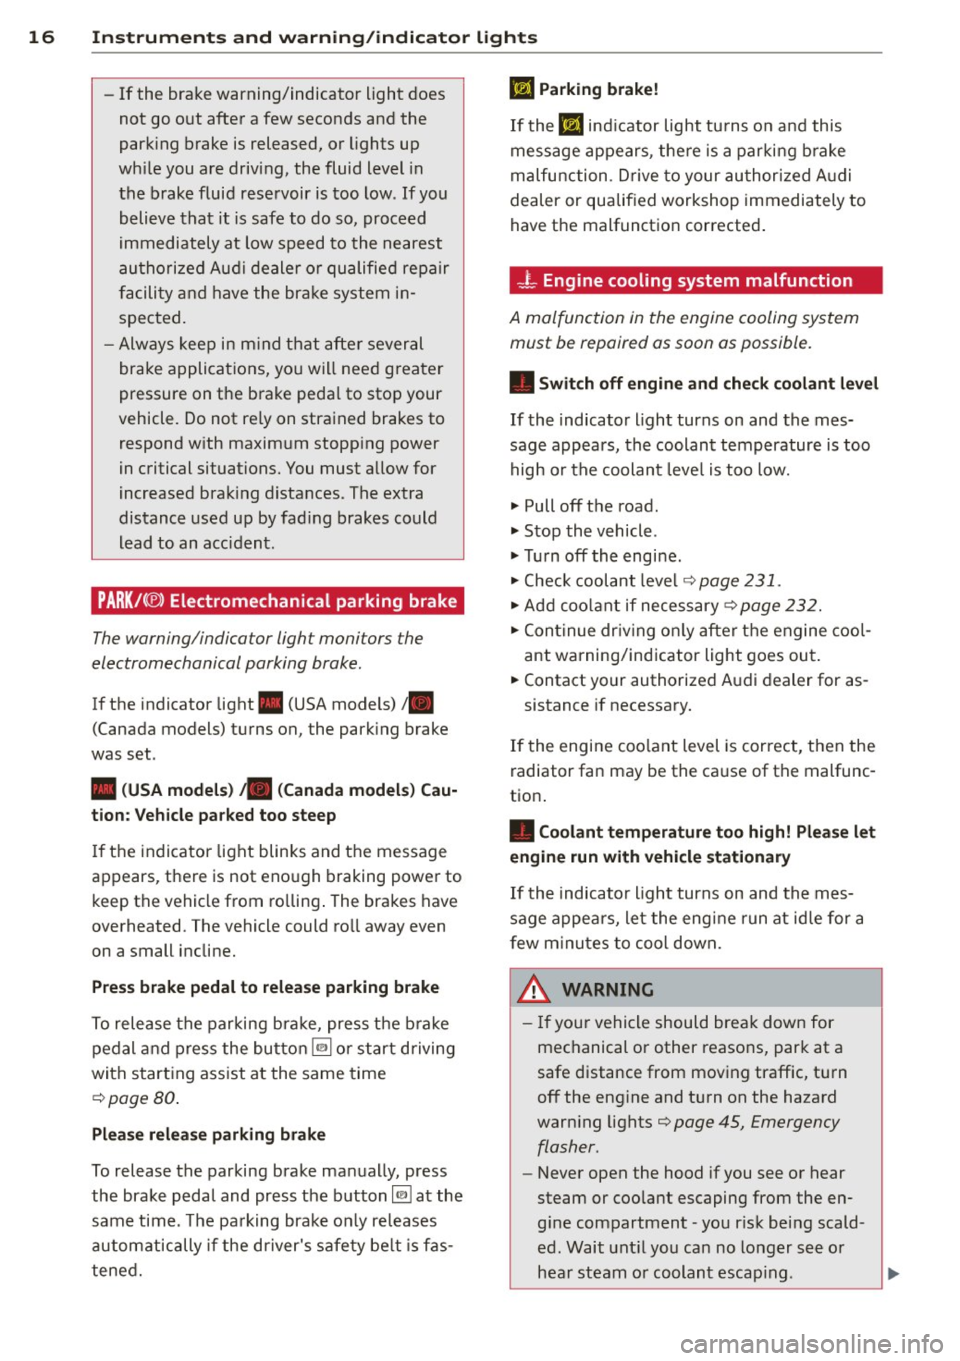
PARK/( ®) Electromechanical parking brake
The warning/indicator light monitors the
electromechanical parking brake.
If the indicator light . (USA models)/ .
(Canada models) turns on, the park ing brake
was set .
• (U SA models) • (Canada models ) Cau
tion: Vehicle pa rked too steep
If the indicator light blinks and the message
appears, there is not eno ugh braking power to
keep the vehicle from ro lling . The brakes have
overheated. The vehicle could ro ll away even
on a small incline.
P res s brake pedal to relea se parking brake
To release the parking bra ke, press t he b ra ke
pedal and press the button~ or start d riving
with start ing assist at the same time
c::> pageBO .
Please release parking brake
To release the parking brake ma nually, press
the brake pedal and press the button~ at the
same time . T he parking brake on ly re leases
automatically if the dr iver's safety be lt is fas
tened.
Ill Parking brak e!
If the Ill ind icator light tu rns o n and this
message appears , the re is a parking b rake
malfunction . Drive to your au thorized A udi
dealer or qualif ied workshop immediately to
have the malfunction corrected .
-L Engine cooling system malfunction
A malfunction in th e engine cooling system
must be repaired as soon as possible.
• Swit ch off engin e and check coolant level
If the indicator light turns on and the mes
sage appea rs, the coolant temperature is too
high o r the coolant leve l is too low.
.. Pull
off the road .
.. Stop the vehicle .
.. Tu rn
off the engi ne .
.,. Check coolant level
c::> page 231.
.. Add coo lant if necessary c::> page 232 .
.,. Con tinue dr iv ing on ly afte r the engine coo l
ant warning/indicator light goes out .
.. Contact your authorized A udi dealer for as-
sistance if necessary.
If the engine coo lant level is correct, then the
radiator fan may be the ca use of the malfunc
tion .
• Coolant temperature too high! Plea se let
engin e run with vehicl e st ationary
If the indicator light turns on and the mes
sage appea rs, let the engine run at id le for a
f ew m inutes to cool down.
A WARNING
- If your vehicle should break down for
mechanical or other reaso ns, park at a
safe distance from mov ing traffic, turn
off the eng ine and turn on the hazard
warn ing lights
c::> page 45, Emergency
flasher .
-
-Never open the hood if you see or hear
steam or coo lant escaping from the en
g in e compartment -you r isk being scald
ed. Wait unt il you can no lo nger see or
hear steam o r coolant escap ing .
~
Page 79 of 316
M N <( (.J
'SI: ,...., \!) ..,.,
,...., ..,., ,....,
Starting th e engin e
"'Pre ss the brake peda l c::> _&..
"'Press the !START ENGINE STOP I button
c::> fig. 81. The engi ne will start .
"' It is possible that the re wi ll be a slight de lay
when starting the engine for diesel vehicles
in colder temperatures. Therefore, you must
hold the brake pedal down until the eng ine
starts. The indicator lamp
Ii illuminates
when the eng ine is preheated.
If the engine should not start immediately,
the starting process is automatically stopped
after a short time . Repeat starting procedure .
Start-Stop-Sy stem *:
Note the information on c::> page 81, Start
Stop-Sys tem.
A WARNING
- Never allow the engine to run in confined
spaces -danger of asphyxiation .
- Never turn off the eng ine unti l the vehi
cle has come to a complete stop .
- The brake booster and power steer ing
only work when the engine is running .
If
the engine is off, you have to use more
force when steering or braking. Because
you cannot stee r and brake as you usua l
ly wou ld, this could lead to crashes and
ser ious injur ies.
- Avoid high engine rpm, fu ll throttle and
heavy engine loads unti l the engine has
reached operating temperat ure - ot her
wise yo u risk eng ine dam age.
- The eng ine ca nnot be started by pushing
or tow ing the veh icle.
(D Tips
- After a cold engine is sta rted, there may
be a brief period of increased noise be
ca use oil p ress ure mus t fi rs t bu ild up in
the hyd raulic valve adjus ters. This is nor
mal and not a ca use for concern .
-If yo u leave the vehicle with t he ignit ion
switched on, the ignition will switch off
On th e ro ad 77
after a cer tain per iod of t ime. Please
note that electrical eq uipment such as
exterior lights will sw itch off as well
when that happens.
Stopping the engine
"' Bring your vehicle to a complete stop.
"' Move the selector lever to the P or N posi
tion .
"' Press the
I STA RT E NGINE ST OP I button
c::> page 76, fig. 81.
Steering lock
The steer ing locks when you tur n the engine
off using the
I STAR T ENGINE ST OP I button
and open the d river's door . The locked steer
ing helps prevent vehicle theft.
Eme rgency off
If necessa ry, the engine can be switched off
with the selector lever in the R or D/S posi
t ion . The engine stops if you press the
I S TART ENG INE STOPI button at speeds below
6 mph (10 km/h) .
A WARNING
-Never tur n off the engine unti l the vehi
cle has come to a complete stop .
- T he b rake booster and powe r stee ring
only work w he n the eng ine is r unning. If
the engine is off, you have to use more
force when steering or braking. Because
you cannot steer and brake as you usual
ly would, th is co uld lead to crashes and
serio us injuries.
- For safety reasons, you sho uld a lways
park your vehicle w ith the selector lever
in P. Otherwise, the vehicle could inad
vertently roll away .
- After the eng ine has been switched off,
the radiator fa n can cont inue to run for
up to 10 minutes - even with the ignition
sw itche d off .
It can also sw itch on again
after some t ime if the coolant tempera
ture r ises as the resu lt of a hea t buildup
.
or if the engine is hot and the engine .,..
Page 123 of 316
M N <( \,J
"". rl I.O
"' rl
"' rl
r::> & in General information on page 118,
r::> (Din General information on page 119 .
The blue area represents an extens ion of the
vehicle's outline by approximately 16 ft
(5 m) to the rear . The long side of the blue
area should be on the curb . The entire blue
area must fit into the pa rking space.
• With the veh icle stopped, turn the steering
wheel to the right as far as it w ill go.
• Back in to the park ing space u ntil the b lue
curve
r::> fig . 134 touches the curb r::> & in
General information on page 118,
r::> (D in
General information on page 119 .
Stop the
vehicle.
• With the veh icle stopped, turn the steer ing
whee l to the left as far as it will go .
• Continue to back into the parking space un
t il the vehicle is parked pa rallel to the cu rb
r::> & in General information on page 118,
r::> (D in General information on page 119.
@ marks the rear bumper . Stop the veh icle,
at the latest, when the red orientation line
@ borders an object. Keep an eye on the
front of your vehicle whi le doing this .
Parking next to obstacles
If there is an obstacle (s uc h a s a wall) next to
the par king space, position the veh icle so
there is more space o n that s ide. Position the
l ong side of the blue s urface so that there is
sufficient space from the obstacle . The sur
face must not be to uch ing . You will also need
to start turning the steer ing wheel much ear
lier . The blue curve
r::> fig . 134 must not touch
the obstacle and should have sufficient room.
(D Note
Remember to maintain sufficient clear
ance from the curb to avoid damag ing the
wheel rims .
(D Tips
The left or right orientation lines and sur
faces will be displayed, depend ing on the
turn sig na l being used.
P arking systems 121
Peripheral cameras
Introduction
Applies to vehicles: with parking system plus with periph
eral cameras
In add ition to parking system plus
c:> page 117, this parking system conta ins pe
ripheral cameras . Depending on the vehicle
equipment, you are ass isted by vario us views
su ch a s p eriphera l view, corne r views a t the
fron t and rear of the veh icle, and views di re ct
ly in front of or behind t he vehicle .
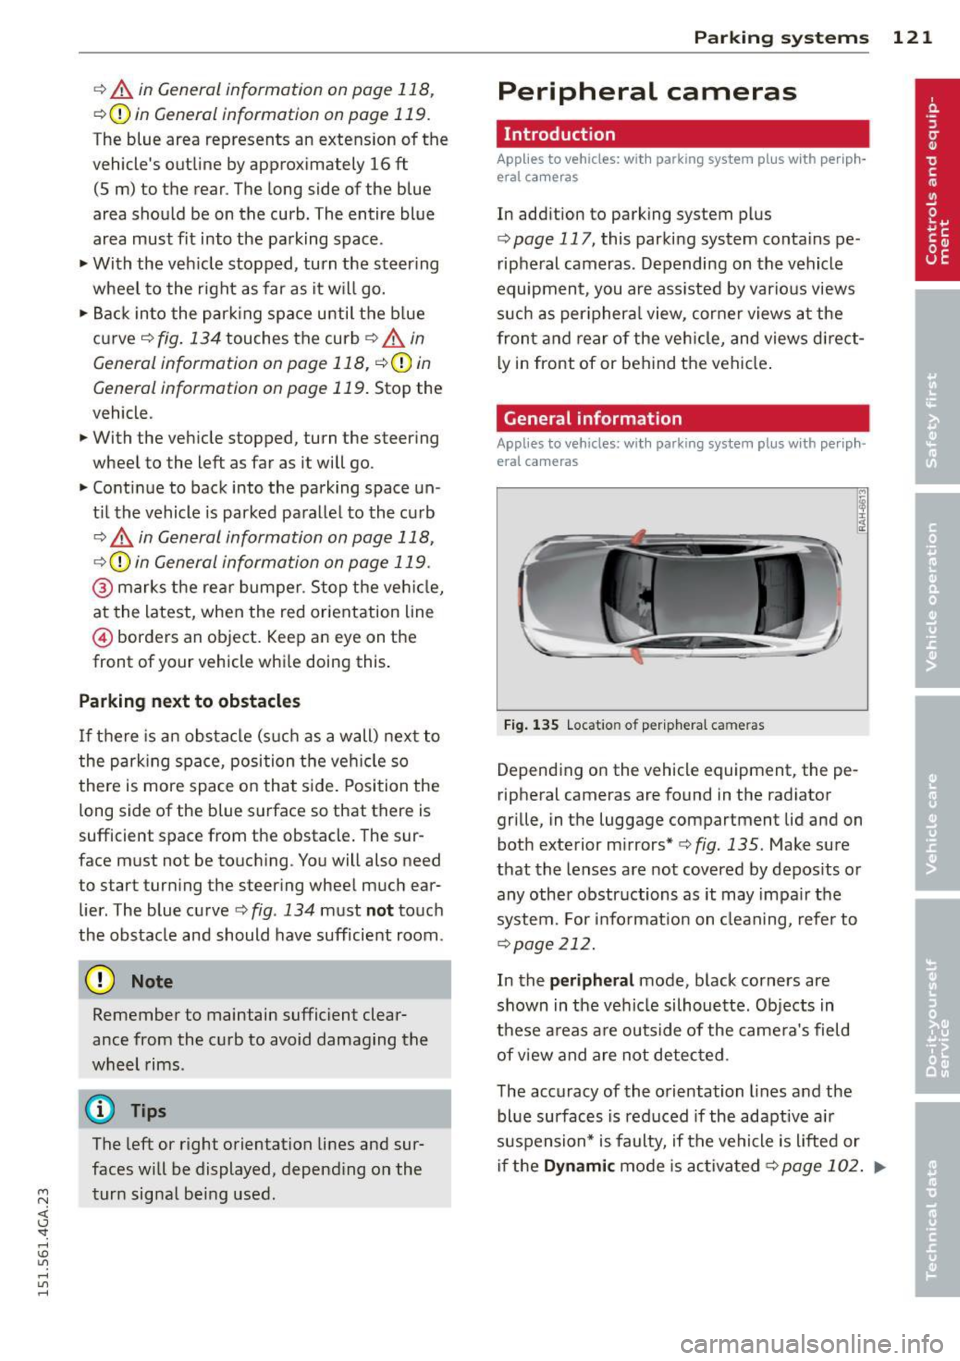
General information
Applies to vehicles: with parking system plus with periph
eral cameras
Fi g. 1 35 Locat io n of per ip hera l came ras
Depending on the vehicle equipment, the pe
ripheral cameras are found in the radiator
grille, in the luggage compartment lid and on
both exterior m irrors*
c:> fig. 135. Make su re
that the lenses a re not covered by depos its o r
any other obstr uctions as it may impa ir t he
system. For info rmat io n on clean ing, refe r to
¢ page 212.
In the peripheral mode, b lack corners are
shown in the ve hicle silhouette . Objects in
these a reas a re outside of the came ra's field
of view and are not detec ted .
The accuracy of the orientation lines and the bl ue surfaces is reduced if the adaptive a ir
suspension* is faulty, if the vehicle is l ifted or
if the
D ynamic mode is activa ted ¢ page 102 . ...,
Page 228 of 316

226 Check ing and filling
- Always disconnect the battery.
- Never smoke or work near heaters or open flames . Fluids in the engine com
partment could start a fire.
- Keep an approved fire extinguisher im
mediately available.
- To avoid electrical shock and persona l in
jury while the engine is running or being started, never touch:
- Ignition cables
- Other components of the high voltage
electronic ignition system.
- If you must perform a check or repa ir
with the engine running:
- Fi rst, fully apply the parking bra ke,
move se lec to r lever to P (Pa rk) .
- Always use extreme caution to preven t
clot hing, jewe lry, or long h air from ge t
ting caught in the radiator fan, V -belts
or other moving parts, or from contact ing hot parts. Tie back hair before
start ing, and do not wear cloth ing that
will hang or droop into the eng ine.
- Min imize exposure to emission and
chemica l hazards¢ ,&..
A WARNING
California Propos ition 65 Warning:
- Engine exhaust, some of its constituents,
and certa in veh icle components conta in
or emit chemicals known to the State of
Califor nia to cause cancer and b irth de
fec ts a nd reproduct ive ha rm. In addition,
certain fluids conta ined in vehicles and
certa in prod ucts of co mponent wear co n
ta in o r emi t chemicals known to the
State o f Ca lifornia to cause can cer and
birth defects or ot her reproductive harm. -
Battery posts, terminals and re lated ac
cessories conta in lead and lead com
pounds, chemicals known to the State of
California to cause cance r and reproduc
tive harms. Wash hands after handling .
(D Note
When adding flu ids, always make sure that
they are poured into the proper conta iner
or f iller opening, otherwise serious dam
age to vehicle systems w ill occur.
® For the sake of the environment
To detect leaks in time, inspect the vehicle
floor pan from underneath regularly. If
you see spots from oil or other ve hicle flu
i ds, have yo ur vehicle inspected by a n au
thori zed Audi dea le r.
Closing the engine hood
.,. Pull the hood down un til the pressure from
t he struts is reduced.
.,. Let the hood
drop down and latch in p lace .
Do not try to push it shut; it may fail to en
gage ¢&_ .
A WARNING
-
A hood that is not completely latched
could fly up and b lock your view while dr iv
ing.
- When you close the engine hood, check it
to make sure the safety catch has p roper
ly engaged. The hood sho uld be flush
with the surrou nding vehicle body pa rts.
- If you notice while driv ing t hat the hood
is not s ecured prope rly, stop at onc e and
close it.
Page 233 of 316
M N
"' rl
-Always dispose of used engine oil proper
ly. Do not dump it on garden soil, wood
ed areas, into open streams or down
sewage drains.
- Recycle used engine oil by taking it to a
used engine oil collection facility in your
area, or contact a service station.
Engine cooling system
Coolant
The engine coolant performs two functions: it
keeps the engine from overheating and it pro
tects the engine from freezing in the winter.
The cooling system is sealed and generally re
quires little attention .
The cooling system has been filled at the fac
tory with a permanent coolant which does not
need to be changed . The coolant consists of a
mixture of specially conditioned water and the
manufacturer 's glycol-based coolant addi-
tive G13 antifreeze with anticorrosion addi
tives (50% for USA models; 60% for Canadian
models) . This mixture both assures the neces
sary frost protection and protects metal com
ponents in the engine's cooling system from
corrosion and scaling.
It also raises the boil
ing point of the coolant.
Do not reduce the concentration of the cool
ant in the summer by adding plain water.
The
proportion of coolant additive must be at
least 50% but not more than 60%
to main
tain antifreeze protection and cooling efficien
cy .
If the coolant frost protection is too low,
the coolant could freeze and damage the vehi
cle heating and engine cooling system.
For year -round driving, antifreeze is added at
the factory for temperatures down to:
- -31°F(-35°C)USA
- -40 °F ( - 40 °C) Canada.
If you must add coolant, use a mixture of wa
ter and coolant additive. Mixing the coolant
additive with distill ed water is recommended .
Checking and filling 231
A WARNING
Before you check anything in the engine
compartment, always read and heed all
WARNINGS ~&.
in Working in the engine
compartment on page 225.
(D Note
- Before winter sets in, have the coolant
checked to see if the coolant additive in
your vehicle is sufficient to meet the cli
mate conditions. This is especially impor
tant if you live in a region where the win
ter is extremely cold. If necessary, in
crease the proportion of coolant additive
to 60%.
- When adding coolant additive to your
cooling system, remember:
- We recommend using only coolant ad
ditive G12++ or G13 (check the label)
for your vehicle. This coolant additive is
available at authorized Audi dealers.
Other types of antifreeze can signifi
cantly reduce corrosion protection. The
resulting corrosion can cause a loss of
coolant and serious engine damage.
- Do not add any type of radiator leak seal
ant to your vehicle's engine coolant.
Adding radiator repair fluid may adverse
ly affect the function and performance of
your cooling system and could result in
damage not covered by your New Vehicle Limited Warranty.
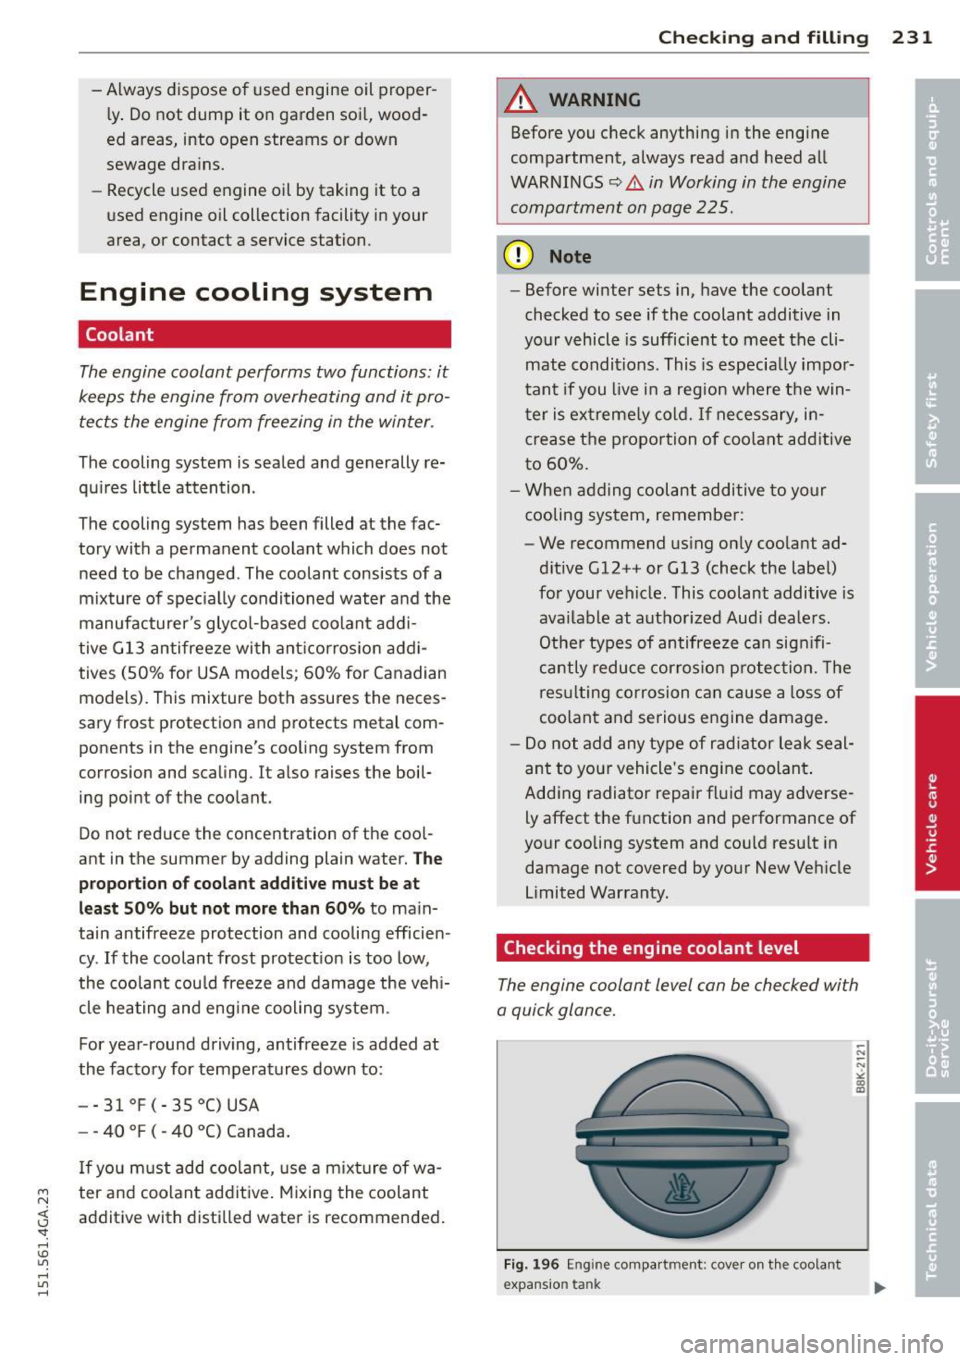
Checking the engine coolant level
The engine coolant level can be checked with
a quick glance.
Fig. 196 Engine compa rtment: cove r on t he coola nt
expansion tank
Page 234 of 316
232 Check ing and filling
Before you check anything in the engine com
partment,
a lways r ea d and heed all WARN
INGS ¢ A in Working in the engine compart
ment on page 225.
• Park your vehicle on a level surface.
• Switch
off the ignition .
• Read the eng ine coolant leve l from the cool
ant expansion tank
c> fig. 196, c> page 22 7,
fig. 193. With a cold eng ine, the coolant
level should be between the "min" and
"max" markings. When the engine is warm,
the leve l may be slightly above the "max"
ma rk ing.
The location of the coolant expans ion tank
can be seen in the engine compartment illus
tration ¢
page 22 7.
To obtain an accurate reading, the engine
must be sw itched
off.
The expans ion tank in your vehicle is equipped
with an electric coolant level sensor.
When the coo lant level is too low, the warning
light in the Auto-Check System ¢ page l 6 will
i l luminate unti l yo u add coolant and the level
has been restored to normal. Even though
there is an electric coolant level senso r, we
still recommend you check the coolant leve l
from time to time .
Coolant loss
Coolant loss may indicate a lea k in the cooling
system. In the event of coolant loss, the cool
ing system should be inspected immediately
by your author ized Audi dealer. It is not
enough merely to add coolant.
In a
sealed system, losses can occur only if
the boiling point of the coolant is exceeded as
a result of overheat ing.
A WARNING
T he cooling system is unde r pr essure and
c an get ve ry hot. Reduce t he risk of s cald
ing from hot coolant by followi ng these
steps .
- T urn
off the engine and allow it to cool
dow n. -
Protect your face, han ds and arms from
escaping flu id and steam by cover ing the
cap with a large, thick rag.
- Tu rn the cap slowly and very care fully in
a counte r-clockwise direct ion while ap
plying lig ht, downward pressure on the
top of the cap.
- To avo id being burned, do not sp ill anti
freeze or coolant on the exhaust system
or hot engine par ts. Under certa in cond i
tions, th e ethylen e glyco l in engine coo l
a nt can catch fire.
(D Note
Do not add a ny type o f radiator leak sea l
ant to your veh icle's engine coolant. Add
i ng radiator r epa ir fluid may adv erse ly af
fe ct the funct io n and perfo rma nce of you r
co oling syste m and could result in damage
not covered by your New Veh icle Limi ted
War ran ty.
Adding coolant
Be very careful when adding engine coolant.
Befo re you check anyth ing in the eng ine com
partment,
alway s read and heed all WARN·
INGS ¢ A in Working in the engine compart
ment on page 225.
• Requirement: The re must be a r esidua l
amount of coolant in the e xpansion ta nk
¢(D.
•Tur no ff the engine.
• Le t the engine cool down.
• Place a thick rag ove r th e coo lant expansion
tank
¢ page 231, fig. 196 and carefully
twist the cap co unte r-clockwise c> &_ .
• Add coo lant m ixed in the correct rat io
¢ page 231, Coolant up to the MAX mark
ing.
• Make s ure that the fl uid leve l remains sta-
b le. Add more coo la nt if necessary.
• Twis t the cap o n again
tightly.
Replacement engine coo la nt must confo rm to
exact spec ificat ions
¢ page 2 31, Coolant. .,.
Page 235 of 316
M N <( (.J
'SI: ,...., \!) ..,.,
,...., ..,., ,....,
We recommend using only coolant addi-
tive
Gl2++, Gl3 or in an emergency Gl2+. Do
not use a different additive. In an emergency
use plain water until you can get the correct
additive and can restore the correct ratio. This
should be done as soon as possible .
If you have lost a considerable amount of
coolant, then you should add cold antifree ze
and cold water only when the engine is cold.
Always use
new engine coolant when refilling.
Do not fill coolant above the "MAX" mark. Ex
cess coolant will be forced out through the pressure relief valve in the cap when the en
gine becomes hot.
A WARNING
-The cooling system is under pressure and
can get very hot. Reduce the risk of
scalding from hot coolant by following
these steps.
-Turn off the engine and allow itto cool
down.
- Protect your face, hands and arms from
escaping fluid and steam by covering
the cap with a large, thick rag.
- Turn the cap slowly and very carefully
in a counter-clockwise direction while
applying light, downward pressure on
the top of the cap.
- To avoid being burned, do not spill an
tifreeze or coolant on the exhaust sys
tem or hot engine parts. Under certain
conditions, the ethylene glycol in en
gine coolant can catch fire.
- Antifreeze is poisonous. Always store an
tifreeze in its original container and well
out of the reach of children.
- If you drain the coolant, it must be
caught and safely stored in a proper con
tainer clearly marked "poison".
(D Note
- Do not add coolant if the expansion tank
is empty. Air could enter the cooling sys
tem and damage the engine. If this is
Checking and filling 233
the case, do not continue driving. Seek
professional assistance .
- Coolant pollutes the environment and
could cause an engine fire. Excess cool
ant will be forced out through the pres
sure relief valve in the cap when the en
gine becomes hot.
- If, in an emergency, only water can be
added, the correct ratio between water
and antifreeze
c> page 231 must be re
stored as soon as possible.
@ For the sake of the environment
Drained coolant should not be reused. Al
ways dispose of used coolant while observ ing all environmental regulations.
Radiator fan
The radiator fan switches on automatically by
itself.
An auxiliary electric radiator fan switches on
and off depending on coolant temperature
and other vehicle operating conditions .
After you switch the engine off, the auxiliary
fan can continue running for up to 10 minutes
- even with the ignition off.
It can even switch
on again later by itself
c> .&, if
- the temperature of the engine coolant rises
due to the heat build-up from the engine in
the engine compartment, or
- the engine compartment heats up because
the vehicle is parked in intense sunlight.
A WARNING
-To reduce the risk of personal injury nev
er touch the radiator fan.
- The auxiliary electric fan is temperature controlled and can switch on suddenly
even when the engine is not running.
- The auxiliary radiator fan switches on au
tomatically when the engine coolant reaches a certain temperature and will
continue to run until the coolant temper
ature drops.
•
•
Page 297 of 316

M N <( (.J
'SI: ,...., \!) 1.1'1 ,...., 1.1'1 ,....,
complexity of today's automobi les, have
steadi ly reduced the scope of maintenance
and repairs which can be carried out by vehicle
owners.
Also, safe ty and e nvir onm en tal con
cerns p lace very strict limits on the na ture of
repairs and adjustments to engine and trans
miss io n pa rts which an owner can perform .
Maintenance, adjustments and repa irs usua lly
require special tools, testing dev ices and oth
er equipment avai lab le to specially trained
workshop personnel in order to assure prope r
performance, reliab ility and safety of the vehi
cle and its many systems .
Improper ma intenance, adjustments and re
pa irs can impair the operation and reliability
of your vehicle and even void your vehicle war ranty. The refo re, p roof of servici ng in accord
ance w ith the maintenance sched ule may be a
condition for upholding a poss ible war ranty
claim made within the warranty period.
Above all, operational safety can be adversely
affected, crea ting unnecessary risks for you
and your passengers.
If in doubt about any servicing, have it done
by your authori zed Audi dealer or any other
properly equipped and q ualified workshop .
We strong ly urge you to give you r a uthorized
Audi dealer the opportunity to perform all
schedu led maintenance and necessary repairs .
Your dea ler has the facilities, or iginal parts
and trained spec ialists to keep your vehicle
running properly .
Performing limit ed m aintenance you rself
The fo llowing pages describe a limited num
ber of procedu res which can be performed on
your vehicle with ordinary too ls, should the
need arise and trained personnel be unavaila
b le. Before performing any of these proce
dures, always tho roughly read a ll of the app li
cable text and carefully follow the instruc
tions given . Always rigorously obse rve the
WARNINGS provided .
Before you check anything in th e engine
compartment, a lway s re ad and heed all
Con sumer In formation 295
WARNINGS ¢ & and ¢ & in Working in the
engine comportment on page 225 .
A WARNING
-Ser ious personal injury may occur as a re
sult of improperly performed mainte nance, adjustments or repa irs.
-Always be extremely care ful when work
ing on the vehicle. Always follow com
mon ly accepted safety pract ices and gen
era l common sense . Never r isk personal
lnJU ry .
- Do not attempt any of the ma intenance ,
checks or repairs descr ibed on the fol
lowing pages if you are not fully fam ilia r
wit h these or othe r pro cedures with re
spect to t he veh icle, or are uncerta in how
to p roceed .
- Do not do any work without the proper
too ls and equipment. Have the necessary
work done by your authorized A udi deal
er or another proper ly equipped and
qualified workshop .
- The engine compar tment o f any motor
veh icle is a potentially hazardous area.
Never reach into the area around or
touch the rad iator fan. It is temperature
contro lled and can switch on suddenly -
even when the engine is
off . The radiator
fan switches on automat ica lly when the
coo lant reaches a certai n tempe rature
and will cont inue to run until the coo lan t
temper ature drops.
- Always sw itch
off the ignition before any
one gets under the vehicle.
- Always support your veh icle with safety
stands if it is necessary to work under
neath the vehicle . The j ack s upplied with
the vehicle is not adequate for this pur
pose and cou ld collapse causing serio us
personal i njury .
- I f you must work unde rneath the vehicle
with the wheels on t he g round , a lways
make sure the vehicle is on leve l ground,
that the wheels are a lways securely
blocked and that the engine cannot be
started.
•
•
Page 305 of 316
M N <( (.J
'SI: ,...., \!) 1.1'1 ,...., 1.1'1 ,....,
Data ...... .. .... .. .... ... .. .. ... 293
Start-Stop -System . . . . . . . . . . . . . . . . . . 81
start ing . ... .... ...... ... .. .. .. .. .. 76
Starting with jumper cab les .. .. .. .. . 285
Stopping . . . . . . . . . . . . . . . . . . . . . . . . . . 77
E ng ine compartment .... ... .. .. .. .. . 22 7
C losing the hood . ..... ... .. .. .. .. . 226
Opening the hood ..... ... .. .. .. .. . 225
Safety instructions ........ .. .. .. .. . 225
Working in the engine compartment . . 225
E ng ine coolant ... ...... ... .. .. .. ... 231
Adding coolant . .. ..... ... .. .. .. ... 232
Chec king the engine coolant leve l .. .. . 23 1
Expansion tank ........... .... .. .. . 231
Malfunct ion symbo l ....... .. .. .. .. .. 16
Radiator fan .............. ... ... .. 233
Temperature gauge ........... ... ... 11
Engine oil ... .... .. .... ... .. .. .. ... 227
Adding .. .. ............. .... .. ... 229
Addit ives . .. ............. .... .. .. . 229
Changing .. .. ... .. ... ... .. .. .. ... 230
Checking the eng ine o il level .. .. ... .. 229
I ndications and cond it ions requ iring ex-
tra check ing ............. .... .. ... 229
I ndicator ligh t . . . . . . . . . . . . . . . . . . . . . 18
O il cons umption .......... .. .. .. .. . 228
P ressu re mal func tion ... ... .. .. .. .. .. 17
Recommended oil check intervals . ... . 229
Sensor defect ive . . . . . . . . . . . . . . . . . . . . 22
Specification and viscos ity .. .. .. .. .. . 227
E ng ine sound ............. .... .. .. . 10 2
Eng ine speed limitat io n ........ .. .... . 21
Engine start -stop mode
refer to Start-Stop-System . .. .. .. .. .. 83
E ng ine star t sys tem (indicator l igh ts) .. .. 18
Env ironment
Break- in period ........ ...... .... .. 203
Cata lytic converter ........... .... .. 204
D iese l par ticul ate fi lter .... .. .. .. .. . 205
Di sposing of yo ur vehicle ba ttery .. .. . 238
D riving a t high speeds .. ... .. .. .... . 206
D riving to minimize pollution and noise 205
Fu el . .... .. .. ... .. ..... ... .. .. ... 219
F ue l economy ............ .... .. ... 205
Leaks under your veh icle ... .. .. .. .. . 225
Lett ing the veh icle stand and warm up . 206
Proper disposal of dra ined brake flu id . 234
Inde x 303
Proper disposal of d rained eng ine cool -
ant . ... .. .. .. .... . ... ...... ... .. 232
Proper disposal of d rained eng ine
o il . . . . . . . . . . . . . . . . . . . . . . . . . 229, 230
Recycling used engine oil ............ 229
Un leaded fuel .. ... ................ 217
What should I do with an o ld battery? . 238
Event Data Recorder (EDR) . . . . . . . . . . . . 194
E xhaust tail pipes
Cleaning .. .. .. .. .. . .............. 213
Expansion tank .. ... ...... .......... 231
Exterior lighting ..... . .. .. ..... ... .. . 44
E xte rior m irrors
Adjus ting . .. .. .. .... ........... .. . 50
Di mming . ... .. .. .. .. .. ...... ... .. . 51
Heating ... .. .... ... .. .. ..... ... .. . 50
Exterior temperature display ........... 24
F
Fastening
Boos ter seats .. .. .. . .. .... .... .. .. 182
Co nvertib le child safety seats ........ 180
Infan t seats . . . . . . . . . . . . . . . . . . . . . . 179
Floor mats . . . . . . . . . . . . . . . . . . . . . . . . . 133
Foot peda ls ... .. .... . ... ...... ... .. 133
Fo r the sake of the environment
Gasoline fumes and t he env ironme nt .. 219
Red ucing engine noise by early upshift -
i ng ....... .. .. .. ... ............ ... 11
Ref ueling ... .... ... .. .. ..... ... .. 219
Saving f uel by early upshifting ... .. .. . 11
Fo ur- zone automatic climate control . .. . 72
Front airbags Descrip tion . . . . . . . . . . . . . . . . . . . . . . . 151
How they work . ......... ......... . 157
Frontal coll isions and the laws of physics 139
Fron t seats . . . . . . . . . . . . . . . . . . . . . . . . . 53
Adjus ting . .. .. .. .. ............... 13 0
Child rest rain ts in the front seat . ... .. 149
Fuel Additives .. .. .. .... .......... ..... 217
B lended gaso line . ............. .... 217
C u rrent cons umption .. ......... .... . 25
E conomy messages (eff icien cy program) 26
F uel fi ller flap emergency release ... .. 221
F uel fi ller neck ..... . .. .. ..... ... .. 219
Fuel gauge . . . . . . . . . . . . . . . . . . . . . . . . 12
•
•
Page 309 of 316

M N <( (.J
'SI: ,...., \!) ..,.,
,...., ..,., ,....,
_______________________________ I~ n~ d:::: e~x 307
Protecting
Q
quattro
refer to All-whee l dr ive
Question What happens to unbelted occupa nts?
Why safety bel ts? ........ .... .. .. .
R
214
200
139
138
Radiator fan ... ... .. ... ... .. .. .. .. . 233
Radio clock .... .. ...... ... .. .. ...... 27
Ra in/ light sensor
H eadlig hts . ............. .... .. .... 44
I ntermittent (windshield wipers) .. .. .. 4 8
Sensor defective . . . . . . . . . . . . . . . . . . . . 23
Range (fuel leve l) .......... .. .. .. .. .. 25
Reading lights ............. .... .. .... 47
Rear fog lights .... ..... ... .. .. .. .... 4 4
Rear lid Automatic operation . . . . . . . . . . . . . . . . 3 7
E me rgency release ........ .. .. .. .. .. 39
Rear light
Defective . . . . . . . . . . . . . . . . . . . . . . . . . 22
Rear she lf . . . . . . . . . . . . . . . . . . . . . . . . . . 64
Rear spoiler . . . . . . . . . . . . . . . . . . . . . . . . 197
Rear view camera
refer to Parking systems . . . . . . . 117, 118
Rear view mirro r .. ...... ... .. .. .. .. .. 51
R ear window heating (automat ic climate
control) . . . . . . . . . . . . . . . . . . . . . . . . . . . . 73
Rear window heating (climate control) . . . 71
Recirculation mode (automatic climate
control) . . . . . . . . . . . . . . . . . . . . . . . . . . . . 72
Recirculation mode (climate control) .. .. 70
Recuperation . . . . . . . . . . . . . . . . . . . . . . . . 25
Refue lling ..... .. .. .... ... .. .. .... . 219
Remote control Un lock ing and locking ......... ... ... 34
Repair manua ls ............ .. .. .. ... 294
Repa irs
A irbag system
Replacing 163
F uses .. ... . .... .......... ..... ... 28 1
Light bulbs . ............. .... .. .. . 284 Tires and wheels
.... .. ..... ... .. .. 261
Windshie ld wiper b lades ..... ... .. .. . 49
Repo rting Safety Defects ............. 136
Reset button .. .. .. ................. . 27
Retractor
. .. .. .. .... . ... ...... ... ..
Reve rsible mat
R ims
Cleaning 1
4 1
67
213
Roo f rack . . . . . . . . . . . . . . . . . . . . . . . . . . . 62
L oad ing ... .. .. .... . ... ...... ... .. . 63
Roof weight ..... .. . .. .. ..... ... .. . 63
s
SA FE
Safe driving habits ... .............. .
Safety be lt position . .. ... ...... ... . .
Safety be lt height adjustment ...... .
Safety belts worn by pregnant women .
Safety be lt pretensioner .. ..... ... .. . . 27
128
142
144
143
1 4 5
Service and disposa l ... .. ..... ... .. 14S
Safety be lt pretensioners
P re sense . . . . . . . . . . . . . . . . . . . . . . . . 192
Safety belts . . . . . . . . . . . . . . . . . . . . . . . . 141
Cleaning 214
Danger to passengers who do not wear a
safety belt ...... .. ............... 139
Fasten ing . . . . . . . . . . . . . . . . . . . . . . . . 141
Height ad justment ............. .... 144
Improperly worn ... . .. .. ..... ... .. 144
Not worn ... .. .... . ... ...... ... .. 139
Safety be lt position . . . . . . . . . . . . . . . . 142
Safety instructions .. ........... .... 141
Securing child safety seats .......... 184
Spec ia l considerations for pregnant
women .......................... 143
U f . n astenmg . . . . . . . . . . . . . . . . . . . . . . 143
Warning/ind icator light ............. 138
Warning light . . . . . . . . . . . . . . . . . . . . . . 17
Why YOU MUST wear them .......... 138
Worn p roperly ..... . .. .. ..... ... .. 140
Safety belt tens ioner
drive select .. .. .. .. . ....... ....... 102
Safety belt warning light ............. 138
S afe ty comp liance s tic ke r ........ .. .. 291
Safety equ ipme nt ... ............... . 128
•
•