stop start AUDI A7 2016 Owner's Manual
[x] Cancel search | Manufacturer: AUDI, Model Year: 2016, Model line: A7, Model: AUDI A7 2016Pages: 294, PDF Size: 73.82 MB
Page 114 of 294
Automatic transmi ssion
DYNAMIC driving mode in drive select
¢page 102 .
• Press the brake pedal firmly with your left food
and hold it all the way down for at le ast 1 sec
ond.
• At the same time, press the gas peda l all the
way down w ith your r ight foot u ntil the engine
reaches and stays at a high R PM level.
• Remove your foot from t he b rake pedal w it hi n 5
seconds ¢,& .
A WARNING
-Always adapt you r driving to the traffic f low.
- Only use the La unch control program when
road and t raff ic condi tions a llow i t and oth
er drivers wi ll not be endangered or both
ered by yo ur driving and t he ve hicle's acce l
eration.
- Please note that the dr ive whee ls can sp in
and the vehicle can brea k away w hen spo rt
mode is switched on, especially when the
road is slippery.
- Once the vehicle has started moving, press
the
I .$ O FF l button briefly to turn the sport
mode off.
(D Tips
- The t ransmission tempe ratu re may inc rease
significantly after using the launch control
program. If that happens, the program may
not be available for a few minutes. It will be
ava ilable again after a coo l-down period .
- When accelerat ing using the launch contro l
program, all vehicle pa rts a re subject to
heavy loads. This can lead to increased wear .
Transmission malfunction
DD Transmission : Please press brake pedal and
s el ect gear again .
Press the brake pedal and se lect the desired se
lecto r leve r posit io n aga in . Yo u can then continue
d riving.
[O] Transmiss ion overhe ating: Please drive con
servativ ely.
112
The transm ission temperat ure has inc reased s ig
nificantly d ue to the sporty driving manner. Drive
i n a less sporty manne r until the temperature re
turns to the normal range and the indicator light
switches of.
DD Transmission malfunction: you can continue
driving
The re is a system mal func tion in the t ransm is
s ion . You may contin ue driving . Drive to yo ur au
thorized Audi dea ler or a uthorized Audi Se rvice
Fac ility soon to have the ma lfunction corrected.
DD Trans mission malfun ction : You can continue
driving with limited functionality
There is a system malfunct ion in the t ransm is
s io n. The t ransm ission is swi tching to eme rgency
mode. This mode on ly shifts in to cer tain gears or
will no longer shift at al l. The engine may stall.
D rive to an authorized A udi dealer o r authorized
Audi Service Facility immed iate ly to have the
malfunction corrected.
DD m Trans mission malfunction: No reverse
gear. You can continue driving
S tronic tra nsmission: The re is a system malfunc
tion in the tr ansmission . Th e transmission is
swi tching to emergency mode. This mode on ly
shifts into certain gears or will no longer shift at
a ll. The eng ine may stall. Yo u cannot engage the
r everse gea r. Drive to an aut hori zed Aud i dea ler
or a uthori zed Audi Service Facility immedia tely to
have the malfunct ion corrected .
DD Transmission malfunction: Stop veh icle and
shift to park.
Do not con tinue driving . Se lect the P selector lev
e r position and see an authorized A udi dealer or
a utho riz ed Aud i service facility for assistance .
([) Note
If the transmission has switched to eme rgen
cy mode, drive to you r aut ho rize d Aud i dea le r
i mmediately to have the ma lf u nction co rrect
ed.
Page 120 of 294

Parking systems
• While driving in reverse gear, adjust the steer
ing wheel angle to fit the parking space with
the a id of the orange orientation lines ~
A in
General information on page 116,
c::> (D in Gen
eral information on page 117.
® displays the
rear bumper . Stop the vehicle, at the latest,
whe n the red orientation line@ borders an ob
ject .
Parallel parking
Applies to vehicles: with rearv iew camera
This view may be used when parallel parking
along the side of a street.
F ig. 129 In fotainme nt: blue surface a lig ned w it h park ing
spot
F ig . 1 30 In fota inme nt: co nta ct of the b lue curved line w it h
the c urb
Parking on the right is described here. It is identi
cal whe n pa rking on the left.
If there is an obstacle next to the park ing space
(such as a wall), refer to "Information for pa rk ing
next to obstacles"
c::> page 118 .
• Activate the turn s ignal.
• Position your vehicle next to a parked vehicle in
front of the desired park ing space . The distance
118
to this vehicle should be approximately 3 ft (1
m).
• Turn the Infotainment on and shift into reverse
gear. The parking system is turned on and the
cross parking view is displayed .
• Press the control button on the Infota inment
un it ©
c::> fig. 129 . The parallel parking indica
tor is d isp layed .
• Backup and align your veh icle so the blue area
@ borders on the rea r end of the vehicle beh ind
you or on the parking space line
c::> A in Gener
al information on page 116,
c::> (D in General in
formation on page 117 .
The blue area repre
sents an extension of the vehicle's outline by
approx imately 16 ft (5 meters) to the rear. The
long side of the blue area should be on the
curb . The entire b lue area must fit into the
parking space.
• With the vehicle stopped, turn the steering
wheel to the right as far as it will go.
• Backup into the park ing spot. When the b lue
curve
c::> fig. 130 is near the curb c::> A in Gener
al information on page 116,
stop the vehicle
c::> Q) in General information on page 117 .
• With the vehicle stopped, turn the steering
wheel to the left as far as it w ill go.
• Continue to back into the parking space until
the vehicle is parked parallel to the curb
c::> A
in General information on page 116, c::> (D in
General information on page 117.@
disp lays
the rear bumper. Stop the vehicle, at the la test,
when the red orientat ion line @ borders an ob
ject . Keep an eye on the fron t of your vehicle
while doing this.
Parking next to obstacles
When there is an obstacle (such as a wall) next to
the parking space, choose a space with more
space on the s ides. Position the long side of the
blue surface so that there is sufficient space from
the obstacle . The surface must not be touching.
You w ill also need to start turn ing the steering
whee l much earlier . The blue curve
c::> fig. 130
must not touch the obstacle, but rather there
should be enough distance.
Page 125 of 294
M N <( I.J "". rl I.O
"' N I.O rl
to this vehicle should be approximately 3 ft (1
m) .
.. Turn the Infotainment on and shift into reverse
gear. The parking system is turned on and the
cro ss park ing view is d isplayed .
.. Press the contro l button on the Infotainment
unit @
c::>page 118, fig . 129. T he par all el park
ing
ind icator is displayed .
.. Back up and align you r vehicle so the b lue area
@ borders on the rear end of the vehicle behind
you or on the parking space line
c::> .&. in Gener
al information on page 119,
c::> (j) in General in
formation on page 119 .
The blue area repre
sents an extension of the vehicle 's outline by
approximately
16 ft (5 meters) to the rear . The
long side of the blue area should be on the
curb . The entire blue area must fit into the
parking space .
.. With the vehicle stopped, turn the steer ing
wheel to the right as far as it w ill go .
.. Back in to the park ing space u ntil the b lue curve
c::> page 118, fig. 130 touches the curb c::> .&. in
General information on page 119,
c::> (D in Gen
eral information on page 119 .
Stop the vehicle.
.. With the vehicle stopped, turn the steer ing
wheel to the left as far as it will go .
.. Continue to back into the park ing space unt il
the vehicle is parked parallel to the curb
c::> ,&
in General information on page 119, c::> (D in
General information on page 119. @
displays
the rear bumper . Stop the vehi cle, at the latest,
when the red or ientation line @borders an ob
ject . Keep an eye on the front o f you r vehicle
whi le doing this .
Parking n ext to obstacles
When there is an obstacle (such as a wall) next to
the park ing space, choose a sp ace with more
space on the sides. Position the long side o f the
b lue area so that there is sufficient space from
the object . The area must not be on the curb. You
will also need to start turning the steering wheel
much earlier. The blue curve
c::> page 118, fig . 130
must not touch the obstacle, but rather there
should be enough distance .
Parking systems
(D Tips
The left or right orientation lines and s urfaces
will be d isp layed, depending on the turn s ig
nal be ing used.
Trailer mode
Applies to vehicles: with peripheral cameras and trailer hitch
This view assists you in positioning the vehicle in
front of a trailer .
Fig. 14 3 Infota inmen t: rear mode
Requirement: Trailer mode is selected
c::> page 121 .
.. Now you can posit ion your veh icle in front of
the trailer
c:> .&. in General information on
page 119,
c::> (D in General information on
page 119 .
The orange colored orientation line
denotes the expected path toward the trailer
hitch . Use the bl ue li nes to he lp you est imate
t he distance to the trailer h itch.
Setting the mode
Applies to vehicles: with peripheral cameras
.. Select: I CAR I function button > (Car )* Syst em s
contro l butto n > Driver a ssist > Parking aid >
Change to front /re ar > Auto or M anual.
Auto -
This view behind the vehicle (Rea r mode)
is disp layed automatically when you shift into re
verse. This view in front of the vehicle
( Front
mode) is displayed automatically when you shift
into the forward gears.
Manu al -When you switch the system on, the
view behind the ve hicle
(Re ar mode) is always
displayed and it does not switch to the
F ro nt
mode when a forward gear is selected.
123
Page 199 of 294

M N <( (.J
'SI: ,...., \!) 1.1"1
N \!) ,....,
CD Note
-Vehicle components such as the engine ,
transmission, suspension or e lectr ical sys
tem can be severe ly damaged by driving
through water .
- Always switch the Start-Stop -System* off
when driving through water
c> page 80.
@ T ips
- Determine the depth before driving through
water.
- Do not stop the vehicle, drive in reverse or
switch the eng ine off when driving through
water.
- Keep in mind that oncoming vehicles may
create waves that raise the water level and
make it too deep for your vehicle to drive
through safely.
- Avoid driving through sa lt water (corrosion).
Catalytic converter
Applies to vehicles: with gasoline engine
It is very impor tan t tha t your emission control
system (catalyti c converter) is functioning prop
erly to ensure that your vehicle is running in an
environmentally sound manner .
... Always use lead-free gasoline c> page 210,
F uel supply .
... Never run the tank down all the way to empty .
.,. Never put too much motor oil in your engine
c> page 222, Adding engine oil~-
.,. Never try to push- or tow-start your veh icle.
The catalytic converter is an eff icient "clean-up"
dev ice bu ilt into the exhaust system of the vehi
cle . T he catalytic converter burns many of the
pollutants in the exhaust gas before they are re
l eased into the atmosphere.
The exclusive use of unleaded fuel is cr itically im
portant for the life of the catalyt ic converte r and
proper functioning o f the eng ine .
A WARNING
The temperature o f the exhaust system is
high, both when driving and after stopping
the engine .
Driving and th e en vir onm ent
- Never touch the exhaust tail pipes once they
have become hot. Th is could resu lt in burns.
- Do not park or operate the vehicle in areas
where the hot exhaust system may come in contact w ith dry grass, brush, fuel spill or
other material which can cause a fire.
- Do not app ly additional undercoating or
rustproofing on or near the exhaust mani
fold, exhaust pipes, catalytic converter or heat shields . During dr iving, the substance
used for undercoat ing could overheat and
cause a fire .
CD Note
-Be aware that just one tank filling with lead
ed
fuel w ill already ser iously degrade the
performance of the catalyt ic converter .
- Do not exceed the correct engine oil level
¢ page 222.
-Do not drive until the fuel tank becomes
completely empty . The engine cou ld misfire .
Unburned fuel could also get into the ex
haust system and this cou ld cause the cata
lyt ic converter to overheat.
- Do not switch off the ignit io n while the veh i
cle is movi ng.
- Do not continue to ope rate your veh icle un
der these conditions, as othe rwise f uel can
reach the catalytic converter . This could re
sult in overheating of the co nve rter , requ ir
ing its replacement .
- T o assu re eff icient operation of the Emission
Contro l System:
- Have your vehicle maintained properly and
in accordance w ith the serv ice recommen
dat ions in your Warranty
& Maintena nce
booklet .
- Lack of proper maintenance as we ll as im
p roper use of the vehicle will impair the
function of the emission control system
and could lead to damage.
@ For the sake of the environment
Even when the Emiss ion Control System is op
erating properly, the exhaust gas can have a
su lfu r-like exhaus t gas sme ll unde r some op
erating states. Th is depends on the s ulf ur
197
Page 201 of 294
M N <( (.J
'SI: ,...., \!) 1.1'1
N \!) ,....,
Reducing unnecessary idling
Even when your car is just idling it burns up fuel.
~ Shut the engine off when you are not driving
the vehicle.
~ Do not warm up the vehicle by letting the en-
gine run at idle .
The idling phase is automatically reduced for
veh icles with the Start-Stop-System . It is effi
cient to switch off the engine in vehicles without
the Start-Stop-System when stopped at railroad
crossings and long red lights. Turning the engine
off for just 30-40 seconds saves more fuel than is
burned by starting the engine again.
It takes a long time for the engine to warm up
fully when it is running at idle . However, wear
and noxious emissions are especially high when
the engine is warm ing up. So you shou ld drive
away as soon as you start the engine and avoid
running at high rpms while the engine is still
warming up .
(D Note
Do not leave engine idling unattended after
starting. If warning lights should come on to
indicate improper operation, they would go
unheeded. Extended idling a lso produces
heat, wh ich could resu lt in overheating or oth
er damage to the vehicle or other property.
Regular maintenance
A badly tuned engine unnecessarily wastes a lot of fuel.
~ Have your vehicle serviced at regular intervals.
By having your vehicle regularly serviced by an
Aud i dea ler helps to ensure that it runs properly
and economica lly. The condition of your vehicle
not only affects its safety and ability to hold its
value, it a lso affects fuel consumption .
Check your oil each time you fill your tank.
The amount of oil used is related to engine load
and speed.
Driving and the environment
It is normal for the oil consumption of a new en
gine to reach its lowest value after a certain mile
age has been driven.
You must drive your veh icle about 3,000 miles
(5,000 kilometers) before you can properly as
sess oil consumption .
T h is also applies to fuel consumption and engine
o ut put .
CD Note
- Have your vehicle maintained properly and
in accordance with the service recommenda
tions in your Warranty
& Maintenance book
let . Lack of proper maintenance as well as
improper use of the vehicle will impair the
function of the em ission contro l system and
cou ld lead to damage.
- Do not alter or remove any component of
the Emission Control System unless ap
proved by the manufacturer.
- Do not alter or remove any device, such as
heat shields, sw itches, ignition wires,
valves, which are designed to protect your
vehicle's Emission Control System and other important vehicle components .
Fewer short trips
Fuel consumption will always be relatively high
on short trips .
~ Try to avoid dr iv ing short distances w ith a co ld
eng ine .
The engine and cata lytic converter have to reach
their optimal operating temperature to reduce
fuel consumpt ion and nox ious em issions effec
t ively.
Just after starting, a co ld engine in a mid-size car
only achieves a fuel economy of 6-8 mi les per
gallon (30-40 l/100 km) . After about a half a
mile, fuel economy climbs to 12 mpg (20 l/100
km). After about
2.5 miles (4 km), the eng ine is
at its proper operating temperature and fuel
economy has reached a norma l level. So you can
see that you should avoid short trips whenever
poss ible. .,.
199
Page 205 of 294

M N <( (.J
'SI: ,...., \!) 1.1'1
N \!) ,....,
braking effect to slow the vehicle. Use of the
brakes alone can cause them to overheat and fail.
Air suspension*
When driving with a trailer, activate the trailer
mode of the air suspension. Switch the air sus
pension trailer mode on when you are towing a
trailer. This will limit the regulation by the air
suspension while driving. Select in the MMI:
ICARI function button > (Car)* systems control
button>
Vehicle settings> Air susp.: towing>
On.
Coolant temperature
The coolant temperature gauge c::> page 10 must
be observed carefully. The coolant temperature
can increase if you drive on long inclines in a low
gear at high engine speeds . Reduce your speed
immediately if the LEDs in the top part of the dis
play turn on .
For more information about indicator lights, re
fer to.
c::> page 15.
A WARNING
Anyone not properly restrained in a moving
vehicle is at a much greater risk in an acci
dent . Never let anyone ride in your car who is
not properly wearing the restraints provided
by Audi.
Trailer mode notes
Important to know
-
Your vehicle handles differently when towing a trailer because of the additional weight and dif
ferent weight distribution . Safety, performance
and economy will greatly depend on how careful
ly you load your trailer and operate your rig.
Before you actually tow your trailer, practice
turning, stopping and backing up in an area away
from traffic . Keep practicing until you have be
come completely familiar with the way your vehi
cle-trailer combination behaves and responds.
Backing up is difficult and requires practice. Back
ing up with a trailer generally requires steering
Trailer mode
action opposite to that when backing up your ve
hicle without a trailer.
Maintain a greater distance between your vehicle
and the one in front of you . You will need more
room to stop. To compensate for the trailer, you
will need a larger than normal turning radius.
When passing, remember that you cannot accel
erate as fast as you normally would because of
the added load. Make sure you have enough room
to pass. After passing, allow plenty of room for
your trailer before changing lanes again.
Avoid jerky starts, sharp turns or rapid lane
changes.
(D Tips
- Do not tow a trailer during the break-in peri
od of your vehicle.
- If you tow a trailer, your Audi may require
more frequent maintenance due to the ex
tra load
c::> page 2 7 4.
Parking on a slope
Do not park on a slope with a trailer. If it cannot
be avoided, do so only after doing the following:
When parking:
" Apply the foot brake.
" Have someone place chocks under both the ve
hicle and the trailer wheels.
"With chocks in place, slowly release the brakes
until the wheel chocks absorb the load.
"Turn the wheels towards the curb.
... Apply the parking brake.
"Select the P selector lever position.
When restarting after parking:
"Apply the foot brake.
"Start the engine.
"Select the D/S selector lever position.
"Release the parking brake and slowly pull out
and away from the wheel chocks.
"Stop and have someone retrieve the wheel
chocks .
203
Page 217 of 294
M N <( I.J "". rl I.O
"' N I.O rl
Messages in the instrument cluster display
Applies to vehicles: with selective catalyt ic reductio n
The display indicates if the Ad Blue level is low or
if there is a system malfunction .
AdBlue level low
You will be informed if the Ad Blue in the tank
drops be low a certain level.
Please refill Ad Blue. Range 1500 mi (2400 km )
This message appea rs whe n there is o nly enoug h
Ad B lue left to dr ive the d ist ance ind icated in the
d river i nfo rmation sys tem . Fill the AdBl ue.
Ad Blue ,0 Refill AdBlue! No restart in 600 mi
( 1000 km)! See owner 's manual
This message appea rs when there is o nly enoug h
Ad Blue left to dr ive the distance indicated in the
d river info rmation system . Fill the Ad Blue . Othe r
wise the eng ine will not sta rt again if you s top it
once the di stan ce in dicated ha s been driven. You
can also check t he rem ain ing distance in the on
board comp ute r*.
Refill Ad Blu e! No restart! See own -
er' s manual
This message appea rs whe n the AdBlue tank is
empty . Fill t he AdBl ue. Othe rw ise you w ill not be
ab le to start the engine aga in once yo u stop it.
T he AdBlue must be refi lled when t he amo unt in
the tank has reac hed the m inimum leve l
q page 215, Filling Ad Blue .
Incorrect filling/system malfunction
A message appears if the AdBl ue tank was filled
with a fluid other than AdBlue and the system has detected t hat the ta nk was f illed incor rectly,
or if there is a sys tem ma lf u nction .
Ad Blue -I' Ad Blue: System fault! No restart in
600 mi (1000 km). See owner's manual.
This message appea rs when it is only poss ible to
drive the d istance ind icated in the dr iver informa
tion system. Drive to the nearest authori zed Audi
dealer or authorized Aud i Service Fac ility to have
the ma lfunction corrected . Otherwise the engine
w ill not start aga in if you stop it once the dis
tance ind icated has been driven .
Fuel and Refueling
AdBlue: System fault No restart!
See owner's manual
T his mes sage ap pea rs if t he system h as detec ted
t h at the t ank was fi lled incor rectly o r tha t there
is a ma lf u nction . Drive immed iate ly to the near
est authorized A udi dealer or autho rized A udi
Se rv ice Facility to have the ma lf u nction co rrect
ed. Otherwise yo u will not be ab le to start the en
gine aga in once you stop it .
Filling AdBlue
Applies to vehicles: with selective catalytic reduction
Fig. 184 Rig ht rea r ve hicle s ide: re m oving t he AdB lu e cap
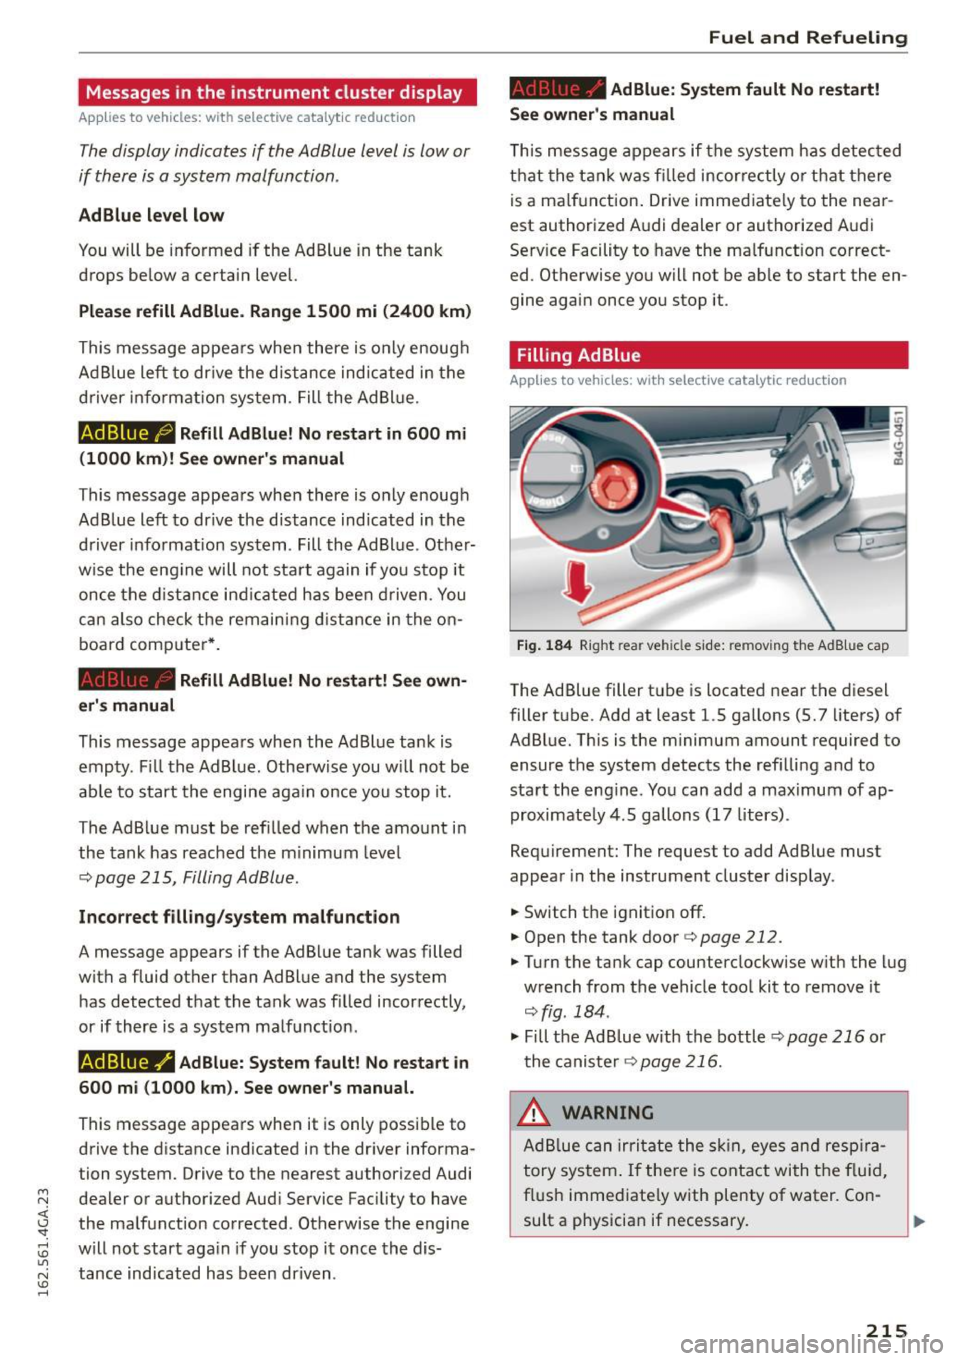
The Ad Blue filler t ube is located near the diesel
filler t ube . Add at least 1.5 ga llons (5.7 liters) of
AdBl ue. This is the m inimum amount required to
ensure the system detects the refi lling a nd to
start the eng ine . Yo u can add a max imum of ap
proximate ly 4.5 gallons (17 liters) .
Req uirement: The request to add Ad Blue must
appear in the instrument cluster display .
.. Switch t he ignit ion off .
.. Open the tank door
q page 212.
.,. Turn the tank cap counterclockwise w it h the lug
w rench from the vehicle too l kit to remove it
q fig . 184 .
.,. Fill the Ad Blue with th e bottl e ~ page 216 or
the caniste r<=>
page 216.
.&_ WARNING
Ad Bl ue can irri tate the skin , eye s and respira
tory sys tem . If the re is con tact with t he flu id,
f lush imme diate ly w ith plenty of water. Co n-
su lt a physicia n if necessary. .,,_
215
Page 221 of 294
M N <( (.J
'SI: ,...., \!) 1.1'1
N \!) ,....,
-Do not remove the engine cover under any
circumstances. This increases the risk of
burns.
- If work on the fuel system or the electrical
system is necessary :
- Always disconnect the battery.
- Never smoke or work near heaters or open
flames . Fluids in the engine compartment
could start a fire.
- Keep an approved fire extinguisher imme
diately available.
- To avoid electrical shock and personal injury
while the engine is running or being started,
never touch:
- Ignition cables
- Other components of the high voltage
electronic ignition system.
-If you must perform a check or repair with
the engine running:
- First, fully apply the parking brake, move
selector lever to P (Park).
- Always use extreme caution to prevent
clothing, jewelry, or long hair from getting
caught in the radiator fan, V-belts or other moving parts, or from contacting hot
parts. Tie back hair before starting, and do
not wear clothing that will hang or droop
into the engine.
- Minimize exposure to emission and chemi
cal hazards ¢.&. .
..&, WARNING
California Proposition 65 Warning:
- Engine exhaust, some of its constituents,
and certain vehicle components contain or
emit chemicals known to the State of Cali
fornia to cause cancer and birth defects and
reproductive harm. In addition, certain flu
ids contained in vehicles and certain prod
ucts of component wear contain or emit
Checking and Filling
chemicals known to the State of California
to cause cancer and birth defects or other
reproductive harm.
- Battery posts, terminals and related acces
sories contain lead and lead compounds,
chemicals known to the State of California
to cause cancer and reproductive harms.
Wash hands after handling .
([) Note
When adding fluids, always make sure that
they are poured into the proper container or
filler opening, otherwise serious damage to
vehicle systems will occur .
® For the sake of the environment
To detect leaks in time, inspect the vehicle
floor pan from underneath regularly. If you
see spots from oil or other vehicle fluids, have
your vehicle inspected by an authorized Audi
dealer .
Closing the engine hood
.,.. Pull the hood down until the pressure from the
struts is reduced.
.,.. Let the hood
drop down and latch in place. Do
not try to push it shut;
it may fail to engage
¢ ,& .
..&, WARNING
--A hood that is not completely latched could
fly up and block your view while driving .
- When you close the engine hood, check it to
make sure the safety catch has properly en
gaged . The hood should be flush with the
surrounding vehicle body parts .
- If you notice while driving that the hood is
not secured properly, stop at once and close
it .
-
219
Page 233 of 294
M N <( (.J
'SI: ,...., \!) ..,.,
N \!) ,....,
(D Note
Never use a fast charger as a booster to start
the engine . This w ill seriously damage sensi
tive electron ic components, such as control
units, relays, radio, etc., as well as the battery
charger.
Battery replacement
The new battery must have the same specifica
tions and dimensions as the original equipment
battery .
Intelligent energy management in your vehicle is
responsible for distributing the electrica l energy
throughout your vehicle
c:> page 194. The intell i
gent energy management system will keep the
engine battery charged better than vehicles w ith
out this system . To make sure the additional elec
tr ical energy is available once again after you
have changed the battery, we recommend that
you install batteries of the same type and manu facture only (the same as those installed at the
time your veh icle was delivered). Specif ications
are listed on the battery housing. Your author
ized dealer must code the battery in the energy
management system to enable you to use the en
e rgy management functions correctly after re
p lacing the battery.
The new battery must have the same capacity ,
voltage (12-volts), amperage, construction and plug sealing .
When installing the battery, make sure the igni
tion and all electrical consumers are switched off.
Make sure the ventilation hose on the s ide of
the battery is connected, otherwise fumes or
battery acid can leak out.
- Vehicles with the Start-Stop-System* are equipped with a special cycle-proof AGM battery. Installing a different type of bat
tery can cause problems in the vehicle elec
trical system. When replacing the vehicle
battery, always install one with the same
specifications as the original battery.
Checking and Filling
{® For the sake of the environment
Because of the prob lem of proper disposal of
a battery, we recommend your authorized
Audi dealer change the battery for you. Bat
teries contain sulfur ic acid and lead and must
always be disposed of properly in compliance
with all environmental regulations. Disposing
of vehicle batteries improperly is very danger
ous to the environment.
Windshield/headlight
washer container
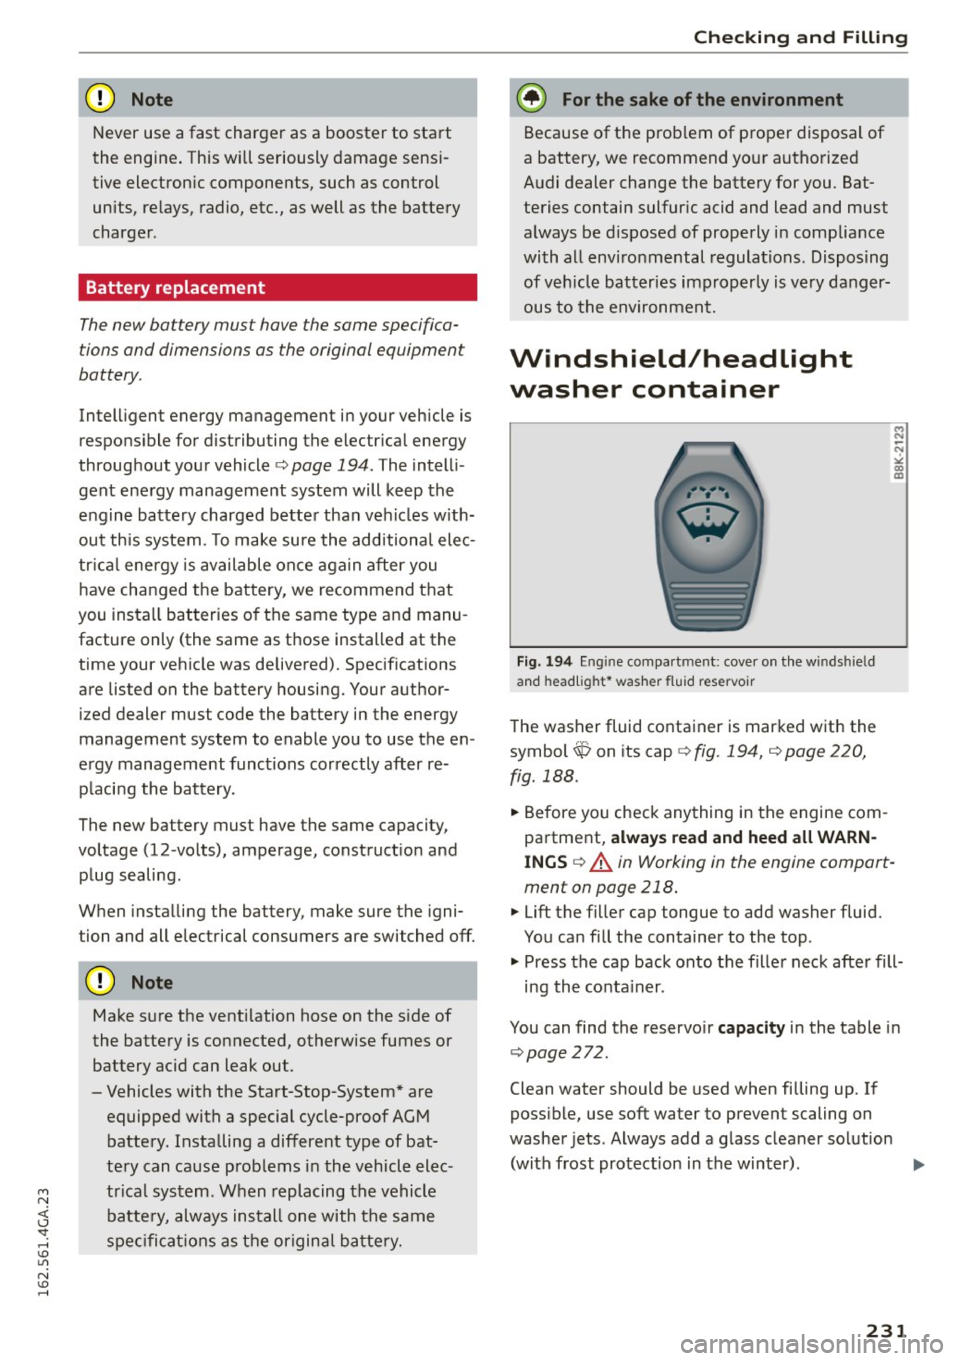
Fig. 194 Engine compa rtment: cover on the winds hie ld
and head lig ht* washer fluid reservoir
The washer fluid container is marked with the
symbol
ip on its cap c:>fig. 194, c:>page 220,
fig. 188.
.. Before you check anything in the engine com
partment,
always read and heed all WARN
INGS c:> .&. in Working in the engine compart
ment on page 218.
.. Lift the filler cap tongue to add washer fluid.
You can fill the container to the top .
.. Press the cap back onto the filler neck after fill-
ing the container .
You can find the reservoir
capacity in the table in
c:>page272.
Clean water should be used when filling up. If
possible, use soft water to prevent scaling on
washer jets. Always add a g lass cleaner solution
(with frost protection in the winter) . ..,.
231
Page 253 of 294
M N <( I.J "". rl I.O
"' N I.O rl
_& WARNING
Temperature grades apply to tires that are properly inflated and not over or underinflat
ed .
Tire pressure monitoring
system
CD General notes
Each tire, includ ing the spare (if provided),
should be checked monthly when cold and inflat
ed to the inflation pressure recommended by the
vehicle manufacturer on the vehicle placard or tire inflation pressure label. (If your veh icle has
tires of a different size than the size indicated on
the vehicle placard or tire inflation pressure la
be l, you shou ld determine the proper tire infla
tion pressure for those tires).
As an added safety feature, your vehicle has been
equipped with a tire pressure monitoring system
(TPMS) that illuminates a low tire pressure tell
tale when one or more of your tires is significant ly under -inflated. Accordingly, when the low tire
pressure telltale illuminates, you should stop and
check your tires as soon as poss ible, and inflate
them to the proper pressure. Driving on a signifi cantly under-inflated tire causes the tire to over
heat and can lead to t ire failure. Under-inflation
also reduces fuel efficiency and tire tread life,
and may affect the vehicle's handling and stop
ping ability .
Please note that the TPMS is not a substitute for
proper tire maintenance, and it is the driver's re
sponsib ility to ma inta in correct tire pressure,
even if under-inflation has not reached the level
to trigger illuminat ion of the TPMS low t ire pres
sure telltale.
Your vehicle has also been equ ipped with a TPMS
malfunction indicator to indicate when the sys
tem is not operating properly. The TPMS mal
function indicator is combined with the low tire
pressure telltale. When the system detects a
malfunction, the telltale will flash for approxi
mately one minute and then remain continuously
illuminated . This sequence will cont inue upon
Wheels
subsequent vehicle start -ups as long as the mal
function exists.
When the malfunction indicator is illuminated ,
the system may not be able to detect or signal
low tire pressure as intended . TPMS malfunctions
may occur for a variety of reasons, including the
i nsta llation of replacement or alternate tires or
wheels on the vehicle that prevent the TPMS
from functioning properly. Always check the
TPMS malfunction telltale after replacing one or
more t ires or wheels on your veh icle to ensure
that the replacement or alternate t ires and
whee ls allow the TPMS to continue to function
properly.
If the Tire Pressure Monitoring System
indicator appears
The tire pressure indicator in the instrument
cluster informs you if the tire pressure is too low
or if there is a system mo/function .
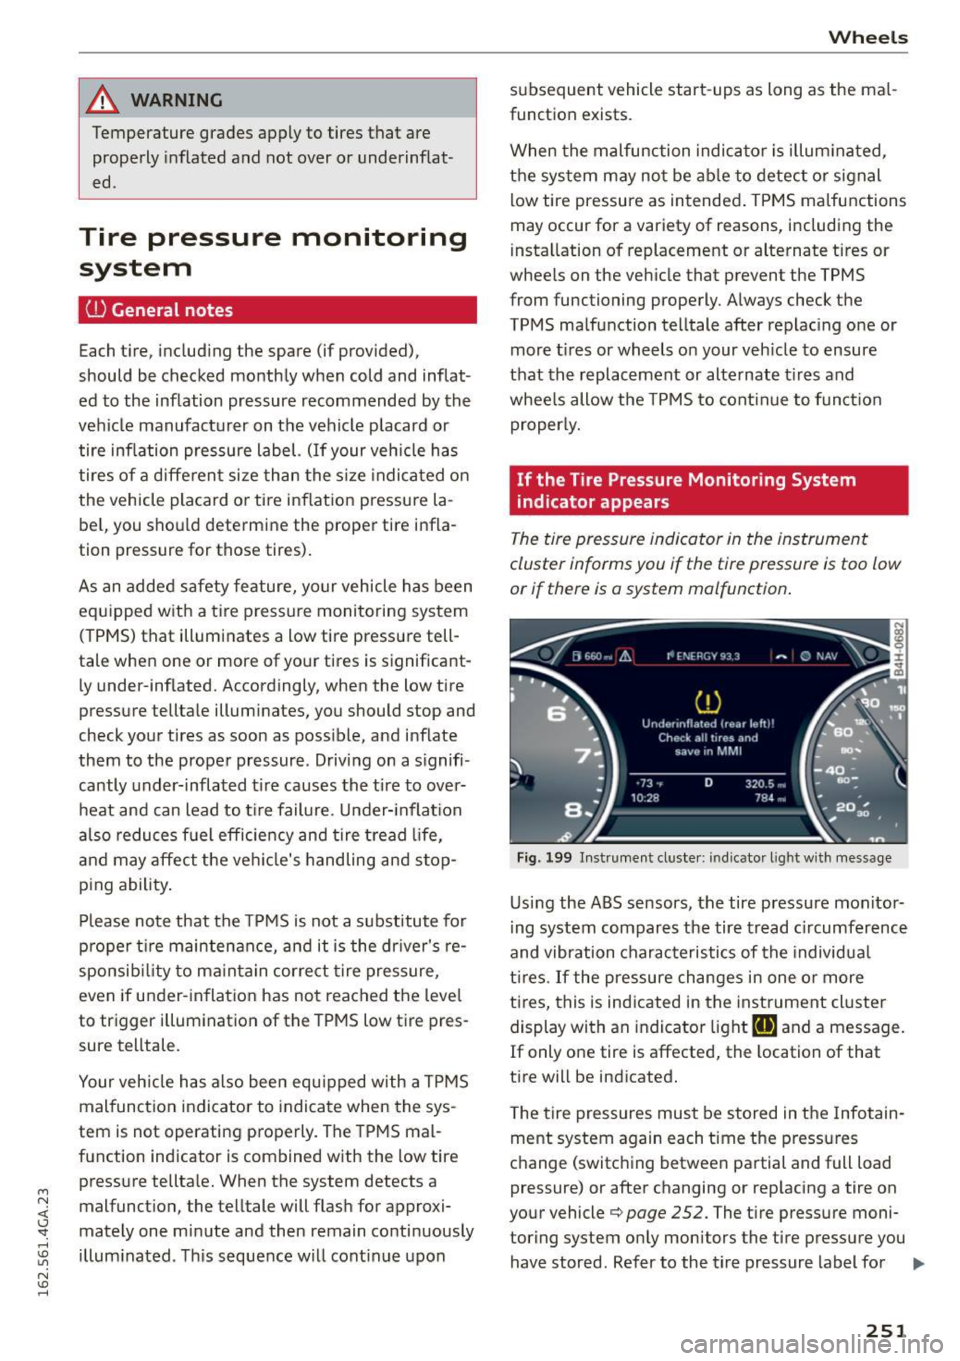
Fig. 199 Instrument cluster: indicator light with message
Using the ABS sensors, the tire pressure monitor
ing system compares the tire tread circumference
and vibration characteristics of the individual
tires . If the pressure changes in one or more
t ir es, this is indicated in the instrument cluster
display with an indicator light
HE and a message.
If only one tire is affected, the location of that
tire will be indicated.
T he tire pressures must be stored in the Infotain
ment system again each time the pressures
change (switching between partial and full load
pressure) or after changing or rep lacing a tire on
your vehicle
¢ page 252. The ti re pressure moni
toring system only monitors the tire pressure you have stored. Refer to the tire pressure label for ..,.
251