stop start AUDI A7 2021 Owner´s Manual
[x] Cancel search | Manufacturer: AUDI, Model Year: 2021, Model line: A7, Model: AUDI A7 2021Pages: 350, PDF Size: 126.66 MB
Page 4 of 350
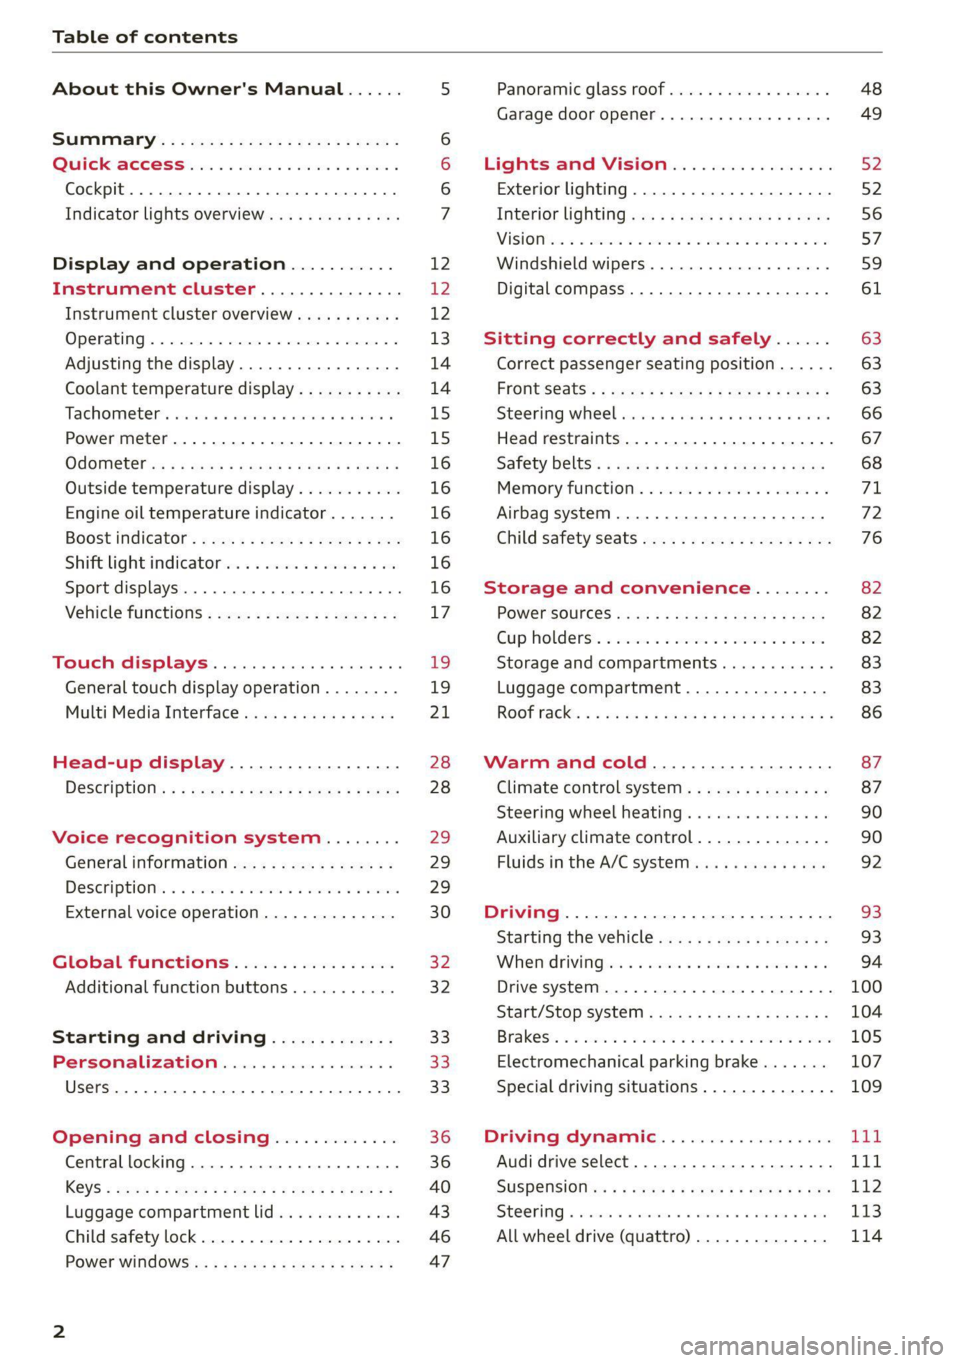
Table of contents
About this Owner's Manual......
SUMIMAry: < = exe : eens: Seen cs sens
QutckeaeCe ssh: «i esis se ois a eaves @
Cockpit. ...... 0... eee eee eee eee
Indicator lights overview...........4..
Display and operation...........
Instrument cluster...............
Instrument cluster overview...........
Operating. ecccuse w+ were oo wens oo ayes 9 ¥
Adjusting the display.................
Coolant temperature display...........
Tachometer’ series i ewe so snes ¥ & ome
Power meter...............0 00000005
QdOMe@ter a: =e giws + pases 2 pees se Hees <
Outside temperature display...........
Engine oil temperature indicator.......
Boost indicator’: 2 2c« «= sesa ¢ x sews «x 2x8
Shiftilightindicator ics «+ sca + 2 oman 2 6 ox
Sport displays...............0 eee eee
Vehicle functions............-.00-005
Touch displays.................008
General touch display operation........
Multi Media Interface................
Head-up display..................
Descriptionis: ss gem = x eames ¢ eee ge eee
Voice recognition system........
General information.................
DeSeriptionis = ssssas « « wens s + eres « + aes
External voice operation..............
Global functions.................
Additional function buttons...........
Starting and driving.............
Personalization..................
Luggage compartment lid.............
Child safety lock.............0...000.
POWEr WIKdOWS 6: «oxen se aes ye eee
NOD
OO
12 12 12
13
14 14
15 15
16
16
16
16
16
16 17
1
19
21
28 28 29 29
29
30
32 32 33 33 33
36 36
40
43
46 47
Panoramic glass roof................. 48
Garage door opener..........--.00 eee 49
Lights and Vision................. 52
Exterior lighting...................4. 52
Interior liQhting ss =e aves ss eews so eos 56
ViSIOMsn « 3 ses 3 3 ema oo wena vo ae © ove 57
Windshield wipers.............-..45- 59
Digital compass.............-.-0000- 61
Sitting correctly and safely...... 63
Correct passenger seating position...... 63
Frontseats:: » ssw. « ¢ sews & » saws +s ewe < 63
Steering wheel seis < «cies ¥ eerie ss eee 66
Head restraints.................0000. 67
Safety Beltsi: s sass x eeups ¢ < saves 2 e cee 68
Memory function . « scons ecw ee cro ee 71
Airbag system... ... 2.62... 0 ee eee eee 72
Child safety seats.................04- 76
Storage and convenience........ 82
POWErSOURCES coisa gs seen ss wae se aes 82
Gup holders. ¢ ssn ss wee 2 2 see 2 & pee 82
Storage and compartments............ 83
Luggage compartment............... 83
ROOF hacks « = weies x = wae 2 s eae 2 & ween 2 86
Warm and cold.................45 87
Climate control system............... 87
Steering wheel heating............... 90
Auxiliary climate control.............. 90
Fluids in the A/C system. .........0065 92
Driving .............. 0.0... eee eee 93
Starting the vehicle...............0.0. 93
When driving isis ss iovsvie se aerswce oo anes oe 94
Drive system... 2.2... ee eee eee eee 100
Start/Stop system .........ee cece eee 104
BrakeS's so isemi 2 wane w aman a 2 oer as ie 105
Electromechanical parking brake....... 107
Special driving situations.............. 109
Driving: dynamic. . « sic. 6 6 see a 6 se Ld
Audi drive select..................00. Tay
SUSPENSION es « + exes ¢ ¢ eres +o ees vv eae 112
SUECOKING « wvessse oo csisweue 6 & saouwun 6 a atonae 6 WB 113
All wheel drive (quattro) .............. 114
Page 9 of 350
4K8012721BF
Quick access
PESOGKEH oo cscieie vw encase vo asveame v a ae 82
— Vehicle key holder
@_ Depending on equipment:
— Starting the engine if there is a
MAlFUNCCION gsc ¢ 2 xawa x s geen a 5 94
— Audi musicinterface .......... 238
— Audi phone box ............... 199
@9 Electromechanical parking brake
BUttON asso «a asowces 0 x amowinte x 3 awssni Y 107
@2 Automatic transmission selector
LOVER arcane oo arnene mn emma os mao Ka 95
@ START ENGINE STOP] button .... 93
@3) Steering wheel adjustment ...... 66
@4 Lever for:
— Cruise control system ......... 151,
— Adaptive cruise assist .......... 154
@5) Connection port for the On Board
Diagnostic System (OBD) ........ 321
@8) Buttons for:
—Lights ..................004. 52
—All-weather lights ............ 52
—Rear fog lights ............... 52
@) Hood release .............0.0.. 261
Button for:
— Luggage compartment lid ...... 43
— Fuel filler door release (plug-in
hybrid drive): : ssc scses s swan 256
@9) Exterior mirror adjustment ...... 57
69 Buttons for:
— Power windows ............0. 47
—Child safety lock .............. 46
@) Tips
Some the equipment listed here is only instal-
led in certain models or is available as an op-
tion.
Indicator lights overview
The indicator lights in the instrument cluster
blink or turn on. They indicate functions or mal-
functions. Some warning and indicator lights
turn on when you switch the ignition on and must
turn off when the drive system is switched on or
while driving.
With some indicator lights, messages may ap-
pear and warning signals may sound. The indica-
tor lights and messages may be covered by other
displays. To show them again, select the second
tab for messages with the multifunction steering
wheel > page 13.
Some indicator lights in the display can display in
several colors.
OMe eee any
If the wA or N indicator light turns on, check
the message in the instrument cluster.
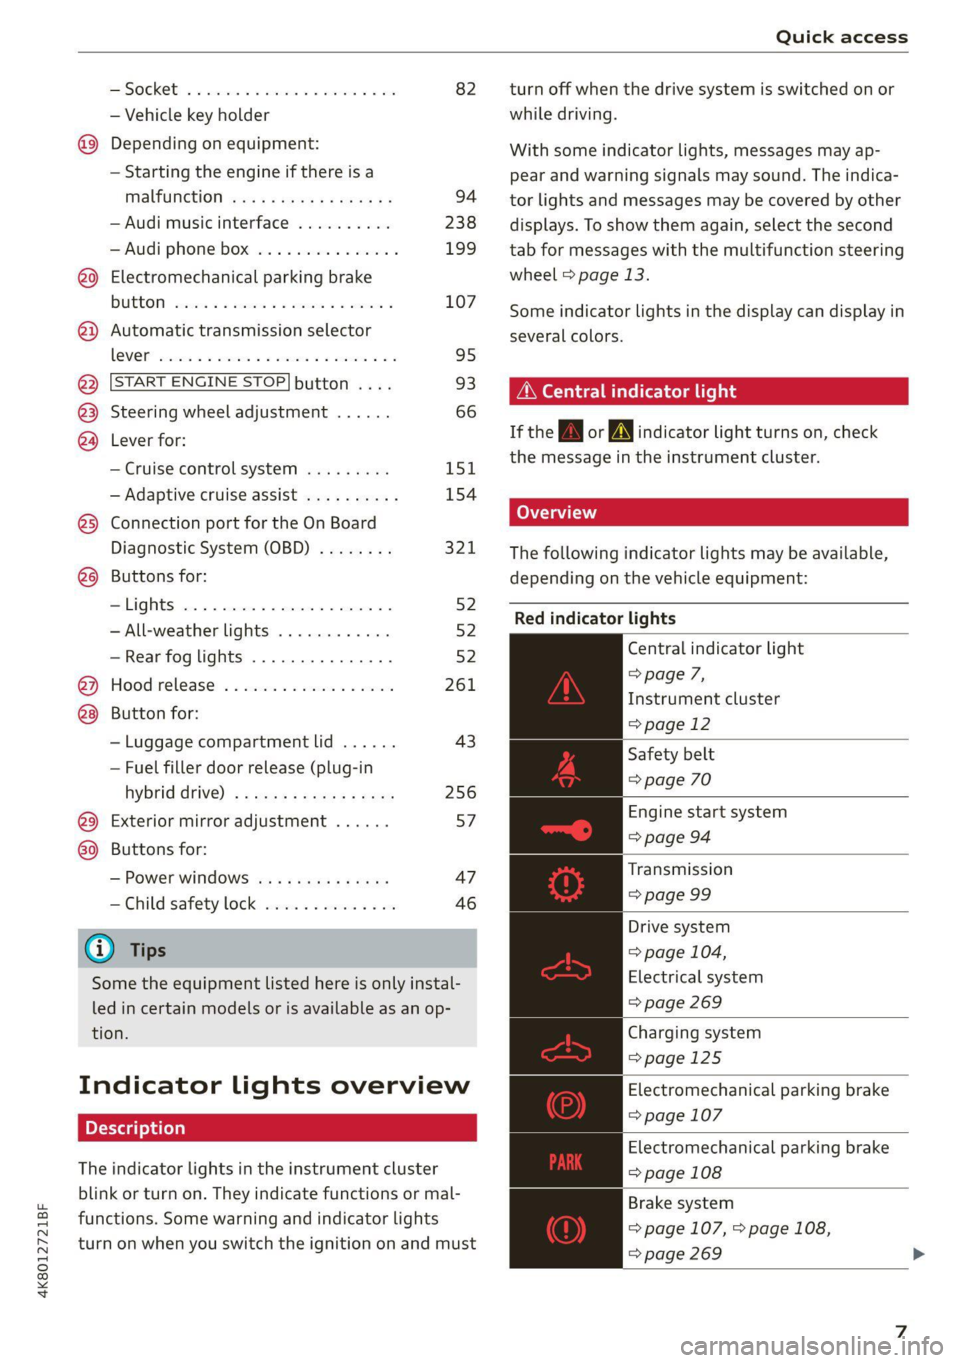
The following indicator lights may be available,
depending on the vehicle equipment:
Red indicator lights
Central indicator light
=> page 7,
Instrument cluster
=> page 12
Safety belt
=> page 70
Engine start system
=> page 94
Transmission
=>page 99
Drive system
=> page 104,
Electrical system
=> page 269
Charging system
=>page 125
Electromechanical parking brake
=> page 107
Electromechanical parking brake
=> page 108
Brake system
=> page 107, > page 108,
=> page 269
Page 12 of 350

Quick access
Other indicator lights
Rear safety belt
=> page 70
Start/Stop system
=> page 104
=>page 101
Low beam headlights
=> page 52
Parking lights
=> page 52
Turn signals
=> page 53, >page 55
Cruise control system
>page 151
Cruise control system
=>page 151
Efficiency assist
=> page 152
Efficiency assist
=>page 152
Efficiency assist
=> page 152
Efficiency assist
=> page 152
Efficiency assist
=> page 152
Efficiency assist
=> page 152
Efficiency assist
=> page 152
Adaptive cruise assist
>page 155
Adaptive cruise assist
>page 155
Adaptive cruise assist
>page 155
Adaptive cruise assist
>page 155
10
Electric drive ready mode
Efficiency assist
=>page 152
Adaptive cruise assist
=>page 155
Adaptive cruise assist
=>page 155
Park assist plus
=> page 187
Lane departure warning
=> page 165
High beam headlights
=> page 53
High beam assistant
=> page 53
Laser lights
=> page 54
Rear safety belt
=> page 70
Rear safety belt
=> page 70
Transmission
=> page 99
Convenience key
=> page 94
Electromechanical parking brake
=> page 108
Electromechanical parking brake
=> page 108
Electric drive ready mode
=> page 101
Electric drive ready mode
=>page 101
Combustion engine
=> page 101
Plug-in hybrid modes
=> page 101
Plug-in hybrid modes
=> page 101
Plug-in hybrid modes
=> page 101
Steering
>page 114
Air suspension
=> page 113
Page 23 of 350

4K8012721BF
Touch displays
> If the General button is not displayed, swipe
toward the left or right with one finger until it
appears.
>» Press the General button.
> If the Date & time button is not displayed,
swipe upward or downward with one finger un-
tilit appears.
> Press the Date & time button.
@ Tips
If a menu or symbol is in parentheses in the
path, for example, (General) or (423), then it is
an optional menu item that does not need to
be used in every system.
You can adjust or turn off the MMI touch display
feedback.
> Applies to MMI: Select on the home screen:
SETTINGS > Display & Brightness > MMI.
Possible settings:
— Brightness
— Touchscreen feedback
Multi Media Interface
Traffic safety information
Audi recommends performing certain Infotain-
ment system functions, such as entering a desti-
nation, only when the vehicle is stationary. Al-
ways be prepared to stop operating the Infotain-
ment system in the interest of your safety and
the safety of other road users.
Z\ WARNING
Only use the Infotainment system when road,
traffic, weather, and visibility conditions per-
mit and always in a way that allows you to
maintain complete control over your vehicle.
@ Tips
Certain functions are not available while driv-
ing.
Switching on or off
Switching the MMI on or off
> To switch the MMI off, press and hold the
On/Off knob > page 32, fig. 21 until the up-
per
display and all Infotainment system func-
tions are switched off.
> To switch the MMI on, press the On/Off knob.
Restarting the MMI
>» Press and hold the On/Off knob for at least 10
seconds.
Switching displays on or off
> To switch the upper display off, press [1] on the
lower display.
> To switch the upper display on, touch the upper
display or press [@J on the lower display.
> To switch both displays on or off, press and hold
Co] on the lower display.
Introduction
You can display and operate Infotainment system
and vehicle functions using both of the Multi Me-
dia Interface (MMI) touch displays.
Configuration wizard
After starting for the first time, the configuration
wizard helps you to set up the vehicle, for exam-
ple to set the desired system language and con-
nect
a telephone.
> Follow the instructions in the display.
> Applies to: MMI: To access the configuration
wizard at a later time, select on the home
screen: HELP > Configuration wizard.
Tool tips
You can have tool tips displayed if necessary.
They introduce various MMI functions to you.
> Applies to: MMI: To open the tool tips, select on
the home screen: HELP > Tool tips > Basic in-
formation or Expert information.
> Follow the instructions in the display.
21
Page 27 of 350
4K8012721BF
Touch displays
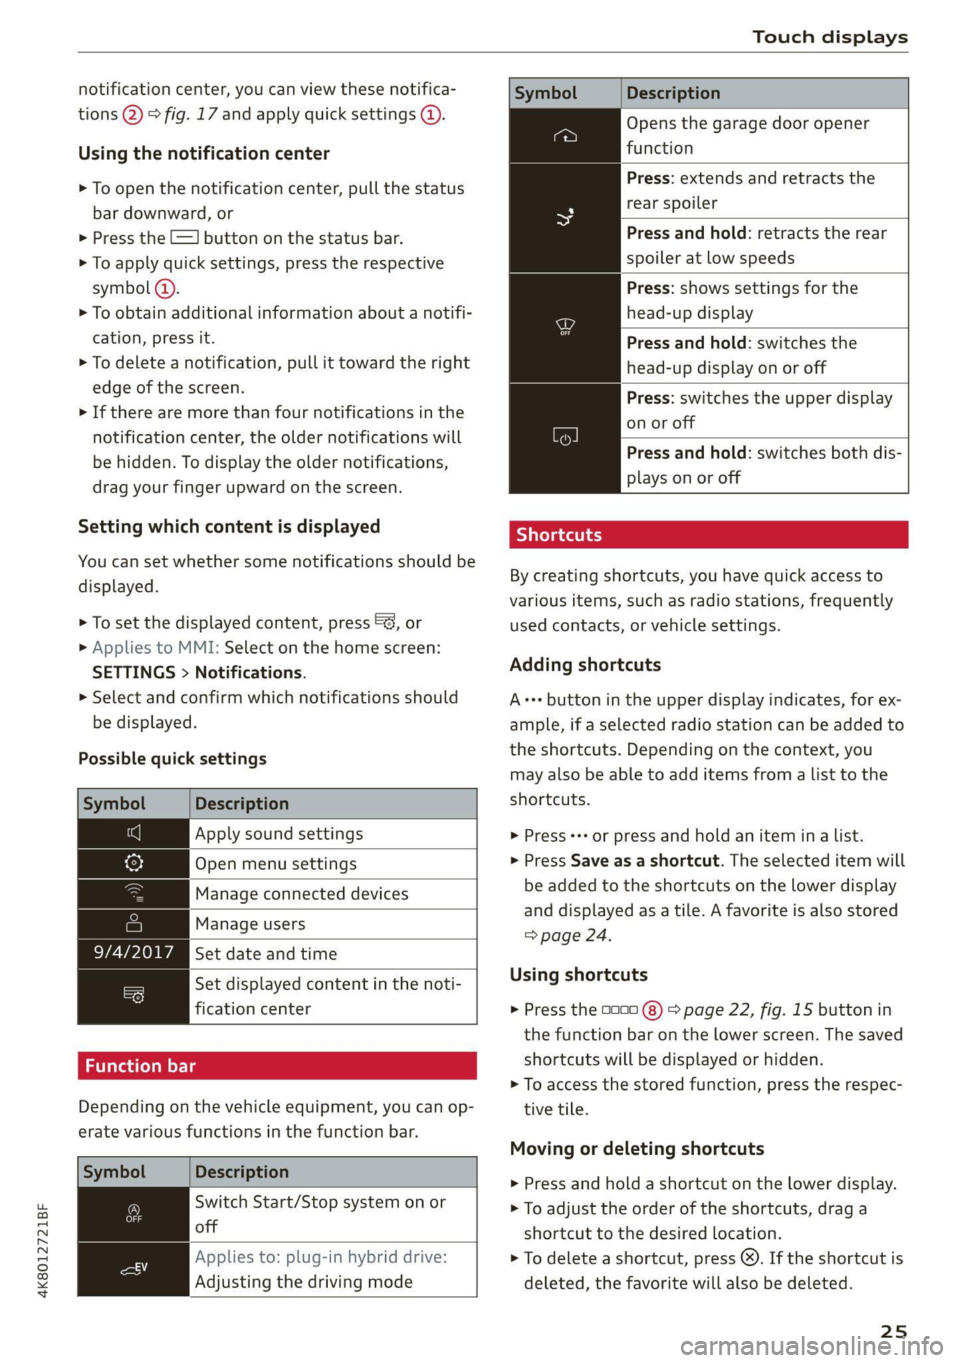
notification center, you can view these notifica-
tions @) > fig. 17 and apply quick settings @.
Using the notification center
> To open the notification center, pull the status
bar downward, or
> Press the E=] button on the status bar.
> To apply quick settings, press the respective
symbol ().
> To obtain additional information about a notifi-
cation, press it.
> To delete a notification, pull it toward the right
edge of the screen.
> If there are more than four notifications in the
notification center, the older notifications will
be hidden. To display the older notifications,
drag
your finger upward on the screen.
Setting which content is displayed
You can set whether some notifications should be
displayed.
> To set the displayed content, press &&, or
> Applies to MMI: Select on the home screen:
SETTINGS > Notifications.
> Select and confirm which notifications should
be displayed.
Possible quick settings
Description
Apply sound settings
Open menu settings
Manage connected devices
Manage users
Set date and time
Set displayed content in the noti-
fication center
Depending on the vehicle equipment, you can op-
erate various functions in the function bar.
Description
Switch Start/Stop system on or
off
Applies to: plug-in hybrid drive:
Adjusting the driving mode
Symbol Description
Opens the garage door opener
function
Press: extends and retracts the
rear spoiler
Press and hold: retracts the rear
spoiler at low speeds
Press: shows settings for the
head-up display
Press and hold: switches the
head-up display on or off
Press: switches the upper display
on or off
Press and hold: switches both dis-
plays on or off
Shortcuts
By creating shortcuts, you have quick access to
various items, such as radio stations, frequently
used contacts, or vehicle settings.
Adding shortcuts
A+++ button in the upper display indicates, for ex-
ample, if a selected radio station can be added to
the shortcuts. Depending on the context, you
may also be able to add items from a list to the
shortcuts.
> Press +++ or press and hold an item ina list.
» Press Save as a shortcut. The selected item will
be added to the shortcuts on the lower display
and displayed as a tile. A favorite is also stored
=> page 24.
Using shortcuts
> Press the a000 (8) > page 22, fig. 15 button in
the function bar on the lower screen. The saved
shortcuts will be displayed or hidden.
> To access the stored function, press the respec-
tive tile.
Moving or deleting shortcuts
> Press and hold a shortcut on the lower display.
> To adjust the order of the shortcuts, drag a
shortcut to the desired location.
> To delete a shortcut, press ®. If the shortcut is
deleted, the favorite will also be deleted.
25
Page 67 of 350

4K8012721BF
Sitting correctly and safely
> To adjust the seat upward or downward, push
the rear section of the button @) upward or
downward.
> To adjust the seat surface, press the front part
of the button @ upward or downward.
Adjusting the backrests
> To move the backrest forward or backward,
press the button @) forward or backward.
Adjusting the lumbar support
> To adjust the lumbar support, press the button
@) in the desired direction.
Massage function
Switching the massage function on or off @). Set-
ting
the massage type and intensity > page 65.
ZA WARNING
The power front seats can also be adjusted
when the ignition is switched off. To reduce
the risk of injury, children should never be left
unattended in the vehicle.
ONC em a Rice) MRE
Applies to: vehicles with seat settings in the MMI
al 8 3 | | | |
cc
Fig. 48 Upper display: seat setting
You can adjust additional settings in the MMI.
The settings and the number of menus and but-
tons depend on the vehicle equipment.
Operating
Applies to: MMI
> Select on the home screen: VEHICLE > Seats.
> To access the various menus ®, swipe to the
left or right.
> To display the various seats, press ) or (@).
The red coloring in the symbol ©) indicates which
seat is selected.
Seat setting
Applies to: MMI
> To select a seat setting, press (@ if necessary.
> Press the respective arrow @) until the desired
position is reached.
Massage
See > page 65
Additional seat settings
See > page 65
Front seat massage function
Applies to: vehicles with massage function
Selecting the massage function
Applies to: MMI
> To open the Massage menu, press the button
@ > page 64, fig. 47.
Switching the massage function on or off
Applies to: MMI
> To switch the massage function on or off, press
the J button @ © page 64, fig. 47. Or:
> Press Start/Stop on the MMI.
Setting the massage type and intensity
Applies to: MMI
> To adjust the massage type, press the desired
button on the MMI, for example Wave.
> To adjust the intensity of the massage, press
Intensity on the MMI repeatedly until the de-
sired level is reached.
(i) Tips
The massage function switches off automati-
cally after approximately 10 minutes.
PX Celpe Coe eeaad ie em
You can adjust additional settings and switch
functions on or off in the MMI.
> Applies to MMI: Select on the home screen: VE-
HICLE > Seats > Additional seat settings.
Depending on the vehicle equipment, the follow-
ing options may be available.
65
>
Page 93 of 350
4K8012721BF
Warm and cold
— Starting or stopping the vehicle will not
switch off the auxiliary climate control auto-
matically.
Applies to: vehicles with auxiliary climate control
Applies to: MMI: Select on the home screen: VE-
HICLE > Air conditioning > F.
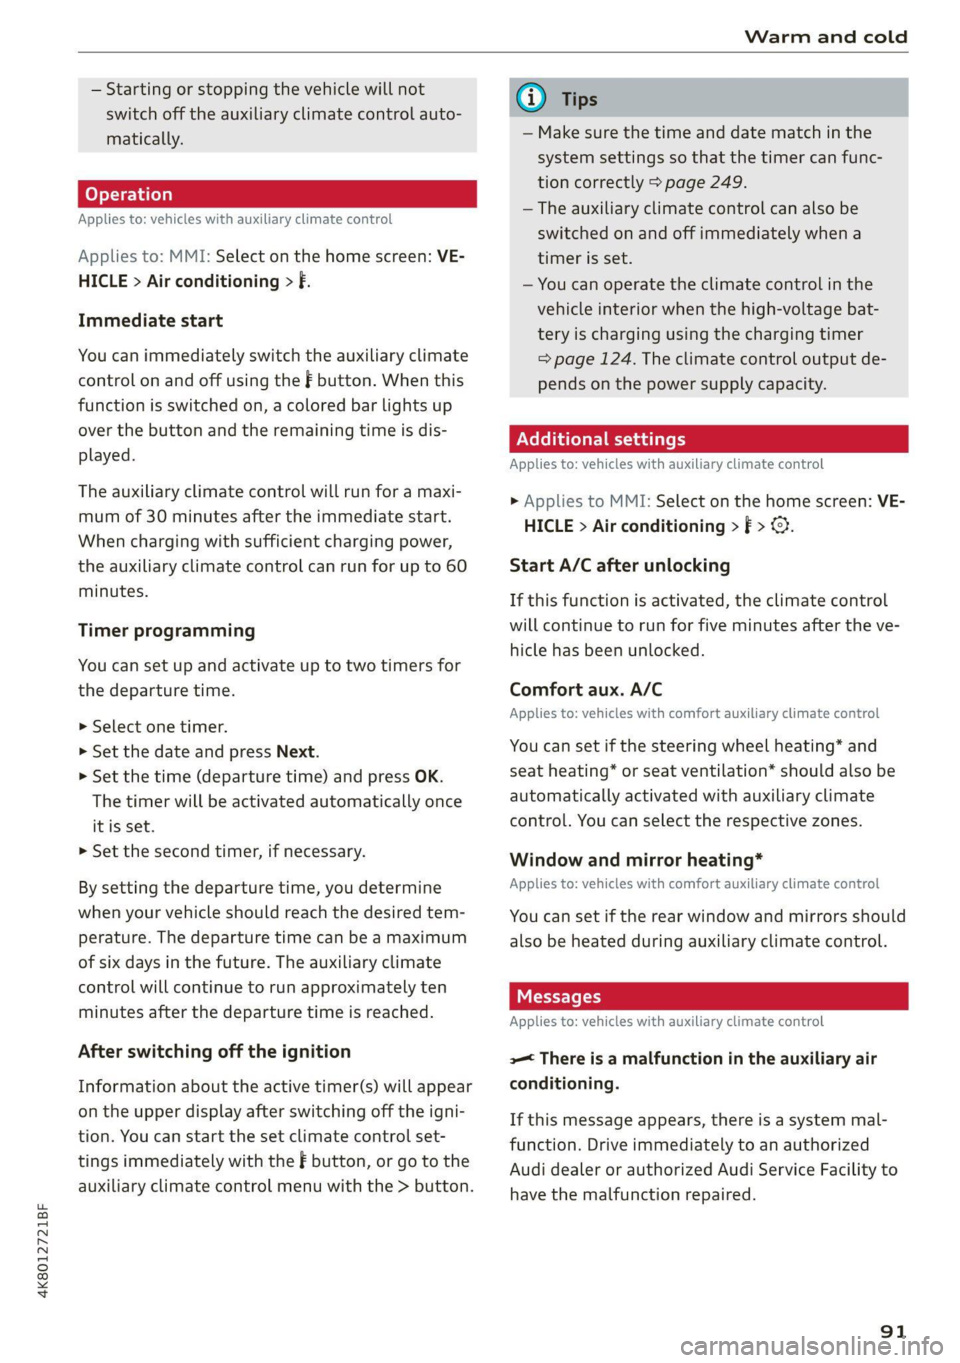
Immediate start
You can immediately switch the auxiliary climate
control on and off using the — button. When this
function is switched on, a colored bar lights up
over the button and the remaining time is dis-
played.
The auxiliary climate control will run for a maxi-
mum of 30 minutes after the immediate start.
When charging with sufficient charging power,
the auxiliary climate control can run for up to 60
minutes.
Timer programming
You can set up and activate up to two timers for
the departure time.
> Select one timer.
> Set the date and press Next.
> Set the time (departure time) and press OK.
The timer will be activated automatically once
itis set.
> Set the second timer, if necessary.
By setting the departure time, you determine
when your vehicle should reach the desired tem-
perature. The departure time can be a maximum
of six days in the future. The auxiliary climate
control will continue to run approximately ten
minutes after the departure time is reached.
After switching off the ignition
Information about the active timer(s) will appear
on the upper display after switching off the igni-
tion. You can start the set climate control set-
tings immediately with the F button, or go to the
auxiliary climate control menu with the > button.
@) Tips
— Make sure the time and date match in the
system settings so that the timer can func-
tion correctly > page 249.
— The auxiliary climate control can also be
switched on and off immediately when a
timer is set.
— You can operate the climate control in the
vehicle interior when the high-voltage bat-
tery is charging using the charging timer
= page 124. The climate control output de-
pends on the power supply capacity.
Additional settings
Applies to: vehicles with auxiliary climate control
> Applies to MMI: Select on the home screen: VE-
HICLE > Air conditioning > F >.
Start A/C after unlocking
If this function is activated, the climate control
will continue to run for five minutes after the ve-
hicle has been unlocked.
Comfort aux. A/C
Applies to: vehicles with comfort auxiliary climate control
You can set if the steering wheel heating* and
seat heating* or seat ventilation* should also be
automatically activated with auxiliary climate
control. You can select the respective zones.
Window and mirror heating*
Applies to: vehicles with comfort auxiliary climate control
You can set if the rear window and mirrors should
also be heated during auxiliary climate control.
Applies to: vehicles with auxiliary climate control
2— There is a malfunction in the auxiliary air
conditioning.
If this message appears, there is a system mal-
function. Drive immediately to an authorized
Audi dealer or authorized Audi Service Facility to
have the malfunction repaired.
91
Page 95 of 350

4K8012721BF
Driving
Driving
Starting the vehicle
pyr Told T ola (ela)
=
Fig. 74 Center console: starting the engine
Requirement: the key must be in the vehicle.
Starting the engine
> Press and hold the brake pedal.
> Press the [START ENGINE STOP] button. The
engine will start.
Plug-in hybrid drive: the electric drive system is
switched on. The combustion engine only starts
when necessary. The power meter indicates if the
electric drive system is switched on > page 15.
Equipment that uses a lot of electricity is switch-
ed off temporarily when you start the engine. If
the engine does not start immediately, the start-
ing procedure stops automatically after a short
time. If this is the case, repeat the starting pro-
cedure after approximately 30 seconds.
Stopping the engine
> Bring the vehicle to a full stop.
> Press the [START ENGINE STOP] button. The
engine will switch off.
Plug-in-hybrid drive: the electric drive system and
the combustion engine are switched off.
Applies to: vehicles with steering lock: The steer-
ing is locked when you turn off the engine with
the selector lever in the “P” position and open
the driver's door. The steering lock helps prevent
vehicle theft.
Stopping the engine in an emergency
If necessary in an emergency, the engine can also
be stopped while driving using the emergency off
function*.
> Press the [START ENGINE STOP] button twice in
a row or press and hold it one time.
Switching on and off
If you would like to switch the ignition on or off
without starting the engine, follow these steps:
> Press the [START ENGINE STOP] button without
pressing the brake pedal.
Switching the ignition off automatically
To prevent the vehicle battery from draining, the
ignition and possibly the exterior lighting may
switch off automatically.
Requirements:
— Conventional drive system: the Start/Stop sys-
tem must have stopped the engine.
— Plug-in hybrid drive: you must have driven the
vehicle. The combustion engine must not be
running.
— You must have left the vehicle for longer than
30 seconds.
— The ignition must be switched on.
Among other indicators, the system detects that
you have left the vehicle based on the following
factors:
— The driver's door has been opened.
— The driver's safety belt has been unbuckled.
— The brake pedal is not being pressed.
The ignition will also be switched off after 30 mi-
nutes or if you lock the vehicle from the outside.
ZA WARNING
—To reduce the risk of asphyxiation, never al-
low the engine to run in confined spaces.
— Never turn off the engine before the vehicle
has come to a complete stop. Switching it
off before the vehicle has stopped may im-
pair the function of the brake booster and
power steering. You would then need to use
more force to steer and brake the vehicle.
The fact that you cannot steer and brake as
93
Page 96 of 350
Driving
usual may increase the risk of accidents and
serious injuries.
— Secure the vehicle against rolling before ex-
iting the vehicle > page 94.
@) Note
— Avoid high engine speed, full throttle, and
heavy engine load if the engine has not
reached operating temperature yet. You
could damage the engine.
— If the engine has been under heavy load for
an extended period of time, heat builds up
in the engine compartment after the engine
is switched off and there is a risk of damag-
ing the engine. For this reason, let the en-
gine run at idle for approximately two mi-
nutes before shutting it off.
@ Tips
— Brief noises are normal when starting and
stopping the vehicle and are no cause for
concern.
— For up to 10 minutes after stopping the en-
gine, the radiator fan may turn on again au-
tomatically or it may continue to run, even if
the ignition is switched off.
— It may not be possible to start the vehicle in
extremely low temperatures.
— Power will be fully available once the engine
is at operating temperature.
Messages
Hj Engine start system: malfunction! Please
contact Service
Do not switch the ignition off because you may
not be able to switch it on again. Drive to an au-
thorized Audi dealer or authorized Audi Service
Facility immediately to have the malfunction cor-
rected.
B Engine start system: malfunction! Please
contact Service
There is a malfunction in the engine start system.
Drive immediately to an authorized Audi dealer
or authorized Audi Service Facility to have the
malfunction repaired.
94
B Remote control key: key not detected. Is the
key still in the vehicle?
The vehicle key was removed from the vehicle
while the engine is running. If the vehicle key is
no longer in the vehicle, you cannot switch the ig-
nition on or start the engine once you stop it. You
also cannot lock the vehicle from the outside.
Remote control key: hold back of key
against the designated area. See owner's man-
ual
The battery in the vehicle key may be drained or
there may be a malfunction. To start the vehicle,
you must also hold the vehicle key against the lo-
cation shown ?) > page 93, fig. 74.
If the malfunction remains, drive immediately to
an authorized Audi dealer or authorized Audi
Service Facility to have the malfunction correct-
ed.
When driving
Starting to drive, stopping, and parking
Starting from a stop
> Press and hold the brake pedal.
> Start the engine.
> Select a gear.
> Release the parking brake.
>» Release the brake pedal. The vehicle may roll.
> Press the accelerator pedal to accelerate.
Securing the vehicle against rolling
Secure your vehicle to prevent it from rolling be-
fore exiting the vehicle.
> Set the parking brake.
> Select the “P” selector lever position.
> If parking on a steep road, turn the steering
wheel so that your vehicle will roll against the
curb in case it should start to move.
If one of these measures is not possible, for ex-
ample because there is no vehicle power, you
must secure your vehicle against rolling using ad-
ditional measures.
> Only park the vehicle on a level surface.
> Use suitable objects to block the front and rear
wheels.
Page 97 of 350

4K8012721BF
Driving
Set the parking brake before selecting the “P” se-
lector lever position. This prevents too much
stress from being placed on the locking mecha-
nism when parking on a steep surface.
ZX WARNING
— Always set the parking brake when leaving
your vehicle, even if for a short period of
time. If the parking brake is not set, the ve-
hicle could roll away, increasing the risk of
an accident.
— Do not leave your vehicle unattended while
the engine is running, because this increases
the risk of an accident.
— If the parking brake is set, it can release au-
tomatically when the accelerator pedal is
pressed. To reduce the risk of an accident,
do not inadvertently press the accelerator
pedal and always shift into “P” when the ve-
hicle is stopped.
— If you leave the vehicle, switch the ignition
off and take the key with you. This is espe-
cially important when leaving persons or an-
imals in the vehicle. Otherwise, the vehicle
could start unintentionally, the parking
brake could release, or electronic equipment
could activate, which increases the risk of an
accident.
— No persons or animals should be left in a
locked vehicle. Locked doors make it more
difficult for emergency workers to enter the
vehicle, which puts lives at risk.
— If you do not begin driving immediately af-
ter releasing the brake pedal, your vehicle
may begin to roll backward. Press the brake
pedal or set the parking brake immediately.
@) Note
If you have to stop on an incline, always press
the brake pedal to hold the vehicle in place to
reduce the risk of the vehicle rolling back-
ward. Do not try to hold the vehicle in place
by pressing and holding the accelerator pedal.
The transmission can overheat, which increas-
es the risk of damage.
Hill hold assist
If you take your foot off of the brake pedal when
driving on hills, the braking force will be held for
several seconds. At that time, you can start driv-
ing without the vehicle rolling backward.
Requirement: the driver's door must be closed,
the engine must be on, and the vehicle must be
traveling uphill.
> To activate hill hold assist, press and hold the
brake pedal for several seconds while the vehi-
cle is stationary.
Z\ WARNING
— If you do not begin driving immediately af-
ter releasing the brake pedal, your vehicle
may begin to roll backward. Press the brake
pedal
or set the parking brake immediately.
— The hill hold assist cannot hold the vehicle
on inclines in every scenario (for example,
on slippery or icy ground).
Gears and driving programs
(1)
(2S
[RAZ-0410
R
N
:
D/S
~— SI
Fig. 75 Center console: selector lever
The automatic transmission shifts automatically
depending on the selected gear and the current
driving style. When driving with a moderate driv-
ing style, upshifting early and downshifting late
will help to improve fuel economy. When driving
with a sporty driving style, the transmission per-
mits higher RPMs.
The gears are displayed next to the selector lever.
— P (Park)
— R (Reverse): driving in reverse
—N (Neutral): idle
95