coolant AUDI A8 1996 D2 / 1.G AHA ATQ Engines Lubrication System Components Workshop Manual
[x] Cancel search | Manufacturer: AUDI, Model Year: 1996, Model line: A8, Model: AUDI A8 1996 D2 / 1.GPages: 34, PDF Size: 0.68 MB
Page 8 of 34
17-5
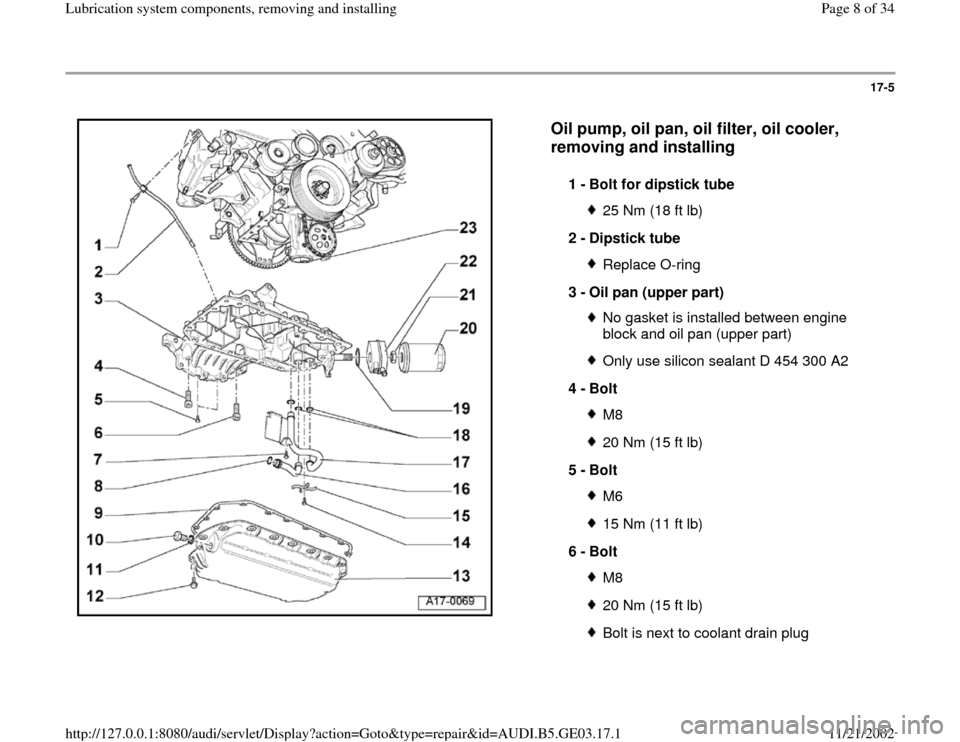
Oil pump, oil pan, oil filter, oil cooler,
removing and installing
1 -
Bolt for dipstick tube
25 Nm (18 ft lb)
2 -
Dipstick tube Replace O-ring
3 -
Oil pan (upper part) No gasket is installed between engine
block and oil pan (upper part) Only use silicon sealant D 454 300 A2
4 -
Bolt M820 Nm (15 ft lb)
5 -
Bolt M615 Nm (11 ft lb)
6 -
Bolt M820 Nm (15 ft lb)Bolt is next to coolant drain plug
Pa
ge 8 of 34 Lubrication s
ystem com
ponents, removin
g and installin
g
11/21/2002 htt
p://127.0.0.1:8080/audi/servlet/Dis
play?action=Goto&t
yp
e=re
pair&id=AUDI.B5.GE03.17.1
Page 15 of 34
17-11
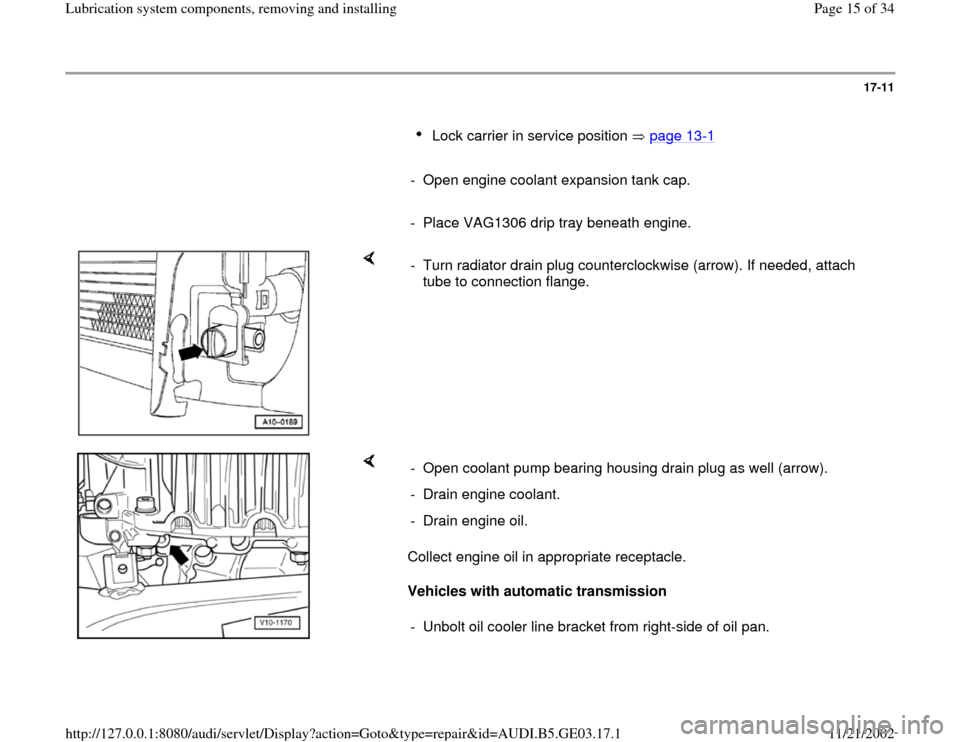
Lock carrier in service position page 13
-1
- Open engine coolant expansion tank cap.
- Place VAG1306 drip tray beneath engine.
- Turn radiator drain plug counterclockwise (arrow). If needed, attach
tube to connection flange.
Collect engine oil in appropriate receptacle.
Vehicles with automatic transmission - Open coolant pump bearing housing drain plug as well (arrow).
- Drain engine coolant.
- Drain engine oil.
- Unbolt oil cooler line bracket from right-side of oil pan.
Pa
ge 15 of 34 Lubrication s
ystem com
ponents, removin
g and installin
g
11/21/2002 htt
p://127.0.0.1:8080/audi/servlet/Dis
play?action=Goto&t
yp
e=re
pair&id=AUDI.B5.GE03.17.1
Page 16 of 34
17-12
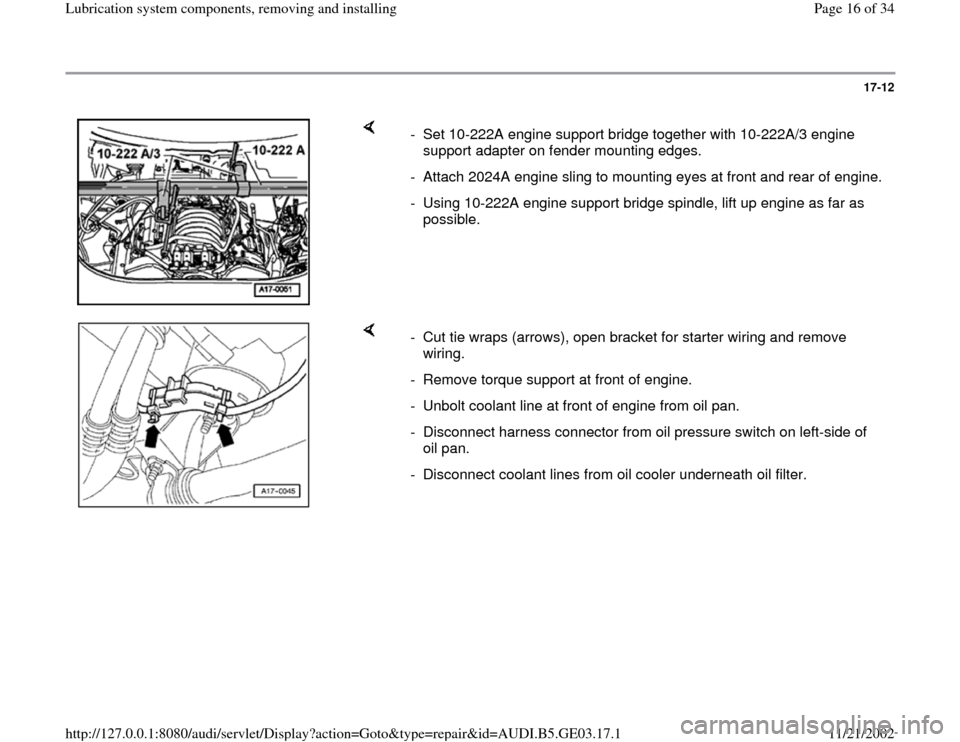
- Set 10-222A engine support bridge together with 10-222A/3 engine
support adapter on fender mounting edges.
- Attach 2024A engine sling to mounting eyes at front and rear of engine.
- Using 10-222A engine support bridge spindle, lift up engine as far as
possible.
- Cut tie wraps (arrows), open bracket for starter wiring and remove
wiring.
- Remove torque support at front of engine.
- Unbolt coolant line at front of engine from oil pan.
- Disconnect harness connector from oil pressure switch on left-side of
oil pan.
- Disconnect coolant lines from oil cooler underneath oil filter.
Pa
ge 16 of 34 Lubrication s
ystem com
ponents, removin
g and installin
g
11/21/2002 htt
p://127.0.0.1:8080/audi/servlet/Dis
play?action=Goto&t
yp
e=re
pair&id=AUDI.B5.GE03.17.1
Page 27 of 34
17-23
Tightening torques
Component
Tightening
torque
Oil pan to cylinder block M6 10 Nm (7 ft lb)
M8 20 Nm (15 ft
lb)
Oil pan (lower part) to oil
pan (upper part) M6 10 Nm (7 ft lb)
Oil pan to transmission M8 25 Nm (18 ft
lb)
M10 45 Nm (33 ft
lb)
Coolant line to oil pan 10 Nm (7 ft lb)
Oil drain plug in oil pan
(lower part) 30 Nm (22 ft
lb)
Component
Tightening
torque
Dipstick tube to cylinder
head M6
M8 10 Nm (7 ft lb)
25 Nm (18 ft
lb)
Oil pump to engine block 25 Nm (18 ft
lb)
Oil supply line for oil pump 10 Nm (7 ft lb)
Pa
ge 27 of 34 Lubrication s
ystem com
ponents, removin
g and installin
g
11/21/2002 htt
p://127.0.0.1:8080/audi/servlet/Dis
play?action=Goto&t
yp
e=re
pair&id=AUDI.B5.GE03.17.1
Page 29 of 34
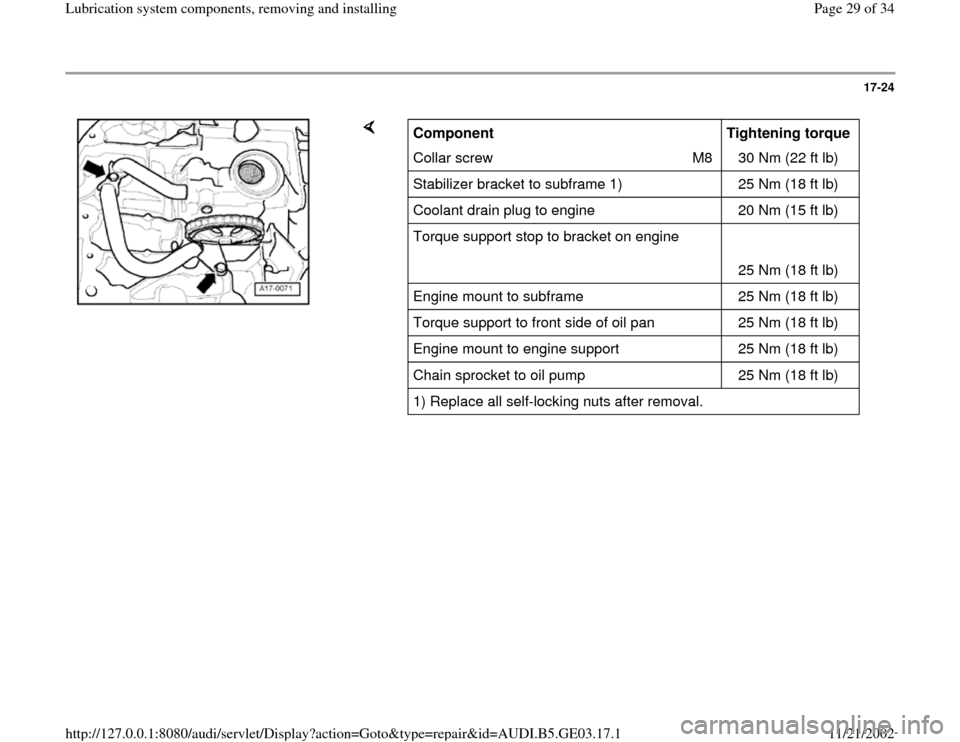
17-24
Component
Tightening torque
Collar screw M8 30 Nm (22 ft lb)
Stabilizer bracket to subframe 1) 25 Nm (18 ft lb)
Coolant drain plug to engine 20 Nm (15 ft lb)
Torque support stop to bracket on engine
25 Nm (18 ft lb)
Engine mount to subframe 25 Nm (18 ft lb)
Torque support to front side of oil pan 25 Nm (18 ft lb)
Engine mount to engine support 25 Nm (18 ft lb)
Chain sprocket to oil pump 25 Nm (18 ft lb)
1) Replace all self-locking nuts after removal.
Pa
ge 29 of 34 Lubrication s
ystem com
ponents, removin
g and installin
g
11/21/2002 htt
p://127.0.0.1:8080/audi/servlet/Dis
play?action=Goto&t
yp
e=re
pair&id=AUDI.B5.GE03.17.1