AUDI A8 1998 D2 / 1.G 01V Transmission Assembly Workshop Manual
A8 1998 D2 / 1.G
AUDI
AUDI
https://www.carmanualsonline.info/img/6/1187/w960_1187-0.png
AUDI A8 1998 D2 / 1.G 01V Transmission Assembly Workshop Manual
Page 1 of 13
37-148
Transmission, disassembling
and assembling
- Observe general repair instructions page 00
-
27
.
Rules of cleanliness for working on
automatic transmissions
Thoroughly clean all connections and the
surrounding area before disconnecting.
Place parts that have been removed on a clean
surface and cover. Use foils and paper. Use
lint-free cloths only!
Carefully cover over opened components or
seal, if repairs are not carried out immediately.
Only install clean components: Only unpack
replacement parts immediately prior to
installation.
Always replace O-rings, gaskets and sealing
rings.
Lightly lubricate O-rings before installing, this
prevents the rings from being pinched when
inserting.
Pa
ge 1 of 13 Transmission, disassemblin
g and assemblin
g
11/20/2002 htt
p://127.0.0.1:8080/audi/servlet/Dis
play?action=Goto&t
yp
e=re
pair&id=AUDI.B5.AT01.37.5
Page 2 of 13
Use only ATF in areas near ATF. Other
lubricating substances cause functional
problems in the hydraulic transmission control.
Check the following fluid levels after installing,
top off if necessary. ATF in planetary gear
page 37
-133
, Gear oil in front final drive
page 39
-1 , Transmission oil in center
differential page 39
-40
. Capacities and
specifications Page 00-22
onward.
Pa
ge 2 of 13 Transmission, disassemblin
g and assemblin
g
11/20/2002 htt
p://127.0.0.1:8080/audi/servlet/Dis
play?action=Goto&t
yp
e=re
pair&id=AUDI.B5.AT01.37.5
Page 4 of 13
37-150
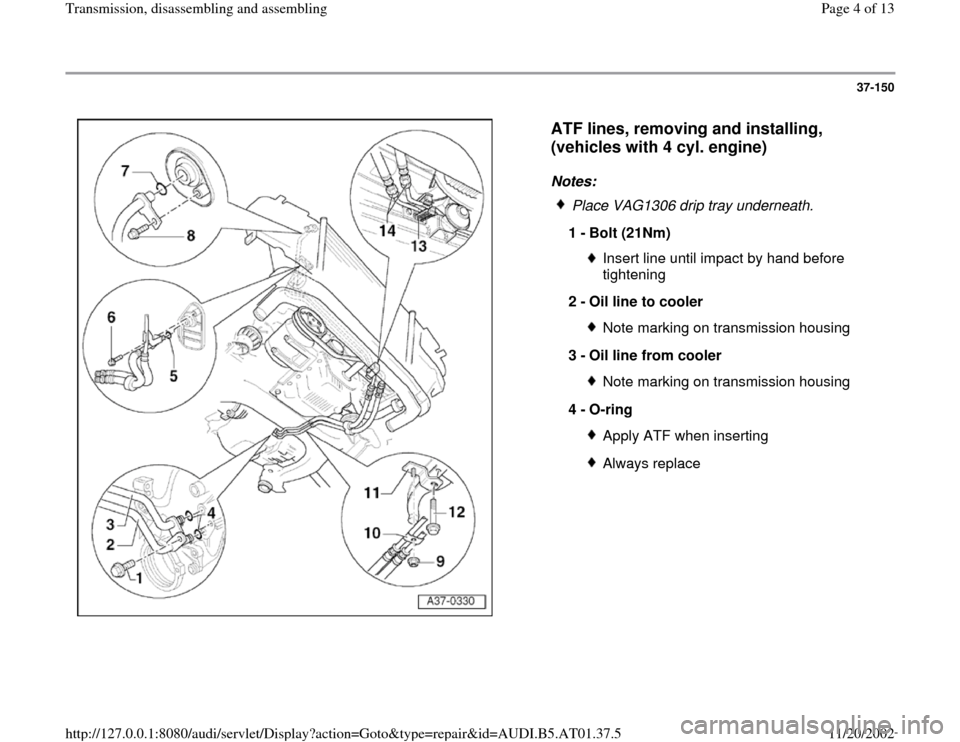
ATF lines, removing and installing,
(vehicles with 4 cyl. engine)
Notes:
Place VAG1306 drip tray underneath.
1 -
Bolt (21Nm)
Insert line until impact by hand before
tightening
2 -
Oil line to cooler Note marking on transmission housing
3 -
Oil line from cooler Note marking on transmission housing
4 -
O-ring Apply ATF when insertingAlways replace
Pa
ge 4 of 13 Transmission, disassemblin
g and assemblin
g
11/20/2002 htt
p://127.0.0.1:8080/audi/servlet/Dis
play?action=Goto&t
yp
e=re
pair&id=AUDI.B5.AT01.37.5
Page 6 of 13
37-152
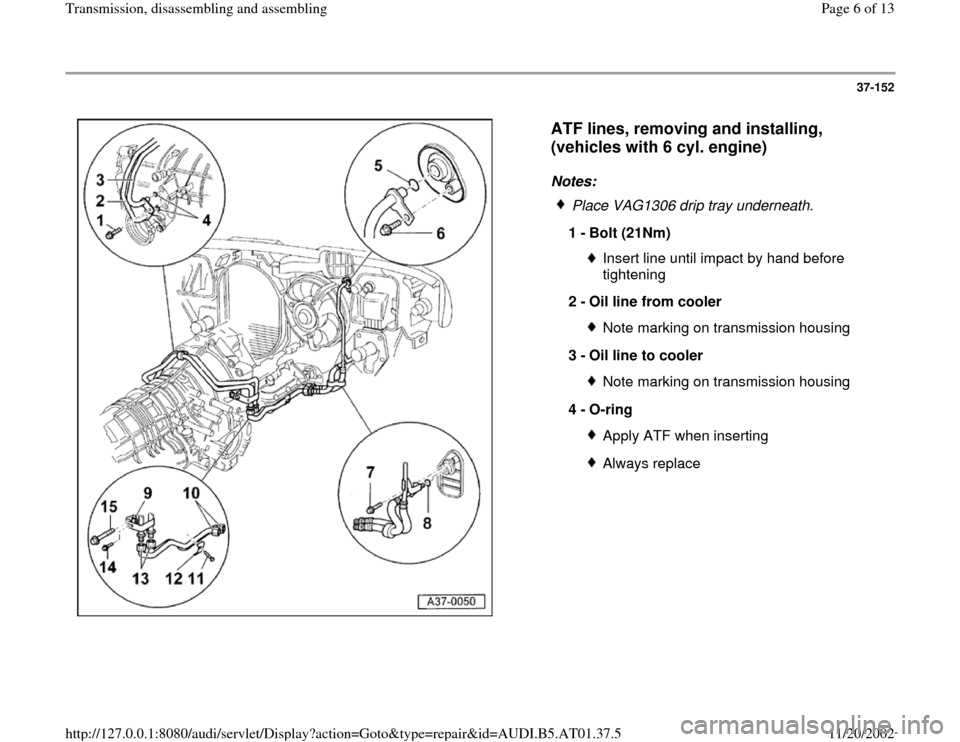
ATF lines, removing and installing,
(vehicles with 6 cyl. engine)
Notes:
Place VAG1306 drip tray underneath.
1 -
Bolt (21Nm)
Insert line until impact by hand before
tightening
2 -
Oil line from cooler Note marking on transmission housing
3 -
Oil line to cooler Note marking on transmission housing
4 -
O-ring Apply ATF when insertingAlways replace
Pa
ge 6 of 13 Transmission, disassemblin
g and assemblin
g
11/20/2002 htt
p://127.0.0.1:8080/audi/servlet/Dis
play?action=Goto&t
yp
e=re
pair&id=AUDI.B5.AT01.37.5
Page 12 of 13
37-158
ATF lines and ATF cooler, cleaning
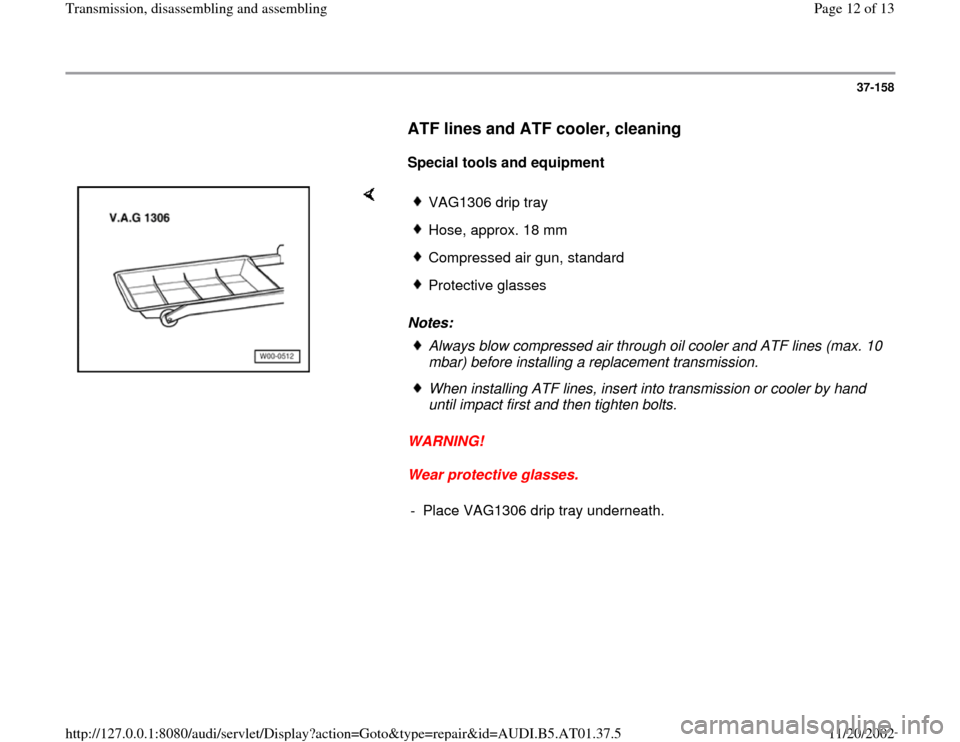
Special tools and equipment
Notes:
WARNING!
Wear protective glasses.
VAG1306 drip trayHose, approx. 18 mm Compressed air gun, standardProtective glassesAlways blow compressed air through oil cooler and ATF lines (max. 10
mbar) before installing a replacement transmission. When installing ATF lines, insert into transmission or cooler by hand
until impact first and then tighten bolts.
- Place VAG1306 drip tray underneath.
Pa
ge 12 of 13 Transmission, disassemblin
g and assemblin
g
11/20/2002 htt
p://127.0.0.1:8080/audi/servlet/Dis
play?action=Goto&t
yp
e=re
pair&id=AUDI.B5.AT01.37.5
