transmission AUDI A8 1998 D2 / 1.G 01V Transmission Center Differential Service Workshop Manual
[x] Cancel search | Manufacturer: AUDI, Model Year: 1998, Model line: A8, Model: AUDI A8 1998 D2 / 1.GPages: 29, PDF Size: 0.61 MB
Page 1 of 29
39-45
Center differential, servicing Transmission installed
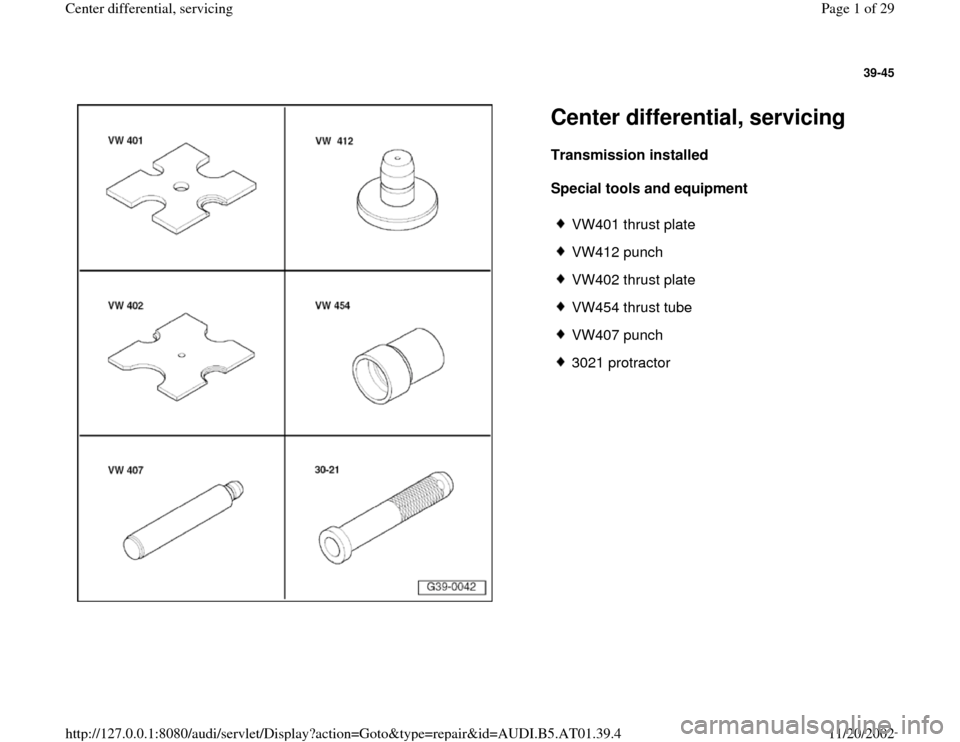
Special tools and equipment
VW401 thrust plate
VW412 punch
VW402 thrust plate
VW454 thrust tube
VW407 punch
3021 protractor
Pa
ge 1 of 29 Center differential, servicin
g
11/20/2002 htt
p://127.0.0.1:8080/audi/servlet/Dis
play?action=Goto&t
yp
e=re
pair&id=AUDI.B5.AT01.39.4
Page 2 of 29
39-46
WARNING!
Do not run engine with the center differential
removed or without gear oil and do not tow
vehicle.
Notes:
The parts listed in the following illustration can be
removed with the transmission installed.
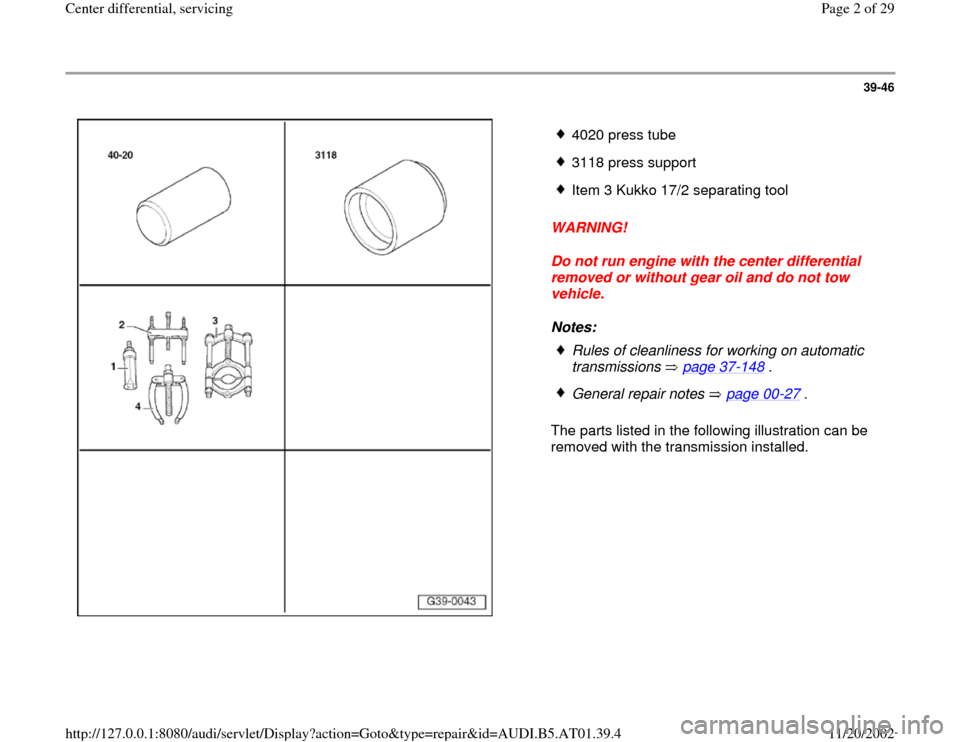
4020 press tube
3118 press support
Item 3 Kukko 17/2 separating tool
Rules of cleanliness for working on automatic
transmissions page 37
-148
.
General repair notes page 00
-27
.
Pa
ge 2 of 29 Center differential, servicin
g
11/20/2002 htt
p://127.0.0.1:8080/audi/servlet/Dis
play?action=Goto&t
yp
e=re
pair&id=AUDI.B5.AT01.39.4
Page 3 of 29
39-47
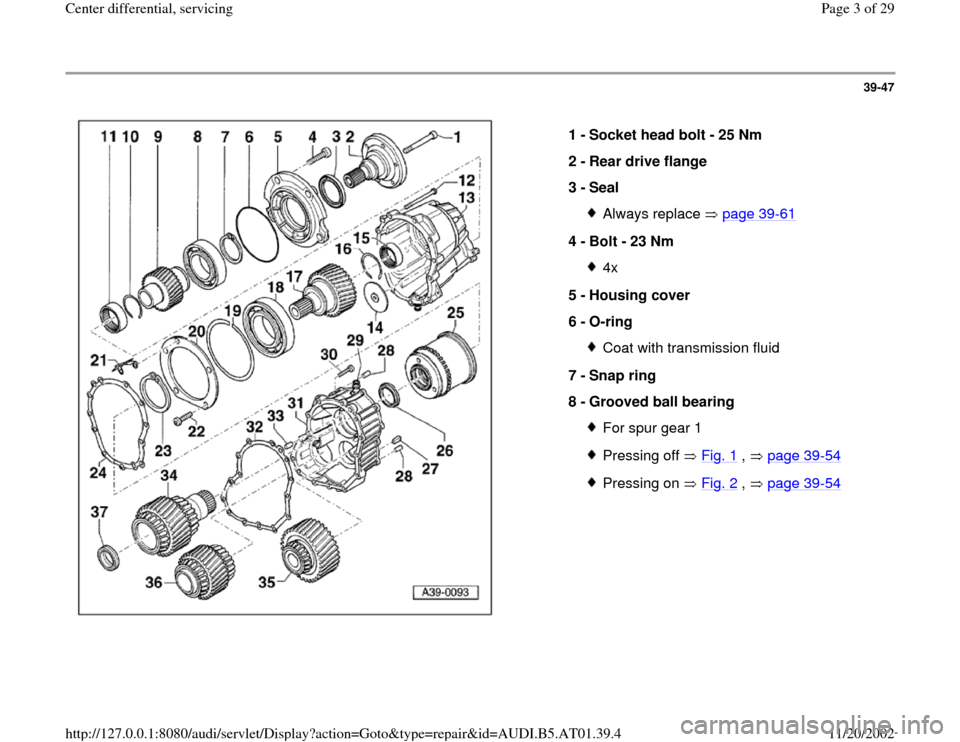
1 -
Socket head bolt - 25 Nm
2 -
Rear drive flange
3 -
Seal
Always replace page 39
-61
4 -
Bolt - 23 Nm
4x
5 -
Housing cover
6 -
O-ring Coat with transmission fluid
7 -
Snap ring
8 -
Grooved ball bearing For spur gear 1Pressing off Fig. 1
, page 39
-54
Pressing on Fig. 2
, page 39
-54Pa
ge 3 of 29 Center differential, servicin
g
11/20/2002 htt
p://127.0.0.1:8080/audi/servlet/Dis
play?action=Goto&t
yp
e=re
pair&id=AUDI.B5.AT01.39.4
Page 13 of 29
39-57
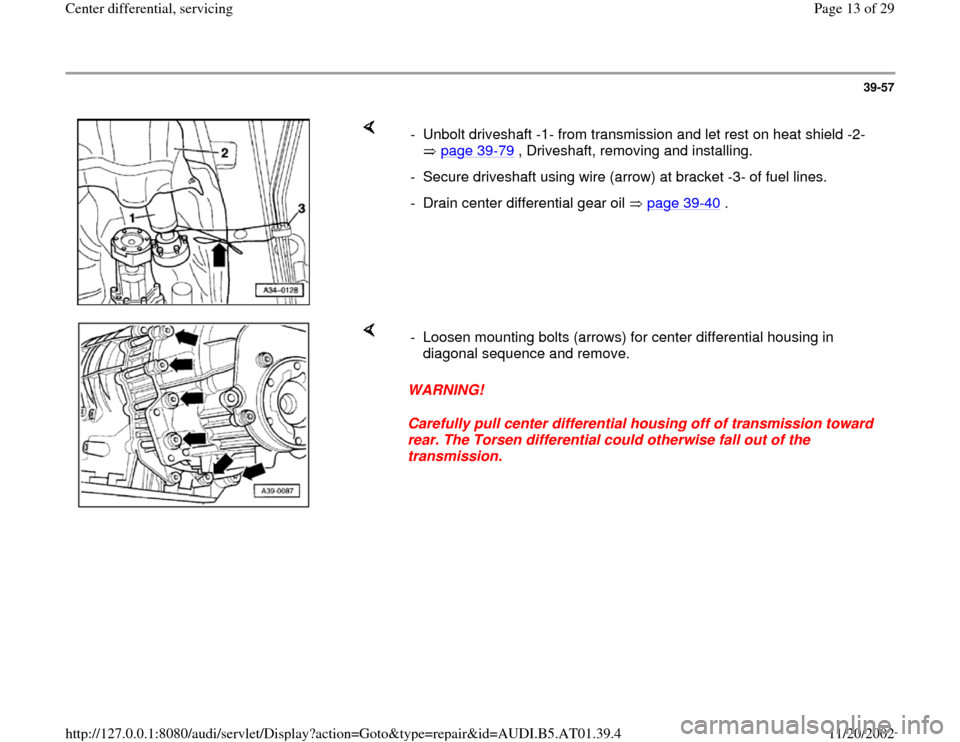
- Unbolt driveshaft -1- from transmission and let rest on heat shield -2-
page 39
-79
, Driveshaft, removing and installing.
- Secure driveshaft using wire (arrow) at bracket -3- of fuel lines.
- Drain center differential gear oil page 39
-40
.
WARNING!
Carefully pull center differential housing off of transmission toward
rear. The Torsen differential could otherwise fall out of the
transmission. - Loosen mounting bolts (arrows) for center differential housing in
diagonal sequence and remove.
Pa
ge 13 of 29 Center differential, servicin
g
11/20/2002 htt
p://127.0.0.1:8080/audi/servlet/Dis
play?action=Goto&t
yp
e=re
pair&id=AUDI.B5.AT01.39.4
Page 15 of 29
39-59
- Add 200 ml. gear oil to output housing
(comparable to gear oil, topping up on removed
and disassembled center differential page 39
-
43
).
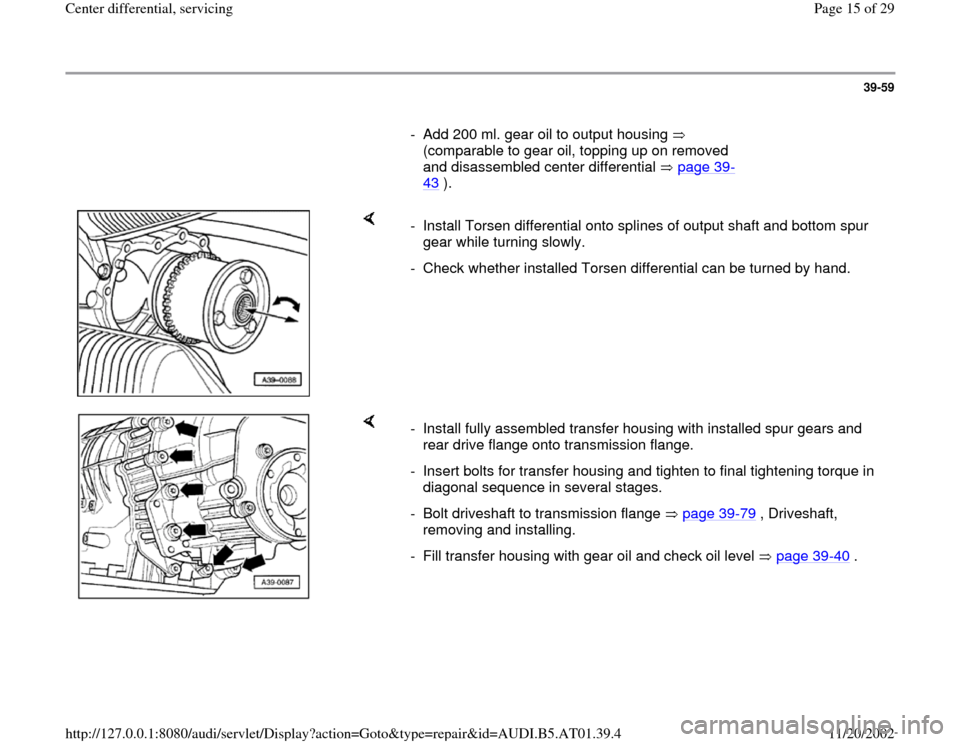
- Install Torsen differential onto splines of output shaft and bottom spur
gear while turning slowly.
- Check whether installed Torsen differential can be turned by hand.
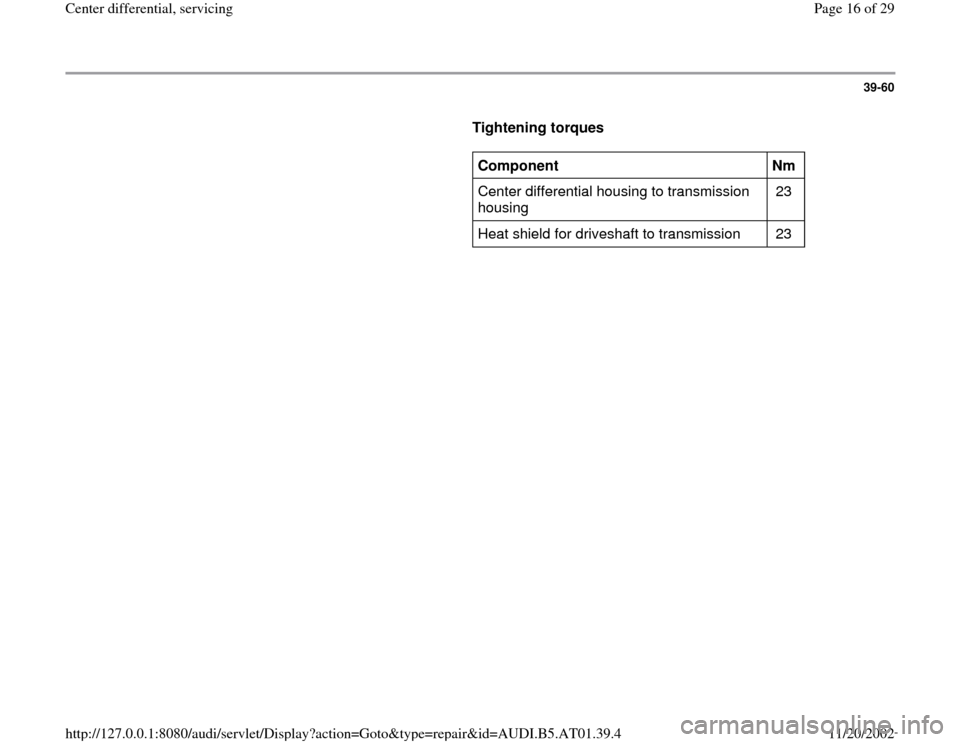
- Install fully assembled transfer housing with installed spur gears and
rear drive flange onto transmission flange.
- Insert bolts for transfer housing and tighten to final tightening torque in
diagonal sequence in several stages.
- Bolt driveshaft to transmission flange page 39
-79
, Driveshaft,
removing and installing.
- Fill transfer housing with gear oil and check oil level page 39
-40
.
Pa
ge 15 of 29 Center differential, servicin
g
11/20/2002 htt
p://127.0.0.1:8080/audi/servlet/Dis
play?action=Goto&t
yp
e=re
pair&id=AUDI.B5.AT01.39.4
Page 16 of 29
39-60
Tightening torques
Component
Nm
Center differential housing to transmission
housing 23
Heat shield for driveshaft to transmission 23
Pa
ge 16 of 29 Center differential, servicin
g
11/20/2002 htt
p://127.0.0.1:8080/audi/servlet/Dis
play?action=Goto&t
yp
e=re
pair&id=AUDI.B5.AT01.39.4
Page 18 of 29
39-62
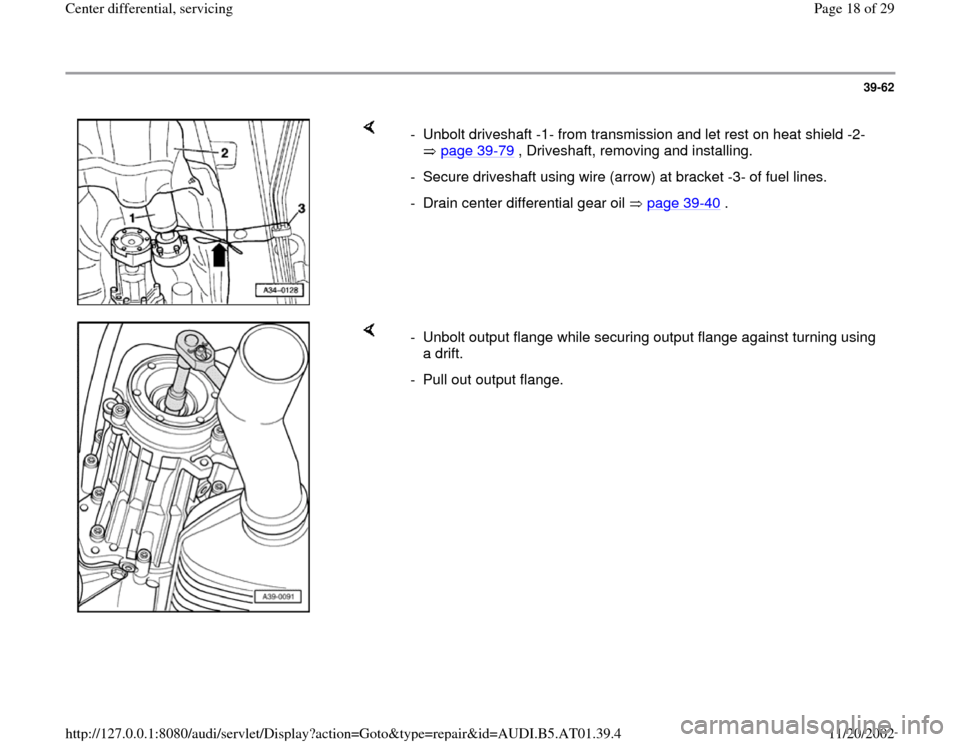
- Unbolt driveshaft -1- from transmission and let rest on heat shield -2-
page 39
-79
, Driveshaft, removing and installing.
- Secure driveshaft using wire (arrow) at bracket -3- of fuel lines.
- Drain center differential gear oil page 39
-40
.
- Unbolt output flange while securing output flange against turning using
a drift.
- Pull out output flange.
Pa
ge 18 of 29 Center differential, servicin
g
11/20/2002 htt
p://127.0.0.1:8080/audi/servlet/Dis
play?action=Goto&t
yp
e=re
pair&id=AUDI.B5.AT01.39.4
Page 20 of 29
39-64
Installing
Installation is reverse of removal, noting the
following:
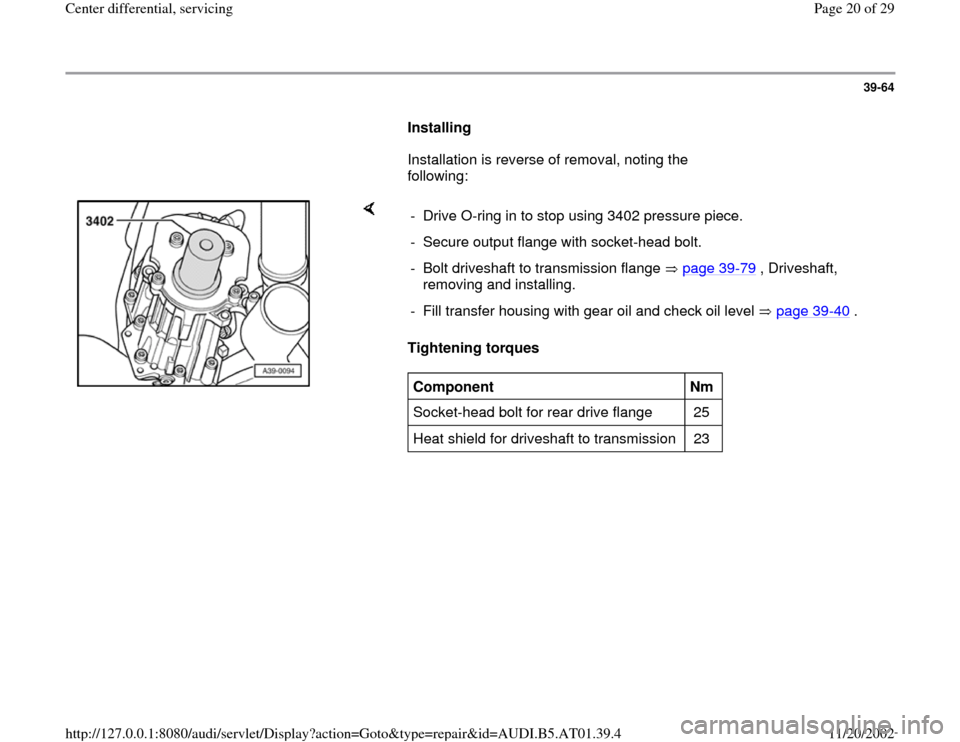
Tightening torques - Drive O-ring in to stop using 3402 pressure piece.
- Secure output flange with socket-head bolt.
- Bolt driveshaft to transmission flange page 39
-79
, Driveshaft,
removing and installing.
- Fill transfer housing with gear oil and check oil level page 39
-40
.
Component
Nm
Socket-head bolt for rear drive flange 25
Heat shield for driveshaft to transmission 23
Pa
ge 20 of 29 Center differential, servicin
g
11/20/2002 htt
p://127.0.0.1:8080/audi/servlet/Dis
play?action=Goto&t
yp
e=re
pair&id=AUDI.B5.AT01.39.4
Page 22 of 29
39-66
Removing
- Remove center differential page 39
-56
.
- Remove intermediate flange for front final
drive.
Installing
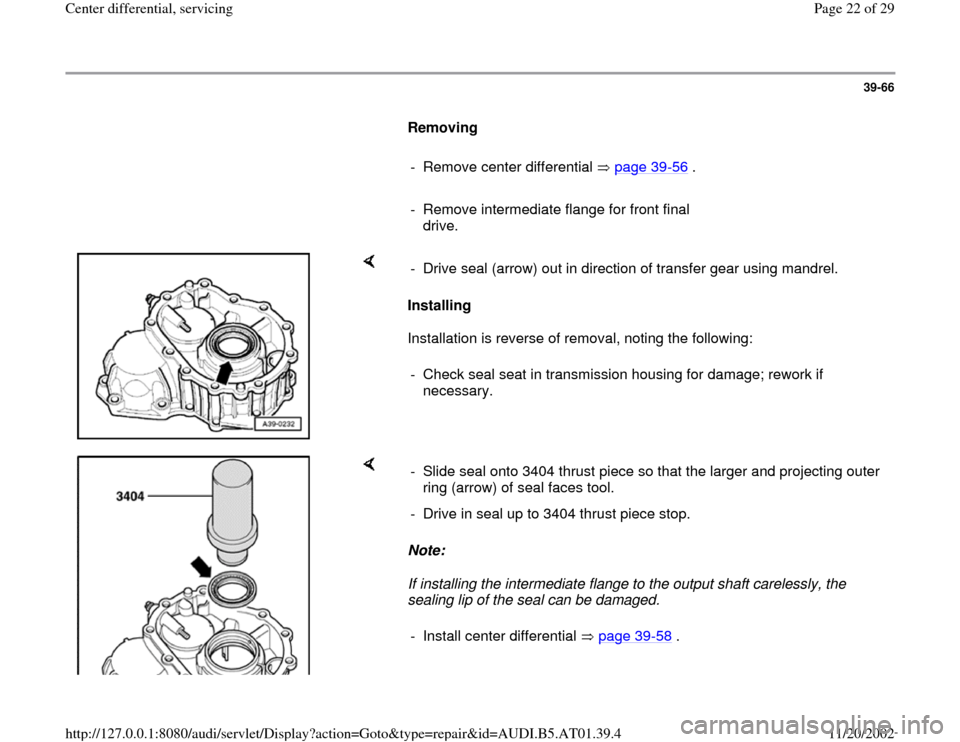
Installation is reverse of removal, noting the following: - Drive seal (arrow) out in direction of transfer gear using mandrel.
- Check seal seat in transmission housing for damage; rework if
necessary.
Note:
If installing the intermediate flange to the output shaft carelessly, the
sealing lip of the seal can be damaged. - Slide seal onto 3404 thrust piece so that the larger and projecting outer
ring (arrow) of seal faces tool.
- Drive in seal up to 3404 thrust piece stop.
- Install center differential page 39
-58
.
Pa
ge 22 of 29 Center differential, servicin
g
11/20/2002 htt
p://127.0.0.1:8080/audi/servlet/Dis
play?action=Goto&t
yp
e=re
pair&id=AUDI.B5.AT01.39.4
Page 24 of 29
39-68
WARNING!
Do not reinstall spur gears that have fallen to
the ground. The transmission must be
replaced in this case.
- Drive out seal using drift.
Installing
Installation is reverse of removal, noting the
following:
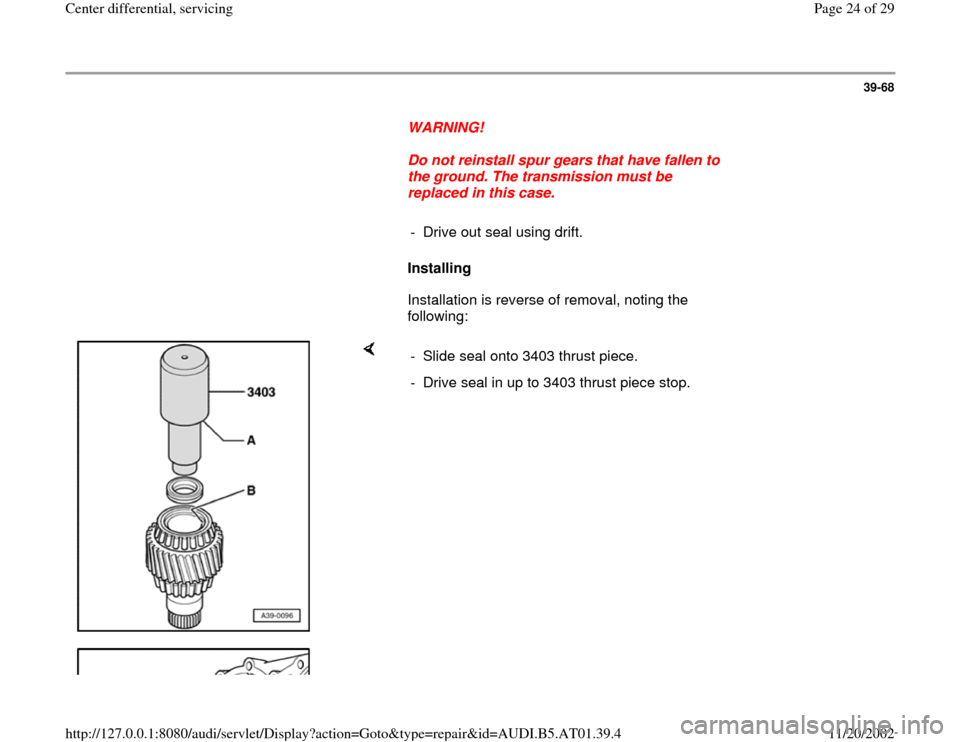
- Slide seal onto 3403 thrust piece.
- Drive seal in up to 3403 thrust piece stop.
Pa
ge 24 of 29 Center differential, servicin
g
11/20/2002 htt
p://127.0.0.1:8080/audi/servlet/Dis
play?action=Goto&t
yp
e=re
pair&id=AUDI.B5.AT01.39.4