AUDI A8 1998 D2 / 1.G AHA ATQ Engines Valve Gear Workshop Manual
Manufacturer: AUDI, Model Year: 1998,
Model line: A8,
Model: AUDI A8 1998 D2 / 1.G
Pages: 62, PDF Size: 1.17 MB
AUDI A8 1998 D2 / 1.G AHA ATQ Engines Valve Gear Workshop Manual
A8 1998 D2 / 1.G
AUDI
AUDI
https://www.carmanualsonline.info/img/6/995/w960_995-0.png
AUDI A8 1998 D2 / 1.G AHA ATQ Engines Valve Gear Workshop Manual
Trending: belt, coolant temperature, ignition, warning, engine oil, light, wiring
Page 51 of 62
15-45
Hydraulic valve lifters, checking
CAUTION!
After installing new hydraulic valve lifters the
engine must not be started for about 30
minutes. The hydraulic valve lifters must
settle (otherwise valves will strike pistons).
Then turn crankshaft two full revolutions by
hand before starting.
Notes:
Only replace hydraulic valve lifters in complete
sets. Hydraulic valve lifters cannot be adjusted
or repaired.
Irregular valve noise when starting engine is
normal.
- Start engine and let run until coolant
temperature reaches at least 80 C.
- Increase RPM to 2500 for about 2 minutes. If
necessary, test drive vehicle.
If hydraulic valve lifters are still loud, locate faulty
valve lifter as follows:
- Remove cylinder head cover.
Pa
ge 51 of 62 Valve
gear, servicin
g
11/21/2002 htt
p://127.0.0.1:8080/audi/servlet/Dis
play?action=Goto&t
yp
e=re
pair&id=AUDI.B5.GE03.15.1
Page 52 of 62
- Rotate crankshaft clockwise by turning mounting
bolt for toothed belt sprocket until lobes on
camshaft of hydraulic valve lifters to be checked
are pointing upward.
- Measure clearance between cam and valve
lifter.
Pa
ge 52 of 62 Valve
gear, servicin
g
11/21/2002 htt
p://127.0.0.1:8080/audi/servlet/Dis
play?action=Goto&t
yp
e=re
pair&id=AUDI.B5.GE03.15.1
Page 53 of 62
15-46
Note:
If irregular valve noise occurs repeatedly during short journeys and
disappears after extended driving, the oil check valves must be replaced
page 17
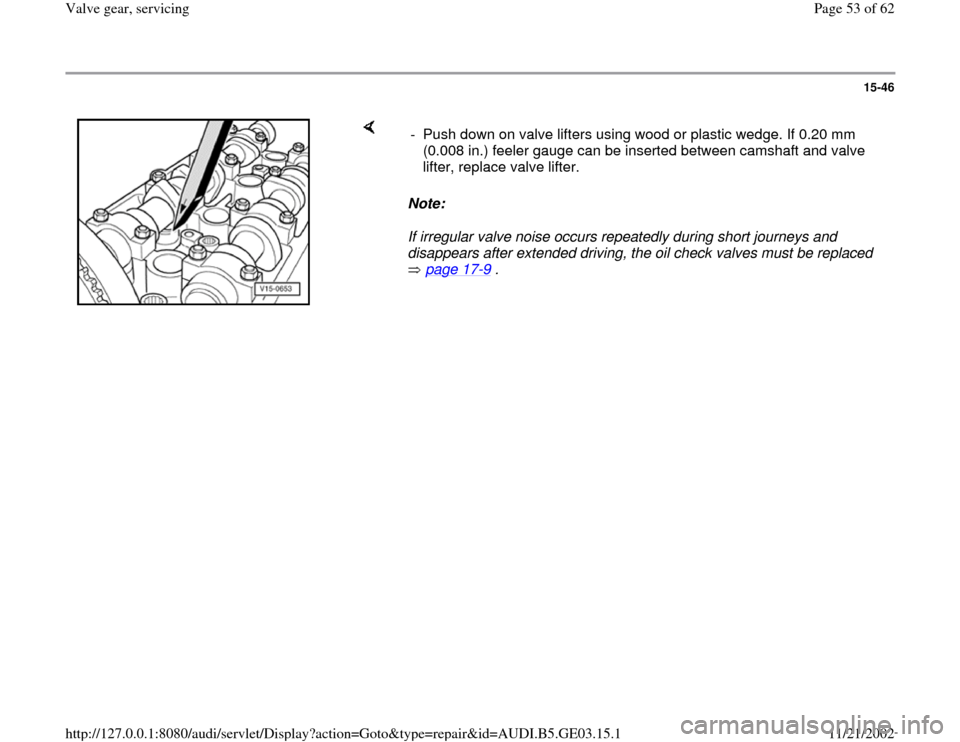
-9 . - Push down on valve lifters using wood or plastic wedge. If 0.20 mm
(0.008 in.) feeler gauge can be inserted between camshaft and valve
lifter, replace valve lifter.
Pa
ge 53 of 62 Valve
gear, servicin
g
11/21/2002 htt
p://127.0.0.1:8080/audi/servlet/Dis
play?action=Goto&t
yp
e=re
pair&id=AUDI.B5.GE03.15.1
Page 54 of 62
15-47
Valve stem oil seals, replacing
Cylinder head installed
Lock carrier in service position page 13
-1
- Remove ribbed belt page 13
-8 .
- Remove toothed belt page 13
-12
.
- Remove camshafts page 15
-31
.
- Remove valve lifters (do not interchange) and
lay aside with contact surface facing down.
- Remove spark plugs.
- Move piston for individual cylinder to Bottom
Dead Center (BDC) position.
Note:
Lightly tap valve lever to loosen stuck valve
keepers.
Exhaust side
Note:
Pa
ge 54 of 62 Valve
gear, servicin
g
11/21/2002 htt
p://127.0.0.1:8080/audi/servlet/Dis
play?action=Goto&t
yp
e=re
pair&id=AUDI.B5.GE03.15.1
Page 55 of 62
Before attaching the adjustable rod, remove the
two studs in the center of the cylinder head and
the three upper studs (intake side) for mounting
the cylinder head cover.
- Install VW653/3 pressure hose together with
seal hand tight into spark plug hole of relevant
cylinder and apply constant pressure (at least 6
bar).
Pa
ge 55 of 62 Valve
gear, servicin
g
11/21/2002 htt
p://127.0.0.1:8080/audi/servlet/Dis
play?action=Goto&t
yp
e=re
pair&id=AUDI.B5.GE03.15.1
Page 56 of 62
15-48
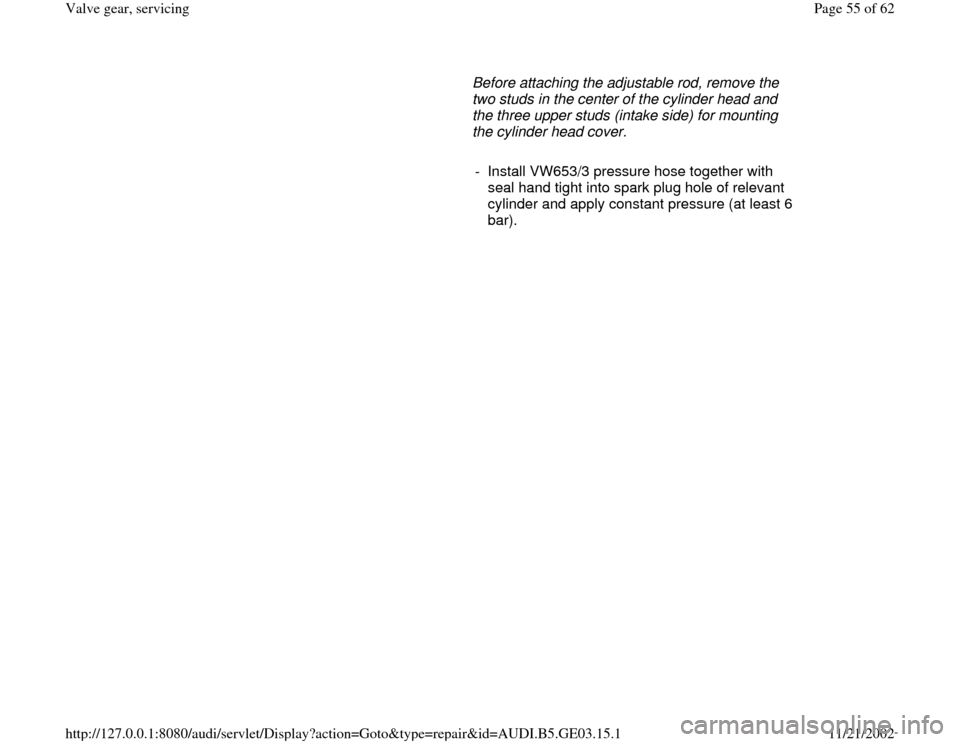
- Attach 2036 adjustable rod (as shown in figure) using M6 x 40 bolts
with large washers.
- Remove valve spring using VW541/1 lever and VW541/5 valve spring
tensioner.
- Remove valve spring and valve spring plate.
- Remove valve stem oil seal using 3047A slide hammer.
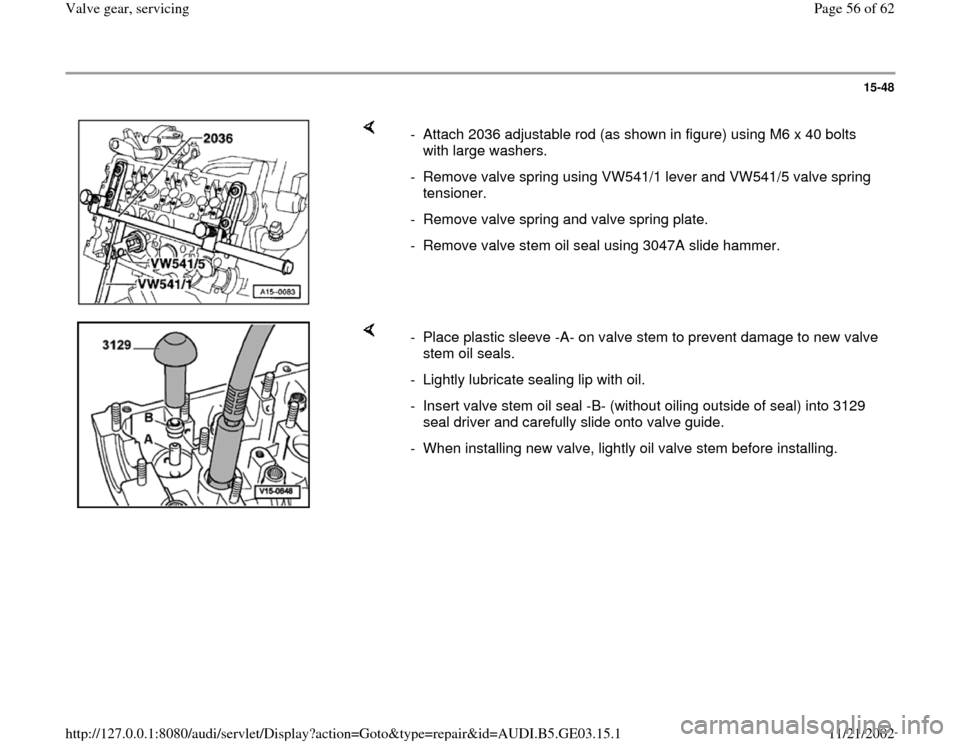
- Place plastic sleeve -A- on valve stem to prevent damage to new valve
stem oil seals.
- Lightly lubricate sealing lip with oil.
- Insert valve stem oil seal -B- (without oiling outside of seal) into 3129
seal driver and carefully slide onto valve guide.
- When installing new valve, lightly oil valve stem before installing.
Pa
ge 56 of 62 Valve
gear, servicin
g
11/21/2002 htt
p://127.0.0.1:8080/audi/servlet/Dis
play?action=Goto&t
yp
e=re
pair&id=AUDI.B5.GE03.15.1
Page 57 of 62
15-49
Intake side
Note:
The intake valves are installed in the cylinder
head at different angles.
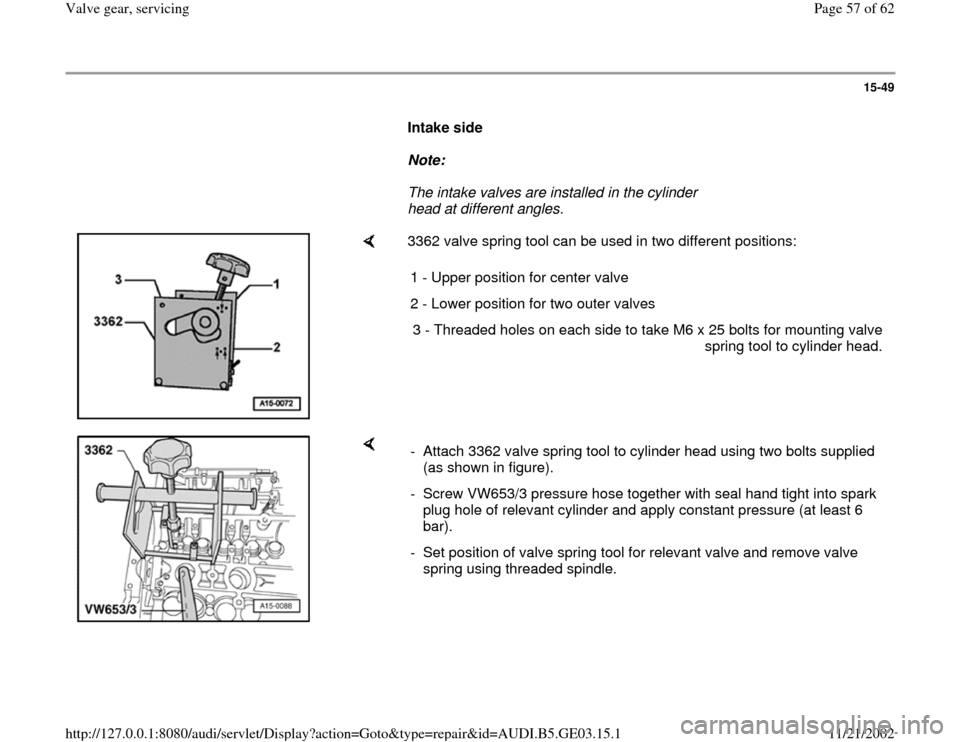
3362 valve spring tool can be used in two different positions:
1 - Upper position for center valve
2 - Lower position for two outer valves
3 - Threaded holes on each side to take M6 x 25 bolts for mounting valve
spring tool to cylinder head.
- Attach 3362 valve spring tool to cylinder head using two bolts supplied
(as shown in figure).
- Screw VW653/3 pressure hose together with seal hand tight into spark
plug hole of relevant cylinder and apply constant pressure (at least 6
bar).
- Set position of valve spring tool for relevant valve and remove valve
spring using threaded spindle.
Pa
ge 57 of 62 Valve
gear, servicin
g
11/21/2002 htt
p://127.0.0.1:8080/audi/servlet/Dis
play?action=Goto&t
yp
e=re
pair&id=AUDI.B5.GE03.15.1
Page 58 of 62
15-50
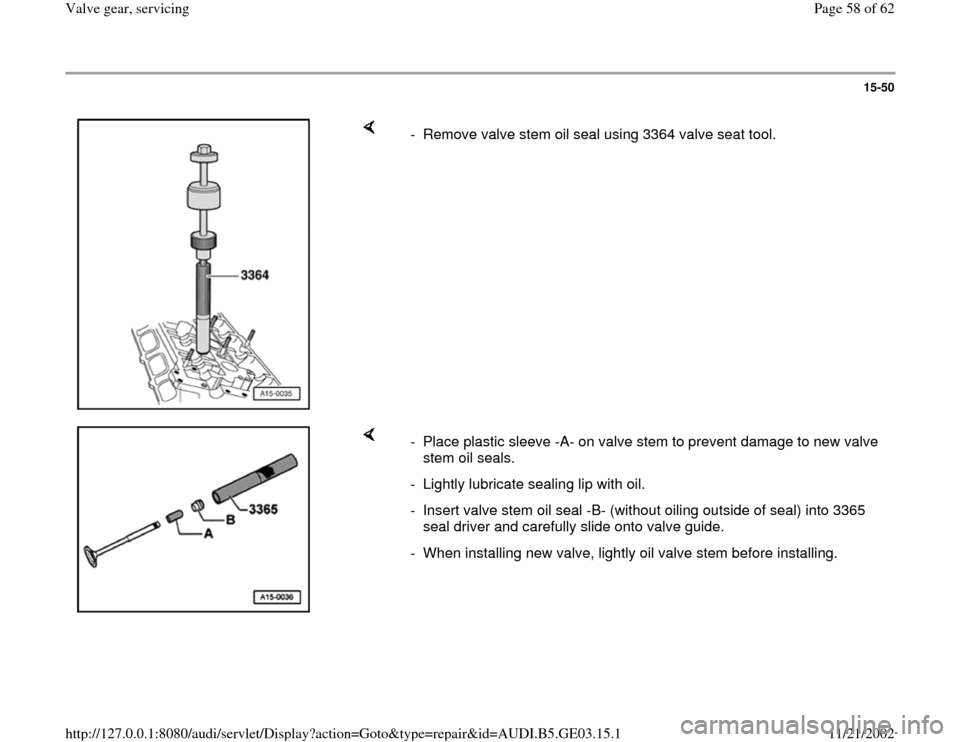
- Remove valve stem oil seal using 3364 valve seat tool.
- Place plastic sleeve -A- on valve stem to prevent damage to new valve
stem oil seals.
- Lightly lubricate sealing lip with oil.
- Insert valve stem oil seal -B- (without oiling outside of seal) into 3365
seal driver and carefully slide onto valve guide.
- When installing new valve, lightly oil valve stem before installing.
Pa
ge 58 of 62 Valve
gear, servicin
g
11/21/2002 htt
p://127.0.0.1:8080/audi/servlet/Dis
play?action=Goto&t
yp
e=re
pair&id=AUDI.B5.GE03.15.1
Page 59 of 62
15-51
Valves, refacing
WARNING!
Valves must not be refaced by cutting or
grinding.
Only hand lapping is permitted.
Observe the WARNING regarding proper
disposal of sodium-filled exhaust valves
page 15
-44
.
Pa
ge 59 of 62 Valve
gear, servicin
g
11/21/2002 htt
p://127.0.0.1:8080/audi/servlet/Dis
play?action=Goto&t
yp
e=re
pair&id=AUDI.B5.GE03.15.1
Page 60 of 62
15-52
Valve guides, checking
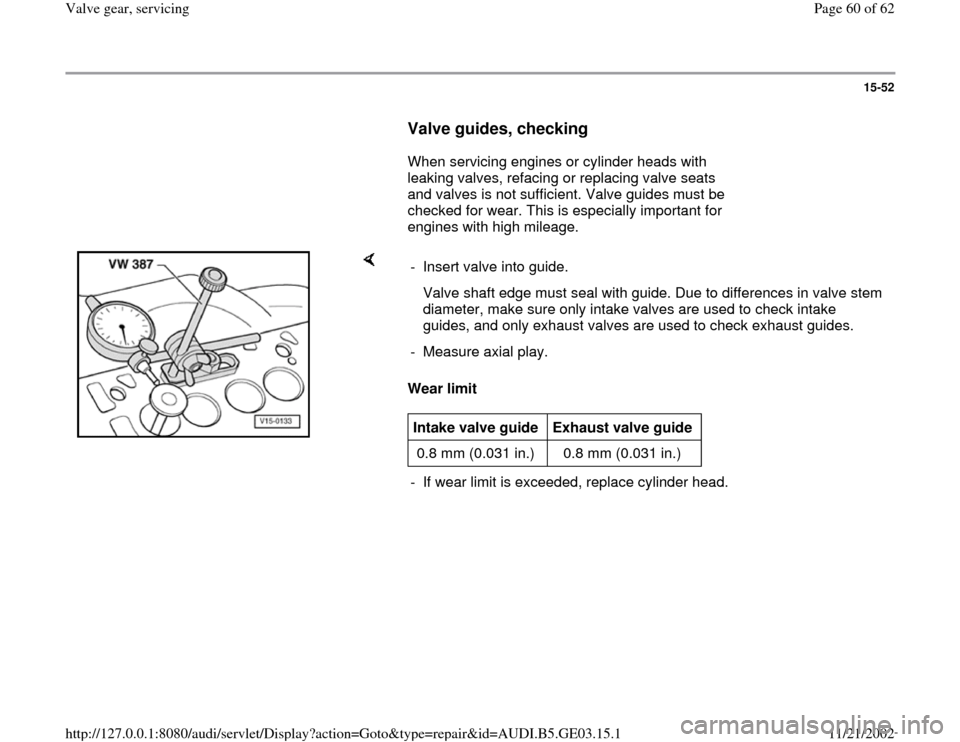
When servicing engines or cylinder heads with
leaking valves, refacing or replacing valve seats
and valves is not sufficient. Valve guides must be
checked for wear. This is especially important for
engines with high mileage.
Wear limit - Insert valve into guide.
Valve shaft edge must seal with guide. Due to differences in valve stem
diameter, make sure only intake valves are used to check intake
guides, and only exhaust valves are used to check exhaust guides.
- Measure axial play.Intake valve guide
Exhaust valve guide
0.8 mm (0.031 in.) 0.8 mm (0.031 in.) - If wear limit is exceeded, replace cylinder head.
Pa
ge 60 of 62 Valve
gear, servicin
g
11/21/2002 htt
p://127.0.0.1:8080/audi/servlet/Dis
play?action=Goto&t
yp
e=re
pair&id=AUDI.B5.GE03.15.1
Trending: coolant temperature, wheel bolt torque, check oil, ESP, mileage, sensor, clock
