lock AUDI A8 2000 D2 / 1.G AHA ATQ Engines Valve Gear Service Manual
[x] Cancel search | Manufacturer: AUDI, Model Year: 2000, Model line: A8, Model: AUDI A8 2000 D2 / 1.GPages: 62, PDF Size: 1.17 MB
Page 20 of 62
15-18
Cylinder head, removing and installing
Note:
The following instructions apply to the left
cylinder head.
Removing
Lock carrier in service position page 13
-
1 .
- Remove ribbed belt page 13
-8 .
- Remove toothed belt page 13
-12
.
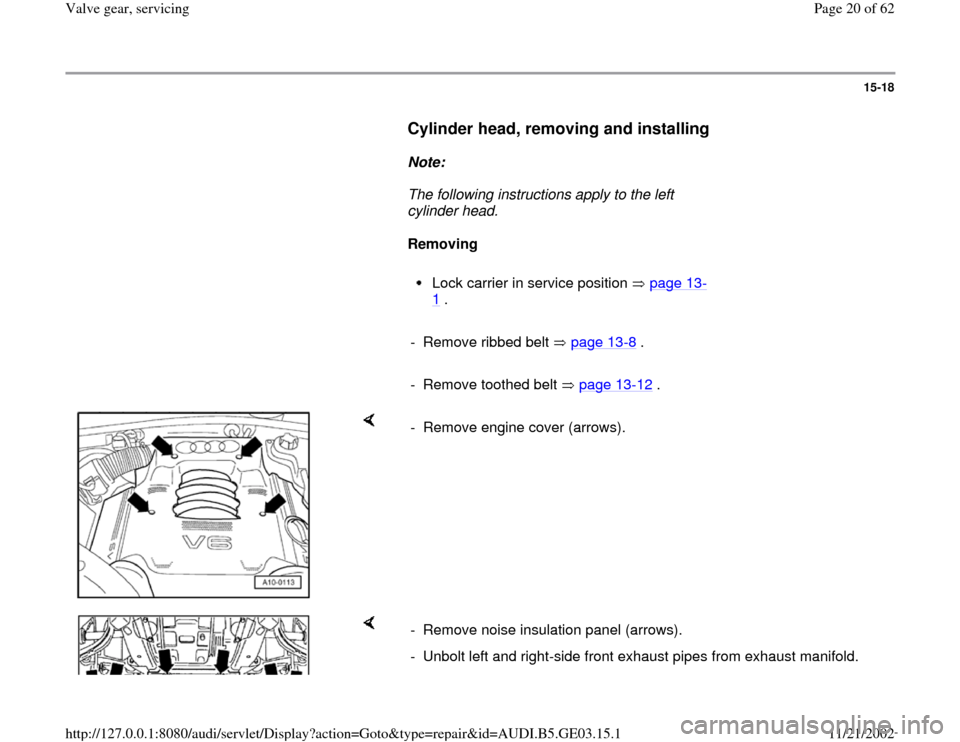
- Remove engine cover (arrows).
- Remove noise insulation panel (arrows).
- Unbolt left and right-side front exhaust pipes from exhaust manifold.
Pa
ge 20 of 62 Valve
gear, servicin
g
11/21/2002 htt
p://127.0.0.1:8080/audi/servlet/Dis
play?action=Goto&t
yp
e=re
pair&id=AUDI.B5.GE03.15.1
Page 22 of 62
15-19
- Place VAG1306 drip tray beneath engine.
- Open engine coolant expansion tank cap.
WARNING!
The cooling system is pressurized when the
engine is warm. When opening the expansion
tank, wear gloves and other appropriate
protection, cover the cap with a cloth and
open carefully to relieve system pressure
slowly.
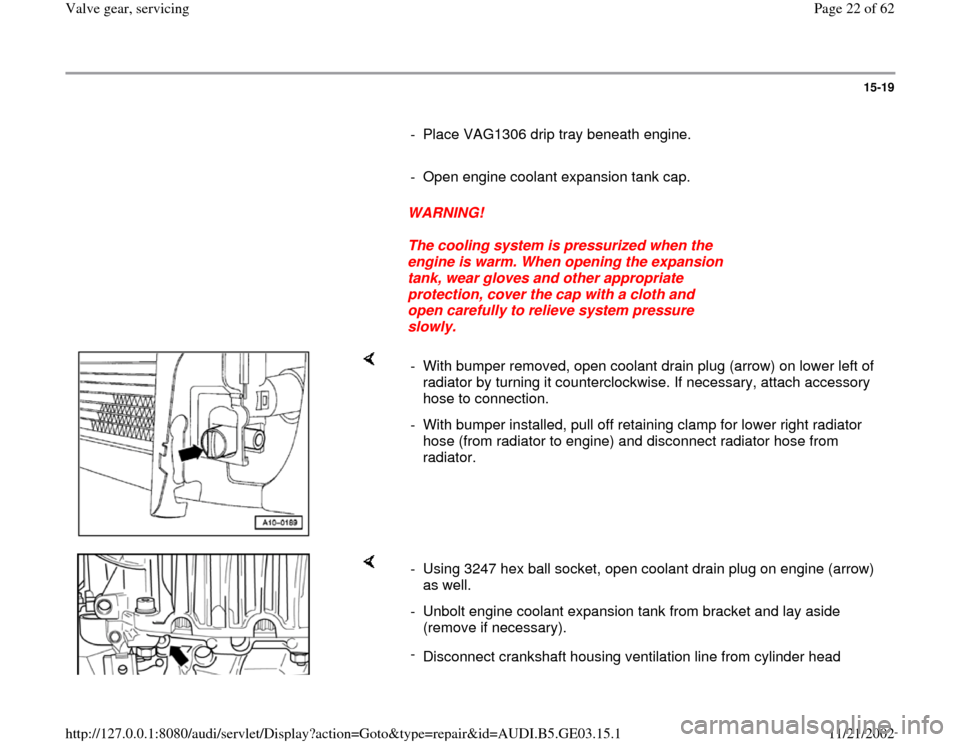
- With bumper removed, open coolant drain plug (arrow) on lower left of
radiator by turning it counterclockwise. If necessary, attach accessory
hose to connection.
- With bumper installed, pull off retaining clamp for lower right radiator
hose (from radiator to engine) and disconnect radiator hose from
radiator.
- Using 3247 hex ball socket, open coolant drain plug on engine (arrow)
as well.
- Unbolt engine coolant expansion tank from bracket and lay aside
(remove if necessary).
-
Disconnect crankshaft housing ventilation line from cylinder head
Pa
ge 22 of 62 Valve
gear, servicin
g
11/21/2002 htt
p://127.0.0.1:8080/audi/servlet/Dis
play?action=Goto&t
yp
e=re
pair&id=AUDI.B5.GE03.15.1
Page 25 of 62
15-21
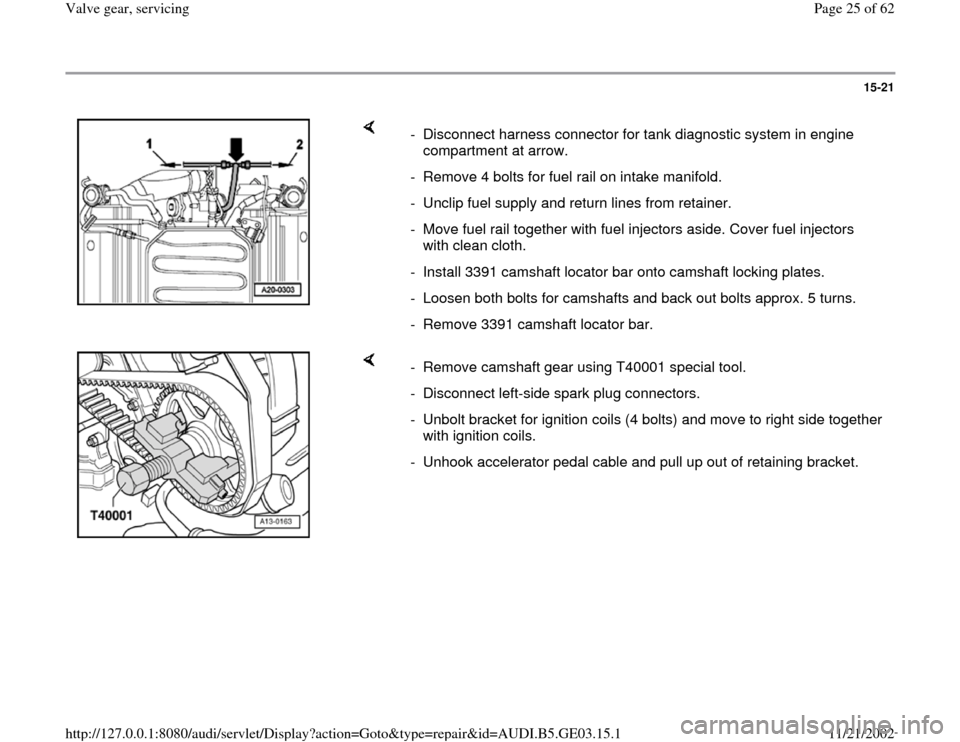
- Disconnect harness connector for tank diagnostic system in engine
compartment at arrow.
- Remove 4 bolts for fuel rail on intake manifold.
- Unclip fuel supply and return lines from retainer.
- Move fuel rail together with fuel injectors aside. Cover fuel injectors
with clean cloth.
- Install 3391 camshaft locator bar onto camshaft locking plates.
- Loosen both bolts for camshafts and back out bolts approx. 5 turns.
- Remove 3391 camshaft locator bar.
- Remove camshaft gear using T40001 special tool.
- Disconnect left-side spark plug connectors.
- Unbolt bracket for ignition coils (4 bolts) and move to right side together
with ignition coils.
- Unhook accelerator pedal cable and pull up out of retaining bracket.
Pa
ge 25 of 62 Valve
gear, servicin
g
11/21/2002 htt
p://127.0.0.1:8080/audi/servlet/Dis
play?action=Goto&t
yp
e=re
pair&id=AUDI.B5.GE03.15.1
Page 28 of 62
15-24
Installing
Notes:
Bolt holes in engine block for cylinder head
bolts must be free of oil and coolant.
Always replace cylinder head bolts.
Vacuum line connections page 10-23
When installing a new cylinder head:
- Install centering pin for intake manifold.
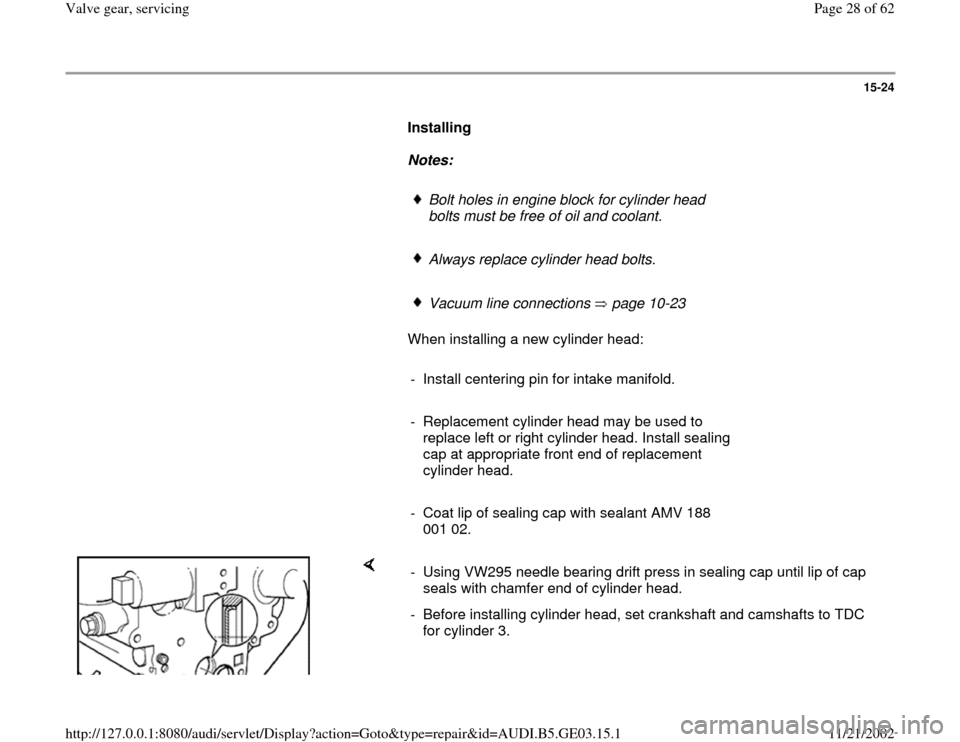
- Replacement cylinder head may be used to
replace left or right cylinder head. Install sealing
cap at appropriate front end of replacement
cylinder head.
- Coat lip of sealing cap with sealant AMV 188
001 02.
- Using VW295 needle bearing drift press in sealing cap until lip of cap
seals with chamfer end of cylinder head.
- Before installing cylinder head, set crankshaft and camshafts to TDC
for cylinder 3.
Pa
ge 28 of 62 Valve
gear, servicin
g
11/21/2002 htt
p://127.0.0.1:8080/audi/servlet/Dis
play?action=Goto&t
yp
e=re
pair&id=AUDI.B5.GE03.15.1
Page 37 of 62
15-31
Camshafts and camshaft adjusters,
removing and installing
Removing
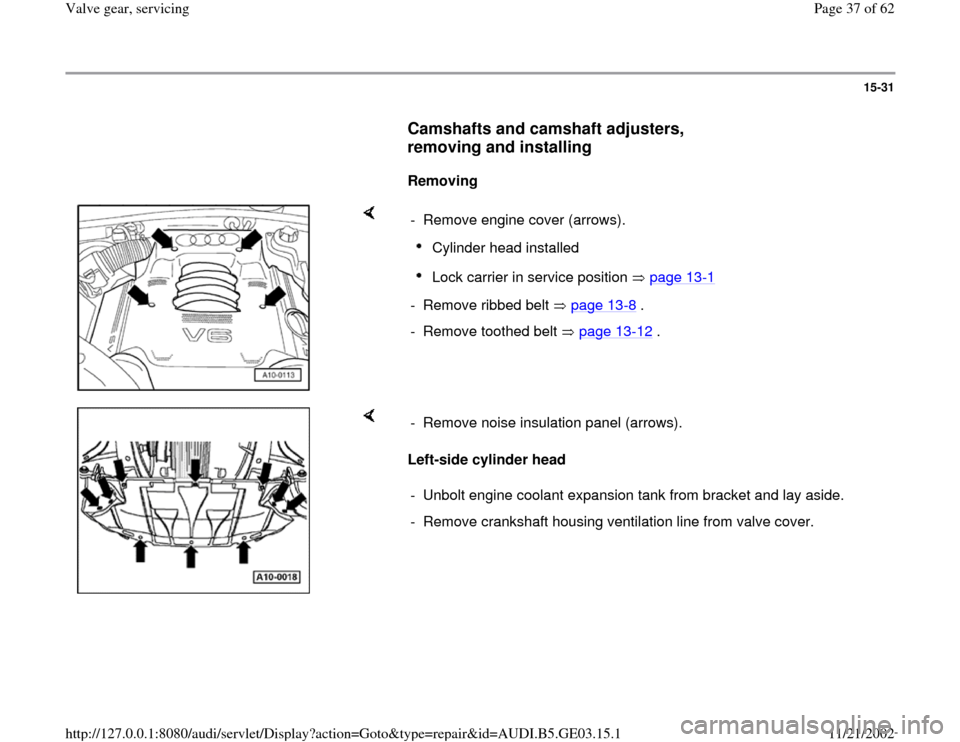
- Remove engine cover (arrows).
Cylinder head installed Lock carrier in service position page 13
-1
- Remove ribbed belt page 13
-8 .
- Remove toothed belt page 13
-12
.
Left-side cylinder head - Remove noise insulation panel (arrows).
- Unbolt engine coolant expansion tank from bracket and lay aside.
- Remove crankshaft housing ventilation line from valve cover.
Pa
ge 37 of 62 Valve
gear, servicin
g
11/21/2002 htt
p://127.0.0.1:8080/audi/servlet/Dis
play?action=Goto&t
yp
e=re
pair&id=AUDI.B5.GE03.15.1
Page 38 of 62
15-32
Right-side cylinder head
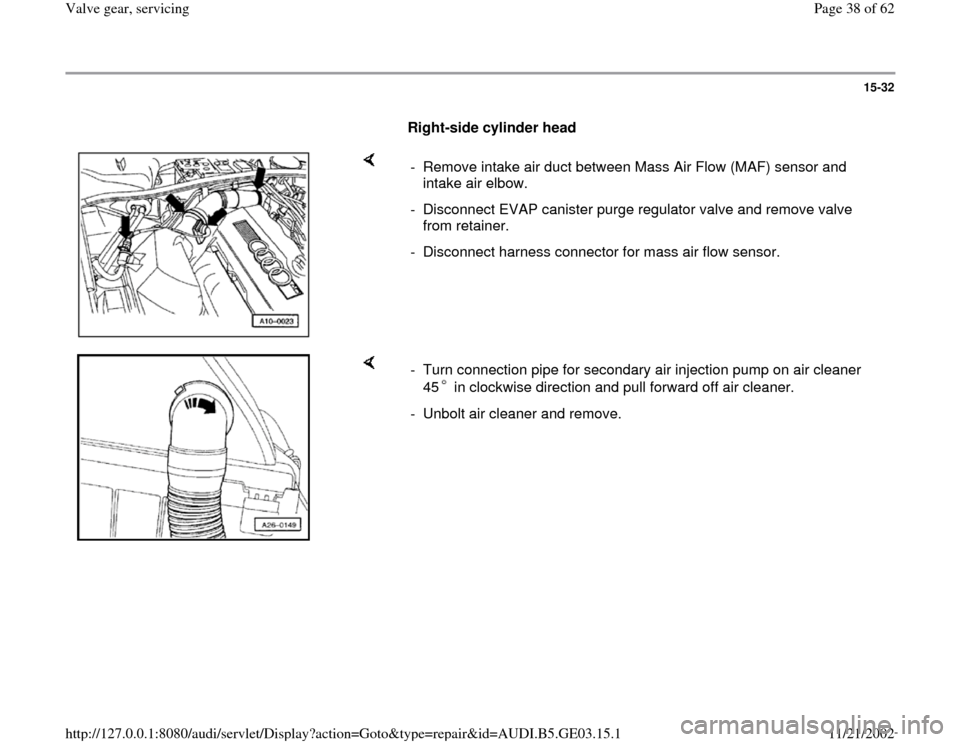
- Remove intake air duct between Mass Air Flow (MAF) sensor and
intake air elbow.
- Disconnect EVAP canister purge regulator valve and remove valve
from retainer.
- Disconnect harness connector for mass air flow sensor.
- Turn connection pipe for secondary air injection pump on air cleaner
45 in clockwise direction and pull forward off air cleaner. - Unbolt air cleaner and remove.
Pa
ge 38 of 62 Valve
gear, servicin
g
11/21/2002 htt
p://127.0.0.1:8080/audi/servlet/Dis
play?action=Goto&t
yp
e=re
pair&id=AUDI.B5.GE03.15.1
Page 39 of 62
15-33
All models
- Remove Camshaft Position (CMP) sensor
housing and shutter wheel.
- Unbolt shutter wheel for Camshaft Position
(CMP) sensor -G40- and carefully pry out using
screwdriver.
Tightening torque: 20Nm (15 ft lb)
- Remove cylinder head cover.
- Install 3391 camshaft locator bar into camshaft
locking plates.
- Loosen both bolts for camshafts and back out
bolts approx. 5 turns.
- Remove 3391 camshaft locator bar.
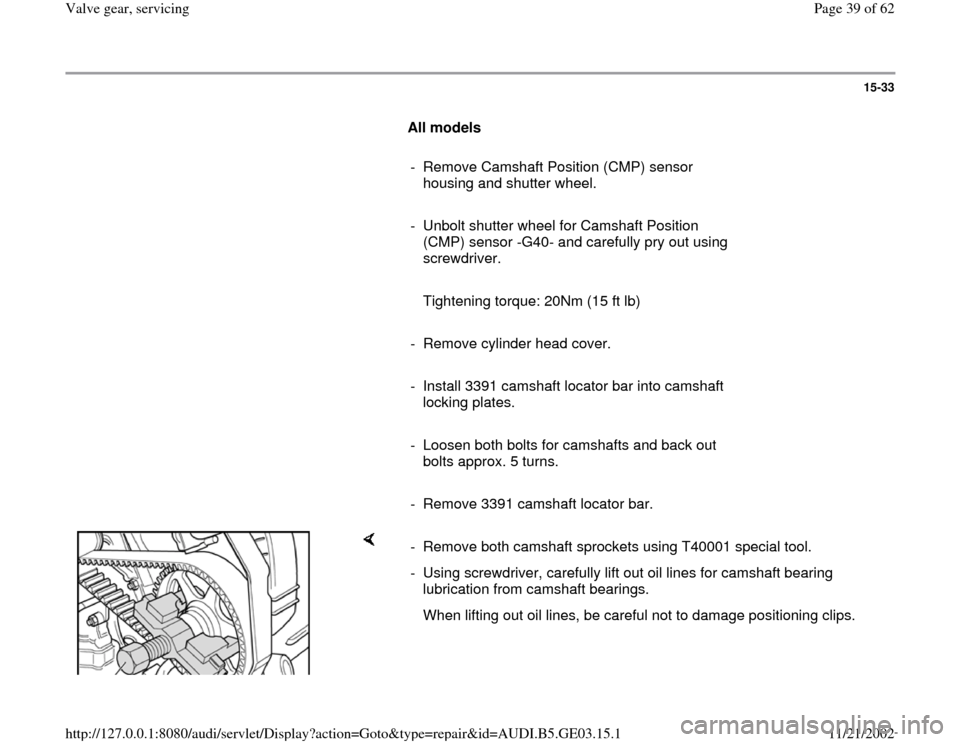
- Remove both camshaft sprockets using T40001 special tool.
- Using screwdriver, carefully lift out oil lines for camshaft bearing
lubrication from camshaft bearings.
When lifting out oil lines, be careful not to damage positioning clips.
Pa
ge 39 of 62 Valve
gear, servicin
g
11/21/2002 htt
p://127.0.0.1:8080/audi/servlet/Dis
play?action=Goto&t
yp
e=re
pair&id=AUDI.B5.GE03.15.1
Page 52 of 62
- Rotate crankshaft clockwise by turning mounting
bolt for toothed belt sprocket until lobes on
camshaft of hydraulic valve lifters to be checked
are pointing upward.
- Measure clearance between cam and valve
lifter.
Pa
ge 52 of 62 Valve
gear, servicin
g
11/21/2002 htt
p://127.0.0.1:8080/audi/servlet/Dis
play?action=Goto&t
yp
e=re
pair&id=AUDI.B5.GE03.15.1
Page 54 of 62
15-47
Valve stem oil seals, replacing
Cylinder head installed
Lock carrier in service position page 13
-1
- Remove ribbed belt page 13
-8 .
- Remove toothed belt page 13
-12
.
- Remove camshafts page 15
-31
.
- Remove valve lifters (do not interchange) and
lay aside with contact surface facing down.
- Remove spark plugs.
- Move piston for individual cylinder to Bottom
Dead Center (BDC) position.
Note:
Lightly tap valve lever to loosen stuck valve
keepers.
Exhaust side
Note:
Pa
ge 54 of 62 Valve
gear, servicin
g
11/21/2002 htt
p://127.0.0.1:8080/audi/servlet/Dis
play?action=Goto&t
yp
e=re
pair&id=AUDI.B5.GE03.15.1