ESP AUDI A8 2014 User Guide
[x] Cancel search | Manufacturer: AUDI, Model Year: 2014, Model line: A8, Model: AUDI A8 2014Pages: 314, PDF Size: 78.47 MB
Page 49 of 314
Highway light function* (vehicles with LED
headlights) - this function adapts the lighting
for highway driving based on vehicle speed.
.&_ WARNING
-Automatic headlights are only intended
to assist the driver. They do not relieve
the driver of his responsibility to check
the headlights and to turn them on man ually according to the current light and
visibility conditions. For example, fog
cannot be detected by the light sensors.
So always switch on the headlights
~D
under these weather conditions and
when driving in the dark.
- Crashes can happen when you cannot see the road ahead and when you cannot be
seen by other motorists. Always turn on
the headlights so that you can see ahead and so that others can see your car from
the back.
- Please observe legal regulations when
using the lighting systems described.
(D Note
The rear fog lights should only be turned
on in accordance with traffic regulation, as
the lights are bright for following traffic.
(D Tips
- The light sensor* for automatic dynamic
headlight range control* is located in the
rear view mirror mount. You should
therefore not apply any stickers to the
windshield in this area in order to pre
vent malfunctions or failures.
- In the event of a light sensor malfunc
tion, the driver is notified in the instru
ment cluster display~
page 22.
- You will hear a warning tone if you open
the driver door when the exterior lights
are switched on.
- In cool or damp weather, the inside of
the headlights, turn signals and tail
lights can fog over due to the tempera
ture difference between the inside and
outside. They will clear shortly after Clear vision 4
7
switching them on. This does not affect
the service life of the lighting.
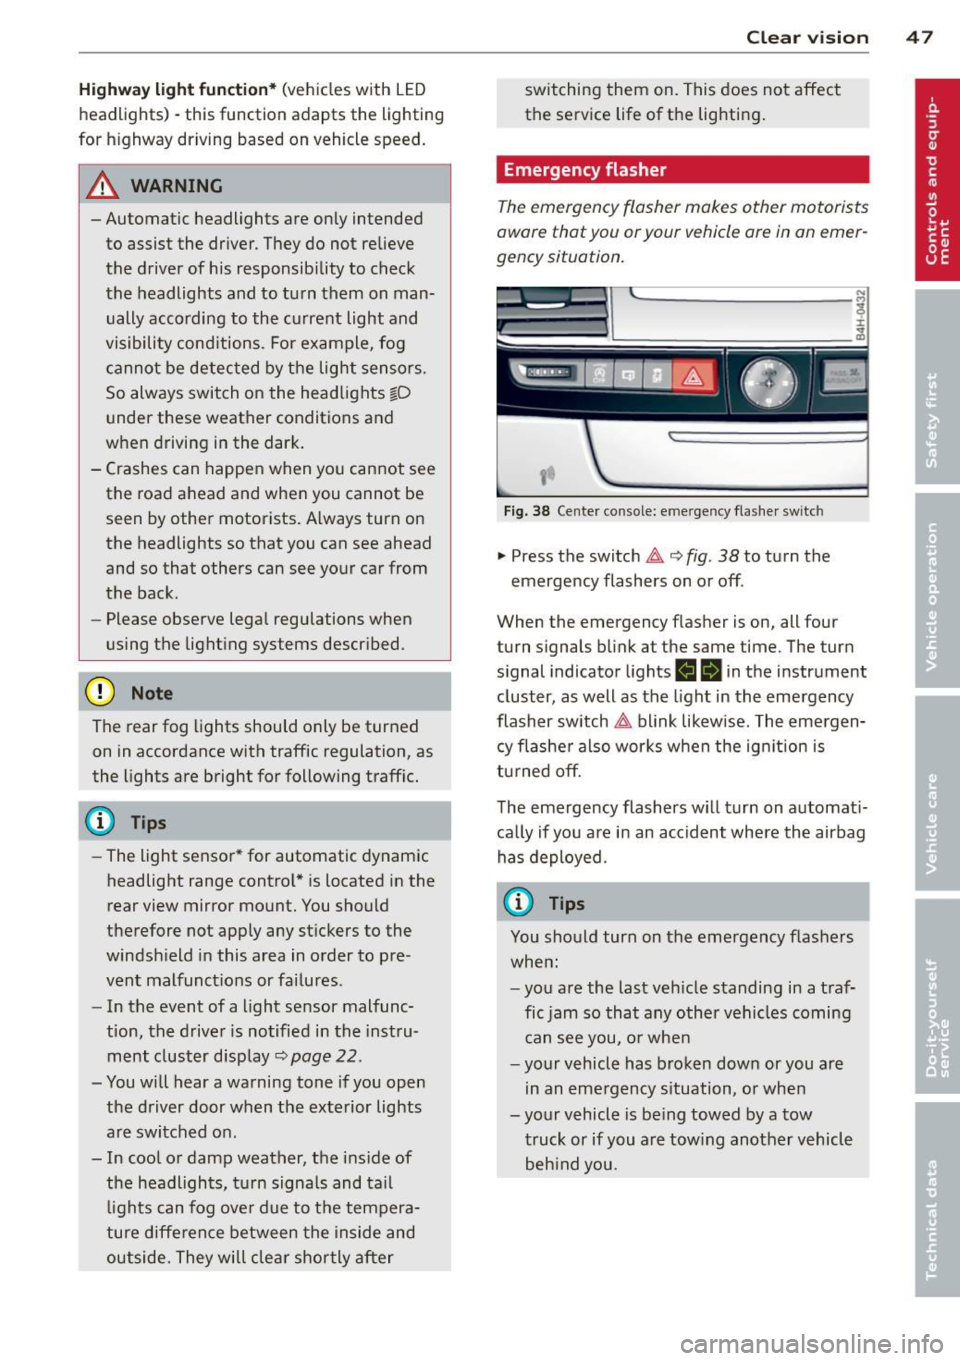
Emergency flasher
Th e emergency flasher makes other motorists
oware that you or your vehicle are in on emer
gency situation.
'1'.r-- ~·
~ ·--~. -~ -..... -._.. l'
1
Fig. 38 Center console: emergency flasher switc h
.,. Press the switch ~ 9 fig. 38 to turn the
emergency flashers on or off .
When the emergency flasher is on, all four
turn signals blink at the same time. The turn
signal indicator lights
H Iii in the instrument
cluster, as well as the light in the emergency
flasher switch~ blink likewise. The emergen
cy flasher also works when the ignition is
turned
off.
The emergency flashers will turn on automati
cally if you are in an accident where the airbag
has deployed.
@ Tips
You should turn on the emergency flashers
when:
-you are the last vehicle standing in a traf
fic jam so that any other vehicles coming
can see you, or when
- your vehicle has broken down or you are
in an emergency situation, or when
-your vehicle is being towed by a tow truck or if you are towing another vehicle behind you.
Page 52 of 314
50 Clear vis ion
& WARNING
H igh beam assist is only intended to assist
the driver. The driver is still responsible for controlling the headlights and sw itching
th e high beams on and off manually de
pending on traffic, l ighting and visibility
condi tions. Failure to intervene manually
may lead to ris k of accident . It may be nec
essary to operate the high beams man ua l
ly in the following situat ions, e.g .:
- For adverse weather conditions such as
fog, heavy rain, blowing snow or spraying
water .
- On roads where oncoming traffic may be
partia lly obsc ured such as expressways .
-If there are individuals on the road with
no light ing or poor lighting, such as cy
cl ists .
- In tight c urves and on steep s lopes .
- In poorly lit areas.
- With strong reflectors su ch as signs.
- If the area of the windshie ld nea r th e
sensor is fogged over, dirty, icy or cov
ered w ith a st icker.
(D Tips
- The high beam ass ist is active above a
speed of approx . 25 mph (40 km/h).
- If afte r activation, your speed falls below
approx . 15 mp h (24 km/h), the high
beams w ill automatically be switched
off.
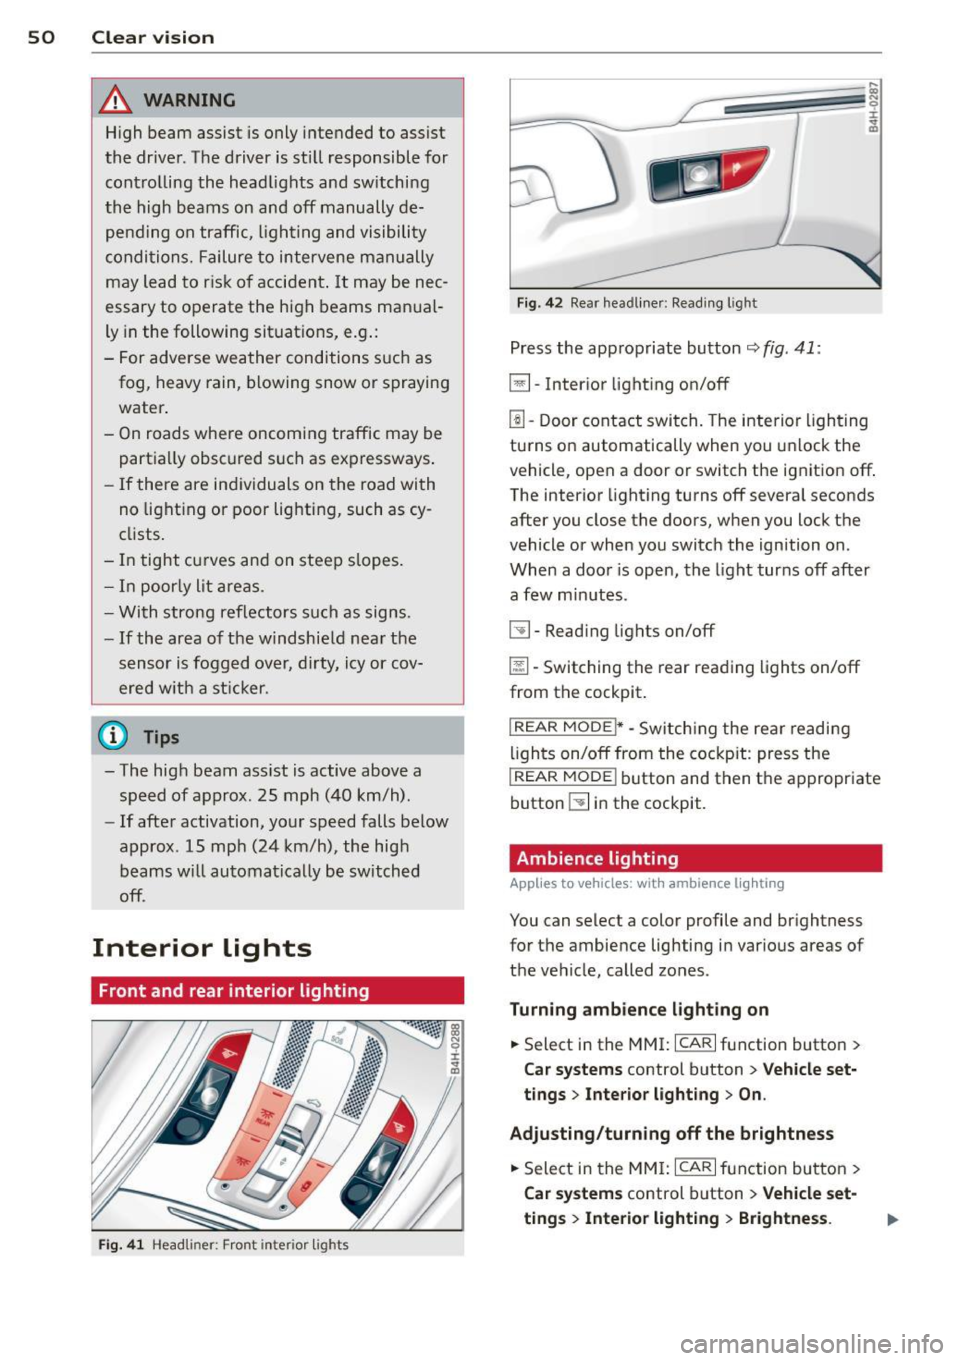
Interior lights
Front and rear interior lighting
Fi g. 41 Headliner: Front interior lights
F ig. 42 Rear headli ner : Read ing light
Press the app ropriate button ~ fig . 41:
~ -Inter ior light ing on/off
l!l -Door contact switch. The interior lighting
turns on automatically when you u nlock the
vehicle, open a door or switch the ignition off.
The interior light ing turns off several seconds
after you close the doors, when you lock the
vehicle or when you switch the ignition on.
When a doo r is open, the light turns off after
a few min utes.
~ -Read ing lights on/off
~ - Switching the rear reading lights on/off
from the cockpit .
I REAR MODEi* -Switching the rear readi ng
li ghts on/off from the cockpit : press the
I REAR MODE ! button and then th e appropriate
button ~ in the cockpit.
Ambience lighting
Applies to veh icles: w it h amb ience l ig h ting
You can select a color profile and brightness
for the ambie nce lighting in various areas of
the ve hicle, called zones.
Turning ambience lighting on
.. Select in the MMI: ICAR ! function button >
Car systems control button > Vehicle set·
tings > Interior light ing > On .
Adjusting /turning off the brightness
• Sele ct in the MM I: ICARI fu nction button >
Car sy stems control b utton > V ehicle set
ting s> Inte rior light ing > Brightness .
Page 55 of 314
Wiper and washer system
Switching the windshield wipers on
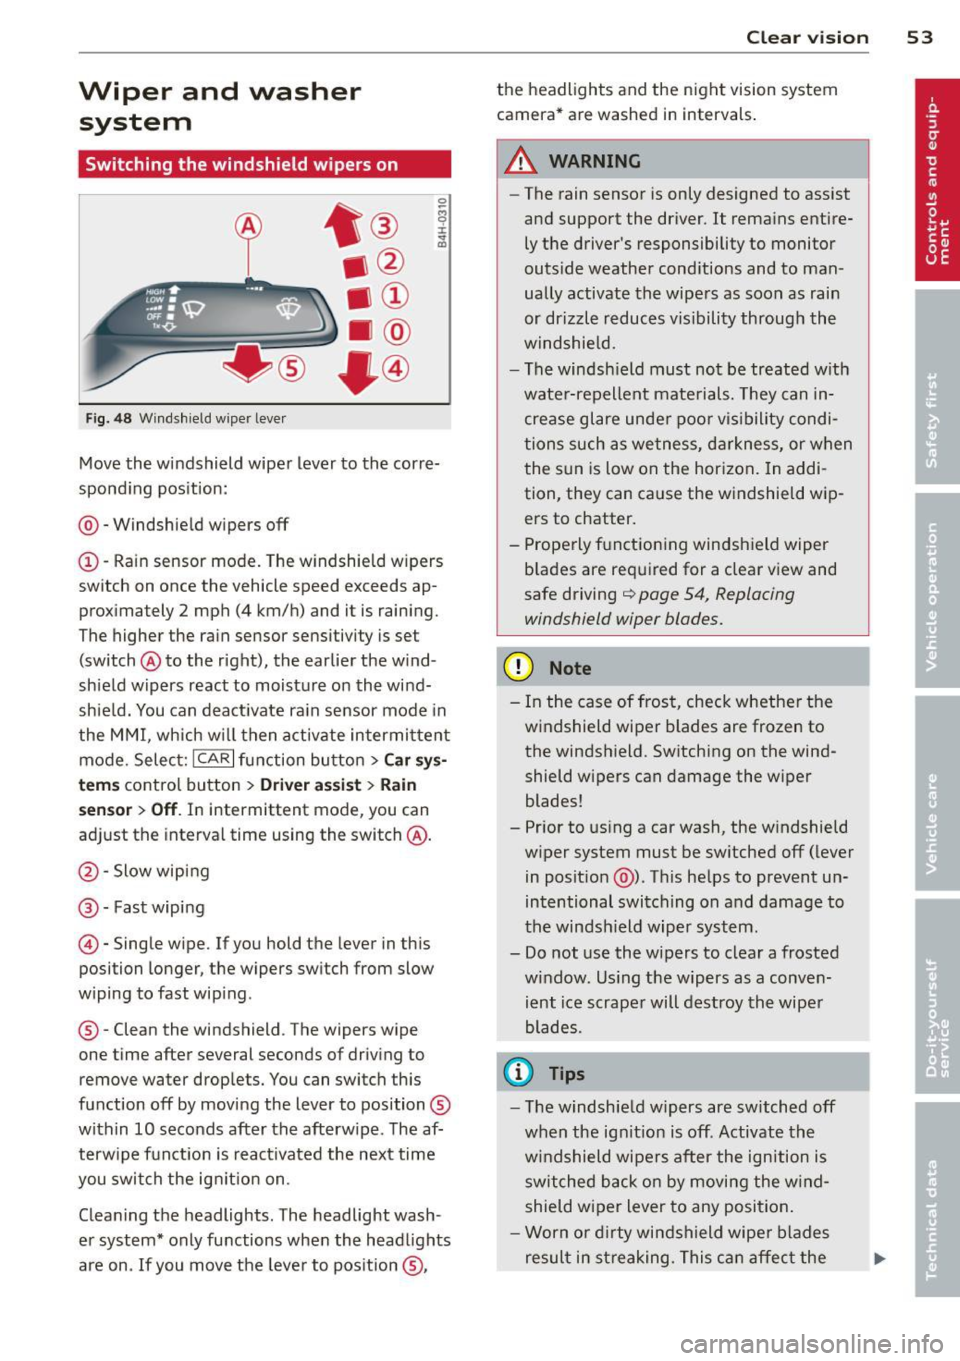
Fig. 48 W indshield w iper leve r
Move the windshield wiper lever to the corre
spond ing pos ition:
@ -Windshie ld w ipers
off
(D -Rain sensor mode. The w indshie ld w ipers
switch on once the vehicle speed exceeds ap
proximately 2 mph (4 km/h) and it is raining.
The higher the rain sensor sensitivity is set
(switch @to the right), the earlier the w ind
shield wipers react to moisture on the wind
shie ld. You can deact ivate rain sensor mode in
the MMI, which w ill then activate intermittent
mode. Select:
ICARI function button > Car sys
t e m s
control button > Dri ver ass is t > Ra in
s en sor
> Off . In intermittent mode, you can
adjust the interval time using the switch @.
@ -Slow wiping
@-Fast wiping
©-Single wipe. If you hold the lever in this
position longer, the wipers switch from slow
wiping to fast wip ing .
® -Clean the windshield . The wipers wipe
one time after several seconds of driving to remove water drop lets. You can switch this
function
off by moving the lever to position ®
within 10 seconds after the afterw ipe . The af
terw ipe f unction is react ivated the next time
you switch the ig nition on.
Cleaning the headlights . The headlight wash
er system* only functions when the headlights
are on . If you move the lever to position ®,
Clear vi sion 5 3
the headlights and the night vision system
camera* are washed in intervals .
A WARNING
-The rain sensor is only designed to assist
and support the driver.
It remains entire
ly the driver's responsibility to monitor
outs ide weather cond itions and to man
ually activate the wipers as soon as rain
or drizzle reduces visibility through the
windshie ld.
- The windsh ield must not be treated w ith
wate r-repellent mate rials. They can in
crease glare unde r poo r vis ibility condi
tions such a s wetness, d arkness, or w hen
the sun is low on the hori zon. In addi
tion, they can cause the w indshield wip
ers to chatter.
- Properly f unctioning windshield wiper
blades are req uired for a clear v iew and
safe driving
¢ page 54, Replacing
windshield wiper blades.
(D Note
- In the case of frost, check whether the
windshield wiper blades are frozen to
the windshield. Switching on the wind
shield wipers can damage the wiper
blades!
- Prior to us ing a car wash, the w indshield
w iper system must be sw itched off ( lever
in posit ion @). T his he lps to prevent un
intentional switching on and damage to
the windsh ield wiper system.
- Do not use the wipers to clear a frosted
w indow. Us ing the wipers as a conve n
ient ice scrape r will destroy the wiper
blades.
(D Tips
- The windshield wipers are sw itched off
when the ign it ion is off . Activate the
w indshield wipe rs after the ignition is
switched back o n by movi ng the w ind
shield wiper lever to any positi on.
- Worn or d irty wi ndshield wipe r blades
result in streaking. This ca n affec t the
Page 58 of 314

56 Clear vis ion
Dimming the mirrors
Fig. 51 Automat ic d imming rea rv iew mirror
.. To dim the rearview mirror and both exterior
mirrors, press the @button . The diode @
turns on. The rearview and exter ior mirrors
dim automatically when light sh ines on
them, for example from head lights on ave
hicle to the rea r.
.&_ WARNING
Electrolyte fl uid can leak from au tomatic
dimmi ng mirrors if the glass is broken.
Electrolyte fl uid can irritate sk in, eyes and
respiratory system.
- Repeated or prolonged exposure to elec
t ro lyte can cause irritation to the resp ira
tory system, especially among people
with asthma or other respiratory cond i
tions. Get fresh air immediately by leav
ing the vehicle or, if that is not possible,
open windows and doors all the way .
- If electrolyte gets into the eyes, flush
them thoroughly with large amounts of
clean water for at least 15 m in utes;
med ica l attent ion is recommended.
- If electrolyte contacts sk in, f lush affect
e d area w ith clean water for at least 15
min utes and then w ash affec ted area
with soap and water; medical at tention
is recommended. Thoroughly wash af
fected clothing and shoes before reuse.
- If swa llowed and person is conscious,
rinse mouth w it h wate r fo r at leas t 15
minutes. Do not induce vomiting unless
instructed to do so by medical professio
nal. Get medical attention immediately.
.
(D Note
Liqu id e lectrolyte leaking from broken mir
ror glass w ill damage any plastic surfaces
i t comes in contact with. Clean up spilled
electrolyte immediately with clean water
and a sponge .
@ Tips
-Switching off the dimming function of
the inside rear view mirror also deacti
vates the automatic dimming function of
the exter ior mir ro rs .
- Automatic d imm ing for the mirror on ly
operates properly if the sun shade* for
the rear w indow is not in use or the light
st riking the inside m irror is not hinde red
by ot he r objects.
- The automatic dimming m irrors do not
dim when the interior lighting is tu rned
on or the reve rse gear is selected .
Digital compass
Switching the compass on and off
Applies to vehicles: with digital compass
The compass direction is shown in the rear
view mirror .
l
Fig. 52 Rearv iew mirro r: Digital compass activated
.. To switch the compass on or off, press and
hold the b utton @ until the compass dis
p lay in the m irror ¢
fig. 52 appears o r disap
pea rs.
The dig ital compass on ly works when the igni
t ion is on . The directions are indicated with
abbrev iat ions:
N (nor th), NE (no rtheast), E
(east) , SE (southeas t), S (so uth), SW (so uth
west),
W (west), NW (northwest) .
Page 60 of 314
58 Seat s a nd s tor ag e
Seats and storage
General recommen
dations
Why is your seat adjustment so
important?
The safety belts and the airbag system can
only provide maximum protection if the front
seats are correctly adjusted.
There are various ways of adjust ing the front
seats to provide safe and comfortable support
for the driver and the front passenger . Adjust
you r seat prope rly so that :
- you can easily and quick ly reach all the
switches and controls in the instrument
panel
-your body is prope rly supported thus reduc
ing physical stress and fatigue
- the safety be lts and a irbag system can offer
maximum protection
¢ page 153 .
In the following sec tions, you will see exactly
how you can best adjust you r seats .
There are special regulations and instructions
for insta lling a child seat on the front pas
senger's seat. Always fo llow the information
regarding ch ild safety provided in
q page 177, Child Safety.
A WARNING
Incorrect seating position of the driver and
all other passengers can result in serious
personal in jury.
- Always keep your feet on the floor when
the vehicle is in motion -never p ut your
f eet on top of the instrument panel, out
of the w indow or on top of the seat cush
ion . Th is app lies especially to the passen
gers .
If your seating position is incorrect,
yo u increase the r isk of injury in the case
of sudden braking or an acc ident.
If the
a irbag infla tes and the seating positio n
is incorrect, this could result in personal
injury o r even death.
- It is import ant for bo th the driver and
front passenger to keep a distance of at least 10 inches (25 cm) between them
selves and the steering wheel and/or in
strument panel. If you're s itting any
closer than th is, the a irbag system can
not protect you properly . In addition, the
front seats and head restraints must be
adjusted to your body height so that they
can give you max imum protect ion.
- Always try to keep as much distance as
possible between yourself and the steer
ing wheel o r inst rument pane l.
- Do not adjust the driver's o r front pas
senger's seat whi le the vehicle is moving.
Your sea t may move unexpected ly, caus
ing sudden loss of vehicle cont rol and
personal injury . If you adjust yo ur seat
while the veh icle is moving, yo u are out
of posit ion.
Driver's seat '
The correct seat position is important for safe
and relaxed driving.
We recommend tha t you adjus t the dr iver's
seat in the fo llowing manner :
.,. Adjust t he seat in fore and aft direction so
t ha t you can eas ily push the peda ls to the
floor w hile keeping your knees sl igh tly bent
q A in Why is your seat adjustment so im
portant? on page 58.
.. Adjust the backrest so that when you sit
w ith your back against t he backrest, you can
still grasp the top of the steering wheel.
.. Adjust the head restraint so the upper edge
is as even as poss ible with the top of your
head . If that is not poss ible , try to adjust
t he head restraint so that it is as close to
t his pos it ion as possib le
q page 65.
A WARNING
Neve r place any objects in the dr iver's foot
well. An object could get into the pedal
a rea and interfere with pedal function . In
case of sudden braking or an acc ident, you
would not be able to brake or accelerate .
Page 62 of 314
60 Seats and st o rage
Multifunction button
App lies to vehicles: wit h memory fu nctio n
You can adjust the massage function, upper
section of the backrest, lumbar support, side
bolsters, seating surface and safety belt
height using the multifunction button.
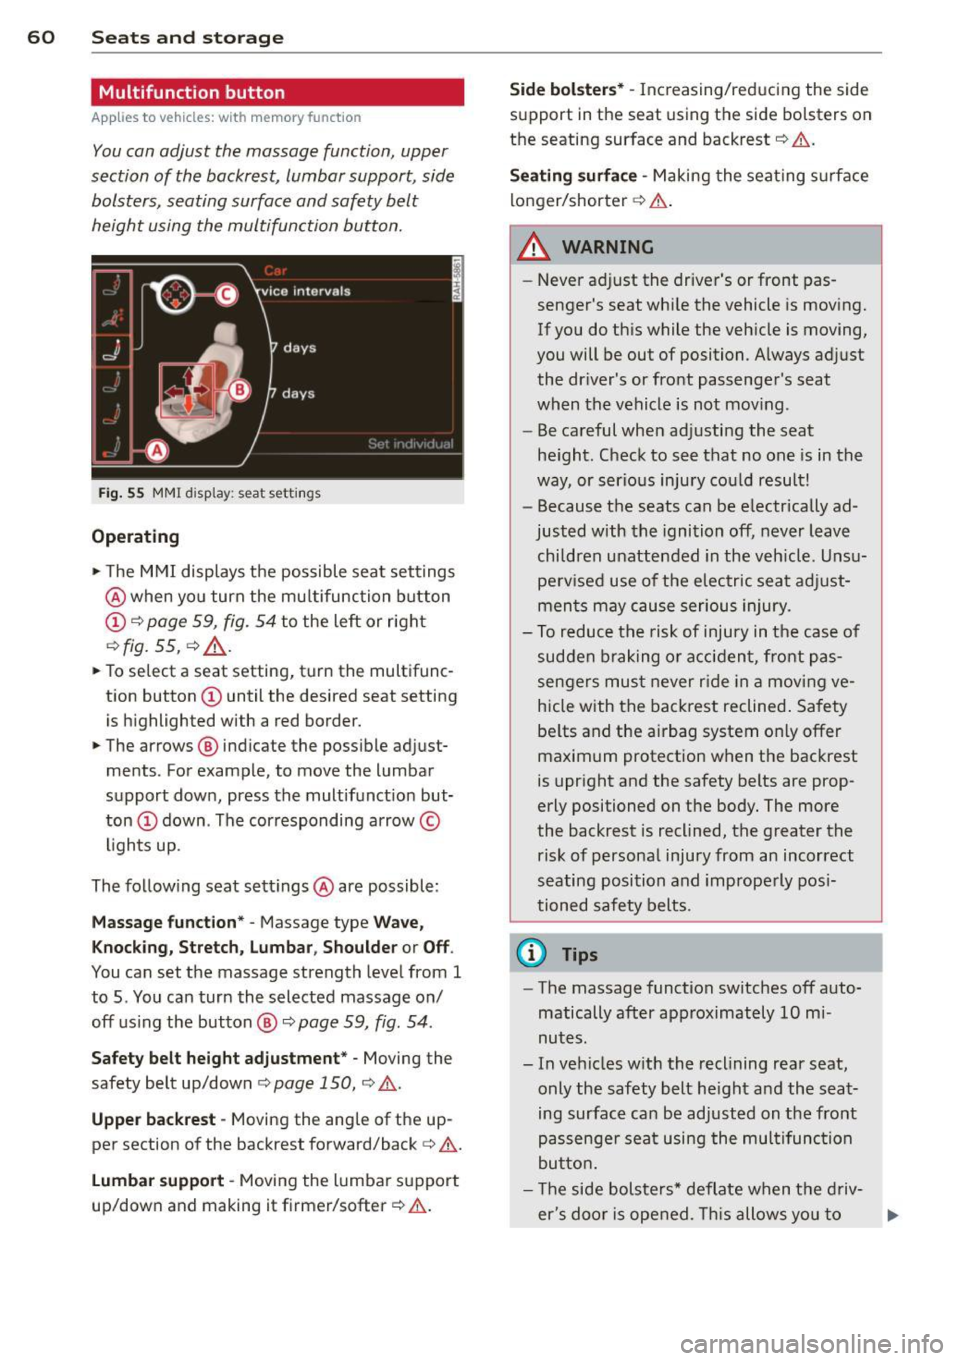
F ig. 55 MMI display : seat settings
Operating
• The M MI displays the possible seat sett ings
@ when yo u turn the mu ltifunction button
CD c:> page 59, fig. 54 to the left or right
c:> fig. 55, c:> .&_ .
• To select a seat setting, turn the multifunc
tion button
CD until the desired seat setting
is h ighlighted with a red border.
• The arrows ® indicate the possible adjust
ments . For example, to move the lumbar
support down, press the multifunct ion but
ton
CD down . The cor responding arrow ©
l ights up .
The following seat settings @are possible:
Mas sage funct ion * -Massage type Wave,
K nock in g, Stretch, Lumbar , Shoulder or Off .
You can set the massage strength level from 1
to 5 . You can turn the selected massage on/
off us ing the button ®
c:> page 59, fig. 54 .
Safety belt h eight adju stment * -Moving the
safety belt up/down
c:> page 150, c:> .&..
Upper backre st -Moving the ang le of the up
per section of the backrest forward/back
c:> &.
Lu mb ar support -Moving the lumbar support
up/down and making it firme r/softer
c:> .&. .
Side bol ster s* -Increasing/reducing the side
support in the seat using the side bolsters on
the seating surface and backrest
c:> &.
Seat ing surfa ce -Making the seat ing s urface
longer/shorter
c:> A .
A WARNING
-
-Never ad just the driver's or front pas
senger's seat whi le the vehicle is moving.
If you do this while the vehicle is moving,
you will be out of position. A lways adjust
the dr iver's or front passenge r's seat
when the vehicle is not mov ing.
- Be careful when adjusting the seat
he ight . Check to see that no one is in the
way, or serious injury cou ld result!
- Because the seats can be electrically ad
justed with the ignition off, never leave
children unattended in the veh icle. Unsu
perv ised use of the e lectr ic sea t adj ust
men ts may cause serious injury.
- To reduce the risk of injury in the case of
sudden b raking or acc iden t, front pas
sengers mus t never r ide in a movi ng
ve
hicle with the backrest reclined . Safety
be lts and the airbag system only offer
maximum protection when the backrest
is upright and the safety belts are prop
erly positioned on the body . The more
the backrest is reclined, the greater the risk of personal injury from an incorrect
seating position and improperly pos i
tioned safety belts .
@ Tips
-The massage function switches off auto
matically after approximately 10 mi
nutes.
- In vehicles w ith the reclining rear seat,
only the safety belt he ight and the seat
ing surface can be adjusted on the front
passenge r sea t using the mul tifunc tion
butto n.
- T he side bolsters * deflate when t he d riv-
er's doo r is ope ned. This allows you to ..,_
Page 65 of 314

@-Folding the leg support up/down
@-Leg support steeper/flatter
©-Leg support forward/back
@ -Adjusting the display
Operating the reclining rear seat
Applies to vehicles: with reclining rear seat
Fig. 59 Rear center conso le: seat adjustment buttons
Reclining position on/off
@ -Adjusting the reclining position: press
and hold the button @c>
page 62, fig. 58 un
til your seat and the front passenger's seat
reach their end positions c>
page 62, fig. 58.
Depending on the last setting, the leg support
may fold out at the same time. The front pas
senger seat's can no longer be used in the re
clining position c>
&.
@ -Adjusting the standard position: press
and hold the button@ until the front pas
senger's seat reaches its end position and its
head restraint is upright. The leg support
folds in at the same time c>
&.
You can adjust the leg support or fold the dis
play forward in the reclining position:
Adjusting the leg support
@ -Folding the leg support out/in: press and
hold the left/right button @c>
fig. 59 until
the leg support reaches the desired position .
@-Leg support steeper/flatter: Activate
front passenger's seat adjustment with the
button
(f) . To adjust the front passenger's
seat backrest and the leg support, press the
button ® forward/back.
Seats and storage 63
© -Leg support forward/back: Activate front
passenger 's seat adjustment with the button
(f) . To adjust the front passenger's seat and
leg support forward/back, press the button @
forward/back.
Adjusting the display
@-Tilting the display forward/back : press
and hold the left/right button@ until the dis
play reaches the desired position .
You can fold the display forward so that you
have a clear view of the roadway . With the
seat in the reclining position, press and hold
the right button @ unti l the display is folded
forward. Make sure the driver has a clear v iew
of the exterior mirrors. If so, confirm the quest ion in the MMI with Yes. If you answer
No or do not respond to the question, the dis
play will return to the upright position.
Adjusting the front passenger's seat
(f)-Make sure that the front passenger's seat
adjustment is switched on in the Infotain ment system
c> page 64. Activate the front
passenger's seat adjustment with the button
(f) . You can now adjust the passenger's seat
forward/back and the backrest using the but
tons @) and @. With buttons @/@ , you can
adjust the passenger's seat to the reclin ing/
upright position. If you do not adjust the pas
senger's seat, the button
(f) will deactivate
automat ica lly after about 10 seconds.
_.& WARNING
Do not use the front passenger's seat for
seating when it is in the reclining position.
This increases the risk of serious injury or
death .
- Never adjust the reclining posit ion when
the front passenger's seat is occupied.
This increases the risk of injury.
- Do not t ilt the display if the driver's view
of the right exterior mirror will be ob
structed.
- Make sure the area between the leg sup
port and the front passenger's seat back
rest is clear befo re folding the leg sup
port in so that you are not pinched .
Page 66 of 314
64 Seats and storage
@ Tips
If you cannot move the seat into the re
clining position, it may be because
- the front passenger's seat memory func
tion is switched off¢
page 67 or
- the child safety lock is switched on (the
~ button ¢ page 41 or the right t but
ton ¢
page 41 light s up in the driver's
door), or
- the front passenger seat adjustment is
switched off in the MMI ¢
page 64.
Massage function remote control
Applies to vehicles: with reclining rear seat an d massage
fu nct ion
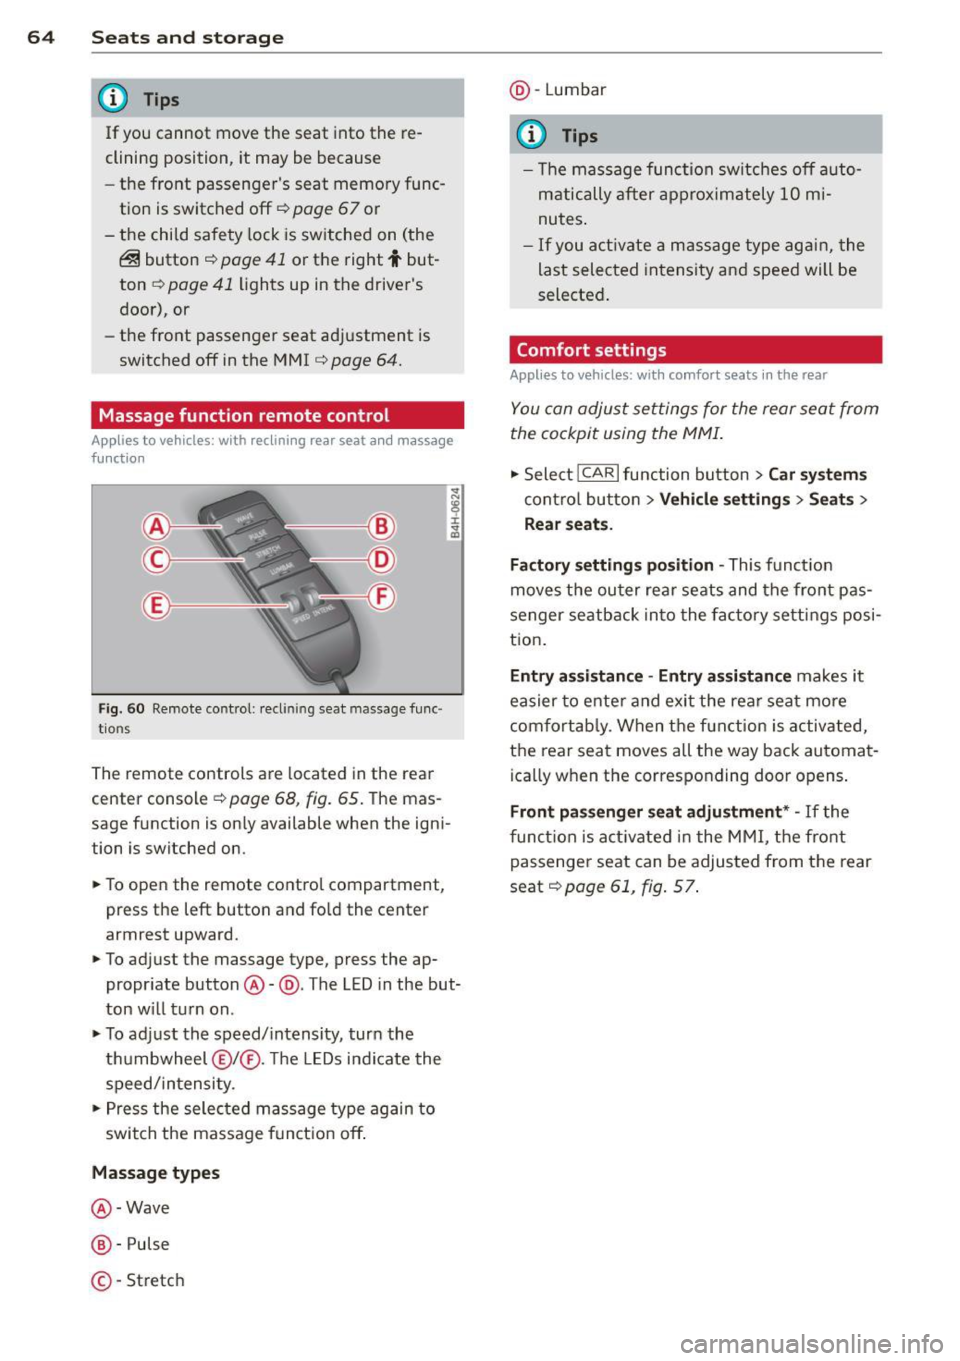
Fig . 60 Remote control: reclining seat massage func
tions
The remote controls are located in the rear
center console¢
page 68, fig. 65. The mas
sage function is on ly available when the igni
tion is switched on.
• To open the remote control compartment,
press the left button and fold the center
armrest upward.
• To adjust the massage type, press the ap
propriate button@-@ . The LED in the but
ton will turn on.
• To adjust the speed/intensity, turn the
thumbwheel @I® . Th e LEDs indicate the
speed/intensity.
• Press the selected massage type again to
switch the massage function off.
Massage types
@ -Wave
@-Pulse
©-Stretch @
-Lumbar
© Tips
- The massage function switches off auto
matically after approximately 10 mi
nutes.
- If you activate a massage type again, the
last selected intensity and speed will be
selected.
Comfort settings
Applies to vehicles: wit h comfort seats in the rear
You can adjust settings for the rear seat from
the cockpit using the MMI.
• Select !CARlfunction button> Car systems
control button > Vehicle settings > Seats >
Rear seats.
Factory settings position -
This function
moves the outer rear seats and the front pas
senger seatback into the factory settings posi
tion.
Entry assistance -Entry assistance makes it
easier to enter and exit the rear seat more
comfortably. When the function is activated,
the rear seat moves all the way back automat
ica lly when the corresponding door opens.
Front passenger seat adjustment* -If the
function is activated in the MMI, the front
passenger seat can be adjusted from the rear
seat¢
page 61, fig. 57.
Page 70 of 314
68 Seats and storage
Full-length center
console
Overview
Appl ies to vehicles: with full-len gth ce nter console
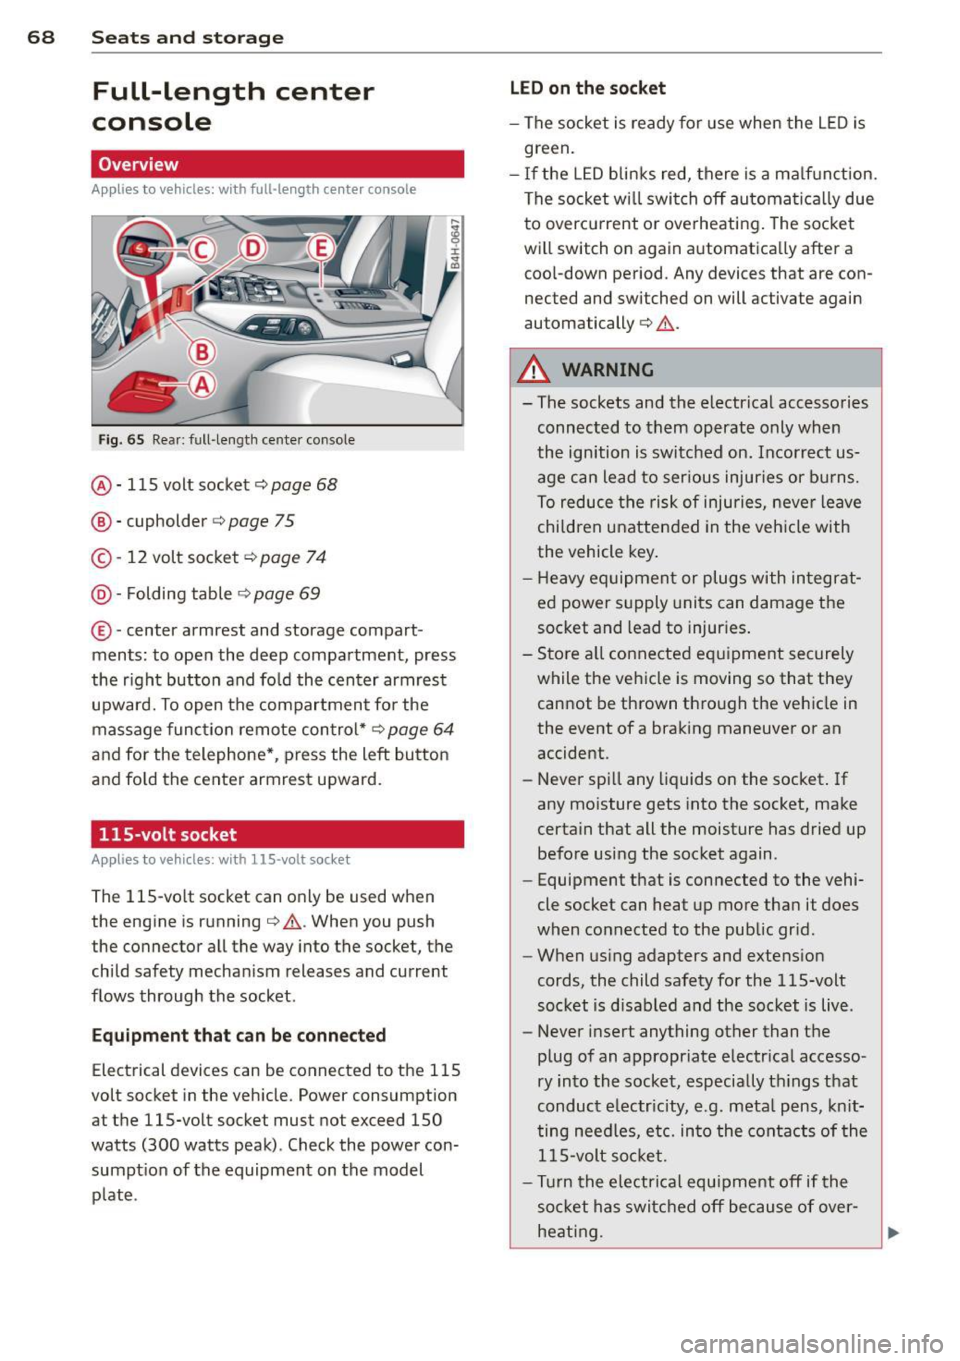
Fig. 65 Rear: full -length center console
@ · 115 volt socket ¢ page 68
@ · cupholder <=> page 75
© · 12 volt socket c:> page 7 4
@ · Folding table ¢ page 69
® ·center armrest and storage com part ·
ments: to open the deep compartment, press
the r ight button and fo ld the center armrest
upward. To open the compartment fo r the
massage func tion remote con trol*
c:> page 64
and fo r the telephone* , press the left button
and fo ld the center armrest upward.
115-volt socket
App lies to vehicles: with 115 -vo lt socket
The 115-vo lt socket can only be used when
the engine is running¢
A. When you push
the connector all the way into the socket, the
child safety mechan ism releases and current
flows through the socket .
Equipm ent that can be conn ected
Electrical devices can be connected to the 115
volt socket in the veh icle. Power consumption
at the 115-volt socket must not exceed 150
watts (300 watts peak) . Check the power con·
sumpt ion of the equipment on the model
p late .
LED on th e socket
- The socket is ready for use when the L ED is
green.
- If the LED blin ks red, there is a ma lf u nction.
The socket wi ll swi tch off automa tica lly due
to overcu rrent or overheating. The socke t
will switch on again automatica lly after a
coo l-down period. Any devices that are con
nected and switched on will activate again
automatically
c:> A .
A WARNING
-
- The sockets and the electr ical accessories
connec ted to them operate only when
the ignition is switched on. Incorrect us
age can lead to ser ious injuries or burns.
To reduce the risk of injuries, neve r leave
chi ldren unattended in the veh icle with
the vehicle key .
- H eavy equipment or plugs with in tegrat
ed power s upply units can damage the
socket and lead to injur ies .
- Sto re a ll connected e quipment securely
while the veh icle is moving so that they
cannot be thrown through the veh icle in
the event of a braking maneuver or an
accident.
- Never sp ill any liquids on the socket . If
any mo isture gets into the socket, make
certain that all the moisture has dried up before using the socket again.
- Equipment that is connected to the vehi·
cle socket can heat up more than it does
when connected to the public gr id .
- When us ing adapters and extens ion
cords, the child safety for the 115-volt
socket is d isabled and the socket is live.
- Never insert anything other than the
p lug of an appropriate e lectr ical accesso·
ry in to the socket, especially th ings that
conduct e lectr icity, e.g . meta l pens, kn it
ting needles, etc. in to the cont acts of the
1 15-volt so cket.
- Turn the electrical equ ipment off if the
socket has switc hed off because of over·
heat ing.
Page 78 of 314

76 Seats and stor age
Addit ional storage
There are a variety of storage compartments
and fasteners in various places in the vehicle.
- Storage compartments in the doors
- Net in the front passenger footwell
- Eyeglasses compartment in the headliner (near the rearview mirror)
- Storage compartments under the center
armrests
- Compartments* on the back of the front
seat backrests
- Garment hooks over the rear doors
- Compartment in the center console with
pass-through)* (rear)
- Compartment behind the rear center arm
rest (in vehicles without the pass-through*
or cooler*)
- Bag hooks in the luggage compartment
A WARNING
-When driving, do not leave any hard ob
jects on the rear window shelf or allow
your pet to sit on the shelf. They could
become a hazard for vehicle occupants in
the event of sudden braking or a crash .
- Always remove objects from the instru
ment panel. Any items not stored could
slide around inside the vehicle while driv
ing or when accelerating or when apply
ing the brakes or when driving around a
corner.
- When you are driving make sure that
anything you may have placed in the cen
ter console or other storage locat ions
cannot fall out into the footwells. In case
of sudden braking you would not be able
to brake or accelerate.
- Any articles of clothing that you have
hung up must not interfere with the driv
er's view. The coat hooks are designed
only for lightweight clothing. Never hang
any clothing with hard, pointed or heavy
objects in the pockets on the coat hooks.
During sudden braking or in an accident -
especially if the airbag is deployed - these objects could injure any passen
gers
inside the vehicle.
- To reduce the risk of personal injury in an
accident or sudden stop, always keep the
glove compartment closed while driving.
- Read and follow all WARNINGS
c:> page 173, Important safety instruc
tions on the side airbag system.
- Hang clothes in such a way that they do
not impair the driver's vision.
- The coat hooks must only be used for
lightweight clothing. Do not leave any
heavy or sharp edged objects in the pock
ets which may interfere with the side cur
tain airbag deployment and can cause personal injury in a crash.
- Do not use coat hangers for hanging clothing on the coat hooks as this can in
terfere with proper deployment of the
side curta in airbags in an acc ident.
- Do not hang heavy objects on the coat
hooks, as they could cause personal in
jury in a sudden stop.
@ Note
Objects located on the rear shelf that rub
against the rear window could damage the
heating wires for the rear window defog
ger .
(D Tips
-A vent slot is located between the shelf
and the rear window. Do not block the
vent with any items you may place on the
rear window she lf.
- Do not place bulky items on the rear win
dow shelf as they could restrict or block
the driver's vision in the rear view mirror.
Cooler
Introduction
App lies to vehicles: wit h coo ler
Please clean the cooler before using it for the
first time
c:> table on page 218 .
You can only switch on the cooler if ...