engine AUDI A8 2016 Owner's Manual
[x] Cancel search | Manufacturer: AUDI, Model Year: 2016, Model line: A8, Model: AUDI A8 2016Pages: 302, PDF Size: 75.68 MB
Page 48 of 302

Lights and Vision
Lights and Vision
Exterior lighting
Switching the headlights on and off
Fig. 42 Instrument panel : lig ht sw it c h with all -weather
l igh ts
The headlights only wo rk when the igni tion is
sw itched on. Whi le sta rting the engine or when
switching off the ignition, the headlights will go
off and only th e side marker lights will be on.
I f the sys tem i s not operating p roperly, a warning
symbo l in the drive r informat ion d isplay is dis
p layed
c::> page 21 .
Light switch -'t;f;
T urn the switch ~ fig. 42 to the corresponding
position . When the lights are sw itched on, the
:oo:
symbo l turns on .
0 - The l ights are off or the daytime runni ng
lights are on :
-USA mode ls: The daytime running lights will
come on automatically when the ignition is on
and the light sw itch
c::> fig . 42 is in the O posi
tion or the
AUTO position (only i n daylight con
di tions). The
Daytime running li ght s func tion
can be turned on and off in the MM I
c::> page 47, c::> &.
- Canada mo del s: T he daytime runn ing lights
will come on automa tically when the ignit io n is
o n and the light switch
c::> fig . 42 is in the O po
s ition, the
:oo : pos ition or the AUTO position
(on ly in daylight conditions)
c::> & .
AUTO -Automatic head light s switch on a nd off
depending on br igh tness , for example i n tw ilight,
du ring ra in or in tunne ls
c::> & .
46
:oo : -Side marker lights
gD -Low beam headlig hts
~ - All-weather lig hts
@il -Rear fog lights *. When the rear fog lights are
on, the symbol
0$ on the switch will illuminate .
All-weather lights
The front lights a re adjus ted au toma tica lly so
that you are less likely to see g la re from your own
headlights, for example whe n driving on a wet
road.
Automatic dynamic headlight range control*
Yo ur vehicle is equipped wi th a headlight range
contro l system so that the head lights do not
bl ind oncoming t raffic if the vehicle load
changes. The head light range also adjusts auto
matically when brak ing and acce lerating .
Light functions
The following ligh t fu nct ions are available de
pend ing on vehicle e quipment and o nly fu nction
whe n the light switc h is in the AUTO position.
You can deactivate these fu nctions in the M MI
unde r
Audi adapti ve light c::> page 47.
Static cornering light* -the corne ring ligh t
switches on automat ically when the steering
whee l is turned at a certain angle at speeds up to
app roximately 44 mph (70 km/h) and when the
turn s ignal is activated at speeds up to approxi
ma tely 25 mph (40 km/h) . The area to the side of
the ve hicle is illuminated better when turning .
Dynamic curve light* -the curve light adapts it
self to the curves in the road .
Highway light fun ction* -this funct ion adapts
the lighti ng for highway d riving based on vehicle
speed .
A WARNING
--Automatic headlig hts are only intended to
assist the driver . They do not relieve the
driver of his responsibi lity to check the
headlights and to turn them o n manually
according to the cur rent light and vis ib ility
co ndi tion s. For example, fog cannot be
Page 69 of 302

© -12 volt socket c:> page 72
@ -Folding table c:> page 68
©-center armrest and storage compartments:
to open the deep compartment, press the rig ht
button and fold the center armrest upward . To
open the compartment fo r the massage funct ion
r emo te contro l*
c:> page 63 and for the tele
phone*, press the left button and fo ld the center
armrest upward .
115-volt socket
Applies to: vehicles with 115-volt socket
The 115-vo lt socket can only be used when the
engine is running
c:> & . When you push the con
nector all the way into the socket, the ch ild safe
ty mechan ism releases and current flows through
the socket .
Equ ipment th at can be conn ect ed
Electrical devices can be connected to the 1 15
volt socket in the vehicle. Power consumption at
the 115-volt socket must not exceed 150 watts
(300 watts peak) . Check the power consumpt ion
of the equipment on the model plate .
LED on the socke t
-The socket is ready for use when the LED is
green.
- If the LED blinks red, there is a malfunction .
The socket will switch off automatically due to overcurrent or overheating. The socket will
switch on again automatically after a cool
down period . Any devices that are connected
and switched on will activate again automati ca lly
c:> ,& .
A WARNING
- T he so ckets and the electrical accesso ries
conne cted to them operate only when the
ignition is switched on . Incorrect usage can
lead to serious injuries or burns. To reduce
the risk of injuries, never leave children un
attended in the vehicle w ith the vehicle key.
- Heavy eq uipment or plugs with integrated
power supply units can damage the socket
and lead to injuries.
-
Seat s and sto rage
-Store all connected equipment securely
while the veh icle is moving so that they can
not be thrown through the vehicle in the
event of a braking maneuver or an accident.
- Never sp ill any liquids on the socket . If any
mo isture gets into the socket, make certain
that all the moisture has dried up before us
ing the socket again .
- Equipment that is connected to the vehicle
socket can heat up more than it does when
connected to the public grid .
- When us ing adapters and extens ion cords,
the child safety for the 115-volt socket is
disabled and the socket is live.
- Never insert anyth ing other than the plug of
an app ropr iate electrical accessory into the
soc ket, especially th ings that conduct ele c
tr icity, e.g. metal pens, knitting need les,
etc. into the contacts of the 115 -vol t sock
et .
- Turn the electrical equ ipment off if the
socket has switched off because of over
heating.
(D Note
- Always follow the manufacture r's i nstruc
tions for a ll electrical accessories yo u wan t
t o use with the e lectr ica l socket!
- Do not connect lamps tha t con tain a neon
t u be. Fo r tech nica l reasons the lamp may be
damaged.
- Do not connect any 230-volt equipment to
t he 115-vo lt socket . The equipment may be
damaged. If necessa ry , check the permiss i
ble vo ltage for the equipment on the mode l
label.
- In the case of some power packs, e.g. for a
laptop computer , the bui lt-in ove rcurrent
shutoff prevents it from being switched on
because of excessive start-up current. In
this case, disconnect the power pack from the consumer and reconnect it after abo ut
1 0 seconds .
(D Tips
-Unshielded equ ipment may cause interfer
ence in the radio and the vehicle electronics .
67
Page 74 of 302
Sea ts and stor age
@ For the sake of the environment
As a result of the increased wind resistance
created by a roof rack, your vehicle is using
fuel unnecessarily. So remove the roof rack
after using it .
12-volt sockets
Gilt fi.ir: Fahrzeuge 12-volt sockets
Electrical accessories can be connected to every
12-volt socket.
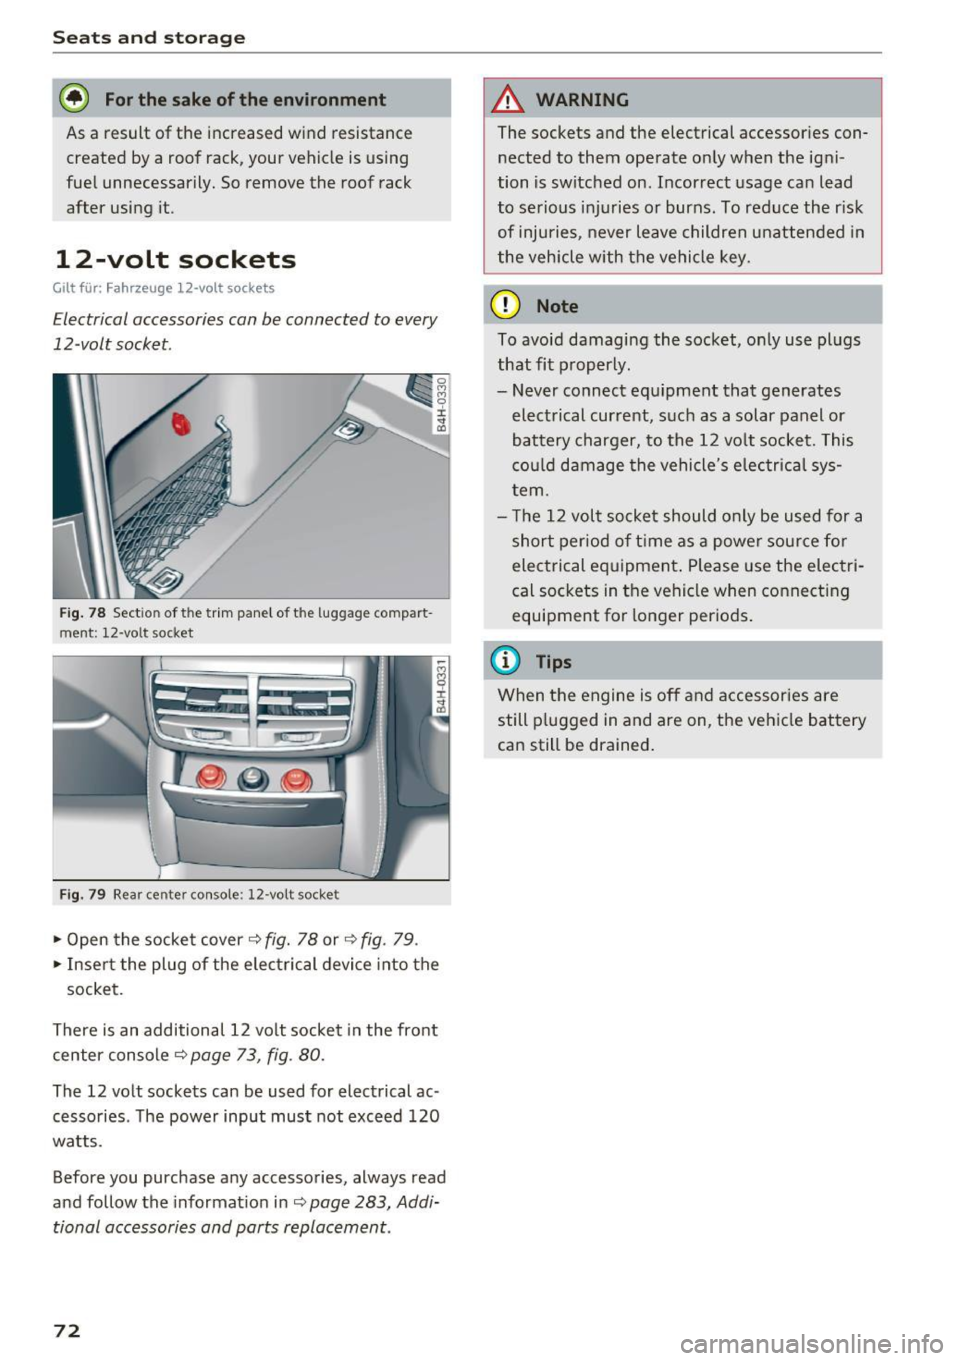
Fig. 78 Sectio n of the trim panel of the luggage compart
ment: 12-vo lt socket
Fig. 79 Rear center console: 12-volt socke t
• Open the socket cover~ fig. 78 or~ fig. 79 .
• Inser t the plug of the elec trical device into the
socket.
There is an additional 12 volt socke t in the front
center console~
page 73, fig . 80.
The 12 volt sockets can be used for electrical ac ·
cessories . T he power input must not exceed 120
watts .
Before you purchase any accessories, always read
and follow the informat ion in~
page 283, Addi·
tional accessories and parts replacement.
72
A WARNING
The sockets and the electrical accessories con·
nected to them operate only when the igni
tion is switched on . Incorrect usage can lead
to se rious injuries or burns . To reduce the risk
of injuries, never leave children unattended in
the vehicle with the vehicle key.
(D Note
To avoid damagi ng the socket, on ly use plugs
that fit p roperly.
- Never connect equipment that generates
electrical current, such as a solar panel or
battery charger, to the 12 vo lt socket. This
cou ld damage the vehicle's elec trical sys
tem.
- The 12 volt socket should o nly be used for a
short period of t ime as a powe r sour ce for
electrical equipment . Please use the electri
cal sockets in the vehicle when connect ing
equipment for longer per iods .
@ Tips
When the engine is off and accessories are
still p lugged in and are on, the veh icle battery
can still be drained .
Page 77 of 302

compartment exceeds 131 °F (55 °C) . Once the
temperat ure falls below 131 °F (55 °C) again,
the cooler switches on again automatically.
- the battery is adequately charged . The cooler
switches off automatically if the vehicle battery
voltage falls below a minimum level. This pre
vents the battery from discharging. The cooler
switches back on again automatically when the
battery voltage increases again (e.g. after start
ing the engine) .
The cooler cools to 42.8 °F
(+ 6 °C) and the freez
er cools to 21.2 °F (- 6 °C) in optimum cooling
conditions . The cooling performance is affected
by the temperature in the luggage compartment .
The temperature inside the cooler will be higher
if the luggage compartment is hot .
& WARNING
To avoid putting the occupants at any risk,
please observe the following safety rules:
- The maximum capacity is 2.5 kg (5.5 lbs.).
- Never overload the cooler. This could cause
injury in the event of a collision or sudden
braking.
- The cooler lid must always be kept closed
while you are driving. Make sure the retain
ing catch is securely engaged. The contents
of the cooler could be thrown forward into
the passenger compartment in the event of
a collision or under sudden braking -risk of
injury!
- Inflammable liquids, gas canisters, etc.
must not be stored in the cooler -risk of ex-
-
plosion! This also includes any products that
might emit volatile or inflammable gases.
- liquids will freeze at temperatures at or be
low 32 °F (0 °C) and may cause glass bottles
to burst!
(D Note
- The ventilation openings for the cooler are
located on the back panel trim in the lug
gage compartment and
must be kept clear
at all times.
- If the cooler is not functioning properly,
switch it off to prevent further damage .
Have it checked by a qualified workshop.
Seats and storage
Operation
App lies to : vehicles wit h coo ler
Fig. 83 Rear center a rmrest
The cooler is located in the rear cabin behind the
center armrest or behind the sliding cover (de
pending on the equipment fitted in your vehicle) .
The cooler and freezer only work when the igni
tion is on.
Opening / closing the cooler
• To open the cooler, pull the re lease lever CD
c:::>fig . 83.
• To close the cooler, push the lid back into its
original position. You should hear the release
lever
CD engage if the lid is properly closed.
Switching on/off
• Press button @ c:::> fig. 83 to switch the cooler
on/off . The symbol in the button is lit when this
function is activated .
• Press button @ to switch the freezer on/off.
The symbol in the button is lit when this func
tion is activated .
(D Tips
-Always try to leave the lid open for as short
a time as possible to prevent condensation
buildup.
- Do not put hot food or drinks in the cooler.
75
Page 78 of 302
Warm and cold
Warm and cold
Climate control system
Description
The climate control system warms, cools and
adds humidity to the air in the veh icle inter ior. It
is the most effective when the windows and sun
roof* are closed . If the temperature inside the
parked vehicle becomes very warm, opening the
window briefly will speed up the cooling process.
I n all heating mode functions except
defrost, the
b lower only switches to a higher speed once the
engine coolant has reached a certain tempera
ture .
Condensat ion from the cooling system can drip
and form a puddle of water under the veh icle.
This is normal and does not mean there is a leak.
P ollutant filt er
The po llutant filte r removes pollutants such as
dust and pollen from the a ir.
The air pollutants filter must be changed at the intervals specif ied in your Warranty
& Mainte
nance booklet, so that the a ir cond it ione r can
properly work.
If you drive your vehicle in an area with high air pollut ion, the filter may need to be changed
more frequently than specified i n your Aud i Wa r
ranty
& Maintenance booklet. If in doubt, ask
your author ized Audi Service Advisor for advice.
Key cod ed setting s
The climate control settings are automatically
stored and assigned to the remote contro l key
that is in use .
.8, WARNING
Reduced visib ility is dangerous and can ca use
accidents.
- For safe dr iv ing it is very impo rtan t that a ll
windows be free of ice, snow and condensa
t ion .
76
- Complete ly familiarize yourself with the
proper use and function of the heating and
ventilation system and espec ially how to de
fog and defrost the wi ndows .
- Never use the windshield wiper/washer sys
tem in freezing weather until you have
warmed the windshield first, using the heat ing and vent ilation system. The washer solu
tion may freeze on the windshield and re
duce visibi lity.
(D Note
- If you suspect that the air conditioner has
been damaged, sw itch the system off to
avoid further damage and have it inspected
by a q ualified dealership.
- Repa irs to the Aud i air cond itioner requ ire
special techn ica l know ledge and spec ial
tools. Contact an a uthorized Audi dealer fo r
assistance.
@ For the sake of the environment
By reduc ing the amo unt of fuel you use, you
also red uce the amount of pollutants emitted
into the a ir.
(D Tips
- Keep t he a ir intake slots (in front of the
windshield) free from ice, snow and debr is
in orde r to maintain the prope r funct ion of
the climate control system .
- The energy management sys tem may sw itch
the seat heating* o r rea r window defroster
off temporarily. These systems are available
again as soon as the energy balance has
been restored.
- Air escapes through vents under the rear
window. When placing items of clothing on
the luggage compartment cover, ensure
that the openings are not covered.
Page 80 of 302
Warm and cold
IAUTO ! Switching auto matic mode on
Automatic mode ma intains a constant tempera
ture inside the vehicle. Air temperature, airflow
and air distribution are cont rolled automatically.
Adjusting th e tempe rature
Tempe ratures between 60 °F (+16 °C) and 84 °F
(+28 °C) can be set. Outside of this range,
l o or hi
will appear in the climate control system disp lay.
At both of these settings, the climate control sys
tem runs continuously at maximum cooling or
heating power . There is no temperature regula
tion .
~ Adjust ing th e airflo w
You can adjust the airf low manually to suit your
needs . To have the airflow regulated automati
cally, press the
IAU TO I button.
~ Adjusting the air distribution
You can manually se lect the vents where the a ir
will flow. To have the a ir dist ribution reg ulated
automatically, press the
IAU TO I button.
[ti /~ * Adjusting Seat h eating /v entil ation *
Pressing the button switches the seat heating/
venti lation on at the h ighest setting (level 3) . The
L EDs indicate the temperature level. To reduce
the tempera ture, press the button aga in. To
switch the seat heating/ventilation off, press the
button repeated ly until the LED turns off.
Afte r 10 minutes, the seat heating/ventilation
automatically switches from level 3 to level 2 .
In vehicles without the four zone automat ic cl i
mate control*, buttons in the rear center console
control the seat hea ting for both outer rear
seats*.
I @ FRONT I Switch th e defroster on /off
The windsh ield and s ide windows are defrosted
or cleared of condensation as qu ickly as possible .
The max imum amo unt of air flows ma inly from
the vents below the w indshield. Recircu lation
mode switches off. The temperature shou ld be
set to approximate ly 72 ° F (22 °C).
The
IAU TOI button switches the defroster off.
78
lliil REAR I Switch ing rear window he ater on /
off
The rear window heater only operates when the
engine is running . It switches off automatically
after 10 to 20 minutes, depending on the outside
temperature.
To prevent the rear window heater from switch
i ng off automatica lly, press and hold the
ICiJ REARI
button for more than 2 seconds. This rema ins
stored until the ignition is sw itched off.
I SYNC ! Synchroni zation *
When synchronization is switched on, the set
tings for the driver's side are applied to the front
passenger's side (except for seat heating/venti la
tion*). The rear seat is also synchroni zed in
vehicles with the 4-zone deluxe automatic cli mate control system*. Synchron izat ion sw itches
off if the sett ings a re adjusted on the front pas
senger's s ide or in the rear*.
You can synchronize the sett ings in a row by
pressing and holding a knob . For example, to ap
ply the settings for the front passenger's side to
the d river's s ide, press and hold the knob o n the
front passenger 's side.
Air vents
You can open or close the center and rear vents in
the cockpit and the vents in the rear center con
so le and doo r pillars us ing the ridged thumb
whee ls. The levers adj ust the direction of the air
flow from the vents.
_&. WARNING
- Do not use the rec irculat ion mode for ex
tended periods of time . The windows could
fog up since no fresh air can enter the vehi cle. If the windows fog up, press the air re
circulation button again immed iate ly to
sw itch off the a ir recircu lation function or
select defrost.
- Individuals w ith reduced sensit iv ity to pa in
or temperature could develop burns when
using the seat heating funct ion. To reduce
the risk of injury, these individuals should not use seat heating.
-
Page 81 of 302
(D Note
To avoid damage to the heating elements in
the seats, do not kneel on the seats or place
heavy loads on a small area of the seat.
Setup
The climate control system setup is accessed
through the MMI.
.. Select : I CARI function button> Car systems
control button > A/C .
Rear cabin settings*
When this function is selec ted, a ll sett ings for
t he rear can be adjusted through the climate con
trol system in the cockpit . T he climate control
system settings cannot be adjusted in the rear
seat at the same time. This function switches off
after a certain period of time or when one of the
dials in the cockpit is pressed.
Auto recirculation*
The sensit ivity level of the automatic recircula
tion mode can be set at various leve ls from
off to
sensitive . The recirculation mode l""' I is controlled
on automatically. You must press the
I~ FRONT I
button if fog forms on the w indows .
Footwell temperature
You can adjust the footwell temperature so that
it is cooler or warmer.
Windshield heat*
When the defroster I@ FRONT I is switched on and
the
Auto setting is selected, the windshield de
froster is con trolled automatically .
Supplementary heater*
The supplementary heater warms the interior of
veh icles with diese l engines* more quickly . The
supp lementary heate r is controlled automat ically
in the
Auto setting.
Solar roof*
Parking ventilation is controlled automatically in
the
auto setting .
Warm and cold
When the ignition is off, so lar-powered parking
ventilation may switch on, as long as
- t here is sufficient sunlight ,
- the outside temperature is not too low,
- the sunroof is closed or tilted and
-auto (MMI) is selected.
~ Steer ing wheel heating
Applies to: vehicles with heated steering wheel
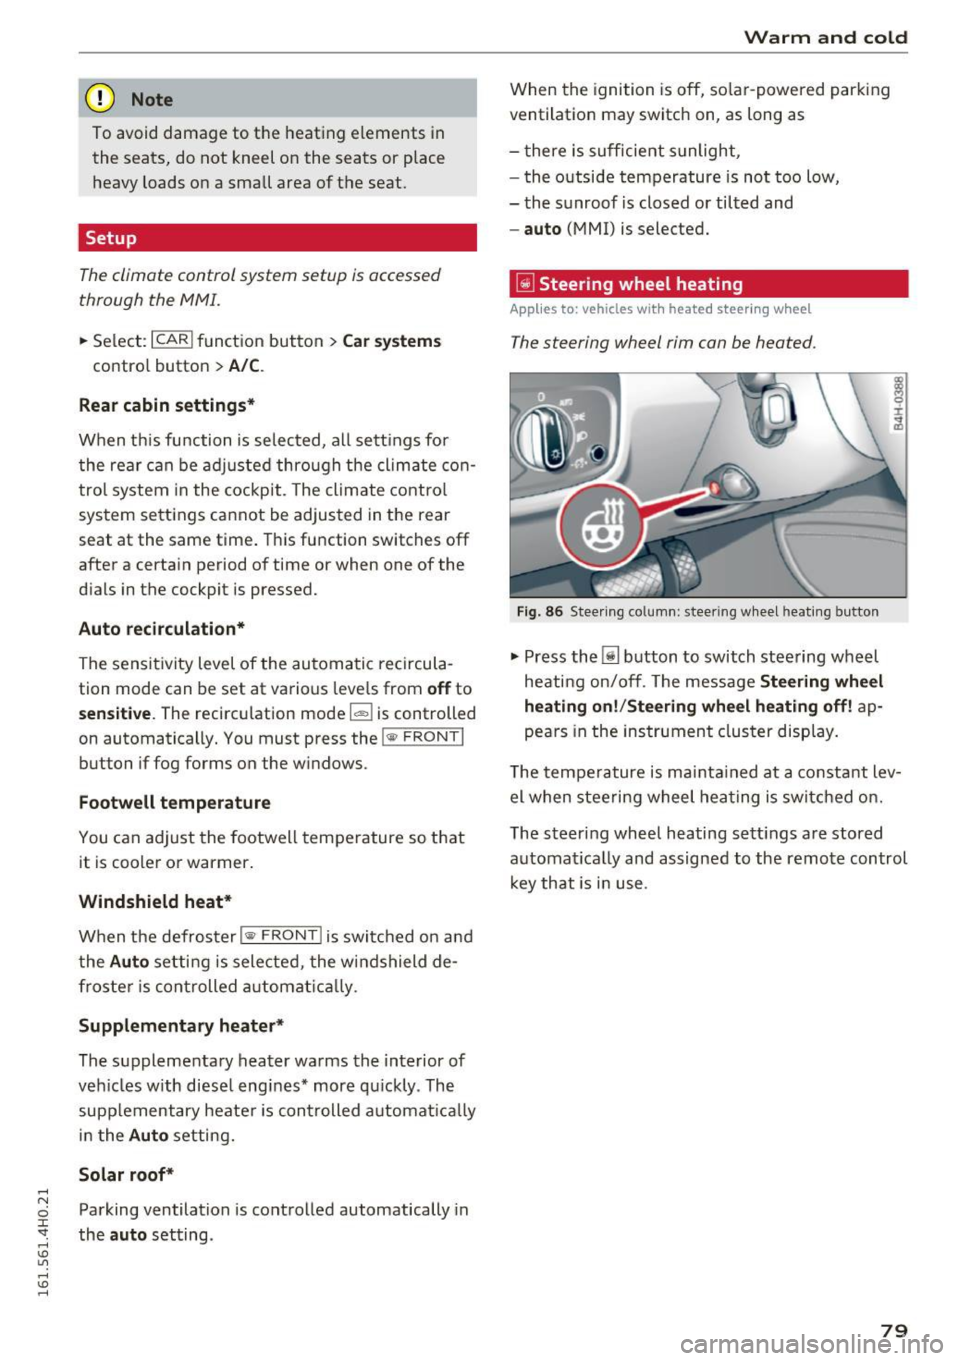
T he steering wheel rim can be heated .
Fig. 86 Stee ring co lumn: steer ing wheel heating bu tton
.,. Press the [j] button to switch steering wheel
heating on/off. The message
Steering wheel
heating on!/Steering wheel heating off!
ap
pears in the instrument cluster display.
T he temperature is maintained at a constant lev
el when steering wheel heating is switched on.
The steering wheel heating sett ings are stored
automat ically and assigned to the remote control
key that is in use .
79
Page 83 of 302
Starting and stopping
the engine
Starting the engine
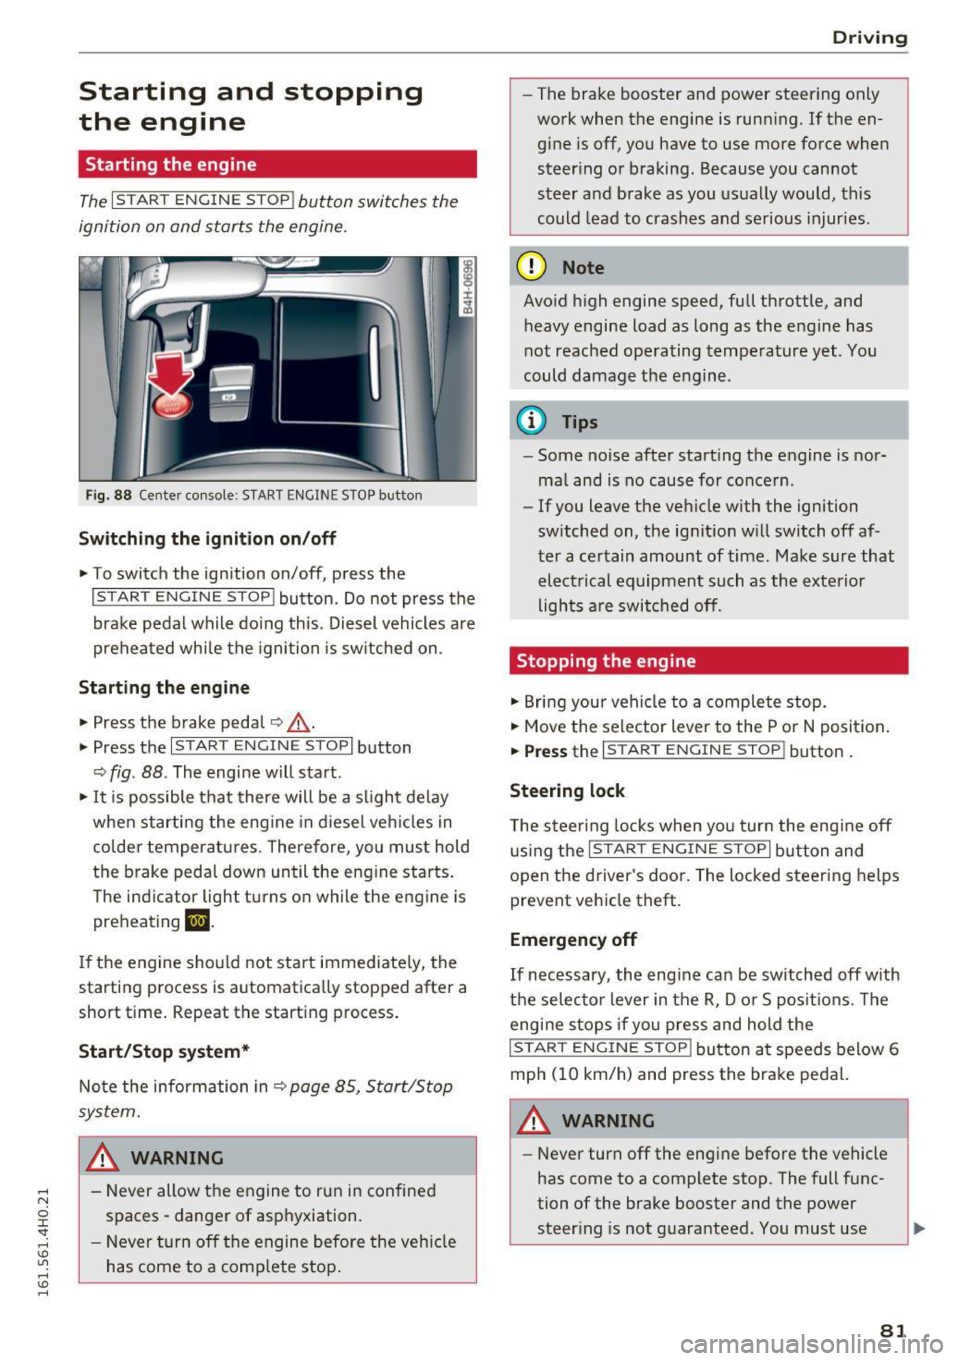
The I S TAR T ENGIN E ST OP ! button switches the
ignition on and starts the engine.
Fig. 88 Cente r co nsole: S TART ENG IN E STOP b utton
Switching the ignition on /off
.,. To switch the ign ition on/off, press the
I START E NGIN E STOP ! button. Do not press the
brake pedal while do ing th is . Diesel vehicles a re
preheated while the ignition is sw itched on .
Starting the engine
~ Press the brake peda l c:> _&.
.,. Press the I START E NG IN E ST OPI button
c:> fig . 88 . The engi ne w ill s tart.
.,. It is possible that there will be a slight delay
when starting the eng ine in d iesel veh icles in
colder temperatures . There fore, you mus t hold
t h e brake pedal down un til the eng ine starts .
The ind icator light turns o n while the engine is
preh eating
m.
If the engine sho uld not start immed iate ly, the
starting process is automatica lly stopped after a
short time. Repeat the start ing process .
Start/Stop system*
Note the infor mation in c:> page 85, Start/Stop
system.
_& WARNING
- Never allow the engine to run in confine d
spaces - danger of asphyxiation.
- Never t urn off the engine before the ve hicle
has come to a comp lete stop .
Drivi ng
-The brake booster and power steer ing only
work when the engine is runn ing . If the en
g ine is off, yo u have to use more force when
steer ing o r braking . Because you cannot
steer a nd b rake as you usu ally would, this
could lead to crashes and serious injuries .
(D Note
Avoid h igh engine speed, full th rottle, and
heavy engine load as long as the eng ine has
not reached ope rating temperature yet . You
could damage the e ng ine .
© Tips
-Some noise after start ing the engine is nor
ma l and is no cause for co nce rn .
- If you leave the ve hicle w ith the ignition
switched on, the ig nit ion w ill switch off af
t er a ce rtain amount of time. Ma ke sure that
el ec trical equipment such as the exte rior
ligh ts a re swi tched off .
Stopping the engine
.,. Bring you r vehi cle to a complete stop.
.,. Move the selector lever to the P o r N posit ion .
.,. Press the I ST AR T EN GINE ST OP ! button.
Steering lock
The steer ing locks when yo u tur n the eng ine off
u sing the
I S TART ENG INE S TOPI bu tton and
o pen t he d river 's doo r. T he locked steering help s
prevent vehicle theft.
Emergency off
If necessary , the eng ine ca n be switched off w ith
t h e selec tor lever in the R, Do r S posit io ns. Th e
engine s tops if you press and hold the
!S TAR T EN GINE ST OP ! button a t speed s below 6
mph ( 10 km/h) and press the bra ke peda l.
_& WARNING
-Never turn off the engine be fore the vehicle
has come to a complete stop . The full func
tion of the brake booster and the power
steer ing is not guara nteed. You must use ..,.
81
Page 84 of 302
Driving
more force to turn or brake if necessary. Be
cause you cannot steer and brake as you
usually would, this could lead to crashes
and serious injur ies.
- For safety reasons, you should a lways park
yo ur vehicle with the selector lever in P.
O therwise, the ve hicle co uld inadverte ntly
r oll away.
- After the engine has been sw itched off , the
rad iator fan can con tinue to ru n for up to 10
mi nutes -even with the ig nition switched
off.
It ca n also swi tc h on again after some
t ime if t he coolant te mperature ris es as th e
resul t of a he at bu ildup o r if the eng ine is
hot an d the engine compartme nt is addi
t iona lly heated by the sun's rays.
([) Note
Do not s top the e ngine immed ia te ly after
h ard o r ex tende d driving. Keep the engine
r u nning for approxima tely two m in utes to
prevent excessive heat b uild- up.
Driver message in the instrument cluster
display
Turn off ignition before leaving car
This message appears and a warn ing tone sounds
if you open the driver's door when the ignition is
sw itched on.
Press brake pedal to start engine
T his message appea rs if you press the
I START ENGI NE STOP I butt on to st art the engine
and do not depress the brake pedal. The eng ine
can only be started if the bra ke pe dal is de
pressed.
Ill Is key in the vehicle ?
If the i nd icator light t urns on and the message
appears, the remote co ntro l key was removed
from the vehicle while the eng ine was ru nning. If
the ignition key is no t in the vehicle yo u w ill not
be ab le to sw itch on the ign ition or restart the
engine after it has been switched off . You will a l
so not be able to lock the ve hicle from the out
side.
82
Shift to P, othe rwi se vehicle can roll away.
Door s do not lock if lever is not in P.
This dr ive r mess age ap pears for safety re a sons if
the tra nsmission has not been shifted to the P
p os it ion when you switch the ignition off . Move
the se lecto r lever to the P position. Otherwise the
vehicle is not p rotected from rol ling and cannot
be locked .
fl Key is not recognized. Hold back of key
against marked area. See owner 's manual.
If the indic ator ligh t turns on and this mes sage
appea rs, there is a ma lfunction
¢page 83 .
Turn off ignition before leaving car . Battery is
discharging
This message appears if the driver's door is
opened wh ile the ign ition is sw itched on. Always
swi tch off the ignition if yo u are leav ing the ve hi
cl e. See a lso
¢ page 87.
Shift to P and turn off ignition before leaving
car, otherwise vehicle can roll away
This message appears if the driver's door is
opened wh ile the ignition is switched on and the
selector lever is not in the P position . S hi ft the
selector lever i nto the P posit io n and sw itch off
t h e ign it io n when yo u exit the vehicle . Otherwise
t h e ve hicle co uld ro ll. See a lso
¢ page 87.
Page 85 of 302
Starting the engine if there is a
malfunction
It may n ot be possible to start the engine under
certain circumstances, for example if the battery
in the vehicle key is drained, if interference hos
affected the key or if there is a system malfunc
tion .
i:;
~ ___ ____ !
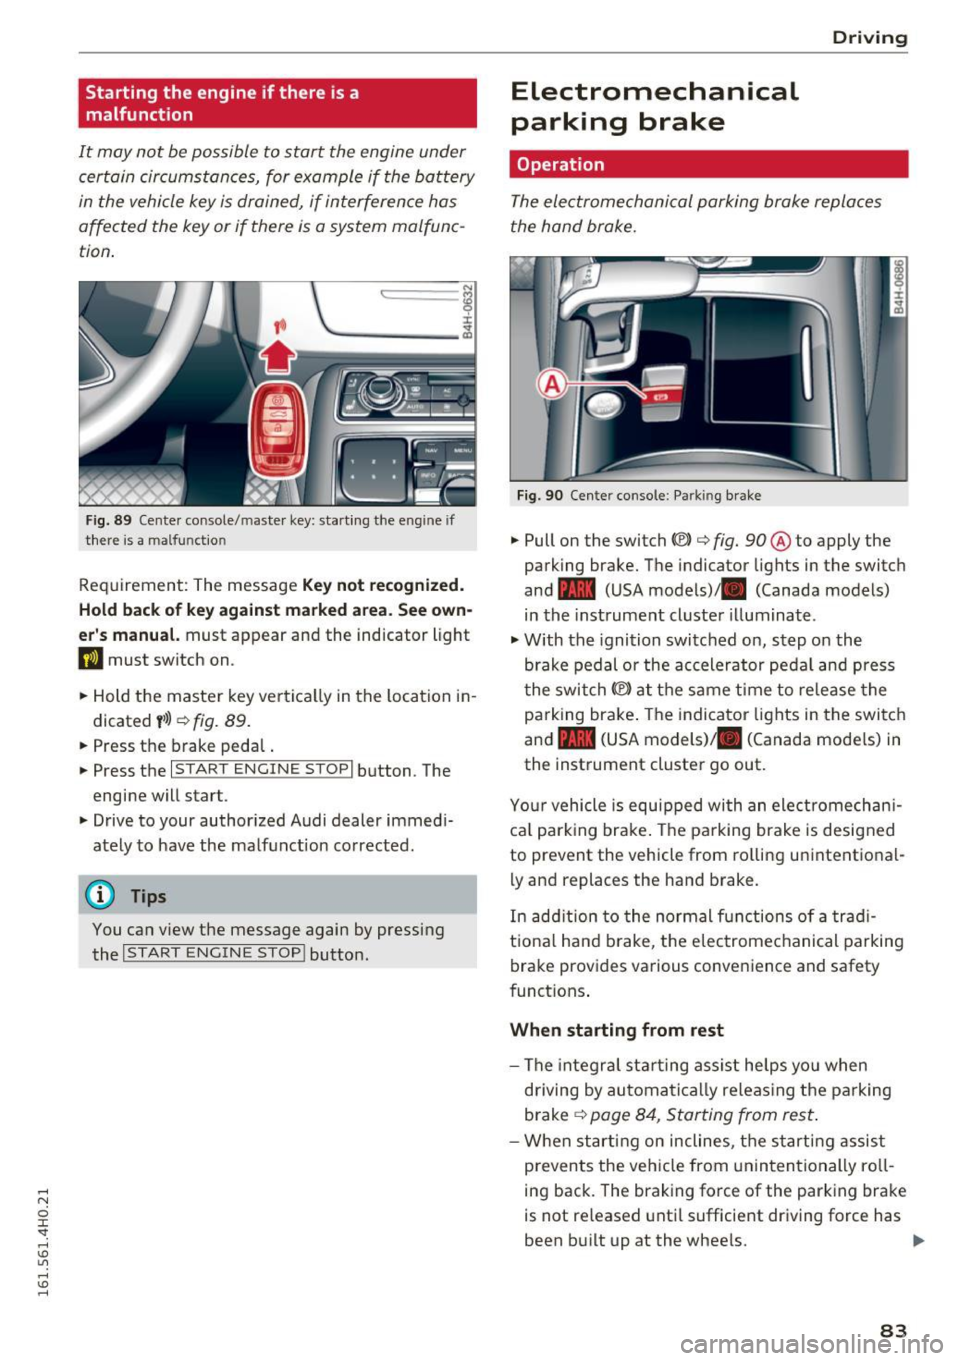
F ig . 89 Cen te r co nsole/ maste r key: start ing the e ng in e if
ther e is a malfu nct io n
Req uirement: The message Key not re cognized.
Hold back of key against marked area. See own
er' s manual.
must appear and the indicator light
DJ must switch on .
.. Hold the master key ve rtica lly in the location i n
d icated
y >l) ¢ fig. 89 .
.. Press the brake peda l.
.. Press the
I STAR T ENGINE STOP I button . The
engine will star t.
.. Drive to your author ized Audi dealer immed i
ately to have the malf unct ion corrected .
(D Tips
You can view the message again by pressing
the
I START ENGINE STOP ! button.
Electromechanical
parking brake
Operation D
rivi ng
The electromechanical parking broke replaces
t he hand broke.
Fig . 9 0 Cen te r conso le : Parkin g brake
.. Pull on the switch «vl c:> fig. 90 ® to apply the
parking brake. The indicator lights in the switch
and - (USA models)/ . (Canada models)
in the instrument cluster illuminate .
.,. With the ignition switched on, step o n the
brake pedal or the accelerator ped al and press
t he swi tch(® at the same time to re lease the
pa rking bra ke . The indicator lights in the swi tc h
and - (USA models)/ . (Canada mode ls) in
the instrument cluster go out .
Yo ur vehicle is equ ipped wi th an ele ct romechan i
ca l park ing brake . The parking brake is designed
to prevent the vehicle from ro lling unintentional
ly and replac es the hand brake.
In add ition to the normal functions of a trad i
t io na l h and brake, t he e lectrome chanical pa rking
brake provides va rious conveni ence and safety
funct ions .
When starting from rest
-The integra l st art ing assis t he lps yo u when
driving by automa tic a lly releas ing the pa rking
brake
¢ page 8 4, Star ting from res t.
-W hen start ing on incline s, t he s tarting assist
prevents the vehicle from unin ten tionally ro ll
ing back . The braking force of the parking bra ke
is not re leased unti l sufficient driv ing force has
been b uilt up at the wheels. .,.
83