spare tire AUDI A8 2016 Owners Manual
[x] Cancel search | Manufacturer: AUDI, Model Year: 2016, Model line: A8, Model: AUDI A8 2016Pages: 302, PDF Size: 75.68 MB
Page 245 of 302
Occupant loading and distri­
but ion for vehicle normal load
for various design ated se ating
c a pa cit ies
Refer to the tire inflation pres­
sure label ¬Ę
page 246, fig. 208
for the number of seating posi­
tions. Refer to the table ¬Ę
table
on page 248
for the number of
people that correspond to the ve­
hicle normal load.
New tires or wheels
Audi recommends having all work
on tires or wheels performed by
an authorized Audi dealer or au­
thorized repair facility. These fa ­
cilities have the proper knowl ­
edge and are equipped with the
required tools and replacement
parts .
.,,. New tires do not yet have the
opt imum adhesion properties.
Drive carefully and at moderate
speeds for the first 350 m iles
(500 km) with new tires .
... use tires of the same construc­
tion, size (rolling circumference)
and as close to the same tread pattern as possible on all four
;:::; wheels.
ci :c ": ....
'¬į V, ....
'¬į ....
Wheels
.,,.Do not replace tires individually.
At least replace both tires on the same axle at the same time.
.,,. Audi recommends that you use
Audi Original equipment tires. If
you would like to use different
tires, please note that the tires may perform differently even if
they are the same size¬Ę,&..
.,,. If you would like to equip your
vehicle w ith a tire/r im combina­
tion that is different from what
was installed at the factory, con ­
sult w ith an authorized Audi
dealer or authorized repair facili­
ty before making a purchase
~ .&. -
The spare tire* is diffe rent from
the regular tires installed on the
vehicle - for example, if winter
tires or wide tires are installed -
then only use the spare tire* tem­
porarily in case of emergency and
drive carefully while it is in use . It
should be replaced with a regular
tire as soon as possible.
All four whee ls must be equipped
with tires that are the same brand
and have the same construction
and tread pattern so that the
drive system is not damaged by different tire speeds. For this rea-
son , in case of emergency, only .,.
24 3
Page 246 of 302
Wheels
use a spare tire* that is the same
circumference as the regular
tires .
A WARNING
-Only use tire/rim combina­
tions and suitable wheel bolts
that have been approved by
Audi. Otherwise, damage to
the vehicle and an accident
could result.
-For technical reasons, it is not
possible to use tires from oth­
er vehicles -in some cases,
you cannot even use tires from the same vehicle model.
-Make sure that the tires you select have enough clearance
to the vehicle. Replacement
tires should not be chosen
simply based on the nominal
size, because tires with a dif­
ferent construction can differ
greatly even if they are the
same size. If there is not
enough clearance, the tires or
the vehicle can be damaged and this can reduce driving
safety and increase the risk of an accident.
-Only use tires that are more than 6 years old when abso-
244
lutely necessary and drive
carefully when doing so.
-Do not use run-flat tires on
your vehicle. Using them when not permitted can lead to ve­
hicle damage or accidents.
-If you install wheel covers on
the vehicle, make sure they al­
low enough air circulation to
cool the brake system. If they
do not, this could increase the
risk of an accident.
Tire wear/damage
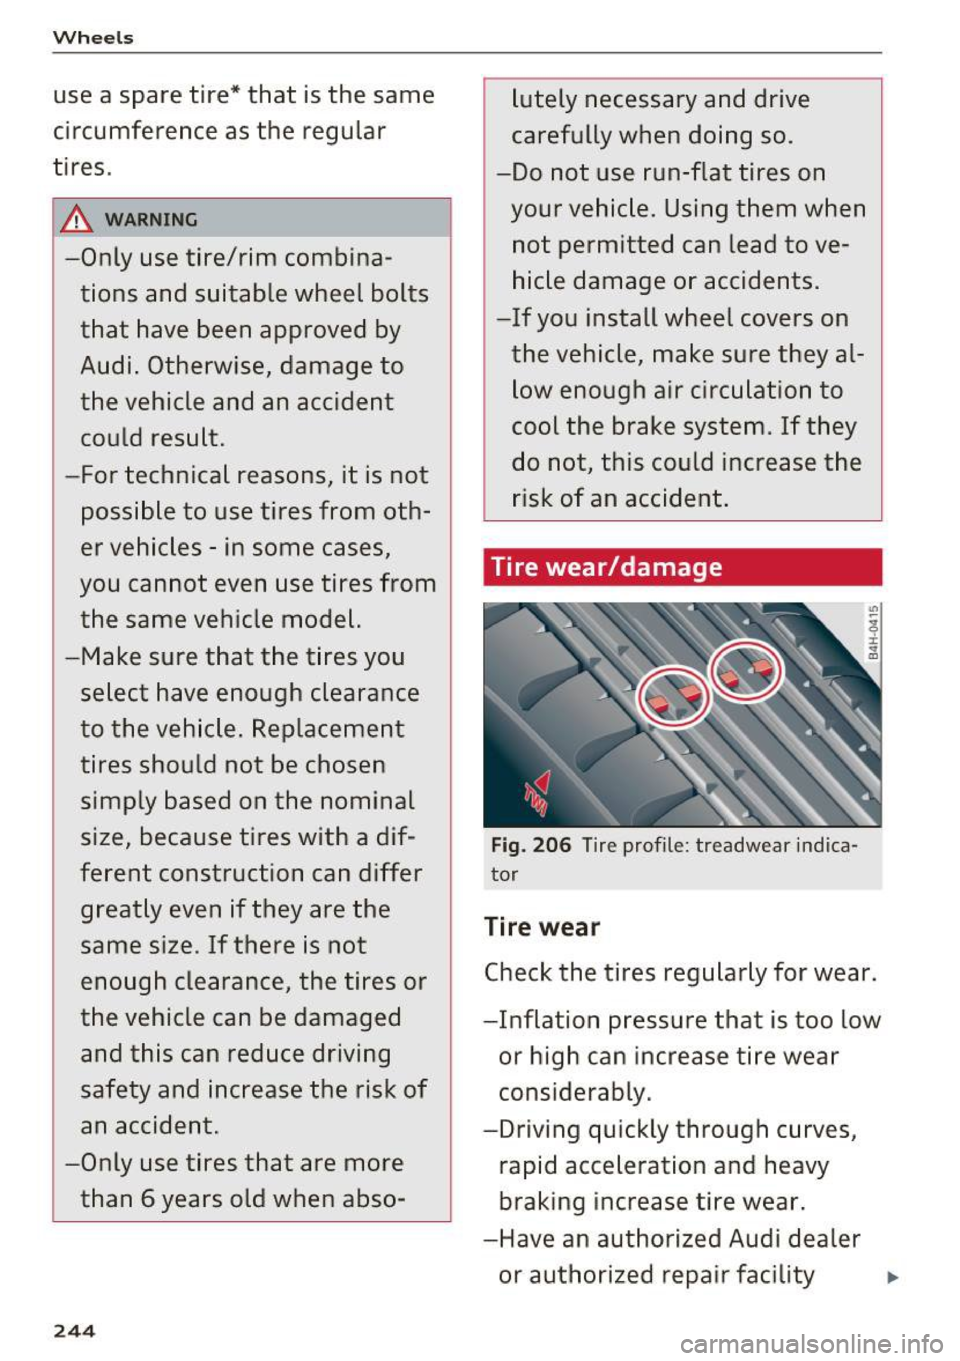
Fig. 206 Tire profile: treadwear indica­
tor
Tire wear
Check the tires regularly for wear.
-Inflation pressure that is too low or high can increase tire wear
considerably.
-Driving quickly through curves, rapid acceleration and heavy
braking increase tire wear.
-Have an authorized Audi dealer or authorized repair facility
i.
Page 248 of 302
Wheels
braking, which increases the
risk of an accident.
Tire pressure
pressure to the maximum speci­
fied pressure
c:::> ,&. .
Checking/correcting tire
pressure
f ‚ÄĘCheck the tire pressure at least
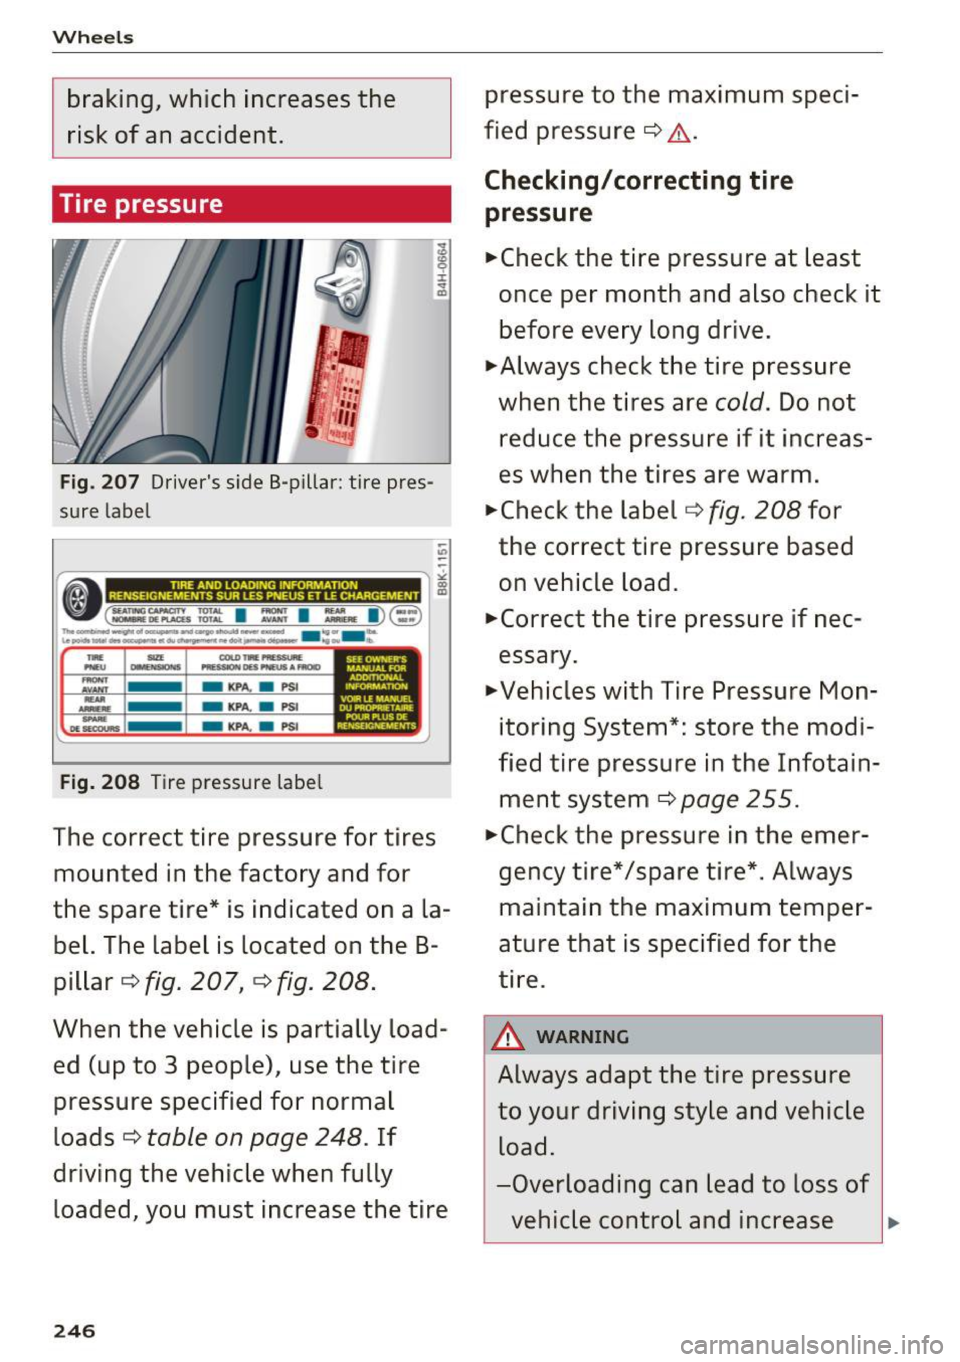
:r
..; once per month and also check it
Fig. 207 Driver's side B-pillar : tire pres­
sure label
:;;
-(~. -----~ ,~
( :=~ ~~:: I ~ I :. I)( ::-) n.,_.....,__.o1___.. .. -vo.._.......... ‚ÄĘ ... _ ... le~---~--.....,,_.,-'"-,............ ....,, .
lllf """ PNW 07:0lifla.l
-KPA. a PSI
- KPA.
a PSl
- KPA.
a PSl
Fig. 208 Tire pressure label
SEE OWNEJll"S MAMJAI.FOR
AODmOHAI.
INIFOAMATlON
VOOIUMANUEl.
DUNIOl'N:iTA.IRE POUR
P'l. US DE HTS J
The correct tire pressure for tires
mounted in the factory and for
the spare tire* is indicated on a la­
bel. The label is located on the B­
pillar
c:> fig. 207, c> fig. 208.
When the vehicle is partially load­
ed (up to 3 people), use the tire
pressure specified for normal
loads
c:> table on page 248. If
driving the vehicle when fully loaded, you must increase the tire
246
before every long drive.
‚ÄĘAlways check the tire pressure
when the tires are
cold. Do not
reduce the pressure if it increas­
es when the tires are warm.
‚ÄĘCheck the label
c:> fig. 208 for
the correct tire pressure based
on vehicle load.
‚ÄĘCorrect the tire pressure if nec¬≠
essary.
‚ÄĘVehicles with Tire Pressure Mon¬≠
itoring System*: store the modi­
fied tire pressure in the Infotain­ ment system
c:> page 255.
‚ÄĘCheck the pressure in the emer¬≠
gency tire*/spare tire*. Always
maintain the maximum temper­
ature that is specified for the
tire.
A WARNING ~
Always adapt the tire pressure
to your driving style and vehicle load.
-Overloading can lead to loss of
vehicle control and increase
Page 256 of 302
Wheels
_& WARNING
Temperature grades apply to tires that are
properly inflated and not over or underinf lat ­
ed.
Tire pressure monitoring system
U) General notes
Applies to: vehicles with tire pressure monito ring system
Each tire, including the spare (if provided),
should be checked monthly when cold and inflat­
ed to the inflation pressure recommended by the
vehicle manufacturer on the vehicle placard or
tire inflat ion pressure label. (If your vehicle has
tires of a different size than the size indicated on
the vehicle placard or tire inflation pressure la­
bel, you should determine the proper tire infla­
tion pressure fo r those tir es) .
As an added safety feature, your vehicle has been
equipped with a t ire pressure monitoring system
(TPMS) that illuminates a low tire pressure tell­
tale when one or more of your tires is significant­
ly under-inflated . Accord ingly, when the low tire
p ressure telltale illuminates, you should stop and
check your tires as soon as possible, and inflate
them to the proper pressure. Driving on a signifi­
cantly under-inflated tire causes the tire to over­
heat and can lead to tire failure. Under-inflation
also reduces fuel efficiency and tire tread life,
and may affect the vehicle's handling and stop­
ping ability.
Please note that the TPMS is not a substitute for
proper tire maintenance, and it is the driver's re­
sponsib ility to maintain correct tire pressure,
even if under-inflation has not reached the level
to trigger illumination of the TPMS low tire pres­
sure telltale.
Your vehicle has also been equipped with a TPMS
malfunct ion indicator to indicate when the sys­
tem is not operating properly. The TPMS mal­
function indicator is comb ined w ith the low tire
pressure telltale. When the system detects a
malfunction, the telltale will flash for approxi­
mately one minute and then remain cont inuous ly
illuminated. This sequence will continue upon
254
subsequent vehicle start-ups as long as the mal­
function exists.
When the malfunction indicator is illum inated,
the system may not be able to detect or s ignal
low tire pressure as intended . TPMS malfunctions
may occur for a variety of reasons, including the
i nstallation of replacement or alternate tires or
wheels on the vehicle that prevent the TPMS
from functioning properly. Always check the
TPMS malfunction telltale after replacing one or
more tires or wheels on your vehicle to ensure
that the replacement or alternate tires and
whee ls allow the TPMS to continue to function
properly.
If the Tire Pressure Monitoring System
indicator appears
Applies to: vehicles with tire pressure monitoring system
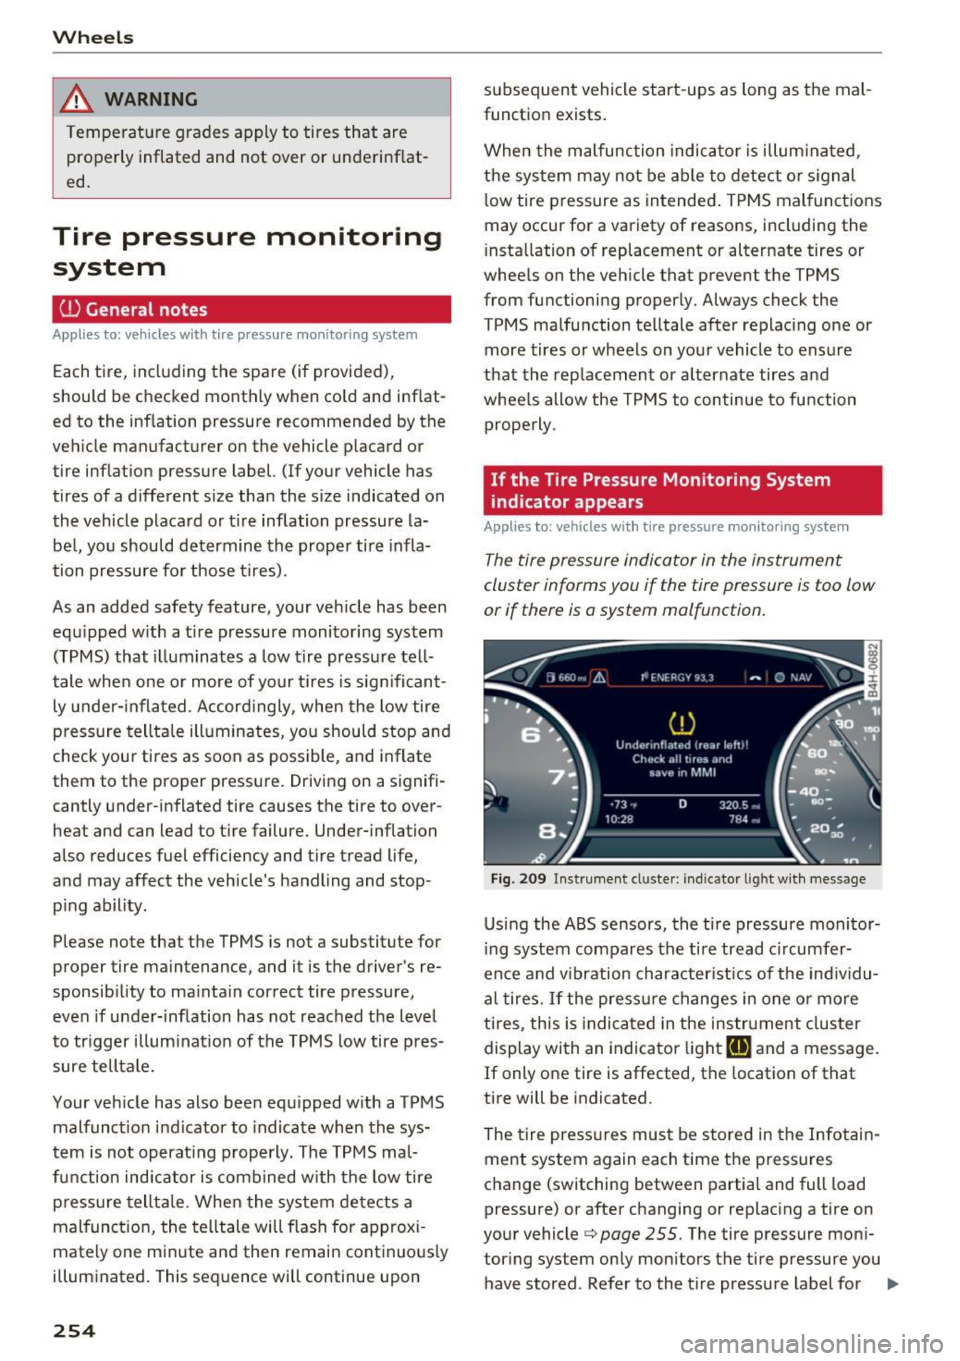
The tire pressure indicator in the instrument
cluster informs you if the tire pressure is too low
or if there is a system malfunction.
Fig . 209 Instrument cl uste r: indicator light with me ssage
Using the ABS sensors, the tire pressure monitor­
ing system compares the tire tread c ircumfer­
ence and v ibration characteristics of the individu­
al tires.
If the pressure changes in one or more
ti res, this is ind icated in the instrument cluster
display with an indicator light
[I] and a message.
If only one tire is affected, the locat ion of that
tire will be indicated.
The tire pressures must be stored in the Infotain­
ment system again each time the pressures
change (switching between partial and full load
pressure) or after changing or replacing a tire on
your vehicle ¬Ę
page 255. The tire pressure moni­
tor ing system only monitors the tire pressure you
have stored . Refer to the t ire pressure label for ..,.
Page 257 of 302
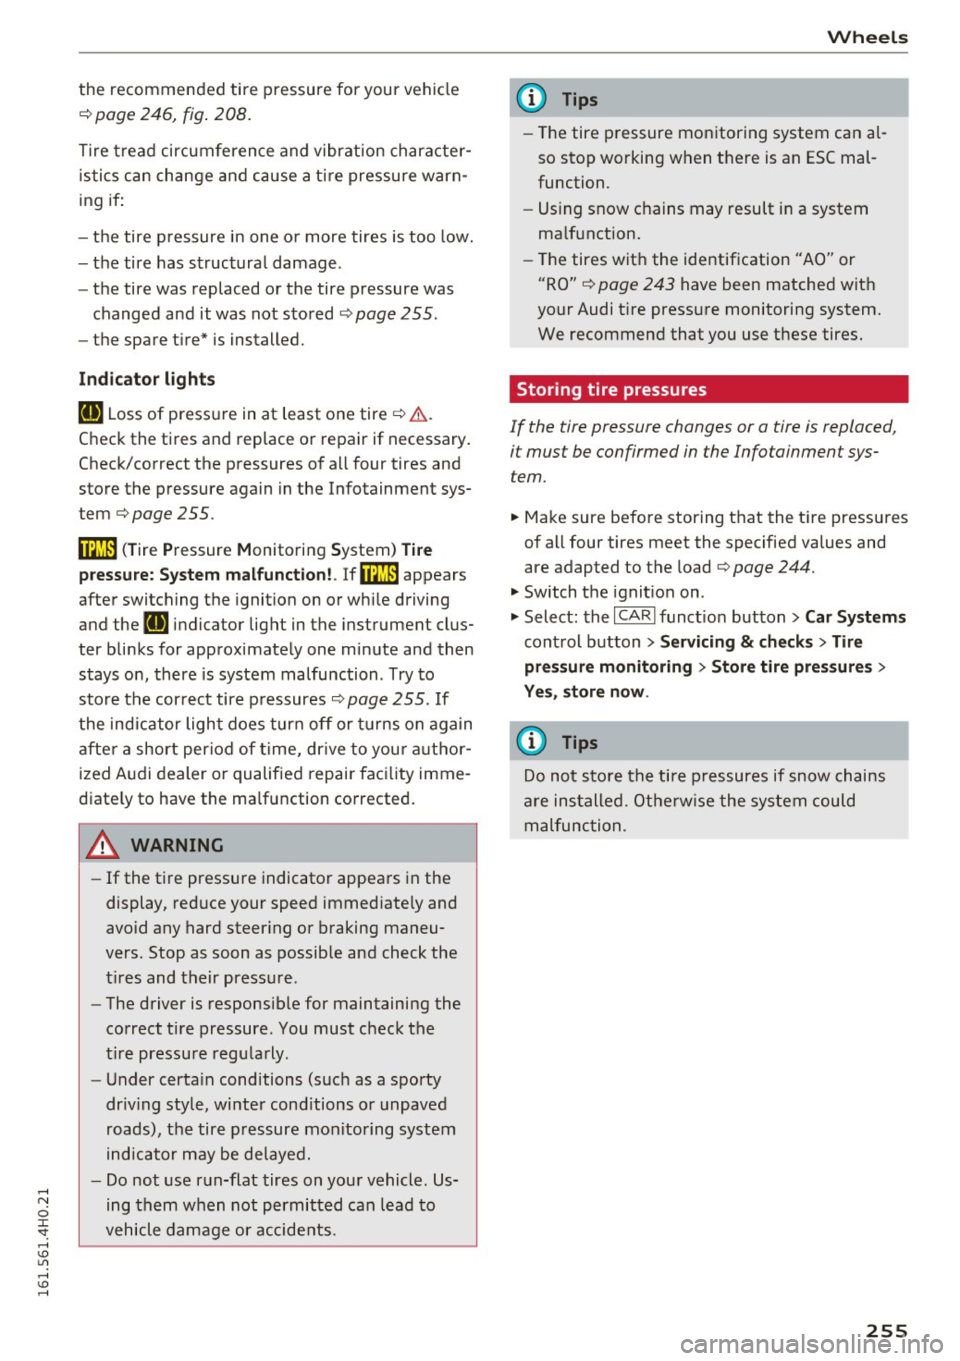
the recommended tire pressure for you r ve hicle
¬Ę page 246, fig . 208.
T ire tread circumference and v ibrat ion character­
istics can change and cause a ti re pressure warn­
ing if :
- the tire p ressure in one o r more tires is too low.
- the tire has structura l damage .
- the tire was replaced or the tire pressure was
changed and it was not stored¬Ę
page 255 .
-the spare t ire* is installed.
Ind icat or light s
IE Loss of press ure in at least one tire q &. .
Check the tires and replace or repair if necessary.
Check/correct the pressures of a ll four tires and
store the pressure again in the Infotainment sys­
tem ¬Ę
page 255.
ffim (T ire Pressure Monitoring System) Tire
pressu re: Sys tem malfunction !.
Iffflm appears
after switching the ignition on or wh ile driving
and the
IE indicator light in the instrument clus­
ter blinks for approximate ly one minute and then
stays on, there is system malfunction . Try to
store the correct tire pressures¬Ę page 255 . If
the indicator light does tur n off or t urns on again
a fte r a short period of time, dr ive to you r author­
ized A udi dealer or qualified repair fac ility imme­
diate ly to have the ma lfunction co rrected.
&_ WARNING
- If the tire pressu re indicator appears in the
display, reduce your speed immed iate ly and
avoid any hard steer ing or braking maneu­
vers. Stop as soon as possib le and check the
t ir es and their press ure .
- The driver is responsib le for maintaining the
correct tire pressure. You must check the
t ir e pressu re regu la rly .
- Under certa in conditions (such as a sporty
dr iv ing style, wi nter cond itions or unpaved
roads), the tire p ressure monitoring system
indicator may be de layed.
- Do not use r un-flat tires on your vehicle. Us­
ing them when not permitted can lead to
vehicle damage or accidents.
Wh eel s
(D Tips
-The tire p ressure monitoring system can al­
so stop working when there is an ESC mal­
function.
- Using snow c hains may result in a system
ma lf u nction.
- The tires wit h the identification "AO" or
"RO"
q page 243 have been matched wit h
your Audi t ire press ure monitoring system.
We recommend that you use these tires.
Storing tire pressures
If the tire pressure changes or a tire is replaced,
it must be confirmed in the Infotainment sys­ tem.
.,. Ma ke sure befo re storing t hat the t ire pressures
of all four tires meet the specified values and
are adapted to the load ¬Ę
page 244.
.,. Switch the ignit ion on .
.,. Select: the
I CAR ! funct io n button > Car Systems
cont rol button > Serv icing & check s > Tire
pressure monitoring > Store tire pressures >
Ye s, store now .
(j) Tips
Do not sto re the tire pressures if snow chains
are ins talled. Ot he rw ise the system could
malfunc tion.
255
Page 258 of 302
Emergency assistance
Emergency assistance
Trunk escape handle
In case of an emergency, the rear lid can be
opened from the inside using the trunk escape
handle.
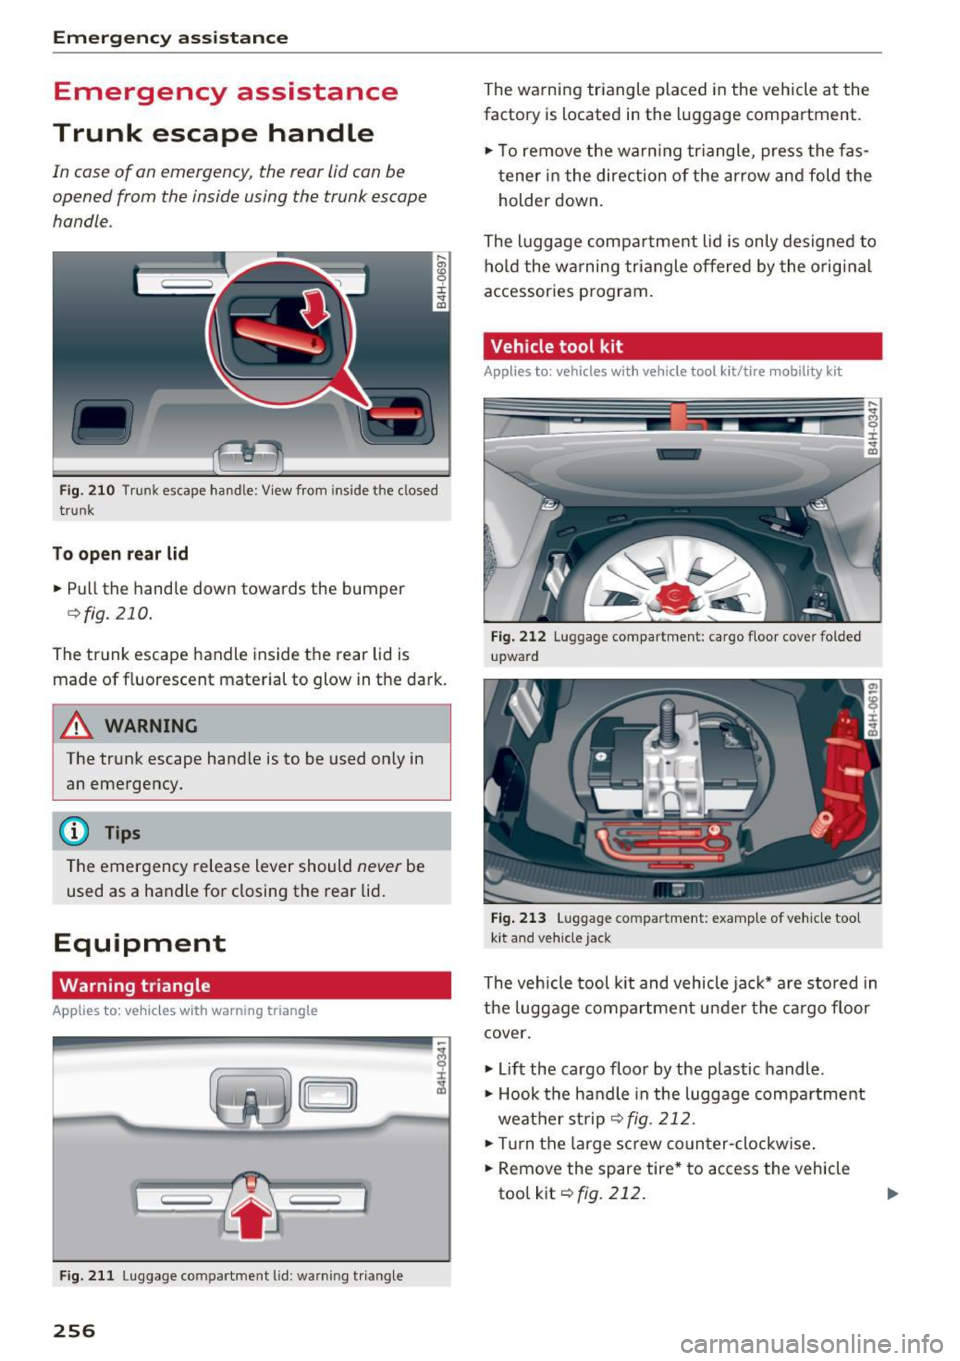
Fig. 210 T runk escape handle: View from inside the closed
tru nk
To open rear lid
.. Pull the handle down towards the bumper
¬Ę fig. 210.
The trunk escape handle inside the rear lid is
made of fluor escent material to glow in the dark.
A WARNING
The trunk escape handle is to be used only in
an emergency.
@ Tips
The emergency release lever should never be
used as a handle for closing the rear lid.
Equipment
Warning triangle
Applies to: vehicles with warn ing triangle
r ---->
Fig . 211 Luggage compartment lid : warning triangle
256
The warning triangle placed in the vehicle at the
factory is located in the luggage compartment.
.. To remove the warn ing triangle, press the fas-
tener in the direction of the arrow and fold the
holder down.
The luggage compartment lid is only designed to
hold the warning triangle offered by the original
accessories program.
Vehicle tool kit
Applies to: vehicles with vehicle tool kit/tire mobility kit
Fig. 212 Luggage compartment: cargo floor cover folded
upward
Fig. 213 L uggage compartment: examp le of vehicle tool
ki t and vehicle jack
The vehicle tool kit and vehicle jack* are stored in
the luggage compartment under the cargo floor cover .
.. Lift the cargo floor by the plastic handle .
.. Hook the handle in the luggage compartment
weather strip
¬Ę fig. 212 .
.. Tu rn the large screw counter -clockw ise .
.. Remove the spare tire * to access the vehicle
tool kit¬Ę
fig. 212.
Page 259 of 302
Depending on the equipment, the vehicle tool kit
may be located under the spare tire under an ad­
d itional cover or in the too l box. The position of
the vehicle jack* may vary.
A WARNING
Improper use of the vehicle jack can cause se­
r ious personal injuries.
- Never use the screw driver hex head to
t ighten wheel bolts, since the bolts cannot
attain the necessary tighten ing torque if you
use the hex head, potentia lly causing an ac­
c ident.
- The factory-supplied jack is intended on ly
for your vehicle model. Under no circum­
stances should it be used to lift heavy
vehicles or other loads; yo u risk injuring
yo urself.
- Never start the engine whe n the vehicle is
raise d, which could ca use a n accident.
- Support the veh icle secure ly with appropr i­
a te stands if wor k is to be perfo rmed u nder ­
neath the veh icle; otherwise, the re is a po­
tential risk for in jury.
- Never use the jack s upplied with your Audi
on another vehicle, particularly o n a heav ier
one. The jack is only suitab le for use on the
vehicle it came wit h.
@ Tips
The vehicle j ack* in your vehicle is mainte ­
nance -free.
Em ergen cy a ssis tanc e
Space-saving spare tire (compact spare
tire)
Applies to: vehicles with space-saving spare tire
The spare tire/wheel is located in the luggage
compartment under the cargo floor cover . It is
intended for short-term use only.
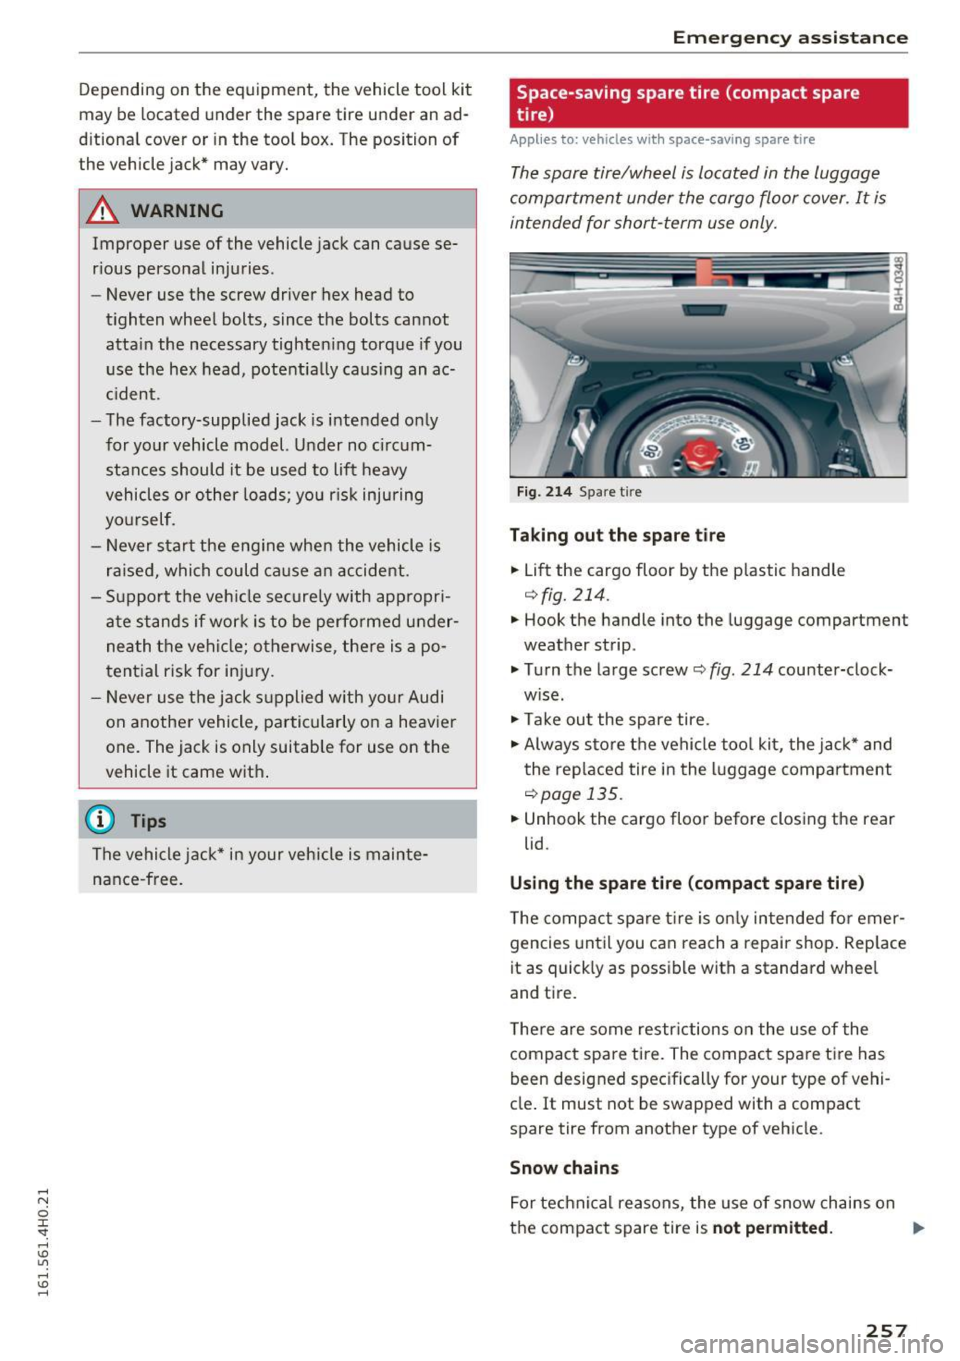
Fig . 21 4 Spare tire
Ta king out the spare tir e
... Lift the cargo floor by the p lastic handle
q fig. 214.
.,. Hook the handle into the luggage compartment
weather strip.
.,. Turn the large screw
r:=;, fig . 214 cou nter-clock­
w ise.
.,. Take ou t the spare tire.
.,. Always s to re the vehicle too l kit, the jac k* and
the rep laced tire i n the luggage compartment
r:::;, page 135.
.,. Unhook the cargo floor before closing the rear
lid.
Using the spare tire (compact spare tire )
The compact spare tire is on ly intended for emer­
gencies until you can reach a repair shop . Rep lace
it as quick ly as poss ible with a standard wheel
and tire.
T here are some restr ictions on the use of the
compact spare tire. The compact spa re tire has
been designed specifically for your type of vehi­
cle . It must not be swapped with a compact
spare tire from another type of vehicle.
Snow chains
For technical reasons, the use of snow chains on
the compact spare tire is
not permitted. .,..
257
Page 260 of 302
Emerg ency assis ta nce
If you do have to drive with snow chains and a
front tire fails, mount the spare wheel with tire
instead of a rear tire . Install the snow chains on
the rear tire and use it to replace the defective
front tire.
A WARNING
- Never use the spare tire if it is damaged or if
it is worn down to the tread wear indicators.
- If the spare tire is more than 6 years old,
use it only in an emergency and with ex­
treme caution and ca refu l dr iving .
- The spare tire is intended only for tempora­
ry and short-term use . It should be replaced
as soon as possible with the normal wheel
and t ire.
- After mounti ng the compact spare t ire, the
tire pressure must be checked as soon as possible. The tire pressure of the compac t
spare tire must be 4.2 bar; otherwise, you risk having an accident.
- Do not drive faster than SO mph (80 km/h).
Yo u risk hav ing an accident.
- Avoid full-throttle accelerat ion, heavy brak­
ing, and fast cornering. You risk having an
acc ident .
- Never dr ive using more than one spare
wheel and tire. You risk having an acciden t.
- Normal summer or winter tires must not be
mounted on the compact spare wheel rim.
- For technical reasons, the use of tire chains
on the spare tire is not pe rm itted. If it is
necessary to drive with tire chains, the spare
wheel m ust be mounted on the front ax le in
the event of a flat in a rear tire. The new ly
available front wheel must then be insta lled
in place of the rear wheel with the flat t ire.
Installing the tire chain before mounting
the wheel and t ire is recommended.
- Loose items in the passenger compartment
can cause ser ious personal injury during
hard braking or in an accident. Never store
the inflatable spare t ire or jack and too ls in
the passenger compartment.
258
Spare wheel
Applies to: vehicles with spare whee l
The spore wheel is stored in the wheel well un­
derneath the floor panel in the luggage
com­
portment.
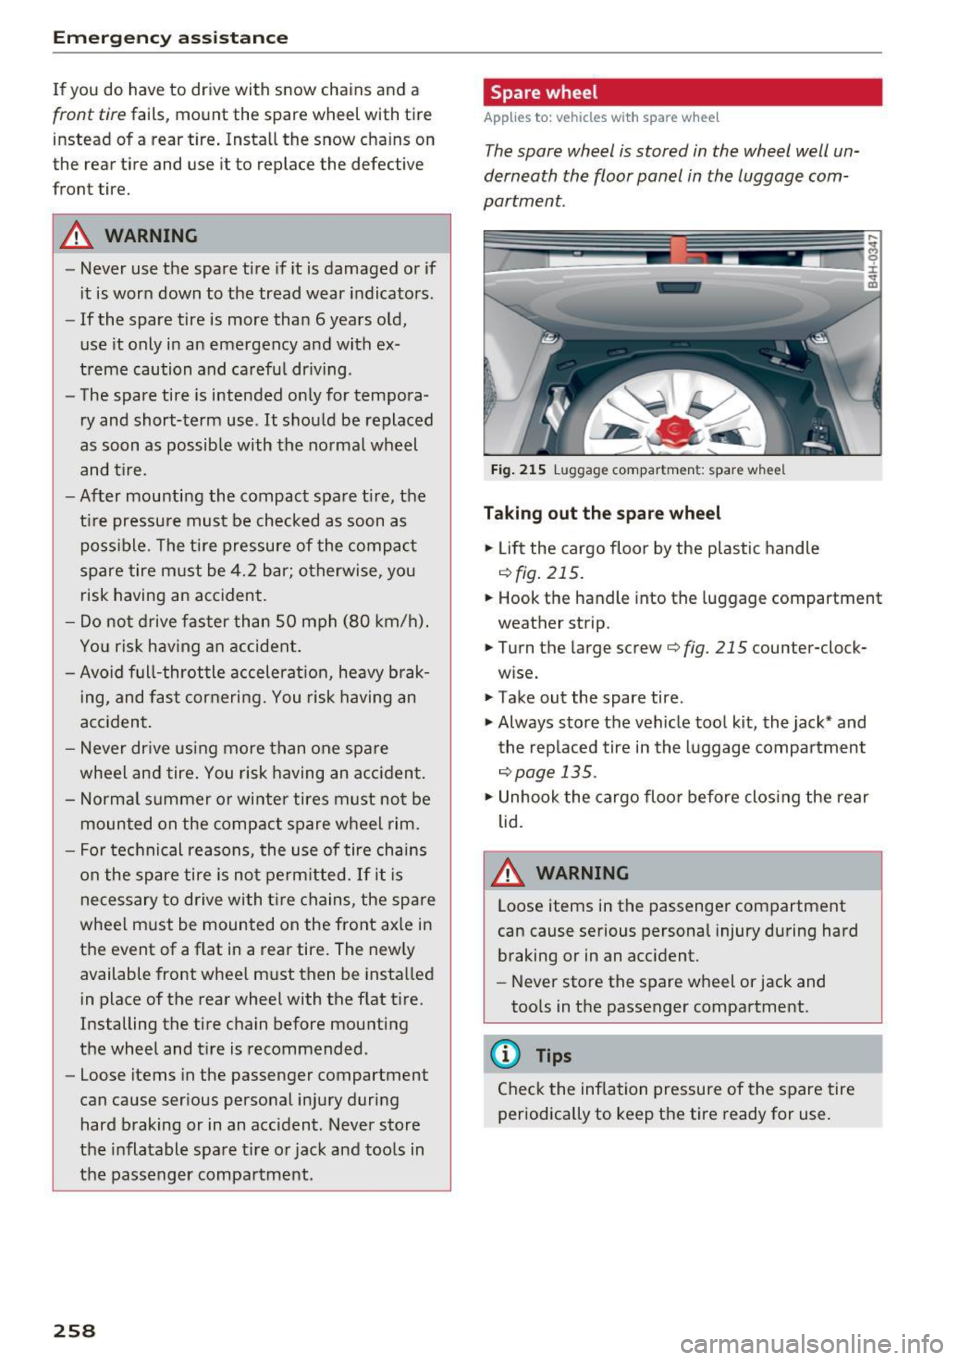
Fig . 215 Luggage compartmen t: spare whee l
Taking out th e spar e wh eel
.. Lift the cargo floor by the plastic handle
¬Ę fig. 215.
.. Hook the handle into the luggage compartment
weather strip.
.. Turn the large screw
¬Ęfig. 215 counter-clock¬≠
wise .
.,. Take out the spare tire.
.,. Always store the vehicle tool kit , the jack* and
the rep laced tire in the luggage compartment
¬Ępage 135.
.. Unhook the cargo floo r before clos ing the rear
lid.
A WARNING
Loose items in the passenger compartment
can cause serious personal injury during hard braking or in an acc ident.
- Never store the spare wheel or jack and
too ls in the passenger compartment .
(D Tips
Check the inflation pressure of the spare tire
periodically to keep the tire ready for use.
-
Page 261 of 302
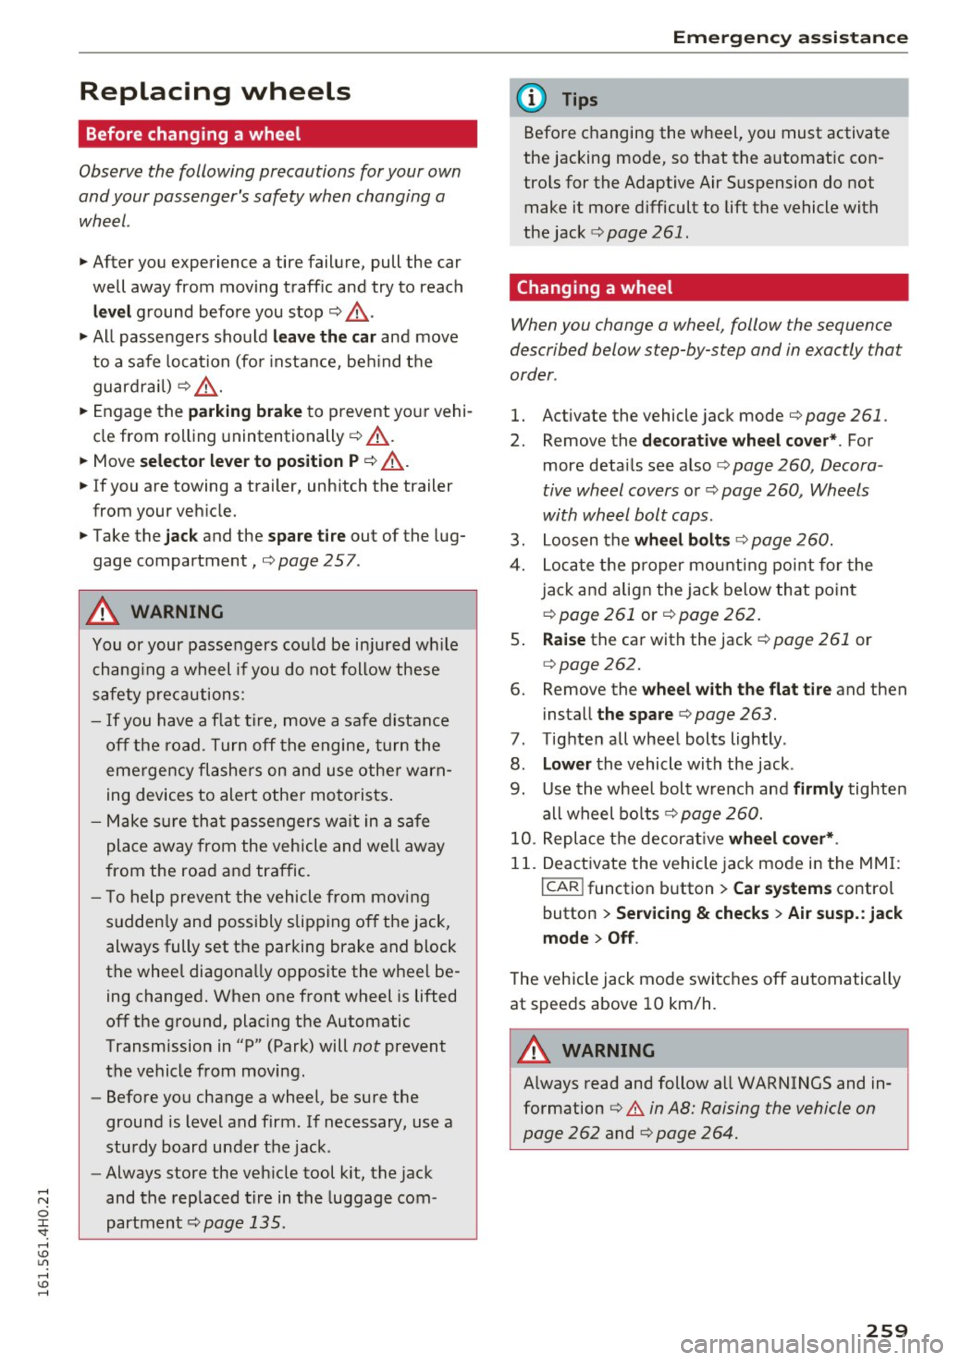
Replacing wheels
Before changing a wheel
Observe the following precautions for your own
and your passenger's safety when changing a
wheel.
.,. After you experience a tire failure, pull the car
well away from moving traffic and try to reach
level ground before you stop¬Ę.,&. .
.. All passengers should
leave the car and move
to a safe location (for instance, beh ind the
guardrail) ¬Ę.,&. .
.,. Engage the
parking brake to prevent your vehi­
cle from rolling unintentionally ¬Ę.,&. .
.. Move
selector lever to position P ¬Ę .,&. .
1> lfyou are towing a trailer, unhitch the trailer
from your vehicle.
.,. Take the
jack and the spare tire out of the lug­
gage compartment,
¬Ępage 257.
..&, WARNING
You or your passengers could be injured wh ile
changing a wheel if you do not follow these
safety precautions:
- If you have a flat tire, move a safe distance
off the road. Turn off the engine, turn the
emergency flashers on and use other warn­
ing devices to alert other motorists.
- Make sure that passengers wa it in a safe
place away from the vehicle and well away
from the road and traffic.
- T o help prevent the vehicle from moving
sudden ly and possibly slipping off the jack,
always fully set the parking brake and block
the wheel diagonally opposite the wheel be­
ing changed. When one front wheel is lifted
off the ground, plac ing the Automatic
Transmission in "P" (Park) will
not prevent
the vehicle from moving.
- Before you change a wheel, be sure the
ground is level and firm . If necessary, use a
sturdy board under the jack .
- Always store the vehicle tool k it, the jack
and the replaced tire in the luggage com­
partment ¬Ę
page 135.
Emergency assistance
{!) Tips
Before changing the wheel, you must activate
the jacking mode, so that the automat ic con­
tro ls for the Adaptive Air Suspension do not
make it more difficult to lift the vehicle with
the jack ¬Ę
page 261 .
Changing a wheel
When you change a wheel , follow the sequence
described below step-by-s tep and in exactly tha t
order .
l. Activate the vehicle jack mode ¬Ę page 261 .
2. Remove the decorative wheel cover*. For
more details see also¬Ę
page 260, Decora ­
tive wheel covers
or¬Ę page 260, Wheels
with wheel bolt caps .
3. Loosen the wheel bolts¬Ę page 260.
4. Locate the proper mounting point for the
jack and align the jack below that point
¬Ę page 261 or¬Ę page 262.
5. Raise the car with the jack¬Ę page 261 or
¬Ępage 262.
6. Remove the wheel with the flat tire and then
install
the spare ¬Ę page 263.
7. Tighten all wheel bolts lightly .
8.
Lower the vehicle with the jack .
9. Use the wheel bolt wrench and
firmly tighten
all wheel bolts<=>
page 260.
10. Replace the decorative wheel cover*.
11. Deactivate the vehicle jack mode in the MMI :
I CAR! function button > Car systems contro l
button
> Servicing & checks > Air susp.: jack
mode > Off.
The vehicle jack mode switches off automatically
at speeds above 10 km/h .
..&, WARNING
Always read and follow all WARNINGS and in­
formation
¬Ę .&. in AB: Raising the vehicle on
page 262
and ¬Ę page 264.
259
Page 262 of 302
Emergency assistance
After changing a wheel
A wheel change is not complete without the do­
ing the following .
‚ÄĘ Always store the vehicle tool kit, the jack* and
the replaced tire in the luggage compartment
<=>page 135.
‚ÄĘ Check the tire pressure on the spare wheel im¬≠
mediate ly after mounting it.
‚ÄĘ As soon as possible, have the
tightening tor­
ques
on all wheel bolts checked with a torque
wrench. The correct tightening torque is 90 ft
lb (120 Nm).
‚ÄĘ Have the flat tire
replaced as soon as possible.
@ Tips
- If you notice that the whee l bolts are cor­
roded and difficu lt to turn while changing a
tire, they should be replaced before you
check the tightening torque .
- Drive at reduced speed until you have the
tightening torques checked.
- After changing a wheel, the tire pressure in
a ll four tires must be checked/corrected and
the tire pressure mon itor ing indicator must
be stored in the MMI
c> page 255.
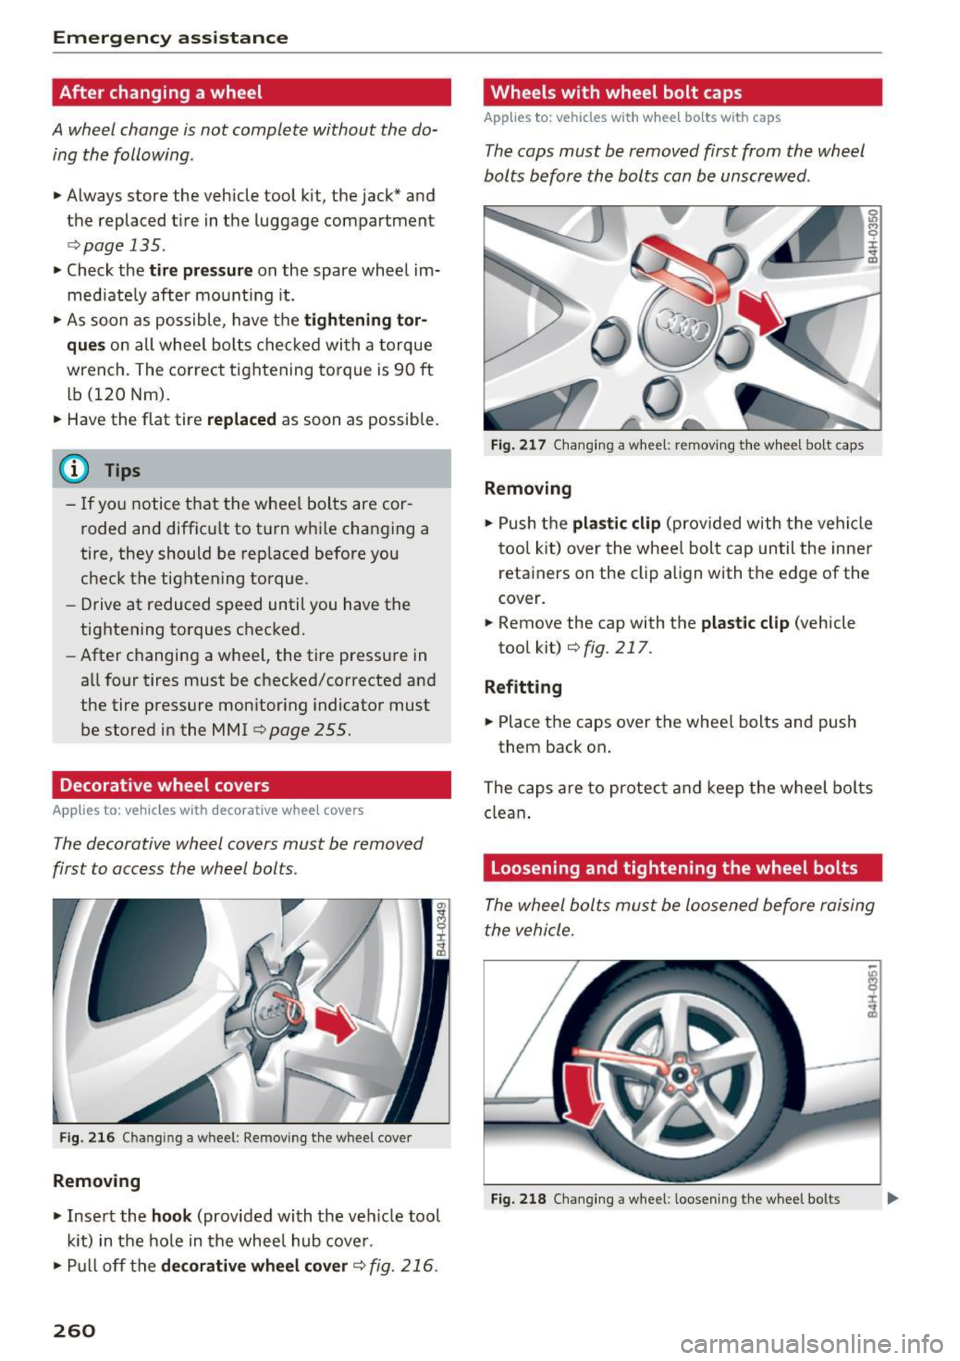
Decorative wheel covers
App lies to: vehicles with decorative wheel covers
The decorative wheel covers must be removed
first to access the wheel bolts .
Fig. 216 Chan gin g a w heel : Removing the whee l cover
Removing
‚ÄĘ Insert the hook (provided with the ve hicle tool
kit) in the hole in the wheel hub cover.
‚ÄĘ Pull off the
decorative wheel cover c> fig. 216.
260
Wheels with wheel bolt caps
Applies to: vehicles with wheel bo lts with caps
The caps must be removed first from the wheel
bolts before the bolts can be unscrewed .
Fig. 217 Changing a wheel: removing the wheel bo lt caps
Removing
‚ÄĘ Push the plastic clip (provided with the vehicle
tool kit) over the whee l bolt cap until the inner
retainers on the clip align with the edge of the
cover.
‚ÄĘ Remove the cap with the
plastic clip (vehicle
tool kit)
<=> fig. 217 .
Refitting
‚ÄĘ Place the caps over the wheel bolts and push
them back on .
The caps are to protect and keep the wheel bolts
clean.
Loosening and tightening the wheel bolts
The wheel bolts must be loosened before raising
the vehicle.
Fig. 218 Chang ing a wheel: loosening the wheel bo lts