window AUDI ALLROAD 2000 Owners Manual
[x] Cancel search | Manufacturer: AUDI, Model Year: 2000, Model line: ALLROAD, Model: AUDI ALLROAD 2000Pages: 306, PDF Size: 9.95 MB
Page 6 of 306

----------------------------------------------TABLE OFCONT ENTS
I GENERAL ILLUSTRATION
General illustration 0 0 0. • • • 8
Warning and indicator lights 10
I SAFETY
FIRST
W elcome ... 0 0 0 •• •• 13
Safety first 0 0
• 0 • 0 0 0 0 • 0 •
13
Safety belts
• . . 0 0 0 • 0 0
14
Airbag system 0 ••••••• 0 0 • • • • • • • 25
Child safety ........ 0 • 0 0 0 0 0 0 0 0 0 44
I CONTROLS AND EQUIPMENT
Keys 0 0 0 0 0 0 0 0 0 0 0 •••• ••••• 0 0 • • 0
56
Power locks 0 0 0 0
Power windows
Mirrors 0 •• 0 0 0 •••
Head restraints
Front seats 0 0 0 •
0.- . 0 0 0 • • 59
69
• •• - •••• 0 ••• 0 72
75
•• 0 •• 0 76
Memory for front seats , .... 0 •• 0 81
Center armrest 0 0 0 0 0 0 0 0 0 •••••• 0 85 Rear
seats 0 0 •• 0 •• 0 • • • • • •
86
Luggage compartment , 0 0 88
Rear facing child seat bench 0 0 0 0 0 92
Ski sack 0 0 0 0 0 0 0 0 0 0 0 0 0 0 0 0.
96
Adjustable steering column
(tilt and telescopic) 0 0 0 0 • 0 0
98
Pedals 0 0 • 0 0 0 0 0 0 0 0 0 0 0 0 0 0 0 0 0 0 0 , 1 02
Parking brake lever 0 • 0 0 0 0 0 0 0 •• 0 1 03
5-speed automatic transmission
(Trptronic ®) 0 0 0 0 0 0 0 0 0 0 • 0 0 0 0 0. 0 • 104
Acoustic park assist
112
Ignition switch 0 0 0 0 0 0 0
1 13
Starting procedures . 0 • • 114
Stopping engine 0 0 0 0 0 0 • • • 115
Instrument cluster 0 0 0 0 0 0 116
Service Interval Display
121
Warning I Indic ator lights 0 0 0 0 0 0 • 122
On Board Diagnostic system 0 0 0 128
Driver information system 0 • 0 • • • 130
Menu display 0 0 0 0 0 0 0 0 0 0 0 0 0
0 131
Rear lid I door open indicator 0 0 0 137
Outside air temp erature 0 • 0 0 0 0 0 0 137 Radio
frequency display 13
8
Auto-Check system 0 0 0 o 0 138
Speed warning . 0 0 0 • 0 0 • • • • 0 • 0 0 144
Tr ip computer 0 0 0 0 0 0 •• 0
146
Switches 0 • 0 •• 0 0 0 0 • 0 0 0 0 148
Ride height adjustment
(4 Level Air Suspension) 0
153
Turn signals,
headlight dimmer switch lever 0 0 156
Cruise control 0 0 0 0 0 0 0 0 0 0 0 0 0 0 0 • • 158
Wiper and washer system 0 ••• 0 0 150
Climate controls 0 0 0 0 0 0 0 0 0 0 0 • 0 152
Power roof 0 0 0 0 0 0 0 • 0 0 0 0 0 • • • • • • 168
Int erior lights, reading lights 171
Luggage compartment light 0 0 0 0 172
Audi Homelink ®
Uni versal Transmitter . 0 0 • • • •
173
Sun visors 00 00 00 00 ... • .. •
177
Sun shade 0 0 0 0 0 0 0 0 •• , • • • ••• 0 0 177
Glo ve compartment
Coat hooks
Ashtray 178
179
180
5
Page 10 of 306

1
2
3
4 5
6
7
8
9
10
11 12
13 14
15
16
17 Power
window switches
Door handle
Power locking switch
Light switch
Air vents
Turn signals I headlight dimmer switch lever ...
Cruise control ................. .............
Instrument illumination
Horn, driver's airbag •••••
0 •• 0 •• 0 0 •• 0 ••• 0 ••• 0
Radio I CD I buttons ................
........
Radio I CD I telephone buttons ...............
Instrument cluster ....... ... ... ... ... .. .....
Warning I indi cator lights ••••••••
0 0
••••••••••
Windshield wiper I washer lever ..............
Tri p computer function control switch .........
Steering lock I ignition I starter switch
Switch for the Electronic Stability Program (i::SP)
Switches for the ride heigh t adjustment and
level display •••••••••••••••
0 •• 0 •• 0 0 •• 0 0 ••••
Emergenc y flasher
Cup holder
Glove compartment (lockable)
Front passenger's airbag
Radio Page
69
59 62
148 165
15 6
15 8
149
25
185
18 6
11 6
12 2
16 0
146
113
15 2
15 3
15 2
18 2
17 8
25 -------GE NERA L ILLUST
RATION
Page
18 Thumb wheel for seat heating
150
19 Switch for rear window defogger 151
20 Climate controls
162
21 Ashtray ...................................
180
Cigarette lighter ............................ 181
22 Gearshift lever or
Selector lever ..............................
104
23 Adjuster control for outside mirrors
72
24 Parking brake lever
103
25 Navigation System switch or
Cup holder
•••••••••••••••• 0 •••• 0 •••• 0 •••••
182
26 Storage compartment
27 Service wallet compartment
183
28 Adjustable steering wheel
98
29 Data Link Connector (DLC) for On Board
Diagnostics (OBD)
128
30 Release lever for engine hood 231
31 Memory for driver's seat
81
Notes
• Some features mentioned are standard equipment on some
models only and options on others.
• For technical reasons, the arrangement of the switches and indi
cator /warning lights may differ. The govern ing factor is the symbol
on the switch itself.
9
Page 29 of 306

SAFETYRRST---------------------------------------------------
The triggering of the airbag system de
pends on the vehicle deceleration rate
caused by the collision and registered by
the control unit. If this rate is below the ref
erence value programmed into the control
unit, the airbags will not be triggered, even
though the car may be badly damaged as a
result of the accident.
When the system is activated, the airbags
fill with a propellant gas, break open the
padded covers, and inflate between the
steering wheel and the driver and between
the instrument panel and the front passen
ger.
All this takes place within the blink of an
eye, so fast that many people don't even
realize that the airbags have deployed. The
airbags also inflate with a great deal or force
and nothing should be in their way when
they deploy.
28 Fully
inflated airbags in combination with
properly worn safety belts slow down and
limit the occupant's forward movement and
help to reduce the risk of injury to the head
and upper torso.
The airbags will deflate immediately after
the deployment so that the front occupants
can see through the windshield again.
When the system is activated, fine dust is
released. This is normal and is not caused
by a fire in the vehicle. It could irritate skin. �W
ARNING
• The fine dust created when air
bags deploy can cause breathing
problems for people with a history
of asthma or other breathing con
ditions.
• To reduce the risk of brea thing
problems, those with asthma or
other respiratory conditions
should get fresh air right away by
getting out of the car or opening
windows or doors.
• If you are in an accident in
which airbags deploy, wash your
hands and face with mild soap and
water before eating.
• Be careful not to get the dust
into your eyes or into any cuts or
scratches.
• If the residue should get into
your eyes, flush them with water.
Page 37 of 306

SA
FETY FIRST
When the supplemental side airbag is acti
vated, it breaks through a seam on the side
of the seatback identified by the AIR BAG la
bel. It inflates between the side trim panel
and the passenger within the blink of an eye
at very high speed and with great force. The
supplemental side airbag could injure you if
your seating position is not proper or upright
or if items are located in the area where the
supplemental side airbag inflates. This ap
plies especially to children. See also "Child
Safety". on page 44.
36 ----------------------------
�W ARNING
To reduce the risk of injury when
the supplemental side airbag in
flates.
always sit in an upright position
and do not lean against the area
where the supplemental side
airbag is located.
always make sure that safety
balta are worn properly,
- a child must never rest his/her
head against the side trim panel
in the area where the supple
mental aide airbag inflates. An
inflating airbag can cause seri
ous or fatal injury.
see "Importance of proper seat
ing position .. in this section at
pages 29 and 37 and heed all
WA RNINGS. When
the system is activated, fine dust is
released. This is normal and is not caused
by a fire in the vehicle. It could irritate your
skin.
�W ARNING
• The fine dust created when air
bags deploy can cause breathing
problems for people with a history
of asthma or other breathing con
ditions.
• To reduce the risk of breath ing
problems. those with asthma or
other respiratory conditions
should get fresh air right away by
getti ng out of the car or opening
windows or doors.
• If you are in an accident in
which airbags deploy. wash your
hands and face with mild soap and
water before eating.
Page 38 of 306

-----------------------------------------------------SAFETYRRST
M WARNING continued
• Be careful not to get the dust
into your eyes or into any cuts or
scratc hes.
• If the residue should get into
your eyes, flush them with water.
Importance of proper seating
position
In a collision supplemental side airbags
must inflate within a fraction of a second
and with considerable force. In order to help
the airbag to do its job, it is important, both
as a driver and as a passenger to sit properly
at all times. By keeping room between your
body and the side of the passenger
compartment, the airbag can inflate fully
and completely and provide supplemental
protection in certain side collisions. �W
ARNING
Failure to maintain an upright and
proper seating position will in�
crease the risk of personal injury
when the supplemental side air�
bag inflates. To reduce the risk of
injury that can be caused by an in�
flating supplemental side airbag:
Never lean against the door and
over the area where the side ai�
bag is located.
- Navar let anyone to place their
hand, lag or face near the sup�
plemental side airbag.
- Do not let anyone sitting in the
front seat put their hand out of
the window or lean against the
door.
- Never let anyone sitting in the
rear seat hold onto the sides of
the front seat backrest. Some
other important points to
know
Because airbags inflate in the blink of an eye
with great force, things you have on your lap
or have placed on the seat could become
dangerous projectiles and be pushed into
you if the airbag inflates.
�W ARNING
• Objects between you and the
airbag can increase the risk of in�
jury in an accident by interfering
with the way the airbag unfolds or
by baing pushed into you as the
airbag inflates.
• Never hold things in your hands
or on your lap when the vehicle is
in use.
Always heed all WAR NINGS
on next page.
37
Page 40 of 306

The head airbags (inflatable curtain head
airbags) are located on the left and right
sides above the doors underne ath the head
lin er. These locations are")
Head airbags (SIDEGUARD)
The head airbags (inflatable curtain head
airbags) are located on the left and right
sides above the doors underne ath the head
lin er. These locations are marked with the
word "AIRBAG".
The head airbags are inflated together with
the supplemental side airbags only in se
vere side collisions occuring on the impact
side of the vehicle. The
head airbags will not inflate ...
• if the ignition is switched off
• in frontal collisions
• in side collisions in which vehicle
deceleration is not high enough
• in rear collisions
• in roll-overs.
Under some accident conditions, front and
side and head airbags may inflate.
Remember too, airbags will deploy only
once and only in certain kinds of accidents
-y our safety belts are always there to offer
protection in those accidents in which air
bags are not supposed to deploy or when
they have already deployed.
A head airbag is not a substitute for the
safety belt It is part of the overa ll vehicle
safety system. The airbag system works
most effectively when used with the safety
belts. Therefore, always wear your safety
belts. See pages 14 to 24. SA
FETY FIRST
How the head airbag system works
In the event of a side-impact collision, the
head airbag deploys to reduce the risk that
persons sitting next to the doors will be in
jured if their heads strike the windows or
door columns. In addition, the head airbag
protects occupants from objects hurtled
into the vehicle from the outside, such as
broken glass.
In order to provide optimal protection for ve
hicle occupants, the airbag system is de
signed so that the head and side airbags on
the accident side are always triggered to
gether.
Therefore, the conditions under which the
head airbags are deployed are identical to
those for the side airbags. See page 35.
39
Page 41 of 306

SAFETY RRST---------------------------------------------------
When the head airbag is triggered, it de
ploys from above in a downward direction,
covering the side windows and door col
umns like a curtain -see illustration. It
therefore helps to protect both the front and
rear occupants at the same time.
To make certain that this additional protec
tive functions is effective, make certain that
the areas in which the airbags deploy are
free of obstacles.
When the system is activated, fine dust is
released. This is normal and is not caused
by a fire in the vehicle. It could irritate your
skin.
40 �W
ARNING
• The fine dust created when air
bags deploy can cause breathing
problems for people with a history
of asthma or other breathing con
ditions.
• To reduce the risk of breathing
problems. those with asthma or
other respiratory
conditions
should get fresh air right away by
getting out of the car or opening
windows or doors.
• If you are in an accident in
which airbags deploy. wash your
hands and face with mild soap and
water before eating.
• Be careful not to get the dust
into your eyes or into any cuts or
scratches.
• If the residue should get into
your eyes. flush them with water. Importance
of proper seating
position
In a collision head airbags must inflate
within a fraction of a second. In order to help
the airbag to do its job, it is important, that
driver and passengers sit properly at all
times. By keeping room between your body
and the side windows, the airbag can inflate
fully and completely and provide supple
mental protection in certain side collisions.
�W ARNING
• To be sure the head airbags can
deploy properly and can help to re
duce the risk of injury In a side col
lision:
- Never lean your head. arm or el
bow against the door. windows
and the area of the head airbags.
Never put your arm. hand or
head out of the window.
Page 61 of 306

CONTROLS AND
EQUIPMENT--------------------
Remember- the panic function can be seen
and heard by other motorists and I or per
sons near you.
Use the panic function only if you
are In an emergency situation.
�W ARNING
Do not leave children unattended
in the vehicle especially with ac
cess to the remote control. There
mote control could be used to lock
the doors delaying access to the
children in an emergency.
Resetting the remote control
If your vehicle will not lock using the remote
control . it could be that the code for the con
trol unit and key needs to be reset. This can
occur if you frequently use the remote c �m
trol while standing outside of the effective
range.
60 Resetting
procedure
1 - To synchronize, press button A or but
ton Con the remote control one time.
2 - Then, within one minute, lock or un
lock the driver's door with the master
key.
The system is now functional.
Operating locks using the key
• To lock and unlock the vehicle from
the outside, turn the key in the lock of the
driver's door or the rear lid.
Yo u can also lock and unlock the vehicle by
turning the key in the re ar lid lock. See
page 63.
• Turn the key one time only to unlock
(A) either the driver's door or respectively
the rear lid.
• Turn the key two times to unlock all ve
hicle doors and the rear lid. Convenience
close I open feature
You can also close any open windows and
1 or the power roof* when you lock your car
with the key.
Insert the key into the lock of the driver's
door, turn it to the lock position (B) and hold
until the wind ows and sunroof are com
pletely closed. The automatic close function
will stop immediately if the key is released.
Always make sure the windows are
not obstructed.
To open all window s: insert your key into the
lock of the dr iver's door, turn it to the open
position (A) and then hold it in this position.
Page 62 of 306
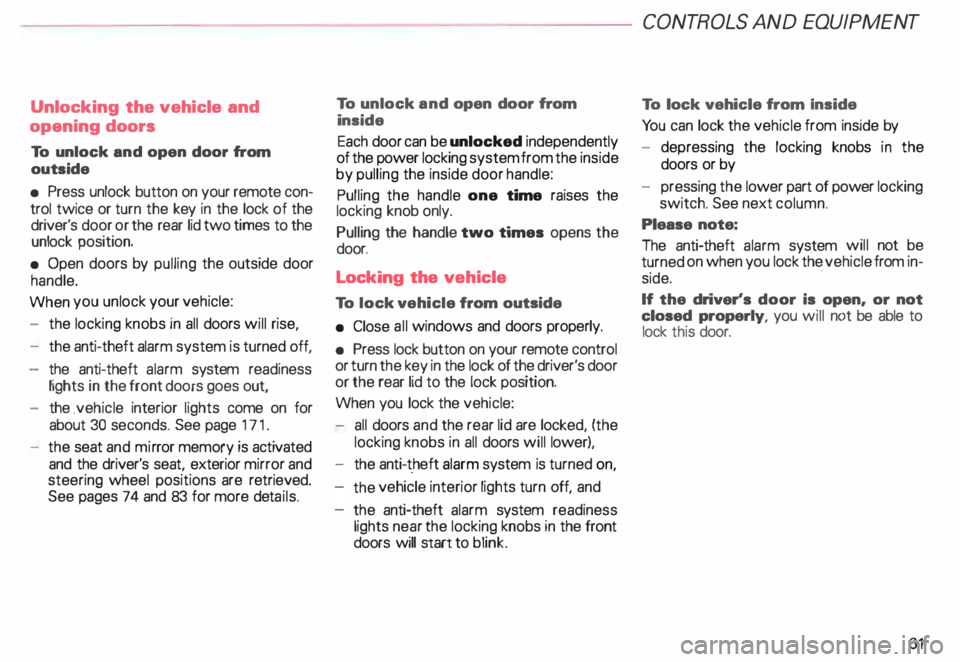
Unlocking the
vehicle and
opening doors
To unlock and open door from
outside
• Press unlock button on your remote con
trol twice or turn the key in the lock of the
driver's door or the rear lid two times to the
unlock position.
• Open doors by pulling the outside door
handle.
When you unlock your vehicle:
- the locking knobs in all doors will rise,
- the anti-theft alarm system is turned off,
- the anti-theft alarm system readiness
lights in the front doors goes out,
- the .vehicle interior lights come on for
about 30 seconds. See page 171.
- the seat and mirror memory is activated
and the driver's seat, exterior mirror and
steering wheel positions are retrieved.
See pages 74 and 83 for more details. To
unlock and open door from
inside
Each door can be unlocked independently
of the power locking system from the inside
by pulling the inside door handle:
Pulling the handle one time raises the
locking knob only.
Pulling the handle two times opens the
door.
Locking the vehicle
To lock vehicle from outside
• Close all windows and doors properly.
• Press lock button on your remote control
or turn the key in the lock of the driver's door
or the rear lid to the lock position.
When you lock the vehicle:
- all doors and the rear lid are locked, (the
locking knobs in all doors will lower),
- the anti-t .heft alarm system is turned on,
the vehicle interior lights turn off, and
the anti-theft alarm system readiness
lights near the locking knobs in the front
doors will start to blink. CONT
ROLS AND EQUIPMENT
To lock vehicle from Inside
Yo u can lock the vehicle from inside by
- depressing the locking knobs in the
doors or by
- pressing the lower part of power locking
switch. See next column.
Please note:
The anti-theft alarm system will not be
turned on when you lock the vehicle from in
side.
If the driver's door is open, or not
closed properly, you will not be able to
lock this door.
61
Page 68 of 306

---------------------CONTROLS
AND EQUIPMENT
• Certification
The remote control device complies with
Part 15 of the FCC Rules. Operation is sub
ject to the following conditions:
1 - this device may not cause harmful in
terfere nce, and
2 - this device must accept any interfer
ence received, including interference
that may cause undesir ed operation.
The manufacturer is not responsible for
ANY RADIO OR TV Interference caused by
una uthorized modifications to this equip
ment. Such modifications could void the
user's authority to operate the equipment. Anti-theft
alarm system
The anti-theft alarm system triggers an
acoustic alarm and switches on the emer
genc y flasher if it senses unauthorized inter
ference with the vehicle.
When the vehicle is locked the alarm sy
stem monitors and protects the following
parts of the vehicle:
• engine compartment
• luggage compartment
• doors
• factory installed radio
• passenger compartment
• ignition.
The alarm system is switched on or off
whenever you lock or unlock the vehicle.
Simply tum the key to the lock or unlock
position or use the remote control.
The system is activated about 30 seconds
after the vehicle is locked, and the indicator
lights on the front door window sills start
flashing. The
horn sounds briefly when the car is
locked to confirm that the alarm system is
operative and that all doors, hood and rear
lid are properly closed. If the hom does not
sound, or the indicator lights do not flash,
check all doors, rear lid and hood and close
them properly. The horn will also sound if
the door, lid and hood are closed when the
system is already switched on.
The rear lid can be opened separately even
when the system is active. When the rear
lid is closed the luggage compartment will
again be included in the alarm circuit.
When the system is switched on the alarm
will be triggered if one of the doors, the en
gine hood or the rear lid are opened, or if the
ign ition is switched on or the radio re
moved.
When the alarm is triggered the hom
sounds and all four turn signals flash simul
taneously. The engine cannot be started un
til the system is switched off with the key
or the remote control.
67