rims AUDI Q2 2021 Owner´s Manual
[x] Cancel search | Manufacturer: AUDI, Model Year: 2021, Model line: Q2, Model: AUDI Q2 2021Pages: 364, PDF Size: 87.77 MB
Page 6 of 364
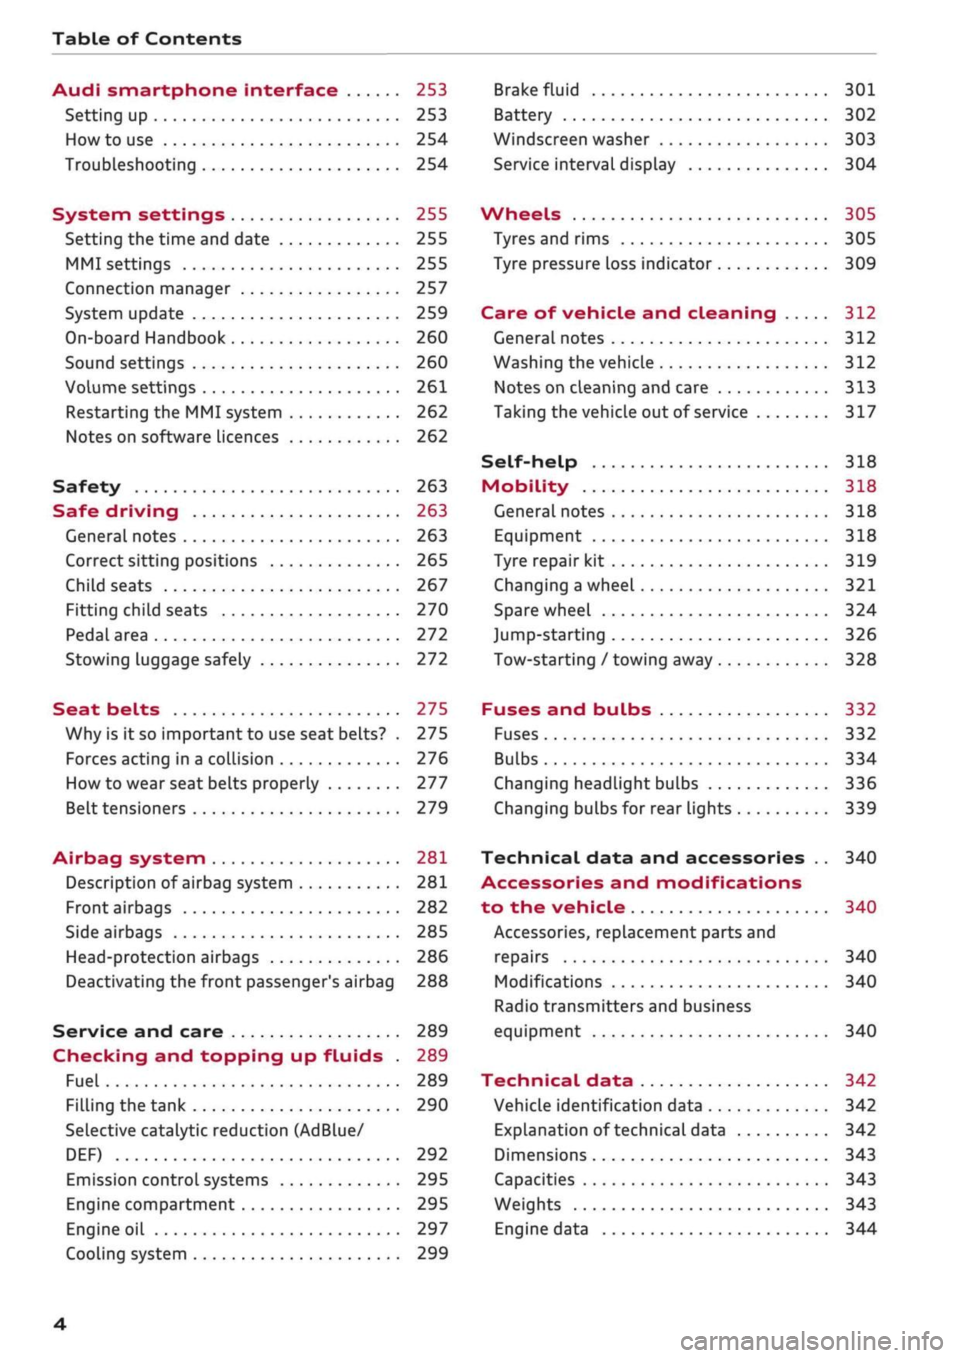
Table of Contents
Audi smartphone interface 253
Setting up
253
How to use 254
Troubleshooting 254
System settings 255
Setting the time and date 255
MMI settings 255
Connection manager 257
System update 259
On-board Handbook 260
Sound settings 260
Volume settings 261
Restarting the MMI system 262
Notes on software licences 262
Safety 263
Safe driving 263
General notes 263
Correct sitting positions 265
Child seats 267
Fitting child seats 270
Pedal area 272
Stowing luggage safely 272
Seat belts 275
Why is it so important to use seat belts? . 275
Forces acting in a collision 276
How to wear seat belts properly 277
Belt tensioners 279
Airbag system 281
Description of airbag system 281
Front airbags 282
Side airbags 285
Head-protection airbags 286
Deactivating the front passenger's airbag 288
Service and care 289
Checking and topping up fluids . 289
Fuel 289
Filling the tank 290
Selective catalytic reduction (AdBlue/
DEF) 292
Emission control systems 295
Engine compartment 295
Engine oil 297
Cooling system 299
Brake fluid 301
Battery 302
Windscreen washer 303
Service interval display 304
Wheels 305
Tyres and rims 305
Tyre pressure loss indicator 309
Care of vehicle and cleaning 312
General notes 312
Washing the vehicle 312
Notes on cleaning and care 313
Taking the vehicle out of service 317
Self-help 318
Mobility 318
General notes
318
Equipment 318
Tyre repair kit 319
Changing a wheel 321
Spare wheel 324
Jump-starting 326
Tow-starting / towing away 328
Fuses and bulbs 332
Fuses 332
Bulbs 334
Changing headlight bulbs 336
Changing bulbs for rear lights 339
Technical data and accessories .. 340
Accessories and modifications
to the vehicle 340
Accessories, replacement parts and
repairs 340
Modifications 340
Radio transmitters and business
equipment 340
Technical data 342
Vehicle identification data 342
Explanation of technical data 342
Dimensions 343
Capacities 343
Weights 343
Engine data 344
4
Page 63 of 364
Seats and storage
CO
rN
•-i
00
children unsupervised in the vehicle with the
key.
© CAUTION
- To avoid damage, please take care when de
taching connectors from the electrical pow
er sources.
-To avoid damage to the vehicle's electrical
system,
never connect equipment that
gen
erates electrical current, such as a solar
panel or battery charger, to the power sour
ces in order to charge the vehicle's battery.
- Always use the correct type of plugs to
avoid damaging the power sources.
©
USB charging sockets marked "CHARGE ON
LY" cannot transfer data and are intended for
charging only.
Storage
Cup holders
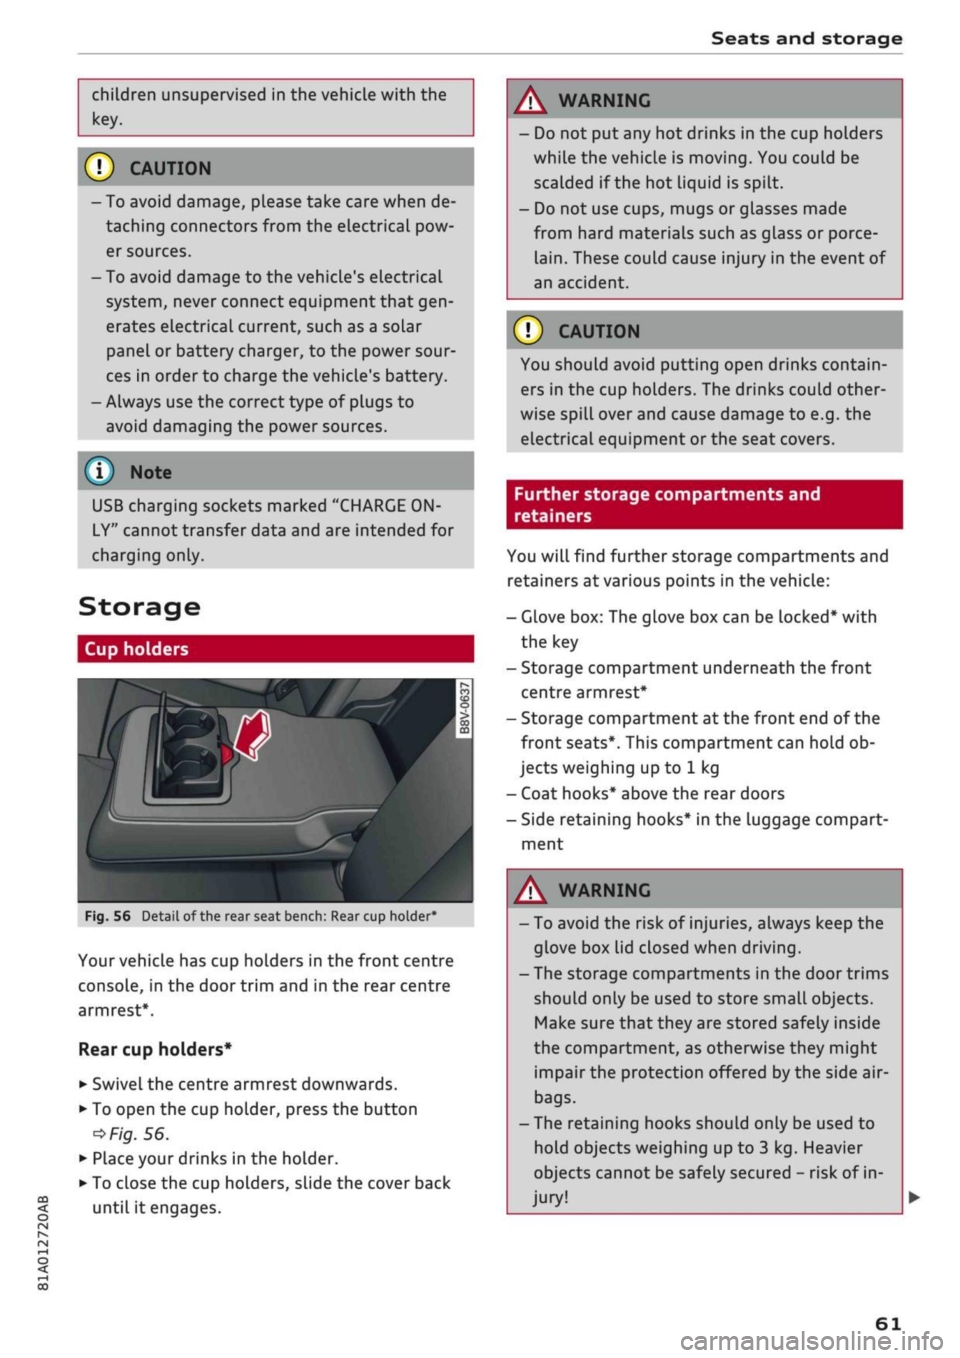
/
Fig.
56
BfT
^^—- j
^^ m /
Detail of the rear seat bench: Rear cup holder*
r^
n
co
3
>
CO
m
A
Your vehicle has cup holders in the front centre
console, in the door trim and in the rear centre
armrest*.
Rear cup holders*
• Swivel the centre armrest downwards.
• To open the cup holder, press the button
•=>
Fig.
56.
• Place your drinks in the holder.
• To close the cup holders, sLide the cover back
until it engages.
A WARNING
- Do not put any hot drinks in the cup holders
while the vehicle is moving. You could be
scalded if the hot liquid is spilt.
- Do not use cups, mugs or glasses made
from hard materials such as glass or porce
lain.
These could cause injury in the event of
an accident.
© CAUTION
You should avoid putting open drinks contain
ers in the cup holders. The drinks could other
wise spill over and cause damage to e.g. the
electrical equipment or the seat covers.
Further storage compartments and
retainers
You will find further storage compartments and
retainers at various points in the vehicle:
- Glove box: The glove box can be Locked* with
the key
- Storage compartment underneath the front
centre armrest*
- Storage compartment at the front end of the
front seats*. This compartment can hold ob
jects weighing up to 1 kg
- Coat hooks* above the rear doors
- Side retaining hooks* in the luggage compart
ment
A WARNING
- To avoid the risk of injuries, always keep the
glove box Lid closed when driving.
- The storage compartments in the door trims
should only be used to store small objects.
Make sure that they are stored safely inside
the compartment, as otherwise they might
impair the protection offered by the side air-
bags.
- The retaining hooks should only be used to
hold objects weighing up to 3 kg. Heavier
objects cannot be safely secured - risk of in
jury!
61
Page 135 of 364
Driver assist systems
•
Select the following on the infotainment sys
tem:
|MENU|
button > Car
>
left control button
> Audi drive select.
•
Select and confirm the desired setting.
You can change the mode while the vehicle is sta
tionary or moving. If traffic conditions permit,
take
your
foot off the accelerator briefly after you
change the mode so that the new mode is also
activated for the engine.
efficiency* - trims the vehicle to a fuel-saving
set-up and helps the driver adopt an economical
driving style.
comfort - alters the vehicle set-up for a more
comfortable ride and is suitable for long motor
way trips, for instance.
auto - gives an overall impression of
a
comforta
ble but dynamic ride and is a good choice of set
up for everyday use.
dynamic - gives the vehicLe a tighter set-up and is
ideal for performance driving.
individual* -
^>page
133.
A WARNING
Always keep an eye on the traffic when using
the drive select controls - Risk of accident!
CO
rN
r>
rN
•-i
00
Configuring individual mode
You
can configure your own personal vehicle set-up.
*-
Select: |MENU| button > Car
>
Audi drive select
> individual
>
right control button.
The individual* driving mode will automatically
be activated when you have finished configuring
the settings.
Your vehicle's equipment and engine determine
which systems you can select. The following ta
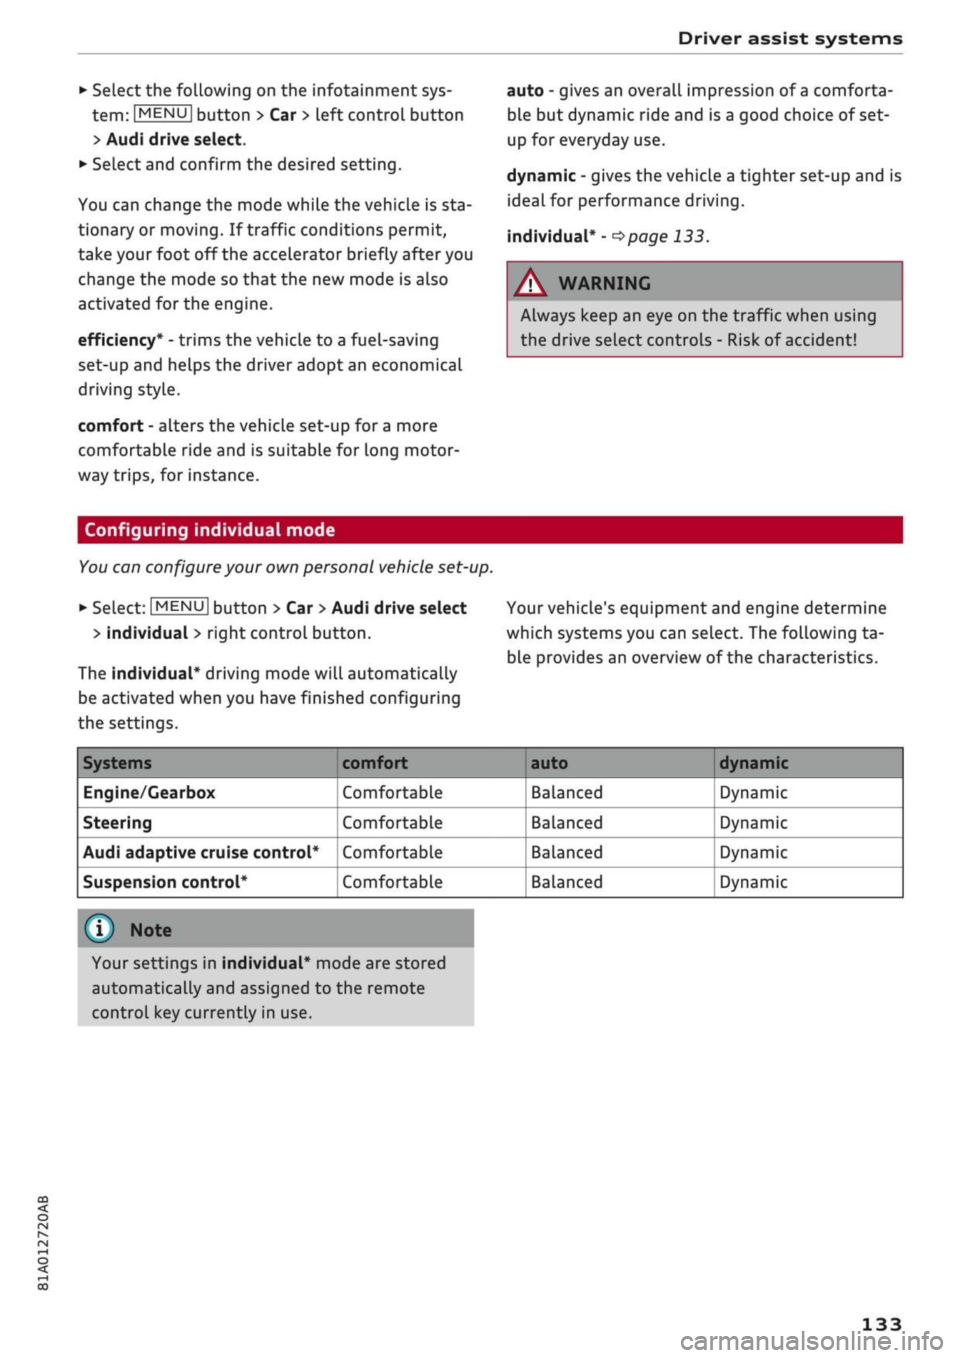
ble provides an overview of the characteristics.
Systems
Engine/Gearbox
Steering
Audi adaptive cruise control*
Suspension control*
comfort
Comfortable
Comfortable
Comfortable
Comfortable
auto dynamic
Balanced
Balanced
Balanced
Balanced
Dynamic
Dynamic
Dynamic
Dynamic
© Note
Your settings in individual* mode are stored
automatically and assigned to the remote
control key currently in use.
133
Page 136 of 364
Parking aids
Parking aids
General notes
Applies to: vehicles with rear parking aid/parking system
plus/reversing camera/park assist
Various systems are available to help you when
parking or manoeuvring in tight spaces, depend
ing on the equipment fitted on your vehicLe.
The rear parking aid gives an acoustic warning if
there are any obstacles behind the car
cépage
135.
When you are parking, the parking system plus
warns you acoustically and optically about obsta
cles detected in front of and behind the vehicLe
^page
135.
The reversing camera uses the infotainment sys
tem display to show a picture of the area behind
the vehicle captured by the camera. This picture
helps you to park the vehicle parallel or perpen
dicular to the roadside. In addition, you are assis
ted by the functions of the parking system plus
^>page
137.
The park assist helps you to find suitable parking
spaces, to manoeuvre the vehicLe into spaces par
allel or perpendicular to the roadside and to drive
out of spaces parallel to the kerb
^>page
139. It
also includes the functions of the parking system
plus
^page
135 and additionally monitors the
area at the side of the vehicle
(f) ^page
135,
Fig. 124.
A
WARNING
- Always watch the road and the area sur
rounding the vehicLe. The electronic systems
cannot replace the full concentration of the
driver. The driver is always responsible for
safety during parking and all other manoeu
vres.
- Please note that certain surfaces, such as
clothing fabrics, cannot be detected or dis
played by the system - risk of accident!
- The sensors and cameras have bLind spots in
which neither people nor objects are regis
tered.
It is particularly important to ensure
that there are no small children or animals
near the vehicLe - risk of accident!
- Always keep a close watch on the area
around the vehicLe and make full use of the
rear-view mirrors.
- Impacts or damage to the radiator grille,
bumper, wheel arches or underbody can
cause misalignment of the sensors. This can
impair the effectiveness of the parking aids.
Have the systems checked by a qualified
workshop.
(T)
CAUTION
- The system may not always be able to de
tect objects such as the following:
- Chains, trailer draw bars, posts or fences
- Objects above the sensors, such as wall
protrusions, etc.
- Objects with certain surfaces or struc
tures,
such as wire fences or powder snow
- As your car moves closer to low obstacles,
they may disappear from the sensors' field
of vision. Please note
that
you will no longer
be warned about these obstacles.
- Remember to maintain sufficient clearance
from the kerb to avoid damaging the wheel
rims.
(T)
Note
- In certain situations, a warning may be giv
en by the system even if there is no obstacle
within range of the sensors. This can be
caused by the following, for instance:
- Certain road surfaces or long grass
- External ultrasound sources, e.g. from
street cleaning vehicles
- Heavy rain or snow or dense exhaust
fumes
-To familiarise yourself with the system, we
recommend
that
you practise parking in a
quiet location or a car park. The weather
and light conditions should be good.
- You can change the display and adjust the
volume and pitch of the beeps
^>page
143.
- Please refer to the notes on the use of a
towing bracket
^page
144.
- There is a slight delay in the picture dis
played on the infotainment display. •
134
Page 142 of 364

Parking aids
- Please note that the park assist only
han
dles the steering. As the driver you are al
ways responsible for braking and accelerat
ing.
- It is the driver's responsibility to decide
whether a parking space shown in the dis
play is suitable for the vehicLe.
- The front of the vehicle swings out during
the parking manoeuvre. Please take all nec
essary measures to ensure that other road
users are not endangered.
- The steering wheel turns rapidly on its own
when parking the vehicle and leaving the
space.
Injury may result if
a
person reaches
between the spokes on the steering wheel
when it is turning.
(T)
CAUTION
- Please observe the safety warnings
•=>©
in
General notes on page 134.
- In certain situations, the park assist will
guide the vehicLe onto or across the kerb,
for instance if other vehicles are parked on
the kerb. You should always be ready to
take over the steering wheel in order to pre
vent damage to the tyres and/or wheel
rims.
- Certain conditions in and around the park
ing space can cause unexpected results
when parking.
- Pillars, posts, etc.
- Loose gravel, snow, ice, etc.
© Note
-The electronic stabilisation control (ESC)
must not be switched off during the parking
manoeuvre
^>page
146.
- The park assist cannot be used to park the
vehicle on tight bends.
- The park assist cannot be used to park the
vehicle if
a
trailer is attached and the elec
trical connector for the trailer socket is
plugged in.
Switching on and off
Applies to: vehicles with park assist
Fig.
135 Centre console: Button for park assist
^^i=^k—
Bp-"1
Fig.
136 Infotainment system: Looking for
a
parking
space
•
Press the
P@
button
^>Fig.
135 to switch on the
park assist. The LED in the button will light up
and the infotainment display will show the ve
hicle looking for
a
parking space
^>Fig.
136.
• To switch off the park assist, press the
P@
but
ton.
The LED in the button will go out.
© Note
When a parking space is detected, the system
automatically suggests a particular parking
mode.
You can change the suggested selec
tion.
Looking for a parking space
Applies to: vehicles with park assist
140
Fig.
137 Infotainment display: Parking space detected •
Page 309 of 364
Wheels
WheeLs
Tyres and rims
General notes
•
Inspect the tyres regularly for damage (cuts,
cracks or blisters, etc.). Remove any foreign
bodies embedded in the treads.
•
If
you
have to drive over
a
kerb or similar obsta
cle,
drive very slowly and as near as possible at
a right angle to the kerb.
• Damaged rims or tyres must be replaced imme
diately.
•
Keep grease, oil and fuel off the tyres.
•
Mark the wheels before taking them off so that
they rotate in the same direction when refitted.
•
When removed, the wheels should be stored
flat in a
cool,
dry and preferably dark place.
CO
<
O
rN
IV
rN
t-H
o <
(l)
CAUTION
- Please note that summer and winter tyres
are optimised for the prevailing road condi
tions at different times of
year.
We recom
mend that you use winter tyres during the
winter months. At low temperatures, sum
mer tyres lose their elasticity and grip, and
braking performance also suffers as a re
sult. Cracks can form in the tread block on
summer tyres if they are used at very cold
temperatures, and this can cause perma
nent damage to the tyres. An increase in
rolling noise and tyre imbalance may result
from this damage.
- Machined, polished or chrome-plated rims
must not be used in winter conditions. The
process used to manufacture these types of
wheel rim does not provide adequate sur
face protection against corrosion, and the
rims can be permanently damaged by road
salt or similar.
New wheels or tyres
It is best to have all servicing of wheels and tyres
performed by a qualified workshop, since they
have the necessary special tools and replacement
parts in addition to trained personnel.
•
New tyres do not yet give maximum grip. When
driving with new tyres, drive at moderate
speeds and be especially careful during the first
500 km.
•
All four wheels must be fitted with tyres of the
same type, size (rolling circumference) and
preferably the same tread pattern.
• Tyres should be replaced in pairs and not
indi
vidually (i.e. both front tyres or both rear tyres
together).
•
We recommend the use of Audi Genuine Tyres.
If
you
wish to use other tyres, please note that
the actual size can differ from the nominal size
marked on the tyre
•=> /\.
•
If
you
wish to purchase a different combination
of rims and tyres than the ones fitted on the ve
hicle during production, it is advisable to
con
sult
a
qualified workshop beforehand
<=> /\.
The sizes of the rims and tyres approved
for
your
vehicle are listed in the vehicle's documents (e.g.
EC
Certificate of Conformity or COC
document1)).
The vehicle documents vary depending on the
country in which the vehicle is registered.
If the spare wheel* is
not
the same type as the
tyres fitted on the car (for example if the car has
winter tyres or wide-section tyres) you should on
ly use the spare wheel* if
a
puncture occurs, and
then
only
for
a
short period of time. In this case,
please drive with extra care. Refit
a
normal road
wheel as soon as possible.
Applies to vehicles with four-wheel drive: All four
wheels must always be fitted with tyres of the
same type, make and tread pattern, as the drive-
line could otherwise be damaged by variations in
the wheel speeds. For the same reason, only use
a spare wheel* which has the same rolling cir
cumference as the normal road wheels.
Manufacturing date
The manufacturing date is indicated on the tyre
sidewall (possibly only on the inner side of the
wheel): •
15 COC
= Certificate of conformity
305
Page 310 of 364
Wheels
DOT ...2216...
means, for example, that the tyre was produced
in the 22nd week of 2016.
Audi Genuine Tyres
Audi Genuine Tyres with the marking "AO" are
specially matched to your Audi. When used prop
erly, these tyres meet the highest standards in
safety and handling. Your specialist retailer will
be glad to provide more information.
Tyre wear / damage
A
WARNING
- Use only tyre/rim combinations and match
ing wheel bolts approved by Audi. Otherwise
damage to the vehicLe and an accident could
result.
- For technical reasons, it is not possible to
use wheels from other vehicles. In certain
cases, it is not even possible to use wheels
from another vehicle of the same model.
- It is very important to ensure that the tyres
you have chosen have adequate clearance.
When selecting replacement tyres, do not
rely entirely on the nominal tyre size
marked on the tyre; with some makes of
tyre the effective tyre size can differ signifi
cantly from the nominal dimensions, even
though the tyres have the same size desig
nation.
Inadequate tyre clearance can result
in damage to the tyres or the vehicle, caus
ing a serious safety risk.
- Avoid running the car on tyres that are more
than 6 years old. If
you
have no alternative,
you should drive slowly and with extra care
at all times.
- The use of run-flat tyres on your vehicle is
NOT authorised! Unauthorised use can cause
an accident or damage your vehicLe.
- If wheel trims are fitted after the car is pur
chased,
ensure that there is an adequate
flow of air for cooling the brakes - risk of ac
cident!
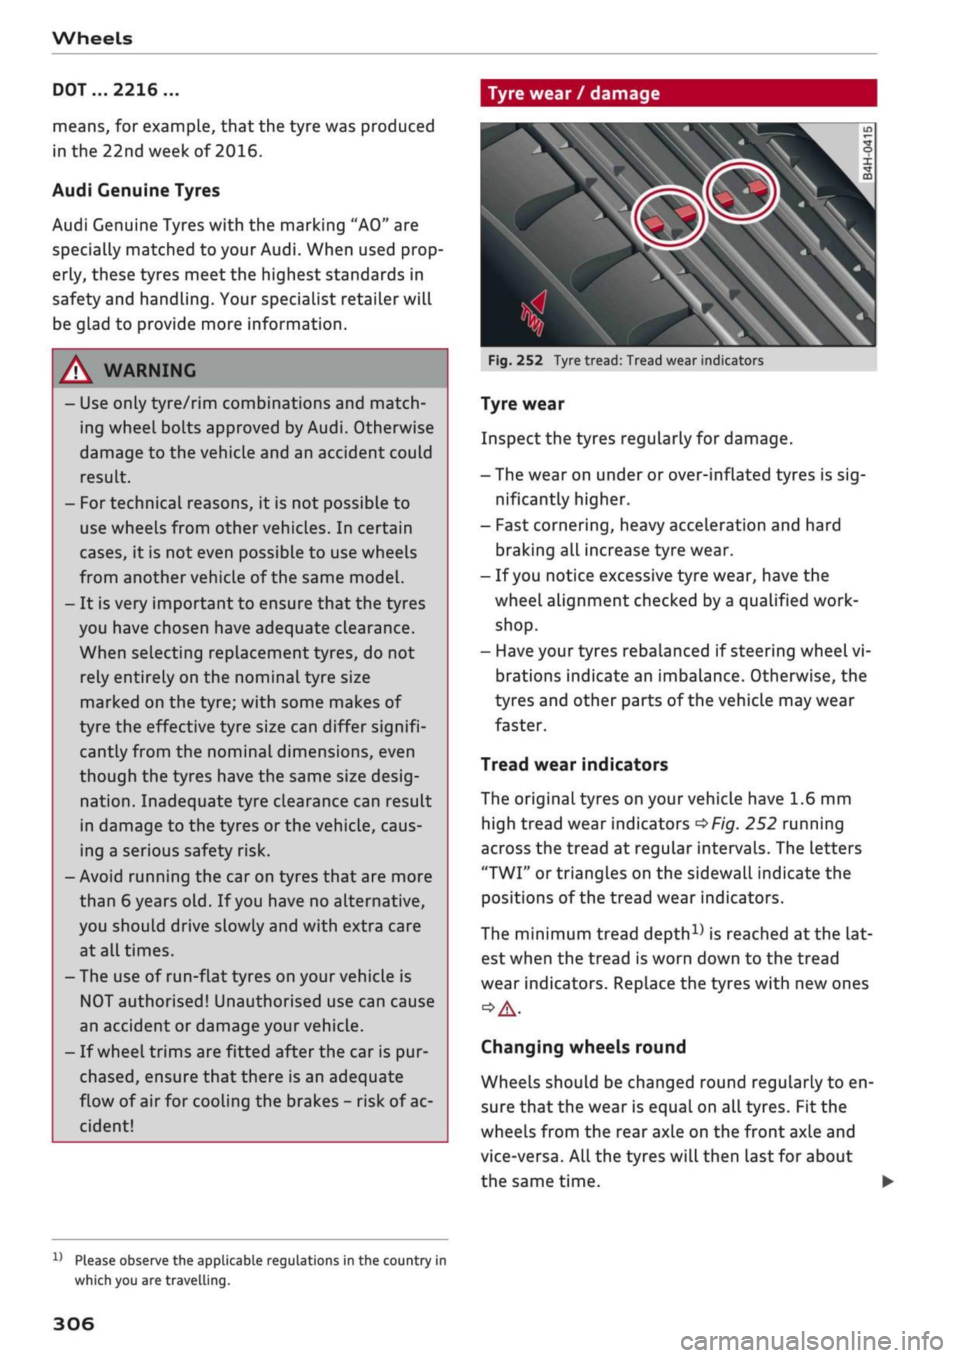
Fig.
252 Tyre tread: Tread wear indicators
Tyre wear
Inspect the tyres regularly for damage.
- The wear on under or over-inflated tyres is
sig
nificantly higher.
- Fast cornering, heavy acceleration and hard
braking all increase tyre wear.
- If
you
notice excessive tyre wear, have the
wheel alignment checked by a qualified work
shop.
- Have your tyres rebalanced if steering wheel vi
brations indicate an imbalance. Otherwise, the
tyres and other parts of the vehicLe may wear
faster.
Tread wear indicators
The original tyres on your vehicle have 1.6 mm
high tread wear indicators
^>Fig.
252 running
across the tread at regular intervals. The letters
"TWI"
or triangles on the sidewall indicate the
positions of the tread wear indicators.
The minimum tread
depth1)
is reached
at
the lat
est when the tread is worn down to the tread
wear indicators. Replace the tyres with new ones
Changing wheels round
Wheels should be changed round regularly to en
sure that the wear is equal on all tyres. Fit the
wheels from the rear axle on the front axle and
vice-versa. All the tyres will then last for about
the same time.
x)
Please observe the applicable regulations in the country in
which you are travelling.
306
Page 311 of 364
Wheels
CO
< o rN
iv
rN
•-i
00
On tyres with a directional tread pattern, note
the direction of rotation indicated on the sidewall
opage
324.
Concealed damage
Damage to tyres and rims is often not readily
visi
ble.
If you notice unusual vibrations
or
the car
pulling to one side, this may indicate that one of
the tyres is damaged. Reduce your speed imme
diately. Inspect the tyres for damage. If no exter
nal damage is visible, drive slowly and carefully
to the nearest qualified workshop and have the
car inspected.
A WARNING
Insufficient tread depth or different tread
depths on different wheels reduce safety. This
is particularly evident in vehicle handling,
when there is a risk of aquaplaning in deep
puddles of water and when driving through
corners. Braking is also adversely affected -
risk of accident!
Tyre pressure
®-
CGOO
Audi
SO)
EÛ
T—
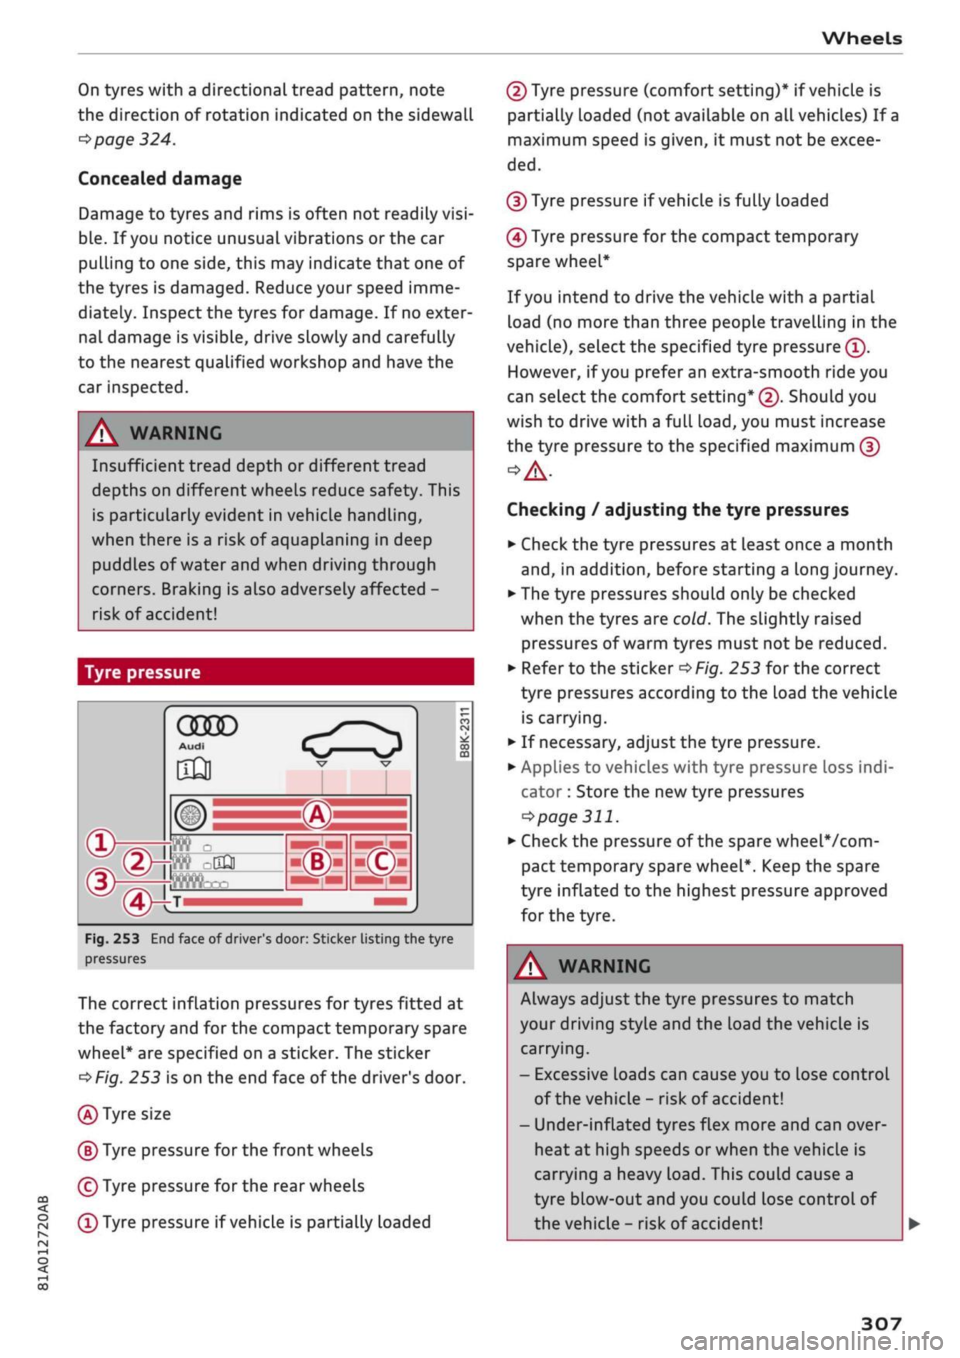
Fig.
253 End face of driver's door: Sticker listing the tyre
pressures
The correct inflation pressures for tyres fitted at
the factory and for the compact temporary spare
wheel*
are specified on a sticker. The sticker
<=>Fig.
253 is on the end face of the driver's door.
(A)
Tyre size
(B)
Tyre pressure for the front wheels
©
Tyre pressure for the rear wheels
©
Tyre pressure if vehicLe is partially Loaded
(2)
Tyre pressure (comfort setting)* if vehicle is
partially loaded (not available on all vehicles) If a
maximum speed is given, it must not be excee
ded.
(3) Tyre pressure if vehicle is fully loaded
(4) Tyre pressure for the compact temporary
spare wheel*
If you intend to drive the vehicLe with a partial
load (no more than three people travelling in the
vehicle), select the specified tyre pressure
©.
However, if you prefer an extra-smooth
ride
you
can select the comfort setting* (2). Should you
wish to drive with a full
load,
you must increase
the tyre pressure to the specified maximum (3)
Checking / adjusting the tyre pressures
•
Check the tyre pressures at least once a month
and,
in addition, before starting a long journey.
•
The tyre pressures should only be checked
when the tyres are cold. The slightly raised
pressures of warm tyres must not be reduced.
•
Refer to the sticker
•=>
Fig. 253 for the correct
tyre pressures according to the load the vehicle
is carrying.
•
If necessary, adjust the tyre pressure.
• Applies to vehicles with tyre pressure loss
indi
cator : Store the new tyre pressures
^>page
311.
• Check the pressure of the spare
wheeLVcom-
pact temporary spare wheel*. Keep the spare
tyre inflated to the highest pressure approved
for the tyre.
WARNING
Always adjust the tyre pressures to match
your driving style and the load the vehicle is
carrying.
- Excessive Loads can cause you to Lose control
of the vehicle - risk of accident!
- Under-inflated tyres flex more and can over
heat at high speeds or when the vehicLe is
carrying a heavy Load. This could cause a
tyre blow-out and you could lose control of
the vehicle - risk of accident!
307
Page 312 of 364
Wheels
- Incorrect tyre pressures increase tyre wear
and adversely affect vehicle braking and
handling - risk of accident!
(7) CAUTION
Replace any lost valve caps to prevent dam
age to the tyre valves.
(#) For
the sake of the environment
- Under-inflated tyres will increase the fuel
consumption.
- Driving with the tyre pressures adjusted to
the comfort setting* may also result in in
creased fuel consumption.
©
We recommend always using the tyre pres
sure setting
(T)
for partial loads and the set
ting
(?) for
full loads.
Wheel bolts and rims
Wheel bolts
The wheel bolts should be clean and turn easily.
A special adapter is required to turn the
anti-
theft wheel bolts*
^
page 321.
Rims
Rims with a bolted rim flange* or bolted trim
parts*
consist of several components. A special
technique is applied to bolt these components
together. Never attempt to repair or dismantle
them
o
A-
A,
WARNING
If the wheel bolts have not been tightened or
serviced correctly, they can come loose, and
you could lose control of the vehicLe - risk of
accident! For the correct tightening torque,
refer to
^page
324, After changing a wheel.
- Make sure that the wheel bolts and threads
in the wheel hubs are always clean and free
from grease.
- Only use wheel bolts that are designed to
match the rims on your car.
- Always have damaged rims repaired by a
qualified workshop. Never attempt to repair
or dismantle rims yourself - risk of accident!
Winter tyres
In winter road conditions winter tyres will consid
erably improve the car's handling. Due to their
type of construction (width, rubber compound,
tread pattern), summer tyres give less grip on ice
and snow.
•
Winter tyres must be fitted on all four wheels.
•
Only use winter tyres of the correct type ap
proved for your vehicle.
•
Please note that the maximum permissible
speed for winter tyres may be lower than for
summer tyres
•=> A-
Your specialist retailer can
advise you of the maximum speed
for
your
tyres.
•
After fitting the wheels you must always check
the tyre pressures
^>page
307.
Winter tyres Lose their effectiveness when the
tread is worn down to a depth of 4 mm. The per
formance of winter tyres is also severely impaired
by ageing, even if the tread is still much deeper
than 4 mm.
A WARNING
- Never exceed the maximum approved speed
for your tyres. This causes the tyres to over
heat and can even result in a blow-out - risk
of accident!
- Always adapt your driving style to the pre
vailing road and traffic conditions. Drive
carefully and reduce your speed on icy or
slippery roads. Even winter tyres lose their
grip on black ice.
(^)
For the sake of the environment
Summer tyres should be fitted again as soon
as possible; they give better handling on
roads which are free of snow and ice. They are
quieter, do not wear so quickly and reduce
fuel consumption. •
308
Page 313 of 364
Wheels
CO
< o rN
iv
rN
i—i
o < 00
All-weather tyres can also be used instead of
winter tyres. Please note that winter tyres
with the
A
symbol are required by law during
the winter season in some countries.
Snow chains
Snow chains will improve braking ability as well
as traction in winter conditions.
• Snow chains can be used on the front wheels
only. This also applies to vehicles with four-
wheel drive*.
•
Check that the snow chains are correctly seated
after driving for
a
few yards; follow the instruc
tions given by the manufacturer.
•
Keep your speed below 50 km/h. Please ob
serve the applicable local regulations.
Only use snow chains with fine-pitch links. The
links must not protrude more than 13.5 mm
from the tyres (including tensioner).
You must remove the snow chains on roads which
are free of snow; otherwise the vehicLe handling
may be impaired and the tyres may be damaged.
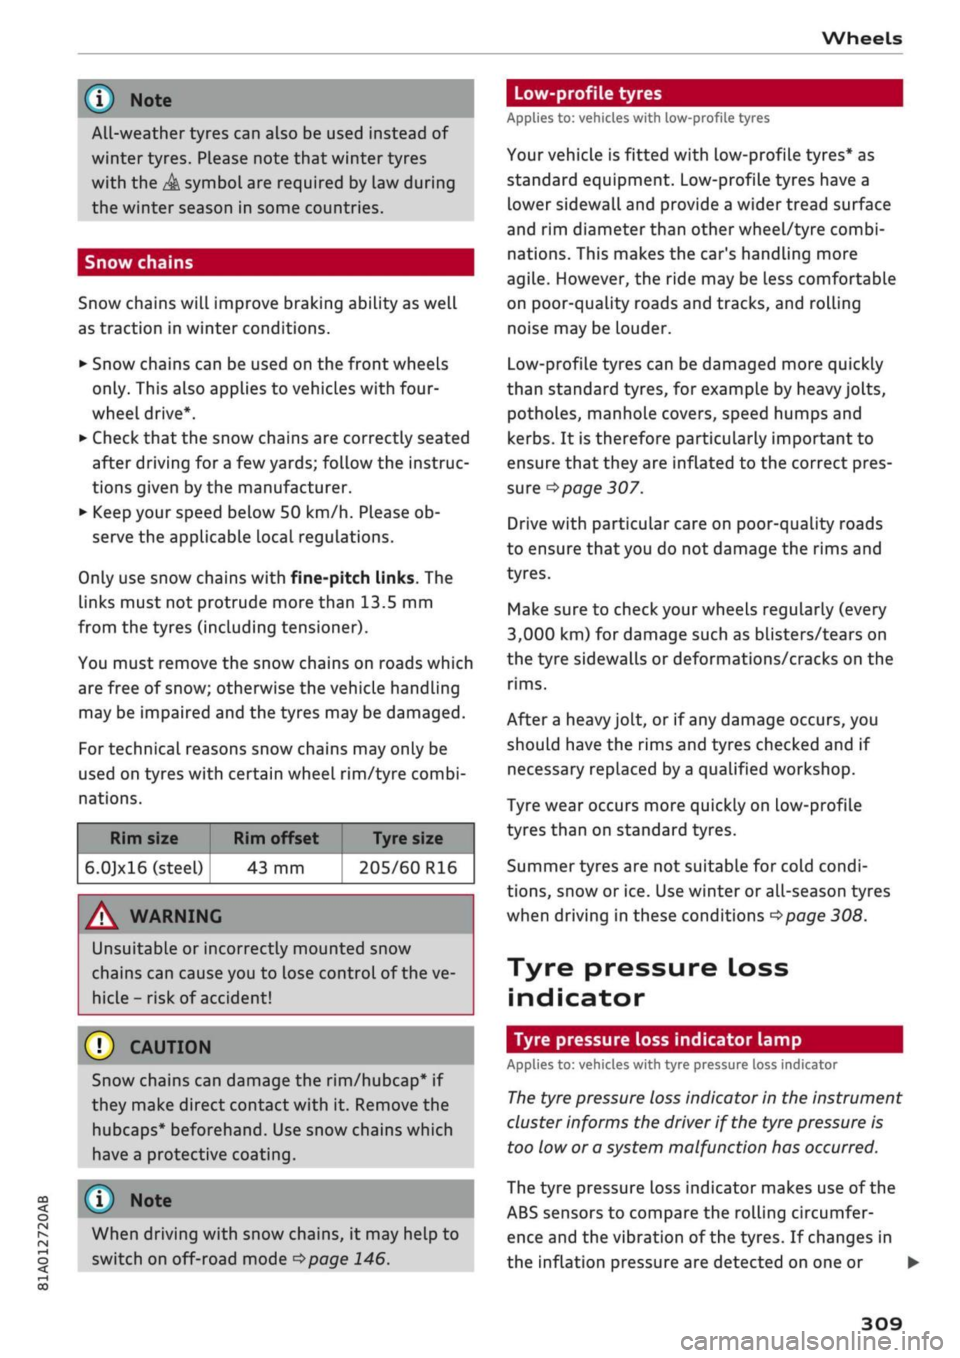
For technical reasons snow chains may only be
used on tyres with certain wheel rim/tyre combi
nations.
Rim size
6.0]xl6 (steel)
Rim offset Tyre size
43 mm 205/60 R16
A WARNING
UnsuitabLe
or incorrectly mounted snow
chains can cause you to lose control of the ve
hicLe-
risk
of accident!
© CAUTION
Snow chains can damage the rim/hubcap* if
they make direct contact with it. Remove the
hubcaps* beforehand. Use snow chains which
have a protective coating.
© Note
When driving with snow chains, it may help to
switch on off-road mode
^page
146.
Low-profile tyres
Applies to: vehicles with low-profile tyres
Your vehicLe is fitted with low-profile tyres* as
standard equipment. Low-profile tyres have a
lower sidewall and provide a wider tread surface
and rim diameter than other wheel/tyre combi
nations. This makes the car's handling more
agile.
However, the ride may be Less comfortable
on poor-quality roads and tracks, and rolling
noise may be louder.
Low-profile tyres can be damaged more quickly
than standard tyres, for example by heavy jolts,
potholes, manhole covers, speed humps and
kerbs.
It is therefore particularly important to
ensure that they are inflated to the correct pres
sure
o
page 307.
Drive with particular care on poor-quality roads
to ensure that you do not damage the rims and
tyres.
Make sure to check your wheels regularly (every
3,000 km) for damage such as blisters/tears on
the tyre sidewalls or deformations/cracks on the
rims.
After a heavy jolt, or if any damage occurs, you
should have the rims and tyres checked and if
necessary replaced by
a
qualified workshop.
Tyre wear occurs more quickly on low-profile
tyres than on standard tyres.
Summer tyres are not suitable for cold condi
tions,
snow or ice. Use winter or all-season tyres
when driving in these conditions
^>page
308.
Tyre pressure loss
indicator
Tyre pressure loss indicator lamp
Applies to: vehicles with tyre pressure loss indicator
The
tyre pressure loss indicator in the instrument
cluster informs the driver if the tyre pressure is
too low or a system malfunction has occurred.
The tyre pressure loss indicator makes use of the
ABS sensors to compare the rolling circumfer
ence and the vibration of the tyres. If changes in
the inflation pressure are detected on one or •
309