coolant reservoir AUDI Q3 2015 Owners Manual
[x] Cancel search | Manufacturer: AUDI, Model Year: 2015, Model line: Q3, Model: AUDI Q3 2015Pages: 258, PDF Size: 64.9 MB
Page 16 of 258
![AUDI Q3 2015 Owners Manual 14 Instrum ent s and w arn ing /indic ato r light s
(USA models): If the warning light . and the
warning light
ll] appear together, immedi
ately contact your authorized Audi deale AUDI Q3 2015 Owners Manual 14 Instrum ent s and w arn ing /indic ato r light s
(USA models): If the warning light . and the
warning light
ll] appear together, immedi
ately contact your authorized Audi deale](/img/6/57629/w960_57629-15.png)
14 Instrum ent s and w arn ing /indic ato r light s
(USA models): If the warning light . and the
warning light
ll] appear together, immedi
ately contact your authorized Audi dealer or
qua lified workshop to have all brake pads in
spected
¢ page 17.
When the light comes on, an audib le warning
signal is also given .
.&_ WARNING
- Always observe the warnings in
¢ page 179, before opening the hood
and checking the brake fluid.
- Driv ing with low brake fluid is a safety
hazard. Stop the car and get professional
assistance.
- If the . (USA models) . (Canada
models) brake system indicator light
turns on together with the ABS and ESC
indicator lights, the ABS/ESC regu lating
function may have failed. Functions that
stabilize the vehicle are no longer availa
ble. Th is could cause the vehicle to
swerve and increase the risk of sliding .
Drive carefully to the nearest a uthorized
Audi dealer or other qualified workshop
and have the malfunction corrected.
- If the brake warning/indicator light does
not go out after a few seconds and the
park ing brake is released, or lights up
wh ile you are driving, the fluid level in
the brake fluid reservoir is too low .
If you
believe that it is safe to do so, proceed
immediately at low speed to the nearest
authori zed Audi dealer o r qualified wo rk
shop and have the bra ke system inspect
ed.
- Always keep in m ind that after several
brake applicat ions, yo u will need greater
pressure on the brake peda l to stop your
vehicle. Do not re ly on strained brakes to
respond with maxim um stopping power
in critical situations. You must allow for
increased brak ing distances. The extra
distance used up by fad ing brakes could
lead to an acc ident.
PARK !<®> Electromechanical parking brake
The warning/indicator light monitors the
electromechanical parking brake .
If the indicator light. (USA models) •
(Canada models) turns on, the parking brake
was set.
• (USA model s)/. (Canada models ) Press
brake pedal to release parking b ra ke.
To re lease the park ing brake, press the brake
peda l and press the button(®) at the same
t ime or start driving with starting assist
¢ page 71, Starting from rest.
Ill Pa rking br ake : S ys tem f ault! See owne r's
manual.
If the I.II ind ic a tor light tu rns o n and this
message appears, there is a parking b rake
malfunction. Drive to your authorized A udi
dealer or qualified workshop immediately to
have the malfunct ion corrected.
@ Tips
More informat ion on the parking brake
¢page 70 .
-L Engine cooling system
A malfunction in the engine cooling system
must be repaired as soon as possible.
• Turn off engine and ch eck coolant level
T he coolant level is too low .
Do not continue dr iving and turn
off the en
gine. Check the coo lant level
¢ page 186.
-If the coo lant level is too low, add coo lant
¢ page 186. Only continue driving if the in
dicator light turns off.
- If the coo lant level is correct, then the ma l
function may be ca used by fa ilure of the
coolant fan. Do not continue driving. See
your authorized Audi dealer or qualified re pa ir fac ility .
• Coolant temperature! Let engine run
w ith vehicle stationar y.
Page 182 of 258

180 Checking and filling
coolant can be seen or heard before
carefully opening the hood.
- Keep children away from the engine com
partment.
- Never spill fluids on hot engine compo
nents. They can cause a fire.
- Never touch the radiator fan. The auxili ary electric fan is temperature controlled
and can switch on suddenly.
- Never open the coolant reservoir cap
when the engine is still warm. The cool
ant system is pressurized and hot cool
ant could spray out .
- Protect your face, hands and arm from
steam or hot engine coolant by placing a
thick rag over the cap when you open the
coolant reservoir .
- Do not remove the engine cover under
any circumstances. This increases the
risk of burns.
- If work on the fuel system or the electri
cal system is necessary:
- Always disconnect the battery .
- Never smoke or work near heaters or
open flames. Fluids in the engine com
partment could start a fire.
- Keep an approved fire extinguisher im
mediately available.
- To avoid electrical shock and personal in
jury while the engine is running or being
started, never touch:
- Ignition cables
- Other components of the high voltage
electronic ignition system.
- If you must perform a check or repair
with the engine running:
- First, fully apply the parking brake,
move selector lever of automatic trans
mission to "P" (Park) .
-Always use extreme caution to prevent
clothing, jewelry, or long hair from get- ting caught in the
radiator fan, V-belts
or other moving parts, or from contact
ing hot parts. Tie back hair before
starting, and do not wear clothing that
will hang or droop into the engine .
- Minimize exposure to emission and
chemical hazards
c> A .
A WARNING
-California Proposition 65 Warning:
- Engine exhaust, some of its constituents,
and certain vehicle components contain
or emit chemicals known to the State of
California to cause cancer and birth de
fects and reproductive harm. In addition,
certain fluids contained in vehicles and
certain products of component wear con
tain or emit chemicals known to the
State of California to cause cancer and
birth defects or other reproductive harm.
- Battery posts, terminals and related ac
cessories contain lead and lead com
pounds, chemicals known to the State of
California to cause cancer and reproduc
tive harms. Wash hands after handling.
(D Note
When adding fluids, always make sure that
they are poured into the proper container
or filler opening, otherwise serious dam
age to vehicle systems will occur.
@ For the sake of the environment
To detect leaks in time, inspect the vehicle
floor pan from underneath regularly. If
you see spots from oil or other vehicle flu
ids, have your vehicle inspected by an au
thorized Audi dealer.
Page 183 of 258

M N M N
0 ::i co
rl I.O
"' rl
"' rl
Checking and fillin g 181
Engine compartment
Engine compartment
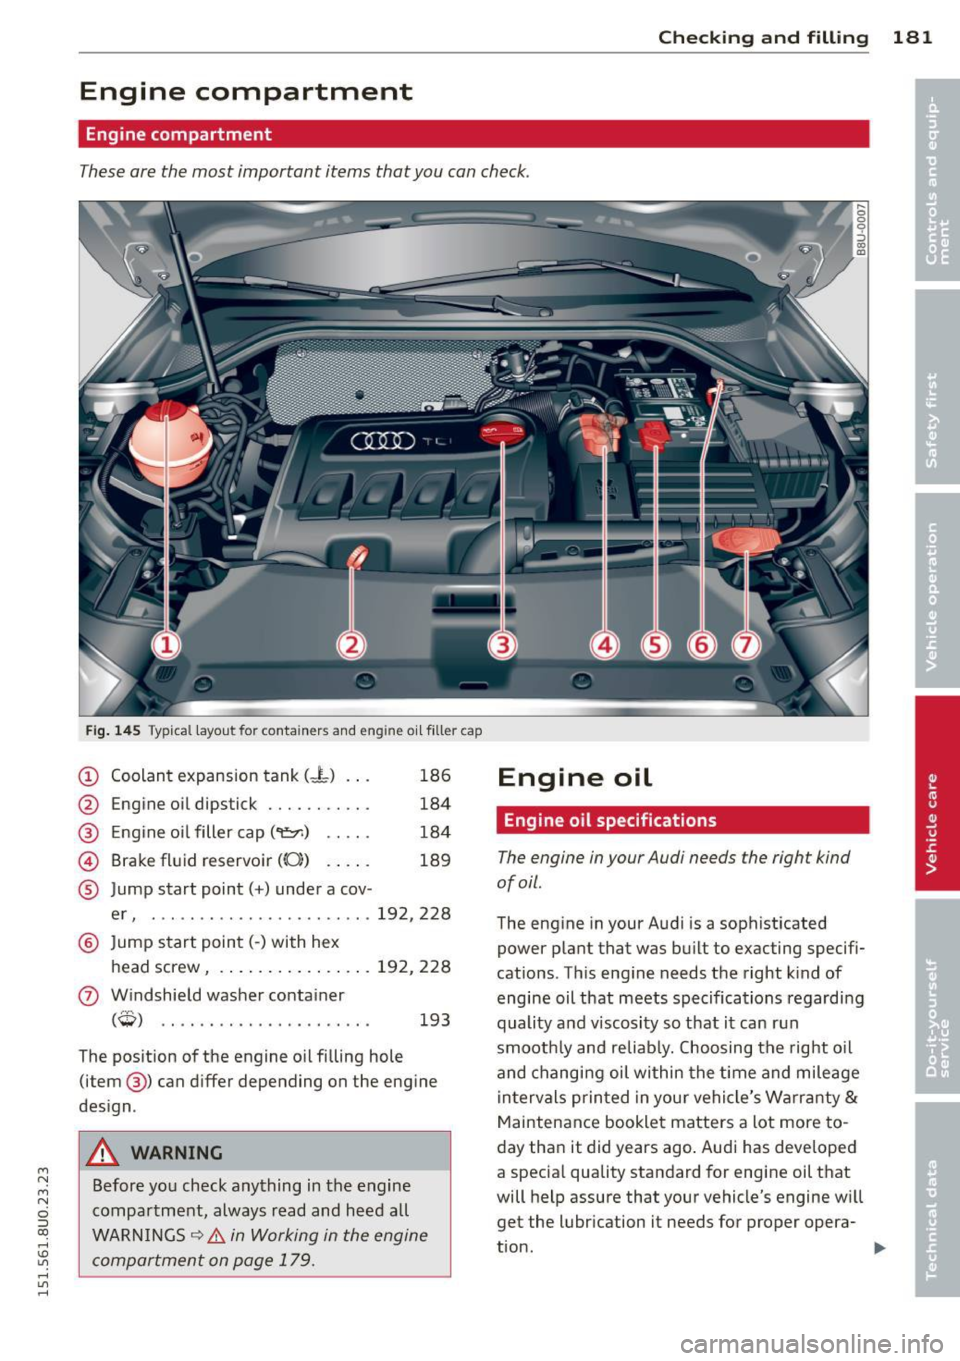
These are the most important items that you can check.
Fig. 14 5 Typical layout for containers and engine oil filler cap
(D Coolant expansion tank (- L) . . . 186
@ Engine oil dipstick . . . . . . . . . . . 184
@ Eng ine oi l filler cap ('t::r.) . . . . . 184
@ Brake fl uid reservoir (0)) . . . . . 189
® Jump start point(+) under a cov-
er, ....................... 192, 228
@ Jump start point(-) with hex
head screw, . .. ..... ... .. .. . 192, 228
(J) Windshield washer conta iner
Cw) . . . . . . . . . . . . . . . . . . . . . . 193
The position of the engine o il filling hole
(item @) can differ depending on the engine
des ign .
A WARNING
Before yo u check anything in the engine
compartment, always read and heed all
WARN INGS
~ .& in Working in the engine
compartment on page 179.
-
Engine oil
Engine oil specifications
The engine in your Audi needs the right kind
of oil.
The eng ine in your Audi is a sophisticated
power p lant that was bu ilt to exacting specifi
cations. This eng ine needs the right k ind of
engine oil that meets specifications regarding
quality and viscosity so that it can run
smooth ly and reliab ly. Choosing the rig ht o il
and changi ng oil within the t ime and mileage
in tervals printed in you r vehicle's Warranty
&
Maintenance booklet matters a lot more to
day than it did years ago . Audi has developed
a specia l quality standard for engine oil that
will help assure that your vehicle's engine w ill
get the lubr ication it needs for proper opera-
tion. .,..
Page 196 of 258

194 Checking and filling
Clean water sho uld be used when filling up. If
possible, use soft water to prevent scaling on
the washer jets. Always add a glass cleaner
solut ion (w ith frost protection in the w inter) .
Do not mix engine coolant antifreeze or
any other additives to fill up the wind
shie ld washer reservoir.
Page 245 of 258

M N
M N
0 ::i co ,...., \!) ..,.,
,...., ..,., ,....,
Selector lever ...................... 81
Selector lever emergency release . . . . . . 86
Automatic wipers .......... .... .. .... 46
Auto Safety Hotline ........ .. .. .. .. . 101
Average speed . . . . . . . . . . . . . . . . . . . . . . . 22
Avoid damaging the vehicle ...... ... .. 161
B
Bass box .. .. ............. .... .. .. . 217
Battery . . . . . . . . . . . . . . . . . . . . . . . 15, 190
Battery location inside the luggage com-
partment .. .. ........... .. .. .. ... 190
Charging . .. ............. .... .. ... 192
Important warnings when working on
the battery . ................ ... ... 190
Jump starting .... .. ...... .. .. .. .. . 228
Low ... .. .. .. ... .. ..... ... .. .. .. . 159
Replacing the battery ..... .. .. .. .. . 193
State of charge . . . . . . . . . . . . . . . . . . . . 159
Winter operation ............ ... .. . 190
Working on the battery ....... ... .. . 190
Before driving . . . . . . . . . . . . . . . . . . . . . . . 94
Blended gasoline .......... .... .. .. . 17 5
Blower (automatic climate control) . . . . . . 65
Booster seats ................ ... ... 141
Brake fluid Changing the brake fluid ... .. .. .. .. . 189
Checking the brake fluid level . .. .. .. . 189
Reservoir .. ... ... .... ... .. .. .. .. . 189
What is the correct brake fluid level? .. 189
What should I do if the brake fluid warn-
ing light comes on? ....... .. .. .. .. . 189
Brake system . . . . . . . . . . . . . . . . . . . . . . . 189
Brake assist system . . . . . . . . . . . . . . . . 153
Brake fluid ........... ...... .... .. 189
Brake fluid specifications for refill and re-
placement . ............. .... .. .. . 189
Brake light defective ...... .. .. .. .. .. 18
Brake power assist unit ...... .. .. .. . 156
Brakes ..... .. ................ .... 156
Electromechanical parking brake .. .. .. 70
General information ......... ... .. . 156
Warning/indicator lights ..... .. .. .. .. 13
Worn brake pads symbol . . . . . . . . . . . . . 17
Braking Emergency braking function . . . . . . . . . . 72
Starting on inclines . . . . . . . . . . . . . . . . . 72
Index 243
Break-in period . ..... ............... 161
Tires 161
Bul bs ........ .. .. ................. 226
C
California Proposition 65 Warning ... .. 180
Battery specific .................. . 191
Capacities .. .. .. .. ............... .. 235
Caps for wheel bolts, removing ...... .. 220
Carbon parts Cleaning . . . . . . . . . . . . . . . . . . . . 172, 173
Care ....... .. .. .. ................. 170
Cargo area
refer to Loading the luggage compart-
ment ....... .. .... ............... 100
Catalytic converter ................. . 161
Center armrest Adjusting . .. .. .. .. ............... . 51
Storage compartment . ...... ..... .. . 51
Central locking . ..... ................ 28
Central locking switch ............... 32
Convenience key . . . . . . . . . . . . . . . . . . . . 31
Remote control key . . . . . . . . . . . . . . . . . 30
Certification . . . . . . . . . . . . . . . . . . . . . . . 240
Changing a flat tire ... . .. .. .. .... .... 218
Changing a wheel ...... ............. 218
Changing engine oil .. ........... .... 185
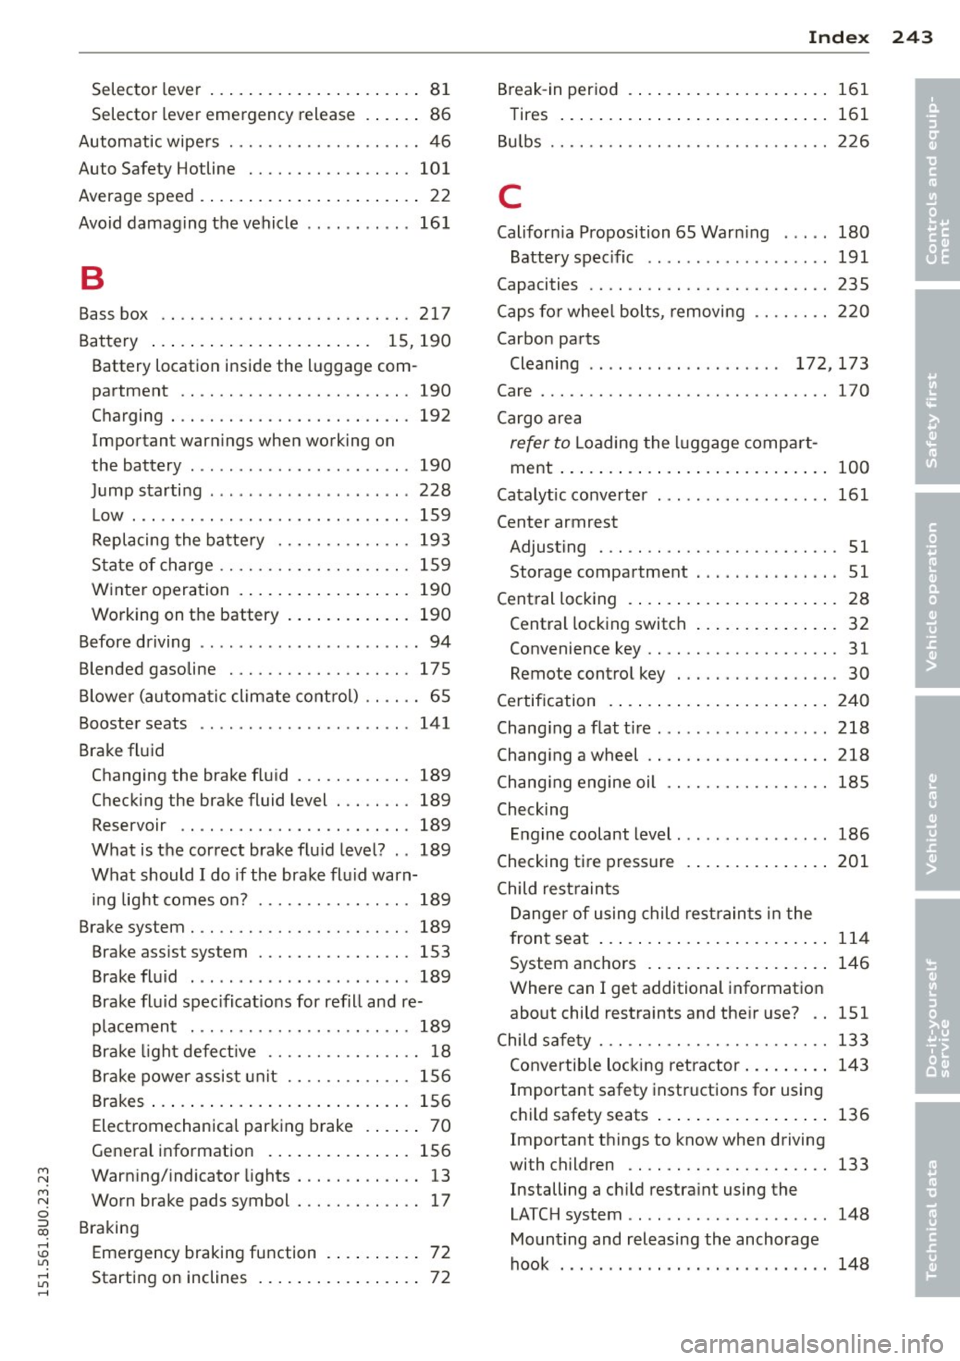
Checking Engine coolant level ............... . 186
Checking tire pressure .............. . 201
Child restraints
Danger of using child restraints in the
front seat . . . . . . . . . . . . . . . . . . . . . . . . 114
System anchors .. .. .............. . 146
Where can I get additional information
about child restraints and their use? .. 151
Child safety ... .. ...... ........... .. 133
Convertible locking retractor ........ . 143
Important safety instructions for using
child safety seats ... .............. . 136
Important things to know when driving
with children .. .. ............... .. 133
Installing a child restraint using the
LATCH system . . . . . . . . . . . . . . . . . . . . . 148
Mounting and releasing the anchorage
hook ... .. .. .. .. .. . ....... ..... .. 148
•
•