cooling AUDI Q3 2015 Owners Manual
[x] Cancel search | Manufacturer: AUDI, Model Year: 2015, Model line: Q3, Model: AUDI Q3 2015Pages: 258, PDF Size: 64.9 MB
Page 5 of 258
M N
M N
0 ::i co ,...., \!) 1.1'1 ,...., 1.1'1 ,....,
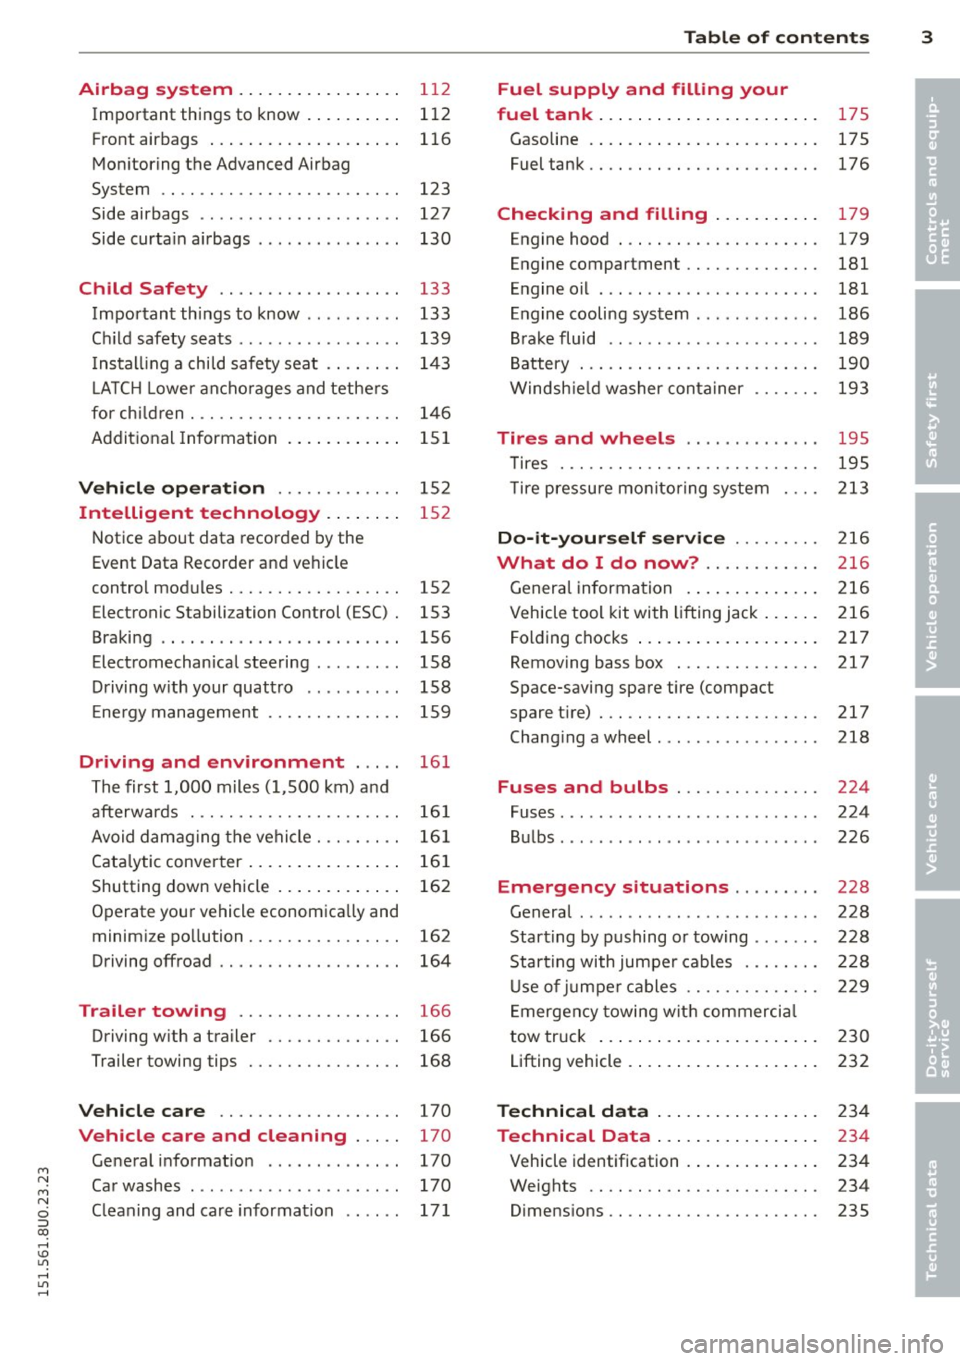
Airbag system ............ ... .. 112
Important things to know . . . . . . . . . . 112
Front airbags .................... 116
Monitoring the Advanced Airbag
System . . . . . . . . . . . . . . . . . . . . . . . . . 123
Side airbags . . . . . . . . . . . . . . . . . . . . . 127
Side curtain a irbags . . . . . . . . . . . . . . . 130
Child Safety . . . . . . . . . . . . . . . . . . . 133
Important things to know . . . . . . . . . . 133
Child safety seats . . . . . . . . . . . . . . . . . 139
Installing a child safety seat . . . . . . . . 143
LATCH Lower anchorages and tethers
for child ren . . . . . . . . . . . . . . . . . . . . . . 146
Additional Information
lSl
Vehicle operation . . . . . . . . . . . . . 1S2
Intelligent technology . . . . . . . . 152
Notice about data recorded by the
Event Data Recorder and vehicle
control modules . . . . . . . . . . . . . . . . . . 152
Electronic Stabili zation Control (ESC) . 153
Braking . . . . . . . . . . . . . . . . . . . . . . . . . 156
Electromechanical steering . . . . . . . . . 158
Driving with your quattro . . . . . . . . . . 158
Energy management . . . . . . . . . . . . . . 159
Driving and environment . . . . . 161
The first 1,000 miles (1,500 km) and
afterwards . . . . . . . . . . . . . . . . . . . . . . 161
Avoid damaging the vehicle. . . . . . . . . 161
Catalytic converter . . . . . . . . . . . . . . . . 161
Shutting down vehicle . . . . . . . . . . . . . 162
Operate your vehicle economically and minimize pollution. . . . . . . . . . . . . . . . 162
Driving offroad . . . . . . . . . . . . . . . . . . . 164
Trailer towing . . . . . . . . . . . . . . . . . 166
Driving with a trailer . . . . . . . . . . . . . . 166
Trailer towing tips . . . . . . . . . . . . . . . . 168
Vehicle care . . . . . . . . . . . . . . . . . . . 170
Vehicle care and cleaning . . . . . 170
General information . . . . . . . . . . . . . . 170
Car washes . . . . . . . . . . . . . . . . . . . . . . 170
Cleaning and care information . . . . . . 171
Table of contents 3
Fuel supply and filling your
fuel tank ..... .... ..............
175
Gasoline .. .. .. .. .. .. .. .. .. .. .. .. 175
Fuel tank. . . . . . . . . . . . . . . . . . . . . . . . 176
Checking and filling . . . . . . . . . . . 179
Engine hood . . . . . . . . . . . . . . . . . . . . . 179
Engine compartment ............. .
Engine oil . .. .. .... ... .. ..... ... .
Engine cooling system .......... .. .
Brake fluid ....... .............. .
Battery ........................ .
Windshield washer container
Tires and wheels ... ..... ... .. .
181
181
186
189
190
193
195
Tires . . . . . . . . . . . . . . . . . . . . . . . . . . . 195
Tire pressure monitoring system 213
Do-it-yourself service . . . . . . . . . 216
What do I do now? ............ 216
General information . . . . . . . . . . . . . . 216
Vehicle tool kit with lifting jack . . . . . . 216
Folding chocks . . . . . . . . . . . . . . . . . . . 217
Removing bass box . . . . . . . . . . . . . . . 217
Space-saving spare tire (compact
spare tire) . . . . . . . . . . . . . . . . . . . . . . . 217
Changing a wheel . . . . . . . . . . . . . . . . . 218
Fuses and bulbs . . . . . . . . . . . . . . . 224
Fuses. ....... ... .. .............. 224
Bulbs. . . . . . . . . . . . . . . . . . . . . . . . . . . 226
Emergency situations . . . . . . . . . 228
General . . . . . . . . . . . . . . . . . . . . . . . . . 228
Starting by pushing or towing . . . . . . . 228
Starting with jumper cables . . . . . . . . 228
Use of jumper cables . . . . . . . . . . . . . . 229
Emergency towing with commercial
tow truck . . . . . . . . . . . . . . . . . . . . . . . 230
Lifting vehicle . . . . . . . . . . . . . . . . . . . . 232
Technical data . . . . . . . . . . . . . . . . . 234
Technical Data . . . . . . . . . . . . . . . . . 234
Vehicle identification . . . . . . . . . . . . . . 234
Weights . . . . . . . . . . . . . . . . . . . . . . . . 234
Dimensions . . . . . . . . . . . . . . . . . . . . . . 235
•
•
Page 13 of 258
Instrument s and warnin g/indic ator ligh ts 11
M N
M N
0 ::i co ,...., \!) ..,.,
& WARNING
-Always observe the wa rning in
¢
page 179, before opening the hood
and checking the engine coolant level.
- Never open the engine hood if you see or
hear steam, or if you see engine coolant
dripping from the engine compartment.
You could burn yourself. Let the engine cool off first so that you cannot hear or
see any steam or engine coolant.
(D Note
- Mounting additional lights or accessories
in front of the air inlets reduces the cool
i ng effect of the rad iator. At h igh outside
temperatures or high eng ine load, the
engine could overheat.
- The front spo iler has been designed to
proper ly distr ib ute the cooling air when
the veh icle is moving.
If the spoiler is
damaged, this cou ld redu ce the cooling
effect and the engine co uld then over
heat. Ask yo ur autho rized Aud i de aler f or
assistance.
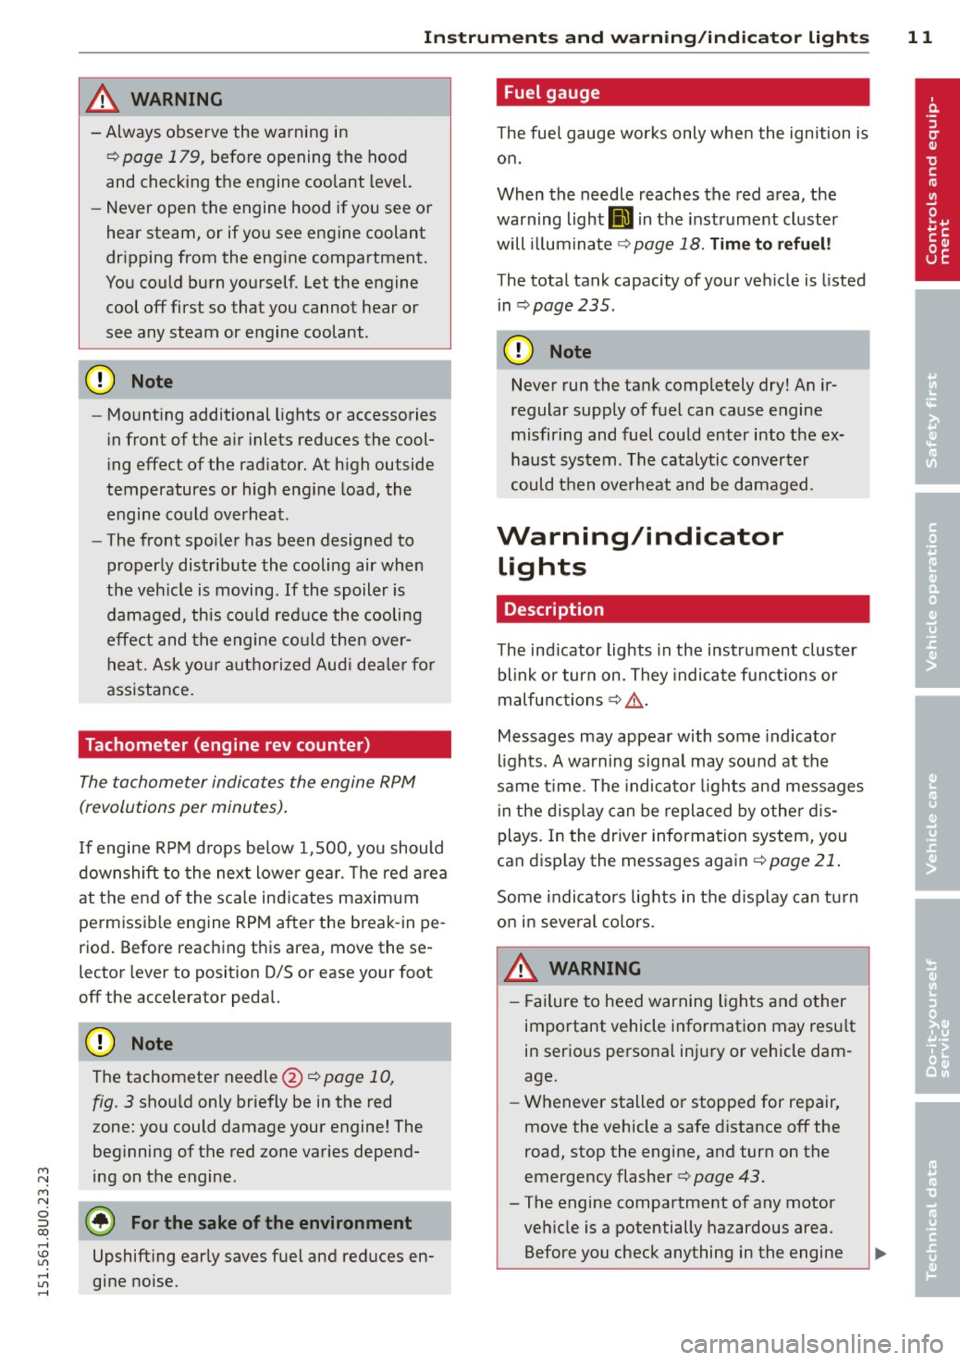
Tachometer (engine rev counter)
The tachometer indicates the engine RPM
(revolutions per minutes).
If engine R PM drops be low 1,500, you should
downshift to the next lower gear. The red area
at the e nd of the sca le ind icates maximum
permissible engine RPM after the break- in pe
riod. Before reaching this area, move these
l ector lever to position D/S or ease your foot
off the accelerator peda l.
(D Note
The tachometer needle@¢ page 10,
fig. 3 sho uld only briefly be in the red
zone: you could damage your engine! The
beg inning of the red zone varies depend
ing on the engine.
@) For the sake of the environment
Upshift ing early saves fue l and reduces en-
~ gine noise. ,....,
Fuel gauge
T he fuel gauge wo rks only when the ignition is
o n.
When the needle reaches the red a rea, the
warning light
Ii] in the instrume nt cluster
will illuminate
¢ page 18. Time to refuel!
The tota l tank capacity of your ve hicle is listed
i n
¢ page 235.
(1) Note
Never run the ta nk completely dry! An ir
regular supply of f uel can cause engine
misfiring and fuel could enter into the ex
haust system . The catalytic converter
could t hen ove rheat and be damaged.
Warning/indicator
Lights
Description
T he ind icator lights in the instrument cluster
blink or tur n on. They indica te funct io ns or
malfu nctions ¢
.&,..
Messages may appea r with some indicato r
lights. A warning signal may sound at the
same time. The indicato r lights and messages
in the disp lay can be replaced by othe r d is
plays. In the dr iver informa tion system, you
can display the messages aga in
¢ page 21 .
Some indica tors lig hts in the d isplay can turn
on i n severa l colors.
& WARNING ~
- Failure to heed warning ligh ts and other
important vehicle information may res ult
in ser ious personal inj ury or vehicle dam
age.
- Whenever stalled or stoppe d for repair,
move the vehicle a safe d istance off the
road, stop the engine, and turn on the
emergency flasher ¢
page 43.
-The engine compartment o f any motor
ve hicle is a potentially hazardous area.
Before you check anything in the engine
Page 14 of 258
12 Instruments and warning/indicator lights
compartment, stop the engine and let it
cool down. Always exercise extreme cau
tion when work ing under the hood
c::> page 179.
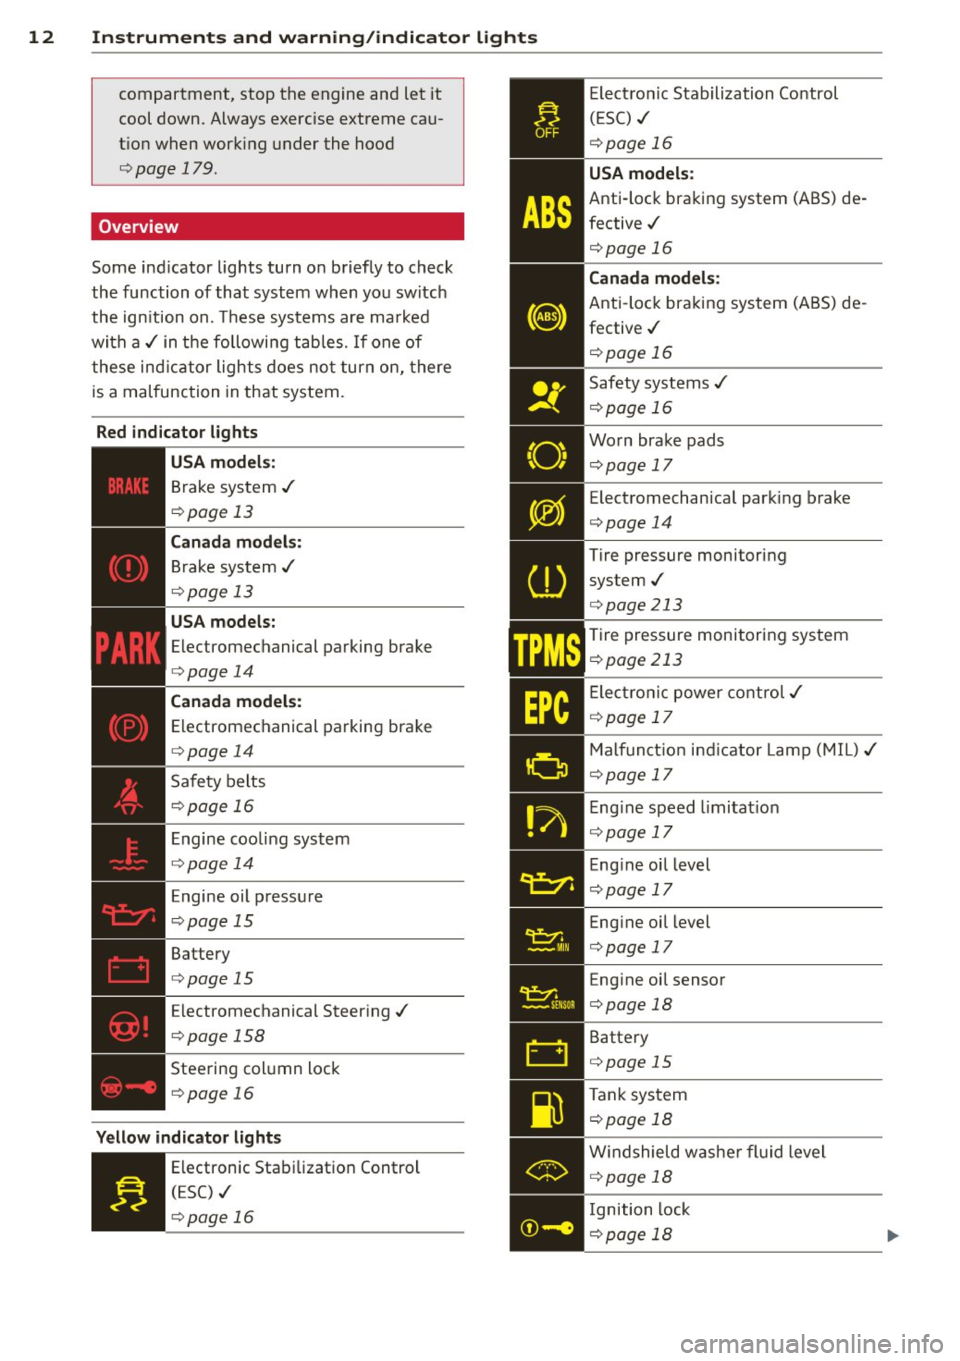
Overview
Some ind icator lights turn on briefly to check
the function of that system when you switch
the ign ition on. These systems are ma rked
with a ../ in the following tables. If one of
these indicator lights does not turn on, there
is a malfunction in that system.
Red indicator lights
USA models:
Brake system ../
c::>page 13
Canada models:
Brake system ../
c::>page 13
USA models:
Electromechanical parking brake
c::>page 14
Canada models:
Electromechanical parking brake
c::>page 14
Safety belts
c::>page 16
Engine cooling system
c::>page 14
Engine oil pressure
c::>page 15
Battery
c::>page 15
Electromechanical Steering../
¢ page 158
Steering column lock
¢page 16
Yellow indicator lights
Electronic Stabilization Control
(ESC) ../
¢page 16
TPMS
Electronic Stabilization Control
(ESC) ../
¢page 16
USA models:
Anti-lock braking system (ABS) de
fective../
¢page 16
Canada models:
Anti-lock braking system (ABS) de
fective../
c::> page 16
Safety systems ../
c::> page 16
Worn brake pads
c::> page 17
Electromechanical park ing brake
¢ page 14
Tire pressure monitoring
system../
¢page 213
Tire pressure monitoring system
¢page 213
Elect ronic power control../
c::> page 17
• M
alfunct ion ind icator Lamp (MIL)../ ¢page 17
Engine speed limitat ion
c::> page 17
- Engine oil level
- c::>pagel7
• ·
-. Engine oil level _
1 c::> page 17
• Engine oil sensor c::> page 18
Battery
c::> page 15
-
Tank system
... c::> page 18
• Windshield
washer fluid level c::> page 18
- Ignition lock
IYiiil c::> page 18
Page 16 of 258
![AUDI Q3 2015 Owners Manual 14 Instrum ent s and w arn ing /indic ato r light s
(USA models): If the warning light . and the
warning light
ll] appear together, immedi
ately contact your authorized Audi deale AUDI Q3 2015 Owners Manual 14 Instrum ent s and w arn ing /indic ato r light s
(USA models): If the warning light . and the
warning light
ll] appear together, immedi
ately contact your authorized Audi deale](/img/6/57629/w960_57629-15.png)
14 Instrum ent s and w arn ing /indic ato r light s
(USA models): If the warning light . and the
warning light
ll] appear together, immedi
ately contact your authorized Audi dealer or
qua lified workshop to have all brake pads in
spected
¢ page 17.
When the light comes on, an audib le warning
signal is also given .
.&_ WARNING
- Always observe the warnings in
¢ page 179, before opening the hood
and checking the brake fluid.
- Driv ing with low brake fluid is a safety
hazard. Stop the car and get professional
assistance.
- If the . (USA models) . (Canada
models) brake system indicator light
turns on together with the ABS and ESC
indicator lights, the ABS/ESC regu lating
function may have failed. Functions that
stabilize the vehicle are no longer availa
ble. Th is could cause the vehicle to
swerve and increase the risk of sliding .
Drive carefully to the nearest a uthorized
Audi dealer or other qualified workshop
and have the malfunction corrected.
- If the brake warning/indicator light does
not go out after a few seconds and the
park ing brake is released, or lights up
wh ile you are driving, the fluid level in
the brake fluid reservoir is too low .
If you
believe that it is safe to do so, proceed
immediately at low speed to the nearest
authori zed Audi dealer o r qualified wo rk
shop and have the bra ke system inspect
ed.
- Always keep in m ind that after several
brake applicat ions, yo u will need greater
pressure on the brake peda l to stop your
vehicle. Do not re ly on strained brakes to
respond with maxim um stopping power
in critical situations. You must allow for
increased brak ing distances. The extra
distance used up by fad ing brakes could
lead to an acc ident.
PARK !<®> Electromechanical parking brake
The warning/indicator light monitors the
electromechanical parking brake .
If the indicator light. (USA models) •
(Canada models) turns on, the parking brake
was set.
• (USA model s)/. (Canada models ) Press
brake pedal to release parking b ra ke.
To re lease the park ing brake, press the brake
peda l and press the button(®) at the same
t ime or start driving with starting assist
¢ page 71, Starting from rest.
Ill Pa rking br ake : S ys tem f ault! See owne r's
manual.
If the I.II ind ic a tor light tu rns o n and this
message appears, there is a parking b rake
malfunction. Drive to your authorized A udi
dealer or qualified workshop immediately to
have the malfunct ion corrected.
@ Tips
More informat ion on the parking brake
¢page 70 .
-L Engine cooling system
A malfunction in the engine cooling system
must be repaired as soon as possible.
• Turn off engine and ch eck coolant level
T he coolant level is too low .
Do not continue dr iving and turn
off the en
gine. Check the coo lant level
¢ page 186.
-If the coo lant level is too low, add coo lant
¢ page 186. Only continue driving if the in
dicator light turns off.
- If the coo lant level is correct, then the ma l
function may be ca used by fa ilure of the
coolant fan. Do not continue driving. See
your authorized Audi dealer or qualified re pa ir fac ility .
• Coolant temperature! Let engine run
w ith vehicle stationar y.
Page 17 of 258
M N
M N
0 ::i co ,...., \!) 1.1'1 ,...., 1.1'1 ,....,
Instrument s and warnin g/indic ator ligh ts 15
If the indicator light turns on and the mes
sage appears , let the engine run at idle for a
few minutes to cool down .
A WARNING
-If your veh icle should break down for
mechanical or other reasons, park at a
safe distance from moving traffic, turn
off the engine and turn on the hazard
warning lights¢
page 43, Emergency
flashers.
-
- Never open the hood if you see or hea r
steam o r coolant escap ing from the en
gine compartment - you risk being s cald
ed . Wa it until you can no longe r see or
hear s team or coo lant escaping .
- T he e ngine compartment of any veh icle
is a dangerous a rea. Before you perform
any work in the engine compartment,
tu rn of the engine and allow it to cool.
Follow the warning stickers¢
page 179.
(D Note
Do not contin ue driving if the . symbo l
illuminates. There is a ma lf u nct ion in the
engine cooling system -you co uld damage
your eng ine.
requires immediate service or repair . Driving
with a low-oil -pressure indication is likely to
inflict severe damage to the engine.
• Turn off engine! Oil pressu re i s too low.
Tu rn off the eng ine and do no t continue dr iv
ing . Chec k the engine oil leve l¢
page 184.
- If the engine oil level is too low, add engine
o il ¢
page 184 . Only continue dr iv ing if the
indica tor l igh t turns off.
- If the engine oil leve l is correct and the indi
c ator lig ht st ill turns on, tur n the eng ine off
and do not contin ue d riving. See yo ur a u
tho rized Aud i dea le r or q uali fied repa ir fa
c ili ty.
(D Tips
- The engine oil pressure symbol. is
not an indicator for a low engine o il lev
el. Do not rely on it . Instead, check the
o il level in yo ur engine at regular inter
vals, preferably each time you refuel ,
and alway s before going on a long trip .
- The yellow oil lev el warn ing indication
l!I requires oil refill or workshop serv
ice without delay . Do not wait until th e
red oil pressure warning. start s to
fla sh before you respond to the low oil
level warning
m. By then, your engine
may alread y have suffered serious dam
age.
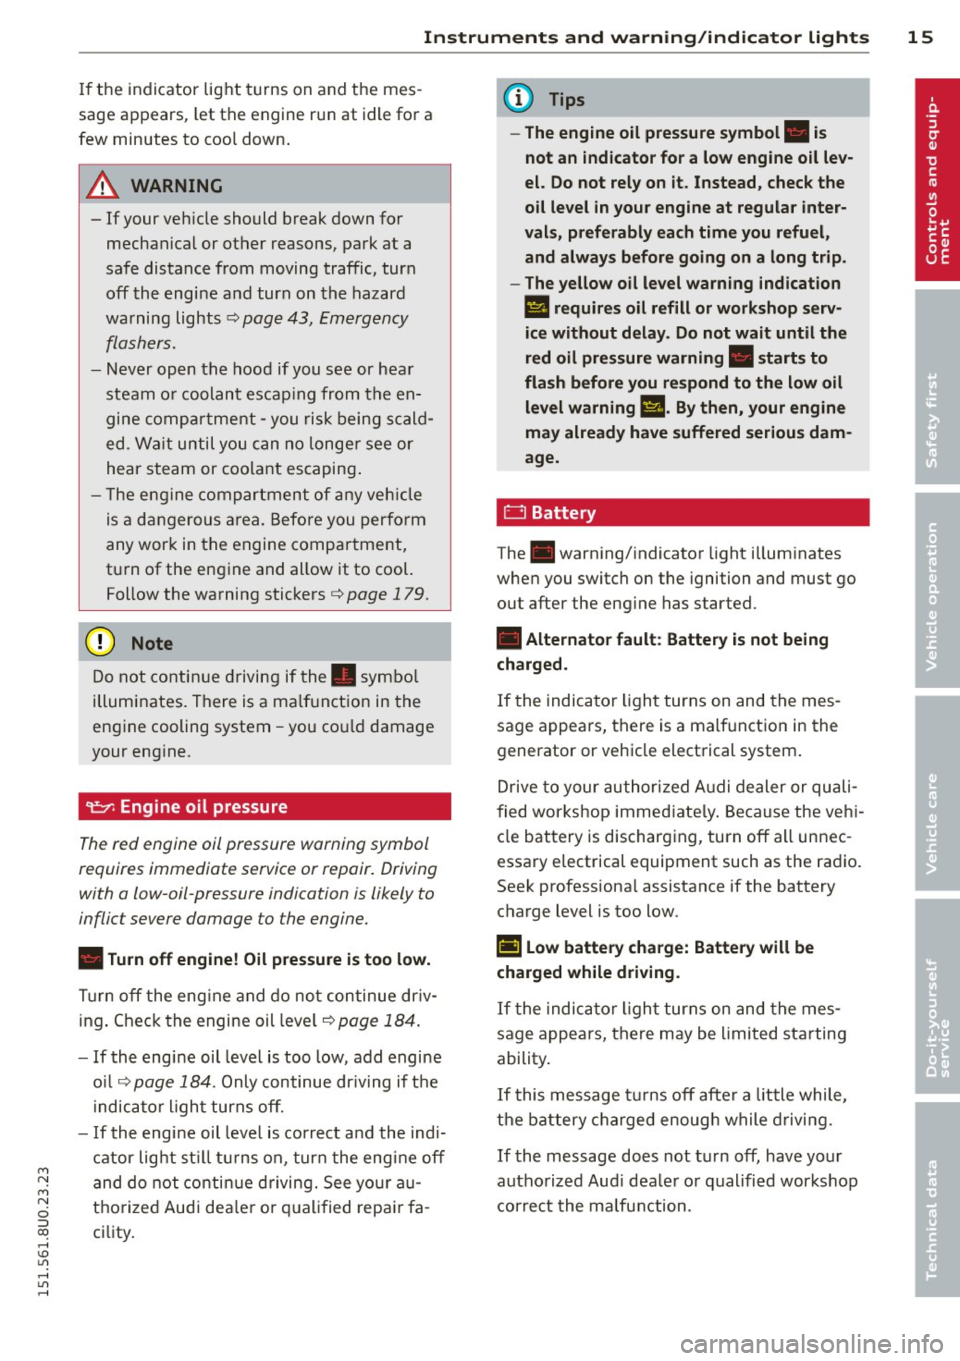
D Battery
The .warn ing/ indicator light i llum inates
when you switch on the ignition and must go
out after the eng ine has started.
• Alternator fault : Battery is not being
charged.
If the indicator light turns on and the mes
sage appears, there is a malfunction in the generator or vehicle electrical system .
Drive to your authori zed A udi dealer or quali
fied wor kshop immed iate ly . Because the ve hi
cle battery is discharging, turn off all unnec
essary e lectrical equipment such as the radio.
Seek professiona l assistance if the battery
charge level is too low.
(•) low battery cha rge: B atter y will be
charged while driving .
If the indica to r ligh t turns on and the mes
sage appears, there may be limited sta rting
ability .
If this message turns off afte r a little while,
the battery c ha rged enough while drivi ng.
If the message does not turn off, have you r
autho rized Aud i dea le r or qualified wor kshop
cor re ct t he malfu nction.
Page 57 of 258
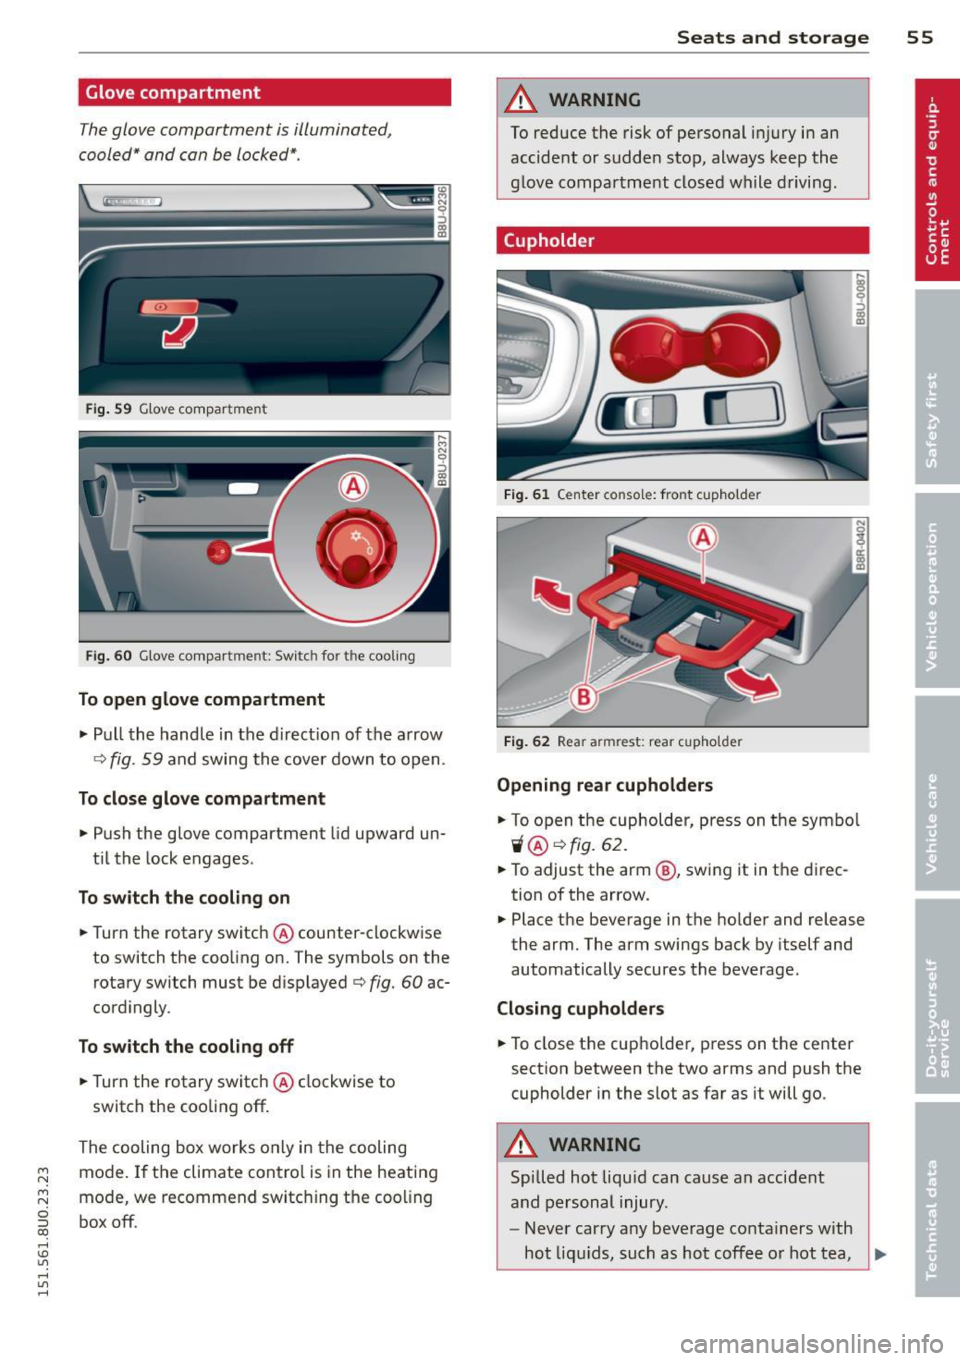
Glove compartment
The glove compartment is illuminated,
cooled" and can be locked*.
Fig . 59 Glove compartment
Fi g. 60 Glove compartment: Switc h for the cooling
To open glove compartment
~ Pull the handle in the direction of the arrow
¢
fig. 59 and swing the cover down to open.
To close glove compartment
~ Push the glove compartment lid upward un
t il the lock engages .
To switch the cooling on
~ Turn the rotary switch @ counter-clockwise
to switch the cooling on. The symbols on the
rotary switch must be displayed ¢
fig. 60 ac
cordingly .
To switch the cooling off
~ Turn the rotary switch @ clockwise to
switch the cooling off.
The cooling box works only in the cooling
~ mode. If the climate contro l is in the heating
M N
0 ::i co
rl I.O
"' rl
"' rl
mode, we recommend switching the cooling
box off.
Seats and storage 55
A WARNING
To reduce the risk of personal injury in an
accident or sudden stop, always keep the
glove compartment closed while driving.
(upholder
Fig. 61 Center console: front cupho lde r
Fig. 62 Rear arm rest: rear cupho lder
Opening rear cupholders
~ To open the cupholder, press on the symbo l
i/@ ¢fig. 62.
~ To adjust the arm @, swing it in the direc
tion of the arrow.
~ Place the beverage in the holder and release
the arm. The arm swings back by itself and
automatically secures the beverage.
Closing cupholders
~ To close the cupholder, press on the center
section between the two arms and push the
cupholder in the slot as far as it will go .
A WARNING
Spilled hot liqu id can cause an accident
and personal injury.
- Never carry any beverage conta iners with
hot liquids, such as hot coffee or hot tea,
II>-
Page 65 of 258
M N
M N
0 ::i co ,...., \!) 1.1'1 ,...., 1.1'1 ,....,
Warm and cold Climate control
Description
The climate control system warms, cools and
adds humidity to the a ir in the veh icle inter io r.
It is the most effect ive when the windows and
sunroof are closed . If the re is a build-up of
h eat inside the vehicle, ventilation can help to
speed up the cooling process .
Condensat ion from the cooling sys tem can
drip and form a puddle of water under the ve
hicle. This is normal and does not mean there
is a leak .
Pollution filter
The po llution filte r removes impuri ties, such
as dus t and po llen, from the air.
The air pollutants filter must be changed at
the intervals spec ified in you r Wa rra nty
&
M aintenance book let, so tha t the air condi
tioner can prope rly work .
If you drive your vehicle in an area with h igh
a ir po llution, the fi lter may need to be
changed more frequent ly than specified in
your Aud i Warr anty
& Ma intenance booklet. If
in doubt, ask your authorized A udi Service Ad
visor for advice .
A WARNING
Reduced visibility is dangero us and can
cause accidents.
-
- For safe dr iv ing it is very important that
all windows be free of ice, snow and con
densation.
Warm and c old 63
-Comp letely fam iliarize yourse lf with the
proper use and f unct ion of the heat ing
a nd venti lation system and especially
how to defog and defrost the w indows.
- Never use the windshield wiper/washer
system in freez ing weather unt il you
have warmed the w indshield first, using
the heating and ve ntilation system. The
washer sol ution may freeze on the wi nd
shie ld and re duce visib ility.
0 Note
- If you suspect that the air conditioner
has been damaged, switch t he system
off to avoid furt her damage and have it
in spec ted by a q ual ified dea lership.
- Repairs to the Audi air conditioner re
quire specia l te ch nical know ledge and
speci al to ols. Conta ct an autho rized Aud i
dea ler fo r ass istance.
(® For the sake of the environment
B y reducing the a mou nt of f uel you use,
you also reduce the amount of pollu tants
emitted in to the air.
(D Tips
- Keep the air intake s lots ( in fro nt of the
w indshield) free from ice, snow and de
br is in order to maintain the proper f unc
t ion of the climate control sys tem.
- T he e nergy m ana gement system m ay
switch the seat heating * or rear window
defroster off temporari ly . These systems
are available again as soon as the energy
balance has been resto red.
Page 66 of 258
64 Warm and cold
Operation
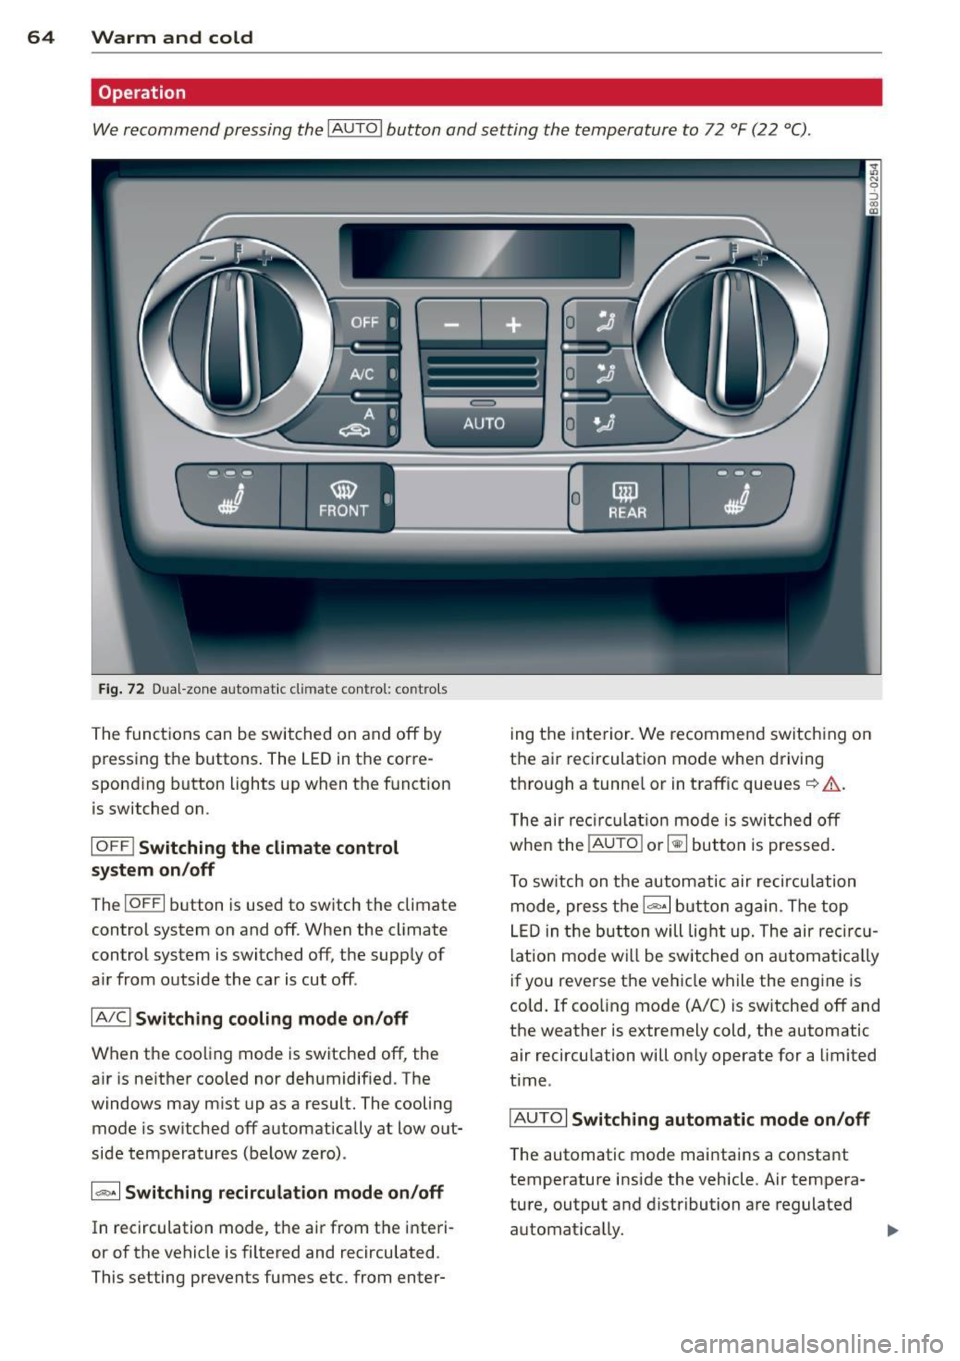
We recommend pressing the IAU TOI button and setting the temperature to 72 °F (22 °C) .
)-~~~
•I;. .. Q
Fig. 72 Dua l-zon e auto mat ic cl imate control: co ntrols
The functions can be switched on and off by
pressing the buttons . The LED in the corre
sponding button lights up when the function is switched on .
IOFFI Switching the climate control
sy stem on /off
ThelOFFI b utton is used to switch the climate
control system on and off . When the climate
control system is switched off, the supp ly of
a ir from outside the car is cut off .
IA/Cl Switching cooling mode on /off
When the cooling mode is switched off, the
a ir is ne ither cooled nor dehumidif ied. The
windows may m ist up as a result. The cooling
mode is sw itched off automatically at low o ut
side temperatures (below zero) .
1~ 1 Switching r ecirculat ion mod e on /off
In recirculation mode, the air from the interi
or of the vehicle is filtered and recirculated .
This setting prevents fumes etc. from enter- 0
mil
--f-~
REAR ~~ -=-
ing the inte rior . We recommend switch ing on
the ai r recirculation mode when driving
t h ro ugh a tunne l or in traff ic queues ~.&. .
T he air reci rcul atio n mo de is switched off
whe n the !AUTO
I o r~ button is pressed .
T o sw itch on the automatic air recircu lation
mode, press the
1 ""' ·1 b utt on again . The top
LE D in the but ton will lig ht up. The air reci rc u
lation mode wi ll be switched on automat ica lly
if you reverse the ve hicle while the engine is
cold. If coo ling mode (A/C) is sw itched off and
the weather is extremely c old, the automatic
air recircu lation will on ly operate for a limited
t ime .
IAU TOI
Switching automatic mode on /off
T he automatic mode maintains a constant
temperature inside the vehicle. Air tempera
ture, output and d istribution are regulated
automat ica lly. ..,.
Page 169 of 258
M N
M N
0 ::i co ,...., \!) ..,.,
,...., ..,., ,....,
Operating instructions
6"
~ ~
I 1,2 ..
-{ }
l::_
-
2
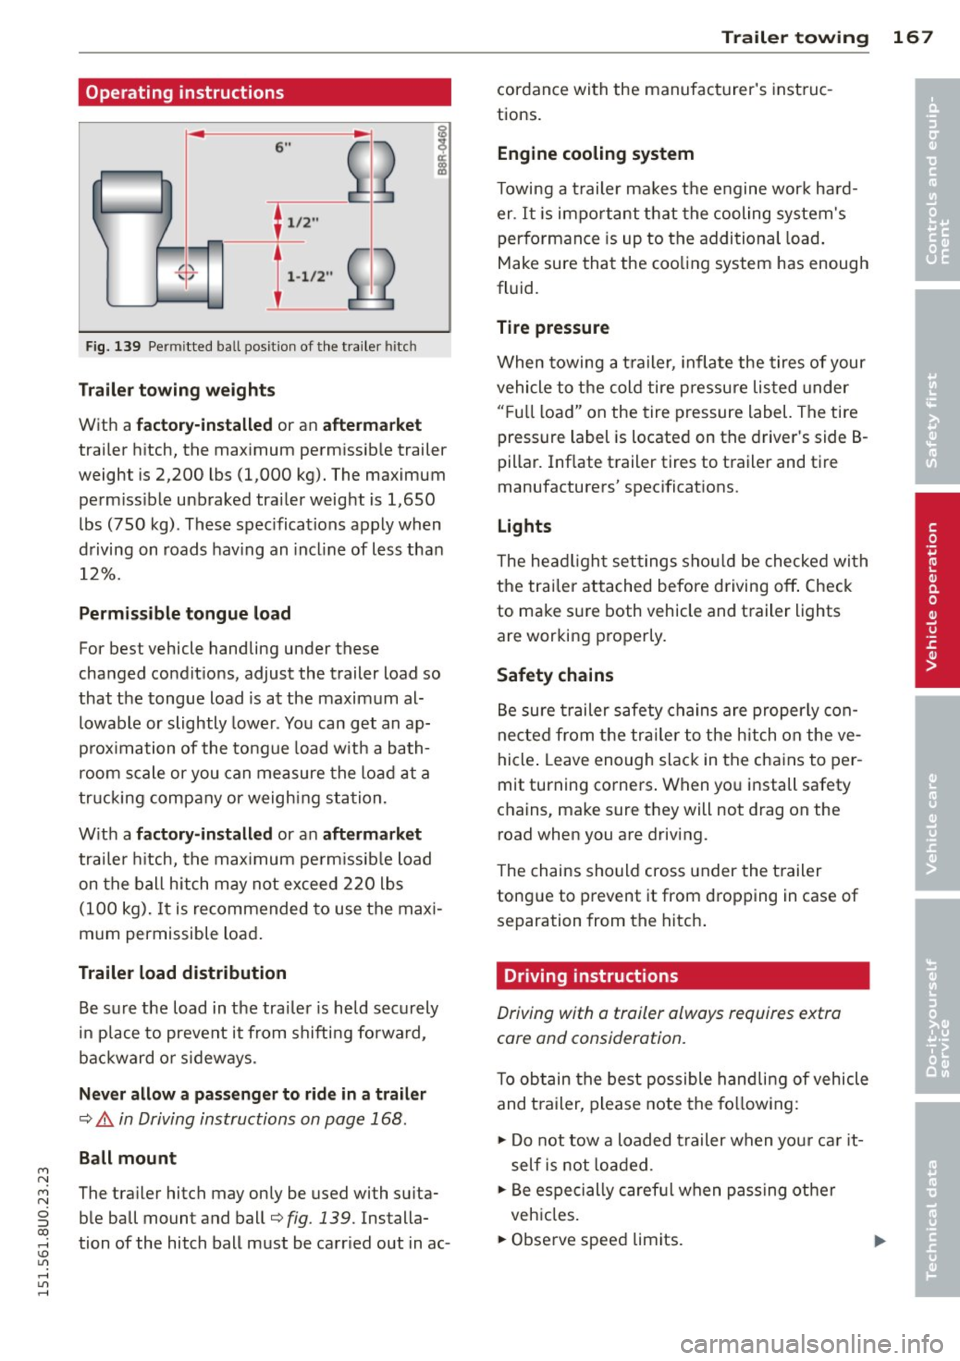
Fig. 139 Permit ted ball position of the trailer hitch
Trailer towing weights
With a factory-installed or an aftermarket
trailer hitch, the maximum permissible trailer
weight is 2,200 lbs (1,000 kg). The maximum permissible unbraked trailer weight is 1,650
lbs (750 kg) . These specifications apply when
driving on roads having an incline of less than
12%.
Permissible tongue load
For best vehicle handling under these
changed conditions, adjust the trailer load so
that the tongue load is at the maximum al
lowable or slightly lower . You can get an ap
proximation of the tongue load with a bath
room scale or you can measure the load at a
trucking company or weighing station.
With a
factory-installed or an aftermarket
trailer hitch, the maximum permissible load
on the ball hitch may not exceed 220 lbs
(100 kg).
It is recommended to use the maxi
mum permissible load.
Trailer load distribution
Be sure the load in the trailer is held securely
in place to prevent it from shifting forward,
backward or sideways.
Never allow a passenger to ride in a trailer
¢.&. in Driving instructions on page 168.
Ball mount
The trailer hitch may only be used with suita
ble ball mount and ball¢
fig. 139. Installa
tion of the hitch ball must be carried out in ac-
Trailer towing 167
cordance with the manufacturer's instruc
tions.
Engine cooling system
Towing a trailer makes the engine work hard
er .
It is important that the cooling system's
performance is up to the additional load.
Make sure that the cooling system has enough
fluid.
Tire pressure
When towing a trailer, inflate the tires of your
vehicle to the cold tire pressure listed under
"Full load" on the tire pressure label. The tire
pressure label is located on the driver's side B
pillar. Inflate trailer tires to trailer and tire
manufacturers' specifications .
Lights
The headlight settings should be checked with
the trailer attached before driving off. Check
to make sure both vehicle and trailer lights
are working properly.
Safety chains
Be sure trailer safety chains are properly con
nected from the trailer to the hitch on the ve
hicle. Leave enough slack in the chains to per
mit turning corners. When you install safety
chains, make sure they will not drag on the
road when you are driving.
The chains should cross under the trailer
tongue to prevent it from dropping in case of
separation from the hitch.
Driving instructions
Driving with a trailer always requires extra
core and consideration.
To obtain the best possible handling of vehicle
and trailer, please note the following :
.,. Do not tow a loaded trailer when your car it
self is not loaded.
.,. Be especially careful when passing other
vehicles.
.,. Observe speed limits.
•
•
Page 188 of 258
186 Checking and filling
Engine cooling system
Coolant
The engine coolant performs two functions: it
keeps the engine from overheating and it pro
tects the engine from freezing in the winter .
The cooling system is sealed and generally re
qu ires little attention .
The cooling system has been filled at the fac
tory with a permanent coo lant which does not
need to be changed. The coolant consists of a
mixture of spec ially conditioned water and the
manufacturer's glycol-basedcoolant addi-
tive G13 antifreeze with ant icorros ion addi
tives (50% for USA models; 60% for Ca nada
models) . This mixture both assures the neces
sary frost protection and protects metal com
ponents in the engine's cooling system from
corrosion and scaling.
It a lso raises the boil
ing point of the coo lant.
Do not reduce the concentration o f the coo l
ant in the summer by adding plain water .
The
proportion of coolant additive must be at
least 50% but not more than 60%
to main
tain antifree ze protection and cooling efficien
cy. If the coolant frost protect ion is too low,
the coolant could freeze and damage the veh i
cle heating and engine cooling system .
For year-round driving, antifree ze is added at
the factory for temperatures down to:
- -31°F(-35°C)USA
- - 40 °F ( -40 °C) Canada.
I f you must add coo lant, use a mixture of wa
ter and coolant addit ive. Mixing the coolant
additive with distilled water is recommended.
_& WARNING
Before yo u check anything in the engine
compartment, always read and heed all
WARNINGS
~ &. in Working in the engine
compartment on page 179.
(D Note
- Before winter sets in, have the coolant
checked to see if the coolant additive in
-
your vehicle is sufficient to meet the cli mate conditions . This is especia lly impor
tant if you live in a reg ion where the win
ter is extreme ly cold. If necessary, in
crease the proportion of coolant add itive
to 60% .
- When adding coolant additive to your
cooling system, remember:
- We recommend using only coolant ad
ditive G12++ or G13 for your vehicle.
This coolant additive is available at au
thorized Audi dealers. Other types of
antifreeze can significantly reduce cor rosion protection. The resulting corro
sion can cause a loss of coolant and se
rious engine damage .
- Do not add any type of rad iator leak seal
ant to your vehicle's engine coolant.
Adding radiator repair flu id may adverse
ly affect the function and performance of
your cooling system and could result in
damage not covered by your New Vehicle
Limited Warranty.
Checking the engine coolant level
The engine coolant level can be checked with
a quick glance.
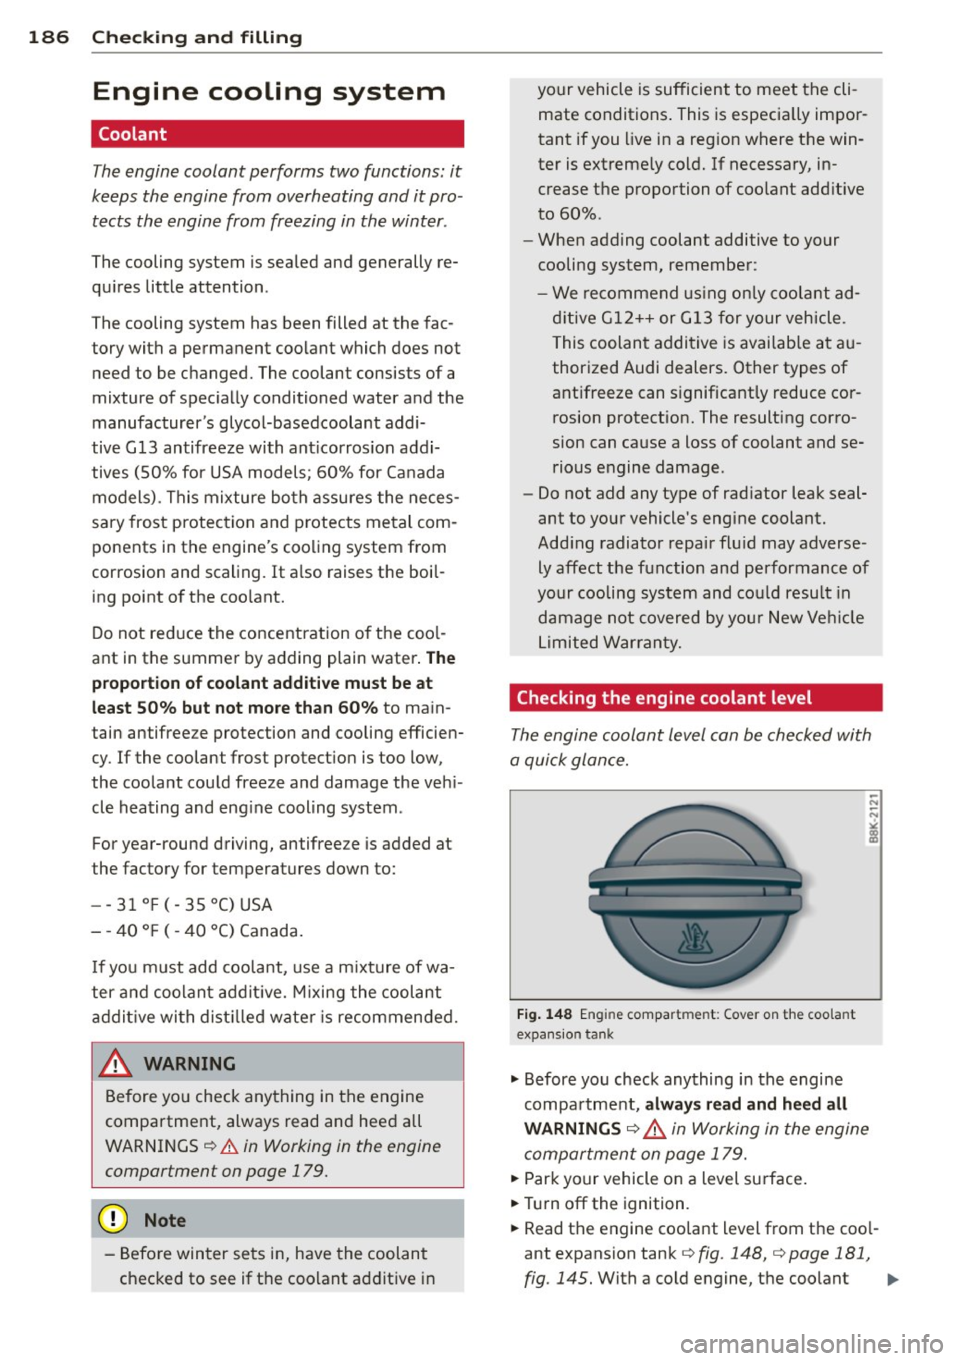
Fig. 148 E n gin e compart men t: Cover on the coo la n t
expans io n tank
.,. Before you check anything in the engine
compa rtment,
always read and heed all
WARNINGS ~ ,& in Working in the engine
compartment on page 179.
.,. Park your vehicle on a level surface .
.,. Tur n off the ignition.
.,. Read the engine coolant level from the coo l
ant expansion tank
c:> fig . 148, c:> page 181,
fig. 145.
With a cold engine, the coolant Iii>-