mirror AUDI Q3 2017 Owner´s Manual
[x] Cancel search | Manufacturer: AUDI, Model Year: 2017, Model line: Q3, Model: AUDI Q3 2017Pages: 236, PDF Size: 58.93 MB
Page 9 of 236
00
00
......
"' ,....
"' ...... 0 0 :::,
00
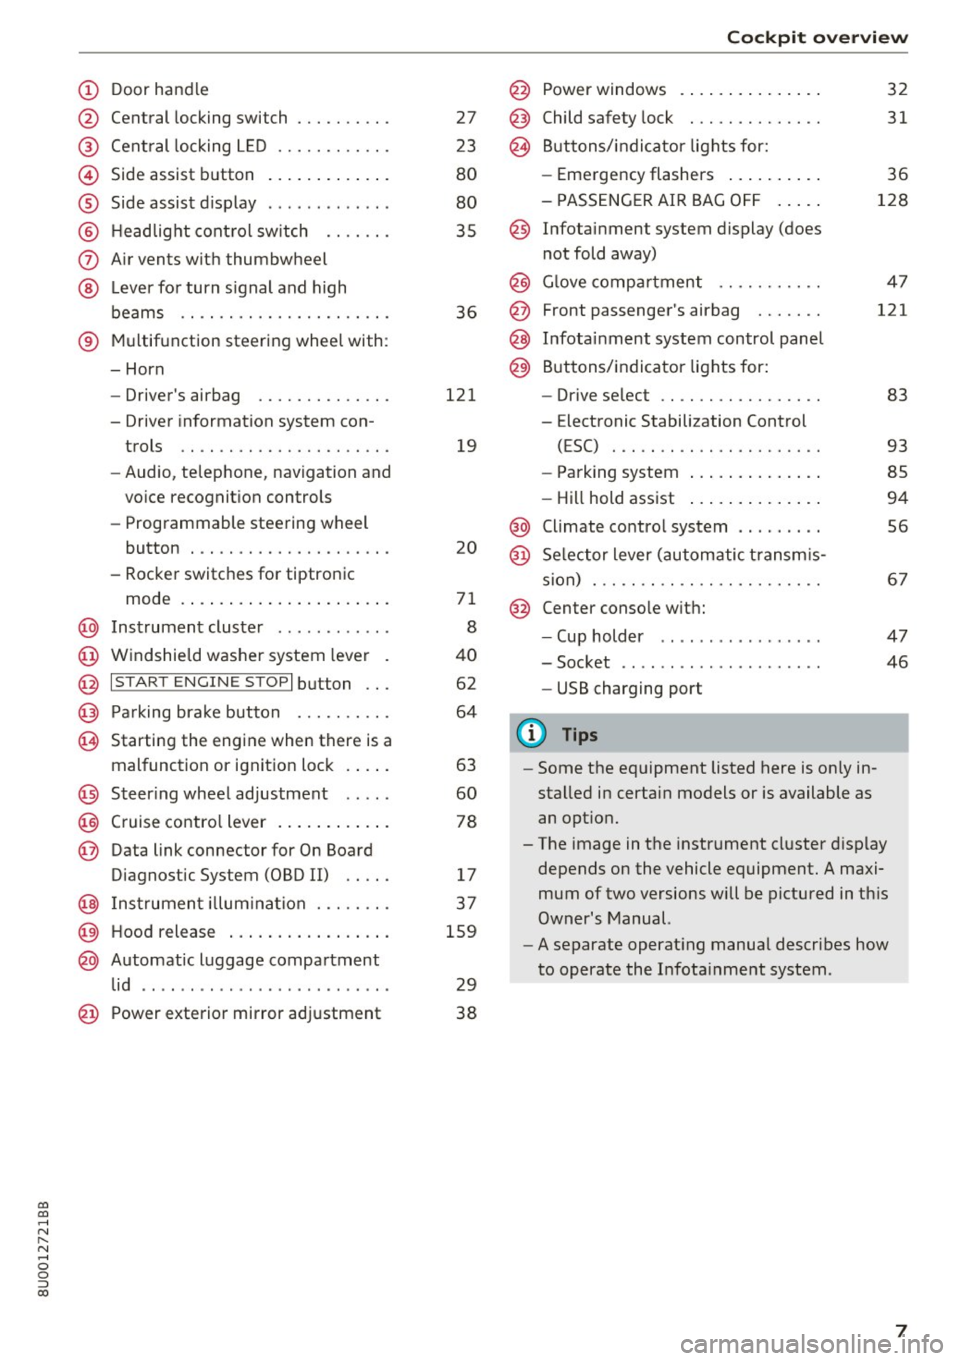
(!) Door handle
@
®
©
®
®
(J)
®
Central locking switch
Cent ral locking L ED ......... .. .
Side assist button
Side assist d isplay
H eadlight cont rol sw itch .... .. .
A ir vents with thumbwheel
L ever for turn s ignal and h igh
beams .. .. .... . .......... .. .
® Multifunction ste ering wheel with :
- Horn
- Driver's airbag ........... .. .
- Driver information system con-
trols .. .. ............... .. .
- Audio , te lephone, nav igation and
vo ice recognit ion controls
- Programmable steering wheel
button . .. .. ........... .. .. .
- Rocker switches for tiptronic
mode . ... .. ... ..... ... .. .. .
@ Instrument cluster ........... .
@ Windshield washer system lever
@ I S TART EN GIN E ST OPI button .. .
@ Pa rking brake button ....... .. .
~ Starting the engine when there is a
malfunction or ignition lock . ... .
@ Steer ing whee l adjustment .... .
@ Cruise contro l lever .... ... .. .. .
@ Data link connector for On Board
Diagnostic System (OBD II) .. .. .
@ Inst rument illum ination ... .. .. .
@ Hood r ele as e .... ..... ... .. .. .
@ Automat ic luggage compartment
lid .. .. ... ............. ..... .
27
23
80
80
35
36
121
19
20
71
8
40
62
64
63
60
78
17
37
159
29
@ Power exterior mirror adjustment 38
Coc kpit o ve rv iew
@ Power windows . .. .. .. ..... .. .
@ Child safety lock ............. .
@ Buttons/indi cator lights for:
- Eme rgency flashers .. ..... .. .
- PASSENG ER AIR BAG O FF .... .
@ Infotainment system display (does
not fold away)
@ G love compartment .......... .
@ Front passenger's airbag ...... .
@ Infota inment system control panel
@ Buttons/indicator lights for:
- Drive se lect .. .. ............ .
- E lectronic Stabilization Control
( E SC) . .. .. .. .. ....... ..... .
32
31
36
128
4 7
121
83
93
- Park ing system . . . . . . . . . . . . . . 85
- Hill hold ass ist . . . . . . . . . . . . . . 94
@ Climate contro l system . . . . . . . . . 56
@ Se lector lever (automatic transm is -
sion) . . . . . . . . . . . . . . . . . . . . . . . . 67
@ Center conso le w ith:
- Cup holder . . . . . . . . . . . . . . . . . 47
- Socket . . . . . . . . . . . . . . . . . . . . . 46
- USB charging port
(D Tips
-Some the eq uipment listed here is on ly in
sta lled in certain models or is available as
an opt ion.
- The image in the instrument cluster d isplay
depends on the vehicle equipment. A maxi
mum of two versions will be pictured in th is
Owner's Manual.
- A separate operat ing manua l describes how
to operate the Infota inment system .
7
Page 40 of 236
Lights and Vision
and the ignition is switched on . The illum ina
tion reduces automatica lly and eventually
turns
off as brightness outs ide decreases.
This function reminds the driver to turn the
low beams on at the appropriate time .
Vision
Adjusting the exterior mirrors
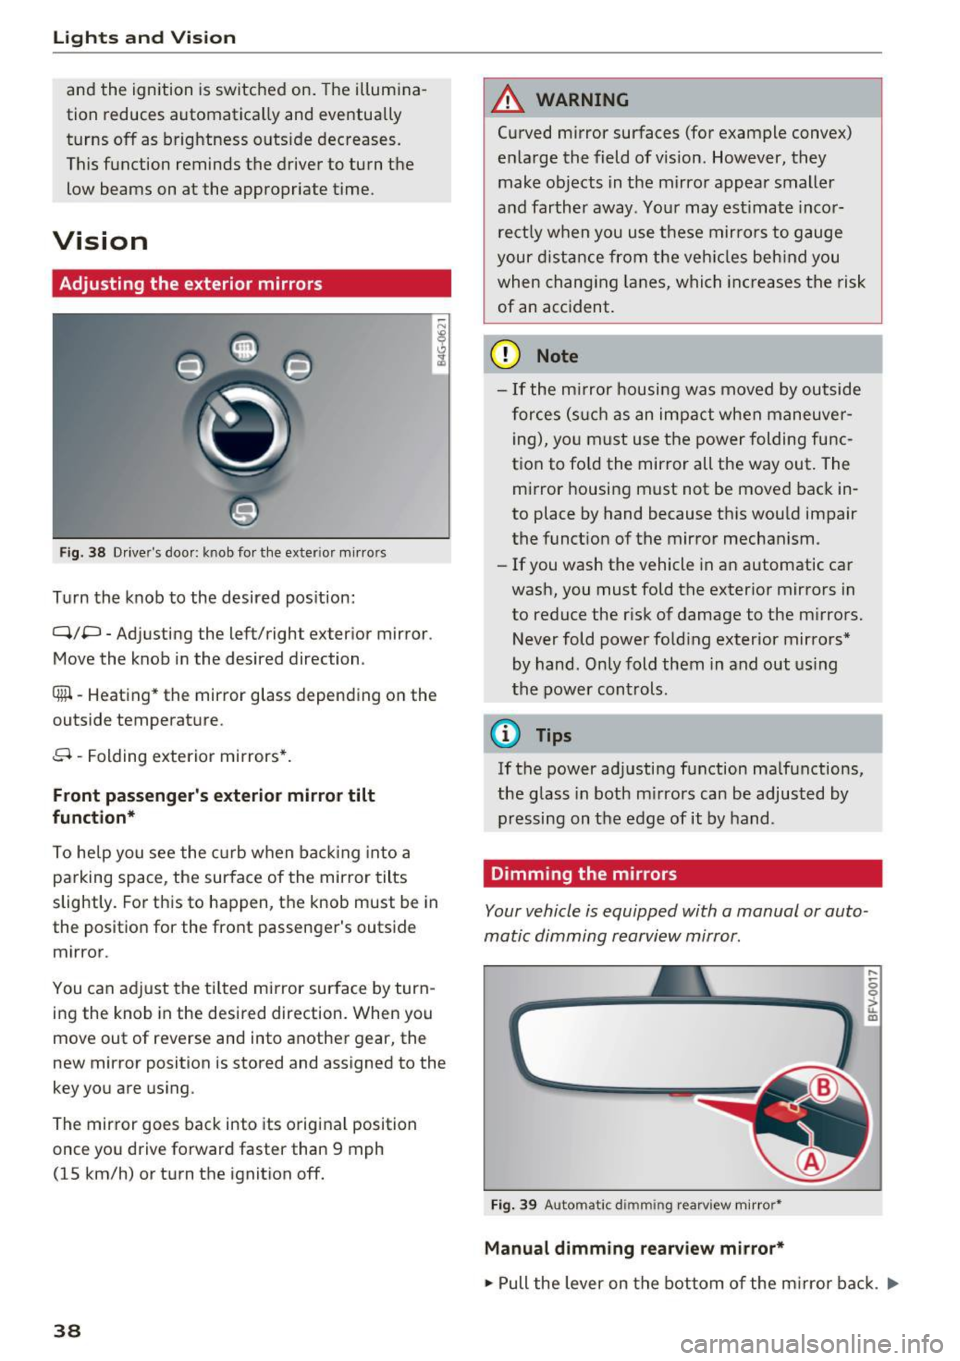
Fig . 38 D river's doo r: kn ob fo r th e ex te ri or m irrors
T u rn the knob to the desired pos ition:
Q/P -Adjus ting the left/ righ t exterior m irror .
Move the knob in the desired dire ction .
®l-Heating * th e mirror glass d epending on the
outs ide temperature .
8 -Folding exterior mirrors*.
Front passenger's exterior mirror tilt
function*
To he lp you see the curb w hen ba cking into a
parking space, the surface of the mirror tilts
slightly. For this to happen, the knob must be in
the position for the front passenger 's outs ide
mir ror .
You can adjust the tilted mirror surface by turn
ing the knob in the desired direction. When you
move out of r everse and into another g ear, the
new mirror position is stored and assigned to the
key you are us ing .
The mirror goes back into its origina l position
once yo u drive forward faster than 9 mph
( 1 5 km/h) or turn the ignition
off.
38
A WARNING
Curved mirror surfaces (for example convex)
e nla rge the field of vision. However, they
make ob jects in the mirro r appear smaller
a nd farther away . Your may est imate inco r
rect ly w hen you use these mirro rs to gauge
your dista nce from the veh icles beh ind you
when chang ing lanes , whi ch in cr eases the risk
of an acc ident .
(D Note
-If the m irror housing w as moved by outside
f o rces ( such as a n impac t when maneuve r
ing), yo u m ust use the power folding fu nc
tion to fo ld the mirror all the way out. The
mi rror housing must not be moved back in
to place by hand because t his wou ld impair
the funct ion of the mirror mechanism .
- If you wash the vehicle in an automatic ca r
wash, you must fold the exter ior mirrors in
to reduce the r isk of damage to the m irrors.
Never fold power fo ld ing exterior mirrors*
by hand . Only fold them in and out using
the power con trols.
(D Tips
If the power ad justing function ma lfunctions,
the glass in both m irrors can be adjusted by
pressing on the edge of it by hand .
Dimming the mirrors
Your vehicle is equipped with a manual or auto
matic dimming rearview mirror .
Fig. 39 A uto mat ic dimmin g rearview m irro r*
Manual dimming rearview mirror*
....
0 0
> ~ m
"" Pull the lever on the bot tom of the m irro r b ack . Ill-
Page 41 of 236
Automatic dimming rearview mirror*
• Press the button @to switch the dimming
function on the mirror on or off. If the indicator
light @ turns on, the interior and exterior mir
rors* are dimmed when light shines on them
(for example headlights shining from a vehicle
behind you) .
A WARNING
If the glass on an automatic dimming mirror
breaks, electrolyte can leak out . This liquid
can irritate the skin, eyes and respiratory sys
tem. If there is contact with the fluid, flush
immediately with plenty of water. Consult a
physician if necessary.
- Repeated or long-term exposure to electro
lyte fluid can lead to irritation of the air
ways, especially in people with asthma or
other respiratory conditions. Take deep
breaths immediately after leaving the vehi
cle or, if this is not possible, open all of the
doors and windows as wide as possible.
- If electrolyte fluid enters the eyes, flush
them thoroughly with a large amount of
clean water for at least 15 minutes and then
seek medical attention.
- If electrolyte fluid comes into contact with
the skin, flush the affected area with clean
water for at least 15 minutes and then clean
with soap and water and seek medical at
tention. Clean affected clothing and shoes
thoroughly before wear ing again .
- If the fluid was swallowed and the person is
conscious, flush the mouth with water for at
least 15 minutes. Do not induce vomiting
unless this is recommended by medical pro
fessionals. Seek medical attention immedi
ately.
(D Note
If the glass on an automatic dimming mirror
breaks, electrolyte can leak out. This liquid
damages plastic surfaces and paint. Clean
this liquid as quickly as possible, for example
a:,
~ with a wet sponge.
N r--. N .... 0 0 ::, a:,
Lights and Vision
(D Tips
-If the light reaching the rearview mirror is
obstructed, the automatic dimming mirror
will not function correctly,
- The automatic dimming mirrors do not dim
when the interior lighting is turned on or
the reverse gear is selected.
Sun visors
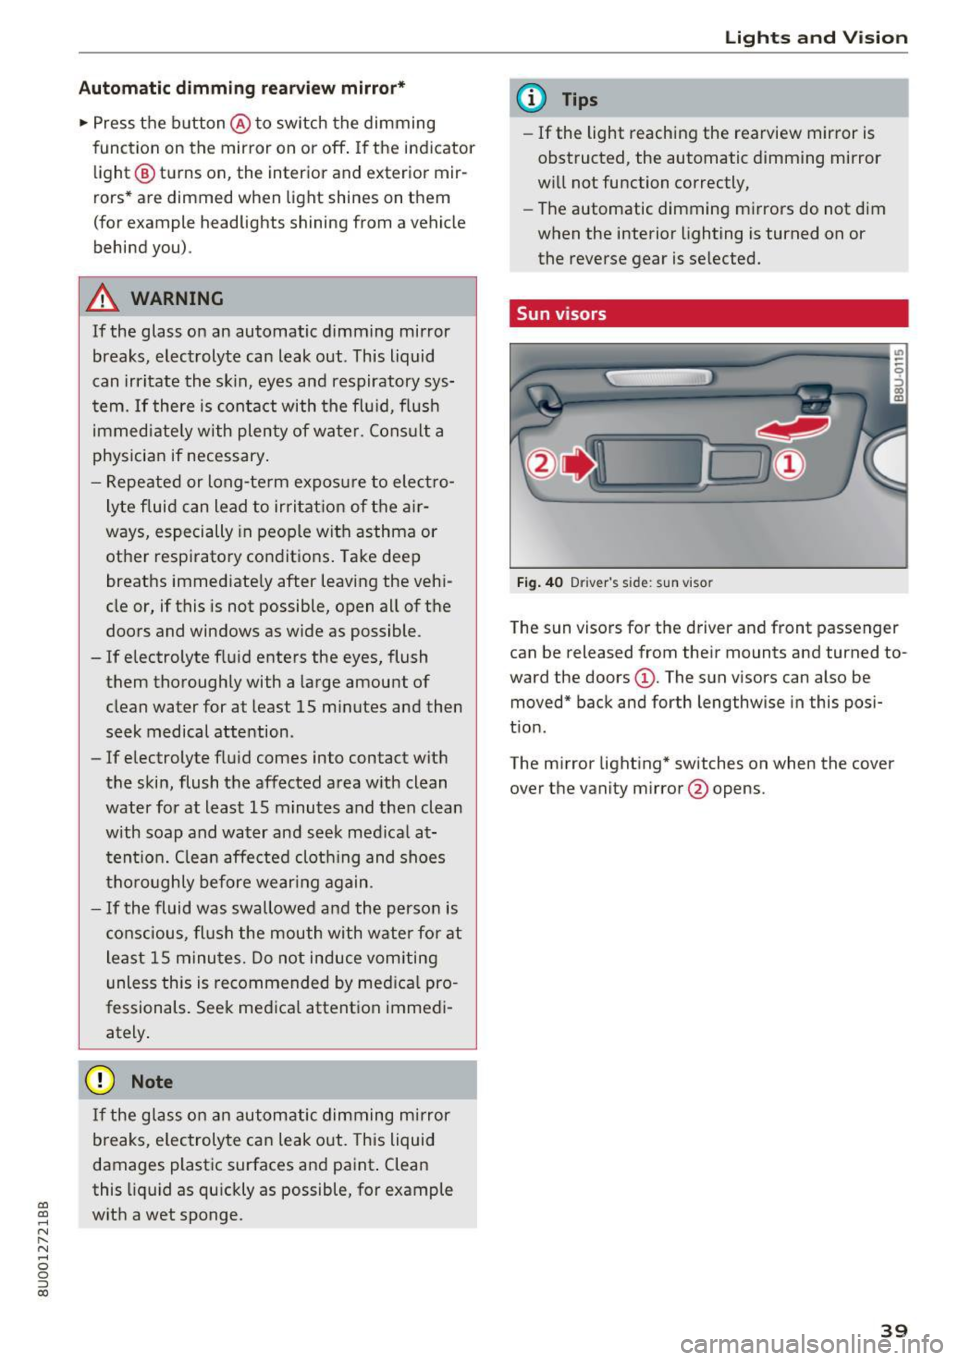
Fig. 40 Driver 's s ide: sun viso r
The sun visors for the driver and front passenger
can be released from their mounts and turned to
ward the doors
(D . The sun visors can also be
moved* back and forth lengthwise in this posi
tion.
The mirror lighting* switches on when the cover over the vanity mirror @opens.
39
Page 44 of 236
Lights and Vision
@ Tips
-You can also use the service position, for ex
ample, if you want to protect the windsh ield
from icing by using a cover.
- You cannot activate the service position
when the hood is open.
Replacing rear wiper blades
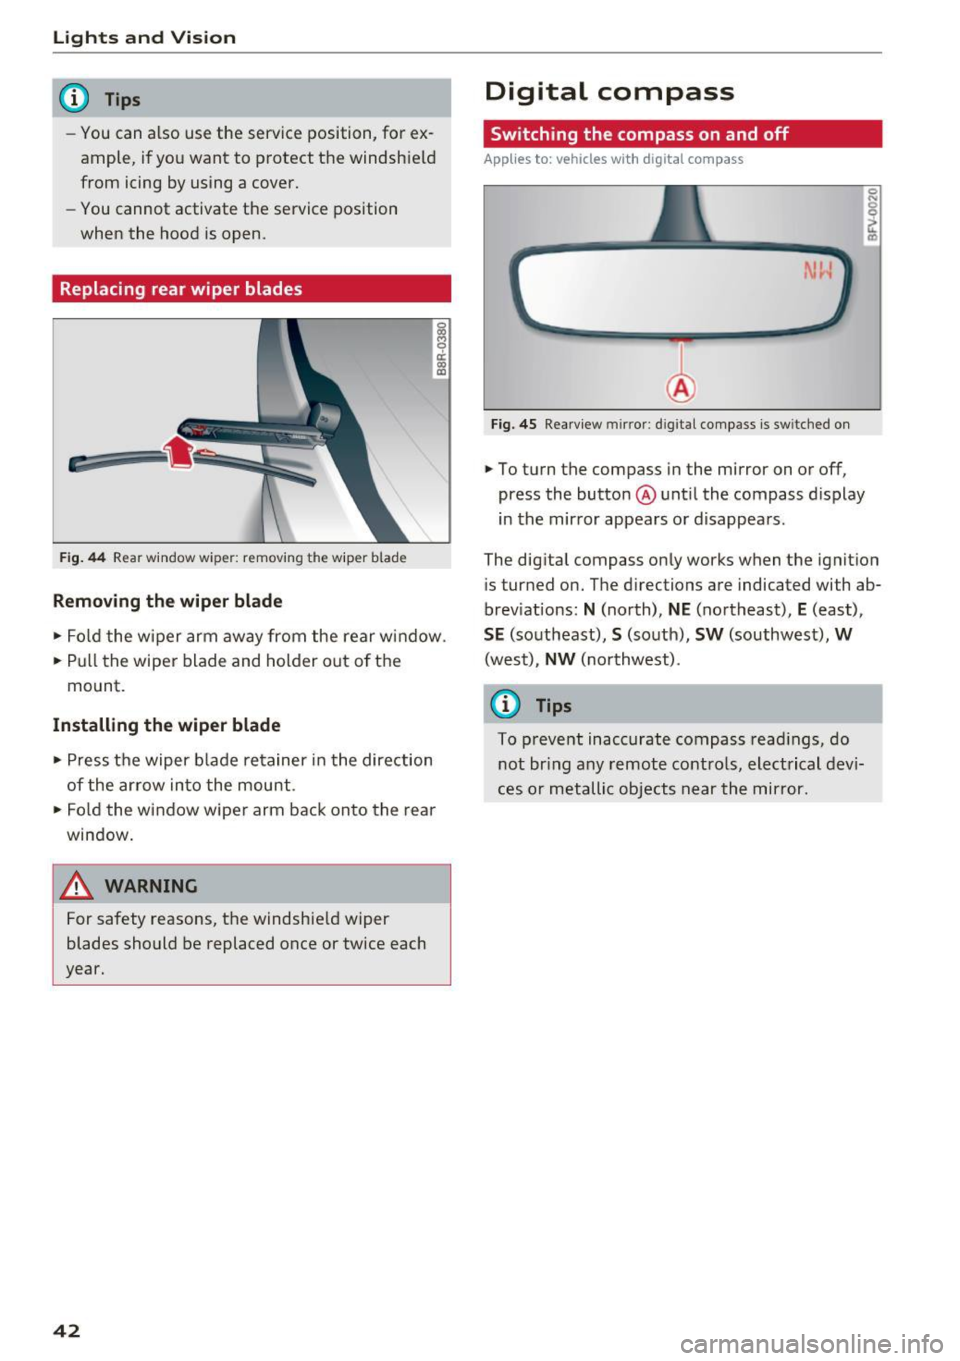
Fig . 44 Rear window wiper: removing the wiper blade
Removing th e wiper blade
16 M 0 ci: (X) a,
• Fo ld the w iper arm away from the rear window.
• Pull the wiper blade and holder out of the
mount.
Installing th e wiper blade
• Press the wiper b lade retainer in the direction
of the ar row into the mount.
• Fo ld the window wiper arm back onto the rear
window.
A WARNING
For safety reasons, the windshie ld wiper
blades should be replaced once or tw ice each
year.
42
Digital compass
Switching the compass on and off
App lies to: vehicles with digital compass
Fig. 45 Rearv iew m ir ror : d ig ita l compass is sw itched on
• To turn the compass in the mirror on or off,
press the butto n@ unt il the compass display
in the mir ror appears or d isappears.
0 N
I .,
The digital compass on ly works when the ignit ion
i s turned on. The directions are indicated with ab
brev iat ions:
N (north), NE (northeast), E (east),
S E (southeast), S (south), SW (southwest), W
(wes t), NW (no rthwest).
(D Tips
To preve nt inaccurate compass read ings, do
n ot br ing any remote cont ro ls, elect rical dev i
ces or metallic objects near the mirror.
Page 45 of 236
a:,
a:,
...... N r--. N
'"' 0 0 ::, a:,
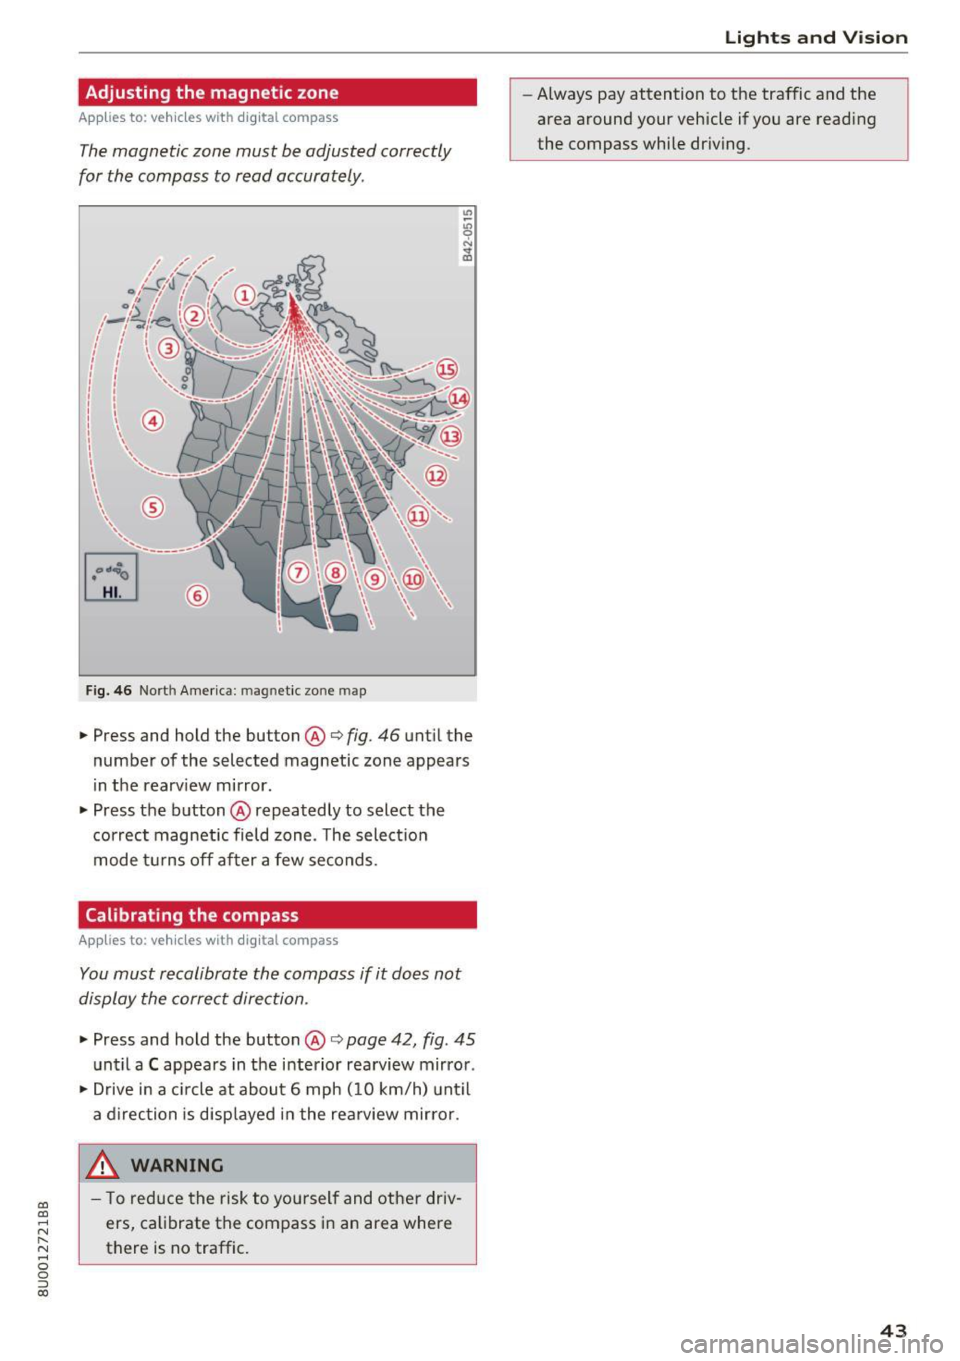
Adjusting the magnetic zone
Applies to: vehicles with digital compass
The magnetic zone must be adjusted correctly
for the compass to read accurately .
®
Fig. 46 Nort h Americ a: magn etic zone map
• Press and hold the button @i=> fig. 46 unt il the
number of the selected magnetic zone appears
in the rearv iew mirror.
• Press the button @repeatedly to select the
correct magnetic field zone . T he select io n
mode t urns off after a few seconds.
Calibrating the compass
Applies to: vehicles with digital compass
You must recalibrate the compass if it does not
display the correct direction .
• Press and hold the button @i=> page 42, fig . 45
unt il a C appears in the interior rearview mirror .
• Drive in a c ircle at about 6 mph ( 10 km/h) unt il
a d irection is disp layed in the rea rview mirror.
_& WARNING ,___
- T o reduce the risk to you rself and other driv
ers, calibrate the compass i n an area where
there is no traffic.
Lights and V ision
-Always pay attention to the traffic and the
area around your vehicle if you are read ing
the compass while dr iv ing .
43
Page 76 of 236
Trailer towing
Trailer towing
Driving with a trailer
General information
Your Audi was designed primarily for passenger
transportation.
If you plan to tow a trailer, please remember that
the additional load will affect durability, economy and performance.
Trailer towing not on ly places more stress on the
ve hicle, it also ca lls for more concentration from
the dr iver.
F or this reason, always follow the operating and
driving instructions provided and use common
sense.
Technical requirements
Trailer hitch
Use a weight-carrying hitch conforming to the
gross tra iler weight. The hitch must be suitab le
for your veh icle and tra iler and must be mounted
securely on the vehicle's chassis at a technically
sound
locat ion . Use on ly a trailer hitch with a re
movable ba ll mount . Always che ck with the t rail
er hitch man ufac tur er to make s ure t hat you are
using the co rrect hi tc h.
Do not use a bumper hitch.
The hitch must be installed in such a way that it
does not interfere with the impact -absorbing
bumper system. No mod ificat ions should be
made to the vehicle exhaust and b rake systems .
Fr om t ime to t ime, che ck that all hitch mo unti ng
bol ts rem ain securely f aste ned.
W hen you are not tow ing a tra iler, remove the
tra ile r hitc h ba ll mount . This prevents the hit ch
from caus ing damage s hou ld your veh icle be
s truck from be hind ¢
,&..
Trailer brakes
If you r trailer is equipped with a brak ing system,
check to be su re that it conforms to all regula
tions .
74
The t rai ler hydraulic bra ke system must not be
directly connected to the vehicle's hydraulic
bra ke system ¢&. .
Safety chains
Always use s afety chains be tween you r vehi cle
and t he tra ile r.
Trailer lights
Traile r lights must meet all regula tions . B e s ure
to check w ith your author ized Audi dealer for cor
r ec t wir ing, swi tches, an d relays.
Mirrors
If you are unable to see t he traffic behind you us
i ng t he regular outs ide mirrors, then yo u
must in
stall ex tended mirro rs . It is impo rtant that you
al ways have clear vision to the rear.
.&_ WARNING
- If a tra ile r has e lectr ical brake s ple ase no te
t h at these b ra kes are not activated by the
factory -fit ted contro l unit -risk of accident!
- After removing the traile r h itch, d o no t
s t o re it in your vehicle. In case of sud den
braking, the hitch co uld fly forwar d and in
jure you or yo ur passenge rs.
- Never install a "we igh t distribu tin g" or
"loa d eq ualizing" trailer hitch on your veh i
cle . The vehicle was not designed fo r these
kinds o f trailer hitches. The hitch attach
ment can fail, ca us ing the tra ile r to tear
loose from the vehicle .
- The Gross Vehicle Weight Rating for your
veh icle, found on the safety compliance la
be l on the driver's s ide B-pillar, must never
be exceeded under any circ umstances . Ex
ceed ing the Gross Vehicle We ight Rat ing of
your veh icle is likely to damage yo ur vehicle,
a nd such d amage will no t be covered by
your Limi ted New Vehicle W arra nty . Exceed
ing the Gross Ve hicl e We ight Rating will al
so change the pe rformance and han dling
characte ristics o f yo ur vehicle, which could
cause a crash result ing in se rious injury or
death.
Page 82 of 236
Assist
Audi side assist
Description
Applies to: vehicles w ith Aud i side ass ist
F ig. 81 Sensor detection range
Fig. 82 Display on the exterior mirror
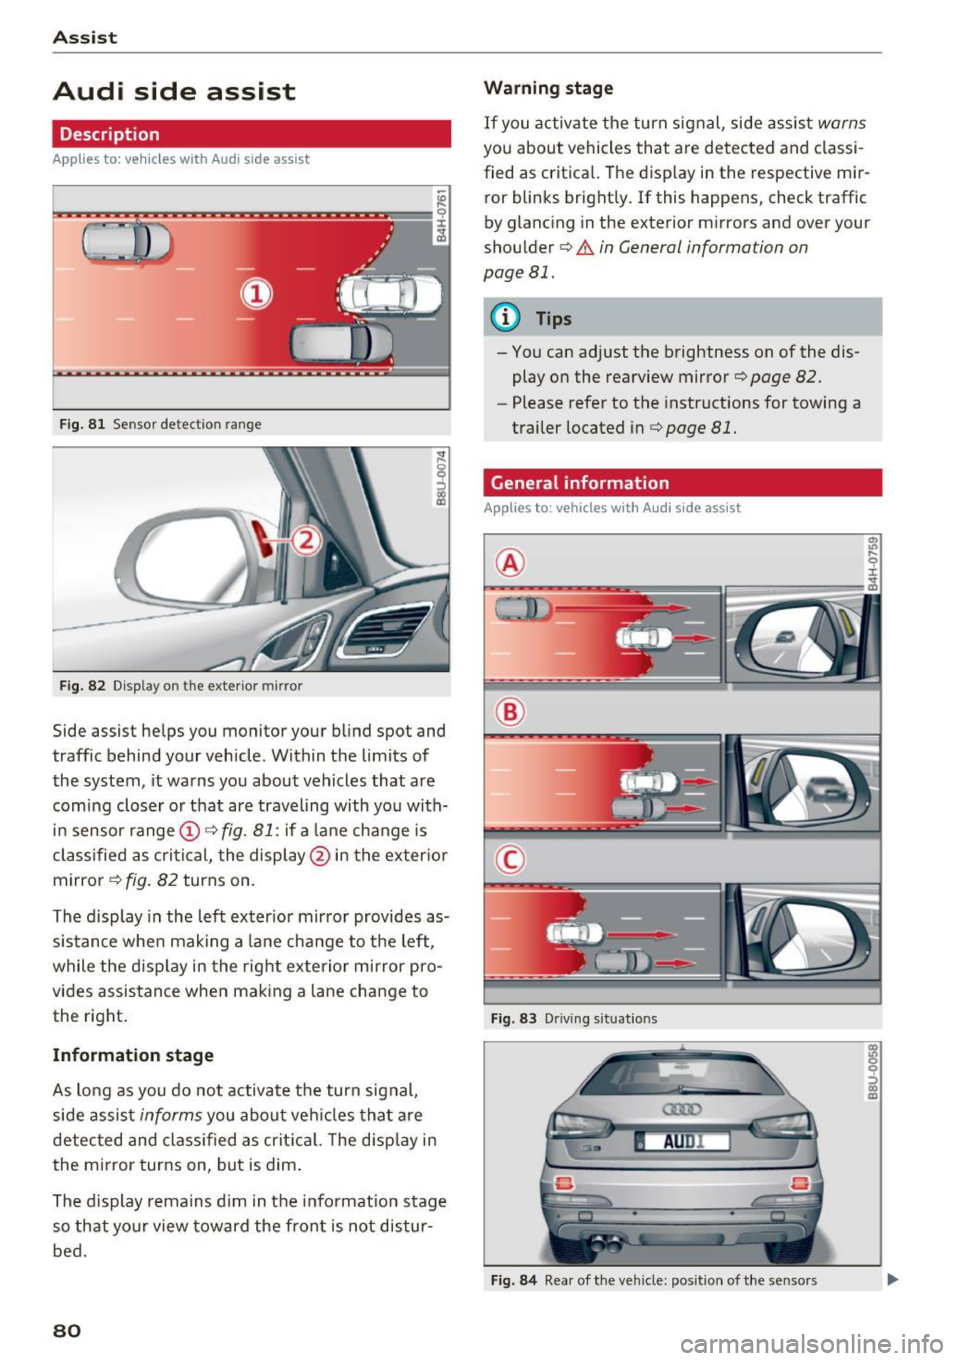
Side assist helps you monitor your blind spot and
traffic behind your vehicle. Within the limits of
the system, it warns you about vehicles that are
coming closer or that are traveling with you with
i n sensor range
(D ¢ fig. 81: if a lane change is
classified as critical, the display@in the exter io r
mirror
¢fig. 82 turns on.
The display in the left exter ior mirror provides as
sistance when mak ing a lane change to the left,
while the disp lay in the right exterior mirror pro
vides assistance when making a lane cha nge to
the right .
Information stage
As long as you do not activate the turn signal,
side assist
informs you abou t veh icles tha t are
detected and classified as critical. The disp lay in
the mi rror turns on, but is dim .
The display remains dim in the in formation stage
so that your view toward the front is not distur
bed.
80 Warning stage
If you
activate the turn signal, side assist warns
you about vehicles that are detected and classi
fied as critica l. The display in the respective mir
ror blinks brightly.
If this happens, check traffic
by g lancing in the exterior mirrors and over your
shou lder ¢.&
in General information on
page 81.
{!) Tips
- You can adjust the brightness on of the dis·
play on the rearview mirror¢
page 82.
- Please refer to the instructions for towing a
trailer located in ¢
page 81.
General information
Applies to : vehicles wi th A udi side ass ist
®
®
©
Fig. 83 Dr iving situa tions
Fig. 84 Rea r of the vehicle: pos it io n of the sensors
Page 83 of 236
00
00
......
"' ,....
"' ...... 0 0 :::,
00
Side assist functions at speeds above approxi
mately 19 mph (30 km/h).
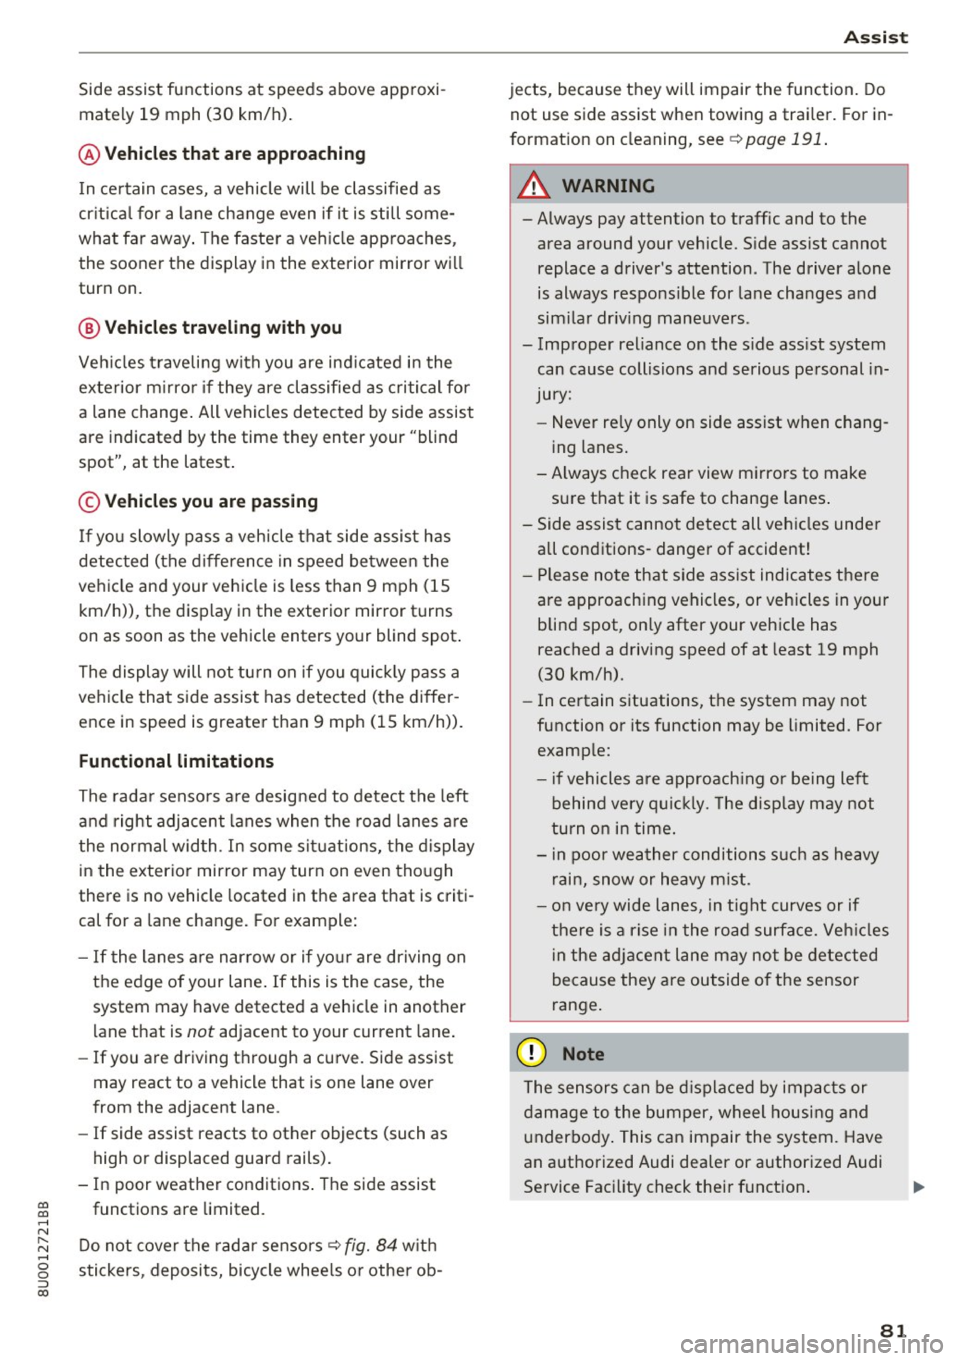
@ Vehicles that are approaching
In certain cases, a vehicle will be classified as
critical for a lane change even if it is still some
what far away. The faster a vehicle approaches,
the sooner the display in the exterior mirror will
turn on.
@ Vehicles traveling with you
Vehicles traveling with you are indicated in the
exterior mirror if they are classified as critical for
a lane change. All vehicles detected by side assist
are indicated by the time they enter your "blind
spot", at the latest.
© Vehicles you are passing
If
you slowly pass a vehicle that side assist has
detected (the difference in speed between the
vehicle and your vehicle is less than
9 mph (lS
km/h)), the display in the exterior mirror turns
on as soon as the vehicle enters your blind spot.
The
display will not turn on if you quickly pass a
vehicle that side assist has detected (the differ
ence in speed is greater than 9 mph (15 km/h)).
Functional limitations
The radar sensors are designed to detect the left
and right adjacent lanes when the road lanes are
the normal width . In some situations, the display
in the exterior mirror may turn on even though
there is no vehicle located in the area that is criti
cal for a lane change. For example:
-If the lanes are narrow or if your are driving on
the edge of your lane. If this is the case , the
system may have detected a vehicle in another
lane that is
not adjacent to your current lane.
-If you are driving through a curve. Side assist
may react to a vehicle that is one lane over
from the adjacent lane .
- If side assist reacts to other objects (such as
high or displaced guard rails).
- In poor weather conditions. The side assist
functions are limited.
Do not cover the radar sensors
c!:> fig. 84 with
stickers, deposits, bicycle wheels or other ob-
Assist
jects, because they will impair the function. Do
not use side assist when towing a trailer. For in
formation on cleaning, see
c!:>page 191.
A WARNING
-- Always pay attention to traffic and to the
area around your vehicle. Side assist cannot replace a driver's attention. The driver alone
is always responsible for lane changes and
similar driving maneuvers .
- Improper reliance on the side assist system can cause collisions and serious personal in
jury:
- Never rely only on side assist when chang
ing lanes.
- Always check rear view mirrors to make
sure that it is safe to change lanes.
- Side assist cannot detect all vehicles under
all conditions- danger of accident!
- Please note that side assist indicates there
are approaching vehicles, or vehicles in your
blind spot, only after your vehicle has
reached a driving speed of at least 19 mph
(30 km/h).
- In certain situations, the system may not
function or its function may be limited. For
example:
- if vehicles are approaching or being left
behind very quickly. The display may not
turn on in time.
- in poor weather conditions such as heavy
rain, snow or heavy mist.
- on very wide lanes, in tight curves or if
there is a rise in the road surface. Vehicles
in the adjacent lane may not be detected
because they are outside of the sensor
range.
(I) Note
The sensors can be displaced by impacts or
damage to the bumper, wheel housing and
underbody. This can impair the system. Have
an authorized Audi dealer or authorized Audi
Service Facility check their function.
-
81
Page 84 of 236
Ass is t
@ Tips
- If the window g lass in the driver's door or
front passenger's door has been tinted, the
display in the exterior mirror may be incor rect.
- For an explanation on conformity with the FCC regulations in the United States and the
Industry Canada regu lations, see
¢ page 221.
Switching on and off
A pp lies to: ve hicles w ith Aud i side ass ist
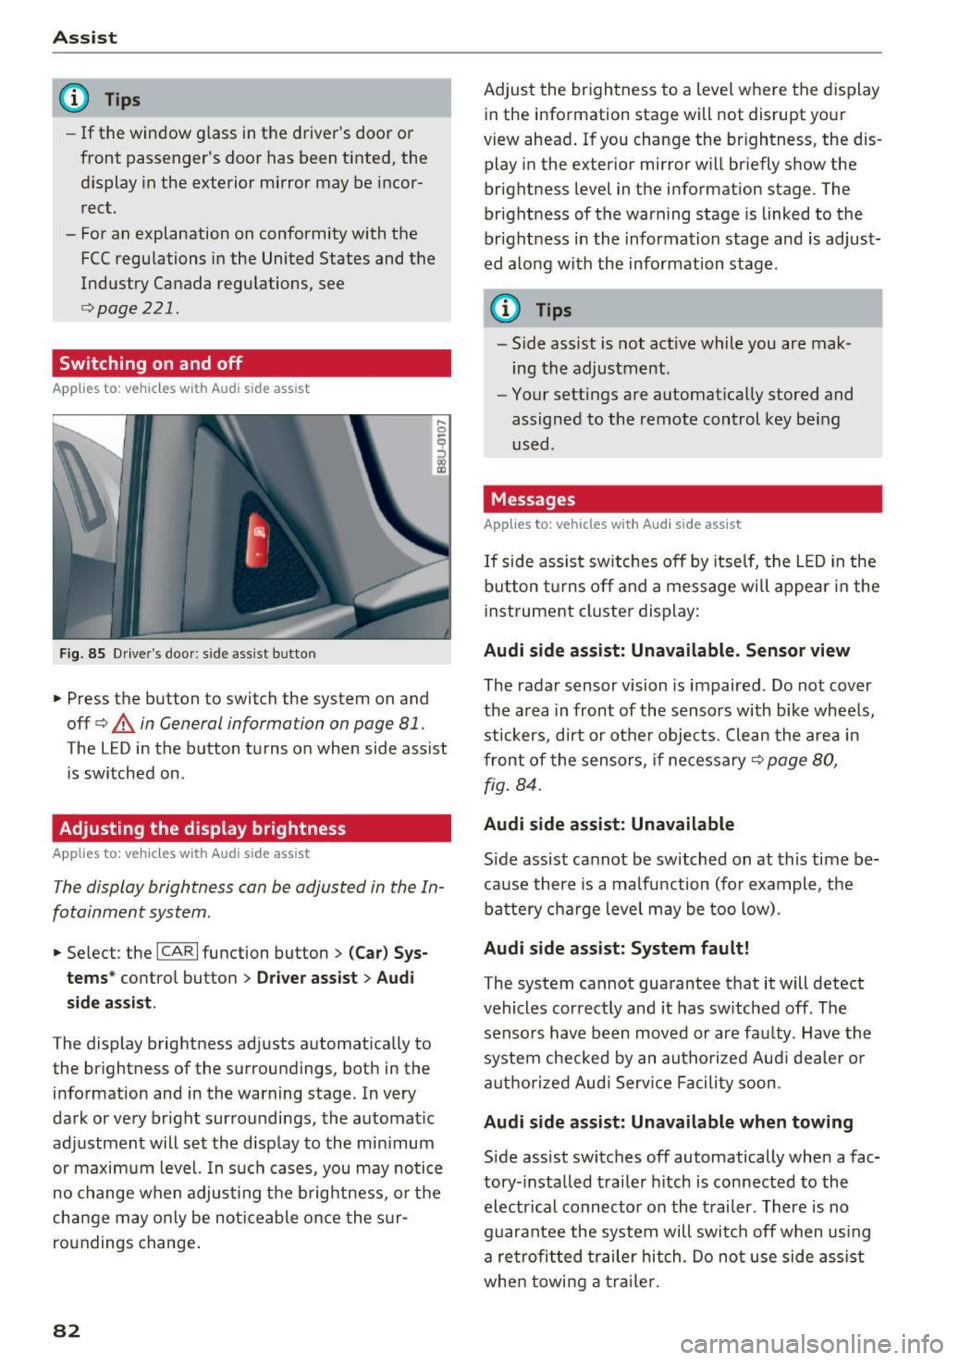
F ig. 85 Drive r's door : side assist b utto n
.... 0
I
.. Press the button to switch the system on and
off ¢
A in General information on page 81 .
The LED in the button turns on when side assist
is sw itched on .
Adjusting the display brightness
Applies to: ve hicles w ith Aud i side ass ist
The display brightness can be adjusted in the In
fotainment system .
.. Se lect : the ICARI function button> (Ca r) Sys
t e m s*
control button > Dr ive r assi st> Audi
sid e assi st.
The display brightness adjusts automatically to
the brightness of the surroundings, both in the
information and in the warning stage . In very
dark or very bright surroundings, the automat ic
adjustment will set the disp lay to the min imum
or maximum level. In such cases, you may notice
no change when adjust ing the b rightness, o r the
cha nge may only be no ticeable once the s ur
roundings change .
82
Adjust the brightness to a level where the display
in the information stage will not disrupt your
view ahead . If you change the br ightness, the dis
play in the exterior mirror w ill br iefly show the
brightness level in the information stage . The
brightness of the warning stage is linked to the
br ight ness in the information stage and is adjust
ed along with the information stage .
(D Tips
-Side ass ist is not act ive while you are mak
ing the adjustment .
- Your settings are automat ically stored and
assigned to the remote control key be ing
used .
Messages
Applies to : vehicles wi th Audi side ass ist
If side assist sw itches off by itse lf, the L ED in the
b utton t urns off and a message will appea r in the
i nstrument cluster display:
Audi s ide assi st: Unavailable. S ensor view
The radar sensor vision is impaired . Do not cover
the area in front of the sensors with bike whee ls,
stickers, dirt or other objects. Clean the a rea in
front of the sensors, if necessary¢
page 80,
fig . 84.
Audi side assist: Unavailable
Side assist cannot be switched on at this time be
ca use there is a ma lfunction (for example, the
battery c ha rge level may be too low).
Audi side assist: System f ault!
The system cannot guarantee that it will detect
vehicles correctly and it has sw itched off . The
sensors have been moved or are faulty . Have the
system checked by an autho rized Aud i dealer o r
aut ho rized Aud i Serv ice Facility soon.
Audi s ide assist: Unavailable when towing
Side assist switches off automatically when a fac
tory- installed trailer h itch is connected to the
electr ical connec tor on the t railer . There is no
guarantee the system will switc h off when using
a ret rofi tted trailer hitch . Do not use side assist
whe n towi ng a traile r.
Page 90 of 236
Parking systems
-If the position and the installation angle of
the rearview camera was changed, for ex
ample after a collision, do not continue to
use the system for safety reasons . Have it
checked by an authorized Audi dealer or au
thorized Audi Service Facility.
- Only use the rearview camera to assist you if
it shows a good, clear picture. For example,
the image may be affected by the sun shin
ing into the lens, dirt on the lens, or if there
is a malfunction.
- Use the rearview camera only if the luggage
compartment lid is completely closed. Make
sure any objects you may have mounted on
the luggag e compartment lid do not block
the rearview camera.
- The camera lens enlarges and distorts the
field of vision. The object appears both al
tered and inaccurate on the screen.
- In certain situations, people or objects in the display appear closer or farther away:
- For objects that do not touch the ground,
such as the bumper of a parked vehicle, a
trailer hitch or the rear of a truck . Do not
use the orientation lines in this case.
- If driven from a level surface onto an in
cline, or a downward slope.
- If driven toward protruding objects .
- If the vehicle is carrying too much load in
the rear .
Q) Note
-Always read and follow the applicable warn
ings
¢ (I) in General information on
page 85.
- The orange-colored orientation lines in the
Infotainment display show the vehicle path
based on the steering wheel angle . The
front of the vehicle swings out more than
the rear of the vehicle. Maintain plenty of
distance so that an exterior mirror or a cor
ner of the vehicle does not collide with any
obstacles.
88
· Sw itching on /off
Applies to: vehicles with parking system plus with rearview
camera
Switching on
.. Shift into reverse, or
.. Press the
PwA button in the center console
¢ page 86, fig. 89. A short confirmation tone
sounds and the LED in the button turns on .
Switching between the rearview camera and
optical display
.. Press the Car graphic control button ®
c:> page 89, fig. 95 to see the optical display .
.,. Press the
Rearview control button to see the
rearview camera image.
Switching off
.. Drive faster than 6 mph (10 km/h), or
.,. Press the
PwA button, or
.. Switch the ignition off.
(D Tips
The visual display in the left part of the dis
play should help you detect the critical vehicle
areas .