start stop button AUDI Q3 2017 Owner´s Manual
[x] Cancel search | Manufacturer: AUDI, Model Year: 2017, Model line: Q3, Model: AUDI Q3 2017Pages: 236, PDF Size: 58.93 MB
Page 15 of 236
00
00
.....,
"' ,....
"' .....,
0 0 :::,
00
To release the parking brake, press the brake
pedal and press the~ button at the same time
or start driving with hill start assist
¢ page 66,
S tar ting from a s top.
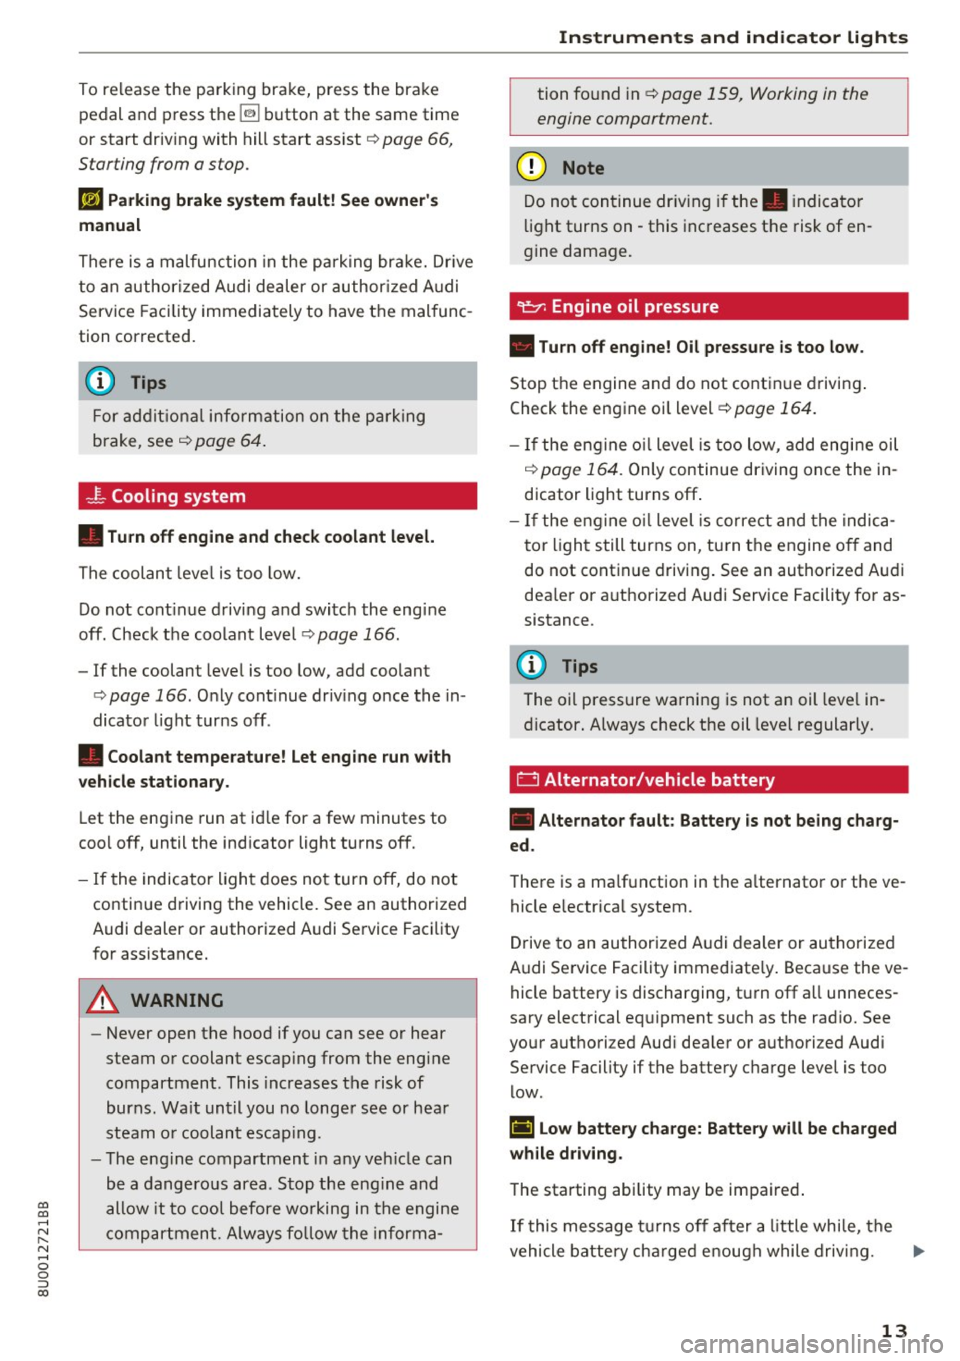
rlJ Parking brake system fault! See owner's
manual
There is a malfunction in the parking brake. Drive
to an authorized Audi dealer or authorized Audi
Service Facility immediately to have the malfunc
tion corrected.
@ Tips
For additional information on the parking
brake, see
¢ page 64.
- ~- Cooling system
• Turn off engine and check coolant level.
The coolant level is too low.
Do not continue driving and switch the engine
off. Check the coolant level¢
page 166.
-If the coolan t level is too low, add coolant
¢page 166. Only continue driving once the in
dicator light turns off.
• Coolant temperature! Let engine run with
vehicle stationary.
Let the engine run at idle for a few minutes to
cool off, until the indicator light turns off.
- If the indicator light does not turn off, do not
continue driving the vehicle. See an authorized
Audi dealer or authorized Audi Service Facility
for assistance.
.&_ WARNING
- Never open the hood if you can see or hear
steam or coolant escaping from the engine compartment . This increases the risk of
burns. Wait until you no longer see or hear
steam or coolant escaping .
- The engine compartment in any vehicle can
be a dangerous area. Stop the engine and
allow it to cool before working in the engine
compartment. Always follow the informa-
-
Instruments and indicator lights
tion found in ¢ page 159, Working in the
engine compartment.
@ Note
Do not continue driving if the . indicator
light turns on -this increases the risk of en
gine damage.
Stop the engine and do not continue driving.
Check the engine oil level
¢ page 164.
- If the engine oil level is too low, add engine oil
c:!;> page 164. Only continue driving once the in
dicator light turns off.
- If the engine oil level is correct and the indica
tor light still turns on, turn the engine off and
do not continue driving. See an authorized Audi
dealer or authorized Audi Service Facility for as
sistance.
(D Tips
The oil pressure warning is not an oil level in
dicator. Always check the oil level regularly .
0 Alternator/vehicle battery
• Alternator fault: Battery is not being charg
ed.
There is a malfunction in the alternator or the ve
hicle electrical system .
Drive to an authorized Audi dealer or authorized
Audi Service Facility immediately. Because the ve
hicle battery is discharging, turn off all unneces
sary electrical equipment such as the radio. See
your authori zed Audi dealer or authori zed Audi
Service Facility if the battery charge level is too
low .
r•j low battery charge: Battery will be charged
while driving.
The starting ability may be impaired.
If this message turns off after a little while, the
vehicle battery charged enough while driving. ..,_
13
Page 26 of 236
Opening and clo sin g
Key set
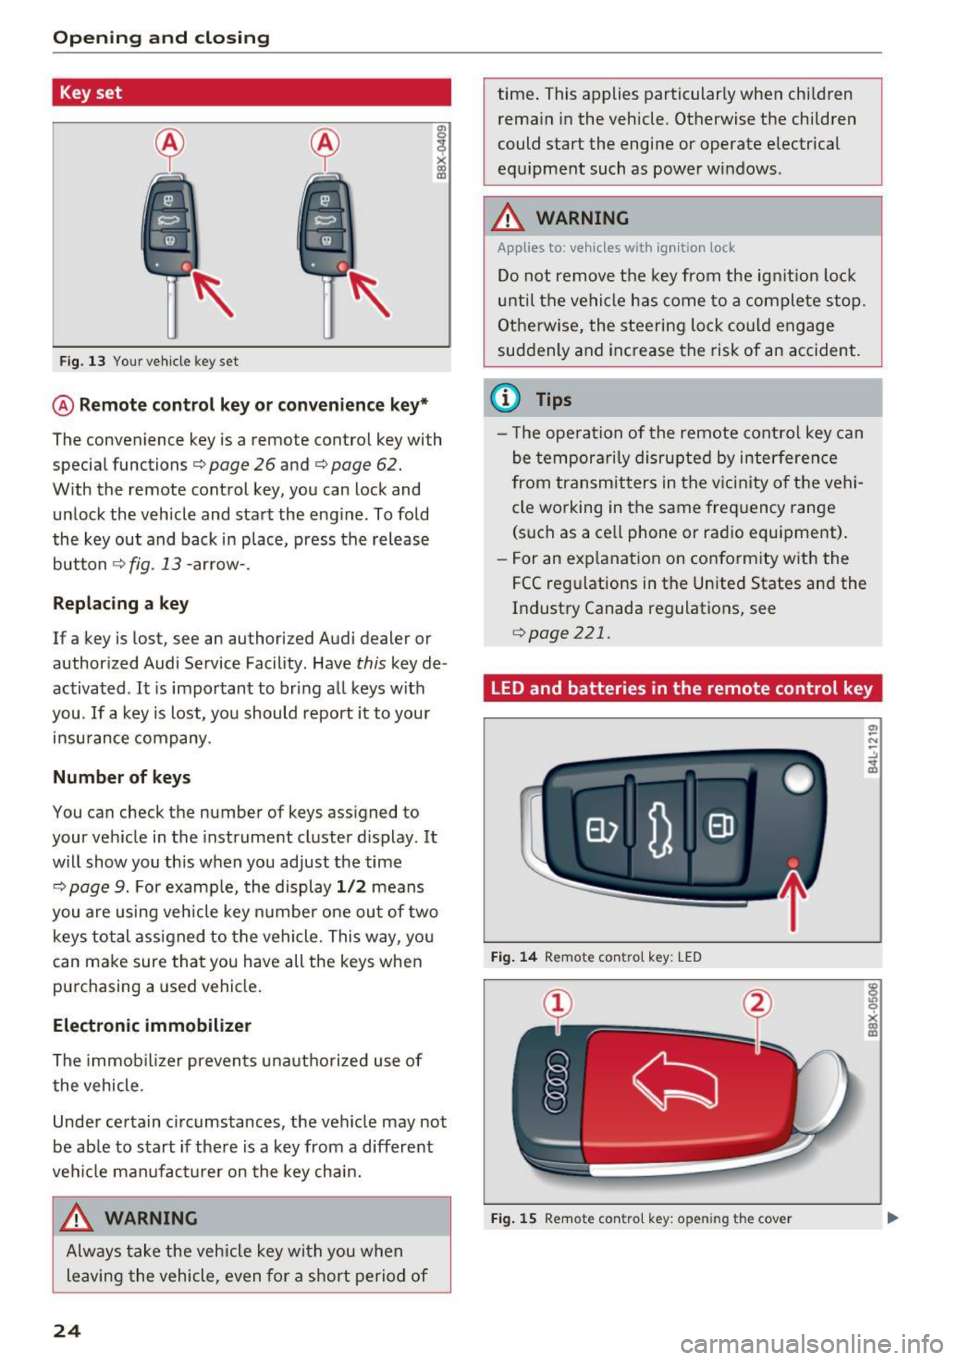
Fig. 13 Your veh icle key set
I X CX) cc
@ Remote control key o r con venience k ey*
The convenience key is a remote control key with
special functions
c> page 26 and c> page 62.
W ith the remote control key, you can lock and
unlock the vehicle and start the engine . To fold
the key out and back in place, press the release button
c> fig. 13 -arrow-.
Repla cing a ke y
If a key is lost, see an authorized Audi dealer or
authorized Audi Service Facility . Have
this key de
activated .
It is important to bring a ll keys with
you .
If a key is lost, you should report it to your
insu rance company.
Numb er of k ey s
You can check the number of keys ass igned to
your veh icle in the instrument cluster d isplay . It
will show you this when you adjust the time
c> page 9. For examp le, the display 1/2 means
you are using vehicle key numbe r one out of two
keys total assigned to the vehicle. This way, you
can make sure that you have all the keys when
purchasing a used vehicle.
Electronic immobilizer
The immob il izer prevents una uthorized use of
the vehicle .
Under certain c ircumstances, the veh icle may not
be ab le to start if there is a key from a different
veh icle man ufact urer on the key cha in.
A WARNING
Always take the vehicle key with you when
leaving the vehicle, even for a short period of
24
time . This applies particularly when children
rema in in the vehicle. Otherwise the children
could start the engine or operate electrical
equipment such as power windows .
A WARNING
Applies to: vehicles with ignition lock
Do not remove the key from the ign it ion lock
until the vehicle has come to a complete stop.
Otherw ise, the steering lo ck could engage
suddenly and increase the risk of an accident.
@ Tips
- T he opera tion of the remote cont rol key can
be temporarily disrupted by interference
from transmitters in the v ic inity of the vehi
cle working in the same frequency range
(such as a ce ll phone or radio equipment).
- For an exp lanation on conformity with the
FCC regulations in the Un ited States and the
Industry Canada regulat ions, see
c> page 221.
LED and batteries in the remote control key
Fig . 14 Remot e con tro l key: LED
Fig . 15 Remote con tro l key : o pen in g th e cov er
Page 64 of 236
Driving
exposed to very high or very low tempera
tures.
CD Note
If the engine has been under heavy load for
an extended period of time, heat builds up in
the engine compa rtment after the engine is
sw itched off and there is a risk of damaging
the engine. For this reason, let the engine run
at idle for approximately two minutes before
shutt ing it off .
Starting and stopping
the engine (vehicles with
a convenience key)
Starting the engine
Applies to: vehicles with convenience key
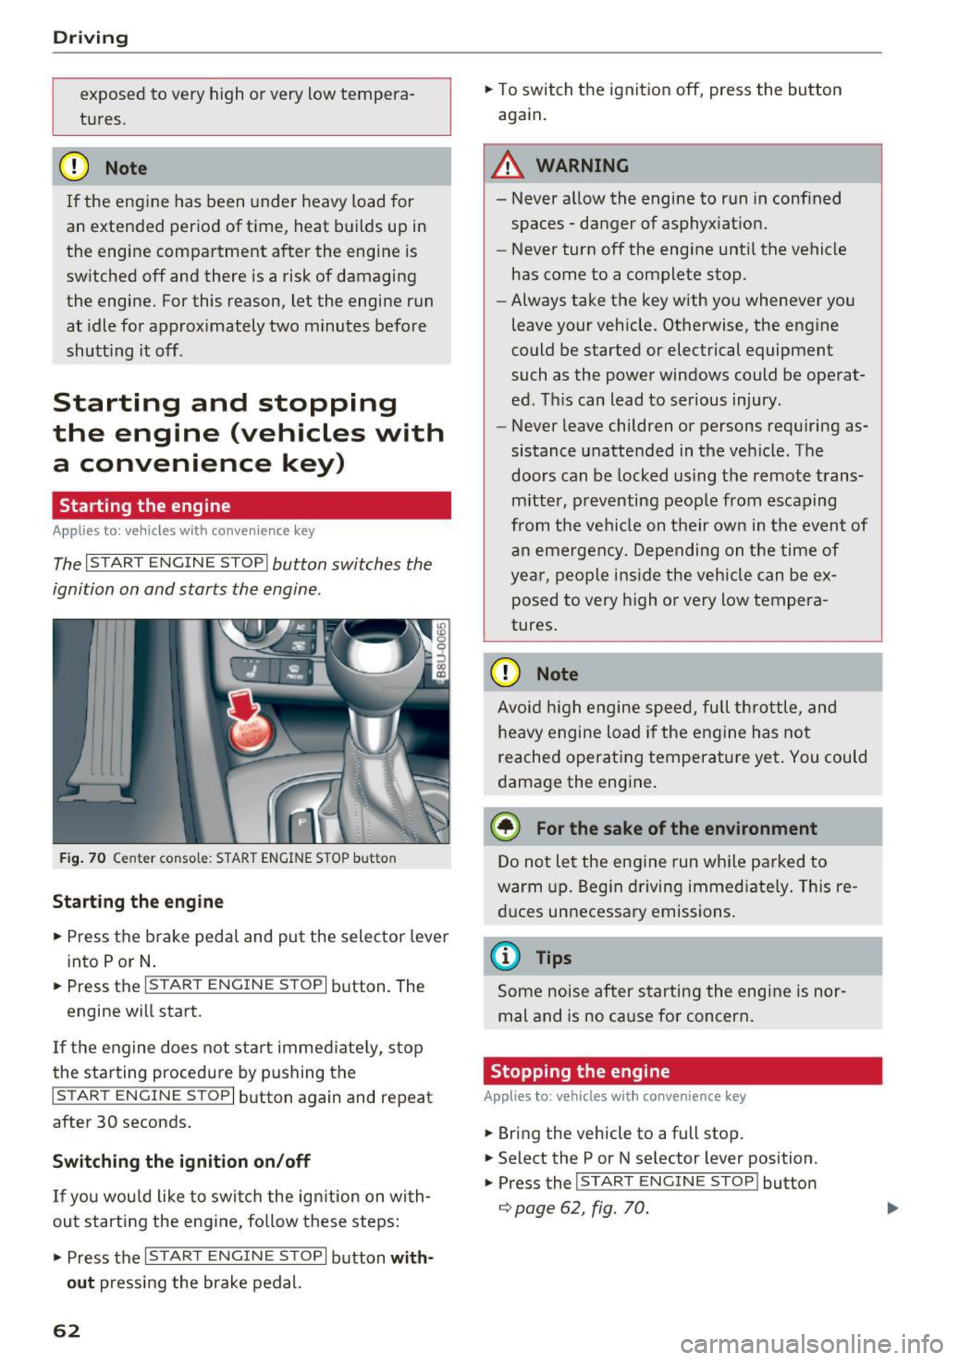
The I START E N GINE STOP I button switches the
ignition on and starts the engine .
Fig. 70 Center conso le : STAR T ENGINE S TOP b utt o n
Starting the engine
.,. Press t he b rake pedal and pu t the sele ctor leve r
into P or N .
.,. Press the
I S TART ENGINE STOPI button . The
engine wi ll start .
If the engine does not sta rt immed iate ly, stop
the starting procedure by pushing the
I START ENGINE STOP I button again and repeat
after 30 seconds.
Switch ing the ignition on/off
If you wou ld like to swi tch the ig nition on wi th
out starting the e ngine, fo llow these steps:
.,. Press the
I S TAR T ENGIN E STOPI button with
out
press ing the brake pedal.
62
.,. To switch the ignition off, press the button
again.
A WARNING
- Never a llow the engine to run in conf ined
spaces -danger of asphyx iat ion.
- Never turn off the engine until the vehicle
has come to a complete stop.
- Always take the key with you whenever yo u
leave your vehicle . Otherwise, the engine
could be started or electrical equipment
such as the powe r windows could be operat
ed. This can lead to serious injury .
- Never leave children o r persons requ iring as
sistance unattended in the ve hicle. The
doors can be locked us ing t he remote trans
m itter, p reventing peop le from escaping
from the vehi cle on their own in the even t of
an emergen cy. Depending on t he time of
year, peo ple ins ide the veh icle can be ex
posed to very high o r very low tempera
tures .
CD Note
Avoid high engi ne spee d, full t hrott le, and
h eavy engine load if the e ngine has not
reached operat ing temperatu re ye t. You could
d amage the eng ine.
@ For the sake of the environment
D o not le t the eng ine run wh ile parked to
warm up. Beg in driving immed iate ly . Th is re
d uces un necessa ry emissions .
@ Tips
Some noise after s tarting the eng ine is nor
mal and is no ca use for concern .
Stopping the engine
Applies to: vehicles with convenience key
.,. Bring the vehicle to a full stop .
.,. Select the P or N se lector lever position .
.,. Press the
I START E NGINE STOP I button
¢ page 62, fig. 70.
-
Page 65 of 236
a:,
a:,
...... N r--. N .-< 0 0 ::, a:,
Engaging the steering lock1
)
The steering locks when you tu rn the engine off
using the
! S TART ENGINE ST OP I butto n and
open the driver's door. The locked stee ring he lps
p revent vehicle theft .
Emergency off function *
If it is absolutely necessary, the engine can also
be turned off while driv ing at speeds starting at
4 mph (7 km/h). To switch the engine off, p ress
the
! STA RT ENGINE ST OP I button twice in a row
bri efly or press and hold for long er than two sec
onds.
A WARNING
- Never turn off the engine before the veh icle
has come to a complete stop. The f ull func
ti on of the brake booster and the power
steering is not gua ranteed. You must use
more fo rce to turn or b rake if necessary. Be
c a use you canno t steer and brake as you
usually wou ld, this could lead to c rashes
and serious injuries .
- For safety reasons, you should always par k
yo ur vehicle wi th the selector lever in P .
Otherwise, the vehicle could inadvertently
roll away .
- The radiator fan can continue to run for up
to 10 min utes even afte r you have turned
off the engine and removed the ignition key.
The radiator fan can also tu rn on again if the
engine coolant heats up because of intense
sunlight or heat bui ld -up in the engine com
partment.
- Always take the key with you whenever you
leave your vehicle. Otherw ise, the engine
cou ld be sta rted or electrical equ ipme nt
such as the power w indows cou ld be opera t
ed . T his can lead to se rious inj ury.
(D Note
If the eng ine has been under heavy load for
an extended per iod of t ime, heat builds up in
the engine compa rtme nt after the eng ine is
sw itched off and there is a risk of dam aging
ll Th is fun ctio n is not a vail able in al l countries .
Drivi ng
the engine. For th is reason, let the engine run
at idle for approximate ly two minutes before
shutting it off .
Starting the engine when there is a
malfunction
Applies to: vehicles with convenience key
Other circumstan ce s can cause the engine no t to
s tar t, such as the battery in the remote control
key has drained , there is interference with the
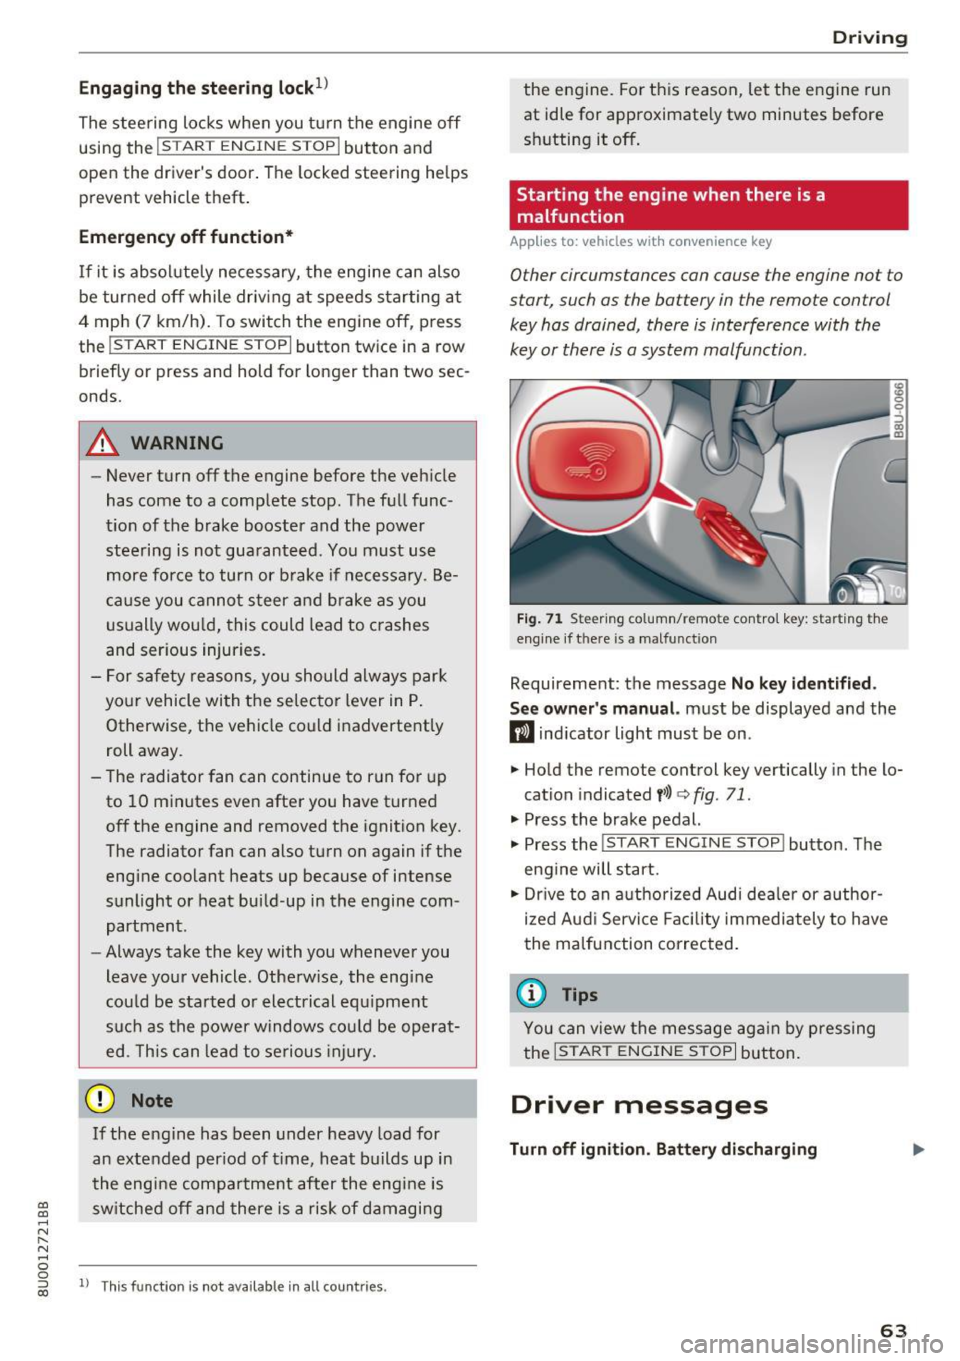
key or there is a system malfunction.
F ig . 7 1 Steer ing co lumn/remo te con trol k ey: star ting the
eng ine if t here is a ma lfun ction
Requirement: the message No key id entified .
S ee owner's manual.
must be displayed and the
m ind icator light must be on .
.,. Hold the remote control key vertically in the lo
cation indicated
y> l) q fig. 71 .
.,. Press the brake pedal.
... Press the
!START E NGINE STOP ! button. The
eng ine will start.
.,. Dr ive to an a uthorized Audi dea ler or a uthor
ized Aud i Servi ce Fa cili ty immediately to have
the malfunct ion correc ted.
(D Tips
You can view the message ag ai n by pressing
the
I START ENGI NE STOP I bu tton.
Driver messages
Turn off ignition . Battery discharging
63
Page 71 of 236
00
or in the 5 sport mode. The instrument cluster
display shows the selected driving mode.
In the
normal mode D, the transmission auto
matically selects the suitable gear ratio.
It de
pends on engine load, vehicle speed and driving
style.
Select the
sport mode 5 for sporty driving. The
vehicle makes full use of the engine's power.
Shifting may become noticeable when accelerat
ing.
To move from selector lever position N to D, you
must press the brake pedal and the vehicle must
be traveling less than 1 mph (2 km/h) or be sta
tionary ¢&. .
A WARNING
Read and follow all WARNINGS¢&. in Driv
ing tips on page
70.
@ Note
Coasting downhill with the transmission in N
and the engine not running will result in dam
age to the automatic transmission and possi
bly the catalytic converter.
(D Tips
- If you accidentally select N while driving,
take your foot off the accelerator pedal and
wait for the engine to slow down to idle be
fore selecting Dor 5.
- If there is a power failure, the selector lever
will not move out of the P position. The
emergency release can be used if this hap
pens ¢
page 72.
Driving tips
Starting the engine
.. The selector lever must be in the P or the N po
sition.
Starting from a stop
.. Press and hold the brake pedal.
~ .. Press and hold the interlock button in these-
"' ~ lector lever handle, select the desired selector .... 0 0
:::,
00
Driving
lever position such as D ¢ page 68 and release
the lock button.
.. Wait a moment until the transmission shifts.
You will notice a slight movement when the
gear engages.
.. Release the brake pedal and press the accelera
tor pedal ¢_& .
Stopping temporarily
.. Press the brake pedal to stop the vehicle, for
example at a traffic light. Do not press the ac
celerator pedal when doing this.
.. To prevent the vehicle from rolling when you
start driving, set the parking brake when stop
ping on steep inclines¢,& .
.. The parking brake will release automatically
and the vehicle will start moving once you press
the accelerator pedal.
Stopping/parking
If the selector lever is not in the P position when
you open the driver's door, the vehicle could roll.
In vehicles with a convenience key*, the message
Shift to P and turn off ignition, or vehicle can
roll away
appears.
.. Press and hold the brake pedal¢ _&.
.. Set the parking brake .
.. Select the P selector lever position.
Stopping on an incline
.. Always press the brake pedal to hold the vehi
cle in place and prevent it from "rolling back"
¢
&_ . Do not try to prevent the vehicle from
" rolling back" when a gear is engaged by in
creasing the engine speed
¢(D .
Starting on a hill
.. Set the parking brake .
.. Select the D position .
.. Press the accelerator pedal carefully. If your
safety belt is fastened, the parking brake is au
tomatically released and your vehicle begins to
move.
69
Page 92 of 236
Parking sy stems
behind you o r on the parking space line c:> A in
General information on page 87 ,
c:>(D in Gen
eral information on page 88 .
The blue area rep
resents an extension of the vehicle 's outline by
approximately 16
ft (5 meters) to the rear . The
long side of the b lue area shou ld be on the
curb . T he entire blue area mus t fit into the
parking space .
• With the veh icle stopped, turn the steer ing
whee l to the right as far as it w ill go.
• Back into the par king space until the b lue curve
c:> fig. 98 touches the curb c:> A in General in
formation on page 87,
c:> (D in General infor
mation on page 88.
Stop the vehicle.
• With the veh icle stopped, turn the steer ing
whee l to the left as far as it will go.
• Cont inue to back into the pa rking space unt il
the ve hicle is parked parallel to the curb
c:> A
in General information on page 87, c:> (D in
General information on page 88. @
marks the
re ar bumpe r. At the ve ry latest, stop the vehicle
whe n the re d or ientat ion line @ borders an ob
ject. Keep an eye on the front of your vehicle whi le doing this.
Parking next to obstacles
I f t here is an obstacle (such as a wall) next to the
p ar king sp ace, pos ition the vehicle so there is
mo re spa ce on that side . Position the long s ide of
the blue surface so that there is sufficient space
from the obstacle. The s urface m ust not be
touch ing. Yo u wi ll also need to start turn ing the
steer ing whee l earlier. The blue curve
c:> fig. 98
must not to uch the obstacle and should have suf
ficient room .
(};) Note
Keep enough distance from the curb to re
duce the risk of damage to the rims.
(D Tips
The left or right orientation lines and s urfaces
w ill be displayed, depending on the turn sig
nal being used.
90
Adjusting the display and the warning tones
App lies to: vehicles with parking system plus/rearv iew cam
era
T he display and warning tones can be adjusted in
the Infotainment.
• Select: the I CAR I fu nct ion button > (Car) Sys
tems*
cont rol b utton > Driver assi st > Par king
system .
Display
On* -an optical display is shown for the park ing
system p lus, a rearview camera image is shown
fo r par kin g system p lus with rea rview camera*.
Off -When t he p arking system is sw itche d off,
on ly aud ible signals are g iven.
Signal tones
Front volume -volume for the front area
Rear vo lume -volume for the rear area
Front frequency -frequency for the front area
Rear frequency -frequency for the rear a rea
In -car entertainment fader -when the parking
system is tu rned on, the volume of the a udio/vid
eo source is lowe red .
The newly selected level is demonstrated briefly
by the sound generator .
(D Tips
-The warn ing tones can also be adjusted di
rectly from the vis ual d isp lay or the rearview
camera image* . Simply p ress t he
Settings
co ntrol button .
- Changed settings are activated w hen the
park ing system is switched on again .
- The settings are automatically sto red and
assigned to the remote con trol key that is in
use .
Error messages
Applies to: vehicles with parking system plus/rearv iew cam
era
There is an error in the system if the LED in the
P wJ\. button is blinking and you hear a contin uous .,.
Page 233 of 236
Speed warning system . . . . . . . . . . . . . . . . . . 78
Stabilization control
refer to Electronic stabilization contro l . . . 92
START ENGINE STOP button . . . . . . . . . . . . . 62
Starting (engine) . . . . . . . . . . . . . . . . . . . 60, 62
Steering
Electromechanical steering .......... .
96, O
I ndicator light . . . . . . . . . . . . . . . . . . . .
14, 96
Lock ing (conven ience key) . . . . . . . . . . . . . . 63
Locking (ignition lock) . . . . . . . . . . . . . . . . . 61
also refer to Electromechanical steering 96
Steering wheel
Shift paddles (automatic transmission) . . .
71
Steps for determining correct load limit . . . 185
St . ( . )
opping engine . . . . . . . . . . . . . . . . . . . 61, 62
Storage compartments . . . . . . . . . . . . . . . . . 47
Subwoofer . .......................... 204
Sunroof
refer to Panorama roof . . . . . . . . . . . . . . . . 33
Sun shade
Emergency closing (panorama roof) . . . . . .
34
Sun visors . . . . . . . . . . . . . . . . . . . . . . . . . . . . 39
Symbo ls
refer to Indicator lights . . . . . . . . . . . . . . . . 10
T
Tachometer . . . . . . . . . . . . . . . . . . . . . . . . . . 8, 9
Tail lights
Cleaning . . . . . . . . . . . . . . . . . . . . . . . . . . .
192
Tail light (indicator light) . . . . . . . . . . . . . . . . 16
Technical data . . . . . . . . . . . . . . . . . . . . . . . . 215
Technical modifications . . . . . . . . . . . . . . . . 220
Temperature disp lay
Coolant . . . . . . . . . . . . . . . . . . . . . . . . . . . . . . 8
Outside temperature . . . . . . . . . . . . . . . . . . . 9
Tempo rary spare tire ............. .... .
Tether anchors . ............... .. .. .. .
Tether strap ... ................ ..... .
Tie-down r ings
Tie-downs
203
152
152
106
so
Time . .... ................... .... ..... 9
tiptron ic mode (automatic transmission) . . .
71
~ tiptronic (automatic transmission) . . . . . . . . 67 ......
"' ,....
"' ...... 0 0
:::,
00
Index
T ires........ ... .. .................. . 171
All wheel drive . . . . . . . . . . . . . . . . . . . . . . . 97
Low aspect ratio tires . . . . . . . . . . . . . . . . 187
Replacing . . . . . . . . . . . . . . . . . . . . . . . . . . 198
Service life 179
Tire pressure . . . . . . . . . . . . . . . . . . . . . . . 181
Tire pressure monitoring system . . . 188, 189
Tire pressure table . . . . . . . . . . . . . . . . . . . 182
Treadwear indicators ............... . .
u "d· . l ni 1rect1ona ...................... .
Uniform tire quality grading .......... .
Tires and wheels Glossary of tire and loading terminology .
T ires and vehicle load l imits .......... .
Tool
................................
179
173
187
173
183
197
Torn or frayed safety belts . . . . . . . . . . . . . . 111
Towing
Tow trucks
Towing loop
211
211,212
T PMS (tire pressure monitoring system) . . . 189
Trailer towing . . . . . . . . . . . . . . . . . . . . . . . . . 74
Information . . . . . . . . . . . . . . . . . . . . . . . . . 76
Operat ing instructions . . . . . . . . . . . . . . . . . 75
p k' ar mg system . . . . . . . . . . . . . . . . . . . . . . . 91
Techn ica l req uirements ............. 74, 75
Tongue load . . . . . . . . . . . . . . . . . . . . . . . . . 75
Tra iler turn signal assembly
Warning/indicator l ights . . . . . . . . . . . . . . .
17
Transmission malfunction (indicator light) . . 72
Transport Canada . . . . . . . . . . . . . . . . . . . . . 108
Turn signals . . . . . . . . . . . . . . . . . . . . . . . . . . 36
Indicator light . . . . . . . . . . . . . . . . . . . . . . . 17
u
Unfastening safety belts
Uniform tire quality grading
Un locking/locking 114
187
By
remote control . . . . . . . . . . . . . . . . . . . . 25
On the door lock . . . . . . . . . . . . . . . . . . . . . . 28
With the centra l locking switch . . . . . . . . . 27
With the convenience key . . . . . . . . . . . . . . 26
With the door lock . . . . . . . . . . . . . . . . . . . . 28
Use of jumper cables . .. . . . . . . . . . . . . . . . 210
V
Vanity mirror . . . . . . . . . . . . . . . . . . . . . . . . . . 39
231