turn signal AUDI Q3 2019 User Guide
[x] Cancel search | Manufacturer: AUDI, Model Year: 2019, Model line: Q3, Model: AUDI Q3 2019Pages: 280, PDF Size: 72.73 MB
Page 46 of 280
Lights and Vision
fog over due to the temperature difference
between the inside and outside. They will
clear shortly after switching them on. This
does not affect the service life of the light-
ing.
— When the parking lights are switched on
and the ignition is switched off, the 200: sym-
bol appears in the light switch module.
Turn signal and high beam lever
©
-
!
®
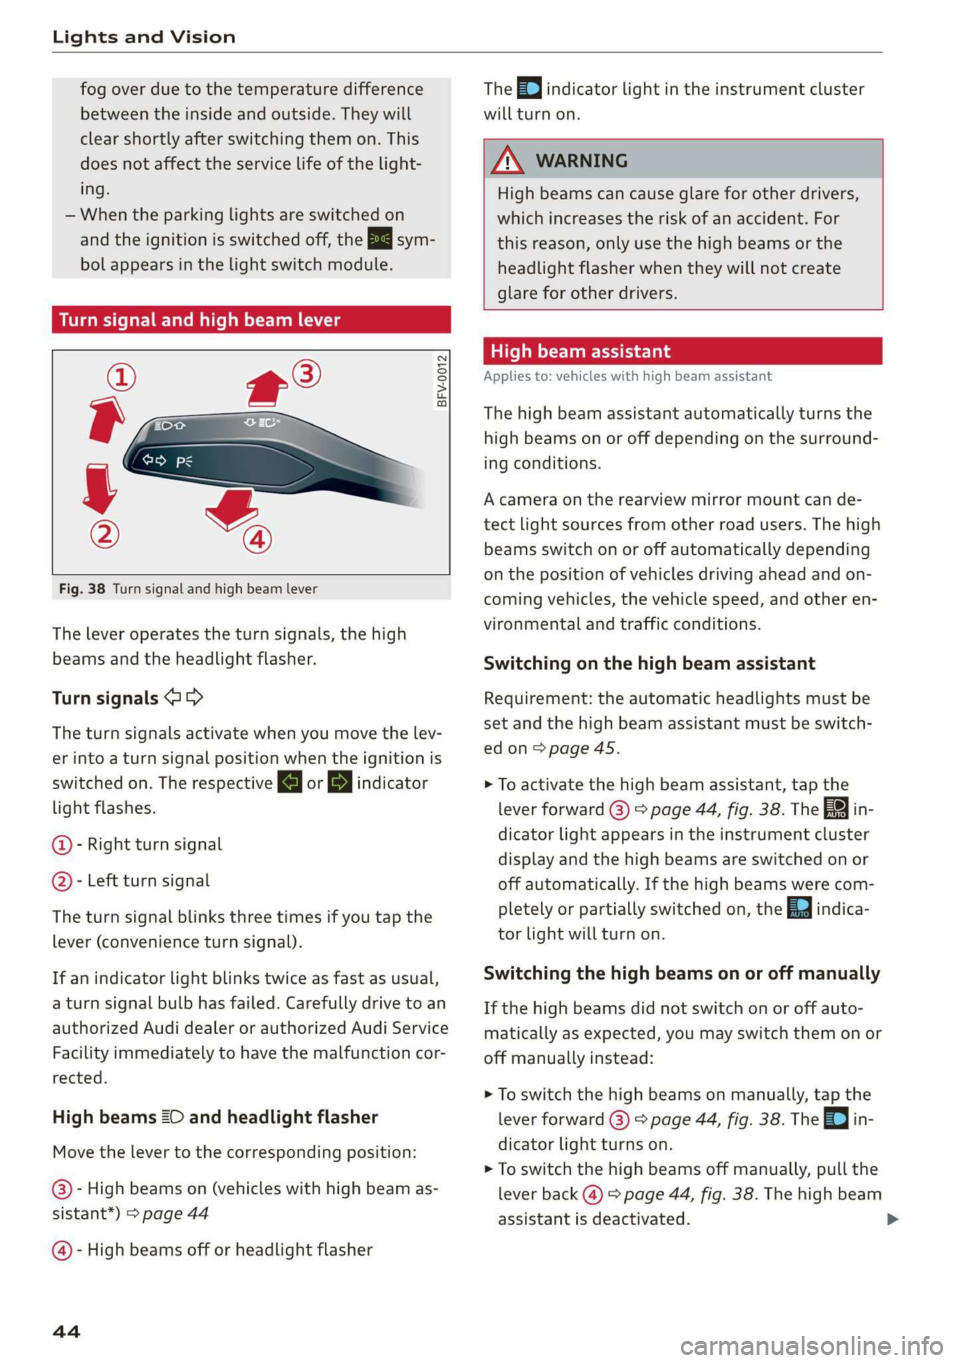
Fig. 38 Turn signal and high beam lever
The lever operates the turn signals, the high
beams and the headlight flasher.
Turn signals @ >
The turn signals activate when you move the lev-
er into a turn signal position when the ignition is
switched on. The respective a or B indicator
light flashes.
@- Right turn signal
@- Left turn signal
The turn signal blinks three times if you tap the
lever
(convenience turn signal).
If an indicator light blinks twice as fast as usual,
a turn signal bulb has failed. Carefully drive to an
authorized Audi dealer or authorized Audi Service
Facility immediately to have the malfunction cor-
rected.
High beams 2D and headlight flasher
Move the lever to the corresponding position:
@)- High beams on (vehicles with high beam as-
sistant*) > page 44
@ - High beams off or headlight flasher
44
The =0) indicator light in the instrument cluster
will turn on.
ZX WARNING
High beams can cause glare for other drivers,
which increases the risk of an accident. For
this reason, only use the high beams or the
headlight flasher when they will not create
glare for other drivers.
teh Meola
Applies to: vehicles with high beam assistant
The high beam assistant automatically turns the
high beams on or off depending on the surround-
ing conditions.
A camera on the rearview mirror mount can de-
tect light sources from other road users. The high
beams switch on or off automatically depending
on the position of vehicles driving ahead and on-
coming vehicles, the vehicle speed, and other en-
vironmental and traffic conditions.
Switching on the high beam assistant
Requirement: the automatic headlights must be
set and the high beam assistant must be switch-
edon>
page 45.
> To activate the high beam assistant, tap the
lever forward (@) > page 44, fig. 38. The 5%
dicator light appears in the instrument cluster
display and the high beams are switched on or
off automatically. If the high beams were com-
pletely or partially switched on, the Ea indica-
tor light will turn on.
in-
Switching the high beams on or off manually
If the high beams did not switch on or off auto-
matically as expected, you may switch them on or
off manually instead:
> To switch the high beams on manually, tap the
lever
forward (3) > page 44, fig. 38. The =| in-
dicator light turns on.
> To switch the high beams off manually, pull the
lever
back @) > page 44, fig. 38. The high beam
assistant is deactivated.
Page 47 of 280
83A012721BA
Lights and Vision
Operating the headlight flasher
> To operate the headlight flashers, pull the lever
back @) > page 44, fig. 38. If the high beam as-
sistant is activated, but the high beams were
not turned off, the high beam assistant remains
activated.
Z\ WARNING
— Follow the safety precautions and note the
limits of the assist systems, sensors, and
cameras = page 104.
— High beam assistant is only intended to as-
sist the driver. The driver is still responsible
for controlling the headlights and may need
to switch them on and off manually depend-
ing on light and visibility conditions.
— High beams can cause glare for other driv-
ers, which increases the risk of an accident.
For this reason, only use the high beams or
the headlight flasher when they will not cre-
ate glare for other drivers.
Adjusting the exterior lighting
You can adjust the exterior lighting separately.
The settings depend on the vehicle equipment.
> Applies to: MMI: Select on the home screen:
VEHICLE > Light & Visibility > Exterior light-
ing.
Automatic headlights
You can adjust the following settings in the Auto-
matic
headlights menu:
Activation time - You can adjust if the headlights
switch on Early, Medium, or Late based on the
sensitivity of the light sensor.
High beam assistant - You can switch the high
beam assistant on and off.
Entry/exit lighting
When it is dark, selecting Entry/exit lighting will
illuminate the area around the vehicle when un-
locking the vehicle and after switching off the ig-
nition and opening the driver's door. The entry/
exit lighting only works when it is dark and the
light switch is in the AUTO light function.
Daytime running lights
USA models: The daytime running lights can be
turned on and off.
Canada models: this function cannot be switched
off. They activate automatically each time the ig-
nition is switched on.
Emergency flashers
[RAZ.0469
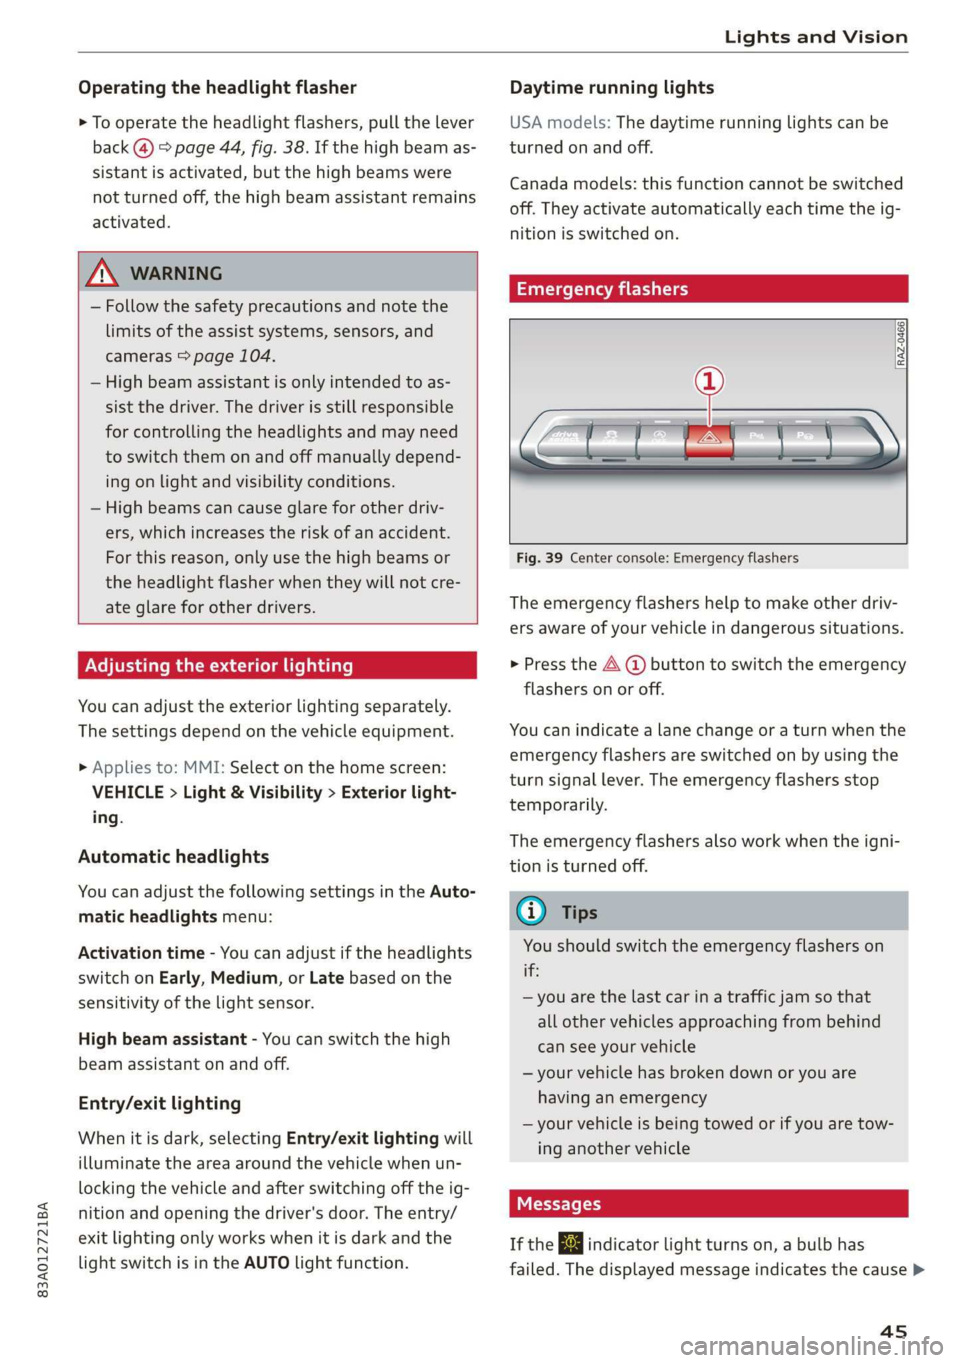
Fig. 39 Center console: Emergency flashers
The emergency flashers help to make other driv-
ers aware of your vehicle in dangerous situations.
» Press the A @ button to switch the emergency
flashers on or off.
You can indicate a lane change or a turn when the
emergency flashers are switched on by using the
turn signal lever. The emergency flashers stop
temporarily.
The emergency flashers also work when the igni-
tion is turned off.
@ Tips
You should switch the emergency flashers on
this
— you are the last car in a traffic jam so that
all other vehicles approaching from behind
can see your vehicle
— your vehicle has broken down or you are
having an emergency
— your vehicle is being towed or if you are tow-
ing another vehicle
If the 2} indicator light turns on, a bulb has
failed. The displayed message indicates the cause >
4s
Page 110 of 280
Driving information
Driving information
Speed warning system
Applies to: vehicles with speed warning system
The speed warning system helps the driver to
stay below a specified maximum speed. A warn-
ing threshold can be set for this purpose.
Once the speed slightly exceeds the stored
threshold, the speed warning system will alert
the driver with an indicator in the instrument
cluster and a warning tone. Once the speed drops
below the stored maximum speed, the indicator
will turn off.
Setting a threshold is recommended if you would
like to be reminded when you reach a certain
maximum speed. Situations where you may want
to do so include driving in a country with a gener-
al speed limit or if there is a specified maximum
speed for winter tires.
G) Tips
Regardless of the speed warning system, you
should always monitor your speed using the
speedometer and make sure you are following
the legal speed limit.
Setting the warning threshold
Applies to: vehicles with speed warning system
» Applies to: MMI: Select on the home screen:
VEHICLE > Driver assistance > Speed warning.
CEE Tel
Applies to: vehicles with speed warning system
cy Manually set XX speed limit warning
threshold exceeded
The stored speed was exceeded.
108
Traffic light information
Applies to: vehicles with traffic light information
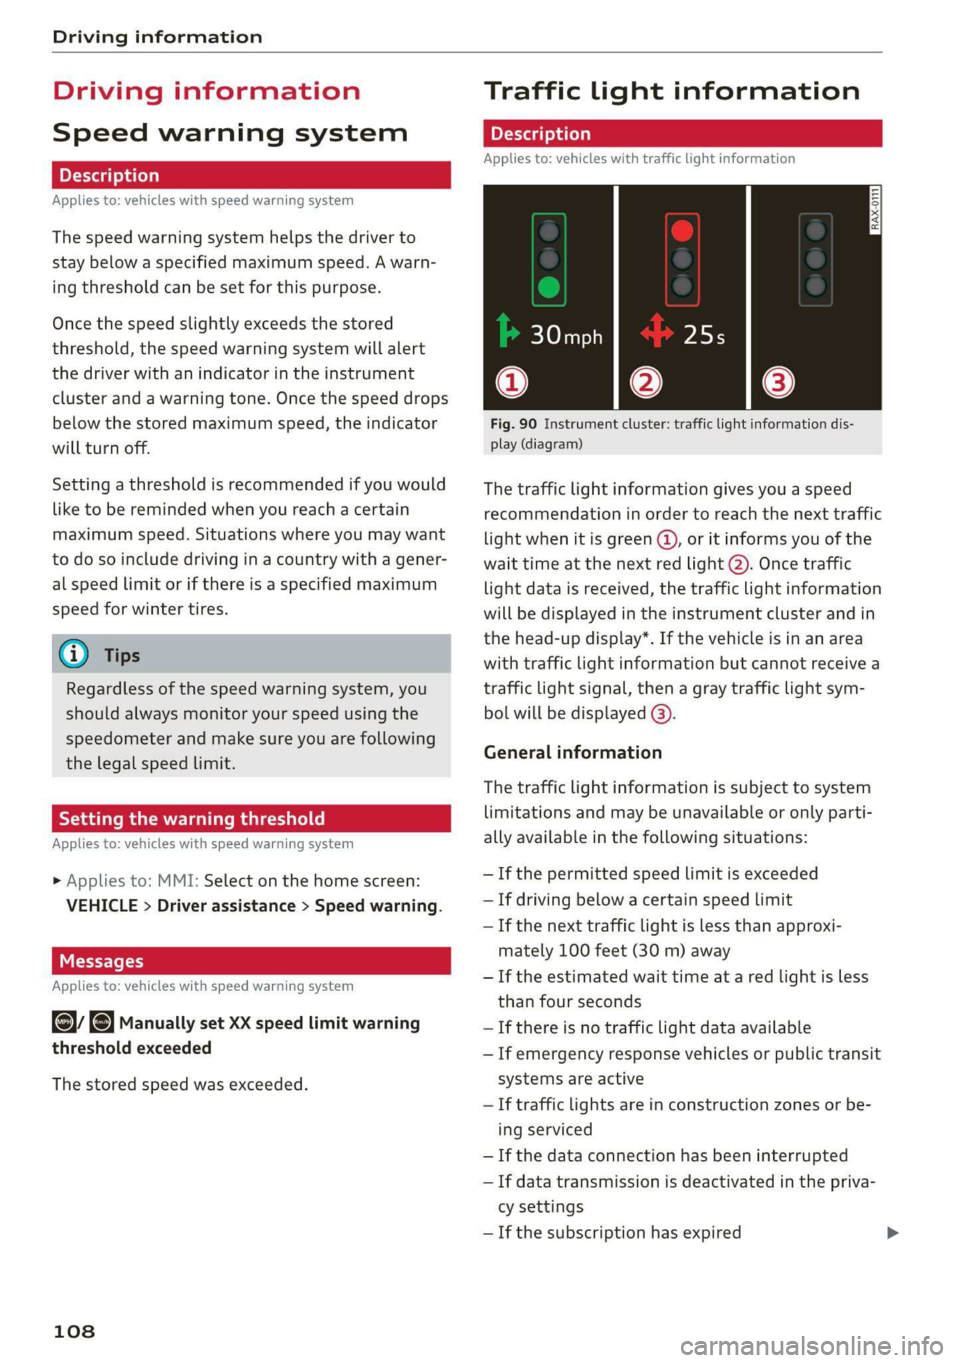
Fig. 90 Instrument cluster: traffic light information dis-
play (diagram)
The traffic light information gives you a speed
recommendation in order to reach the next traffic
light
when it is green ©, or it informs you of the
wait time at the next red light 2). Once traffic
light data is received, the traffic light information
will be displayed in the instrument cluster and in
the head-up display*. If the vehicle is in an area
with traffic light information but cannot receive a
traffic light signal, then a gray traffic light sym-
bol will be displayed @).
General information
The traffic light information is subject to system
limitations and may be unavailable or only parti-
ally available in the following situations:
— Ifthe permitted speed limit is exceeded
— If driving below a certain speed limit
—If the next traffic light is less than approxi-
mately 100 feet (30 m) away
—If the estimated wait time at a red light is less
than four seconds
—If there is no traffic light data available
— If emergency response vehicles or public transit
systems are active
— If traffic lights are in construction zones or be-
ing serviced
— If the data connection has been interrupted
— If data transmission is deactivated in the priva-
cy settings
— If the subscription has expired
Page 117 of 280
83A012721BA
Driver assistance
responsible for controlling the vehicle. The
driver is especially responsible for braking,
starting to drive, controlling the speed, and
maintaining the distance to other vehicles.
— Turn on the adaptive cruise assist only if the
surrounding conditions permit it. Always
adapt your driving style to the current visu-
al, weather, road, and traffic conditions.
— Switch the adaptive cruise assist off tempo-
rarily when driving in turning lanes or high-
way exits. This prevents the vehicle from ac-
celerating to the stored speed when in these
situations.
ZA WARNING
If you press the SETI2) button when driving
at speeds below 20 mph (30 km/h), then 20
mph (30 km/h) will be set because that is the
minimum speed that can be set. If no vehicle
is detected ahead of you, the vehicle will ac-
celerate up to that speed.
@ Tips
— Always keep your hands on the steering
wheel. The driver is always responsible for
adhering to the regulations applicable in
the country where the vehicle is being oper-
ated.
— If you switch the ignition or the adaptive
cruise assist off, the stored speed is erased
for safety reasons.
— When the adaptive cruise assist is switched
on, the ESC and the ASR are switched on au-
tomatically.
— The system cannot be switched off if the
road exceeds the maximum possible grade
for safe operation.
— If you signal to pass and the adaptive cruise
assist suggests a passing maneuver, the
adaptive cruise assist will accelerate just be-
fore changing lanes to shorten the distance
to the vehicle driving ahead.
Setting the distance
Applies to: vehicles with adaptive cruise assist
B4M-0234
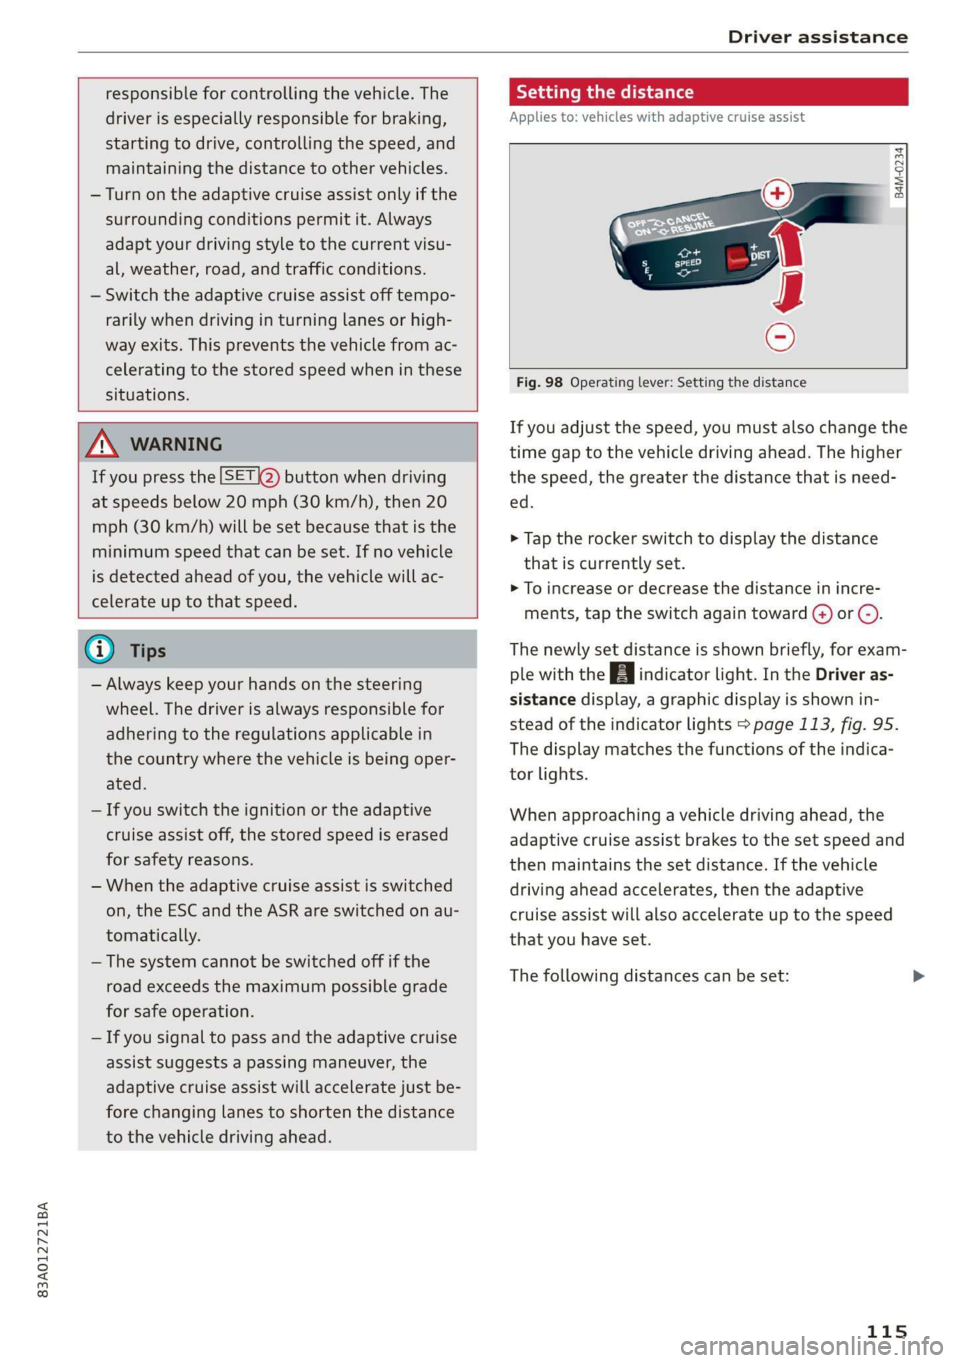
Fig. 98 Operating lever: Setting the distance
If you adjust the speed, you must also change the
time gap to the vehicle driving ahead. The higher
the speed, the greater the distance that is need-
ed.
> Tap the rocker switch to display the distance
that is currently set.
>» To increase or decrease the distance in incre-
ments, tap the switch again toward G) or C).
The newly set distance is shown briefly, for exam-
ple with the [eg indicator light. In the Driver as-
sistance display, a graphic display is shown in-
stead of the indicator lights > page 113, fig. 95.
The display matches the functions of the indica-
tor lights.
When approaching a vehicle driving ahead, the
adaptive cruise assist brakes to the set speed and
then maintains the set distance. If the vehicle
driving ahead accelerates, then the adaptive
cruise assist will also accelerate up to the speed
that you have set.
The following distances can be set:
115
Page 119 of 280
83A012721BA
Driver assistance
Driving in stop-and-go traffic
Applies to: vehicles with adaptive cruise assist
> Press the brake pedal to slow your vehicle
down.
S 3 S z
ee
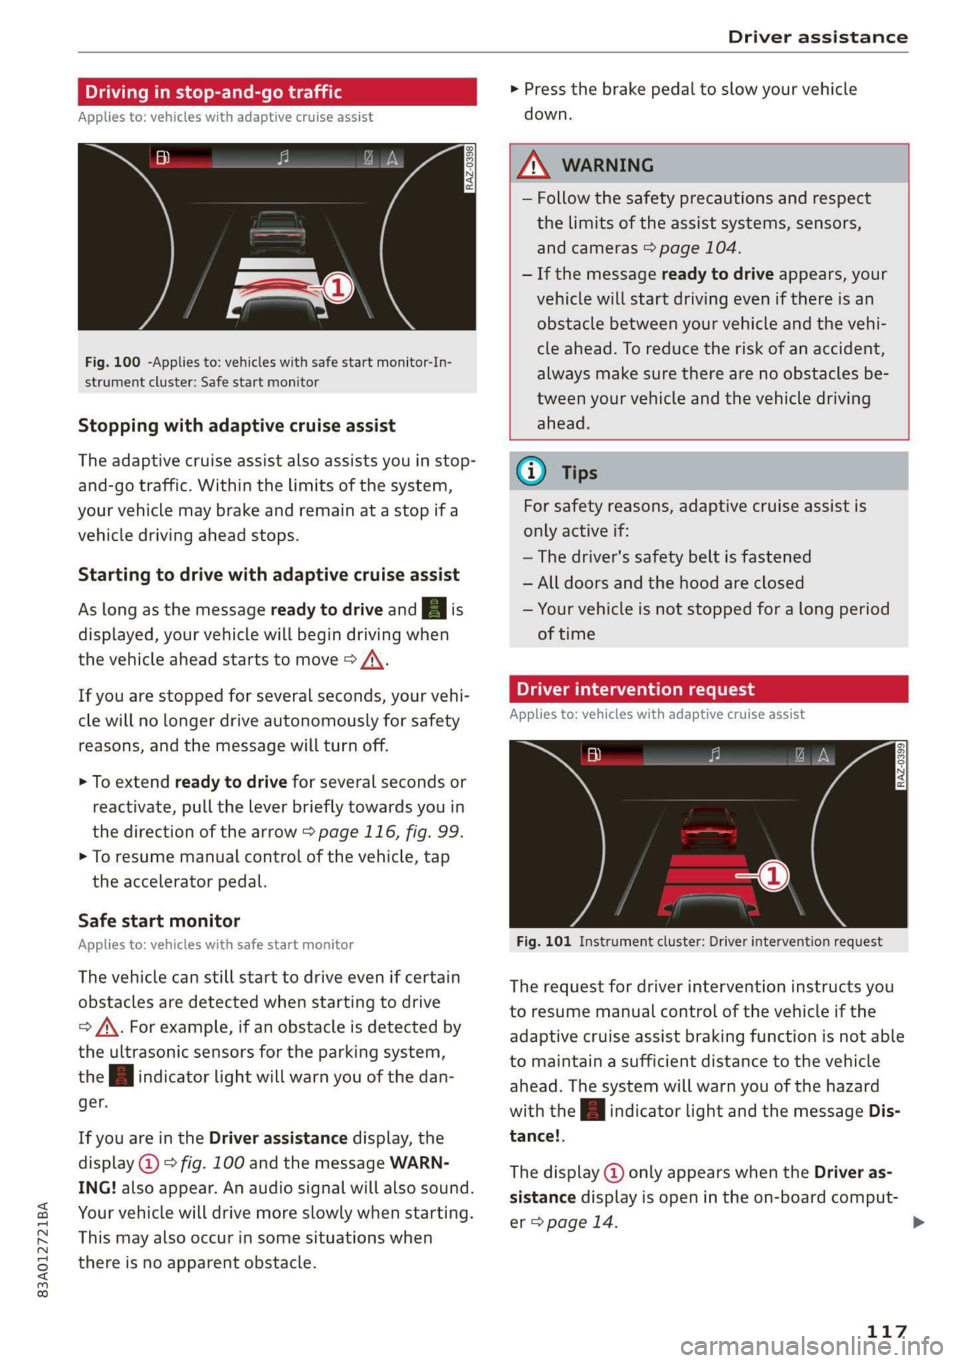
Fig. 100 -Applies to: vehicles with safe start monitor-In-
strument cluster: Safe start monitor
Stopping with adaptive cruise assist
The adaptive cruise assist also assists you in stop-
and-go traffic. Within the limits of the system,
your vehicle may brake and remain at a stop if a
vehicle driving ahead stops.
Starting to drive with adaptive cruise assist
As long as the message ready to drive and A is
displayed, your vehicle will begin driving when
the vehicle ahead starts to move > /\.
If you are stopped for several seconds, your vehi-
cle will no longer drive autonomously for safety
reasons, and the message will turn off.
> To extend ready to drive for several seconds or
reactivate, pull the lever briefly towards you in
the direction of the arrow > page 116, fig. 99.
> To resume manual control of the vehicle, tap
the accelerator pedal.
Safe start monitor
Applies to: vehicles with safe start monitor
The vehicle can still start to drive even if certain
obstacles are detected when starting to drive
=> /\. For example, if an obstacle is detected by
the ultrasonic sensors for the parking system,
the A indicator light will warn you of the dan-
ger.
If you are in the Driver assistance display, the
display @) © fig. 100 and the message WARN-
ING! also appear. An audio signal will also sound.
Your vehicle will drive more slowly when starting.
This may also occur in some situations when
there is no apparent obstacle.
Z\ WARNING
— Follow the safety precautions and respect
the limits of the assist systems, sensors,
and cameras > page 104.
— If the message ready to drive appears, your
vehicle will start driving even if there is an
obstacle between your vehicle and the vehi-
cle ahead. To reduce the risk of an accident,
always make sure there are no obstacles be-
tween your vehicle and the vehicle driving
ahead.
G) Tips
For safety reasons, adaptive cruise assist is
only active if:
— The driver's safety belt is fastened
— All doors and the hood are closed
— Your vehicle is not stopped for a long period
of time
Tamia e cme [sid
Applies to: vehicles with adaptive cruise assist
Fig. 101 Instrument cluster: Driver intervention request
The request for driver intervention instructs you
to resume manual control of the vehicle if the
adaptive cruise assist braking function is not able
to maintain a sufficient distance to the vehicle
ahead. The system will warn you of the hazard
with the A indicator light and the message Dis-
tance!.
The display @ only appears when the Driver as-
sistance display is open in the on-board comput-
er > page 14.
117
>
Page 121 of 280
83A012721BA
Driver assistance
Image in the Driver assistance display
Applies to: vehicles with adaptive cruise assist
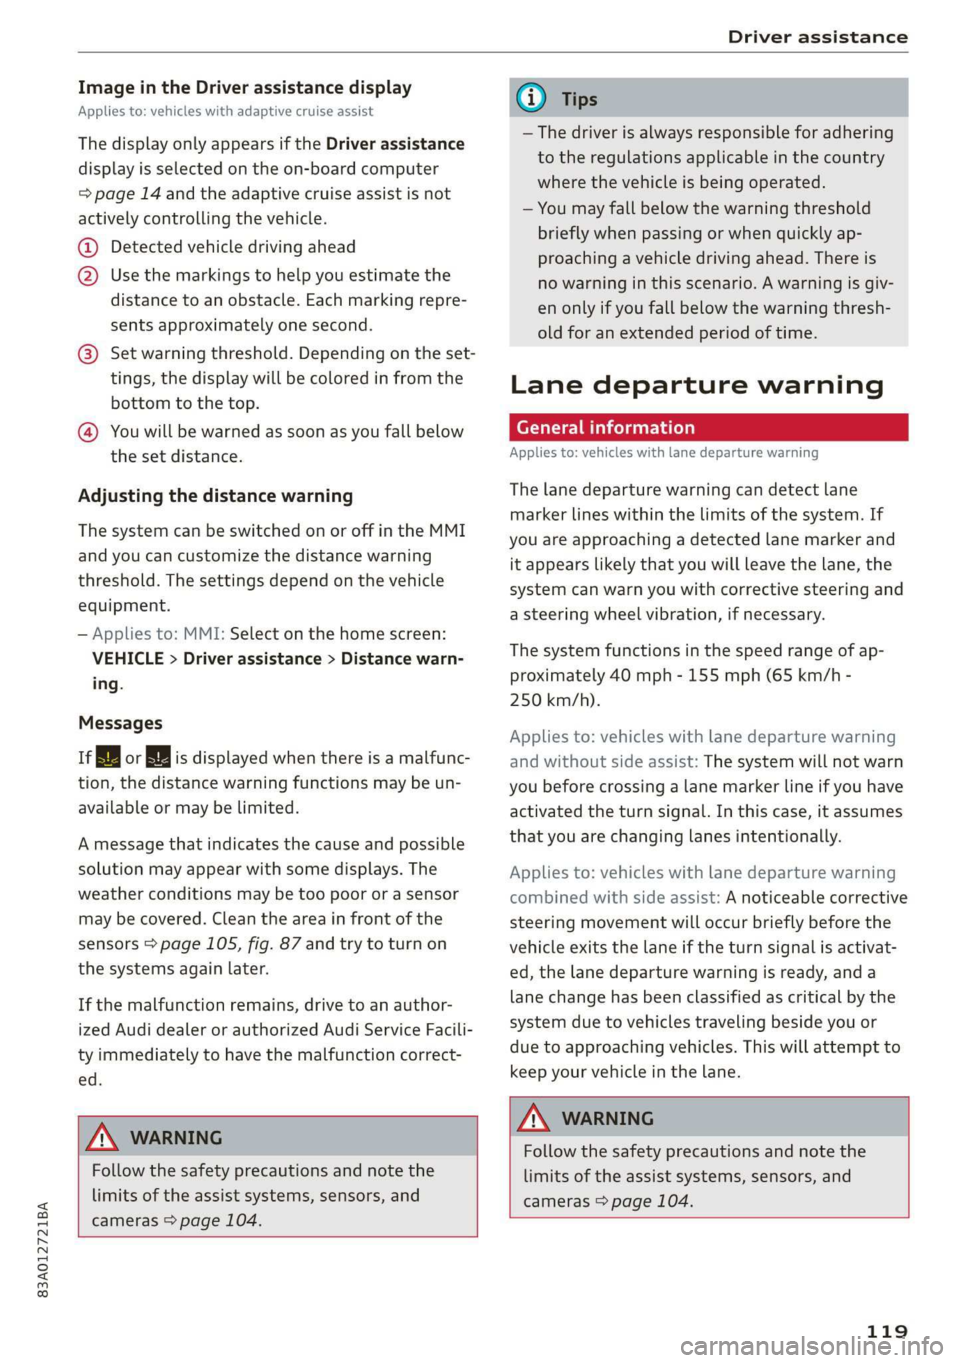
The display only appears if the Driver assistance
display is selected on the on-board computer
= page 14 and the adaptive cruise assist is not
actively controlling the vehicle.
@ Detected vehicle driving ahead
@ Use the markings to help you estimate the
distance to an obstacle. Each marking repre-
sents approximately one second.
@®) Set warning threshold. Depending on the set-
tings, the display will be colored in from the
bottom to the top.
@ You will be warned as soon as you fall below
the set distance.
Adjusting the distance warning
The system can be switched on or off in the MMI
and you can customize the distance warning
threshold. The settings depend on the vehicle
equipment.
— Applies to: MMI: Select on the home screen:
VEHICLE > Driver assistance > Distance warn-
ing.
Messages
irk or is displayed when there is a malfunc-
tion, the distance warning functions may be un-
available or may be limited.
A message that indicates the cause and possible
solution may appear with some displays. The
weather conditions may be too poor or a sensor
may be covered. Clean the area in front of the
sensors > page 105, fig. 87 and try to turn on
the systems again later.
If the malfunction remains, drive to an author-
ized Audi dealer or authorized Audi Service Facili-
ty immediately to have the malfunction correct-
ed.
Z\ WARNING
Follow the safety precautions and note the
limits of the assist systems, sensors, and
cameras > page 104.
@) Tips
— The driver is always responsible for adhering
to the regulations applicable in the country
where the vehicle is being operated.
— You may fall below the warning threshold
briefly when passing or when quickly ap-
proaching a vehicle driving ahead. There is
no warning in this scenario. A warning is giv-
en only if you fall below the warning thresh-
old for an extended period of time.
Lane departure warning
General information
Applies to: vehicles with lane departure warning
The lane departure warning can detect lane
marker lines within the limits of the system. If
you are approaching a detected lane marker and
it appears likely that you will leave the lane, the
system can warn you with corrective steering and
a steering wheel vibration, if necessary.
The system functions in the speed range of ap-
proximately 40 mph - 155 mph (65 km/h -
250 km/h).
Applies to: vehicles with lane departure warning
and without side assist: The system will not warn
you before crossing a lane marker line if you have
activated the turn signal. In this case, it assumes
that you are changing lanes intentionally.
Applies to: vehicles with lane departure warning
combined with side assist: A noticeable corrective
steering movement will occur briefly before the
vehicle exits the lane if the turn signal is activat-
ed, the lane departure warning is ready, and a
lane change has been classified as critical by the
system due to vehicles traveling beside you or
due to approaching vehicles. This will attempt to
keep your vehicle in the lane.
Z\ WARNING
Follow the safety precautions and note the
limits of the assist systems, sensors, and
cameras > page 104.
119
Page 122 of 280
Driver assistance
Applies to: vehicles with lane departure warning
B4M-0064
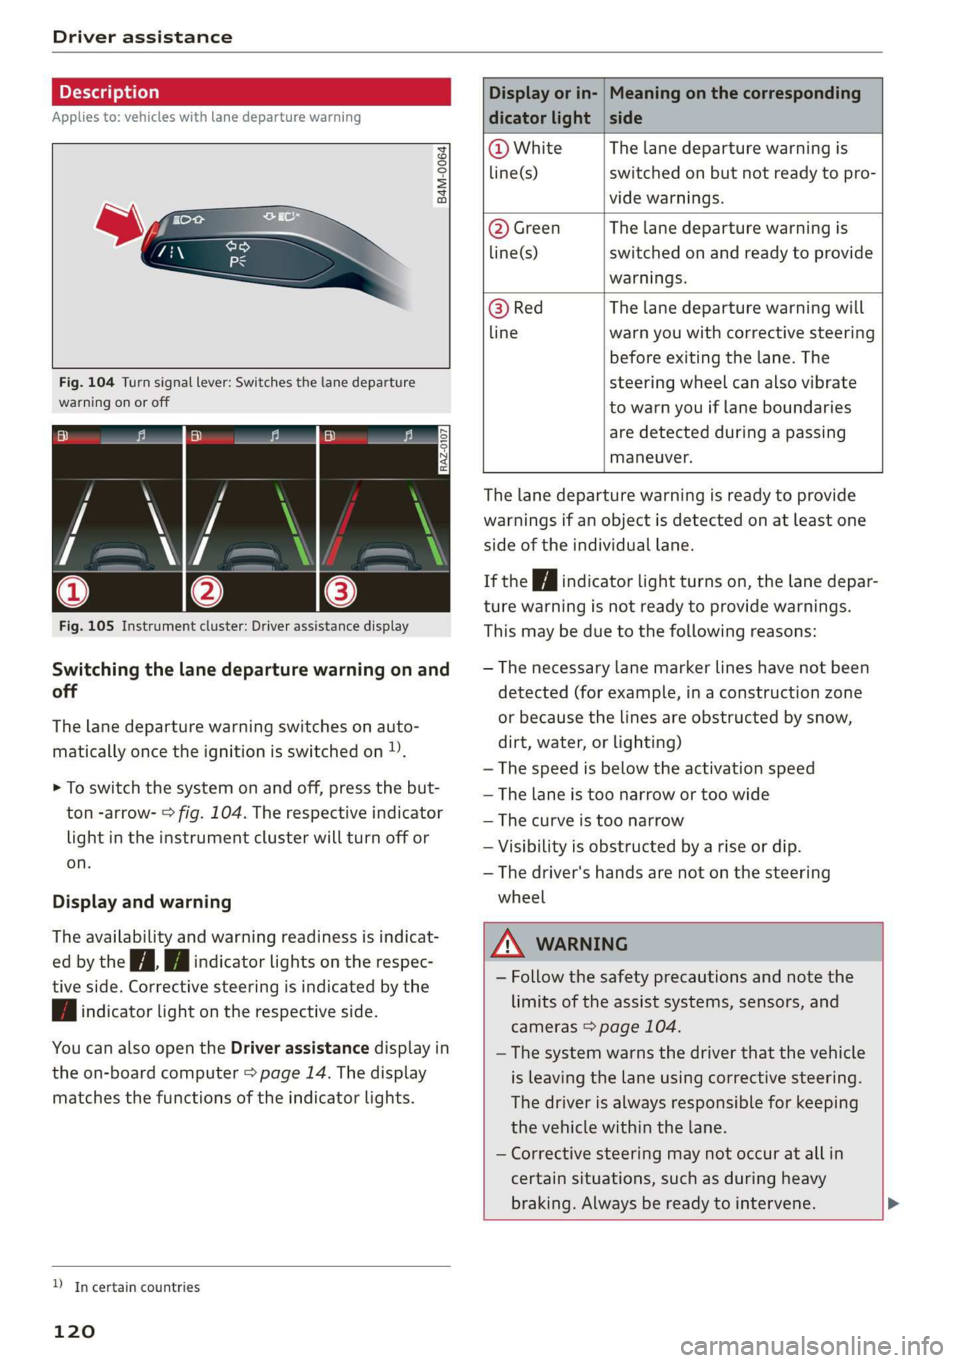
Fig. 104 Turn signal lever: Switches the lane departure
warning on or off
RAZ-0107
Fig. 105 Instrument cluster: Driver assistance display
Switching the lane departure warning on and
off
The lane departure warning switches on auto-
matically once the ignition is switched on )).
> To switch the system on and off, press the but-
ton -arrow- > fig. 104. The respective indicator
light in the instrument cluster will turn off or
on.
Display and warning
The availability and warning readiness is indicat-
ed by the iA Hi indicator lights on the respec-
tive side. Corrective steering is indicated by the
fA indicator light on the respective side.
You can also open the Driver assistance display in
the on-board computer > page 14. The display
matches the functions of the indicator lights.
YD In certain countries
120
Display or in- | Meaning on the corresponding
dicator light | side
@ White The lane departure warning is
line(s) switched on but not ready to pro-
vide warnings.
@ Green The lane departure warning is
line(s) switched on and ready to provide
warnings.
@ Red The lane departure warning will
line warn you with corrective steering
before exiting the lane. The
steering wheel can also vibrate
to warn you if lane boundaries
are detected during a passing
maneuver.
The lane departure warning is ready to provide
warnings if an object is detected on at least one
side of the individual lane.
If the Hi indicator light turns on, the lane depar-
ture warning is not ready to provide warnings.
This may be due to the following reasons:
— The necessary lane marker lines have not been
detected (for example, in a construction zone
or because the lines are obstructed by snow,
dirt, water, or lighting)
— The speed is below the activation speed
— The lane is too narrow or too wide
—The curve is too narrow
— Visibility is obstructed by a rise or dip.
— The driver's hands are not on the steering
wheel
ZA WARNING
— Follow the safety precautions and note the
limits of the assist systems, sensors, and
cameras > page 104.
— The system warns the driver that the vehicle
is leaving the lane using corrective steering.
The
driver is always responsible for keeping
the vehicle within the lane.
— Corrective steering may not occur at all in
certain situations, such as during heavy
braking. Always be ready to intervene. >
Page 123 of 280
83A012721BA
Driver assistance
@) Tips
— Always keep your hands on the steering
wheel. The driver is always responsible for
adhering to the regulations applicable in
the country where the vehicle is being oper-
ated.
— The system does not provide any corrective
steering or steering wheel vibrations if it de-
tects that you are passing another vehicle.
ONT em MT Me() Sade em ea Tale)
Applies to: vehicles with lane departure warning
You can switch the optional steering wheel vibra-
tion warning for the lane departure warning on
and off. The settings depend on the vehicle
equipment.
— Applies to: MMI: Select on the home screen:
VEHICLE > Driver assistance > Lane departure
warning > Vibration warning.
Messages
Applies to: vehicles with lane departure warning
ir or is displayed when there is a malfunc-
tion, the lane assist/lane departure warning may
be unavailable or may be limited.
A message that indicates the cause and possible
solution may appear with some displays. The
weather conditions may be too poor or the cam-
era may be covered. Clean the area in front of the
camera > page 106, fig. 88 and try to turn on the
systems again later.
If the malfunction remains, drive to an author-
ized Audi dealer or authorized Audi Service Facili-
ty immediately to have the malfunction correct-
ed.
Lane departure warning: please drive in the cen-
ter of the lane!
This message appears and an audio signal sounds
if the lane departure warning must intervene for
a long period of time.
& Please take over steering!
This message appears if steering activity is no
longer detected and the vehicle comes close to
leaving the lane multiple times. Always keep your
hands on the steering wheel so you can be ready
to steer at any time. The lane departure warning
is switched on but not ready to provide warnings.
G@) Tips
Always keep your hands on the steering
wheel. The driver is always responsible for ad-
hering to the regulations applicable in the
country where the vehicle is being operated.
Audi pre sense
Introduction
Applies to: vehicles with Audi pre sense
Within the limits of the system, the Audi pre
sense functions can initiate measures in certain
driving situations to protect the vehicle occu-
pants and other road users. Depending on the ve-
hicle equipment, various Audi pre sense systems
may
be installed:
— Audi pre sense basic can react during emergen-
cy and dangerous braking maneuvers and un-
stable driving situations (such as oversteering
or understeering).
— Audi pre sense front can detect an impending
frontal impact and react with warnings, braking
interventions, and preemptive safety measures
for the vehicle occupants.
Audi pre sense preemptive safety measures
Applies to: vehicles with Audi pre sense
Depending on the vehicle speed and the vehicle
equipment, the following functions may be initi-
ated in certain situations:
— Visual and audio warnings
— Reversible tensioning of the front safety belts
— Closing the windows and panoramic glass roof
ZA\ WARNING
Follow the safety precautions and note the
limits of the assist systems, sensors, and
cameras > page 104. >
121
Page 127 of 280
83A012721BA
Driver assistance
Warning stage
If the display in a mirror blinks brightly when you
activate a turn signal, side assist is warning you
about detected objects classified as critical.
Depending on the vehicle equipment and other
driver assistance systems, the display on the re-
spective mirror may also flash if you have not
turned on the turn signal: If you are approaching
a detected lane marker line and it appears you
will be leaving the lane, the display on the mirror
will warn you about detected vehicles that it has
classified as critical. You can also be warned with
corrective steering > page 119, Lane departure
warning.
Detection range
The radar sensors are designed to detect the left
and right adjacent lanes when the road lanes are
the normal width. In some situations, the display
in the exterior mirror may turn on even though
there is no vehicle located in the area that is criti-
cal for a lane change. For example:
— If the lanes are narrow or if you are driving on
the edge of your lane. If this is the case, the
system may have detected a vehicle in another
lane that is not adjacent to your current lane.
— If you are driving through a curve. Side assist
may react to a vehicle that is in the same lane
or one lane over from the adjacent lane.
—If side assist reacts to other objects (such as
roadside structures like guard rails).
ZA\ WARNING
— Follow the safety precautions and note the
limits of the assist systems, sensors, and
cameras > page 104.
— The display may not appear on time when
vehicles are approaching or being passed
very quickly.
@ Tips
— The system is not available when towing a
trailer. There is no guarantee the system
will switch off when using a retrofitted trail-
er hitch. Do not use these functions when
towing a trailer.
— For an explanation on conformity with the
FCC regulations in the United States and the
Industry Canada regulations, see
=> page 261.
Oe ees
Applies to: vehicles with side assist
You can adjust the side assist to your preferences.
The settings depend on the vehicle equipment.
> Applies to: MMI: Select on the home screen:
VEHICLE > Driver assistance > Side assist.
Possible settings:
The system can be switched on and off. If the sys-
tem is switched on, the displays in the exterior
mirrors will turn on briefly each time the ignition
is switched on.
Brightness - Change the brightness only when
side assist is switched on, so that the selected
setting can be checked in the exterior mirror dis-
plays. Adjust the brightness to a level where the
display will not interfere with your view ahead.
The display brightness is automatically adapted
to the ambient light. If the surrounding area is
very dark or bright, the display may have already
adjusted automatically to the lower or upper lev-
el
@® Tips
If the window glass in the driver's door or
front passenger's door has been tinted, the
display in the exterior mirror may be incor-
rect.
Messages
Applies to: vehicles with side assist
fg or Eg is displayed in the instrument cluster
when there is a malfunction, the side assist func-
tions may be unavailable or may be limited.
A message that indicates the cause and possible
solution may appear with some displays. The
weather conditions may be too poor or a sensor
may be covered. Clean the sensor area in the ve-
hicle rear and try to turn the systems on again
later.
125
Page 129 of 280
83A012721BA
Parking and maneuvering
Parking and
maneuvering
Introduction
Depending on the vehicle equipment, various
parking aids will help you when parking and ma-
neuvering.
The parking system plus assists you while park-
ing using audio and visual signals to warn you
about objects detected in front of, behind, and
next to* the vehicle > page 127.
The rearview camera shows the area behind the
vehicle in the center display. The lines in the rear-
view camera image help you to park and maneu-
ver > page 129.
The peripheral cameras are an addition to the
rearview camera and help you to see various
areas around the vehicle while parking and ma-
neuvering > page 129.
The rear cross-traffic assist can warn you of ap-
proaching cross traffic when driving in reverse or
exiting a parking space > page 133.
Assisted parking
Park assist helps you to find suitable parking
spaces > page 134 and to park in and exit these
spaces while the driver monitors the area around
the vehicle and controls the parking process.
A WARNING
Follow the safety precautions and note the
limits of the assist systems, sensors, and
cameras > page 104.
@) Tips
Practicing parking in a traffic-free location or
parking lot to become familiar with the sys-
tems is recommended. When doing this,
there should be good light and weather condi-
tions.
Parking system plus
Sic Ee moll
Applies to: vehicles with parking system plus
2
3 3
> © oO
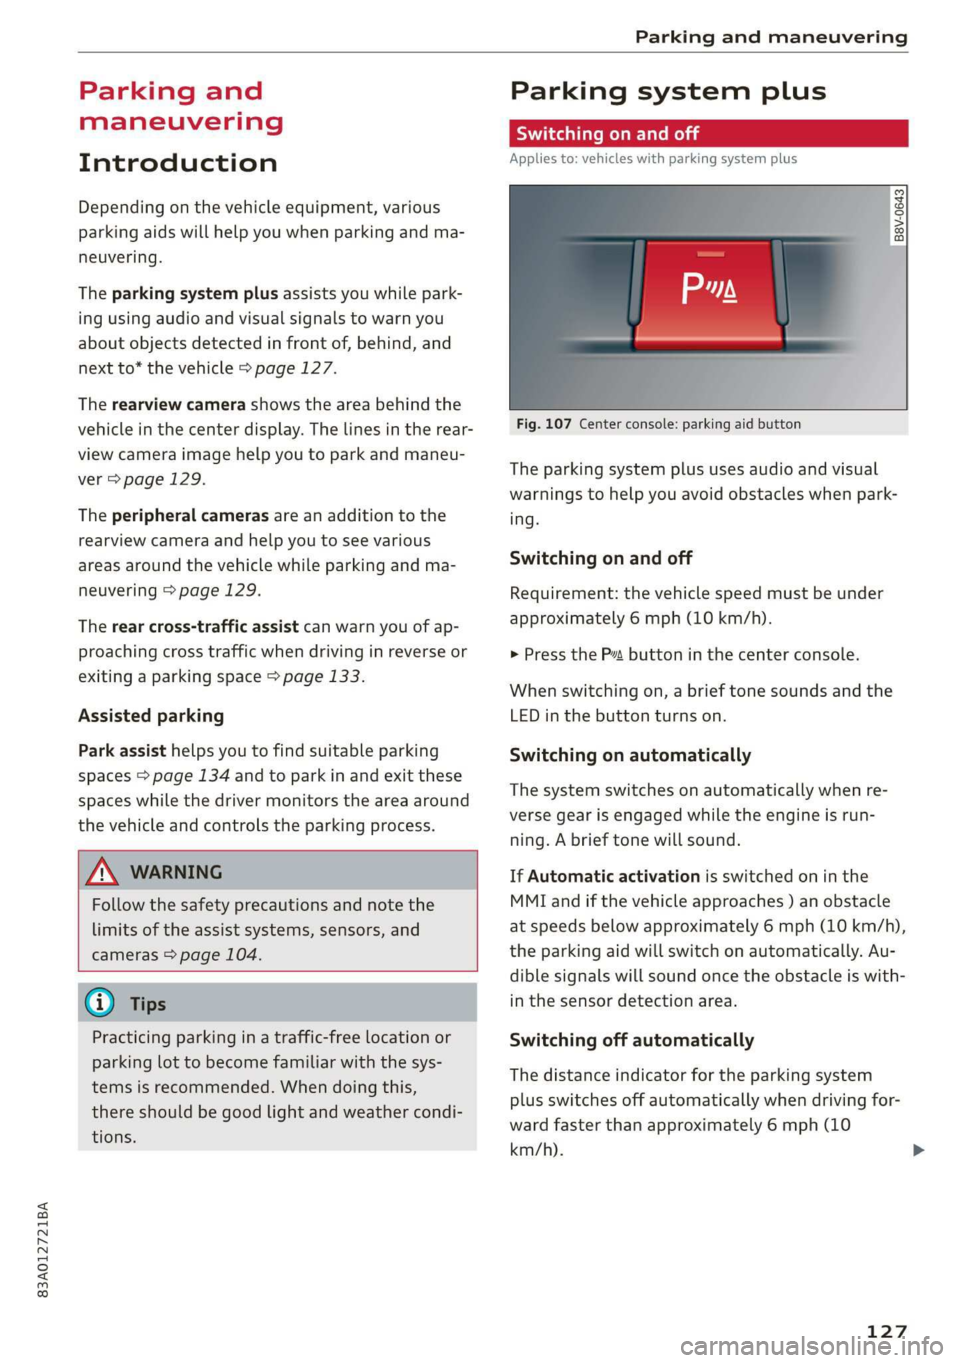
Fig. 107 Center console: parking aid button
The parking system plus uses audio and visual
warnings to help you avoid obstacles when park-
ing.
Switching on and off
Requirement: the vehicle speed must be under
approximately 6 mph (10 km/h).
> Press the Ps button in the center console.
When switching on, a brief tone sounds and the
LED in the button turns on.
Switching on automatically
The system switches on automatically when re-
verse gear is engaged while the engine is run-
ning. A brief tone will sound.
If Automatic activation is switched on in the
MMI and if the vehicle approaches ) an obstacle
at speeds below approximately 6 mph (10 km/h),
the parking aid will switch on automatically. Au-
dible signals will sound once the obstacle is with-
in the sensor detection area.
Switching off automatically
The distance indicator for the parking system
plus switches off automatically when driving for-
ward faster than approximately 6 mph (10
km/h).
127