service indicator AUDI Q3 2020 Owner's Manual
[x] Cancel search | Manufacturer: AUDI, Model Year: 2020, Model line: Q3, Model: AUDI Q3 2020Pages: 278, PDF Size: 72.66 MB
Page 140 of 278
Parking and maneuvering
> Activate the turn signal on the desired side or
press that side next to the vehicle in the center
display.
> Remove your hands from the steering wheel.
> Pay attention to the path of the vehicle. If the
traffic situation permits, accelerate carefully
of.
> Follow the visual instructions in the center dis-
play and the warning tones until the vehicle has
finished exiting the parking space.
> The indicators in the center display show the
necessary direction of travel. Drive in the direc-
tion indicated by the arrows or symbols on the
roof in the parking aid image @) > page 135,
fig. 117.
> The process of exiting the parking space has
ended if additional corrective movements are
no longer necessary and the specified steering
wheel angle is sufficient to drive out of the
parking space. Resume control of the steering
wheel >@).
Park assist automatically steers the vehicle out of
the parking space while the driver presses the
pedals. The maximum speed for exiting a parking
space is 3 mph (5 km/h).
ZA\ WARNING
— Follow the safety precautions and note the
limits of the assist systems, sensors, and
cameras > page 105.
— The park assist is an assist system. The driv-
er is still responsible for monitoring the ve-
hicle's surroundings and preventing colli-
sions when using the system.
— When using park assist to drive into or out
of a parking space, the steering wheel turns
quickly on its own. Reaching into the steer-
ing wheel spokes while this is happening can
result in injury.
@) Note
Resume steering immediately after the last
corrective movement and the takeover
prompt, so that the specified steering wheel
angle is not recentered.
138
Interrupting the park assists
Applies to: vehicles with park assist
Park assist will be canceled automatically in the
following scenarios:
— You switch the system off.
— You start steering.
— The speed is too high.
—The time limit is exceeded.
— An obstacle is detected.
— ESC intervenes.
Resume control of the vehicle, end the parking
process manually, or:
— You can resume the parking process in some sit-
uations. Press the P@ button.
— To continue exiting the parking space, switch
the engine off and on. Press the Pe button.
ZA\ WARNING
Follow the safety precautions and note the
limits of the assist systems, sensors, and
cameras > page 105.
Applies to: vehicles with park assist
If the Poo" or indicator light turns on, park as-
sist is not available or was interrupted.
A message that indicates the cause and possible
solution may appear with some displays. The
weather conditions may be too poor or a sensor
may be covered. Clean the area in front of the
sensors > page 106, fig. 85 and try to turn on
the systems again later.
If the malfunction remains, drive to an author-
ized Audi dealer or authorized Audi Service Facili-
ty immediately to have the malfunction correct-
ed.
Page 201 of 278
83A012721BB
Checking and Filling
The correct fuel type for your vehicle can be
found ona label located on the inside of the fuel
filler door. For additional information on fuel, see
=> page 197.
For the tank capacity in your vehicle, refer to the
Technical Data > page 262.
To reduce the risk of fuel leaking out or vapors
escaping, make sure that the fuel tank is closed
correctly. Otherwise the Ey indicator light will
turn on.
If the central locking system malfunctions, there
is a fuel filler door emergency release
=> page 200.
Messages
[il Tank system: malfunction! Please contact
Service
There is a malfunction in the fuel tank system.
Drive to an authorized Audi dealer or authorized
Audi Service Facility immediately to have the
malfunction corrected.
flying sparks. Sparks can start a fire when
refueling.
Z\ WARNING
Improper fueling procedures and improper
handling of fuel can lead to explosions, fires,
severe burns, and other injuries.
— Do not smoke. Keep away from open flames.
— The ignition must be switched off when re-
fueling.
— Mobile devices, radio devices, and other ra-
dio equipment should always be switched
off when refueling. Electromagnetic rays
could cause sparks and start a fire.
— If you do not insert the fuel pump nozzle all
the way into the filler tube, then fuel can
leak out. Spilled fuel can ignite and start a
fire.
— Never get into the vehicle when refueling. If
there is an exceptional situation where you
must enter the vehicle, close the door and
touch a metal surface before touching the
fuel pump nozzle again. This will reduce the
risk of electrostatic discharge that can cause
A WARNING
Transporting fuel containers inside the vehicle
is not recommended. Fuel could leak out of
the container and ignite, especially during an
accident. This can cause explosions, fires, and
injuries.
— Ifyou must transport fuel in a fuel contain-
er, note the following:
— Always place the fuel container on the
ground before filling. Never fill the fuel
container with fuel while it is inside or on
the vehicle. Electrostatic discharge can oc-
cur while refueling and the fuel vapors
could ignite.
— When using fuel containers made of met-
al, the fuel pump nozzle must always re-
main in contact with the container to re-
duce the risk of static charge.
— Insert the fuel pump nozzle as far as pos-
sible into the filler opening while refuel-
ing.
— Follow the applicable legal regulations in
the country where you are driving when
using, storing and transporting fuel con-
tainers.
— Make sure that the fuel container meets
the industry standards, for example ANSI
or ASTM F852-86.
) Depending on the engine and country
@) Note
— Remove fuel that has overflowed onto any
vehicle
components immediately to reduce
the risk of damage to the vehicle.
— Never drive until the fuel tank is completely
empty. The irregular supply of fuel that re-
sults from that can cause engine misfires.
Uncombusted fuel may enter the exhaust
system and increase the risk of damage to
the catalytic converter.
199
Page 202 of 278
Checking and Filling
@) For the sake of the environment
— Do not overfill the fuel tank, or fuel could
leak out when the vehicle is warming up.
— Fuel should never enter the sewer system or
come into contact with the ground.
@ Tips
The fuel filler door on your vehicle does not
lock if you lock the vehicle from the inside us-
ing
the central locking switch.
Fuel filler door emergency release
If the central locking system malfunctions, the
fuel filler door can be unlocked manually.
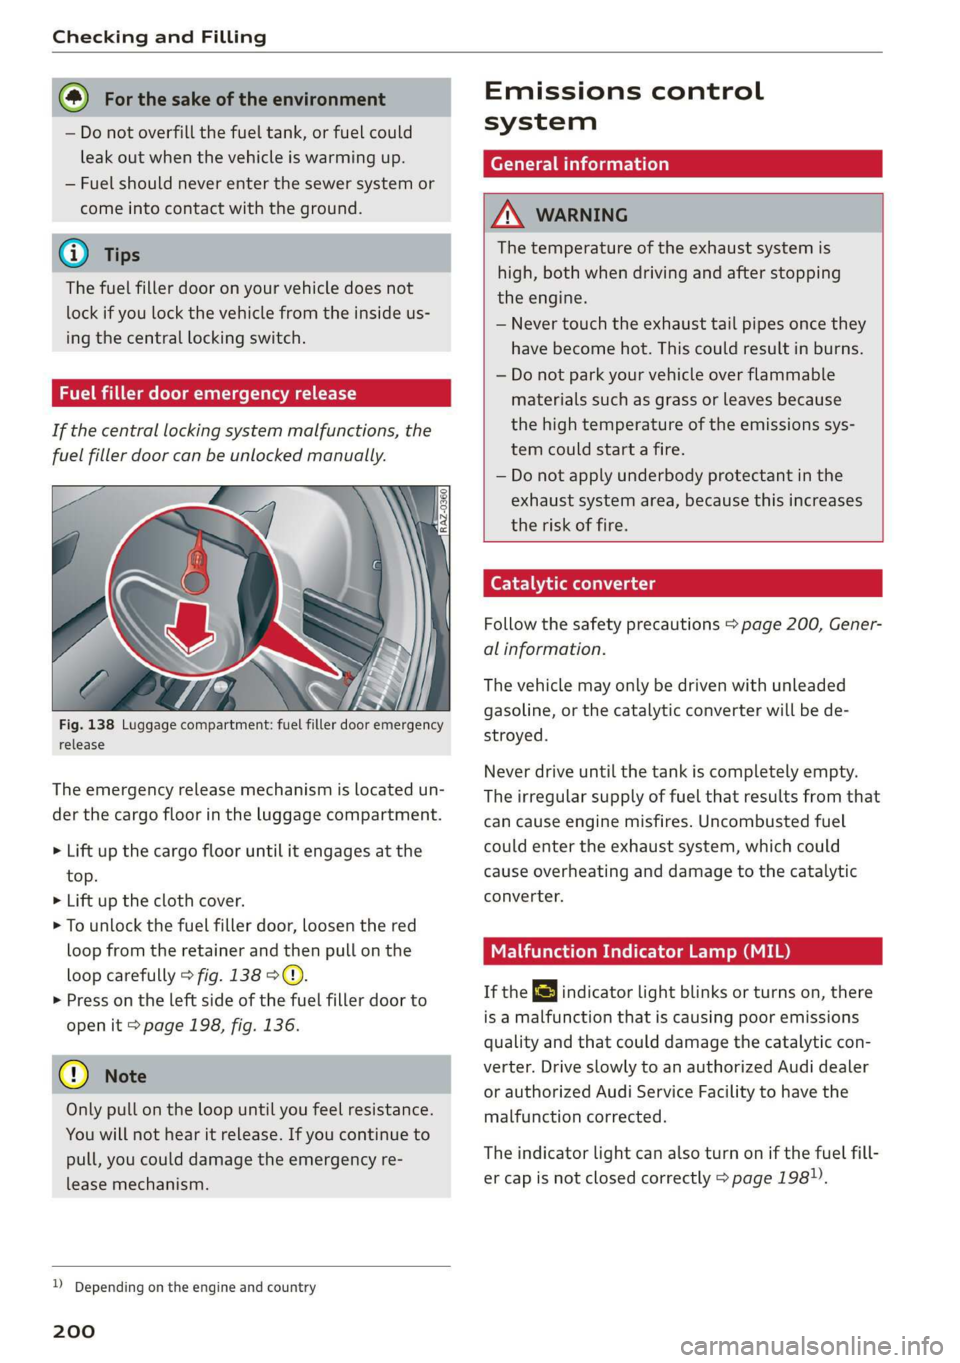
Fig. 138 Luggage compartment: fuel filler door emergency
release
The emergency release mechanism is located un-
der the cargo floor in the luggage compartment.
> Lift up the cargo floor until it engages at the
top.
> Lift up the cloth cover.
> To unlock the fuel filler door, loosen the red
loop from the retainer and then pull on the
loop carefully > fig. 138 ©.
>» Press on the left side of the fuel filler door to
open it > page 198, fig. 136.
@) Note
Only pull on the loop until you feel resistance.
You
will not hear it release. If you continue to
pull, you could damage the emergency re-
lease mechanism.
D Depending on the engine and country
200
Emissions control
system
General information
A WARNING
The temperature of the exhaust system is
high, both when driving and after stopping
the engine.
— Never touch the exhaust tail pipes once they
have
become hot. This could result in burns.
— Do not park your vehicle over flammable
materials such as grass or leaves because
the high temperature of the emissions sys-
tem could start a fire.
— Do not apply underbody protectant in the
exhaust system area, because this increases
the risk of fire.
Catalytic converter
Follow the safety precautions > page 200, Gener-
al information.
The vehicle may only be driven with unleaded
gasoline, or the catalytic converter will be de-
stroyed.
Never drive until the tank is completely empty.
The irregular supply of fuel that results from that
can
cause engine misfires. Uncombusted fuel
could enter the exhaust system, which could
cause overheating and damage to the catalytic
converter.
Malfunction Indicator Lamp (MIL)
If the S indicator light blinks or turns on, there
is a malfunction that is causing poor emissions
quality and that could damage the catalytic con-
verter. Drive slowly to an authorized Audi dealer
or authorized Audi Service Facility to have the
malfunction corrected.
The indicator light can also turn on if the fuel fill-
er cap is not closed correctly > page 198).
Page 206 of 278
Checking and Filling
quart (1 liter) of ACEA C3 or API SN engine oil
one time until the next oil change.
For more information on the correct engine oil
for your vehicle, contact an authorized Audi deal-
er or authorized Audi Service Facility. Have the oil
changed by an authorized Audi dealer or author-
ized Service Facility.
Audi recommends
Sbastrol/ ZIDIBE Frorzssional
Audi recommends using the LongLife high-per-
formance engine oil from Audi Genuine Parts.
Engine oil pressure
2 Turn off engine. Oil pressure too low
Stop driving and switch the engine off. Check the
engine oil level > page 204.
— If the engine oil level is too low, add engine oil
=> page 205. Only continue driving once the in-
dicator light turns off.
— If the engine oil level is correct and the indica-
tor light still turns on, turn the engine off and
do not continue driving. See an authorized Audi
dealer or authorized Audi Service Facility for as-
sistance.
Engine oil level
Applies to: vehicles with oil level warning
= Please check oil level
— You may continue driving for the time being.
Check the engine oil level as soon as possible
=> page 204, Checking the engine oil level.
— If the engine oil level is correct and the indica-
tor light still turns on, drive at low engine
speed to an authorized Audi dealer or author-
ized Audi Service Facility.
Engine oil sensor
=. Oil level sensor: oil change necessary. Please
contact Service
Fuel has entered the engine oil. This will cause
the engine oil level to rise slowly and the engine
oil quality to decrease. Do not extract engine oil
to reduce the level, because this will increase the
204
risk of engine damage. Drive to an authorized
Audi dealer or authorized Audi Service Facility im-
mediately to have engine oil extracted.
& Oil level system: malfunction! Please con-
tact Service
The sensor that checks the engine oil level has
malfunctioned. Drive immediately to an author-
ized Audi dealer or authorized Audi Service Facili-
ty to have the malfunction repaired.
& Oil pressure sensor: malfunction! Please
contact Service
The sensor that checks the engine oil pressure
has malfunctioned. Drive immediately to an au-
thorized Audi dealer or authorized Audi Service
Facility to have the malfunction repaired.
Engine warm-up request
i Please drive to warm up engine
Fuel has entered the engine oil, either due to low
outside temperatures or frequent short drives.
Drive until the engine is warm so that the fuel in
the engine oil will evaporate. Avoid high engine
speeds, full accelerating, and heavy engine loads
when doing this.
G) Tips
The oil pressure warning EE is not an oil level
indicator. Always check the oil level regularly.
Checking the engine oil level
The engine oil dipstick varies depending on the
engine type.
B8V-0588
&
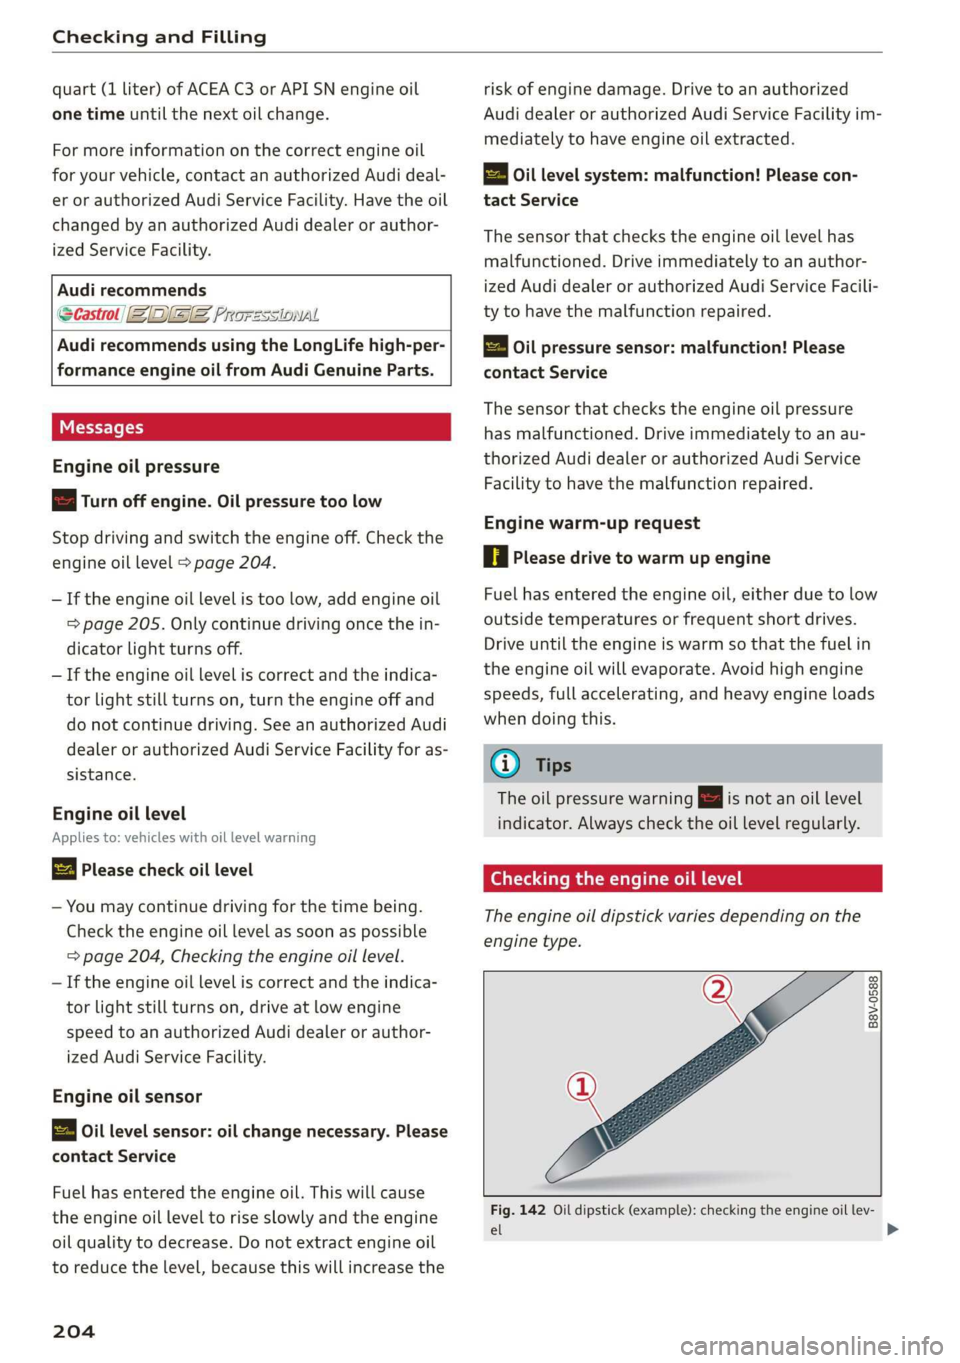
Fig. 142 Oil dipstick (example): checking the engine oil lev-
el
Page 209 of 278
83A012721BB
Checking and Filling
— Maintain enough distance when you are re-
moving the oil drain plug. While doing this,
keep your forearm parallel to the ground to
reduce the risk of hot oil dripping down your
arm.
— Drain the oil into a container designed for
this purpose that is large enough to hold the
full amount of oil in your engine.
— Engine oil is poisonous. Always store out of
reach of children.
— Prolonged contact of used engine oil with
the skin may cause skin damage. Always
wash oil off immediately with soap and wa-
ter to protect your skin.
@) Note
Do not mix any additives with the engine oil.
Additives may cause engine damage that is
not covered by your New Vehicle Limited War-
ranty.
() For the sake of the environment
— Before changing the engine oil, make sure
you can dispose of the used engine oil cor-
rectly.
— Engine oil must always be disposed of cor-
rectly. Do not dump it in the yard, in the for-
est, or in open water, river channels, or sew-
ers.
— Have your used engine oil recycled by bring-
ing it to a used oil collection site or contact
a gas station.
Cooling system
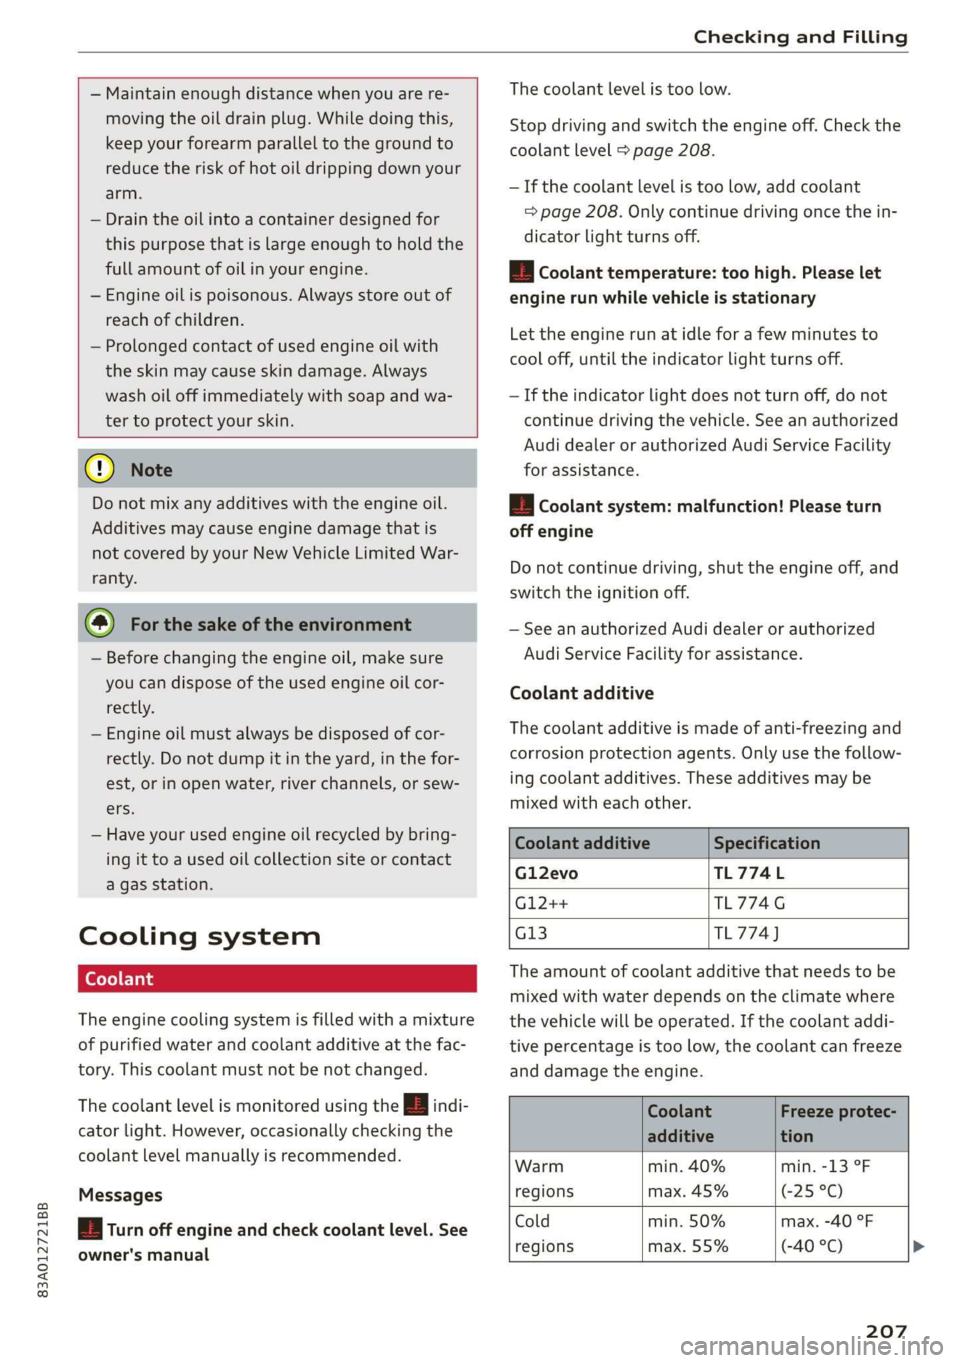
The engine cooling system is filled with a mixture
of purified water and coolant additive at the fac-
tory. This coolant must not be not changed.
The coolant level is monitored using the B indi-
cator light. However, occasionally checking the
coolant level manually is recommended.
Messages
Ea Turn off engine and check coolant level. See
owner's manual
The coolant level is too low.
Stop driving and switch the engine off. Check the
coolant level > page 208.
— If the coolant level is too low, add coolant
=> page 208. Only continue driving once the in-
dicator light turns off.
/_E| Coolant temperature: too high. Please let
engine run while vehicle is stationary
Let the engine run at idle for a few minutes to
cool off, until the indicator light turns off.
— If the indicator light does not turn off, do not
continue driving the vehicle. See an authorized
Audi dealer or authorized Audi Service Facility
for assistance.
|| Coolant system: malfunction! Please turn
off engine
Do not continue driving, shut the engine off, and
switch the ignition off.
— See an authorized Audi dealer or authorized
Audi Service Facility for assistance.
Coolant additive
The coolant additive is made of anti-freezing and
corrosion protection agents. Only use the follow-
ing coolant additives. These additives may be
mixed with each other.
Coolant additive Specification
Gl2evo TL774L
G12++ TL774G
G13 TL774)
The amount of coolant additive that needs to be
mixed with water depends on the climate where
the vehicle will be operated. If the coolant addi-
tive percentage is too low, the coolant can freeze
and damage the engine.
Coolant Freeze protec-
additive tion
Warm min. 40% min. -13 °F
regions max. 45% (-25 °C)
Cold min. 50% max. -40 °F
regions max. 55% (-40 °C) >
207
Page 211 of 278
83A012721BB
Checking and Filling
on even if the ignition is switched off, which
increases the risk of injury.
— Coolant additive and coolant can be danger-
ous to your health. For this reason, store the
coolant in the original container and away
from children. There is a risk of poisoning.
@) Note
Do not add coolant if the expansion tank is
empty. Air could enter the cooling system and
damage the engine. If this is the case, do not
continue driving. See an authorized Audi deal-
er or authorized Audi Service Facility for assis-
tance.
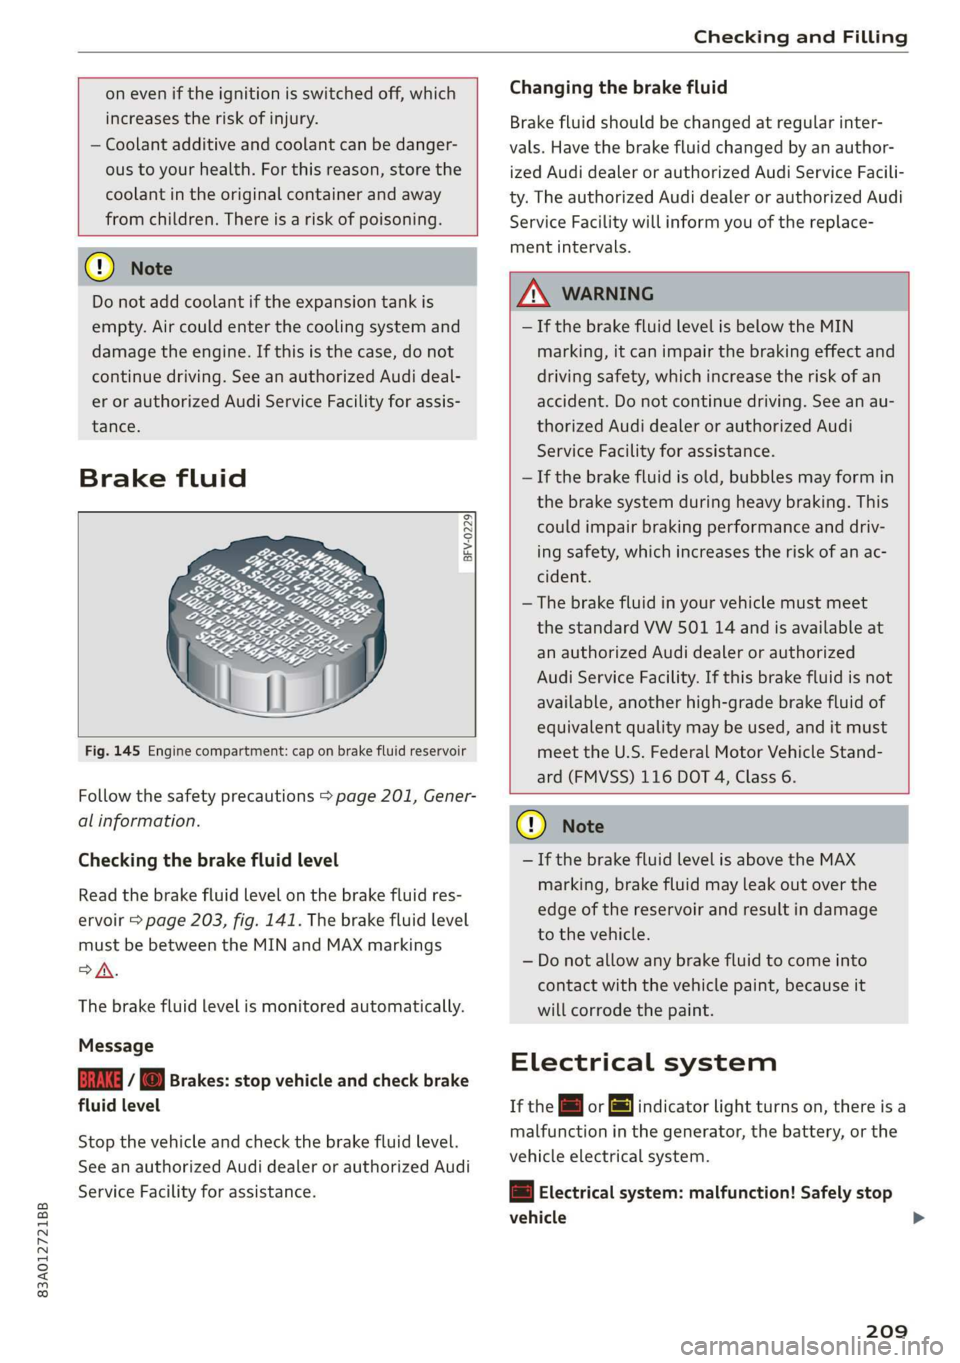
Brake fluid
BFV-0229|
Fig. 145 Engine compartment: cap on brake fluid reservoir
Follow the safety precautions > page 201, Gener-
al information.
Checking the brake fluid level
Read the brake fluid level on the brake fluid res-
ervoir > page 203, fig. 141. The brake fluid level
must be between the MIN and MAX markings
oA.
The brake fluid level is monitored automatically.
Message
GG / © Brakes: stop vehicle and check brake
fluid level
Stop the vehicle and check the brake fluid level.
See an authorized Audi dealer or authorized Audi
Service Facility for assistance.
Changing the brake fluid
Brake fluid should be changed at regular inter-
vals. Have the brake fluid changed by an author-
ized Audi dealer or authorized Audi Service Facili-
ty. The authorized Audi dealer or authorized Audi
Service Facility will inform you of the replace-
ment intervals.
Z\ WARNING
— If the brake fluid level is below the MIN
marking, it can impair the braking effect and
driving safety, which increase the risk of an
accident. Do not continue driving. See an au-
thorized Audi dealer or authorized Audi
Service Facility for assistance.
— If the brake fluid is old, bubbles may form in
the brake system during heavy braking. This
could impair braking performance and driv-
ing safety, which increases the risk of an ac-
cident.
—The brake fluid in your vehicle must meet
the standard VW 501 14 and is available at
an authorized Audi dealer or authorized
Audi Service Facility. If this brake fluid is not
available, another high-grade brake fluid of
equivalent quality may be used, and it must
meet the U.S. Federal Motor Vehicle Stand-
ard (FMVSS) 116 DOT 4, Class 6.
@) Note
— If the brake fluid level is above the MAX
marking, brake fluid may leak out over the
edge of the reservoir and result in damage
to the vehicle.
— Do not allow any brake fluid to come into
contact with the vehicle paint, because it
will corrode the paint.
Electrical system
If the = or fj indicator light turns on, there is a
malfunction in the generator, the battery, or the
vehicle electrical system.
= Electrical system: malfunction! Safely stop
vehicle >
209
Page 215 of 278
83A012721BB
Checking and Filling
@) Note
— The concentration of anti-freezing agent
must be adjusted to the vehicle operating
conditions and the climate. A concentration
that is too high can lead to vehicle damage.
— Never add radiator anti-freeze or other addi-
tives to the washer fluid.
— Do not use a glass cleaner that contains
paint solvents, because this could damage
the paint.
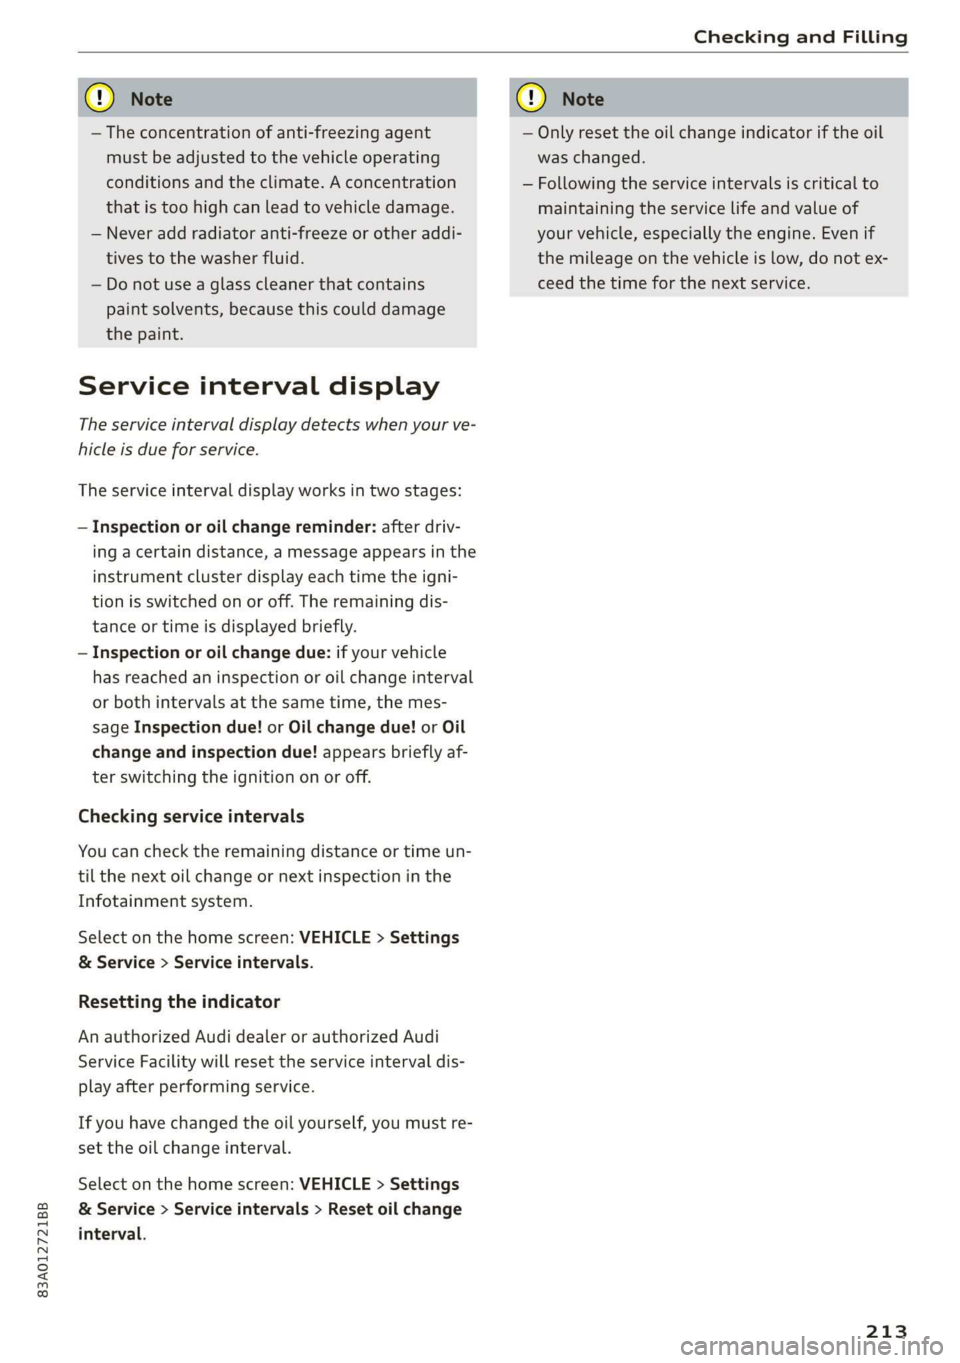
Service interval display
The service interval display detects when your ve-
hicle is due for service.
The service interval display works in two stages:
— Inspection or oil change reminder: after driv-
ing a certain distance, a message appears in the
instrument cluster display each time the igni-
tion is switched on or off. The remaining dis-
tance or time is displayed briefly.
— Inspection or oil change due: if your vehicle
has reached an inspection or oil change interval
or both intervals at the same time, the mes-
sage Inspection due! or Oil change due! or Oil
change and inspection due! appears briefly af-
ter switching the ignition on or off.
Checking service intervals
You can check the remaining distance or time un-
til the next oil change or next inspection in the
Infotainment system.
Select on the home screen: VEHICLE > Settings
& Service > Service intervals.
Resetting the indicator
An authorized Audi dealer or authorized Audi
Service Facility will reset the service interval dis-
play after performing service.
If you have changed the oil yourself, you must re-
set the oil change interval.
Select on the home screen: VEHICLE > Settings
& Service > Service intervals > Reset oil change
interval.
CG) Note
— Only reset the oil change indicator if the oil
was changed.
— Following the service intervals is critical to
maintaining the service life and value of
your vehicle, especially the engine. Even if
the mileage on the vehicle is low, do not ex-
ceed the time for the next service.
213
Page 225 of 278
83A012721BB
Wheels
not permitted can lead to ve-
hicle damage or accidents.
—If you install wheel covers on
the vehicle, make sure they al-
low enough air circulation to
cool the brake system. If they
do not, this could increase the
risk of an accident.
Tire wear and damage
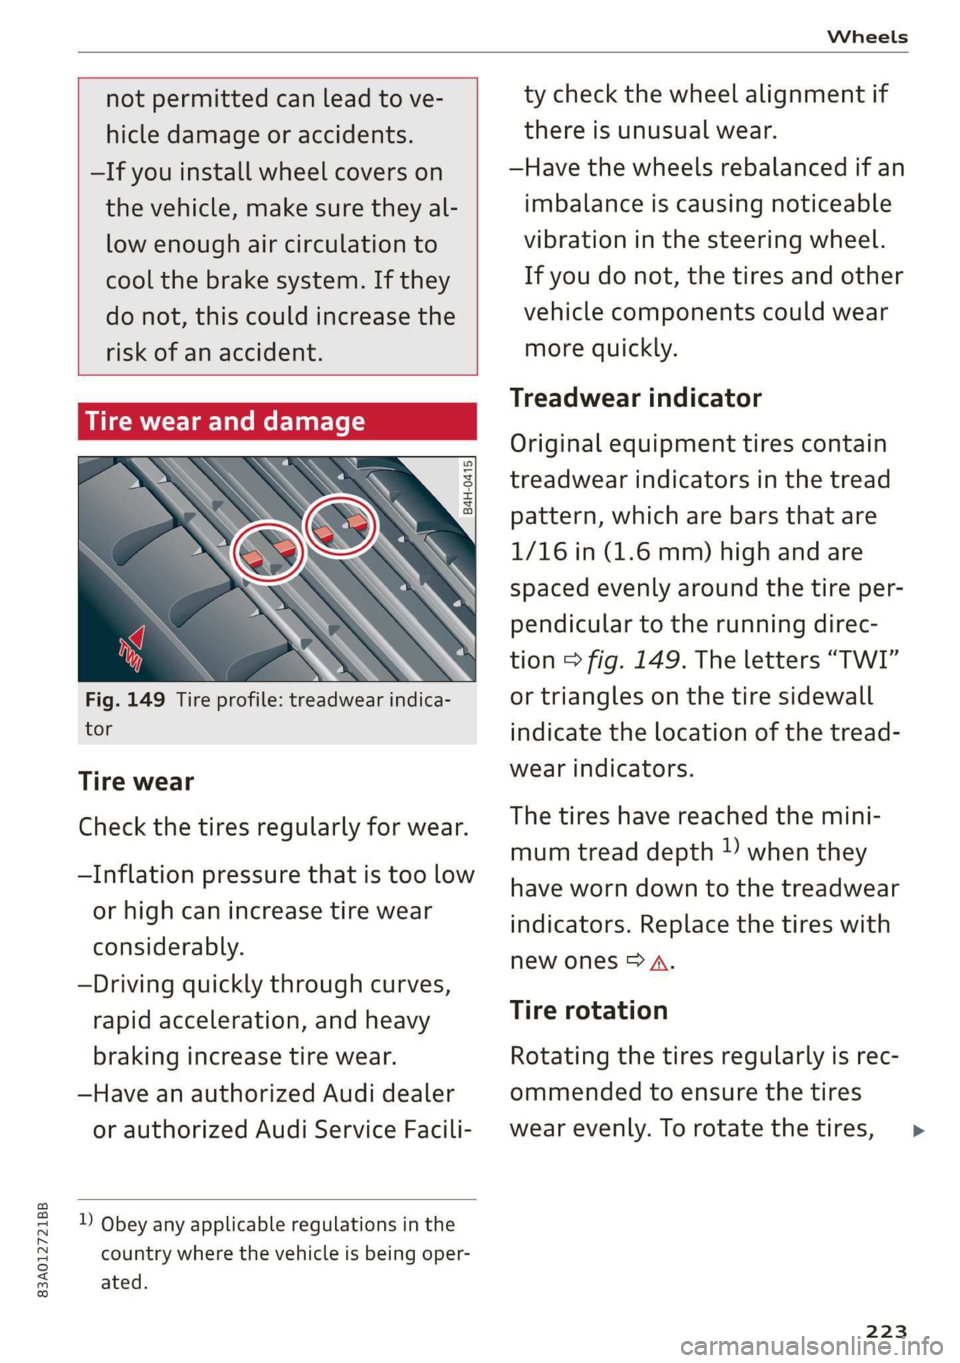
B4H-0415
Fig. 149 Tire profile: treadwear indica-
tor
Tire wear
Check the tires regularly for wear.
—Inflation pressure that is too low
or high can increase tire wear
considerably.
—Driving quickly through curves,
rapid acceleration, and heavy
braking increase tire wear.
—Have an authorized Audi dealer
or authorized Audi Service Facili-
D Obey any applicable regulations in the
country where the vehicle is being oper-
ated.
ty check the wheel alignment if
there is unusual wear.
—Have the wheels rebalanced if an
imbalance is causing noticeable
vibration in the steering wheel.
If you do not, the tires and other
vehicle components could wear
more quickly.
Treadwear indicator
Original equipment tires contain
treadwear indicators in the tread
pattern, which are bars that are
1/16 in (1.6 mm) high and are
spaced evenly around the tire per-
pendicular to the running direc-
tion > fig. 149. The letters “TWI”
or triangles on the tire sidewall
indicate the location of the tread-
wear indicators.
The tires have reached the mini-
mum tread depth !) when they
have worn down to the treadwear
indicators. Replace the tires with
new ones > A.
Tire rotation
Rotating the tires regularly is rec-
ommended to ensure the tires
wear evenly. To rotate the tires,
223
>
Page 231 of 278
83A012721BB
Wheels
>Check the tire sidewall
(=> page 215, fig. 148) to deter-
mine the designated load rating
for a specific tire.
Wheel bolts and rims
Wheel bolts
Wheel bolts must be clean and loosen/tighten
easily. You will need a special adapter to loosen
the anti-theft wheel bolts* > page 241.
Rims
Rims with a bolted rim ring* or with bolted wheel
covers* consist of multiple pieces. These compo-
nents were bolted together using special bolts
and a special procedure. You must not repair or
disassemble them > A.
ZA WARNING
Wheel bolts that are tightened or repaired in-
correctly can become loose and result in loss
of vehicle control, which increases the risk of
an accident. For the correct tightening specifi-
cation, see > page 243, Finishing.
— Always keep the wheel bolts and the threads
in the wheel hub clean and free of grease.
— Only use wheel bolts that fit the rim.
— Always have damaged rims repaired by an
authorized Audi dealer or authorized Audi
Service Facility. Never repair or disassemble
rims yourself, because this increases the risk
of
an accident.
Loose wheel warning
Applies to: vehicles with loose wheel warning
Within the limits of the system, the loose wheel
warning in the instrument cluster warns you if
one or more wheels are loose.
Using the ABS sensors, the loose wheel warning
system compares the vibration characteristics of
the individual tires. If one or more wheels are
loose, it will be indicated in the instrument clus-
ter display with the & indicator light and a mes-
sage. If only one wheel is affected, the location
of that wheel will be indicated.
Messages
fi Wheel bolts loose. Please safely stop the ve-
hicle and check all wheel bolts!
Loose wheel warning for at least one wheel > A\.
Check the wheel bolts on all wheels with the
wheel wrench (vehicle tool kit). Have the tighten-
ing specification checked as soon as possible with
a torque wrench. Drive carefully until then. For
the correct tightening specification, see
=> page 243, Finishing.
fl Wheel assessment active. Please continue
driving carefully
After this message appears and you have checked
the wheel bolts, the assessment phase begins
when the vehicle is in motion. This may take sev-
eral minutes.
| | Loose wheel warning: malfunction! See
owner's manual
There is a system malfunction. Drive immediately
to an authorized Audi dealer or authorized Audi
Service Facility to have the malfunction repaired.
ZA WARNING
Wheel bolts that are tightened incorrectly can
become loose and result in loss of vehicle con-
trol, which increases the risk of an accident.
— If a message appears, reduce your speed im-
mediately and avoid any hard steering or
braking maneuvers. Stop as soon as possible
and check the wheel bolts.
— Check your wheels for damage. Have the
damaged wheels checked and/or replaced
immediately by an authorized Audi dealer or
authorized Audi Service Facility.
— Under certain conditions (such as a sporty
driving style, winter conditions, or unpaved
roads), the message may be delayed.
— The driver is responsible for ensuring that
the wheels are attached correctly.
229
Page 235 of 278

83A012721BB
Wheels
— Tires that are only partially used are replaced
with new tires
Indicator lights
@ - Loss of pressure in at least one tire > A\.
Check the tires and replace or repair if necessary.
Check and correct the pressures of all four tires
and store the pressure again > page 233.
ia (Tire Pressure Monitoring System) Tire pres-
sure: malfunction! See owner's manual. if
appears after switching the ignition on or while
driving and the @ indicator light in the instru-
ment cluster blinks for approximately one minute
and then stays on, there is system malfunction.
Try to store the correct tire pressures
=> page 233. In some cases, you must drive for
several minutes after storing the pressures until
the indicator light turns off. If the indicator light
does turn off or turns on again after a short peri-
od of time, drive to an authorized Audi dealer or
authorized Audi Service Facility immediately to
have the malfunction corrected.
ZA WARNING
— If the tire pressure indicator appears in the
display, reduce your speed immediately and
avoid any hard steering or braking maneu-
vers. Stop as soon as possible and check the
tires and their pressure.
— The driver is responsible for maintaining the
correct tire pressure. You must check the
tire pressure regularly.
— Under certain conditions (such as a sporty
driving style, winter conditions, or unpaved
roads), the tire pressure monitoring system
indicator may be delayed.
(i) Tips
—The tire pressure monitoring system can al-
so stop working when there is an ESC mal-
function.
— Using snow chains may result in a system
malfunction.
—The tire pressure monitoring system in your
Audi was calibrated with “Audi Original
Tires” > page 221. Using these tires is rec-
ommended.
Storing tire pressures
If the tire pressure changes or a tire is replaced,
it must be confirmed in the system.
> Before storing the tire pressures, make sure the
tire pressures in all four tires meet the speci-
fied values and are adapted to the load
=> page 224.
> Switch the ignition on.
> Select on the home screen: VEHICLE > Settings
& Service > Tire pressure monitoring > Store
tire pressure > Yes, store now.
(i) Tips
Do not store the tire pressures if snow chains
are installed.
233