garage door opener AUDI Q3 2020 Owners Manual
[x] Cancel search | Manufacturer: AUDI, Model Year: 2020, Model line: Q3, Model: AUDI Q3 2020Pages: 278, PDF Size: 72.66 MB
Page 4 of 278
Table of contents
About this Owner's Manual......
SUMIMALY: ; « ss6% : osen ss sean cs poe s
QC CCeS Skis: si esis a 6 ores os ewe
Cockpit... 2... ee eee eee eee
Indicator lights overview...........0.
Display and operation............
Instrument cluster...............
Instrument cluster overview...........
Operating. ecco ws swacemn o © aero o erm 9
Adjusting the display.................
Coolant temperature display...........
Tachometer’. series s ewie so sie ¥ & overs
Odometer............ 0. cee eee eee eee
Outside temperature display...........
Vehicle functions « se-0 2. ese ve eee ees
Touch’ display . 22... : secs ie eses ees
General
touch display operation........
Multi Media Interface................
Voice operation..................
Generalinformation.................
Voice recognition system..............
External voice operation..............
Global functions.................
Additional function buttons...........
Starting and driving.............
Personalization..................
Luggage compartment lid.............
Child safety lock sa04 45 eec4 es eee e ee ees
Power Windows. . 6 sce « 6 umes #6 enna o
Panoramic glass roof................-
Garage door Opener’: sens ss esas se cess
Lights and Vision.................
Exterior lighting sees < = sees « « eee% sv oe
Interior liQhtingios . esas + exe ee ews x
VISION... eee eee
NOD
OO
13)
16 16 18
24 24 24
25
26 26 27 27 27 28 28
32
34
38 38
40
40
44 44
47 48
Windshield wipers............--..+-- 50
Digital compass............0 000 eens 52
Sitting correctly and safely...... 54
Correct passenger seating position...... 54
FRONUSGAtS s + astns s ¢ ewes +o eo te eoeee F 54
Rearseats sic 2 sea oo awn oo coon 7 9 oe 56
SLEEKIMG WHEEL esses 4 0 sneceas » s sxereye 9 6 eunaece 57
Head restraints..................000. 58
Safety belts: « ssa: s 2 wens 5 2 worms x s sawn 59
Airbag system... .. cc eee eee eee 62
Child safety seats..............0.00.. 67
Stowing and using............... 73
Power SOUrCeES ...... eee eee eee 73
Cup Holders: « saws = ¢ seme + ¢ eas ¢ e ees 73
Additional storage...............005. 74
Luggage compartment............... 74
ROOT ACK: « a waxem 2 2 soem 4 x em Foe tee oY 77
Warm and cold................... 78
Climate control system.............0. 78
Steering wheel heating............... 80
Fluids in the A/Csystem.............. 81
PICEVITIG:: ¢ ecces « 2 wees & o pees 5 oe oc oe 82
Starting the vehicle..............000- 82
When driving............. ee eee eee ee 84
Drive sySteliteves: + « wwe & & ews so eee es we 89
Start/Stop'system « sce ee ewer vo essere a « 90
Brakes. .............0000 0c cece eee 91
Electromechanical parking brake....... 93
Special driving situations.............. 94
Driving dynamic.................. 97
Audi driveiseleetss «isis ss naan a 2 cain a ve 97
Suspension.........-..00 eee eee eee 97
StGOriNG « awu & x Secs 5 = Hoves + F RevOS FE 98
All wheel drive (quattro).............. 99
Electronic Stabilization Control......... 99,
Trailer towing.................... 102
Driving with atrailer................. 102
Assist systems................005 105
Assist systems................005 105
Generalinformation................. 105
Surrounding area detection............ 106
Page 23 of 278
83A012721BB
Touch display
> If there are more than four notifications in the
notification center, the older notifications will
be hidden. To display the older notifications,
drag
your finger upward on the screen.
Setting displayed content
You can set whether some notifications should be
displayed.
> To set the displayed content, press ©, or
> Applies to MMI: Select on the home screen:
SETTINGS > Notifications.
>» Select and confirm which notifications should
be displayed.
Possible functions
Description
Press: switches the center display
on or off
Press and hold: switches screen
clearing mode on or off
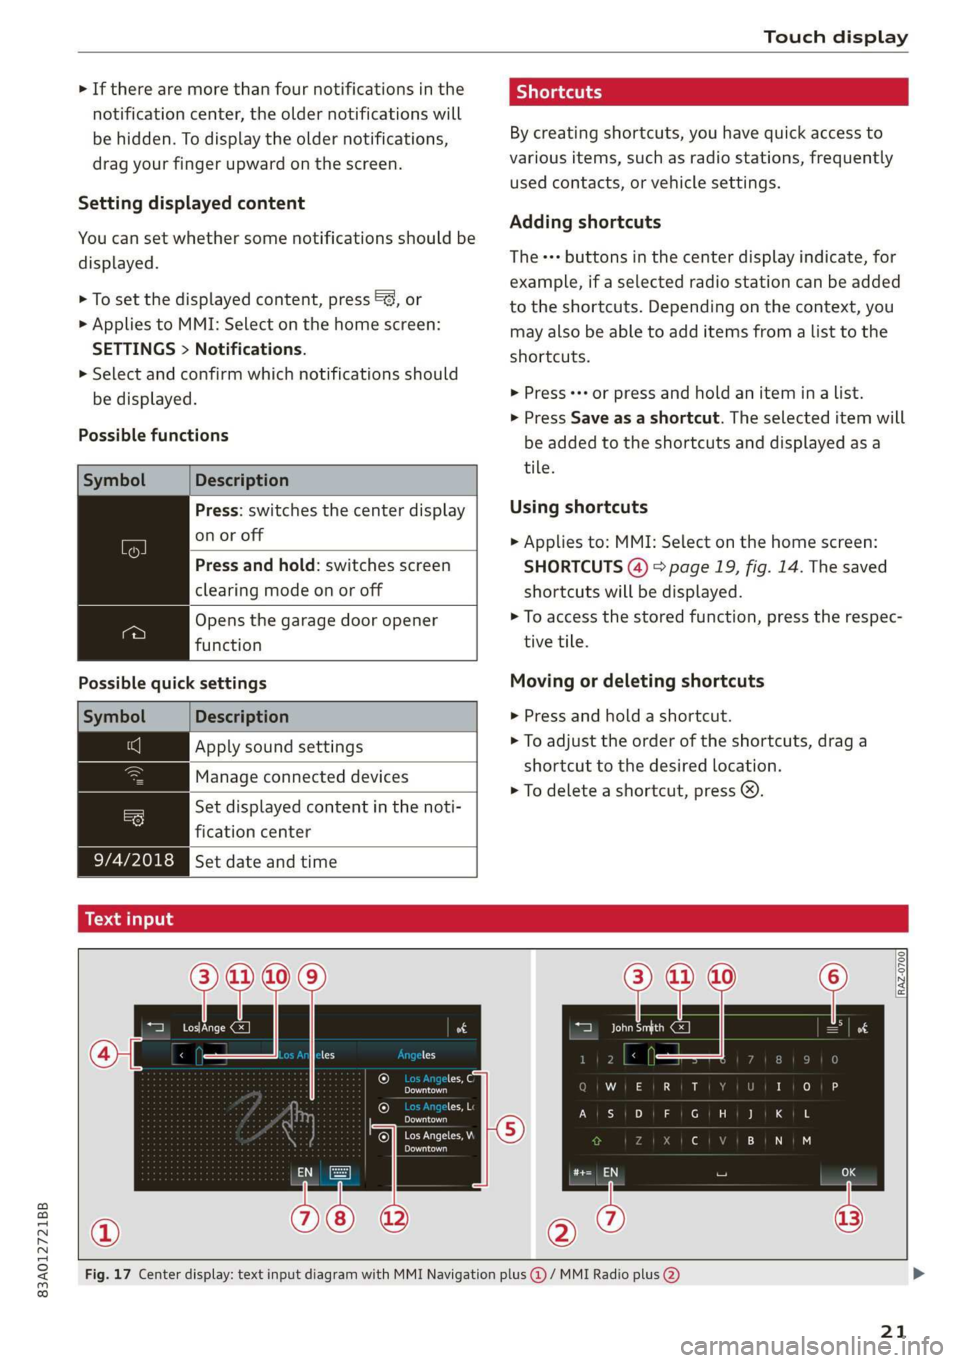
Opens the garage door opener
function
Possible quick settings
Description
Apply sound settings
Manage connected devices
Set displayed content in the noti-
fication center
EZYASEM Set dateandtime ——_——i|
Shortcuts
By creating shortcuts, you have quick access to
various items, such as radio stations, frequently
used contacts, or vehicle settings.
Adding shortcuts
The +++ buttons in the center display indicate, for
example, if a selected radio station can be added
to the shortcuts. Depending on the context, you
may also be able to add items from a list to the
shortcuts.
> Press +++ or press and hold an item ina list.
>» Press Save as a shortcut. The selected item will
be added to the shortcuts and displayed as a
tile.
Using shortcuts
> Applies to: MMI: Select on the home screen:
SHORTCUTS (4) > page 19, fig. 14. The saved
shortcuts will be displayed.
> To access the stored function, press the respec-
tive tile.
Moving or deleting shortcuts
> Press and hold a shortcut.
> To adjust the order of the shortcuts, drag a
shortcut to the desired location.
> To delete a shortcut, press ©.
acetal hg
be ure
< les
he
Downtown
oan
Downtown
eee
Pern
RAZ-0700.
Fig. 17 Center display: text input diagram with MMI Navigation plus @) / MMI Radio plus @)
21
Page 42 of 278
Opening and closing
Panoramic glass roof
oy Tela mamta late Meera iarle()
Applies to: vehicles with panoramic glass roof and roof sun-
itr
ceriga”
as ee
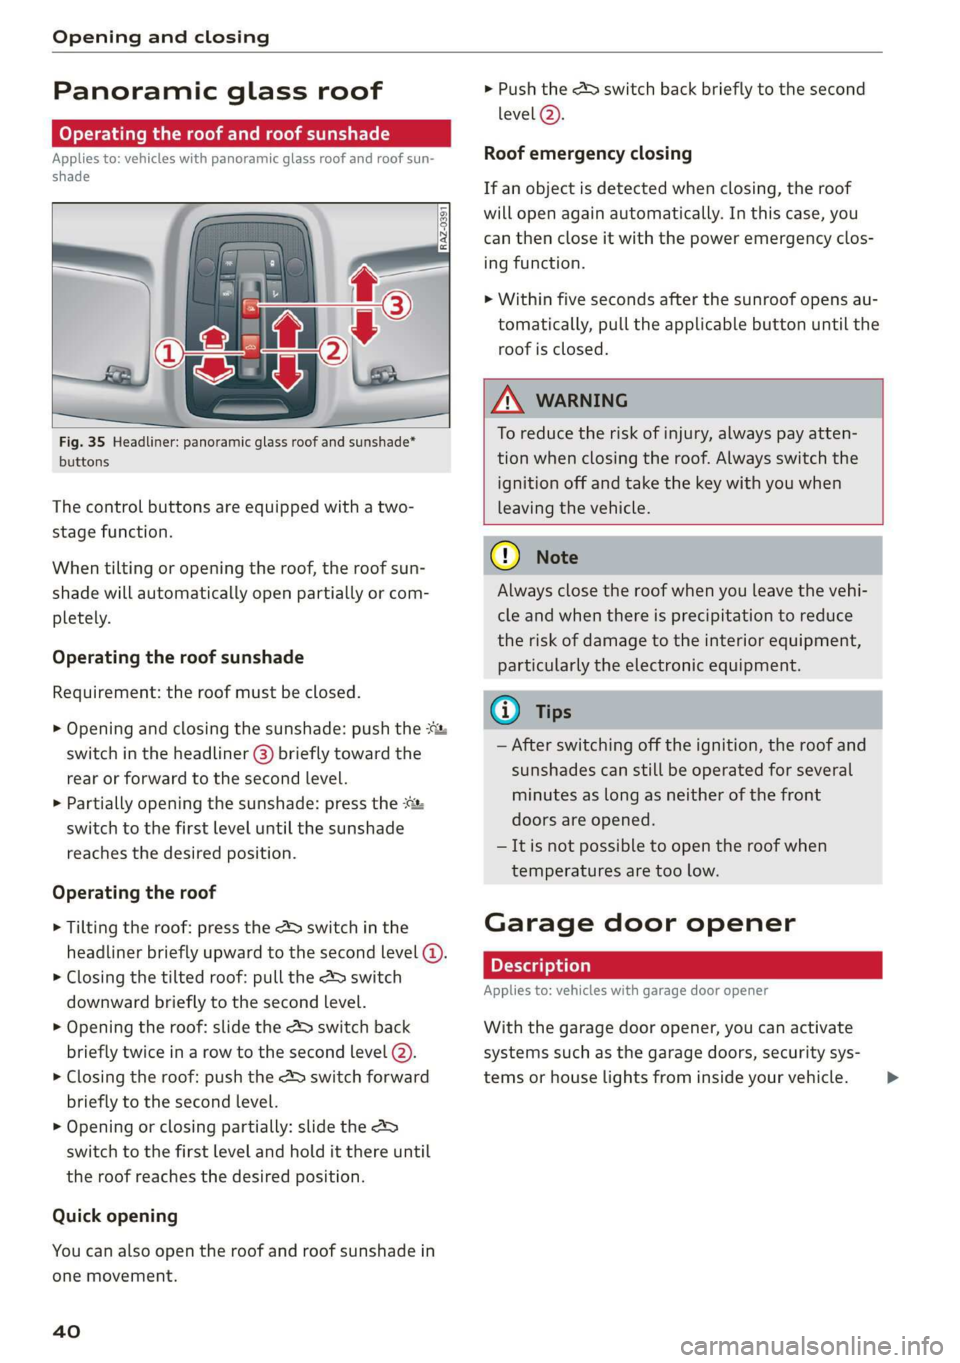
Fig. 35 Headliner: panoramic glass roof and sunshade*
buttons
The control buttons are equipped with a two-
stage function.
When tilting or opening the roof, the roof sun-
shade will automatically open partially or com-
pletely.
Operating the roof sunshade
Requirement: the roof must be closed.
> Opening and closing the sunshade: push the *:
switch in the headliner @) briefly toward the
rear or forward to the second level.
> Partially opening the sunshade: press the :&
switch to the first level until the sunshade
reaches the desired position.
Operating the roof
> Tilting the roof: press the &> switch in the
headliner briefly upward to the second level (@.
> Closing the tilted roof: pull the A> switch
downward briefly to the second Level.
> Opening the roof: slide the 2> switch back
briefly twice in a row to the second level (2).
> Closing the roof: push the &> switch forward
briefly to the second level.
> Opening or closing partially: slide the 2
switch to the first level and hold it there until
the roof reaches the desired position.
Quick opening
You can also open the roof and roof sunshade in
one movement.
40
> Push the > switch back briefly to the second
level @).
Roof emergency closing
If an object is detected when closing, the roof
will open again automatically. In this case, you
can then close it with the power emergency clos-
ing function.
> Within five seconds after the sunroof opens au-
tomatically, pull the applicable button until the
roof is closed.
ZA WARNING
To reduce the risk of injury, always pay atten-
tion when closing the roof. Always switch the
ignition off and take the key with you when
leaving the vehicle.
C) Note
Always close the roof when you leave the vehi-
cle and when there is precipitation to reduce
the risk of damage to the interior equipment,
particularly the electronic equipment.
Gi) Tips
— After switching off the ignition, the roof and
sunshades can still be operated for several
minutes as long as neither of the front
doors are opened.
— It is not possible to open the roof when
temperatures are too low.
Garage door opener
Applies to: vehicles with garage door opener
With the garage door opener, you can activate
systems such as the garage doors, security sys-
tems or house lights from inside your vehicle. >
Page 43 of 278
83A012721BB
Opening and closing
These functions are operated in the MMI. Multi-
ple receivers can be programmed, which can con-
trol the functions of up to eight!) hand-held
transmitters.
ZA WARNING
— When operating or programming the garage
door opener, make sure that no people or
objects are in the area immediately sur-
rounding the equipment. People can be in-
jured or property can be damaged if struck
when closing.
— Do not allow yourself to be distracted from
traffic by the viewing and operating the dis-
plays.
G) Tips
— If you sell your vehicle, reset all settings to
the factory default settings > page 194.
— For an explanation on conformity with the
FCC regulations in the United States and the
Industry Canada regulations, see
=> page 259.
@) Tips
Before you program your system to the ga-
rage door opener, first check the compatibili-
ty:
— Ask an authorized Audi dealer or authorized
Audi Service Facility or check at www.
homelink.com. You can also find more infor-
mation about HomeLink there.
— You can display information about Home-
Link (compatibility level/status/country
code/HomeLink generation) in the MMI:
— Select on the home screen: VEHICLE > Set-
tings & Service > Garage door opener > (0.
Applies to: vehicles with garage door opener
Requirements: the remote control transmitter
must be programmed > page 41, the vehicle
must be within range of the system, and the igni-
tion must be switched on.
D_ The possible number of hand-held transmitters depends
on the equipment.
There are multiple options to open or close the
system (such as the garage door).
> To display the ra button (garage door opener
button) for the garage door opener, press the
[£) button in the status bar > page 20.
> If you have only programmed one remote con-
trol transmitter, press the r@ button in the sta-
tus bar on the display > page 19. Or
> If you have programmed multiple remote con-
trol transmitters, press the ra button in the
status bar on the display > page 19 and then
press the button for the respective system. Or
> If you have configured the programmable
steering wheel button*, press the K button
= page 26 and then press the respective button
for the system. Or
> Applies to: vehicles with GPS pairing: If you
have programmed Location pairing, press the
respective button in the center display (notifi-
cation center > page 20). As you approach the
system, the button is displayed on the MMI. Or
> When reverse gear is selected, the parking sys-
tem* / rearview camera* / peripheral camera*
will appear in the display. To display the but-
tons of the first three garage door openers,
press the E=] button in the status bar and then
press the button for the respective system.
If transmission was successful, the message:
Send to: XXX will appear.
Applies to: vehicles with garage door opener
You can program both fixed code and rolling code
systems in the MMI using the procedure that is
described.
Requirement: the ignition must be switched on.
Programming the system
Requirement: the hand transmitter must be
present and the vehicle must be within range of
the system (such as the garage door) that you
would like to program. If you program more than
three remote control transmitters, assign the
41
>
Page 44 of 278
![AUDI Q3 2020 Owners Manual Opening and closing
first three spots to the systems that you would
also like to use when driving in reverse.
> To display the rd button for the garage door
opener, press the [=] button in the AUDI Q3 2020 Owners Manual Opening and closing
first three spots to the systems that you would
also like to use when driving in reverse.
> To display the rd button for the garage door
opener, press the [=] button in the](/img/6/57625/w960_57625-43.png)
Opening and closing
first three spots to the systems that you would
also like to use when driving in reverse.
> To display the rd button for the garage door
opener, press the [=] button in the status bar
=> page 20.
> If you are programming the garage door opener
for the first time, press the 2 button on the
display. Follow the instructions in the MMI. Or
> If you would like to program other systems, se-
lect on the home screen: VEHICLE > Settings &
Service > Garage door opener. Select the de-
sired button: @). Follow the instructions in the
MMI.
> If you would like to reprogram systems that are
already programmed, select on the home
screen: VEHICLE > Settings & Service > Garage
door opener. Press the Z button and select 7
for the system to be reprogrammed. Select:
Program. Follow the instructions in the MMI.
With some systems, the garage door opener will
be immediately available after programming.
With other systems, the garage door opener
must also be synchronized.
Synchronizing!)
Requirement: the hand transmitter must already
be programmed and the vehicle must be within
range of the system (such as the garage door).
If the system synchronization is performed di-
rectly after the programming procedure, follow
the instructions on the MMI.
If you would like to sync at a later time:
> Select on the home screen: VEHICLE > Settings
& Service > Garage door opener.
> Press the button for the system that you would
like to synchronize.
> Follow the instructions in the MMI.
GPS pairing
Applies to: vehicles with GPS pairing
For easier operation, you can program your sys-
tem's location.
> Select on the home screen: VEHICLE > Settings
& Service > Garage door opener.
D_ Only applies to rolling code systems
42
> Press the Z button.
> Press the 7 button for the system your vehicle
is facing.
> Select: Location pairing.
> Follow the instructions in the MMI.
Only a maximum of three systems can be dis-
played in the notification center > page 20. If
you would like to have all systems displayed,
press 49.
Renaming programmed systems
You can rename the programmed systems indi-
vidually.
> Select on the home screen: VEHICLE > Settings
& Service > Garage door opener.
> Press the Z button.
> Press the button for the system that you
would like to rename.
> Select: Rename.
> Follow the instructions in the MMI.
Deleting programmed systems
The programmed systems can be deleted individ-
ually or all at once.
> Select on the home screen: VEHICLE > Settings
& Service > Garage door opener.
> Press the Z button.
> To delete an individual system, press the L]
button for the desired system. If the checkmark
V is set, select: Delete.
> To delete all systems, select: All > Delete.
G) Tips
— Make sure the batteries in the hand trans-
mitter are charged before starting the pro-
gramming process.
— The programming process may take up to
30 seconds. It may be necessary for the
hand transmitter to be pressed again in the
meantime.
— The garage door opener may need to be
synchronized with the system after pro-
gramming. Follow the manufacturer's in-
structions for doing this.
Page 45 of 278
83A012721BB
Opening and closing
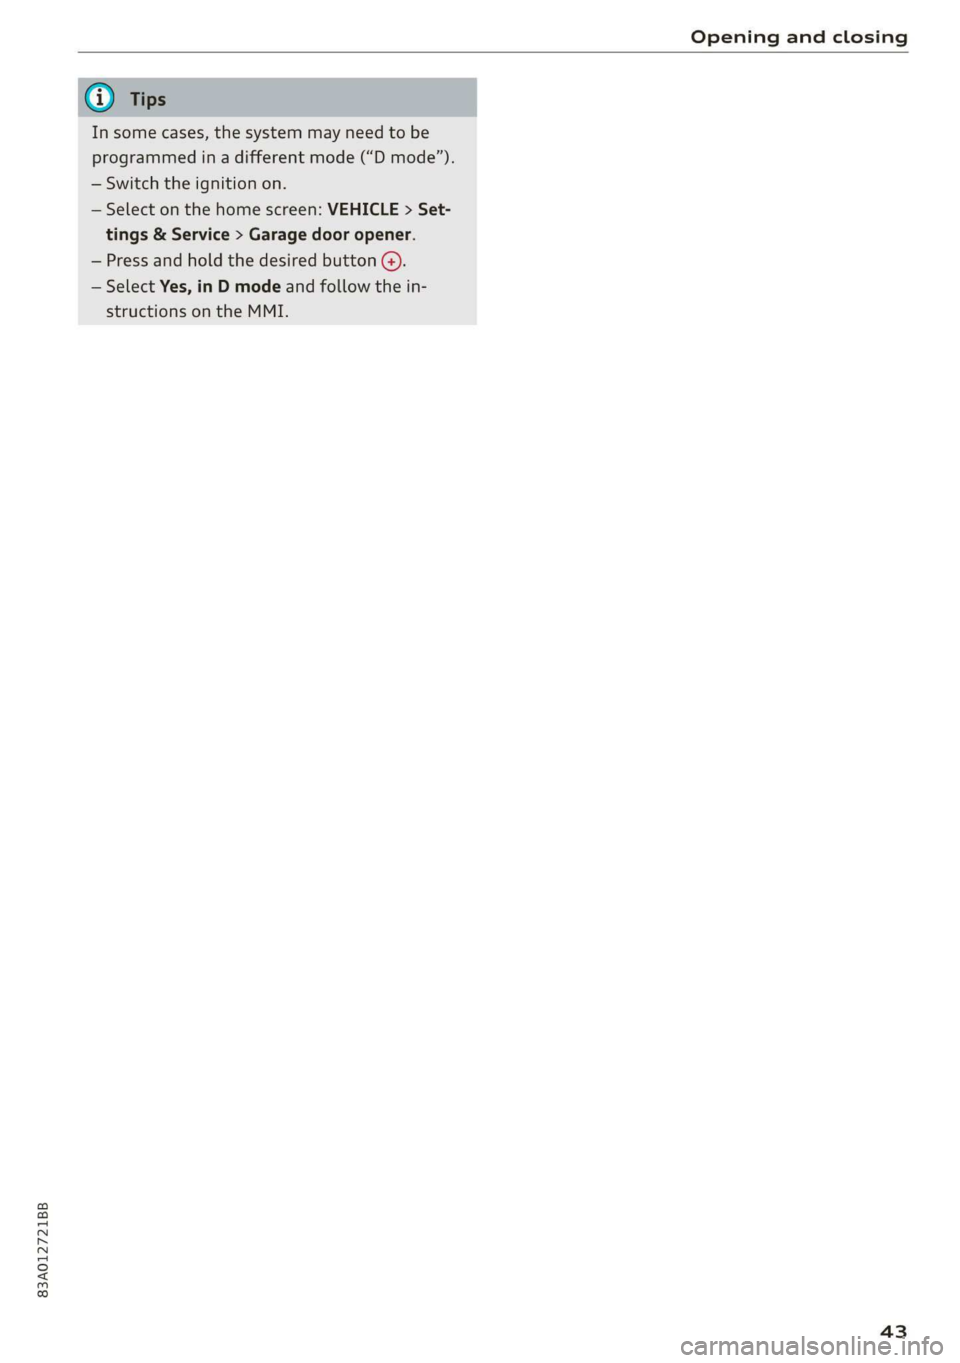
In some cases, the system may need to be
programmed in a different mode (“D mode”).
— Switch the ignition on.
— Select on the home screen: VEHICLE > Set-
tings & Service > Garage door opener.
— Press and hold the desired button @).
— Select Yes, in D mode and follow the in-
structions on the MMI.
43
Page 252 of 278
Fuses and bulbs
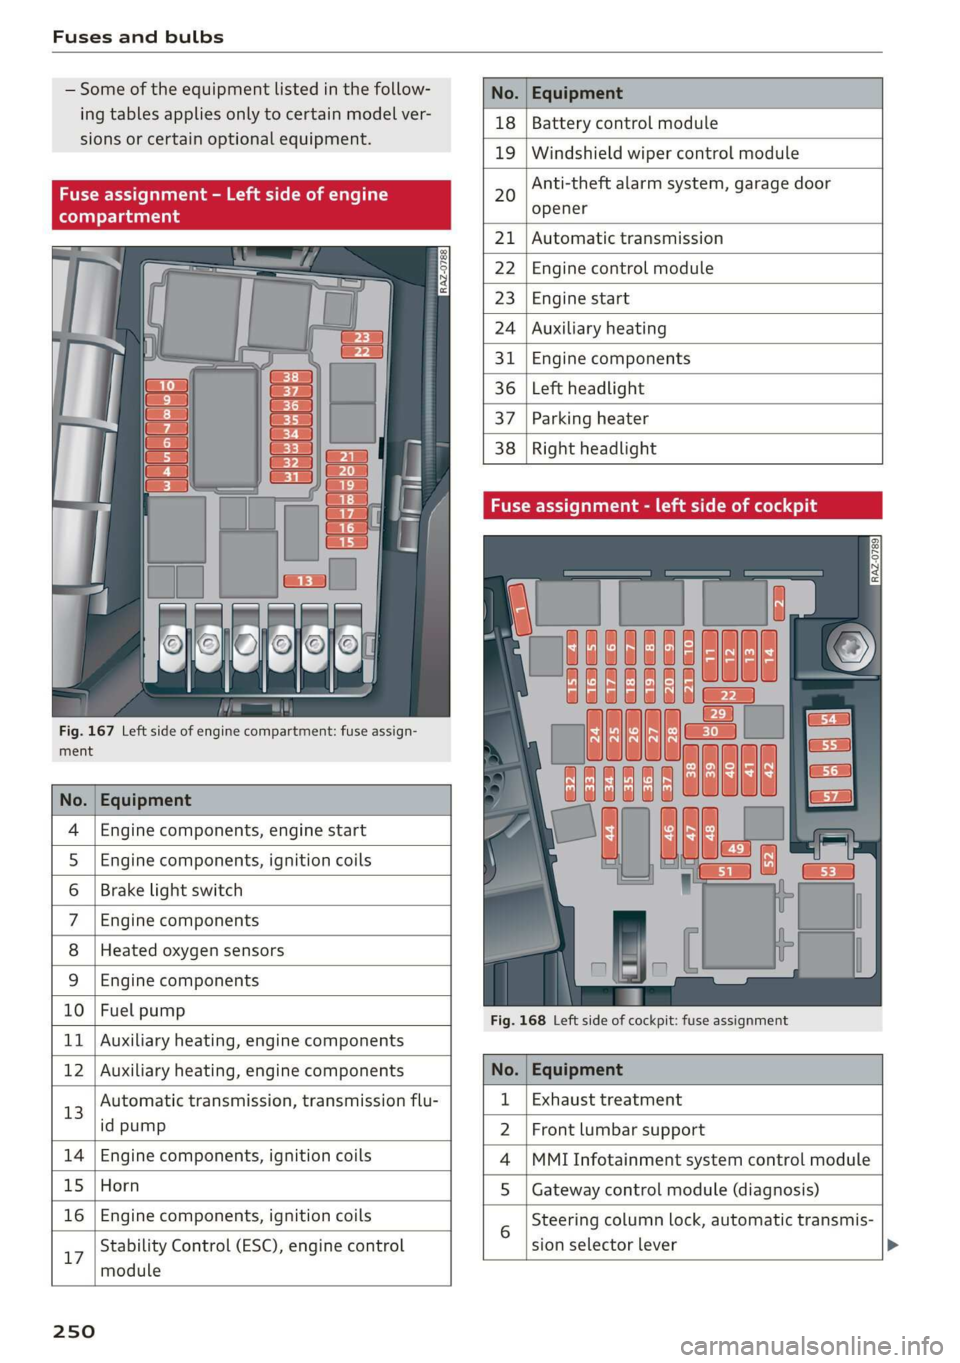
— Some of the equipment listed in the follow-
ing tables applies only to certain model ver-
sions or certain optional equipment.
Fig. 167 Left side of engine compartment: fuse assign-
ment
No. | Equipment
Engine components, engine start
Engine components, ignition coils
Brake light switch
Engine components
Heated oxygen sensors
OlOAIN
I
DA/Mm|A
Engine components
10 | Fuel pump
11 | Auxiliary heating, engine components
No. Equipment
18 Battery control module
19 Windshield wiper control module
20
Anti-theft alarm system, garage door
opener
21 Automatic transmission
22 Engine control module
23 Engine start
24 Auxiliary heating
31 Engine components
36 Left headlight
37 Parking heater
38
Right headlight
Fig. 168 Left side of cockpit: fuse assignment
Stability Control (ESC), engine control
17
module
250
12 | Auxiliary heating, engine components No. | Equipment
13 Automatic transmission, transmission flu- 1 | Exhaust treatment
id pump 2 | Front lumbar support
14 | Engine components, ignition coils 4 |MMI Infotainment system control module
15 | Horn 5 | Gateway control module (diagnosis)
16 | Engine components, ignition coils 5 Steering column lock, automatic transmis-
sion selector lever
Page 261 of 278

83A012721BB
Accessories and technical changes
or write to:
Administrator NHTSA
1200 New Jersey Ave.,
S.E. West Building
Washington, DC
20590.
You can also obtain other infor-
mation about motor vehicle safe-
ty from http://www.safercar.gov.
Applicable to Canada
If you live in Canada and you be-
lieve that your vehicle has a de-
fect that could cause a crash, in-
jury or death, you should immedi-
ately inform Transport Canada,
Defect Investigations and Recalls.
You should also notify Audi Cana-
da.
Canadian customers who wish to
report a safety-related defect to
Transport Canada, Defect Investi-
gations and Recalls, may either
call Transport Canada toll-free at:
Tel.: 1-800-333-0510 or
Tel.: 1-819-994-3328 (Ottawa re-
gion and from other countries)
TTY for hearing impaired:
1-888-675-6863
or contact Transport Canada by
mail at:
Transport Canada
Motor Vehicle Safety Investiga-
tions Laboratory
80 Noel Street
Gatineau, QC
J8Z OA1
For additional road safety infor-
mation, please visit the Road
Safety website at:
English:
http://www.tc.gc.ca/eng/
motorvehiclesafety/menu.htm
French:
http://www.tc.gc.ca/fra/
securiteautomobile/menu.htm
Declaration of
compliance for telecom-
munications equipment
and electronic systems
The manufacturer is not liable for radio malfunc-
tions that are caused by unauthorized changes to
the equipment.
Equipment
The following equipment complies with FCC sec-
tion 15 and RSS-Gen:
— Adaptive cruise assist*
— Remote control key
— Cell phone package*
— Garage door opener (HomeLink)*
— Side assist*
— Rear cross-traffic assist*
— WLAN hotspot*
FCC Part 15.19
This device complies with part 15 of the FCC
Rules. Operation is subject to the following two
conditions: (1) This device may not cause harmful >
259
Page 269 of 278
83A012721BB
Fuel tank capacity
Gasoline... 2... ee eee eee eee
Reducing fuel consumption............. 89
Fueling
Fuebtillerdoor's + = sce so sens o soamsne + aress 198
Fuel filler door emergency release....... 200
Fuel tank capacity.................00-. 262
Fuse assignment..............-.2-.0-- 250
G
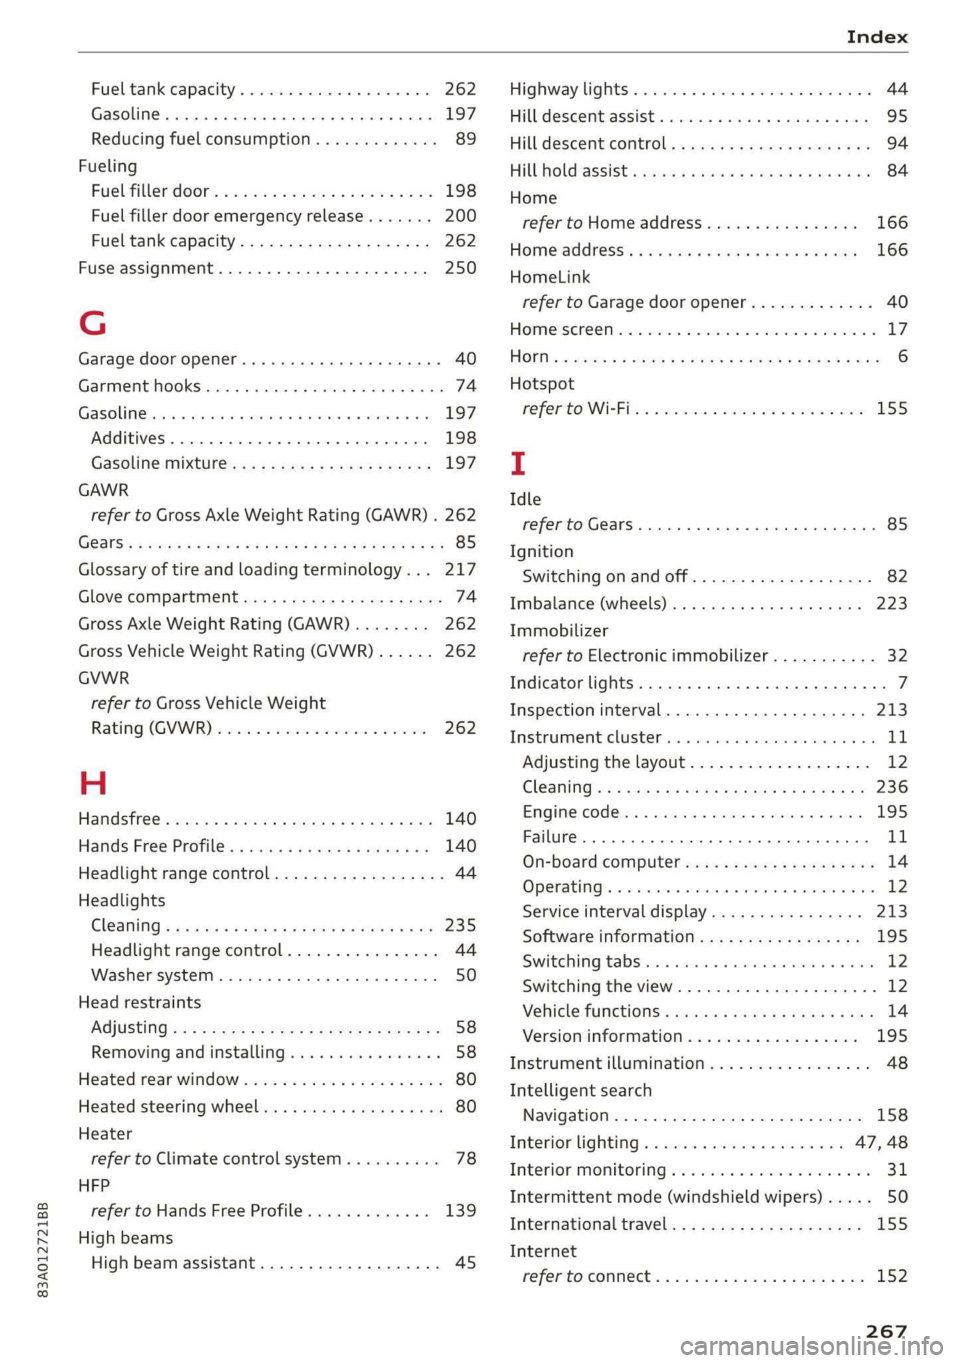
Garage door opener... .. 6... ce eee eee eee 40
Garment hooks.......... 000.0000 eee eee 74
Gasoline... 2. eee eee 197
Additives ..... 0... ccc cece 198
GASOLINE MIXtURElea: « » coe ss yee 2 4 eee 197
GAWR
refer to Gross Axle Weight Rating (GAWR) . 262
GSlSiy « saves a neue 3 e Rew oe EER e eTEEY & BE 85
Glossary of tire and loading terminology... 217
Glove Compartment ocx « : cccu es yew 2 g can 74
Gross Axle Weight Rating (GAWR)........ 262
Gross Vehicle Weight Rating (GVWR)...... 262
GVWR
refer to Gross Vehicle Weight
Rating (GVWR) iiss «2 sssuos 6 2 wasn 2 w cose 262
H
Handstrees: esis « y ween ¢ pase 2 aaien gs ears 140
Hafids Free.Profile’. «sows + < sas sv emu ges 140
Headlight range control.................. 44
Headlights
Cleaning « « ssw ¢ owas x o owes x o sew so oe 235
Headlight range control................ 44
Washer system... 1... 0... cece eee ee eee 50
Head restraints
AGjUStING ss = = wows : 2 ewes to wees oo eee 2 2 58
Removing and installing................ 58
Heated rear window.............00000008 80
Heated steering wheel................--. 80
Heater
refer to Climate control system.......... 78
HFP
refer to Hands Free Profile............. 139
High beams
High beam assistant................... 45
Highway tights. © asi 2 oscar 2 waver vee 2 44
Hill descent assist ..... 0.0... ce eee eens 95
Hill descent control... 2.0... ..ce eee e eens 94
Hill Hold assist « vies se ees xe ews enews oe 84
Home
refer to Home address................ 166
Homeaddress:: « s sess saya nee ee pee 166
HomeLink
refer to Garage door opener............. 40
HOMEISCrERNs: 5. covi oo sosueee oH seston = 0 ane ov LZ
HIOKN « « sues 2 2 aus oo eee ee ey Fo eee s Bee 6
Hotspot
MO fEritONN eR be: 2 x seawes w = snecawe =o maesne ew anes 155
I
Idle
refer to Gears... . ee eee eee 85
Ignition
Switching on and off..............0000- 82
Imbalance (wheels) ............0 eee eee 223
Immobilizer
refer to Electronic immobilizer........... 32
Indicator lights... 2... 6. . eee eee eee eee 7
Inspection interval..............0000 00 213
Instrument cluster.............0 000 eee 11
Adjusting the layout................... 12
GlEANING’s « & seuss @ & wawe 2 = wow « y ROS ea 236
Engine code........... 2... eee ee eee 195
Failure... ee eee 11
On-board computer...............000-5 14
OPerabing’. « ssersc « vere eo evauens + + anova © & en 12
Service interval display................ 213
Software information................. 195
Switching tabs: « «wasn s & were w & areomwe 6 6 aoe 12
Switching the view.............2--0000- 12
Vehicle TUNCtIONS « isis x estas se ews oe eee 14
Version information.................- 195
Instrument illumination................. 48
Intelligent search
Navigationion + « scare ao casesene
Interior lighting © «ces << were ee ese ve 47,48
Interior MONItOriING’s « s scsi so csuew sees ws 31
Intermittent mode (windshield wipers) ..... 50
Internationaltravel..................0. 155
Internet
referto CONNeCts « 2 esws es eews ees wm 152
Page 273 of 278
83A012721BB
Index
Receptionsranges wecsier + wes as cose a 4 suevem L73
Recirculation: Mode voi. s visi ss eee. 6 ween 80
RecUPElatlOltss « ¢ ewe + + mesg + + cous os cee 15
REfWelinig x cums a x seen & x seems 2B aooee Fe ee 198
Remote control
Garage door opener............-22+000- 40
Remote control key............. ee eee ee 32
Remote control key..............0000005 32
Convenience opening and closing......... 39
Key replacement..............---00 eee 32
LED ssiccns x a ascuaen oo snaneen a a ocanone wrenii ee aeons 34
Replacing the battery................2. 34
SYNCHTONIZACION's « smu: & = seus 4 equ 4 ee 34
Unlocking and locking............-...0. 33
also refer to Vehicle key.............00. 32
Removing the caps (wheel bolts)......... 240
REPailS sovss 2 smemus © anes ow temom @ H aneReN § 2 256
Repeats. « sans « s sane os ames o 2 nee o meee 186
Replacement key.............0 00 eevee 32
Replacement parts............---.2+--- 258
Replacing: BULBS! 2. « sw « ¢ wees se eee ge 251
Replacing fuses ........ 00.0 cc eeee renee 249
Reporting
Safety Defects................ 258
Reverse gear
refer to Gears sees = eee ¢ s seen co wees: 2: 85
Rewinding (media files)................. 184
RIMS 0... eee eee 229
Cleaning « + sess « = sews ¢ e pees ce ewe se 235
Roof
refer to Panoramic glass roof............ 40
ROOF lOdd « saves 4 & owe 3 2 wom oy pews oe 77,262
Roof tackswe = » aewis = & seme : 5 cee ee Bee SE ae 77
also refer to Roof rack......... ce ee sees 77
Route guidance
Stopping...............0... 22 eee 162
also refer to Navigation............... 157
Running direction (tires).............-.. 243
S
Safety belts. ...... 2... eee eee eee eee 59
GLEAMING « « suns x & mere oe eae & 2 aR w 2 oe 236
LOCKING c= sosesie = ot areueoe =o eeaveue aw coenace a 8 aoe 70
Securing child safety seats.............. 70
Satellite map........ 0... cece eee ee eee 167
Saving fuel
Energy consumers ...... 0.0020 se eee eee 15
REGUPERStION » : anew s x eaves 3 & eae 2 eee 8 15
Screen
refer to Touch display................-. 16
SChewWarivel's « = wees ¢ 2 pwn = ¢ seu + eto 2 240
SD.catd reader (MMI) sus x = gawy x x seme 4 e 180
Searcharea (POD) sca ¢ « gaceu 3 2 seme 3 § aaa 160
Search function
refer to Free text search............... 187
Seat heating -wes z + sen es pean 2 ees ees 80
Seats
ACIUStINGicus x 5 xa @ 3 eum 4 & aos sy ow 55
Adjusting the front seats................ 56
Adjusting the rear seats.............00- 56
ClOANING's = + swap yo ewe yo ees oo ewe oe 237
Folding. ........... cee eee 76
Head restraints ..............00e eee eee 58
Selecting a source (media)............-. 184
Selector lever. ... 0.0... cece eee eee eee 85
Self-learning navigation
refer to Personal route assistance....... 165
Sensors
GOVEFAGE St6aS sxe x s wees 5 2 ween 5s eRES 106
LOCATIONS iis o secnces oo weasane ow inane © @ onavEKe 106
Service interval display................. 213
Setting measurement units.............. 193
Settings = = sews ¢ = wees 5s eed ts em ey oe 193
Announcements and tones............. 195
Bluetooth........................00. 194
Date anid tim@tan » s waiss < ¢ aeeon ¢ § saree x Ss 193
LANGUAGE cssrc 5 o soem: oo cormee & 3 cms WH Heats 193
Measurement units...............005. 193
Media........... 00.00 188
NaVvigatiOnios ¢ « wean 2 » mewn oo meen 2 reeey 170
RAGIO bcs sx sxewsas 2 4 secs a anemone wo a samme © 5 3 178
Sound... . eee eee 193
SYStEMs
« aes + eanem 4 s ews oe eeu 2 2 193
TiIMO2ZOMC isi ao cnereos « w sranie © avai eo Heese 193
Wi-Fi hotspot .......... 0.00 eee eee ee 155
Setting the language.............e eevee 193
Setting thetime.............0...00 eee 193
SHIPE paddlestencu « a meus x svexems w © wnaznos ve ¥ struese 86
Shortcut
refer to Shortcuts...........0.... eee 21
SHOPECUESH. 1 « seesnan so sueseos « & anenne cn w woesene © «au 21
Shuffle... 2... eee cee eee ee 186