roof AUDI Q3 2020 Owners Manual
[x] Cancel search | Manufacturer: AUDI, Model Year: 2020, Model line: Q3, Model: AUDI Q3 2020Pages: 278, PDF Size: 72.66 MB
Page 4 of 278
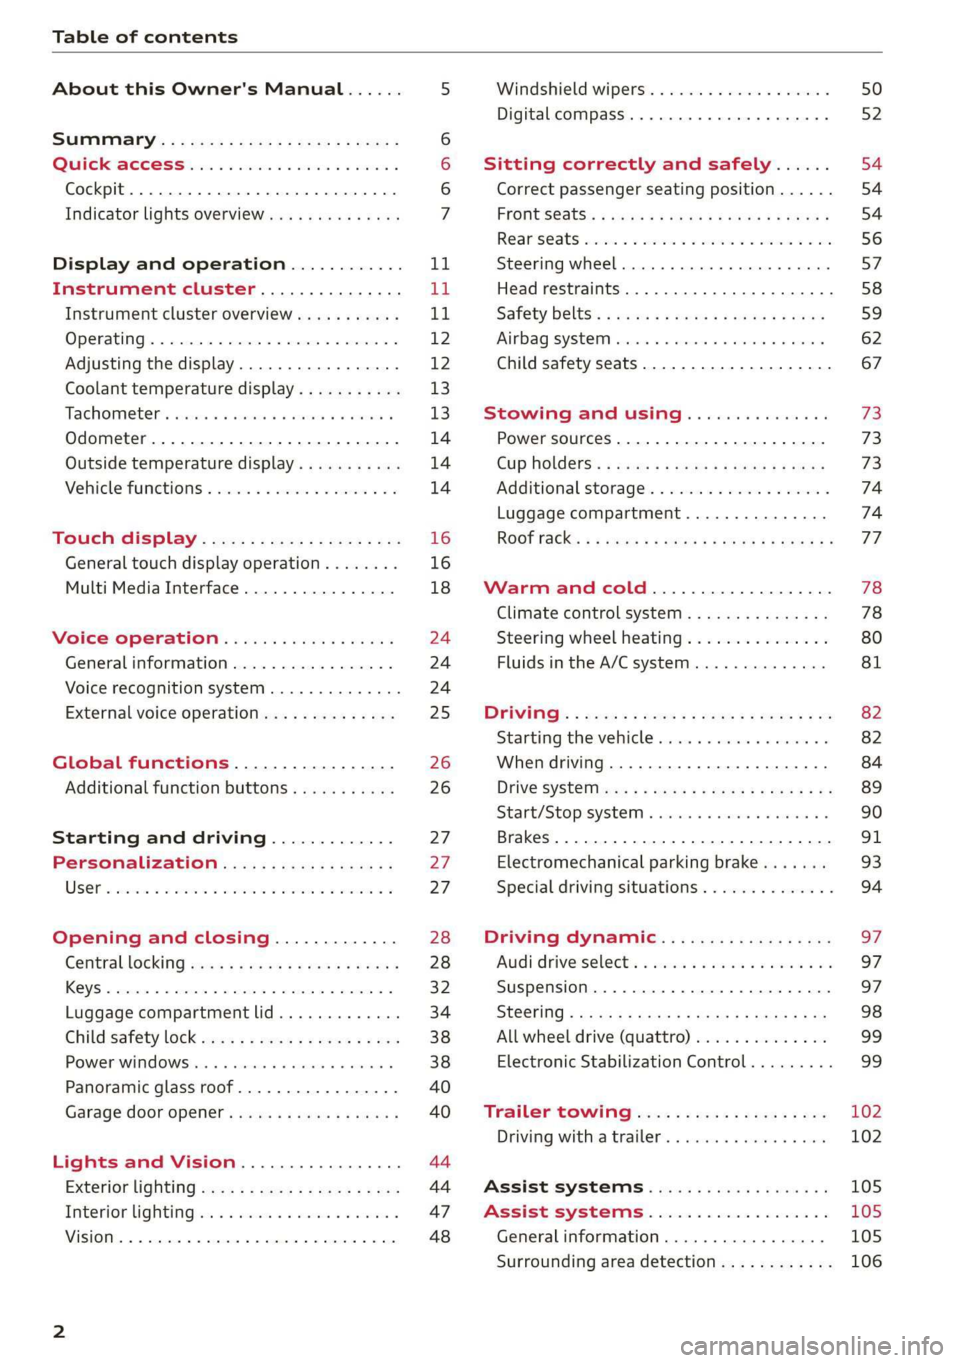
Table of contents
About this Owner's Manual......
SUMIMALY: ; « ss6% : osen ss sean cs poe s
QC CCeS Skis: si esis a 6 ores os ewe
Cockpit... 2... ee eee eee eee
Indicator lights overview...........0.
Display and operation............
Instrument cluster...............
Instrument cluster overview...........
Operating. ecco ws swacemn o © aero o erm 9
Adjusting the display.................
Coolant temperature display...........
Tachometer’. series s ewie so sie ¥ & overs
Odometer............ 0. cee eee eee eee
Outside temperature display...........
Vehicle functions « se-0 2. ese ve eee ees
Touch’ display . 22... : secs ie eses ees
General
touch display operation........
Multi Media Interface................
Voice operation..................
Generalinformation.................
Voice recognition system..............
External voice operation..............
Global functions.................
Additional function buttons...........
Starting and driving.............
Personalization..................
Luggage compartment lid.............
Child safety lock sa04 45 eec4 es eee e ee ees
Power Windows. . 6 sce « 6 umes #6 enna o
Panoramic glass roof................-
Garage door Opener’: sens ss esas se cess
Lights and Vision.................
Exterior lighting sees < = sees « « eee% sv oe
Interior liQhtingios . esas + exe ee ews x
VISION... eee eee
NOD
OO
13)
16 16 18
24 24 24
25
26 26 27 27 27 28 28
32
34
38 38
40
40
44 44
47 48
Windshield wipers............--..+-- 50
Digital compass............0 000 eens 52
Sitting correctly and safely...... 54
Correct passenger seating position...... 54
FRONUSGAtS s + astns s ¢ ewes +o eo te eoeee F 54
Rearseats sic 2 sea oo awn oo coon 7 9 oe 56
SLEEKIMG WHEEL esses 4 0 sneceas » s sxereye 9 6 eunaece 57
Head restraints..................000. 58
Safety belts: « ssa: s 2 wens 5 2 worms x s sawn 59
Airbag system... .. cc eee eee eee 62
Child safety seats..............0.00.. 67
Stowing and using............... 73
Power SOUrCeES ...... eee eee eee 73
Cup Holders: « saws = ¢ seme + ¢ eas ¢ e ees 73
Additional storage...............005. 74
Luggage compartment............... 74
ROOT ACK: « a waxem 2 2 soem 4 x em Foe tee oY 77
Warm and cold................... 78
Climate control system.............0. 78
Steering wheel heating............... 80
Fluids in the A/Csystem.............. 81
PICEVITIG:: ¢ ecces « 2 wees & o pees 5 oe oc oe 82
Starting the vehicle..............000- 82
When driving............. ee eee eee ee 84
Drive sySteliteves: + « wwe & & ews so eee es we 89
Start/Stop'system « sce ee ewer vo essere a « 90
Brakes. .............0000 0c cece eee 91
Electromechanical parking brake....... 93
Special driving situations.............. 94
Driving dynamic.................. 97
Audi driveiseleetss «isis ss naan a 2 cain a ve 97
Suspension.........-..00 eee eee eee 97
StGOriNG « awu & x Secs 5 = Hoves + F RevOS FE 98
All wheel drive (quattro).............. 99
Electronic Stabilization Control......... 99,
Trailer towing.................... 102
Driving with atrailer................. 102
Assist systems................005 105
Assist systems................005 105
Generalinformation................. 105
Surrounding area detection............ 106
Page 26 of 278
Voice operation
Voice operation
General information
You can operate many functions in the vehicle
easily using voice commands.
Using the voice operation system effectively
> Speak clearly and distinctly at a normal volume.
Speak louder when driving faster.
> Emphasize the words in the commands evenly
and do not leave long pauses.
> Close the doors, the windows, and the sunroof*
to reduce background noise. Make sure that
passengers are not speaking when you are giv-
ing a voice command.
> Do not direct the vents toward the hands-free
microphone, which is in the roof headliner near
the front interior lights.
> Only the driver should speak to the system, be-
cause the handsfree microphone is aimed to-
ward this seating position.
ZA\ WARNING
— Direct your full attention to driving. As the
driver, you have complete responsibility for
safety in traffic. Only use the functions in
such a way that you always maintain com-
plete control over your vehicle in all traffic
situations.
— Do not use voice operation in emergencies
because your voice may change in stressful
situations. The system may take longer to
dial the number or may not be able to dial it
at all. Dial the emergency number manually.
@ Tips
There are no voice guidance* prompts when a
dialog is active.
24
Voice recognition system
Applies to: vehicles with voice recognition system
See
Dat)
Where is a
Connect
Diala
coy
Es
ea
cog
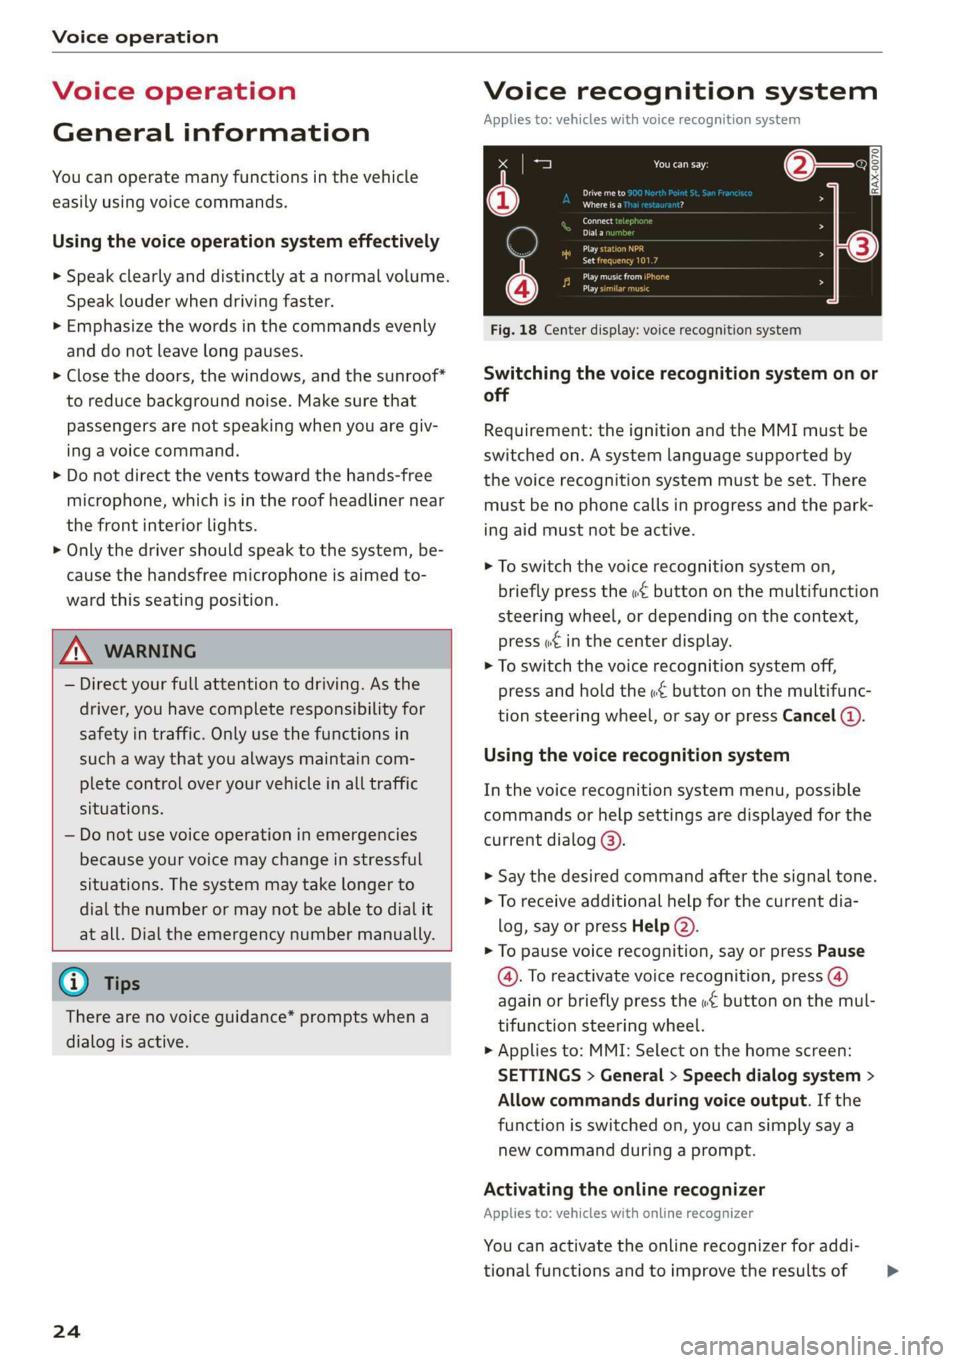
Fig. 18 Center display: voice recognition system
Switching the voice recognition system on or
off
Requirement: the ignition and the MMI must be
switched on. A system language supported by
the voice recognition system must be set. There
must be no phone calls in progress and the park-
ing aid must not be active.
> To switch the voice recognition system on,
briefly press the «€ button on the multifunction
steering wheel, or depending on the context,
press w¢ in the center display.
> To switch the voice recognition system off,
press and hold the « button on the multifunc-
tion steering wheel, or say or press Cancel ().
Using the voice recognition system
In the voice recognition system menu, possible
commands or help settings are displayed for the
current dialog @).
> Say the desired command after the signal tone.
> To receive additional help for the current dia-
log, say or press Help (2).
> To pause voice recognition, say or press Pause
@. To reactivate voice recognition, press (@)
again or briefly press the «€ button on the mul-
tifunction steering wheel.
> Applies to: MMI: Select on the home screen:
SETTINGS > General > Speech dialog system >
Allow commands during voice output. If the
function is switched on, you can simply say a
new command during a prompt.
Activating the online recognizer
Applies to: vehicles with online recognizer
You can activate the online recognizer for addi-
tional functions and to improve the results of >
Page 31 of 278
83A012721BB
Opening and closing
© Note
Door unlocking
—If you select All, all doors and the luggage
compartment lid will be unlocked when unlock-
ing.
— If you select Driver's door, only the driver's
door will be unlocked. To unlock all doors and
the luggage compartment lid, press the {9 but-
ton on the vehicle key twice. In vehicles with a
convenience key*, only the driver's door will un-
lock when you pull the driver's door handle. If
you pull another door handle, the entire vehicle
will be unlocked.
Applies to: vehicles with convenience key
— If the convenience key* that was last used is
detected inside the passenger compart-
ment, then the vehicle cannot be locked
from the outside. The turn signals will flash
several times to indicate this. If you do not
open the vehicle within a short time to re-
move the key, then the vehicle will lock au-
tomatically. This prevents the vehicle from
being left unlocked for long periods of time.
The key will then be locked inside the vehi-
cle. The entire vehicle will always be locked when you
— If the convenience key* that was used last is press the @ button.
detected inside the luggage compartment,
it will not be possible to lock the luggage Long press to open windows
compartment and the luggage compart- You can select if all windows and the panoramic
ment lid will open. The turn signals will glass roof* should open using the vehicle key
flash several times to indicate this. The => page 39, Convenience opening and closing. If
doors will lock. Always take the convenience you press and hold the f@ button on the vehicle
key with you, or unauthorized people may key, all of the windows and the panoramic glass
be able to enter the vehicle. roof* will close.
@) Tips Fold mirrors
—Do not leave valuables unattended in the ve- You can select if the exterior mirrors automatical-
hicle. A locked vehicle is not a safe! ly fold in when locking.
— The LED in the driver's door rail blinks when
you lock the vehicle. If the LED turns on for
approximately 30 seconds after locking, You can select if an audio signal sounds when
there is a malfunction in the central locking locking the vehicle.
system. Have the problem corrected by an
authorized Audi dealer or authorized Audi (ender diem cine)
Service Facility.
Setting the central locking system
You can adjust the central locking system to your
preferences. The settings depend on the vehicle
equipment.
Tone when locking!)
> Select on the home screen: VEHICLE > Settings
& Service > Central locking.
= —— rrr
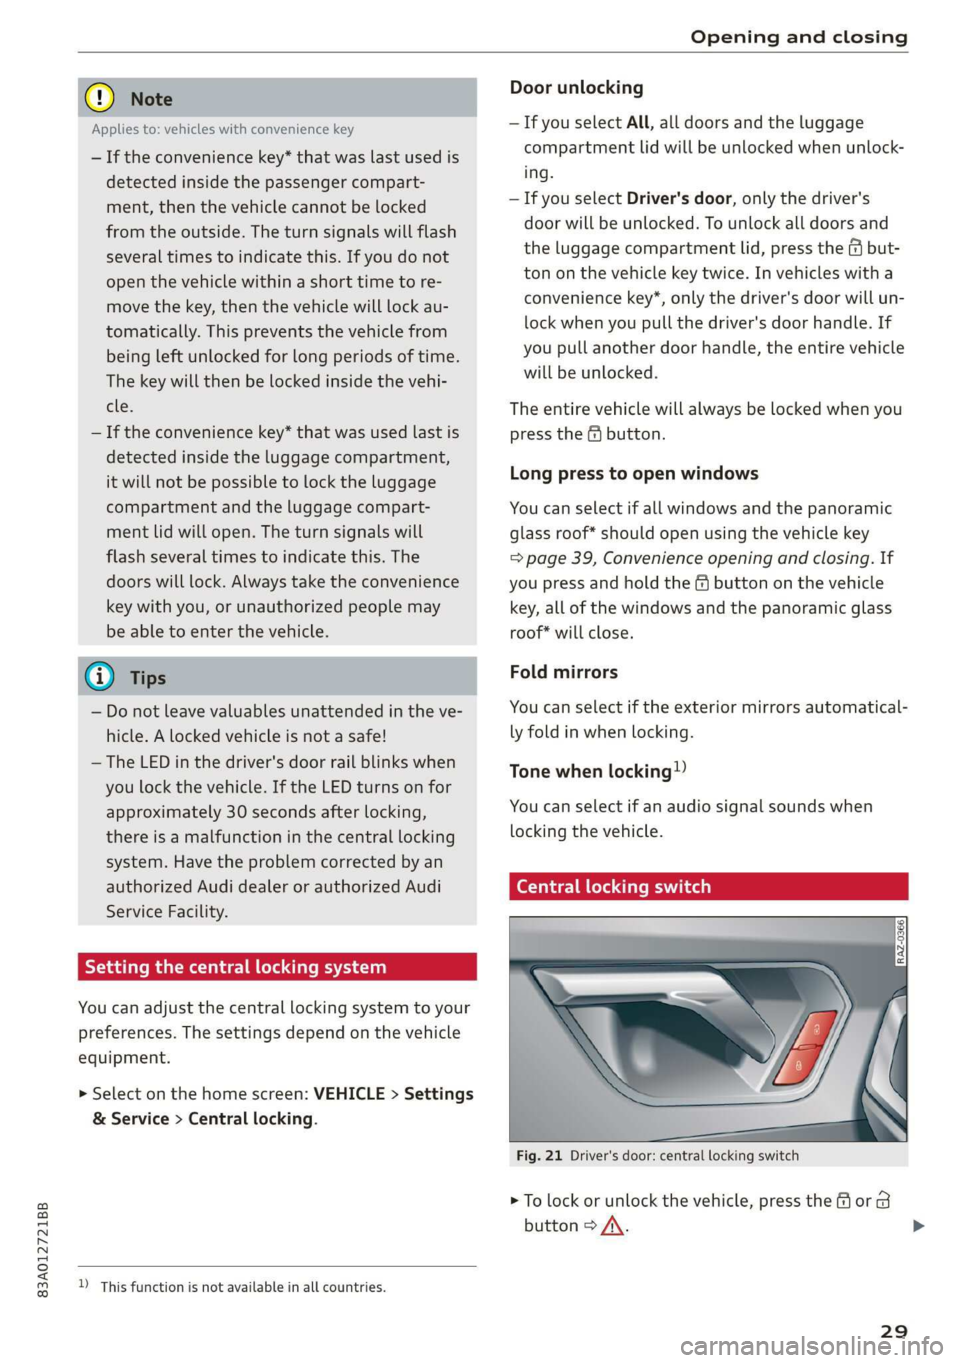
Fig. 21 Driver's door: central locking switch
> To lock or unlock the vehicle, press the or B
button > /\. >
D_ This function is not available in all countries.
29
Page 33 of 278
83A012721BB
Opening and closing
> Install the cap in the opening and close the
door.
Once the front passenger’s door or rear doors
close, it will no longer be possible to open them
from the outside. The front doors can be opened
from the inside by pulling the door handle one
time. The rear doors can be unlocked from the in-
side by pulling the door handle one time and
then opened by pulling the door handle again. If
the child safety lock in one of the rear doors is ac-
tivated, you must first pull the door handle from
the inside. Then you can open the door from the
outside.
ZA WARNING
Follow the safety precautions > page 28.
Pee
Applies to: vehicles with anti-theft alarm system
If the anti-theft alarm system detects a vehicle
break-in, audio and visual warning signals are
triggered. The anti-theft alarm system is switch-
ed on or off when locking or unlocking your vehi-
cle. If the alarm is triggered, it will shut off auto-
matically after a certain amount of time.
Switching the alarm off manually
> To switch the alarm off, press the G button on
the vehicle key or switch the ignition on.
Depending on the vehicle equipment, the anti-
theft alarm system may have the following fea-
tures:
Break-in security feature
The alarm will sound if there is a break-in at the
doors, hood, and/or luggage compartment lid.
Interior/towing protection monitor
The alarm will be triggered if there are move-
ments detected in the vehicle interior (for exam-
ple, by animals) or if there is a change in the vehi-
cle angle (for example, when the vehicle is being
towed).
You can prevent the alarm from being triggered
by deactivating the interior/towing protection
monitor.
Deactivating the interior/towing protection
monitor
There are the following options for deactivating
the interior/towing protection monitor:
> Press the ff button on the vehicle key a second
time within two seconds. Or
> Applies to: vehicles with convenience key:
Touch the sensor on a front door handle a sec-
ond time within two seconds. Or
> Turn the vehicle key in the door lock to the close
position a second time within two seconds.
If you lock the vehicle, then the interior/towing
protection monitor will stay off until the next
time the vehicle is unlocked.
ZA\ WARNING
No one, especially children, should stay in the
vehicle when it is locked from the outside, be-
cause the windows can no longer be opened
from the inside. Locked doors make it more
difficult for emergency workers to enter the
vehicle, which puts lives at risk.
@) Tips
The interior/towing protection monitoring on-
ly functions correctly when the windows and
the roof* are closed.
31
Page 41 of 278
83A012721BB
Opening and closing
@® Left rear door
@® Right rear door
Opening and closing the windows
The driver can control all power windows. All
power window switches are equipped with a two-
stage function:
> To open or close the window completely, press
the switch down or pull the switch up briefly to
the second level. The operation will stop if the
switch is pressed or pulled again.
> To select a position in between opened and
closed,
press or pull the switch to the first level
until the desired window position is reached.
Correcting a malfunction in the one-touch
up/down function
You can reactivate the one-touch up/down func-
tion if it malfunctions.
> Pull the power window switch up until the win-
dow is completely raised.
> Release the switch and pull it up again for at
least one second.
Z\ WARNING
— Follow the safety precautions > page 28.
— Never close the windows carelessly or in an
uncontrolled manner, because this increases
the risk of injury.
@) Tips
— You can still open and close the windows for
several minutes after turning the ignition
off. The power window switch is not disa-
bled until the driver's door or front passeng-
er's door is opened.
— The power windows are equipped with pinch
protection. The automatic window may stop
closing and will open all the way again even
if no obstacle is detected. Pull the power
window switch up until the window is com-
pletely raised.
Convenience opening and closing
Applies to: vehicles with convenience key
Convenience opening and closing the
windows and roof*
You can set in the MMI if all windows or the roof*
should open or close all at once > page 29, Set-
ting the central locking system.
> Press and hold the & or & button on the vehicle
key until all windows and the roof* have
reached the desired position > /A\.
> Applies to: vehicles with convenience key:
Touch the sensor* on one of the door handles
and continue touching it until all of the win-
dows and the roof* are closed. Do not place
your hand in the door handle when doing this.
When all of the windows and the roof* are
closed, the turn signals will flash once.
Z\ WARNING
— Never close the windows or the roof* care-
lessly or in an uncontrolled manner, because
this increases the risk of injury.
— For security reasons, the windows and the
roof* can only be opened and closed with
the vehicle key at a maximum distance of
approximately 6.5 feet (2 m) away from the
vehicle. Always pay attention when using
the &@ button to close the windows and the
roof* so that no one is pinched. The closing
process will stop immediately when the &
button is released.
39
Page 42 of 278
Opening and closing
Panoramic glass roof
oy Tela mamta late Meera iarle()
Applies to: vehicles with panoramic glass roof and roof sun-
itr
ceriga”
as ee
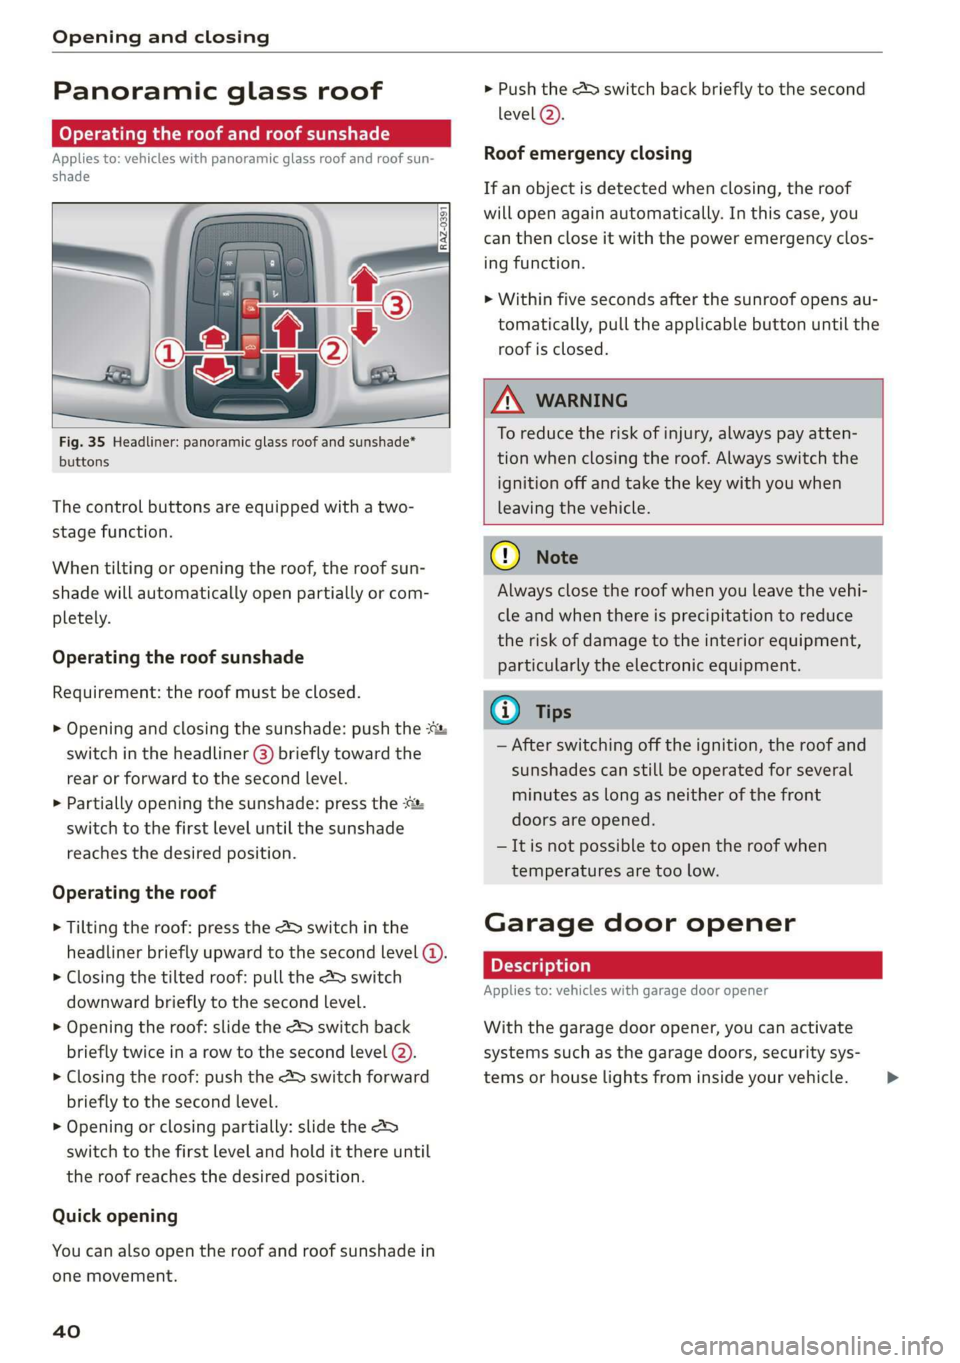
Fig. 35 Headliner: panoramic glass roof and sunshade*
buttons
The control buttons are equipped with a two-
stage function.
When tilting or opening the roof, the roof sun-
shade will automatically open partially or com-
pletely.
Operating the roof sunshade
Requirement: the roof must be closed.
> Opening and closing the sunshade: push the *:
switch in the headliner @) briefly toward the
rear or forward to the second level.
> Partially opening the sunshade: press the :&
switch to the first level until the sunshade
reaches the desired position.
Operating the roof
> Tilting the roof: press the &> switch in the
headliner briefly upward to the second level (@.
> Closing the tilted roof: pull the A> switch
downward briefly to the second Level.
> Opening the roof: slide the 2> switch back
briefly twice in a row to the second level (2).
> Closing the roof: push the &> switch forward
briefly to the second level.
> Opening or closing partially: slide the 2
switch to the first level and hold it there until
the roof reaches the desired position.
Quick opening
You can also open the roof and roof sunshade in
one movement.
40
> Push the > switch back briefly to the second
level @).
Roof emergency closing
If an object is detected when closing, the roof
will open again automatically. In this case, you
can then close it with the power emergency clos-
ing function.
> Within five seconds after the sunroof opens au-
tomatically, pull the applicable button until the
roof is closed.
ZA WARNING
To reduce the risk of injury, always pay atten-
tion when closing the roof. Always switch the
ignition off and take the key with you when
leaving the vehicle.
C) Note
Always close the roof when you leave the vehi-
cle and when there is precipitation to reduce
the risk of damage to the interior equipment,
particularly the electronic equipment.
Gi) Tips
— After switching off the ignition, the roof and
sunshades can still be operated for several
minutes as long as neither of the front
doors are opened.
— It is not possible to open the roof when
temperatures are too low.
Garage door opener
Applies to: vehicles with garage door opener
With the garage door opener, you can activate
systems such as the garage doors, security sys-
tems or house lights from inside your vehicle. >
Page 57 of 278
83A012721BB
Sitting correctly and safely
— Your thighs are lightly supported by the front
surface of the seat
— The backrest is in an upright position and your
back is resting against it
— You have a sufficient view of the area around
the vehicle
— You have a clear view of the instrument cluster
and indicator lights
Z\ WARNING
— If you are too close to the steering wheel or
instrument panel, the airbag system cannot
provide the optimal protection, which in-
creases the risk of injury and death.
— To reduce the risk of injury in the event of
sudden braking maneuvers or accidents,
never drive with the backrest reclined very
far. The airbag system and seat belts can on-
ly provide optimal protection when the back-
rest is in an upright position and the driver
is wearing the seat belt correctly. If the
backrest is angled back too far, the safety
belt can shift to soft areas of the body, such
as the stomach, which increases the risk of
injury.
—To reduce the risk of an accident, only adjust
the seats when the vehicle is stationary.
— Be careful when adjusting the seat. Lack of
control or attention when adjusting can re-
sult in injuries due to pinching to vehicle oc-
cupants both in the front seats and rear
seats.
— Never place objects in the driver's footwell.
Objects could shift and enter the area
around the pedals, which could prevent you
from using them. You would then be unable
to use the pedals if sudden driving or brak-
ing maneuvers were needed, which increas-
es the risk of an accident.
— Make sure that the floor mats are always se-
curely attached.
—To reduce the risk of an accident, never place
additional floor mats or other floor covers
over the installed floor mats, because this
reduces the pedal's range of motion and can
impair pedal operation.
—To reduce the risk of injury, never place your
feet on the instrument panel, out of the
window, or on the seat surfaces. This also
applies to passengers in the rear seats.
() Note
Applies to: vehicles with manually adjustable head re-
straints
To reduce the risk of damage, be very careful
when adjusting the seat to make sure the
head restraints do not hit the headliner or the
Panorama glass roof*.
Need m mae mr lal ih
Applies to: vehicles with manual adjustable seats
be
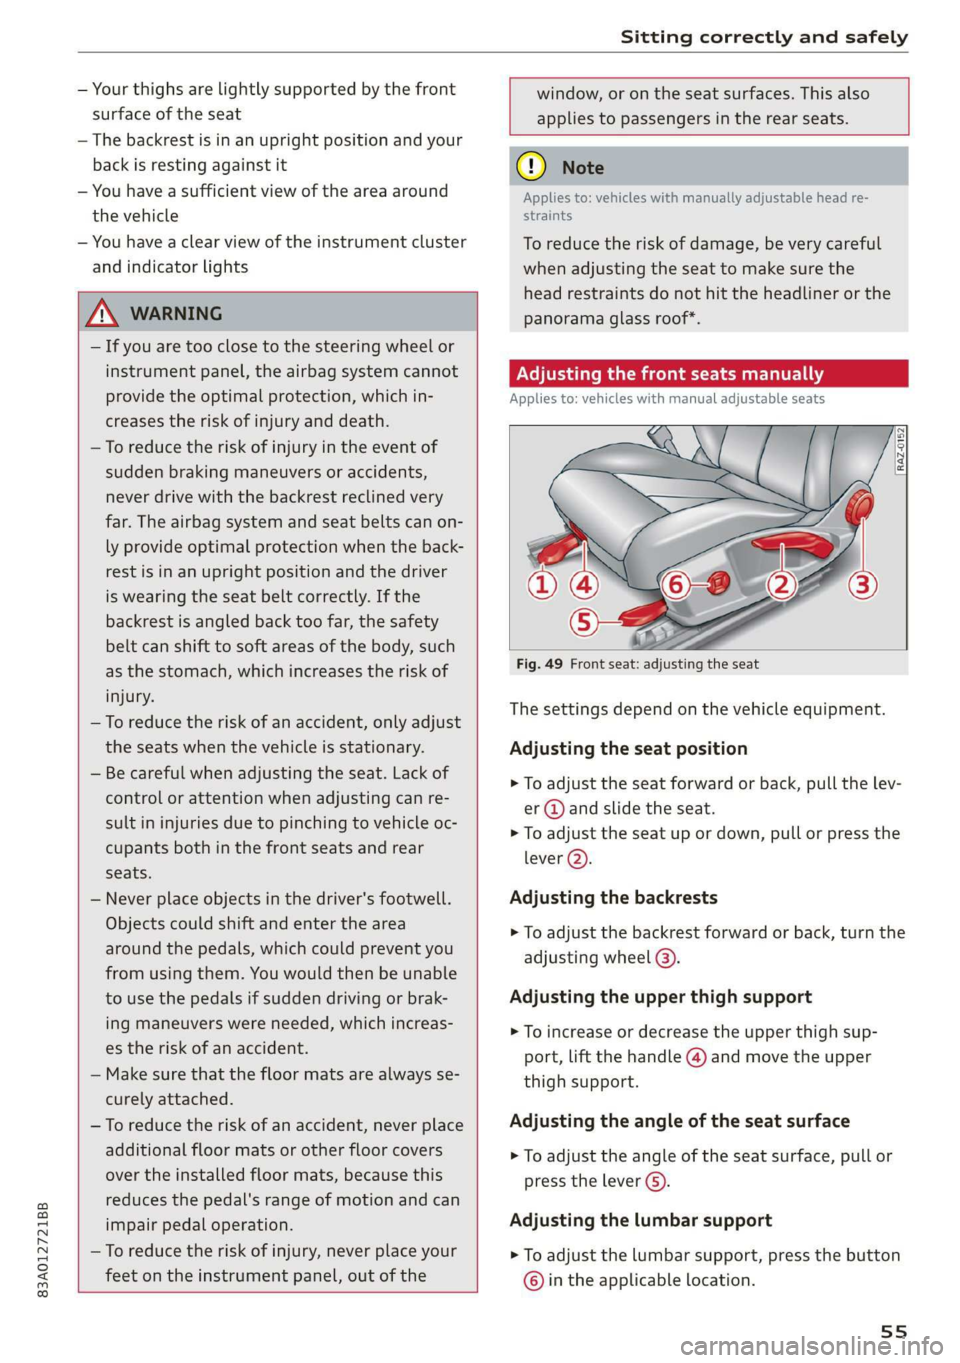
Fig. 49 Front seat: adjusting the seat
The settings depend on the vehicle equipment.
Adjusting the seat position
> To adjust the seat forward or back, pull the lev-
er @ and slide the seat.
> To adjust the seat up or down, pull or press the
lever Q).
Adjusting the backrests
> To adjust the backrest forward or back, turn the
adjusting
wheel @).
Adjusting the upper thigh support
> To increase or decrease the upper thigh sup-
port, lift the handle @) and move the upper
thigh support.
Adjusting the angle of the seat surface
> To adjust the angle of the seat surface, pull or
press the lever G).
Adjusting the lumbar support
> To adjust the lumbar support, press the button
© in the applicable location.
55
Page 79 of 278
83A012721BB
Stowing and using
> Lift the cargo floor up using the handle. — Make sure the roof rack is mounted on the vehi-
> Lock the cargo floor at the side mounts. cle only at the specified locations @.
> Remove the side inserts if necessary. — Note the permitted axle load, permitted total
weight, and permitted roof load of your vehicle
© page 262. The roof load is the total of the
Applies to: vehicles with adjustable cargo floor weight of the roof rack, the attachments and
the cargo you are carrying. However, you must
also note the permitted load of the carrier sys-
tem being used.
— Follow the installation instructions provided
with the roof rack system. If you do not se-
cure the roof rack system and objects on the
roof correctly, they could come loose from
the vehicle and cause an accident.
— The risk of an accident increases when using
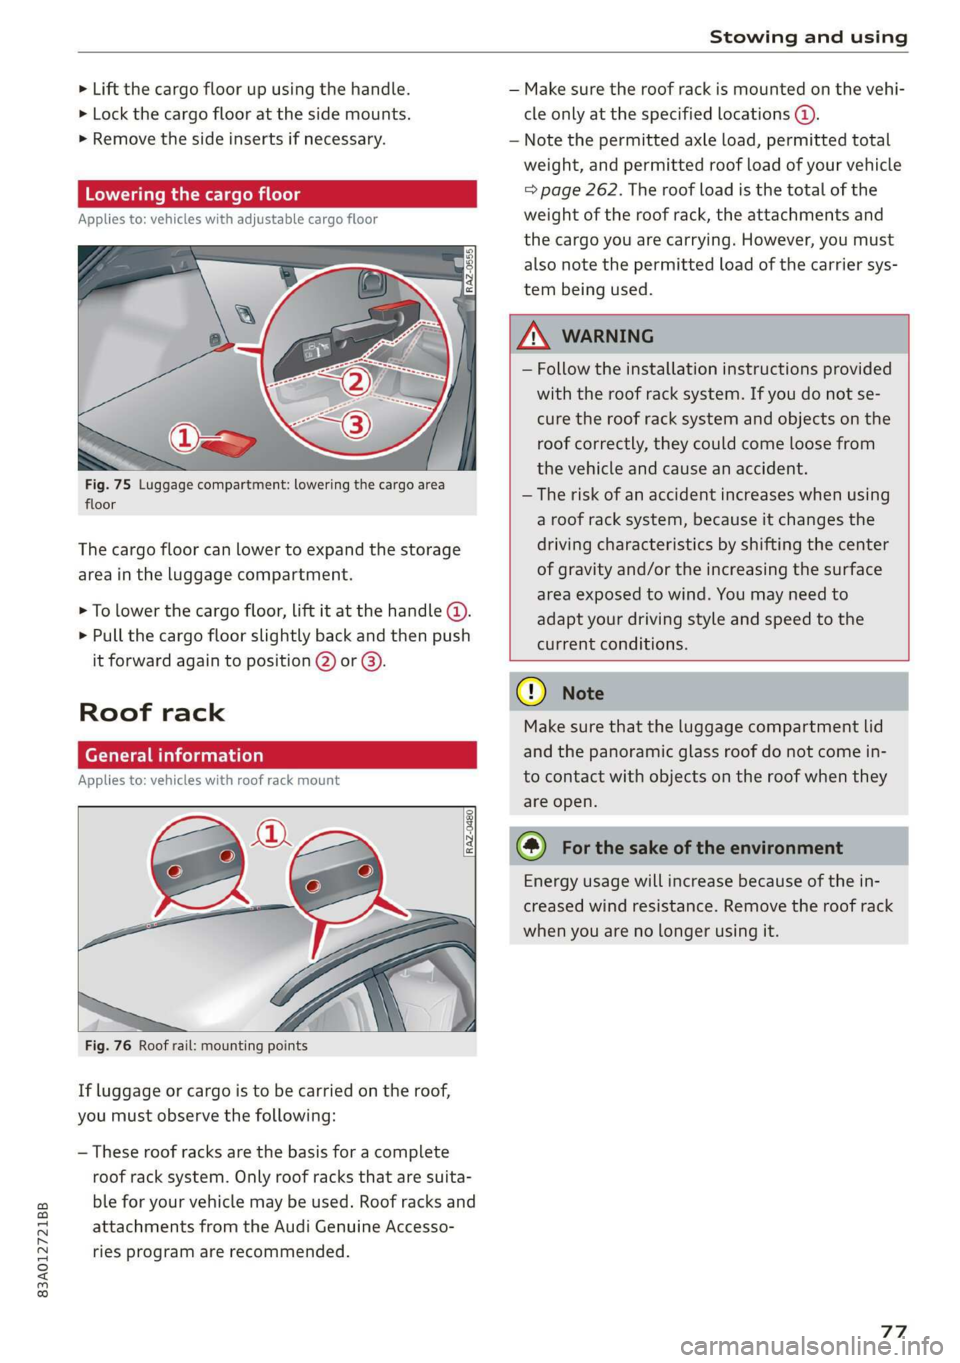
Fig. 75 Luggage compartment: lowering the cargo area
floor
a roof rack system, because it changes the
The cargo floor can lower to expand the storage driving characteristics by shifting the center
area in the luggage compartment. of gravity and/or the increasing the surface
area exposed to wind. You may need to
adapt your driving style and speed to the
current conditions.
Roof rack Make sure that the luggage compartment lid
General information and the panoramic glass roof do not come in-
Applies to: vehicles with roof rack mount to contact with objects on the roof when they
are open.
> To lower the cargo floor, lift it at the handle (4).
> Pull the cargo floor slightly back and then push
it forward again to position 2) or GB).
Energy usage will increase because of the in-
creased wind resistance. Remove the roof rack
when you are no longer using it.
Fig. 76 Roof rail: mounting points
If luggage or cargo is to be carried on the roof,
you must observe the following:
— These roof racks are the basis for a complete
roof rack system. Only roof racks that are suita-
ble for your vehicle may be used. Roof racks and
attachments from the Audi Genuine Accesso-
ries program are recommended.
77
Page 80 of 278
Warm and cold
Warm and cold
Climate control system
One of the following options may be available,
depending on vehicle equipment
— A deluxe automatic climate control system with
2 zones to individually adjust the temperature
and air distribution for the left and right front
sides
— A deluxe automatic climate control system with
3 zones to individually adjust the temperature
and air distribution on the left front side, the
right front side, and in the rear
The climate control system warms, cools, dehu-
midifies, and filters the incoming air. It is the
most effective when the windows and panoramic
glass roof* are closed. If there is a build-up of
heat inside the vehicle, ventilation can help to
speed up the cooling process.
In all heating mode functions except defrost, the
blower only switches to a higher speed once the
engine coolant has reached a certain tempera-
ture.
Pollutant filter
The pollutant filter removes pollutants such as
dust and pollen from the air.
ZA\ WARNING
— You should not use the recirculation mode
for an extended period of time, because no
fresh air is drawn in and the windows can
fog when cooling mode is switched off. This
increases the risk of an accident.
78
— Individuals with reduced sensitivity to pain
or temperature could develop burns when
using the seat heating function. To reduce
the risk of injury, these individuals should
not use seat heating.
C) Note
To reduce the risk of damage to the seat heat-
ing elements, do not kneel on the seats or
place heavy pressure on one area of the seat.
@) For the sake of the environment
Energy can be saved by switching off the A/C
mode.
@) Tips
—To prevent interference with the heating
and cooling output and to prevent the win-
dows from fogging over, the air intake in
front of the windshield must be free of ice,
snow, and leaves.
— Condensation from the cooling system can
drip and form a puddle of water under the
vehicle. This is normal and does not mean
there is a leak.
— The energy management system may tem-
porarily switch off certain functions, such as
the seat heating” or rear window defogger.
These systems are available again as soon as
the energy supply has been restored.
— If the front passenger's seat heating is
turned on, it will not turn on again automat-
ically if more than 10 minutes have passed
between switching the ignition off and
switching it on again.
Page 91 of 278

83A012721BB
Driving
There is a malfunction in the clutch. The engine
torque
that can be transferred is reduced. You
may continue driving. Avoid using the clutch in
the future in any way that will place a heavy load
on it. Do not let the clutch rub for a long time.
The indicator light turns off once the clutch is
fully operable again.
Clutch: check pedal. You can continue driv-
ing
The clutch is not transferring all of the engine
torque. If necessary, remove your foot from the
clutch pedal.
Drive system
A new vehicle must be broken in within the first
1,000 miles (1,500 km) so that all moving parts
work smoothly together, which helps to increase
the service life of the engine and other drive com-
ponents.
Do not drive higher than two-thirds of the maxi-
mum permitted engine RPM during the first 600
miles (1,000 km) and do not use full accelera-
tion. The engine can be increased RPM gradually
during the next 300 miles (500 km).
a iCeC alee R deol el Meade CaCl
driving
Your driving style greatly influences the amount
of fuel and energy consumed, the environmental
impact, and the wear on the engine, brakes, and
tires. Note the following information for efficient
and environmentally-conscious driving:
— Turn off electrical equipment that is not need-
ed, for example seat heating*.
— Anticipate upcoming traffic situations while
driving to avoid unnecessary acceleration and
braking.
— Avoid driving at high speeds.
— Avoid adding extra weight to the vehicle if pos-
sible, for example by not leaving roof racks or
bike racks installed when they are not needed.
— Make sure the tire pressure is correct.
— Have maintenance performed regularly on the
vehicle.
— Do not let the engine run while the vehicle
parked.
— Do not drive with winter tires during the summ-
er.
— Use the Start/Stop system.
— Utilize the engine braking effect.
— Avoid driving short distances when possible.
G) Tips
The amount of noise produced by the vehicle
can increase significantly when driving with a
sporty style. Show respect to others around
you and the environment with the way you op-
erate your vehicle, especially at night.
tee SMe aele [aah
Your vehicle is equipped with an intelligent ener-
gy management system for distributing electrici-
ty. This significantly improves the starting ability
and increases the vehicle battery life.
G) Tips
— If you drive short distances frequently, the
vehicle battery may not charge enough
while driving. As a result, convenience func-
tions for electrical equipment may be tem-
porarily unavailable.
— The vehicle battery will gradually drain if
the vehicle is not driven for long periods of
time, or if electrical equipment is used
when the engine is not running. To ensure
that the vehicle can still be started, the
electrical equipment will be limited or
switched off.
Messages
B Drive system: malfunction! Safely stop vehi-
cle
There is a malfunction in the drive system. The
brake booster and the power steering may stop
working. Stop the vehicle immediately or as soon
as possible and do not continue driving. Have the
problem corrected by an authorized Audi dealer
or authorized Audi Service Facility.
89
>