oil level AUDI Q5 2014 User Guide
[x] Cancel search | Manufacturer: AUDI, Model Year: 2014, Model line: Q5, Model: AUDI Q5 2014Pages: 316, PDF Size: 78.41 MB
Page 237 of 316
names etc.) that conform to Audi oi l standard
VW 502 00 (vehicles with gasoline engine) or
VW 507 00 (vehicles with diesel engine).
C hang ing th e engin e oil
The engine oil and oi l filter must be changed
according to the m ileage (kilomete rs) and
time inte rva ls specified in yo ur vehicle's War
ranty
& Maintenance booklet. Do not exceed
these intervals -harmful deposits from old
engine oil can reduce engine performance and
can lead to expensive eng ine repairs.
Changing the o il at the recommended inter
va ls is so very important because the lubricat
ing properties of oi l decrease gradually during
norma l vehicle use . If you are not sure when
you have your oi l changed, ask your author
ized Audi Service Advisor.
Under some circ umstances the engine oi l
should even be changed more frequently .
Change o il more often if you drive mostly
short distances, operate the vehicle in dusty
areas or mostly under stop-and -go traffic con
d itions, or when you use your veh icle where
temperatures stay below freezing point for l ong periods.
Detergent addit ives in the o il w ill make fresh
oil look dark after the eng ine has been run
n ing for a short time. This is norma l and is not
a reason to change the o il mo re often than
r ecommended.
Damage or ma lf u nction s du e to lac k of
ma intenance
It is essential that you change your oil at the
recommended interva ls using only engine oil
that complies with Audi oil standard
VW 502 00 (vehicles with gasoline engine) or
VW S07 00 (veh icles with diese l engi ne). Yo ur
L im ited New Vehicle Warra nty does not cover
damage or ma lfunctions due to failure to fol
l ow recommended maintenance and use re
quirements as set forth in the A udi Owner's
Manual and Warranty
& Maintenance book let.
Your dealer will have to deny warranty cover age un less you present to the dea ler proof in
the form of Service or Repa ir Orders that a ll
Checking and fillin g 235
scheduled maintenance was performed in a
timely manner.
· Engine oil consumption
The engine in your vehicle depends on an ade
quate amount of oil to lubricate and cool all
of its moving parts.
In order to prov ide effective lubrication and
cooling o f inte rna l engine components, all in
ternal combustion engines consume a certain
amount of oil. Oil consumpt ion varies from
engine to engine and may change sign ificantly
over the life of the engine. Typically, engines
with a spec ified break-in period (see
Q page 205) consume more oil during the
break-in pe riod than they consume after o il
consump tion has stabilized.
Under normal cond itions, the rate of oi l con
sumption depends on the quality and viscos ity
of the oil, the RP M (revolut ions per minute) at
which the engine is operated, the ambient
tempe rature a nd road conditions. Furt her fac
tors are the amount of oil dilut ion from wa ter
condensation or fue l residue and the oxida
tion level of the oi l. As any engine is subject to
wear as mi leage builds up, the oil consump
tion may increase over time until replacement
of worn components may become necessary.
With a ll these variab les coming into p lay, no
standard rate of oil consumpt ion can be es
tablished or spec ified. There is no alternative
to regular and frequent check ing of the o il lev
el, see
Not e.
If the yellow engine oil level warning symbo l
in the instrument cluster
II lights up, you
shou ld check the oil leve l as soon as possib le
¢ page 236 . Top off the oil at your earliest
convenience
~ page 236.
&_ WARNING
Before you chec k anything in the engine
compa rtmen t, always read and heed al l
WARNI NGS
Q .&. in Working in the engine
compartment on page 231 .
•
•
Page 238 of 316
236 Checking and filling
(D Note
Driving with an insufficient oi l level is like
ly to ca use seve re damage to the eng ine.
@ Tips
- The oil pressure warning display. is
not an indicator of the oil level. Do not
rely on it. Instead , check the oil level in
your engine at regular intervals, pref
erably each t ime you refuel, and always
before going on a long trip .
-If you have the impression your engine
consumes excessive amo unts of oi l, we
r ecommend that yo u consult an author
i zed Audi dealer to have the cause of
you r concern p rope rly diag nosed. Keep in
mi nd t hat t he ac curat e measure ment of
oi l co nsu mp tion re q uires grea t care and
may ta ke some time. A n author ize d Audi
dea ler has inst ructions about how to
measure oil consum ptio n accurately.
Checking the engine oil level
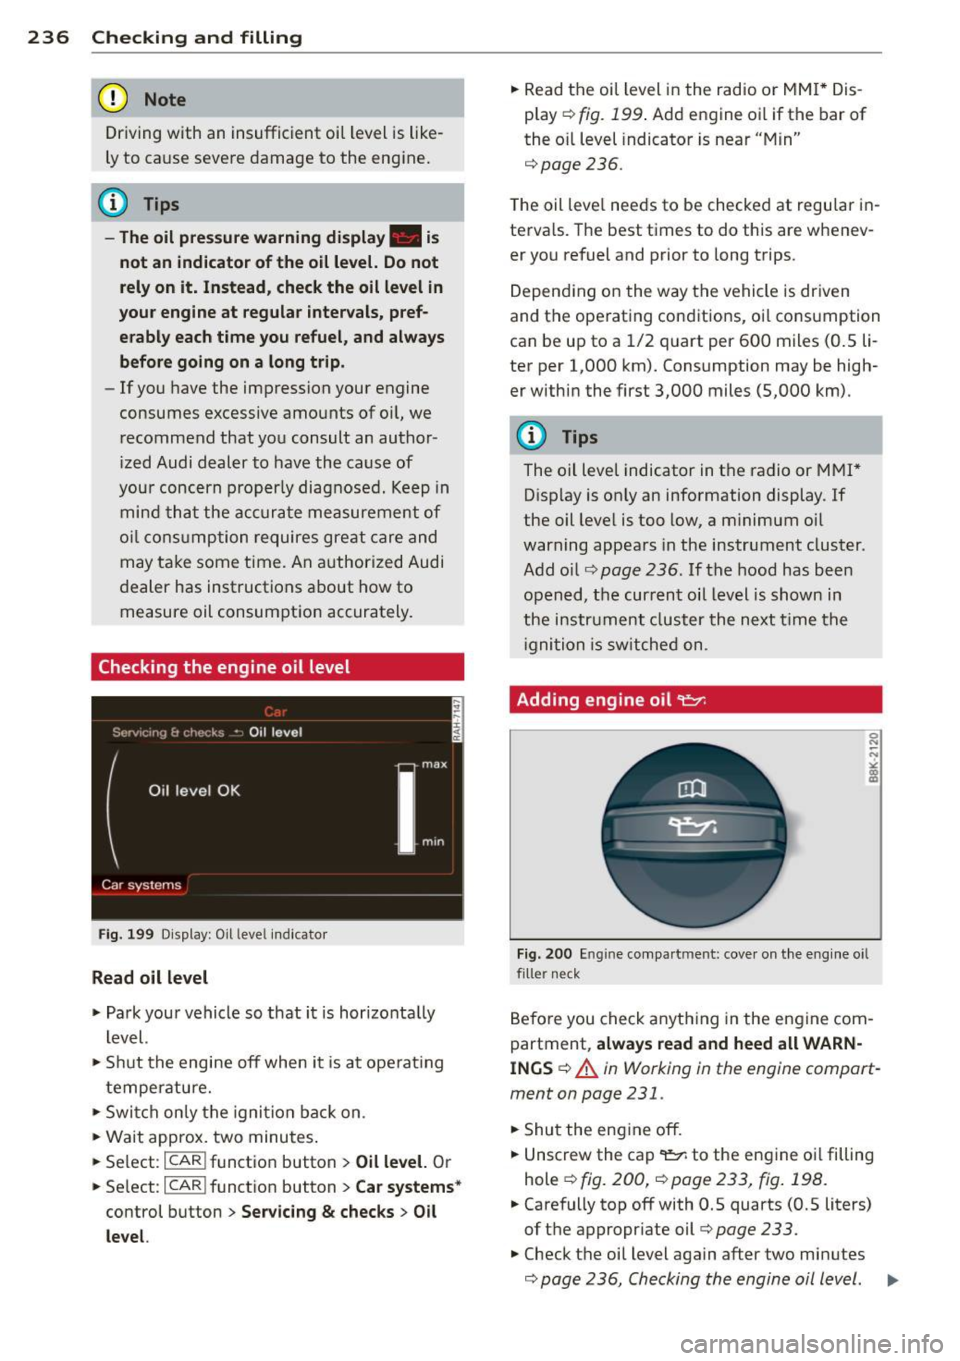
Fig . 199 Di splay: O il leve l in dica tor
Read oil level
.. Park you r vehicle so that i t is hor izo nta lly
l evel.
.. Shu t the engine off when i t is at ope ra ti ng
temperature .
.. Swi tch on ly th e igni tion bac k on .
.. Wa it approx. two minutes .
.. Se lect :
I CAR ! funct io n button > Oil level. Or
.. Se lect :
ICAR ! function button> Car systems*
control button > Servicing & checks > Oil
level.
.. Read the oil level in the radio or MM I* Dis
p lay
r=> fig. 199 . Add engine o il if the bar of
the o il level indicato r is near "Mi n"
r=>page236.
The oil leve l needs to be checked at regu lar i n
terva ls. The best times to do this are whenev
er you refuel and prio r to long trips .
D epend in g on the w ay the vehicle is driven
and the ope rat ing cond itio ns, oi l cons umption
can be up to a 1/2 quart per 60 0 miles (O.S li
ter per 1,000 km). Consumption may be high
er withi n the first 3,000 miles (5,000 km).
(!} Tips
The oil leve l indicator in t he radio or M MI*
D isplay is on ly an information display . If
the oil leve l is too low, a m inimum o il
war ning appea rs in the instrument cluster.
A dd oil ¢
page 236. If the hood has bee n
opened , the cur ren t oi l level is shown in
t he i nstr ume nt cl uster the next t ime t he
i gni tion is sw itche d on.
Adding engine oil 't:::r.
Fig. 2 00 Eng ine co mpa rtm ent : cove r on t he e ng in e o il
f il le r ne ck
B efo re you check anyth ing in the en gine com
partment ,
always read and heed all WARN
INGS
¢ A in Working in the engine compart
ment on page 231 .
.. Shu t the eng ine off .
.. Unscrew the cap
9::7; to the eng ine o il filling
hole ¢
fig. 200, r=> page 233, fig . 198 .
.. Carefully top off with 0.5 quarts (0.5 liters)
of t he appropr iate oil¢
page 233.
.. Check the oi l level again after two minutes
¢ page 2 36 , Checking the engine oil l evel. II>
Page 239 of 316
~ Top off the oil, if necessary.
~ Screw the cap back on the filling hole.
A WARNING
- While topping off, the oil must not come in contact with hot engine parts - fire
hazard!
- The oil filler cap must be properly se cured to prevent oil from being sprayed
on the hot engine and exhaust system
when the engine is running - fire hazard!
- If your skin has come in contact with the
engine oil, you must subsequently
cleanse it thoroughly .
(D Note
-Check the oil level using the radio or the
MM!*. If the message
Please reduce oil
level
appears, contact your authorized
Audi dealer or other qualified workshop
to have excess oil extracted if necessary.
-Audi does not recommend the use of oil
additives. They may damage the engine
and adversely affect your New Vehicle
Warranty.
@ For the sake of the environment
- Under no circumstances can the oil come
in contact with the sewage network or
the soil.
- Observe and follow legal regulations
when disposing of empty oil containers.
Changing the engine oil
We recommend that have your oil changed by
an authorized Audi dealer or a qualified serv
ice station .
Before you check anything in the engine com
partment,
always read and heed all WARN
INGS
c::> .&. in Working in the engine compart
ment on page 231.
The engine oil must be changed according to
the intervals specified in your Warranty
&
Maintenance booklet. This is very important
because the lubricating properties of oil di
minish gradually during normal vehicle use.
Checking and filling 237
Under some circumstances the engine oil
should be changed more frequently. Change
oil more often if you drive mostly short dis
tances, operate the vehicle in dusty areas or
under predominantly stop-and-go traffic con
dition s, or have your vehicle where tempera
tures remain below freezing for extended pe
riods.
Detergent addi tives in the oil will make fresh
oil look dark after the engine has been run
ning for a short time . This is normal and is not
a reason to change the oil more often than recommended.
Because of the problem of proper disposal,
along with the special tools and necessary ex
pertise required, we strongly recommend that
you have your oil changed by an authorized
Audi dealer or a qualified service station.
If you choose to change your oil yourself ,
please note the following important informa
tion:
A WARNING
To reduce the risk of personal injury if you
must change the engine oil in your vehicle
yourself:
- Wear eye protection.
- To reduce the risk of burns from hot en-
gine oil, let the engine cool down to the
touch.
- When removing the oil drain plug with
your fingers, stay as far away as possible.
Always keep your forearm parallel to the
ground to help prevent hot oil from run ning down your arm.
- Drain the oil into a container designed
for this purpose, one large enough to
hold at least the total amount of oil in
your engine.
- Engine oil is poisonous. Keep it well out
of the reach of children.
- Continuous contact with used engine oil
is harmful to your skin. Always protect
your skin by washing oil
off thoroughly
with soap and water.
•
•
Page 241 of 316
Checking the engine coolant level
The engine coolant level can be checked with
a quick glance .
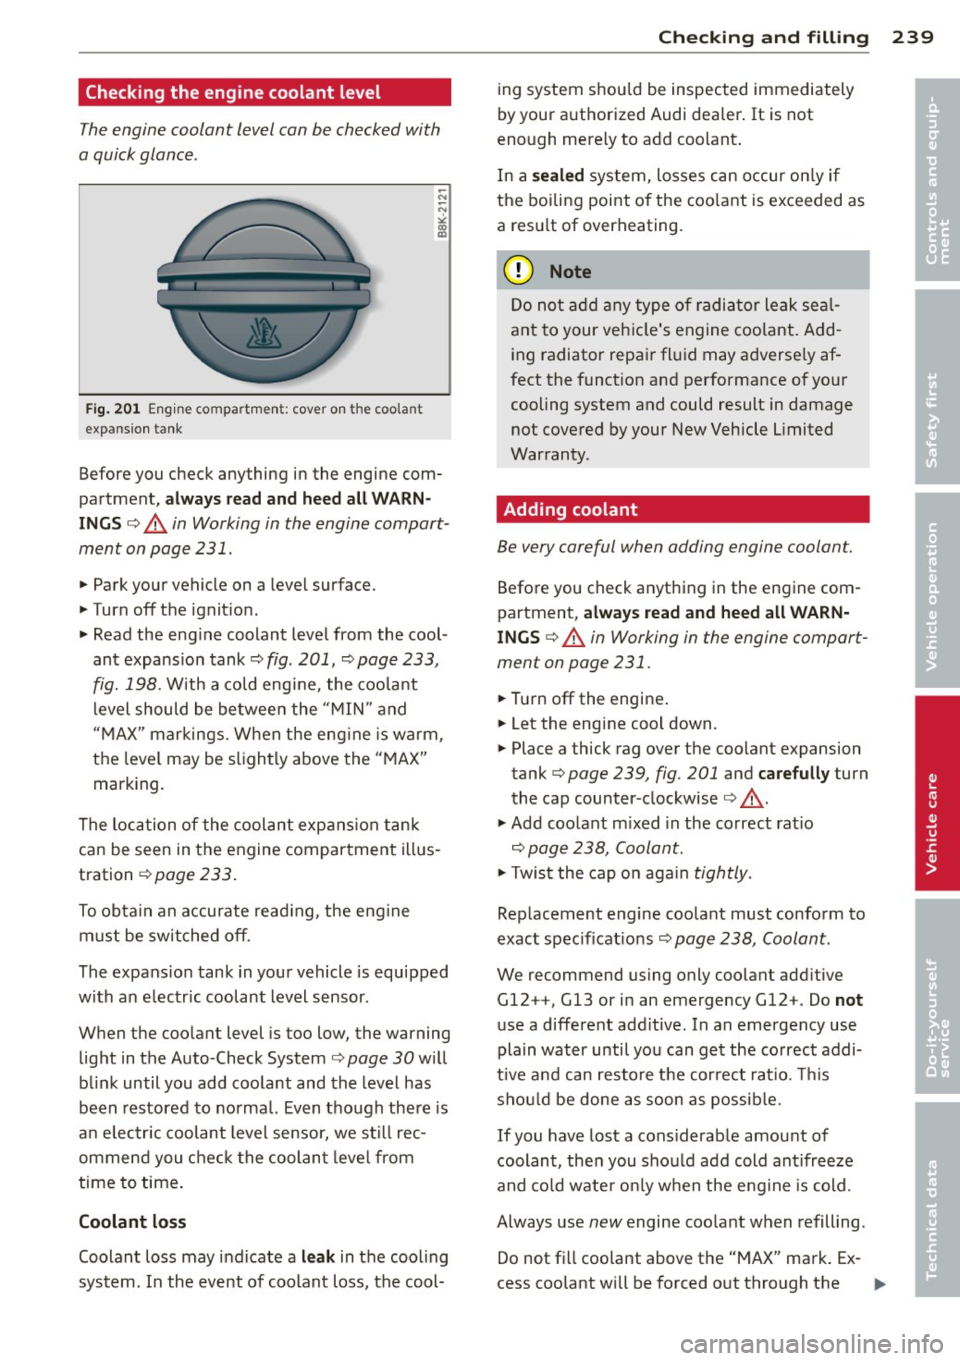
Fig. 201 Eng ine co mpa rtme nt: cove r on the coola nt
exp ansion tank
Before you check anything in the engine com
partment,
a lway s re ad and he ed all WARN
INGS ¢ A in Working in the engine compart
ment on page 231 .
.,. Park your vehicle on a level surface.
.,. Turn off t he ignit ion.
.,. Read the eng ine coolant level from the cool
ant expansion tank¢ fig . 201, ¢ page 233,
fig. 198 . With a cold eng ine , the coola nt
level should be between the "M IN " and
"MAX" markings . W hen the eng ine is warm,
the leve l may be slightly above the "MAX"
marking.
The location of the coolant expans ion tank
can be seen in the engine compartment illus
tration ¢page 233.
To obtain an accurate read ing, the eng ine
must be switched off.
The expans ion tank in your vehicle is equipped
with an e lectr ic coolant level sensor .
When the coo lant level is too low, the warning
light in the Auto -Check System ¢ page 30 will
blink until you add coo lant and the level has
been restored to normal. Even though there is
a n elec tric coolant leve l sensor, we s till rec
ommend you chec k the coolant leve l from
time to time .
Coolant loss
Coolant loss may indicate a leak in the cool ing
system. In the event of coolant loss, the cool-
Checkin g and fillin g 239
ing system shou ld be inspected immediately
by your authorized Audi dealer . It is not
eno ugh merely to add coo lant .
In a
s ealed system, losses can occu r on ly if
the boiling point of the coo lant is exceeded as
a resu lt of overheating.
(D Note
Do not a dd any type o f radiator leak se al
ant to your veh icle's engine coo lant. Add
ing radiator repa ir flui d may adverse ly af
fect the funct ion and performance of yo ur
cooling system and could result in damage not covered by your New Vehicle Limited
Warranty.
Adding coolant
Be very careful when adding engine coolant.
Before you check anything in the engine com
partment,
always read and heed alt WARN
INGS ¢ A in Working in the engine compart
ment on page 231 .
.,. Turn off the engine .
.,. Let the engine cool down.
.,. Place a thick rag over the coo lant expansion
tank ¢ page 239, fig. 201 and
carefully turn
the cap counter -clockwise ¢
_& .
.,. Add coolant m ixed in the co rrect rat io
¢ page 238, Coolant.
.,. Twis t the cap o n aga in tightly.
Rep lacement engine coo lant must conform to
exact spec ificat ions ¢ page 238, Coolant.
We recommend using only coolant add itive
Gl2 ++, Gl3 or in an emergency Gl2 +. Do not
use a different add itive . In an emergency use
plain water until you can get the correct addi
tive and can restore t he cor rect ratio . Th is
sho uld be done as soon as possib le.
If you have lost a cons iderab le amount of
coolant, then you sho uld add cold ant ifreeze
and co ld wate r on ly w hen the eng ine is cold.
Always use new engine coo lant when refill ing .
Do not fi ll coo lant above the "MAX" mark. Ex
cess coolant will be forced o ut through the
•
•
Page 243 of 316
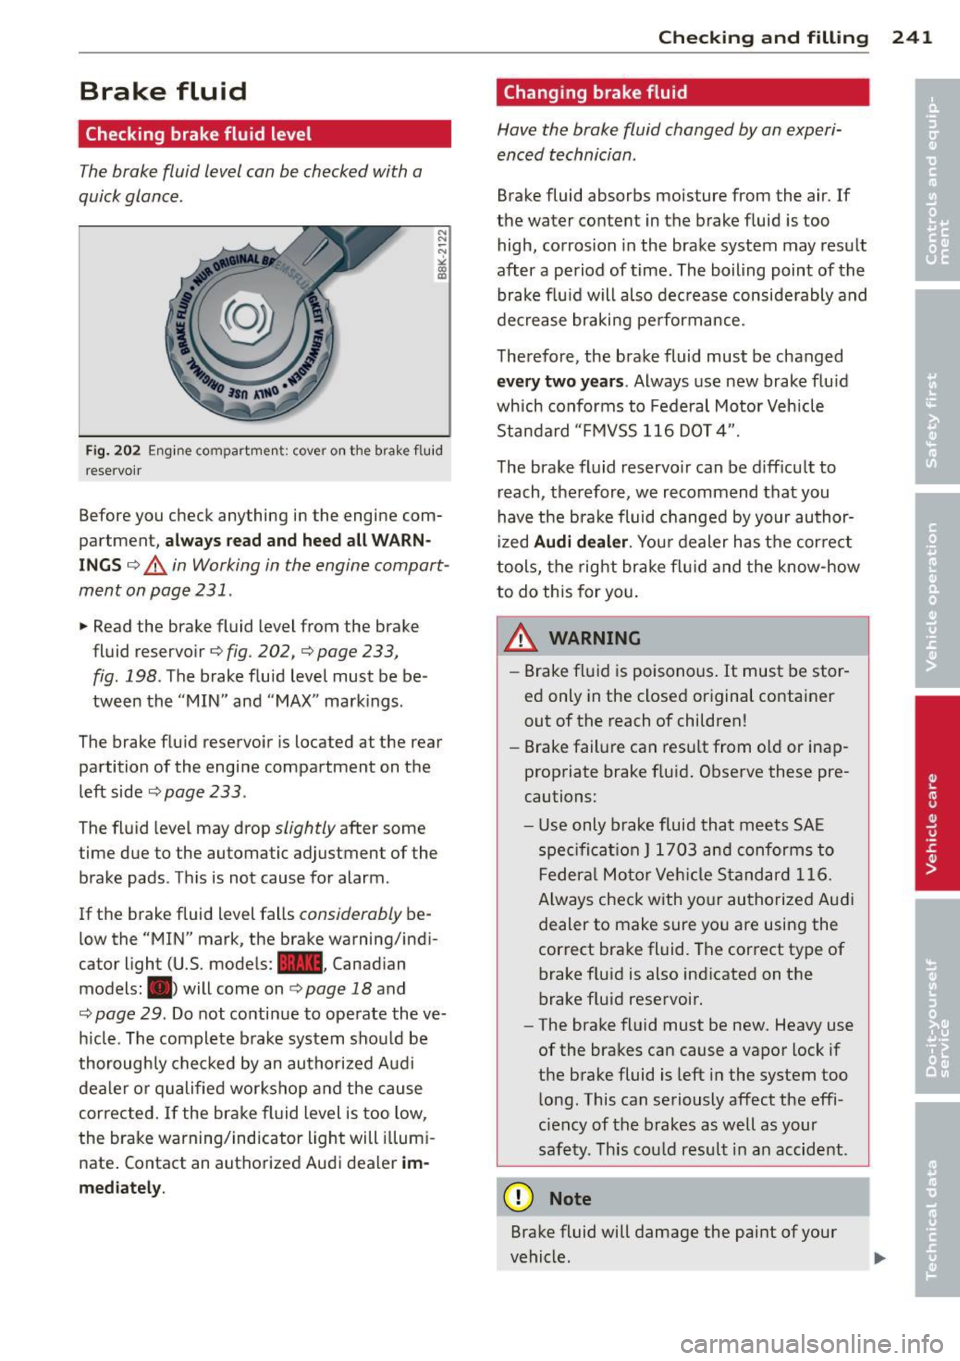
Brake fluid
Checking brake fluid level
The brake fluid level can be checked with a
quick glance.
N
N
;:;;
" 03
"'
Fi g. 202 Eng ine compartment: cover on the brake flu id
reservoir
Before you check anything in the engine com
partment,
a lwa ys read and heed all WARN
ING S c:> .&.. in Working in the engine compart
ment on page 231 .
~ Read the brake fluid level from the brake
fluid reservoir
c:> fig. 202, <=> page 233,
fig . 198 .
The brake flu id level must be be
tween the "MIN" and "MAX" markings.
The brake fluid reservoir is located at the rear
partition of the engine compartment on the
left side
c::> page 2 33 .
The fluid level may drop slightly after some
time due to the automatic adjustment of the
brake pads . This is not cause for alarm .
If the brake fluid level falls
considerably be
low the "MIN" mark, the brake warning/indi
cator light (U.S. models:~, Canadian
models: .) will come on
c> page 18 and
c::> page 29 . Do not continue to operate the ve
h icle. The complete brake system should be
thoroughly checked by an authorized Aud i
dealer o r qualified workshop and the cause
corrected.
If the brake fluid level is too low,
the brake warning/indicator light will illum i
nate . Contact an authorized Audi dealer
im
m ediatel y.
Checkin g and fillin g 241
Changing brake fluid
Have the brake fluid changed by on experi
enced technician .
Brake fluid absorbs moisture from the air. If
the water content in the brake fluid is too
high, corrosion in the brake system may result
after a period of time . The boiling point of the
brake flu id will also dec rease considerably and
decrease braking pe rformance.
Therefore, the brake fluid must be changed
every two years. Always use new brake flu id
which conforms to Federal Motor Vehicle
Standard "F MVSS 116 DOT 4".
The brake fluid reservo ir can be d iff icult to
reach, the refore, we recommend that you
have the brake fluid changed by your author
i zed
Audi d ealer. Your dealer has t he correct
tools, the right brake fl uid and the know-how
to do this for you .
A WARNING -.
-Brake fluid is poisonous . It must be stor
ed only in the closed original container
out of the reach of children!
- Brake failure can resu lt from o ld or inap
propriate brake f luid. Observe these pre
cautions:
- Use only brake fluid that meets SAE
spe cificat ion
J 1 7 03 and conforms to
Federa l Moto r Ve hicl e Standard 116.
Always check with yo ur authorized Audi
dealer to make sure yo u are using the
correct bra ke fluid. The correct type of
brake f luid is also indicated on the
brake f luid reservoir.
- The brake fluid must be new. Heavy use
of the brakes can cause a vapor lock if
the brake fluid is left in the system too
l ong . This can seriously affect the effi
c iency of the brakes as well as your
safety. Th is cou ld resu lt in an accident.
(D Note
Brake fluid will damage the paint of your
vehicle .
Page 275 of 316
(D Note
Special care is required if you are repairing
the tire on a steep incline.
@ Tips
-Do not operate the compressor for more
than 12 minutes continuously, otherwise it can overheat. Once the compressor has
cooled, you can continue to use it.
- If sealant has spilled out, let it dry and
then you can remove it by peeling it away
like a foil.
- Remember to obtain a new bottle of
sealant from your authorized Audi dealer
after repairing a tire. After this, the func
tionality of the tire repair set is restored.
- Obey all laws.
Changing a wheel
Before changing a wheel
Observe the following precautions for your
own and your passenger's safety when chang
ing a wheel.
.,. After you experience a tire failure, pull the
car well away from moving traffic and try to
reach
level ground before you stop¢_& .
.. All passengers should
leave the car and
move to a safe location (for instance, behind
the guardrail) ¢
_&.
.. Engage the parking brake to prevent your
vehicle from rolling unintentionally¢_&.
.. Move
selector lever to position P ¢ _& .
.,. If you are tow ing a trai ler: unhitch the trail
er from your vehicle.
.,. Block the diagonally opposite wheel with
the folding chocks or other objects.
.. Take the
jack* and the inflatable spare tire*
out of the luggage compartment
¢page 268.
A WARNING
You or your passengers could be injured
while changing a wheel if you do not fol
low these safety precautions:
-
What do I do now? 273
- If you have a flat tire, move a safe dis
tance off the road. Turn off the engine,
turn the emergency flashers on and use
other warning devices to alert other mo
torists.
- Make sure that passengers wait in a safe
place away from the vehicle and well
away from the road and traffic.
- To help prevent the vehicle from moving
suddenly and possibly slipping off the
jack*, always fully set the parking brake
and block the wheel diagonally opposite
the wheel being changed with the fold
ing chocks or other objects. When one
front wheel is lifted off the ground, plac
ing the Automatic Transmission in P
(Park) will
not prevent the vehicle from
moving.
- Before you change a wheel, be sure the
ground is level and firm. If necessary,
use a sturdy board under the jack*.
- Always store the vehicle tool kit, the
jack* and the replaced tire in the luggage
compartment
¢page 145.
Changing a wheel
When you change a wheel, follow the se
quence described below step-by-step and in
exactly that order.
1. Remov e the decorative wheel cover*. For
more details see also
¢ page 274, Deco
rative wheel covers
or ¢ page 2 7 4,
Wheels with wheel bolt cops .
2. Loosen the wheel bolts¢ page 2 75 .
3. Locate the proper mounting point for the
jack* and align the jack* below that point
¢ page 275.
4. Lift the car with the jack* ¢ page 2 75 .
S. Remove the wheel with the flat tire and
then install the
inflatable spare tire*
¢page 276.
6. Tighten all wheel bolts lightly.
7.
Lower the vehicle with the jack*.
8. Use the wheel bolt wrench and
firmly
tighten all wheel bolts¢ page 2 75.
9. Replace the decorative wheel cover*.
•
•
Page 297 of 316
-Always make sure the transm ission se
lector lever (automatic transmiss ion) is
in P (Park position) and the park brake is
applied.
@) For the sake of the environment
- Changing the eng ine settings w ill ad
versely affect em ission levels. This is det
rimental to the environment and increas
es fuel consumption .
- Always observe env ironmental regula
tions when d isposing of old engine oil,
used brake fluid, dirty engine coolant,
spent batter ies or worn out t ires.
- Undeployed airbag modules and preten
s ioners might be classified as Perchlo
rate Material -specia l hand ling may ap
ply, see www.dts c.ca .gov/hazardous
waste/perch lorate. When the veh icle or
parts of the restraint system includ ing
airbag modules safety belts with preten
sioners are scrapped, all applicable laws
and regulations must be observed. Your
a uthorized Audi dea ler is familiar w ith
these requirements and we recommend
that you have your dea ler perform this
serv ice for you .
Additional accessories,
modifications and
parts replacement
Additional accessories and parts
replacement
Always consult an authorized Audi dealer be
fore purchasing accessories.
Your veh icle incorporates the latest safety de
sig n featu res ensu ring a high standard of ac
tive and passive safety.
This safety could be compromised by non-ap proved changes to the veh icle. For this reason,
if parts have to be replaced, please observe
the following points when install ing addition
a l accessories:
Con sumer In formation 295
Approved Audi accesso ries and genuine Audi
parts are available from authorized Audi deal
ers.
T hese dea lers a lso have the necessary facili
ties, tools and trained specialists to install the
parts and accessories proper ly.
A WARNING
Using the wrong spare parts or using non
approved accessories can cause damage to
the vehicle and serious persona l injury.
- Use on ly accessories express ly approved
by Audi and genu ine Audi spare parts
- These parts and accessories have been
specially designed to be used on your ve
hicle .
- Never install accessories such as tele
phone cradles or beverage holders on air
bag covers or within the airbag deploy
ment zones . Do ing so will increase the
risk of injury if a irbags are triggered in an
accident!
- Before you check anything in the engine
compa rtment, always read and heed all
WARNINGS
~ page 231.
(D Note
-If items other than genuine Audi spare
parts, add-on equipment and accessory
items are used or if repair work is not
performed accord ing to specified meth
ods, this can result in severe damage to
your vehicle's engine and body (such as
corrosion) and adversely affect your vehi
cle's warranty .
- If emergency repairs must be performed
elsewhere, have the vehicle examined by
an authorized Audi dealer as soon as
possible.
- The manufacturer cannot be held liable
for damage wh ich occurs due to failure
to comply with these stipulations.
•
•
Page 302 of 316
300 Index
Center armrest
Adjusting . ................. ..... .. 66
Storage compartment . . . . . . . . . . . . . . . 66
Certification . . . . . . . . . . . . . . . . . . . . . . . 296
Changing A flat tire .. .......... ...... ... .. . 273
A wheel .. .. ................ ... ... 273
E ng ine oil ... ............ .. .. .. .. . 237
Checking Engine coolant level ....... .. .. .... . 239
Tire pressure .............. ... .. .. . 253
Child restraints Danger of using child restraints in the
front seat .... ........... .. .. .... . 158
System anchors .......... .. .. .. .. . 191
Where can I get additional information
about child restraints and their use? . . 196
Chi ld safety ................. .. .... . 178
Convertible locking retractor .. .. ..... 188
Important safety instructions for using
child safety seats ............. .. ... 181
Important things to know when dr iving
with chi ldren . ... ..... ... .. .. .. .. . 178
I nstalling a child restraint using the
L A T CH system . ......... .. .. .. .. .. . 193
Mounting and releasing the anchorage
hook .... ................ ... .... . 193
Tether anchors ............ ... .... . 194
Tether straps .............. .. .... . 194
Ch ild safety locks
Rear doors ............... ... .... .. 46
Child safety seats . .......... ... .. .. . 184
Booster seats ............. ... .. ... 186
Conve rtible child seats .... .. .. .. .. . 185
Conve rtible locking retractor .. .. .. .. . 188
Danger of using child restraints in the
front seat .. ................ ..... . 158
How do I properly install a child safety
seat in my vehicle? ........ .. .. .... . 181
Infant seats ............. .. .. .. .. . 184
Installing ................. .. .... . 188
LA TCH system ......... .... ... .. .. . 193
Lower anchorages ......... ... .. .. . 192
Safety instructions ... ..... .. .. .... . 181
Unused safety belts on the rear seat .. 183
Cigarette lighter ........... .. .. .. .. .. 75
C leaning .................... ..... . 217 Climate control
.... ............. ..... 79
Air vents . ..... .. .. .............. .. 81
Automatic recircu lation .......... ... . 81
Operation . . . . . . . . . . . . . . . . . . . . . . . . . 80
Setup .... .... .. ............. .... . 81
Supplementary .. ................ .. 82
Synchronizing . ... ....... ...... .. .. . 81
Climatized cupholder ................. 74
Clock .. .. .. .... .. ............. ..... 12
Closing Panoramic sliding sunroof ........ ... . 47
Coat hooks ..... .. .. .............. .. 77
Cold tire inflation pressure .......... .. 251
Compass mirror . . . . . . . . . . . . . . . . . . . . . 59
Compliance ..... .. .. .............. . 296
Consumer Information . . . . . . . . . . 146, 293
Contacting NHTSA . ............... .. 146
Controls Cleaning .. .... .. .. .............. . 219
Convenience Closing ...... ... .. .............. .. 47
Open ing .. .... .. ............. .... . 47
Convenience key . .. ............. .... . 40
Indicator lights .. ..... ........... .. 87
Locking and unlocking vehicle ........ . 40
Start ing engine (START ENGINE STOP
button) ..... .. .. .. ........... .... . 86
Stopping the engine (START ENGINE
STOP button) .... ............... .. . 87
Switching on ignition ............ ... . 86
Convertible child safety seats . .. ... ... 185
Convertible locking retractor Activating . .... .. ............. .... 190
Deactivat ing . ... . ... ... .... ... .. .. 191
Using to secure a child safety seat 1.88, 190
Coolant system .... ................ . 238
Cooled cupholder ............... .... . 7 4
Cooling box in glove compartment . . . . . . 77
Cooling mode (climate control) ..... ... . 80
Cooling System Expansion tank ... ............. .... 239
Cornering light .. .. ............. .... . 51
Cruise control
Changing speed
Preselect speed .
. ................ .. 95
96
Switching off .. .. ............. .. .. . 96
Page 304 of 316
302 Index
Electronic differential lock (EDL) ...... . 19 7
Warning/indicator lights ... .. ... . 15, 17
E lect ronic immobilize r ...... .. .. .... .. 38
Electronic power control (EPC) warn ing/ indicator light . .. .. .. .. 15
Elect ronic Stabilization Control (ESC) . .. 197
Hill descent assist ..... ... .. .. .... . 199
Offroad mode . ........... .... .... . 198
Warn ing/ indicator lights ... .. .. .. .. . . 15
E mergency braking . . . . . . . . . . . . . . . . . . . 90
Emergency flasher . . . . . . . . . . . . . . . . . . . 52
Warn ing/ indicato r lights ....... .. .. .. 16
Emergency key . .... ....... .. .. .... .. 36
Starting engine ............ .. .... .. 85
Emergency locking of the doors ..... ... . 4 2
Eme rgency operation
L uggage compartment lid .. .. .. .. .. . . 45
Emergency release Selector lever ............ .. .. .. .. . 128
Emergency starting ..... ... .. .. .... . 283
Emergency towing ............. .. ... 285
Emergency unlocking Ignition key . . . . . . . . . . . . . . . . . . . . . . . 38
E nergy management .. ... .. .. ... ... . 203
Eng ine
Compartment . .. ...... ... .. .. .. .. . 233
Coolant .. .... ........... .. .. .. .. . 238
D ata .. .. ... ............ .. .. .. .. . 291
H ood . ...... .. .. ..... ... .. .. .... . 23 1
Jump starting .. .. ..... ... .. .. .... . 105
Start-Stop-System . . . . . . . . . . . . . . . . . . 91
Starting . . . . . . . . . . . . . . . . . . . 83, 86, 98
Starting with jumper cables .. .. .... . 283
Stopping . . . . . . . . . . . . . . . . . . . 85, 87, 98
Engine compartment Safety instructions . . . . . . . . . . . . . . . . . 23 1
Working the engine compartment .... 231
E ng ine coolan t sys tem ...... .. .. .... . 238
Adding coolant . .. ..... ... .. .. .... . 239
Checking coolant leve l ... .. .. ... ... . 239
Malfunction . . . . . . . . . . . . . . . . . . . . . . . 30
Radiator fan ............. .. .. .. .. . 240
E ng ine coolan t temperature
Tempe ratu re ga uge .. ... .. .. .... .. .. 1 0
E ng ine hood
C losing .. .. ................ ... .. . 23 1
H ow to release the hood . .. .. .. .. .. . 23 1 E
ngine oi l .. .... .. ... .. ..... .... . .. 233
Adding ... .... .. .. ... ..... ... .. .. 236
Additives . ... .. .. .. ... ..... ... .. .. 236
Changi ng ..... .. ............. .... 237
Check oil level . .. ............. .... 236
Consumption .. .. ................ . 236
Level .... ... .. .. .. ... .. ... ..... .. . 34
Oil consumpt io n .. .......... ...... . 235
Oil g rades . .. .. . .............. .. .. 233
Press ure ma lfu nction ........... .. .. . 30
Senso r defec tive . . . . . . . . . . . . . . . . . . . . 34
S peci fication and viscosit y ........ . .. 233
E ngine speed limitation . . . . . . . . . . . . . . . 34
Environment Break-in per iod . .. ............. .... 205
Catalytic co nverter ................ . 206
Diesel pa rticula te filter .......... ... 206
Dispos ing of your veh icle battery . . . . . 245
Driv ing at high speeds .......... .. .. 20 7
D riv ing to minimize po llution and noise 20 7
F uel .. .. .. .. .. . .............. .. .. 226
Fuel economy .... .. ... ..... ... .. .. 207
Leaks under you r vehicle ..... ... .. .. 231
Letting the vehicle stand and warm up. 208
Proper disposal of drained brake fluid . 241
Proper disposal of drained eng ine cool-
ant .. ..... ... .. .. ... ........... . 239
Proper d isposal of drained eng ine
o il . . . . . . . . . . . . . . . . . . . . . . . . . 236,237
Recycling used eng ine oil ........ .. .. 236
Roof rack . .. .. .. ............. .. .. . 72
U nleaded fuel .... .. .... .... ... .. .. 222
What s hou ld I do with an o ld battery? . 245
E P C
refer to Elect ro nic powe r contro l ... .. . 15
ESC
refer to Electronic Stabilization Control
(ESC) ........ ... .. .............. .. 15
Ethy l alcohol (Fuel) ... ... ..... ... .. .. 223
E vent Data Recorde r (EDR ) ........ .... 19 7
Exhaust tail pipes Cleaning ...... .. .. ... ........... . 219
Expansion tank .... ... .. ..... ... .. .. 239
E xplanation of some technical te rms 210
Exterior mirrors Adjusting ..... .. .. ... ........... .. 57
Dimm ing .. ... ... .. .............. .. 58
Heating ..... .. .. .. ... .. ... ..... .. . 57