start stop button AUDI Q5 2016 User Guide
[x] Cancel search | Manufacturer: AUDI, Model Year: 2016, Model line: Q5, Model: AUDI Q5 2016Pages: 300, PDF Size: 75.02 MB
Page 93 of 300
,....,
N
co
er::
co
,....,
that you are developing enough driving force at
the wheels by depressing the accelerator .
Depending on the weight of the r ig (vehi cle and
tra iler) and the severity of the incline, you may
ro ll backwards as you start . You can prevent roll
ing backwards by holding the parking brake
switch pulled out and accelerating -just as you
wou ld when starting on a hill with a conventiona l
h and brake .
Emergency braking
In the event that the conven tional brake system
fails or locks .
~ In an emergency, pull the sw itch and cont inue
to pull it to slow your veh icle down with the
parking b rake.
~ As soon as you release the switch or accelerate,
the b raking process stops .
If you pull the sw itch and hold it above a speed of
about 5 mph (8 km/h) , the eme rgency braking
function is in it iated . The vehicle is braked at all
four wheels by activating the hydraulic brake sys
te m. T he b rake perfo rman ce is sim ila r t o making
an em ergen cy sto p ~ ,& .
In o rder not to activate the emergency brak ing by
mista ke, an audib le wa rn ing tone (buzze r)
sounds w hen the sw itch is p ulled. As soon as t he
sw itch is rele ased, or the acce le ra to r p edal is de
p ressed, eme rgency bra king stops.
A WARNING
Emergency bra king should only be use d in an
emergency, w hen the normal foot brake has
fai led or the bra ke pedal is obstructed . Using
the par king b rake to perfo rm emergency
brak ing will slow your vehicle down as if you
had made a full bra ke ap plication . The laws of
physics cannot be suspended even wi th ESC
a n d its associated components (A BS, ASR,
E DS). In c orn ers and when road or weath er
c ondi tions are bad, a full brake ap plication
c an ca use the vehicle to sk id or the rear end to
break away· r isking an accident .
Driving
Driver messages in the instrument cluster
Caution: Vehicle parked too steep
T h is message appears when the pa rking bra ke is
applie d on an in cl in e that exceeds about 30%.
In this case the braki ng power o f the pa rking
brake may not be adequate to prevent the ve hi
cle from roll ing uninten tionally.
Press b rake pedal to release park ing brake
This dr iver message appears when the sw itch to
re lease the par king brake was pressed. The park
ing brake can only be released if you step o n the
brake pedal and at the same time press the
switch or you automatica lly re lease the park ing
bra ke w ith the sta rting ass ist ~
page 90 .
r.lJ Parking brake malfunction!
This dr iver message appears together w ith the
yellow
rlJ symbol whe n there is a parki ng brake
malfu nction .
Start/Stop system
Description
Applies to vehicles: wit h Start-Stop-Syste m
The Start -Stop -System can he lp increase f uel
economy and reduce CO2 emissions.
In the Start -S top -mode, the engine sh uts off au
tomat ica lly when the vehicle is stoppe d, such as
at a t raff ic light. The ignition remains switched
on d uring this stop phase. The eng ine will be a u
tomat ically restarted when needed.
T he last Start-Stop -System setting (on/off usin g
the b utton
10~ 1) will be restored when the ign i
t ion is turned on. The LED in the
10'" 1 button turns
on when the Start-Stop-System is switched off
manua lly .
Ba sic requirements for the Start-Stop mode
- The d river 's door is closed.
- The driver 's sea t belt is latc hed.
- The hood is closed.
- The vehicle must have bee n driven fast er than
2.5 mph (4 km/h) s in ce the last s top.
- A t railer is not hitched to the vehicle . .,.
91
Page 94 of 300
Driving
_& WARNING
-Ne ver turn off the engine before the veh icle
has come to a comp lete stop . The f ull func
t ion of the brake booster and the power
steering is not guaranteed. Yo u must use
more force to turn or brake if necessary . Be
ca use you cannot steer and b rake as you
us ually wou ld, this could lead to crashes
and serious injur ies.
- To reduce the risk of inju ries, make s ure that
t h e S tart -Stop-System is turned off whe n
wor king in the eng ine compart ment
9page 93 .
(D Note
Always sw itch off the Start-Stop-System
when dr iv ing th rough water
9 page 93 .
Starting/stopping the engine
Applies to veh icles: w ith Start -Stop -System
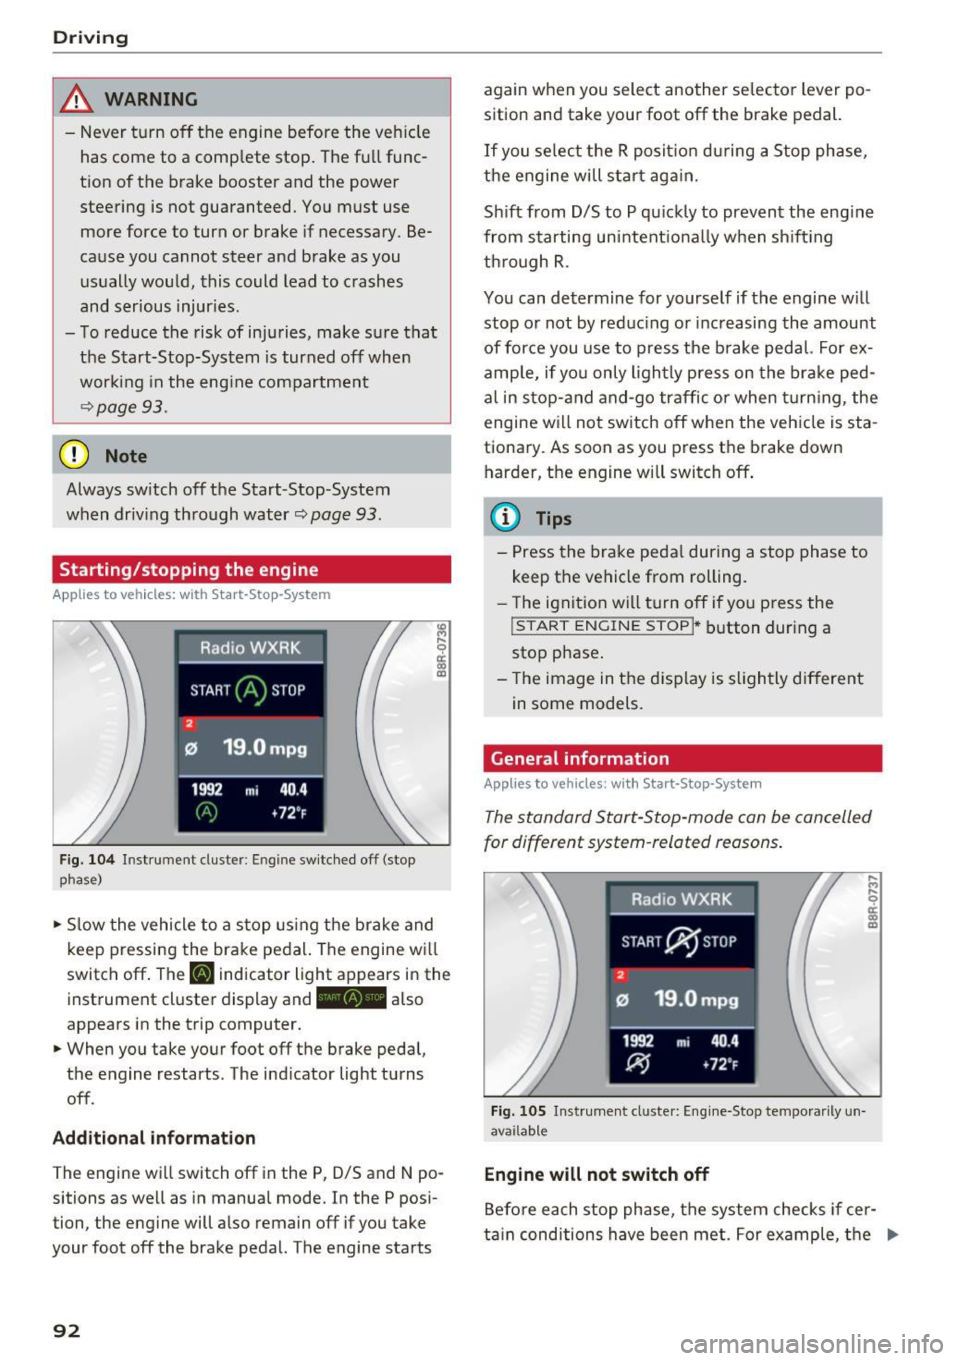
F ig . 104 In strum ent cluste r: En gin e sw itc hed off (stop
phase}
• Slow the vehicle to a s top using the brake and
k eep pressing the bra ke pe dal. The engine w ill
switc h off . The
[I] ind icator light appears in the
i nst rument cluste r display and -also
appears in the t rip computer.
• When you take yo ur foot off the b rake peda l,
the engine restarts . The ind icator light tu rns
off .
Add itional informat ion
The eng ine wi ll switch off in the P, D/S and N po
sitions as we ll as in manua l mode. In the P pos i
tion, the eng ine will a lso remain off if you take
your foot off the brake pedal. The engine starts
92
again w hen you select another se lecto r lever po
sition and take your foot off the brake pedal.
If you se lect t he R posit io n dur ing a Stop phase,
the e ngine will sta rt ag ain.
Sh ift from D/S to P qu ic kl y to prevent the eng ine
from starting uni ntent io na lly when sh if ti ng
th rough R.
You can determine for yourself if t he engine w ill
stop o r not by re duc ing or inc reasing the amount
of force you use to p ress the b rake pedal. Fo r ex
amp le, if yo u only ligh tly press o n the brake ped
a l in s top- and and-go traffic or when turning, the
engine will not switch off when the veh icle is sta
tiona ry. As soon as you press the brake down
h arder, the engine will switch off .
{i) Tips
-Press the brake peda l during a stop phase to
keep the vehicle from rolling.
- The igni tio n wi ll turn off if y ou press the
! START ENGINE STOPI * button dur ing a
stop p hase .
- Th e image in the displ ay is s ligh tly d ifferent
in some models.
General information
Applies to vehicles: with Start-Stop-System
The standard Start-S top-mode can be can celled
for different system -related reasons .
Fig. 1 05 In str um ent cl uste r: E ngi ne-Stop te mpo rari ly un
ava ilab le
Engine will not switch off
.... .., .... 0
~ m
Befo re each sto p phase, t he system checks if cer
ta in conditions have been met. For example, t he .,.
Page 95 of 300
..... N
co ~ CX)
..... I.Cl U"I
..... I.Cl .....
engine will no t be switched off in the following
situations:
- The eng ine has not reached the m in imum re
quired temperature for Start-Stop-mode.
- T he interior temperature selected by the A/C
system has not been reached.
- The outs ide temperatu re is ext remely h igh/low.
- The w indshield is being defrosted
¢ page 82.
-The parking system* is switched on.
- The battery charge level is too low.
- The steering whee l is sharply turned or there is
a steering movement.
- After engaging the reverse gear.
- On sharp inclines .
IIJ appears in the instrument cluster display and
§ii;Ff&Ff ~lso appears in the tr ip comp ute r.
Engine automatically re starts
The stop phase is interrupted in the following sit
uations, for example . The eng ine restarts without
any action by the driver .
- The interior temperature varies from the tem
perature se lected in the A/C system .
- The windshield is beeing defrosted
¢ page 82.
- The brake pedal is pressed several times in a
row.
- The battery charge level becomes too low.
- High power cons umption .
IIJ appears in the instrument cluster display and
H§;Ff&Fii ~lso appears in the tr ip comp ute r.
Switching the ignition off autom atically
To prevent the battery from draining, the ignition
will switch off
automati cally when all of the fol
lowing cond itions have been met:
- The veh icle has already been driven.
- The eng ine has been turned off by the Start-
Stop-System .
- The driver's door is opened .
- T he dr iver's seat bel t is removed.
- The brake pedal is not pressed down.
- T he veh icle is stationary .
In this case, the activated low beam will be re
placed by the s ide marker lights . The side marker
D rivi ng
lights will switch of f after approximate ly 30 m i
nutes or when you lock the veh icle.
If t he Start-S top-System has not turned off the
engine or if you have swi tched the S tart -Stop
System off manually, the ignition will
not be au
tomatica lly switched off and the eng ine wi ll con
t in u e to run¢& .
A WARNING <= -
Never allow the engine to run in confined
spaces -danger of asphyx iation.
(D Tips
If you shift into the 0/S or N positions after
shifting into reverse, the vehicle must be dr iv
en faster than 6 mph (10 km/h) in order for
the engine to switch off again .
Switching the Start-Stop -System on /off
manually
App lies to vehicles: wi th Start -S top-Syste m
If you do not wish to use the system, you can
switch it off manually.
= , __ (A)Off _ --"'-- f'~-.::a-----
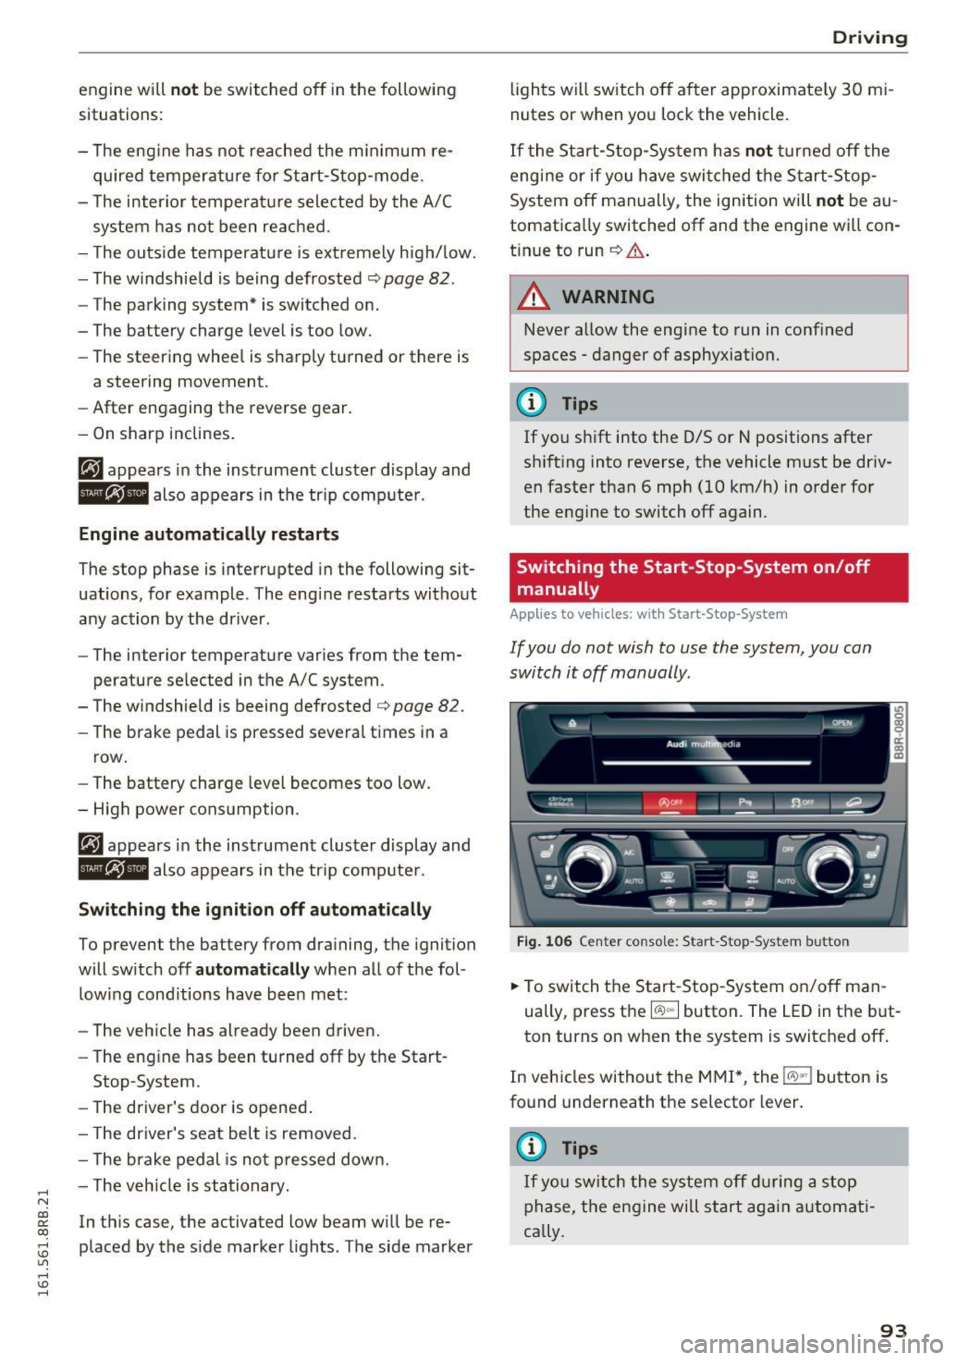
Fig . 10 6 Cen ter co nsole: S ta rt -Stop -System button
.. To switch the Start -Stop-System on/off man
ually, press the
I CAJ ,,.I button. The LED in the b ut
ton turns on when the system is switched off .
In vehicles without the M MI*, the
!CA.> "'! button is
found underneath the se lector lever.
(D Tips
If y ou swit ch the system off d uring a stop
phase, the engine will st art aga in automati
ca lly.
93
Page 96 of 300
Driving
Messages in the instrument cluster display
Applies to vehicles: with Start-Stop-System
Start-stop system: deactivated. Please
restart engine manually
This message appears when specific conditions
are not met during a stop phase and the Start
Stop -System wi ll
not be able to restart the en
gine. The engine must be started with the key or
with the
! START ENGINE STOPI* button .
Start-stop system: system fault. Function
unavailable
There is a malfunction in the Start-Stop-System .
Drive the vehicle to an authorized repair facility
for servicing as soon as possible to correct the malfunction.
Transmission: Car may roll! Shift to pa rk!
This message appears if the selector lever is not
in the
P position when the driver's door is
opened. You will also hear a warning tone. Shift
the selector lever to the
P position. Otherwise,
the vehicle could roll.
Speed warning system
Overview
The speed warning system helps you to keep your
driving speed below a set speed limit.
The speed warning system warns if the driver ex
ceeds a prev ious ly stored maximum speed. A
warn ing tone w ill sound as soon as the vehicle
speed exceeds the set speed by about
3 mph
(3 km/h). At the same time, a wa rning symbo l
appears in the display. The symbol's appearance
might be different in some models.
The speed warning system has
two warning
thresholds that function independently of each
other and that have somewhat different purpos
es:
Speed warning 1
You can use speed warning 1 to set the maximum
speed while yo u are driving. This setting will re
main in effect unti l yo u turn off the ignition, as-
94
suming that you have not changed or reset the
setting .
The speed warning symbol. (USA models)/ .
(Canada models) in the warning 1 disp lay ap
pears when you exceed the maxim um speed. It
goes out when the speed falls below the stored
max imum speed .
The speed warning symbol will also go out if the
speed
exceeds the stored maximum speed by
more than about 2S mph (40 km/h) for at least
10 seconds . The stored maximum speed is delet
ed.
Setting speed warning 1
¢page 95.
Speed warning 2
Storing warning 2 is recommended if you always
want to be reminded of a ce rtain speed, for ex
amp le when you are traveling in a country that
has a genera l maximum speed limit, or if you do
not want to exceed a specified speed for winter
tires.
The speed warning 2 symbol ,. (USA mode ls)/
• (Canada models) appears in the display when
you exceed the stored speed limit. Unlike warn
ing 1, it will not go out until the vehicle speed
drops below the stored speed limit.
Setting speed wa rning 2
¢page 95.
(D Tips
Even though your vehicle is eq uipped with a
speed warning system, you should still watch
the speedometer to make sure you are not
driving faster than the speed limit.
Page 100 of 300
Hybrid
Starting the vehicle
Applies to vehicles: with hybrid drive
The vehicle is started and turned off either with
the ignition key~
page 84 or w it h the
I S T AR T ENG INE S TOPI button* ¢ page 87 in the
same way as a conven tional vehicle .
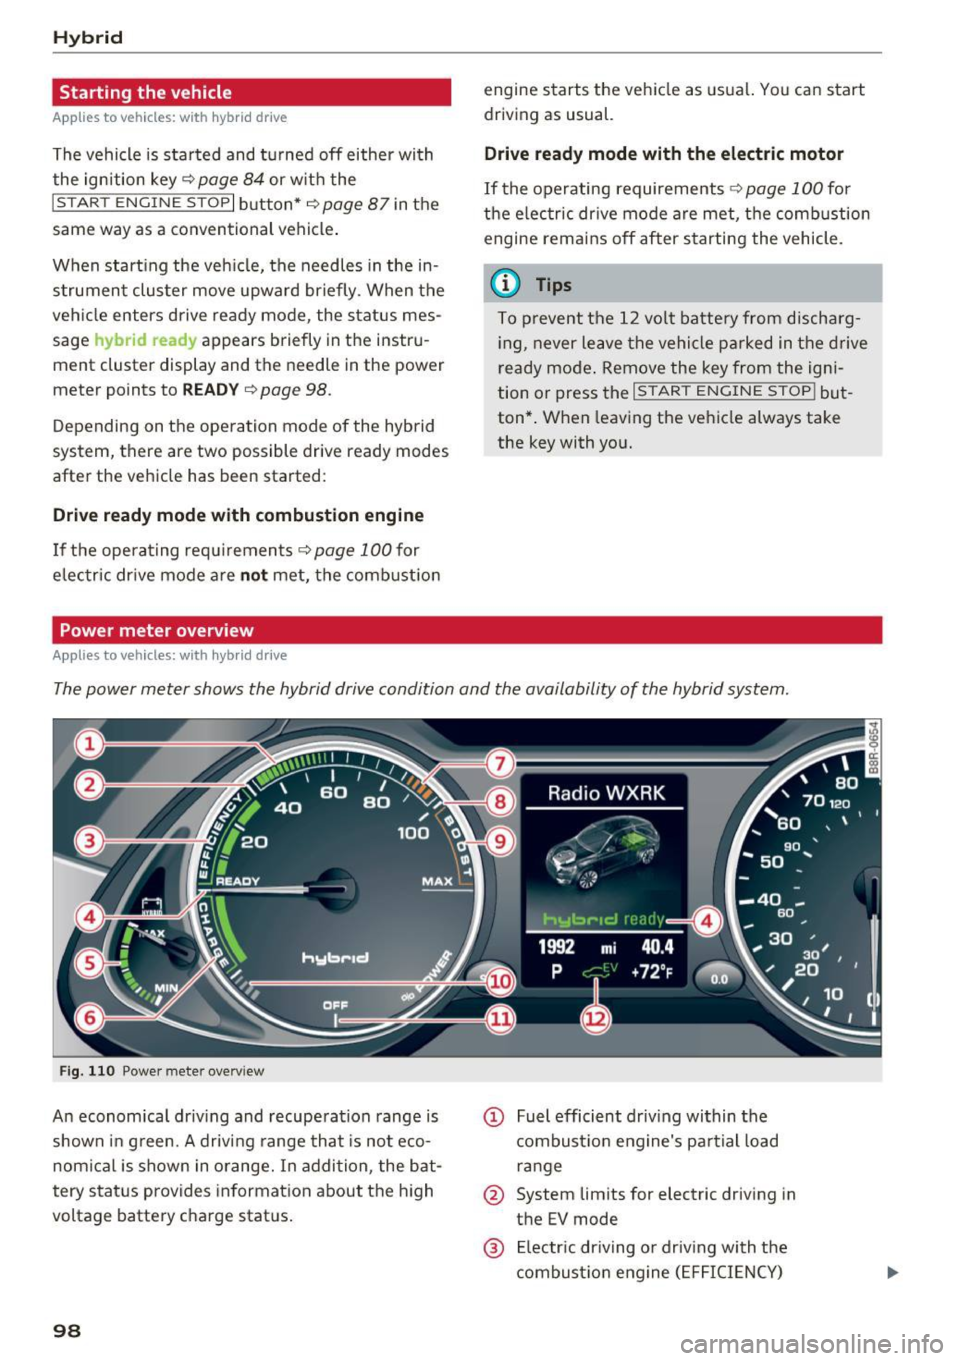
When start ing the veh icle, the needles in the in
s trumen t clus ter move upward briefly . When the
veh icle enters drive ready mode, the status mes
sage
hybrid ready appears briefly in the instru
ment cluster display and the needle in the power
meter points to
READ Y¢ page 98 .
Depending on the operation mode of the hybrid
system, there are two possible drive ready modes
after the vehicle has been started:
Driv e re ady mode with combustion engine
If the operat ing req uirements ¢page l00for
elec tric drive mode are n ot met, the combust ion
Power meter overview
Applies to vehicles: with hybrid drive
engine starts the vehicle as usual. You can start
driving as usual.
Drive ready mod e with the el ectric motor
If the operating requirements ¢ page 100 for
the e lec tric dr ive mode are met, the comb ustion
engine rema ins off after starting the vehicle .
(D Tips
To prevent the 12 volt batte ry from discharg
i ng , never leave the vehicle parked in t he d rive
r eady mode . Remove the key from the igni
tion or press the
I S TAR T ENGINE STOP ! but
ton* . When leaving the ve hicle always take
the key with you.
The power meter shows the hybrid drive condition and the availability of the hybrid system.
Fi g. 11 0 Power meter overv iew
An economica l driv ing and recuperation range is
shown in g reen. A driving range that is not eco
nom ical is shown in o range. In addition , the bat
tery status provides informat ion a bout the h igh
voltage battery charge stat us.
98
@ Fuel efficient dr iv ing within the
combust io n eng ine's pa rtial load
r an ge
@ System lim its for electr ic driving in
the EV mode
@ El ectr ic dr iving o r driving with the
combustio n eng ine ( EFFICIENCY)
Page 101 of 300

© Vehicle drive ready (READY)
® H igh voltage battery charge status
@ Recupe ration (CHARG E)
(J) Driving within the combustion en
g ine's full load range
@ 100% combust ion engine
® Boosting - the elect ric engine as
sists the combustion engine (BOOST)
@ E ngaging the conve ntiona l brakes
with recuperat ion
@ Vehicle not drive ready (OFF)
@ EV mode act ive
The need le remains at
OFF whe n the ignition is
turned on. When the veh icle enters drive ready
mode, the status message
hybrid ready appears
briefly in the instrument cluster d isplay and the
needle in the powe r meter poi nts to
READY .
Indicator lights and messages
Applies to vehicles: with hybrid drive
The indica to r li gh ts in the inst rument cluste r
b link or tur n on. They indicate functions or mal
f u nctions .
W ith some ind icator lights, messages may ap
pear and a warning tone may sou nd . A lso note
the ind icator lights in
<=:> page 2 7.
Press brake pedal to start vehicle
This message appears if you do not press the
b rake pedal whe n starting the vehicle.
Shift to N or P to start vehicle
This message appea rs if the selecto r leve r fo r the
automatic transm iss ion is not in the Nor P posi
tions whe n starting the vehicle .
-Hybrid drive: System fault! Power
brakes , steering malfunction pos sible
If the indicator lig ht turns on and th is message
appears, there is a malfunction in the hybrid sys
tem. The brake booster and the power steeri ng
~ may stop working . Stop the vehicle in a safe loca -
co g:; tion as soon as possible.
Hybrid
You may con tinue dr iving i f the indicator light
tu rns off after sta rt ing the ve hicl e several times .
Drive to an authorized repa ir facility immed iate ly
to have the malfunction cor rected .
f#iifj:j;jj,j Hybrid drive: System fault! Contact
dealer
If the indicator light turns on and this message
appea rs, there is a ma lfunction in the hybrid sys
tem. Drive to an autho rized repair fac ility imme
diately to have the malfunct io n corrected.
(II Hybrid system : Performance rest ricted .
Please contact dealer
If the indicator light turns on and this message
appears, there is an eng ine control malfunction .
The
[Ia i ndica to r li ght in the ins trument clus te r
also t urns on. The engine ou tput is red uced .
Dr ive to your authori zed A udi dealer or qualified
r ep air fa cility i mme diate ly to h ave the m alfu n c
t io n corre cte d.
Hybrid drive deactivated. Please restart
engine manually.
T h is m ess age appe ars if t he high vo lt a ge b attery
c h arge leve l h as fallen below a cer tain range or i f
t h e ig nition key is no longer i nsid e the veh icle for
vehicles with the convenience key* .
Start the engi ne w it h eithe r th e ig nitio n key
<=:> page 84 o r wi th the !START ENGI NE STOPI
button* <=:> page 87.
Hybrid battery: Low battery charge. Battery
will be charged while driving.
T h is mess age app ea rs if the high vo lt a ge b att ery
c h arge leve l has fallen be low a certa in range . If
t hi s message turns off afte r a litt le while, the
high voltage battery cha rged enoug h while driv
ing .
If the message does not turn off, have an au thor
ized repair facility cor rect the ma lf u nction as
soon as possib le .
EV mode is currently unavailable.
Th is me ssa ge appears if the con ditions
<=:> page 10 0 for enhanced ele ctric drivi ng ar e not
met. Try aga in at a late r time .
99
Page 102 of 300
Hybrid
Hybrid functions and operating modes
Applies to veh icles: w ith hyb rid drive
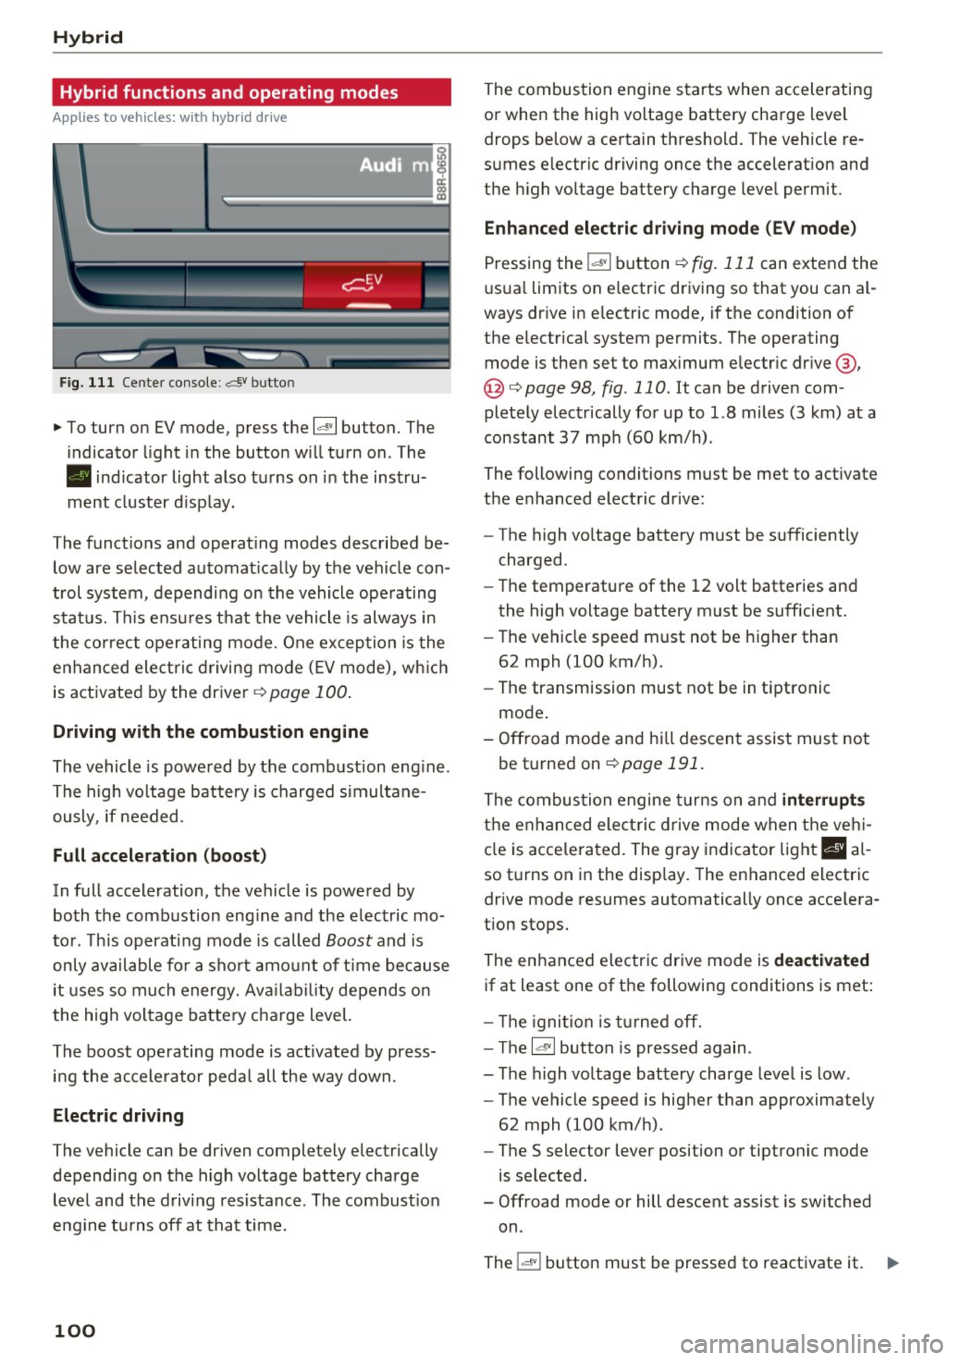
Fig. 111 Center console: a• butto n
"'To turn on EV mode, press the 1.,,.,, 1 button. The
indicator light in the button will turn on. The
• indicator light also turns on in the instru
ment cluster disp lay.
The functions and operating modes described be low are selected automat ically by the vehicle con
trol system, depending on the vehicle operating
status. This ensu res that the vehicle is always in
the correct operating mode. One exception is the
enhanced elect ric driving mode
(EV mode), wh ich
is activated by the driver ¢
page 100.
Driving with the combustion engine
The vehicle is powered by the combustion eng ine.
The high voltage battery is charged simultane
ously, if needed .
Full acceleration (boost)
In full acceleration, the vehicle is powered by both the combustion eng ine and the electric mo
tor . This operating mode is called
Boost and is
only available for a short amount of time because
it uses so much energy. Ava ilability depends on
the high voltage battery charge level.
The boost operating mode is act ivated by press
ing the accelerator pedal all the way down.
Electric driving
The vehicle can be driven completely electrically
depending on the high voltage battery charge
level and the driving resistance. The combust io n
engine tu rns off at that time.
100
The combustion engine starts when accelerating
or when the high voltage battery charge level
drops below a certain threshold. The vehicle re
sumes electric driving once the acceleration and
the high voltage battery charge leve l permit .
Enhanced electric driving mode (EV mode)
Pressing the
i"*'I button ¢ fig. 111 can extend the
usual limits on e lectric driving so that you can a l
ways dr ive in electric mode, if the condition of
the electrical system permits. The operating mode is then set to maximum electr ic drive @,
@ ¢page 98, fig. 110. It can be driven com
pletely electrically for up to 1.8 miles (3 km) at a
constant
37 mph (60 km/h).
The following conditions must be met to activate
the enhanced electric drive:
- The high voltage battery must be sufficiently
charged.
- Th e temperature of the
12 volt batteries and
the high voltage battery must be sufficient.
- The vehicle speed must not be higher than
62 mph (100 km/h).
- The transmission must not be in tiptronic
mode .
- Offroad mode and hi ll descent assist must not
be turned on
r::!> page 191.
The combustion engine turns on and interrupts
the enhanced elect ric drive mode when the vehi
cle is acce lerated. The gray indicator light
II al
so turns on in the disp lay. The enhanced electric
drive mode resumes automatically once acce lera
tion stops.
The enhanced electric drive mode is deactivated
if at least one of the following conditions is met:
- Th e ig nition is turned off.
- T he
l~ ·I button is pressed again .
- The high voltage battery charge level is low .
- The vehicle speed is higher than approximately
62 mph (100 km/h).
- The
S selector lever position or tiptronic mode
is selected.
- Offroad mode or hill descent assist is switched
on.
The
i oa!• I button must be pressed to reactivate it. ..,.
Page 121 of 300

,....,
N
co
er::
co
,....,
Introduction
Applies to vehicles: with Audi drive select
Drive select provides the possibility to experience
d iff erent types of vehicle settings in one veh icle.
F or instance, using the three
Comfort, Auto and
Dynamic modes, the driver can switch from a
sporty to a comfortab le driving mode with the
press of a button.
Addit ionally, in vehicles with MM I*, the vehicle
setup for
Individual* mode can be customized by
you. This makes it possible to combine settings
such as a sporty engine tuning with comfortable
steering.
A WARNING
-
Improper use of the drive select can cause
collisions, other accidents and serious person
al injury.
Description
App lies to vehicles: with Audi drive select
The vehicle setup in each mode depends on the
veh icle's features . However, the engine, auto
matic transmission and steering are always in
volved.
Engine and automatic transmission
Depending on the mode, the engine and the au
tomatic transm ission respond quicker or in a
more balanced manner to accelerator pedal
movements . In the sporty dynam ic mode, the au
tomatic transmission shifts at higher RPMs .
Steering
The steering adapts in terms of steering effort
and steering ratios . Indirect steer ing that moves
eas ily, like the steering in comfort mode, is best
suited to long drives on a highway. In contrast,
dynamic mode provides sporty, direct steering.
The follow ing applies to vehicles with dynam ic
steering*: the steering rat io changes based on
vehicle speed in order to ma inta in optim um
steering effort for the driver at all times. This
Audi drive select
sets the steering to be less sensitive at higher
speeds in order to provide improved vehicle con
tro l. At reduced speeds, however, steering is
more direct in order to keep the steering effort as
minimal as possible when the driver is maneuver
ing the vehicle. At low and average speeds, dy
nam ic steering additionally prov ides more re
sponsive steering performance .
Adaptive dampers*
The adaptive dampers* use sensors to record in
formation regarding steering movements, brak ing and acceleration operations by the driver,
road surface, driving speed, and load . This makes
it possible to adapt damping to the driving situa
t ion virtua lly in real time. Drive select also makes
it possible to sat isfy the desire for sporty suspen
sion (Dynamic) and comfortable suspension
(Comfort) without giving up balanced tuning (Au
to).
Engine sound*
T he sound of the eng ine is adapted to the select
ed mode and ranges from subtle to spo rty.
Adaptive cruise control*
The behavior when accelerating can be adjusted
from comfortable to sporty, depending on the drive select mode. Adaptive cruise control also
responds to the driv ing behavior of the vehicle
ahead in a more conservative or sporty manner.
(D Tips
- In some models, the maximum vehicle
speed can only be reached in the
Auto and
Dynamic modes.
- Selecting the
Dynamic mode results in spo r
ty shift ing characteristics. The S gear posi
tion engages automatically.
- In vehicles that have dynamic steering*, op
erating noise is heard when starting or stop
ping the engine . This does not indicate a
prob lem.
119
Page 126 of 300
Automatic transmissio n
(N eu tra l) for more than approx imately 1 second,
w ithout th e brake peda l being pressed.
Release button
The release button on the se lec to r lever preven ts
the lever from being accidentally sh ifted into cer
tain posit ions . Press ing t his but ton deactivates
the selector lever lock . Depending on the direc
tion of the shift, the selector lever locks at differ
ent positions. The positions are high lighted in
the illustrat ion ¢
fig. 135 .
Ignition key safety int erlock
The key cannot be removed from the igni tion un
less the selector lever is in the P park pos ition .
When the ignition key is removed, the selector lever will be locked in the P pos ition.
Driving the automatic transmission
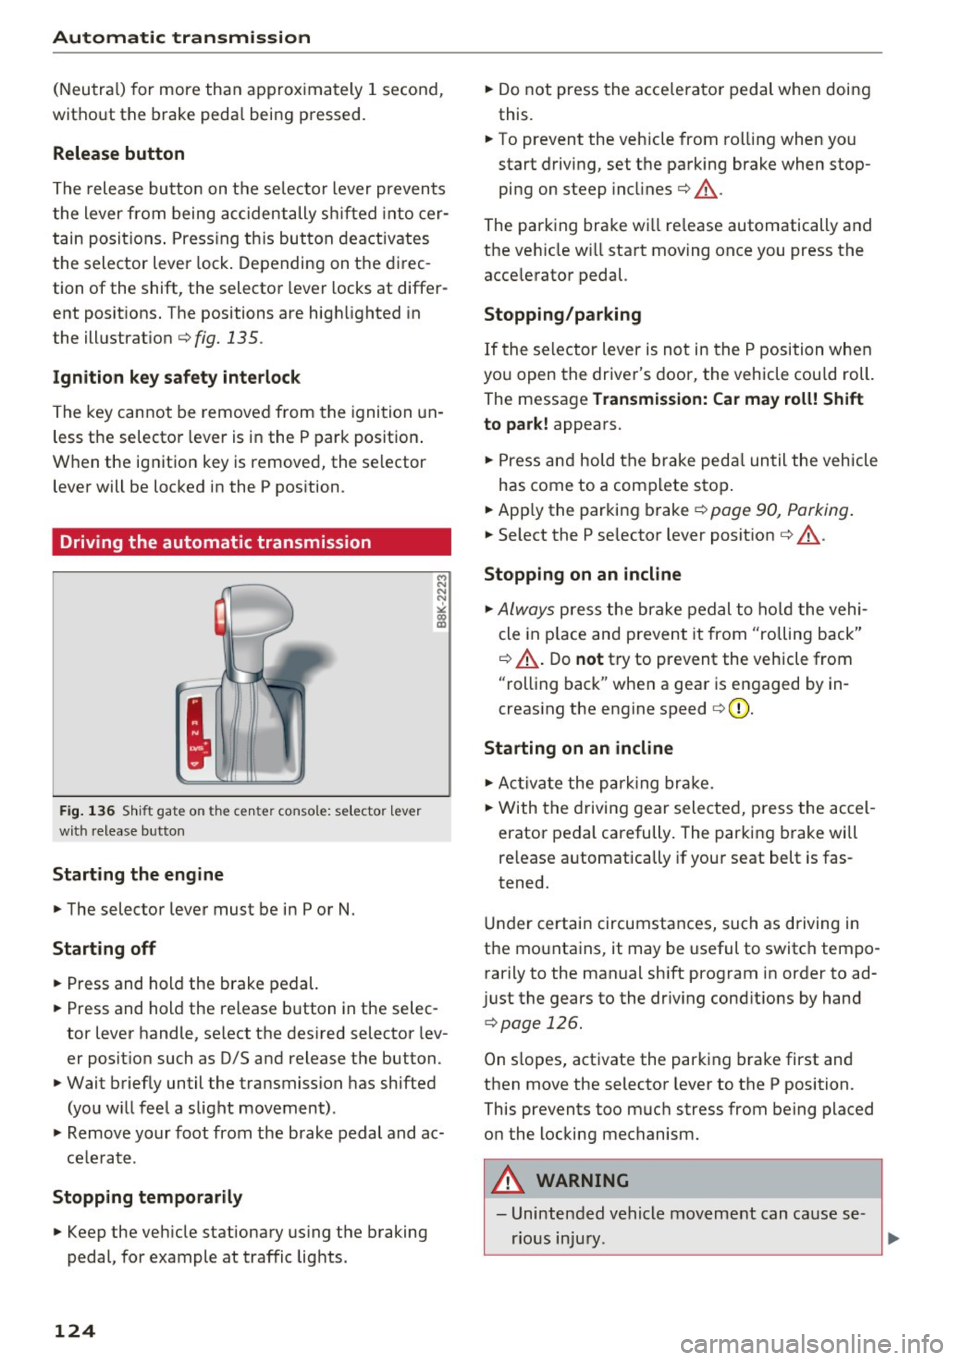
F ig. 1 36 Shi ft gat e on t he c en te r co nsole : se lecto r lev er
w ith release b utto n
Starting the engine
~ The selector lever must be in P or N.
Starting off
~ Press and hold the brake pedal.
~ Press and hold the release button in the selec
tor lever handle, se lect the des ired selector lev
er posit ion such as D/S and release the button.
~ Wait briefly until the transmission has shifted
(you w ill feel a slight movement) .
~ Remove your foot from the brake pedal and ac
cele rate .
Stopp ing temporarily
~ Keep the veh icle stationary us ing the braking
pedal, for example at traffic lights .
124
~ Do not press the acce lerato r pedal when doing
this.
~ To prevent the veh icle from ro lling when you
start driving, set the parking brake when stop
ping on steep incl ines¢ &_.
The parking brake wi ll re lease automatically and
the ve hicle w ill start moving once you press the
acce lerator pedal.
Stopping /par king
If the se lector lever is not in the P position whe n
you open the driver's door, the vehicle cou ld roll.
The message
Tr ansmis sion: Car may roll! Shift
to park!
appears.
~ Press and hold the brake peda l un til the vehicle
has come to a comp lete stop .
~ Apply the parking brake¢ page 90, Parking .
~ Select the P selector lever posit ion ¢ &_ .
Stopping on an incline
~ Always press the brake pedal to ho ld the vehi
cle in p lace and prevent it from "rolling back"
¢ &_ . D o
not try to prevent the vehicle from
"rolling back" when a gear is engaged by in
creas ing the engine speed ¢(D .
Starting on an incline
~ Ac tivate the pa rk ing br ake.
~ With the d riving gear selected, press the accel
erator pedal carefully. The parking brake will
release a utomatica lly if your seat belt is fas
tened.
Under certain circumstances, such as driving in
the mounta ins, it may be useful to switch tempo
rarily to the manual sh ift program in order to ad
j ust the gears to the dr iv ing cond it ions by hand
¢ page 126.
On slopes, activate the parking b rake first and
then move the selector lever to the P position.
This prevents too m uch stress from being placed
on the locking mechanism.
A WARNING
- Unintended vehicle movement can cause se
rious injury .
Page 134 of 300

Parking system
Parallel Parking
Applies to veh icles: w ith Aud i park ing system p lus w ith rear
view ca mera
Use parking mode 2 to help you parallel park
along the side of a street.
Fig. 1 49 MMI d isp lay: blue su rface in the pa rking spot
F ig. 150 MMI d isp lay: Blue curve on the cu rb
The fo llowing steps apply only when there is no
obstacle such as a wall near the parking spot .
Otherw ise, please read the information provided
in the "Pa rking Next to Obstacles " section .
.,. Activate the turn signal.
.,. Pos ition your vehicle parallel to the edge of the
street, approx imately 3 ft (1 meter) from a
parked veh icle .
.,. Swi tch the MMI on and se lect reverse gear. The
parking aid turns on and park ing mode 1 ap
pears on the d isplay .
... Press the control button©¢
fig. 149 on the
MMI control console. Parking mode 2 appears.
... Back up and align your vehicle so the blue area
@ borders on the rear end of the vehicle or on
the parking spot line. The b lue area represents
an extension of the veh icle's outline by approx i
mately 16 ft (S meters) to the rear . The long
s ide of the blue area should be on the c urb . T he
entire blue area m ust fit into the parking spot.
132
.,. With the vehicle stopped, t urn the steering
wheel to the right as far as it will go.
... Back into the parking spot until the blue curve
to uches the curb¢
fig. 150. Stop the vehicle.
.,. With the vehicle stopped, turn the steering
wheel to the left as far as it will go .
.,. Continue to back into the parki ng spot unt il the
veh icle is parked paralle l to the curb .@ marks
the rea r bumpe r. Stop the veh icle when the red
orientat ion line @ borders an object¢ & .
Keep an eye on the front of you r vehicle while
doing this ¢(D .
Parking next to obstacles
When there is an obstacle (such as a wall) next to
the pa rking spot, choose a spot with mo re space
o n the s ides. Position the long side of t he b lue
area so that there is sufficient spa ce from the
curb . The area must not be on the curb. You wi ll
also need to start turning the steering wheel
much earlier . There should be a sufficient
amount of space between the curb and the blue
curve, and the blue curve¢ fig. 150 must not
touch the curb.
&_ WARNING
-The rearview camera does not show the en
tire area behind the vehicle ¢
page 128,
fig . 143.
Watch o ut especially fo r small chi l
dren and animals. The re a rv iew came ra can
no t always detect them, posing risk of an
accident!
- P lease note that objects not touching the
gro und can appear to be further away than
they really are (for examp le, the bumpe r of
a parked vehicle, a trailer hitch, or the rear
of a truck). In this case, you shou ld not use
the help lines to help with parking, which poses danger of an accident!
(D Note
In the M MI d isplay, the direction of travel of
the veh icle rear is represented depend ing on
the steer ing whee l ang le. The veh icle front
swings o ut more tha n the vehicle rear. Main
tai n plenty of distance so that yo ur outside