check engine light AUDI Q5 2017 User Guide
[x] Cancel search | Manufacturer: AUDI, Model Year: 2017, Model line: Q5, Model: AUDI Q5 2017Pages: 296, PDF Size: 74.43 MB
Page 91 of 296
a,
a,
..... N l"N ..... 0 0
0:
co
,&_ WARNING
-Never turn off the engine before the veh icle
has come to a complete stop . T he f ull func
tion of the brake booster and the power
steering is not guaranteed. You must use more force to turn or brake if necessary . Be
cause you cannot steer and b rake as you
us ually wou ld, this could lead to crashes
and ser ious injuries.
- To red uce the risk of injuries, make s ure that
the Start-Stop-System is turned off when
wor king in the eng ine compartment
r:::;, page 90.
(D Note
Always sw itch off the Start -Stop-System
when dr iv ing th ro ugh water
c::> page 90.
Starting/stopping the engine
Applies to: vehicles with Start-Stop -System
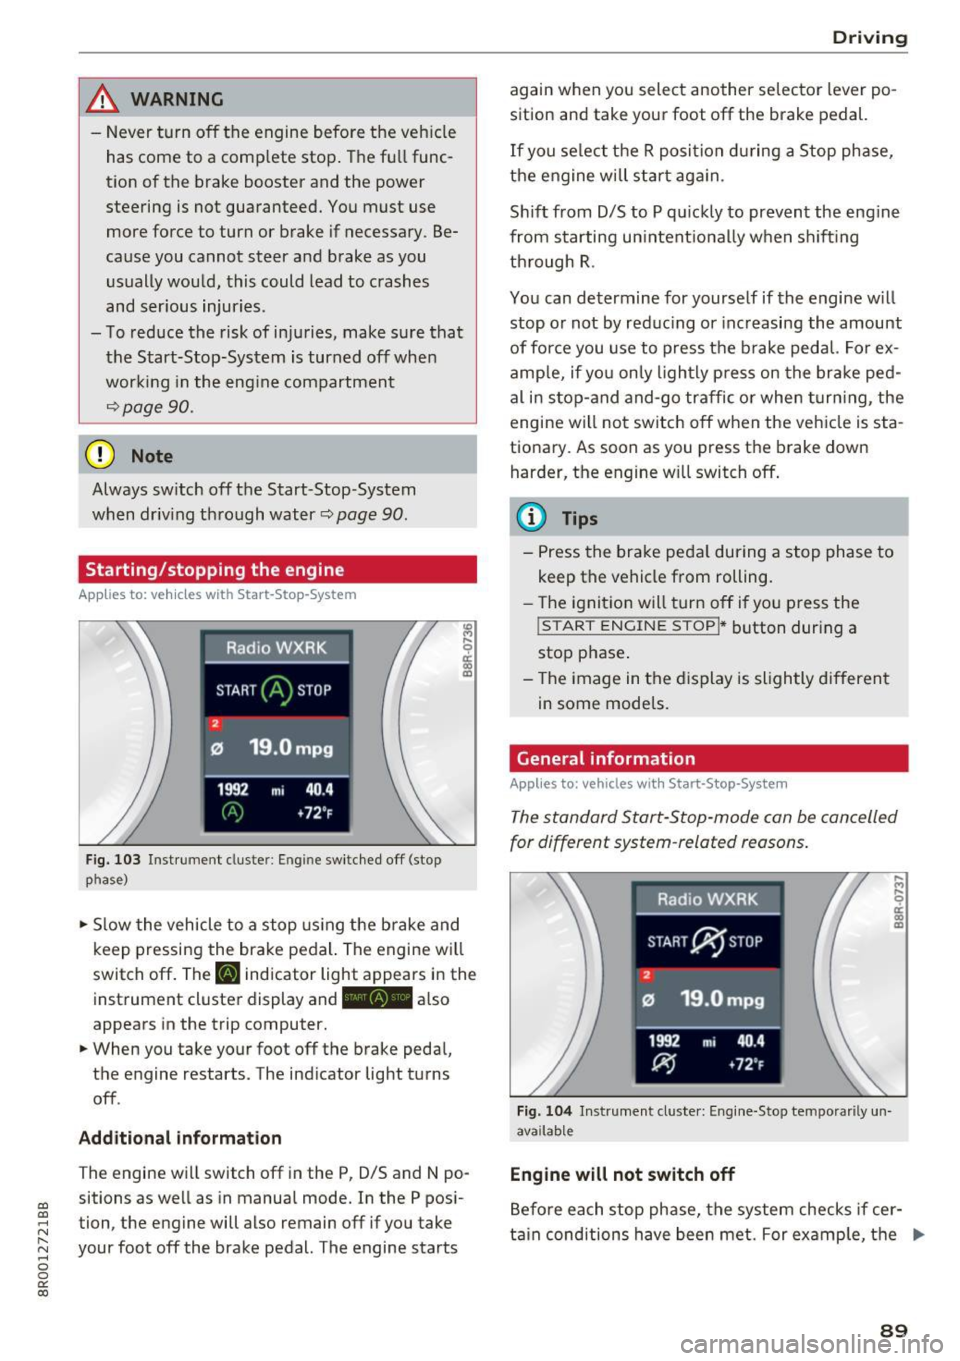
Fi g. 103 Ins tru ment clust er: Engin e sw it ched off (stop
p hase)
.,. Slow the vehicle to a stop using t he brake and
keep pressing the brake pedal. The engine w ill
switch off . The
[I] indicator light appears i n the
instrument cluste r display and
ft¼• also
appears in the tr ip computer .
.,. When you take your foot off the brake peda l,
the engine restarts. The ind icator light tu rns
off .
Additional information
The engine wi ll switch off in the P, D/S and N po
sitions as we ll as in manual mode. I n the P pos i
tion, the engine will also remain off if you take
your foot off the brake pedal. The engine starts
D rivi ng
again when you select anoth er se lector lever po
sition and take your foot off the brak e pedal.
If you se lect t he R posi tion d uring a Stop ph ase,
the engine w ill s tart ag ain.
S hi ft from D/S to P q uick ly to prevent the eng ine
from s tarting un intent ional ly when s hift ing
th rough R .
You can determine for yourse lf if the engine w ill
stop or not by red ucing or inc reasing the amount
of for ce you use to p ress the b rake pedal. Fo r ex
amp le, if yo u only ligh tly p ress on the br ake ped
al i n sto p-and and-go traffic o r whe n turni ng , the
engine wi ll not switch off when the vehicle is sta
tionary. As soon as you press th e brake down
harder, the engine w ill switch off .
(D Tips
-Press the brake peda l during a stop ph ase to
keep the vehicle from rolling.
- The ignitio n will turn off if yo u press the
! STAR T ENGINE ST OPI * button dur ing a
stop p hase .
- The image in the d is p lay is sligh tly differen t
in some models.
General information
Applies to: vehicles with Start-Stop-System
The standard S tart-Stop-mode can be can celled
for different system -related reasons .
Fig. 10 4 In str um en t cl uste r: E ng ine-Stop tem por aril y un
ava ilabl e
Engine will not switch off
Befo re each stop phase, t he system checks if cer
t ai n cond itions have been met. For ex ample, t he .,.
89
Page 198 of 296
Driving and th e en vironm ent
consumption by 10-15 percent. This section will
give you some tips on how you can help the envi
ronment and your pocketbook.
(D Tips
The consumption estimates as published by
ENVIRONMENTAL PROTECTION AGENCY
(EPA) and Transport Canada may not corre
spond to your actual consumption on the
road, which will vary depend ing upon vehicle
load and speed, road and weather conditions,
trip length, etc .
Drive smoothly and keep a lookout ahead
Vehicles use the most fuel when they are acceler
ating .
"'Avo id unnecessary accelerating and braking.
Vehicles use the most fuel when they are acceler
ating . If you anticipate what is going to happen
next, you will need to brake less and, thus, accel
erate less . Let the vehicle coast whenever possi
ble -for example when you see that the next traf
fic light is red .
Avoid full throttle
Driving a t moderate speeds saves fuel and im
proves your mileage .
"'Try and keep well below your car 's maximum
speed .
Accelerating gent ly reduces fuel consumption,
engine wear, and does not disturb the environ
ment.
Fue l cons umption, exhaust emissions and engine
noise increase d isproportionately at high speeds .
If you drive at approximately three q uarters of
top speed, fuel consumpt ion w ill be reduced by
one half. Never drive faster than the posted
speed limit and weather conditions permit.
196
· Reducing unnecessary idling
E ven when your car is just idling it burns up fuel .
"'Shut the engine off when you are not driving
the vehicle.
"' Do not warm up the vehicle by letting the en-
gine run at idle .
The idling phase is automatically reduced for
vehicles with the Start-Stop-System*. It is effi c ient to sw itch off the engine in vehicles without
the Start-Stop-System* when stopped at ra ilroad
cross ings and long red lights. Turning the engine
off fo r just 30-40 seconds saves more fuel than is
bur ned by s tarting the engine again .
It takes a long time for the engine to warm up
fully when it is runn ing at id le . However, wea r
and noxious emissions are especially high when
the engine is warming up . So yo u should dr ive
away as soon as you sta rt the eng ine and avo id
running at hig h rpms whi le the engine is st ill
warming up .
Q) Note
Do not leave eng ine idling una ttended after
starting. If warning lights shou ld come on to
indicate improper operation, they would go
unheeded. Extended idling also prod uces
heat, which could result in overheating or
other damage to the vehicle or other proper
ty .
· Regular maintenance
A badly tuned engine unnecessarily wastes a lot
of fuel .
"' Have your vehicle serviced at regular interva ls.
By having your vehicle regular ly serv iced by an
authorized Audi dea le r helps to ensure that it
r uns prope rly and economically . The condition of
your vehicle not on ly affects its safety and ability
to hold its value, it also affects
fuel consump
t ion .
Check your oil each time you fill your tank.
The amou nt o f oi l used is related to engine load
and speed. ..,
Page 203 of 296
CD
CD
.... N ,-... N ..... 0 0 C<'. 00
Operating instructions
6" r-2
~·~
1/2"
1·1/2"
ill
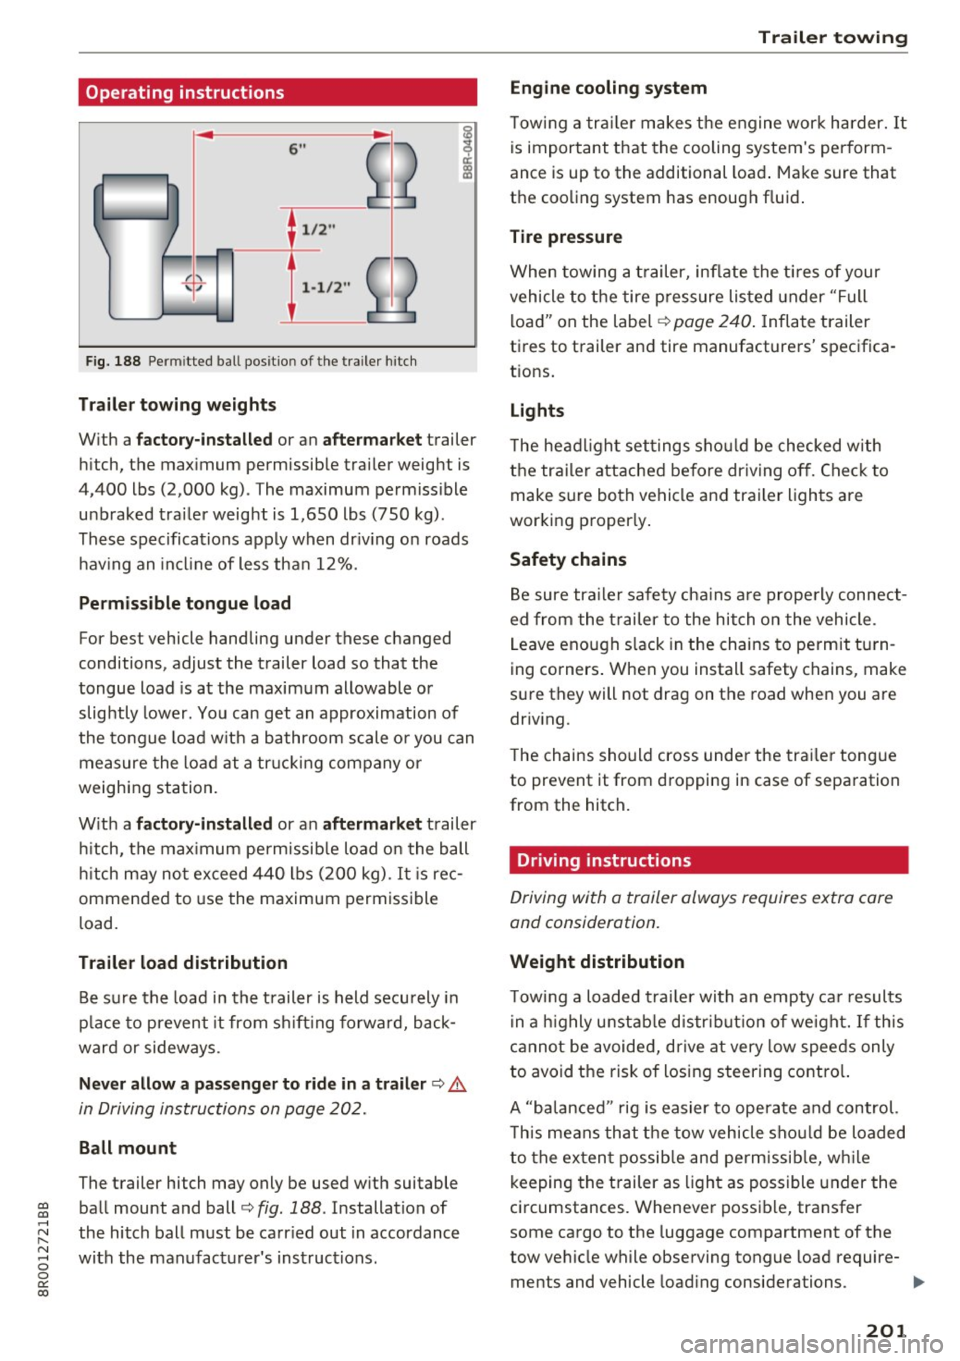
Fig. 188 Permi tted ba ll pos it io n of the trailer h itch
Trailer towing weights
With a
factory-installed or an aftermarket trailer
hitch, the maximum permissible trailer weight is
4,400 lbs (2,000 kg) . The maximum permissible
unbraked trailer weight is 1,650 lbs (750 kg).
These specifications apply when driving on roads having an incline of less than 12%.
Permissible tongue load
For best vehicle handling under these changed
conditions, adjust the trailer load so that the
tongue load is at the maximum allowable or
slightly lower. You can get an approximation of
the tongue load with a bathroom scale or you can
measure the load at a trucking company or
weighing station.
With a
factory-installed or an aftermarket trailer
hitch, the maximum permissible load on the ball
hitch may not exceed 440 lbs (200 kg) .
It is rec
ommended to use the maximum permissible
load.
Trailer load distribution Be sure the load in the trailer is held securely in
place to prevent it from shifting forward, back
ward or sideways.
Never allow a passenger to ride in a trailer ¢.&.
in Driving instructions on page 202.
Ball mount
The trailer hitch may only be used with suitable ball mount and ball¢
fig. 188 . Installation of
the hitch ball must be carried out in accordance
with the manufacturer's instructions .
Trailer towing
Engine cooling system
Towing a trailer makes the engine work harder. It
is important that the cooling system's perform
ance is up to the additional load. Make sure that
the cooling system has enough fluid.
Tire pressure
When towing a trailer, inflate the tires of your
vehicle to the tire pressure listed under "Full
load" on the label¢
page 240. Inflate trailer
tires to trailer and tire manufacturers' specifica
tions.
Lights
The headlight settings should be checked with
the trailer attached before driving off. Check to
make sure both vehicle and trailer lights are
working properly.
Safety chains
Be sure trailer safety chains are properly connect
ed from the trailer to the hitch on the vehicle .
Leave enough slack in the chains to permit turn
ing corners. When you install safety chains, make
sure they will not drag on the road when you are
driving.
The chains should cross under the trailer tongue
to prevent it from dropping in case of separation
from the hitch.
· Driving instructions
Driving with a trailer always requires extra care
and consideration.
Weight distribution
Towing a loaded trailer with an empty car results
in a highly unstable distribution of weight. If this
cannot be avoided, drive at very low speeds only
to avoid the risk of losing steering control.
A "balanced " rig is easier to operate and control.
This means that the tow vehicle should be loaded
to the extent possible and permissible, while
keeping the trailer as light as possible under the
circumstances. Whenever possible, transfer
some cargo to the luggage compartment of the
tow vehicle while observing tongue load require-
ments and vehicle loading considerations. .,.
201
Page 219 of 296
Checking and Filling Hood
Releasing the engine hood
The engine hood is released from inside the vehi
cle .
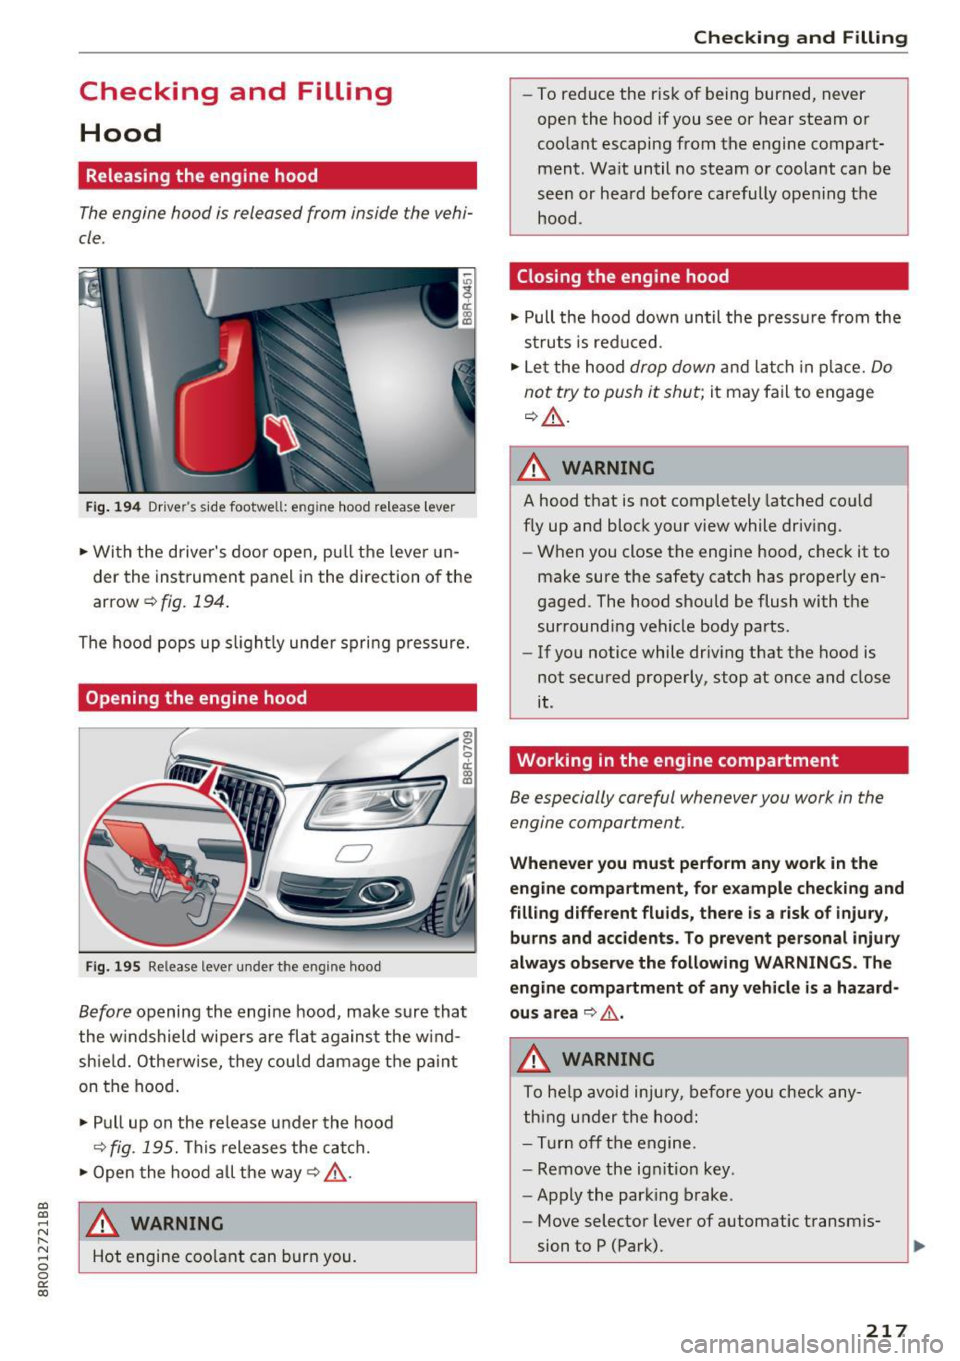
Fig. 194 Drive r's side footwell: e ng ine hood re lease lever
"' Wi th the driver's door open, pu ll th e leve r un
der the instrument panel in the direction of the
arrow ¢fig.194 .
The hood pops up s light ly unde r spri ng p ressure.
Opening the engine hood
Fi g. 19 5 Release lever under t he eng ine hood
Before opening the engine hood, make sure tha t
the w indshield wipe rs are fla t against the w ind
shie ld. Otherwise, they could d amage t he paint
on the hood .
"' Pull up on the release under the hood
~fig . 195. Th is releases the cat ch.
"' Open the hood all the way¢&,, .
a,
~ ,&. WARNING
r--
~ Hot engine coo lant can burn you. 0 0
0:
co
Checking and Filling
- To reduce the r isk of being burned, never
open the hood if you see or hear steam or
coo lant escaping from the engine compart
ment. Wa it until no steam or coolant can be
seen or hea rd before carefully ope ning t he
hood.
Closing the engine hood
"' Pull the hood down until the press ure from the
s truts is red uced.
"' Le t the hood
drop down and latch in p lace. Do
not try to push it shut ;
it may fail to engage
¢ &,, .
A WARNING
- -
A hood that is not completely latched co uld
f ly up and block your view while dr iv ing.
- When you close the engine hood, c heck it to
make sure the safety catch has prope rly en
gaged . The hood should be flush with the
sur rounding vehicle body parts .
- If you notice while driv ing that the hood is
not secured prope rly , stop at once and close
it .
Working in the engine compartment
Be especially careful whenever you work in the
engine compartment.
Whenever you must pe rfo rm any work in the
eng ine compa rtment , for e xample check ing and
fill ing diffe rent fluids, the re is a ris k of injury,
burns and acciden ts. To pre vent personal injur y
always ob serve the fo llowing WARNINGS . The
eng ine compartment of any vehicle is a hazard
ou s area
~ .&, .
A WARNING
To he lp avoid injury, befo re yo u check any
t h ing u nder the hood:
- Tur n off the engine.
- Remove the ig nitio n key .
- Apply the parking brake.
-
- Move selector lever of automatic t ransm is-
sion to P (Park).
217
Page 221 of 296
a,
a,
..... N r-N ..... 0 0
0:
co
Checking and Filling
Engine compartment
Engine compartment
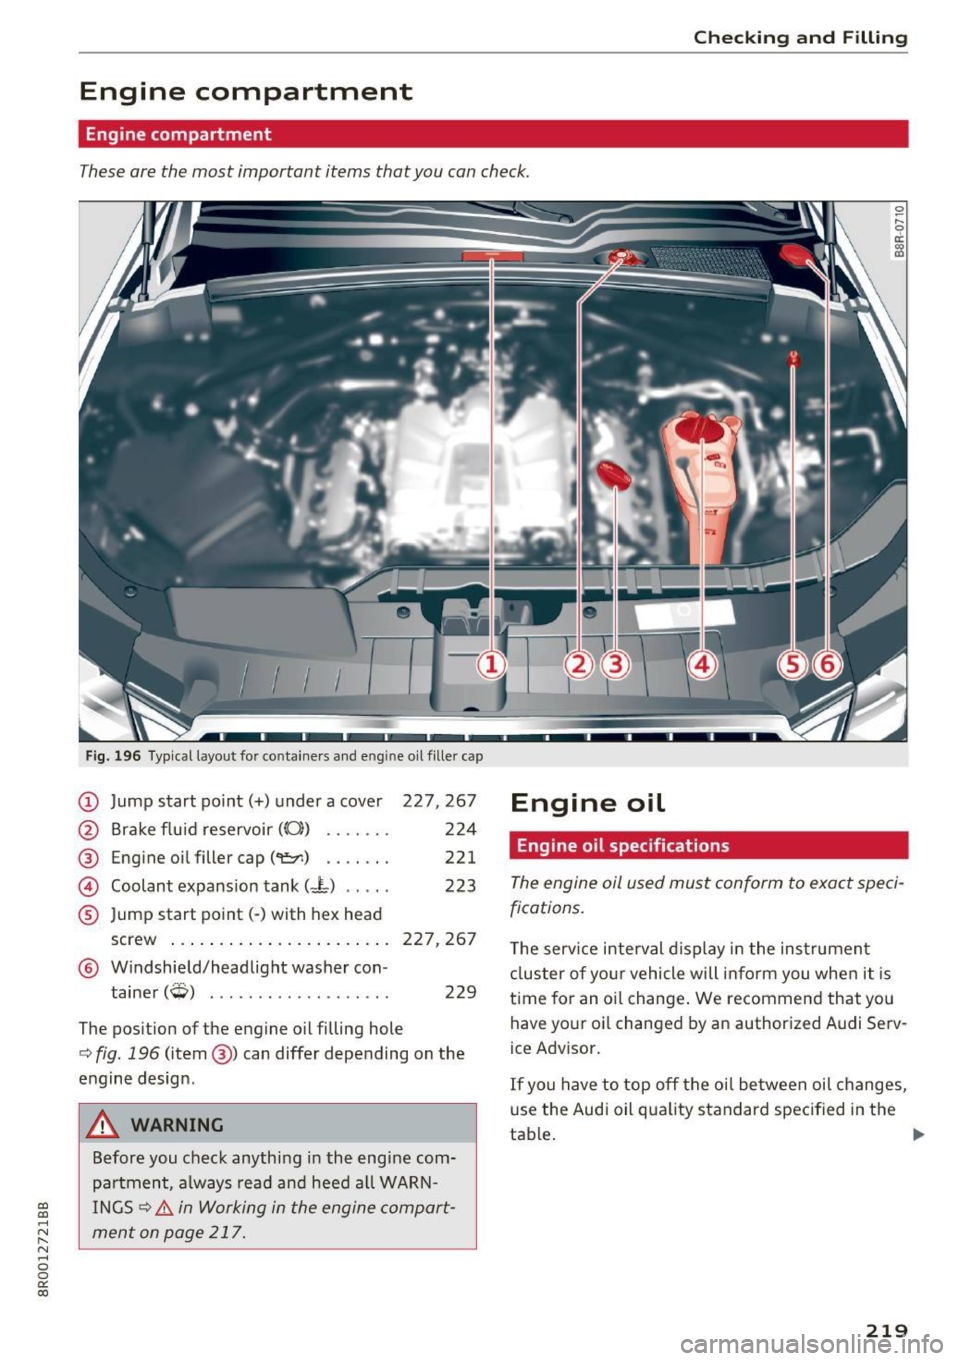
These are the most important items that you can check.
Fig. 196 Typical layout for containers and e ngin e oil fille r cap
(D Jump start po int(+) under a cover 227,267
@ Brake fluid reservoir (CO)) . . . . . . . 224
@ Engine oil filler cap(~) . . . . . . . 221
@ Coolant expansion tank (- L) . . . . . 223
® Jump start point( -) with hex head
screw . . . . . . . . . . . . . . . . . . . . . . . 227, 267
@ Windshield/headlight washer con -
tainer
(W) . . . . . . . . . . . . . . . . . . . 229
The position of the engine oil filling hole
c:> fig. 196 (item@) can differ depending on the
engine design .
A WARNING
Before you check anything in the engine com
partment, always read and heed a ll WARN
INGS
c:> &. in Working in the engine compart
ment on page 217.
Engine oil
Engine oil specifications
The engine oil used must conform to exact speci
fications.
T he serv ice interval display in the instrument
cluster of your vehicle will inform you when it is
time for an oi l change . We recommend that you
have your oi l changed by an authorized Audi Serv
ice Advisor.
If you have to top off the oil between oil changes,
use the Audi oil quality standard specified in the
tab~ .
~
219
Page 222 of 296

Check ing and F illing
Audi oil quality standard
Gas olin e
VW 502 00 or
engi ne vw 50400
Di esel vw 50 7 00
eng in e
Au di r ecomm ends
~ castroL //gJB,'flt@t Frti:rr.:;-...1"JDl'1Al.
Au di r ecommend s Longlif e high perf ormance
engi ne oil from A udi Genuine Part s
Using the proper engine oil is important for the
functionality and service life of the eng ine. Your
engine was factory-filled with a high-quality oil
which can usually be used throughout the entire
year.
{tD Note
Your Limited New Vehicle Warranty does not
cover damage or malfunctions due to failure
to follow recommended maintenance and use
requirements as set forth in the Audi Owner's
Manual and Warranty
& Maintenance booklet.
- Use only a high quality eng ine oil that ex-
pressly complies wi th the Audi oil quality
standard specified for your vehicle's engine.
Using any other oil can cause serious engine
damage.
- Do not mix any lub ricants or other additives
i nto the engine oil. Doing so can cause en
g ine damage.
@ Tips
If you need to add oil and there is none availa
ble tha t meets the Audi o il quality standard
your eng ine requi res, you may add a tota l of
no more than 0 .5 quart/li ter of a h igh-quality
"synthetic"oil that meets the fo llowing speci
fications.
- Vehicles with gasoline eng ine: ACEA A3 or
API SM with a viscosity grade of SAE OW-30,
SAE 5W-30 or SAE 5W-40.
- Vehicles w it h diese l engine: ACEA C3 o r
API CF with a viscosity grade of SAE OW-30
or SAE 5W-30.
- For more information about engine oi l that
has been approved for your ve hicle, please
contact either your authorized Audi dea ler
220
or Audi Customer Relations at
1 (800) 822-2834 or visit our web site at
www.aud iusa .com or www .a udicanada .ca.
Engine oil consumption
The engine in your vehicle depends on an ade
quate amount of oil to lubricate and cool all of
its moving parts.
In order to provide effective lub rication and cool
ing of internal engine components, all internal
combust ion engines consume a certa in amount
of oil. Oil consumption var ies from engine to en
gine and may change significantly over the life of
the engine . Typically, engines w ith a specified
break-in period (see
c::;,page 194) consume more
o il dur ing the break-in per iod than they consume
after o il consumption has stabi lized .
Under normal cond itions, the rate of oil con
sumption depends on t he quality and viscos ity of
the oil, the RPM (revolutions per m inute) at
wh ich the engine is operated, the ambient tem
perature and road condit ions. Furthe r facto rs a re
t h e amount of o il d ilution from water condensa
tion or fue l residue and the oxidation level of the
oi l. As any engine is subject to wear as mileage
builds up, the oil consumption may increase over
time unt il replacement of worn components may
become necessary.
With a ll these variab les coming into p lay, no
standard rate of oi l consumption can be estab
li shed or spec ified . There is no alternative to reg
ular and frequent checking of the oi l level, see
Note .
If the yellow engine oil level warning symbo l in
the instrument cluster
Ill lights up, you should
check the o il level as soon as possible
<=:> page 221 . Top off the o il at your earliest con
venience
c::;, page 221 .
&. WARNING
Before you check anything in the engine com
partment, always read and heed all WARN
I NGS
<=:> .&. in Wor king in the engine compart-
ment on page 217. ..,
Page 225 of 296
CD
CD
.... N ,-... N ..... 0 0 C<'. 00
Cooling system
Coolant
The engine cooling system is filled with a mixture
of purified water and coolant additive at the fac
tory. This coo lant must not be not changed.
The coolant level is monitored through the. in
dicator light
¢page 26. However , we do recom
mend occasionally check ing the coo lant level
manually.
If you must add coolant, use a mixture of water
and coolant addit ive. Mixing the coolant additive
with distilled water is recommended.
Coolant additive
The coolant additive is made of anti-freez ing and
corros ion protection agents. Only use the follow
ing coolant addit ives . These additives may be
mixed with each other.
Coolant additive Specification
G13
TL 774 J
G12++ TL 774 G
The amount of coo lant add itive that needs to be
mixed with water depends on the climate where
the vehicle will be operated.
If the coolant addi
tive percentage is too low, the coolant can freeze
and damage the engine.
Coolant Freeze protec-
additive tion
Warm min. 40% m in. -13 °F
regions max. 45% (-25 °C)
Cold min. 50% max
. -40 °F
regions max. 55% (-40 °C)
(D Note
-Before the start of winter, have your author
ized Audi dealer or authorized Audi Service
Facility check if the coolant additive in your
vehicle matches the percentage appropriate
for the climate . Th is is especially important
when driving in colder climates.
- If the appropriate coolant additive is not
available in an emergency, do not add any
other additive . You could damage the en-
Checking and Filling
gine. If this happens, only use water and re
store the correct mixture ratio with the
specified coolant add it ive as soon as possi
ble.
- Only refill with new coolant .
- Radiator sealant must not be mixed with
the coolant.
Adding coolant
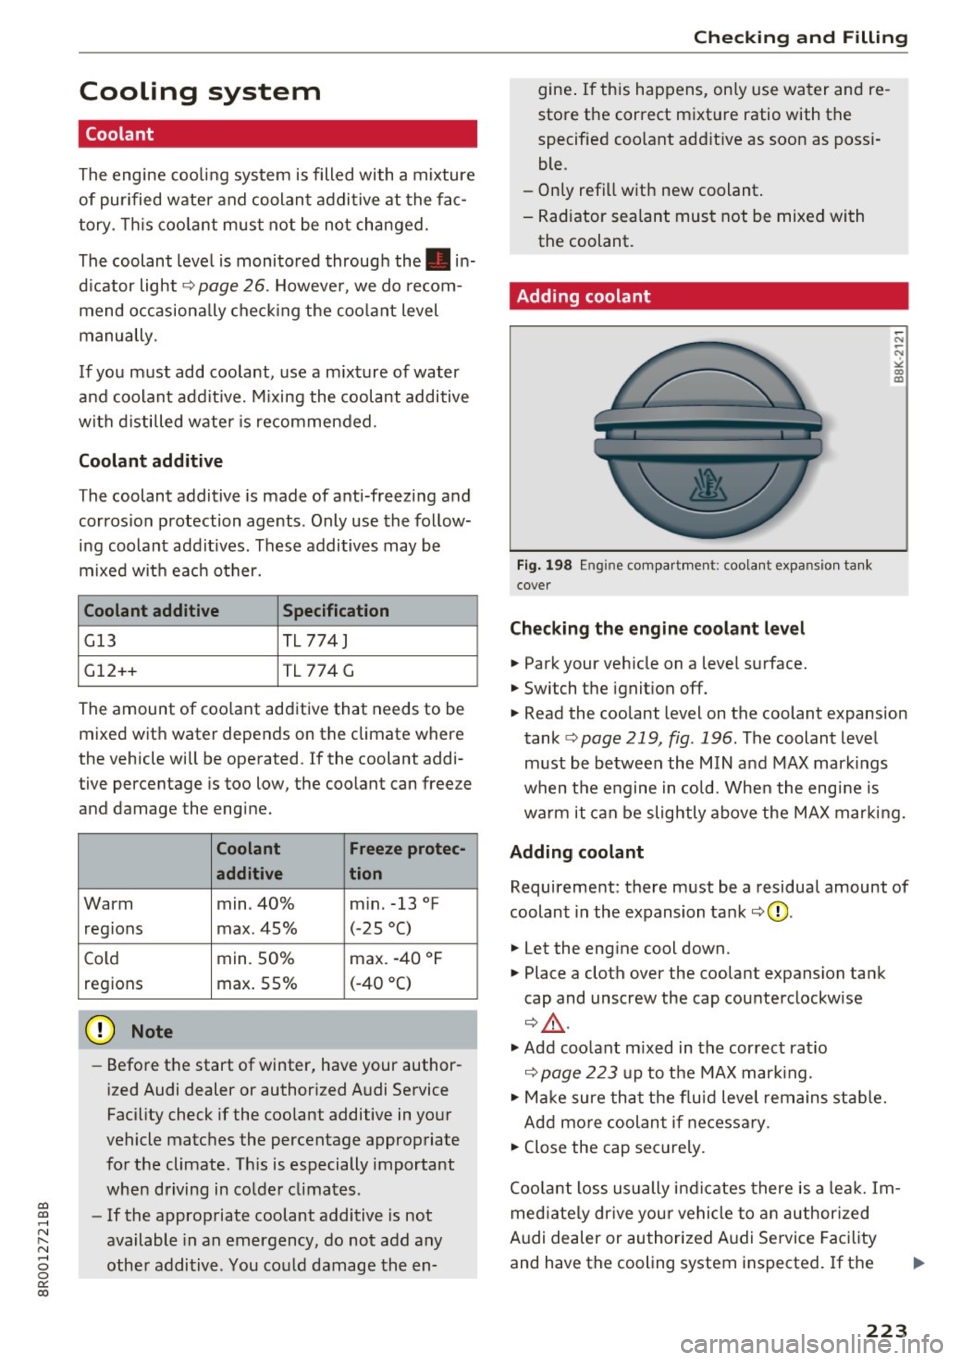
Fig. 198 Engine compartment: coolant expansio n ta nk
cover
Checking the engine coolant level
.,. Park your vehicle on a level surface.
.,. Switch the ignit ion off.
-N
-N
"" CD co
.,. Read the coolant level on the coolant expansion
tank
¢ page 219, fig . 196. The coolant level
must be between the MIN and MAX mark ings
when the engine in cold. When the engine is
warm it can be slightly above the MAX marking.
Adding coolant
Requirement: there must be a residual amount of
coolant in the expansion tank
¢(D .
.,. Let the engine cool down.
.,. Place a cloth over the coolant expansion tank
cap and unscrew the cap counterclockw ise
¢ _& .
.,. Add coo lant mixed in the correct rat io
¢ page 223 up to the MAX marking .
.,. Make sure that the fluid level remains stable.
Add more coolant if necessary .
.,. Close the cap securely.
Coolant loss usually indicates there is a lea k. Im
mediately drive your vehicle to an authorized
Audi dealer or authorized Audi Service Facility
and have the cooling system inspected.
If the
223
Page 226 of 296
Checking and Filling
cooling system is not leakin g, a loss can come
from t he coolant boiling through overheat ing
an d be ing pushed out o f the coo ling system .
A WARNING
-
-The cooling system is under pressure. Do
not open t he coolant expansion tank ca p
when the eng ine is hot. This inc reases the
risk of bu rns .
- The coolant add itive and the coolant can be
dangerous to your health. For this reason,
keep the coolant in the o rigina l container
and away from children. There is a risk of
po isoning .
- When working in the eng ine compartmen t,
r emembe r that the rad iator fan ca n switch
on even if the ign ition is swi tc h ed off, which
in creases the risk of in jury.
(D Note
Do not add coolant if the expansion tank is
empty. Air could enter the cooling system and
damage the engine. If this is the case , do no t
cont inue driv ing. See an authorized Audi deal
er or author ized Audi Se rvice Facility for assis
tance .
Brake fluid
Checking brake fluid level
The brake fluid level can be checked with a quick
glance.
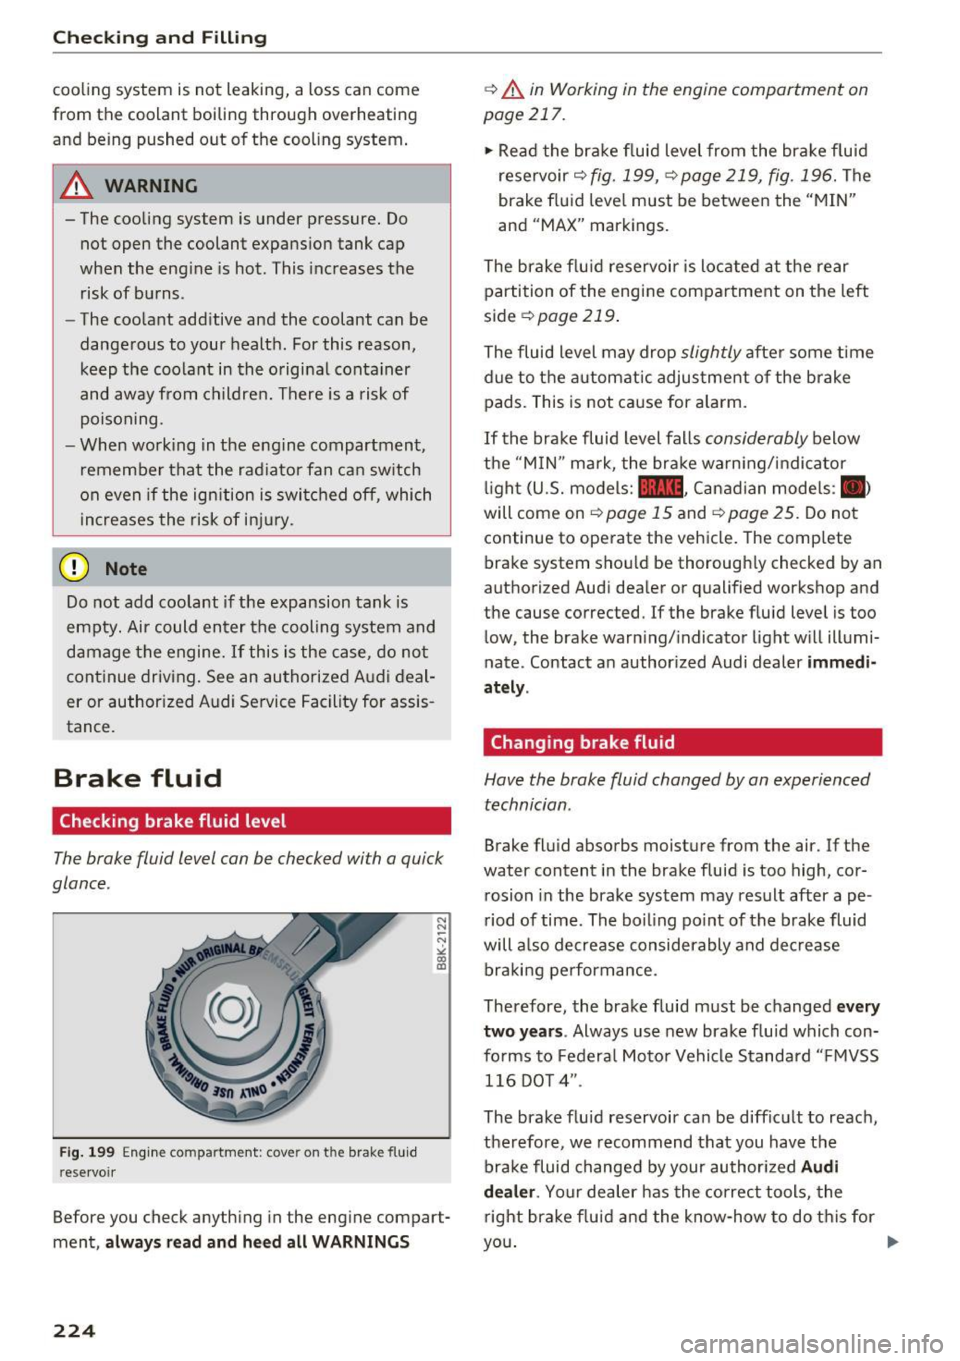
F ig. 19 9 En gi ne co mpa rtme nt: cove r on the brak e fluid
r ese rvoi r
N N
-N
" "' IX)
Before you check anyth ing in the eng ine compart
ment,
a lways read and h eed all WARNING S
224
¢.&. in Working in the engine compartment on
page 217.
.,. Read the bra ke fluid level from the brake f lu id
reservoir ¢
fig. 199, ~ page 219, fig. 196. The
brake fluid leve l must be between the "M IN"
and "MAX" markings.
The brake flu id reservoir is located a t the rear
partition of the engine compartment on the left
side
¢ page 219.
The fluid level may drop slightly afte r some t ime
due to t he automatic adjustme nt of the brake
pads. This is not ca use for a larm.
If the brake fluid level falls considerably below
the
" M IN " mark, the bra ke warn ing/ indica tor
li gh t (U.S. models:
11111 . Canadian models: .
will come on ¢
page 15 and¢ page 25. Do not
continue to ope rate the veh icle. The comp lete
brake system shou ld be thoroughly checked by an
a uthor ized Audi dealer or qualified workshop and
the cause corrected. If the brake fluid level is too l ow, the brake warn ing/ indicator light w ill illumi
nate. Contact a n author ized Audi dealer
immedi
ately .
Chang ing brake fluid
Have the brake fluid changed by an experienced
technician .
Brake fluid absorbs moisture from the air. If the
water content in the brake fluid is too high, cor
rosion in the brake system may result after ape
riod of time . The boiling po int of the brake fluid
will a lso decrease considerably and decrease
bra king pe rformance.
Therefore, the brake fluid must be changed
every
two years .
Always use new brake f lu id which con
fo rms to Federa l Moto r Vehicle S tandard " FMVSS
116 DO T 4".
The brake fluid reservoir can be diff icult to reach,
therefore, we recommend that you have the
brake fluid changed by your author ized
Audi
dealer .
Your dealer has the correct tools, the
right brake fluid a nd the know -how to do t his for
you . ..,.
Page 228 of 296
Check ing and F illing
in the luggage compartment, re ad and heed all
W ARNING S~
A .
Hybr id d rive*: you can find important information
about the h igh vo ltage bat tery unde r
c;>poge 100.
Always heed the s afet y warning s, when working
on the vehicle battery or the vehicle electrical
system to prevent injury .
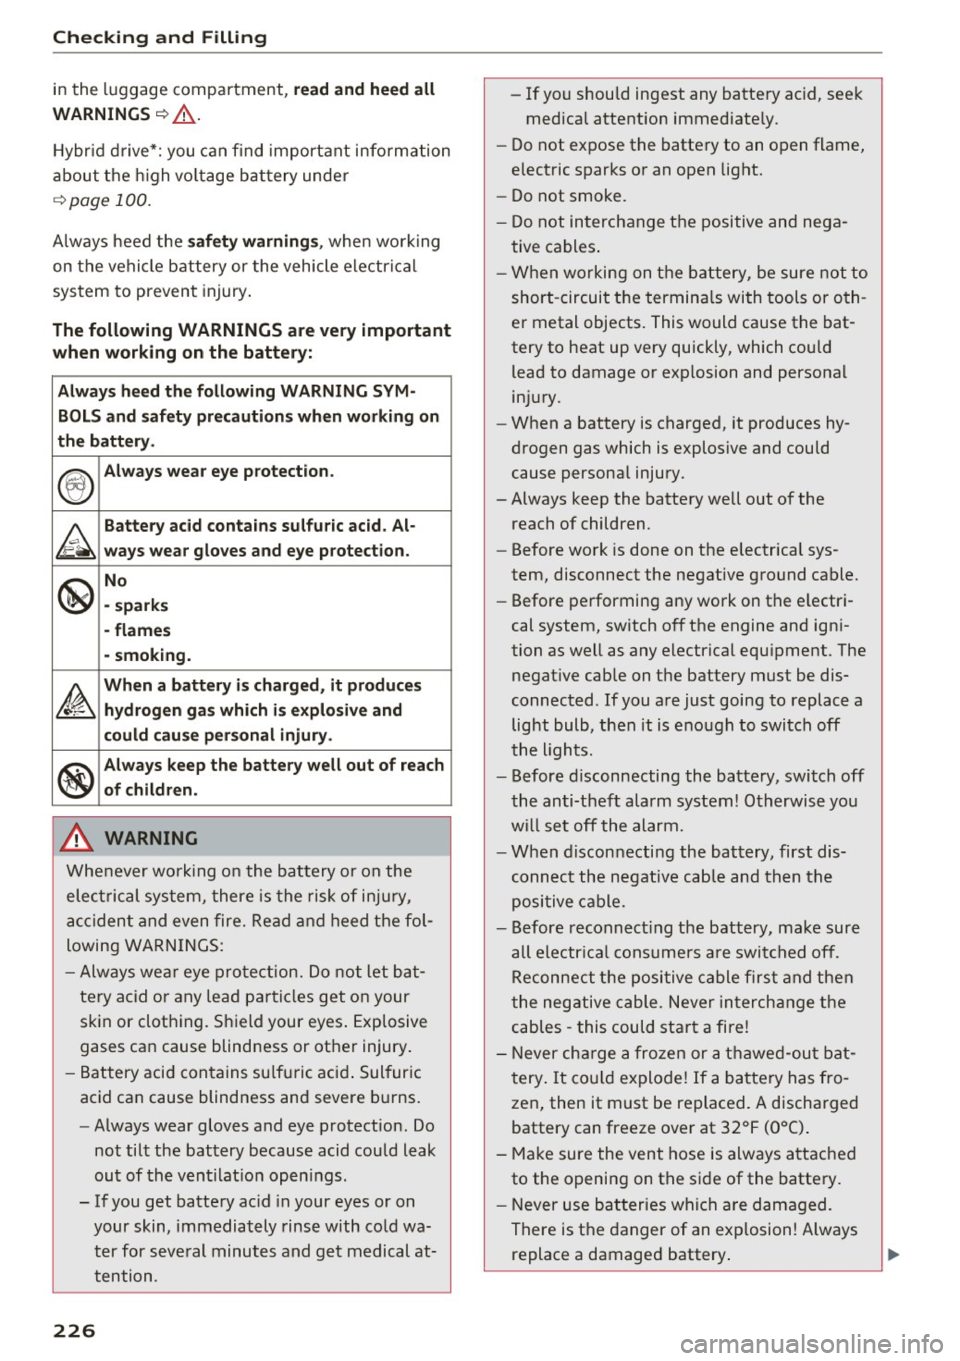
The following WARNINGS are very important
when working on the battery:
A lway s heed the following WARNING SYM-
BOLS and saf ety pr ecautions when working on
the battery.
®
A lway s wear ey e protection .
A
Batter y acid conta ins sulfu ric acid. Al -
w ays wear glo ves and eye p rotection .
.
@
No
- spa rks
- flame s
- smoking.
~
When a battery is charg ed, it produc es
hydrogen gas whi ch is ex pl osi ve and
c o uld cause p ers ona l injury.
®
Alwa ys keep the ba ttery we ll out of rea ch
of child ren.
A WARNING
Whenever work ing on the battery or on the
elect rical system, there is the risk of inju ry,
accident and even fire. Read and heed the fol
lowing WARN INGS:
- Always we ar eye pro tection. Do not let bat
tery acid or any lead particles get on your
skin or clothing. Shield your eyes . Explosive
gases can cause blindness or other injury .
- Battery acid con tains su lfu ric acid . Sulfur ic
acid can cause blindness and severe b urns.
- Always wear gloves and eye protection. Do
not tilt the battery because acid could leak
out of the ventilat ion open ings.
- If you get battery ac id in your eyes or on
your skin, immediately rinse with cold wa
ter for several minutes and get medical at
tention .
226
-If you should ingest any batte ry acid, seek
medical attention immediate ly.
- Do not expose the battery to an open flame,
electric sparks or an open light.
- Do not smoke.
- Do not interchange t he positive and nega -
tive cables .
- When working on t he ba ttery, be sure not to
short -circuit the termina ls with tools or o th
er metal objects. This would cause the bat
tery to heat up very quickly, which could lead to damage or exp losion and personal
injury .
- When a battery is charged, it produces hy
drogen gas which is explosive and could
cause persona l injury.
- Always keep the battery well out of the
reach of children.
- Before wo rk is done on the electrical sys
tem, disconnect the negative ground cable.
- Before performing any work on the e lectri
cal system, sw itch off the engine and ign i
tion as well as any electrical equ ipment. The
negat ive cab le on the battery must be dis
connected . If you a re just going to replace a
light bulb, then it is enough to switch off
the l ights.
- Before d isconnecting the battery, switch off
the anti-theft alarm system ! Otherwise you
will set off the alarm.
- When disconnecting the battery, first dis
connect the negative cable and then the
positive cable.
- Before reconnect ing the battery, make sure
all electr ica l cons umers a re switched off.
Reconnect the positive cable firs t and then
the negative cable . Never in terchange the
cables -this could start a fire !
- Never cha rge a fro zen or a t hawe d-ou t bat
tery . It co uld explode! If a ba tte ry has fro
ze n, then it must be replaced. A discharged
battery can freeze over at 32°F (0°() .
- Ma ke sure the vent hose is always attached
to the opening on the side of the battery .
- Never use bat teries which a re damaged.
There is the danger of an exp losion! Always
replace a damaged battery .
Page 231 of 296
a,
a,
.... N r-N .... 0 0
0:
co
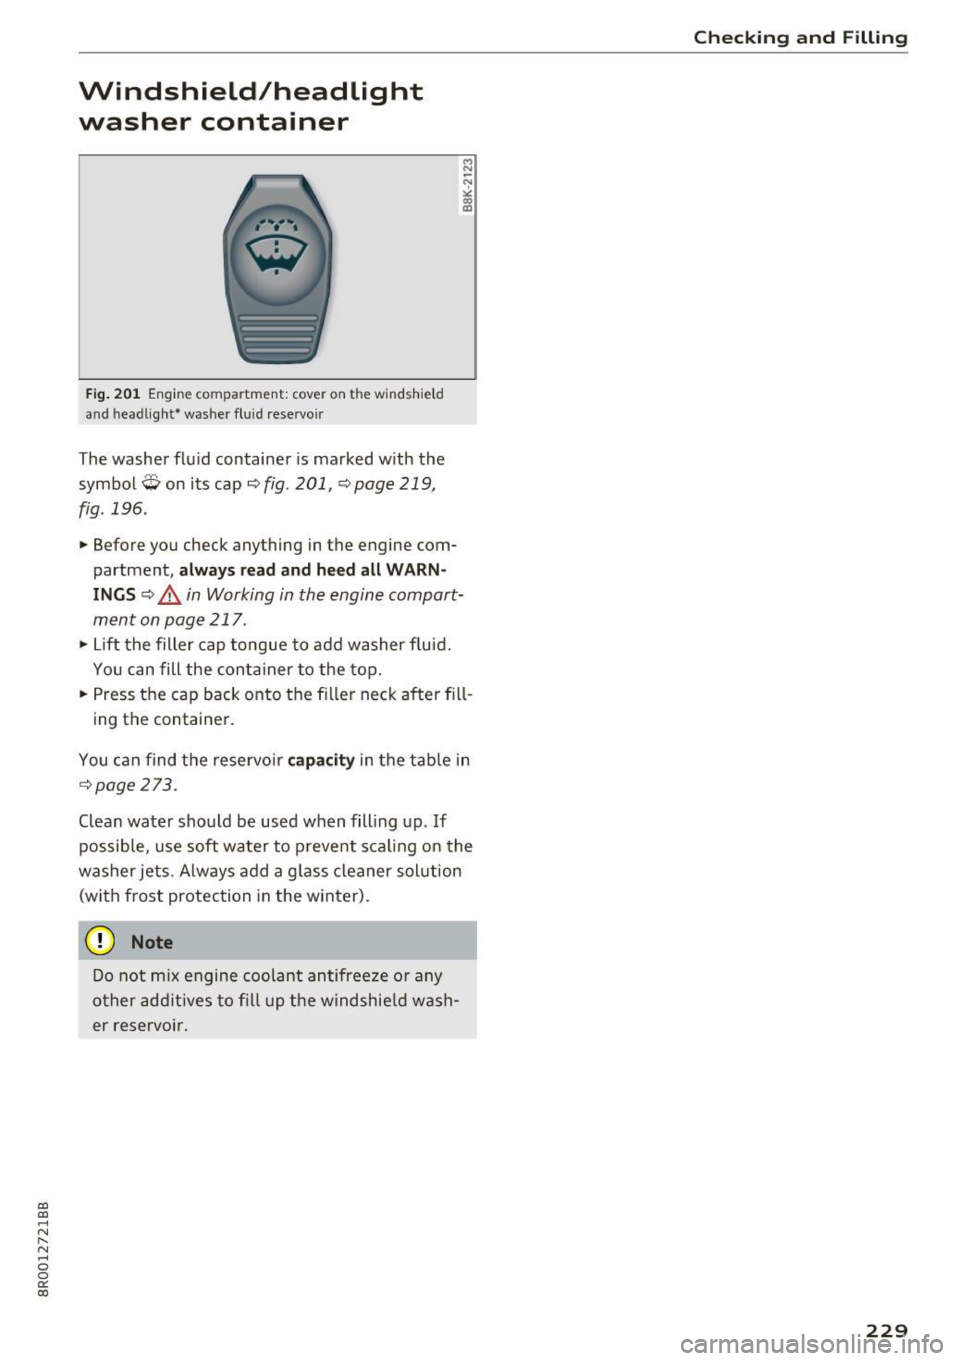
Windshield/headlight washer container
Fig. 201 Engine co mpartment: cover on t he windshie ld
an d h eadligh t* was her fluid reservo ir
The washer fluid container is marked with the
symbol
Q on its cap ¢ fig. 201, ¢ page 219,
fig . 196.
M N
-N ~ a, a,
• Before you check anything in the engine com
partment ,
always read and heed all WARN
INGS ~&, in Working in the engine compart
ment on page 217.
• Lift the filler cap tongue to add washer fluid.
You can fill the container to the top.
• Press the cap back onto the filler neck after fill -
ing the container.
You can find the reservoir
capacity in the table in
¢page 273.
Clean water should be used when filling up. If
possible, use soft water to prevent scaling on the
washer jets . Always add a glass cleaner solution
(with frost protection in the winter).
(D Note
Do not mix engine coolant antifreeze or any
other additives to fill up the windshield wash
er reservoir.
Checking and Filling
229