engine coolant AUDI Q5 2017 User Guide
[x] Cancel search | Manufacturer: AUDI, Model Year: 2017, Model line: Q5, Model: AUDI Q5 2017Pages: 296, PDF Size: 74.43 MB
Page 221 of 296
a,
a,
..... N r-N ..... 0 0
0:
co
Checking and Filling
Engine compartment
Engine compartment
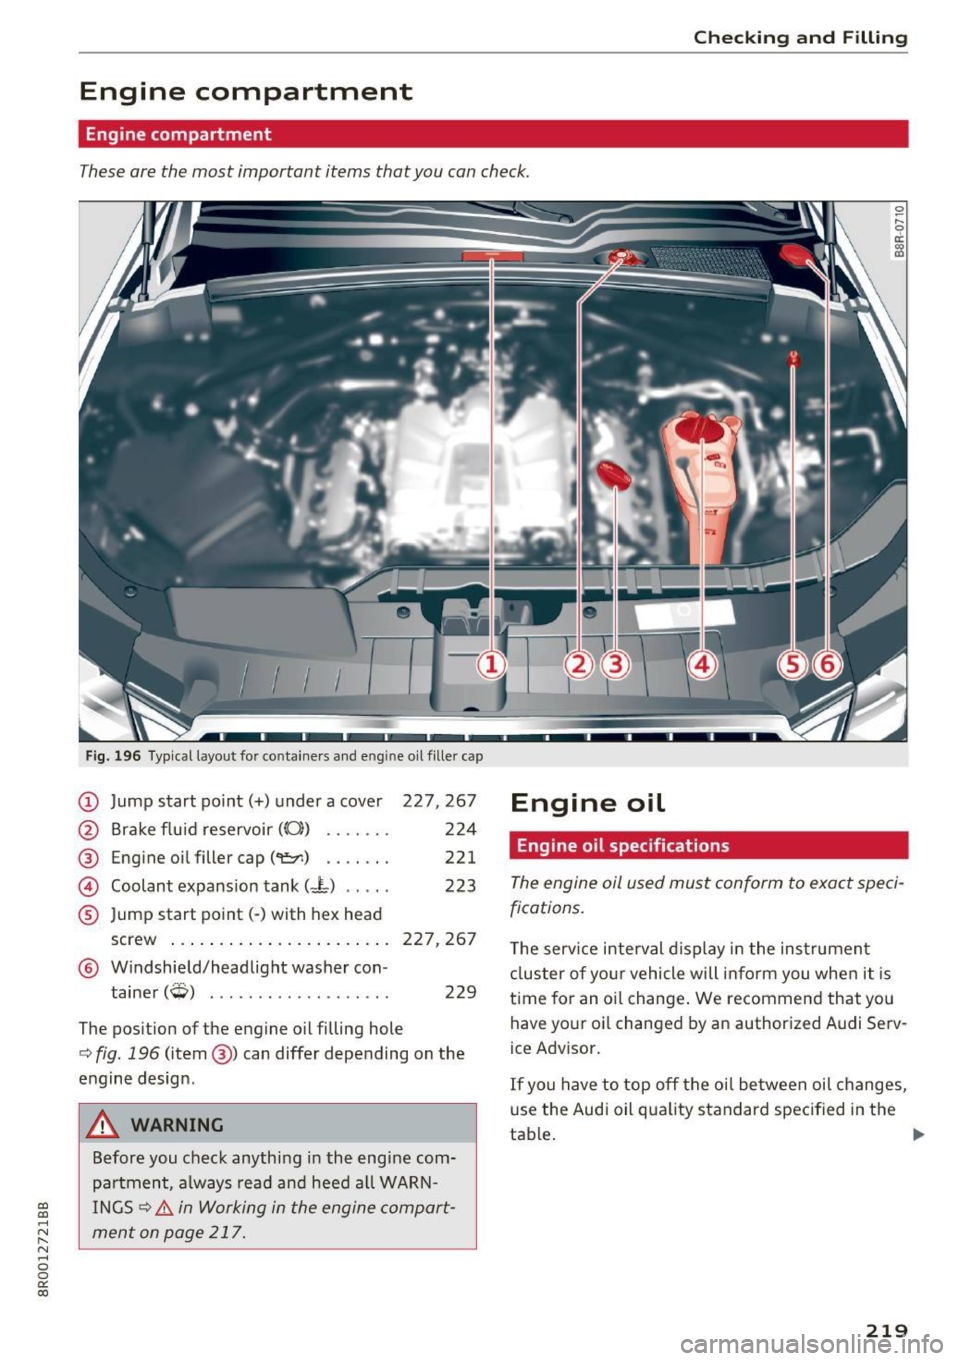
These are the most important items that you can check.
Fig. 196 Typical layout for containers and e ngin e oil fille r cap
(D Jump start po int(+) under a cover 227,267
@ Brake fluid reservoir (CO)) . . . . . . . 224
@ Engine oil filler cap(~) . . . . . . . 221
@ Coolant expansion tank (- L) . . . . . 223
® Jump start point( -) with hex head
screw . . . . . . . . . . . . . . . . . . . . . . . 227, 267
@ Windshield/headlight washer con -
tainer
(W) . . . . . . . . . . . . . . . . . . . 229
The position of the engine oil filling hole
c:> fig. 196 (item@) can differ depending on the
engine design .
A WARNING
Before you check anything in the engine com
partment, always read and heed a ll WARN
INGS
c:> &. in Working in the engine compart
ment on page 217.
Engine oil
Engine oil specifications
The engine oil used must conform to exact speci
fications.
T he serv ice interval display in the instrument
cluster of your vehicle will inform you when it is
time for an oi l change . We recommend that you
have your oi l changed by an authorized Audi Serv
ice Advisor.
If you have to top off the oil between oil changes,
use the Audi oil quality standard specified in the
tab~ .
~
219
Page 225 of 296
CD
CD
.... N ,-... N ..... 0 0 C<'. 00
Cooling system
Coolant
The engine cooling system is filled with a mixture
of purified water and coolant additive at the fac
tory. This coo lant must not be not changed.
The coolant level is monitored through the. in
dicator light
¢page 26. However , we do recom
mend occasionally check ing the coo lant level
manually.
If you must add coolant, use a mixture of water
and coolant addit ive. Mixing the coolant additive
with distilled water is recommended.
Coolant additive
The coolant additive is made of anti-freez ing and
corros ion protection agents. Only use the follow
ing coolant addit ives . These additives may be
mixed with each other.
Coolant additive Specification
G13
TL 774 J
G12++ TL 774 G
The amount of coo lant add itive that needs to be
mixed with water depends on the climate where
the vehicle will be operated.
If the coolant addi
tive percentage is too low, the coolant can freeze
and damage the engine.
Coolant Freeze protec-
additive tion
Warm min. 40% m in. -13 °F
regions max. 45% (-25 °C)
Cold min. 50% max
. -40 °F
regions max. 55% (-40 °C)
(D Note
-Before the start of winter, have your author
ized Audi dealer or authorized Audi Service
Facility check if the coolant additive in your
vehicle matches the percentage appropriate
for the climate . Th is is especially important
when driving in colder climates.
- If the appropriate coolant additive is not
available in an emergency, do not add any
other additive . You could damage the en-
Checking and Filling
gine. If this happens, only use water and re
store the correct mixture ratio with the
specified coolant add it ive as soon as possi
ble.
- Only refill with new coolant .
- Radiator sealant must not be mixed with
the coolant.
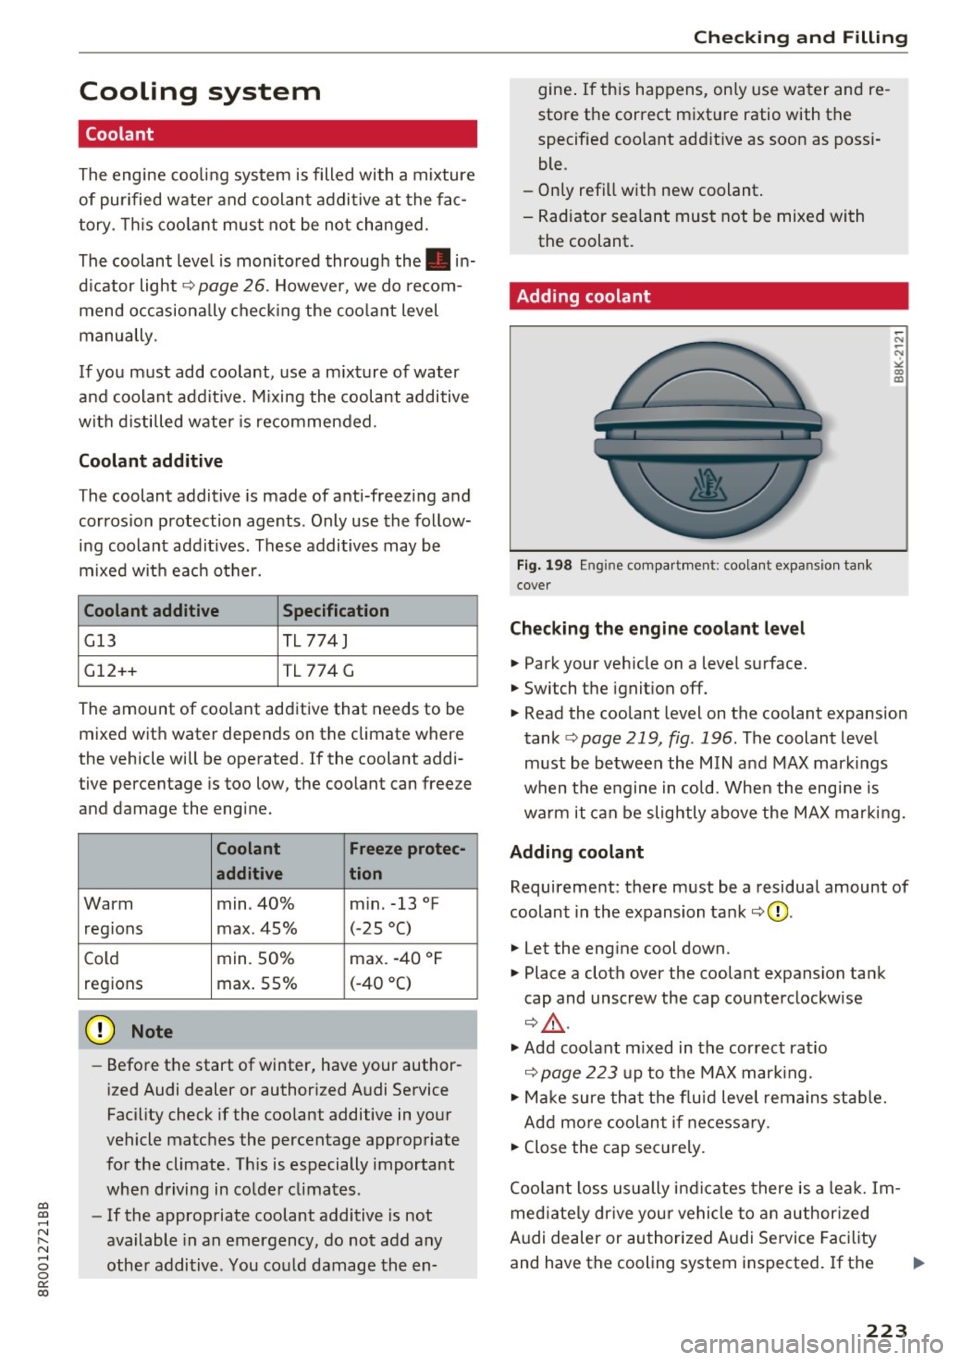
Adding coolant
Fig. 198 Engine compartment: coolant expansio n ta nk
cover
Checking the engine coolant level
.,. Park your vehicle on a level surface.
.,. Switch the ignit ion off.
-N
-N
"" CD co
.,. Read the coolant level on the coolant expansion
tank
¢ page 219, fig . 196. The coolant level
must be between the MIN and MAX mark ings
when the engine in cold. When the engine is
warm it can be slightly above the MAX marking.
Adding coolant
Requirement: there must be a residual amount of
coolant in the expansion tank
¢(D .
.,. Let the engine cool down.
.,. Place a cloth over the coolant expansion tank
cap and unscrew the cap counterclockw ise
¢ _& .
.,. Add coo lant mixed in the correct rat io
¢ page 223 up to the MAX marking .
.,. Make sure that the fluid level remains stable.
Add more coolant if necessary .
.,. Close the cap securely.
Coolant loss usually indicates there is a lea k. Im
mediately drive your vehicle to an authorized
Audi dealer or authorized Audi Service Facility
and have the cooling system inspected.
If the
223
Page 226 of 296
Checking and Filling
cooling system is not leakin g, a loss can come
from t he coolant boiling through overheat ing
an d be ing pushed out o f the coo ling system .
A WARNING
-
-The cooling system is under pressure. Do
not open t he coolant expansion tank ca p
when the eng ine is hot. This inc reases the
risk of bu rns .
- The coolant add itive and the coolant can be
dangerous to your health. For this reason,
keep the coolant in the o rigina l container
and away from children. There is a risk of
po isoning .
- When working in the eng ine compartmen t,
r emembe r that the rad iator fan ca n switch
on even if the ign ition is swi tc h ed off, which
in creases the risk of in jury.
(D Note
Do not add coolant if the expansion tank is
empty. Air could enter the cooling system and
damage the engine. If this is the case , do no t
cont inue driv ing. See an authorized Audi deal
er or author ized Audi Se rvice Facility for assis
tance .
Brake fluid
Checking brake fluid level
The brake fluid level can be checked with a quick
glance.
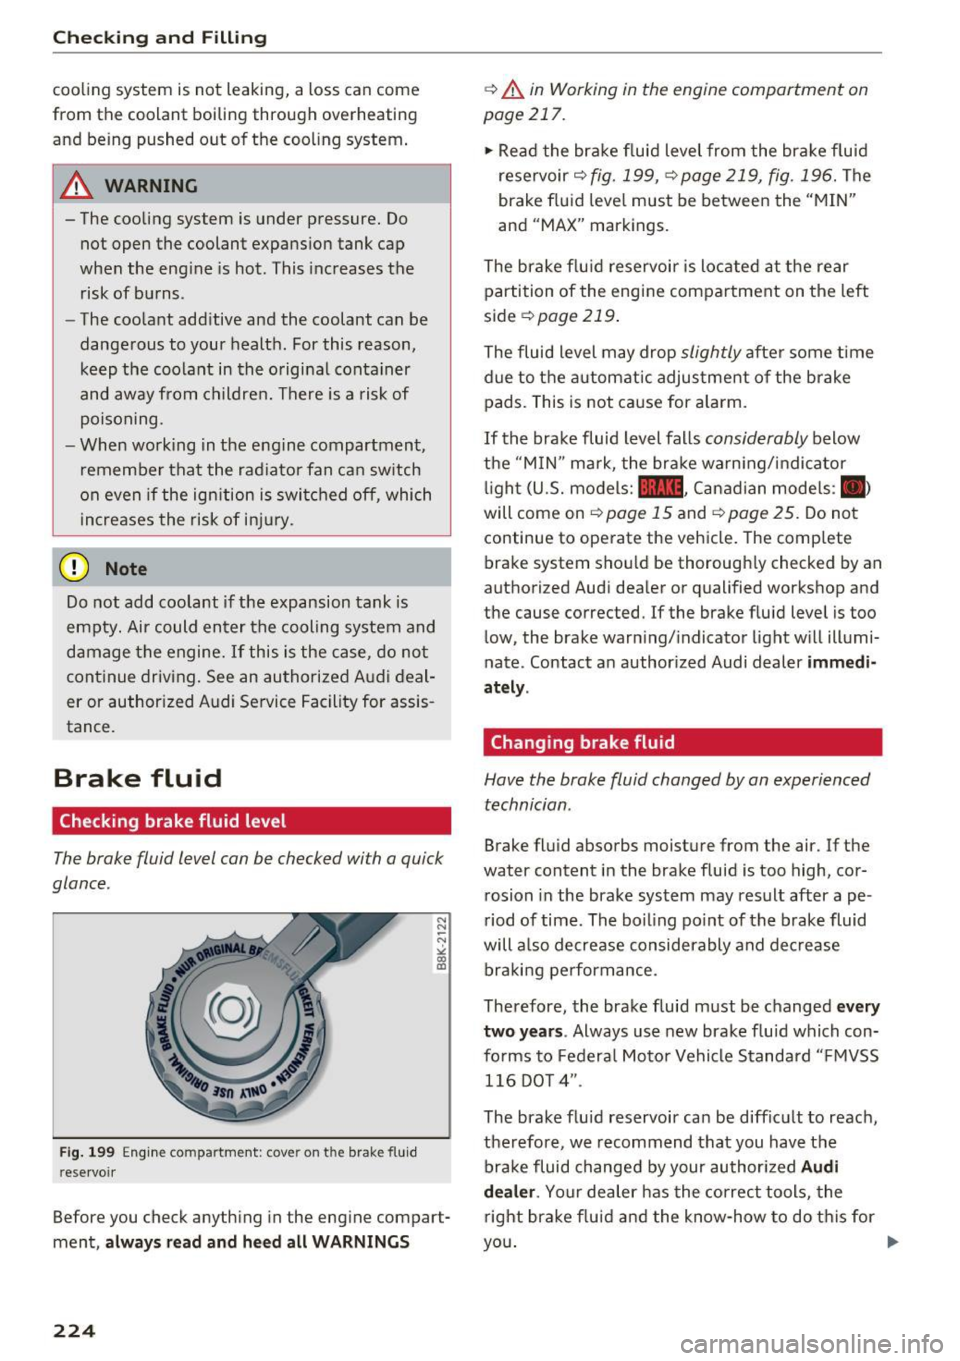
F ig. 19 9 En gi ne co mpa rtme nt: cove r on the brak e fluid
r ese rvoi r
N N
-N
" "' IX)
Before you check anyth ing in the eng ine compart
ment,
a lways read and h eed all WARNING S
224
¢.&. in Working in the engine compartment on
page 217.
.,. Read the bra ke fluid level from the brake f lu id
reservoir ¢
fig. 199, ~ page 219, fig. 196. The
brake fluid leve l must be between the "M IN"
and "MAX" markings.
The brake flu id reservoir is located a t the rear
partition of the engine compartment on the left
side
¢ page 219.
The fluid level may drop slightly afte r some t ime
due to t he automatic adjustme nt of the brake
pads. This is not ca use for a larm.
If the brake fluid level falls considerably below
the
" M IN " mark, the bra ke warn ing/ indica tor
li gh t (U.S. models:
11111 . Canadian models: .
will come on ¢
page 15 and¢ page 25. Do not
continue to ope rate the veh icle. The comp lete
brake system shou ld be thoroughly checked by an
a uthor ized Audi dealer or qualified workshop and
the cause corrected. If the brake fluid level is too l ow, the brake warn ing/ indicator light w ill illumi
nate. Contact a n author ized Audi dealer
immedi
ately .
Chang ing brake fluid
Have the brake fluid changed by an experienced
technician .
Brake fluid absorbs moisture from the air. If the
water content in the brake fluid is too high, cor
rosion in the brake system may result after ape
riod of time . The boiling po int of the brake fluid
will a lso decrease considerably and decrease
bra king pe rformance.
Therefore, the brake fluid must be changed
every
two years .
Always use new brake f lu id which con
fo rms to Federa l Moto r Vehicle S tandard " FMVSS
116 DO T 4".
The brake fluid reservoir can be diff icult to reach,
therefore, we recommend that you have the
brake fluid changed by your author ized
Audi
dealer .
Your dealer has the correct tools, the
right brake fluid a nd the know -how to do t his for
you . ..,.
Page 231 of 296
a,
a,
.... N r-N .... 0 0
0:
co
Windshield/headlight washer container
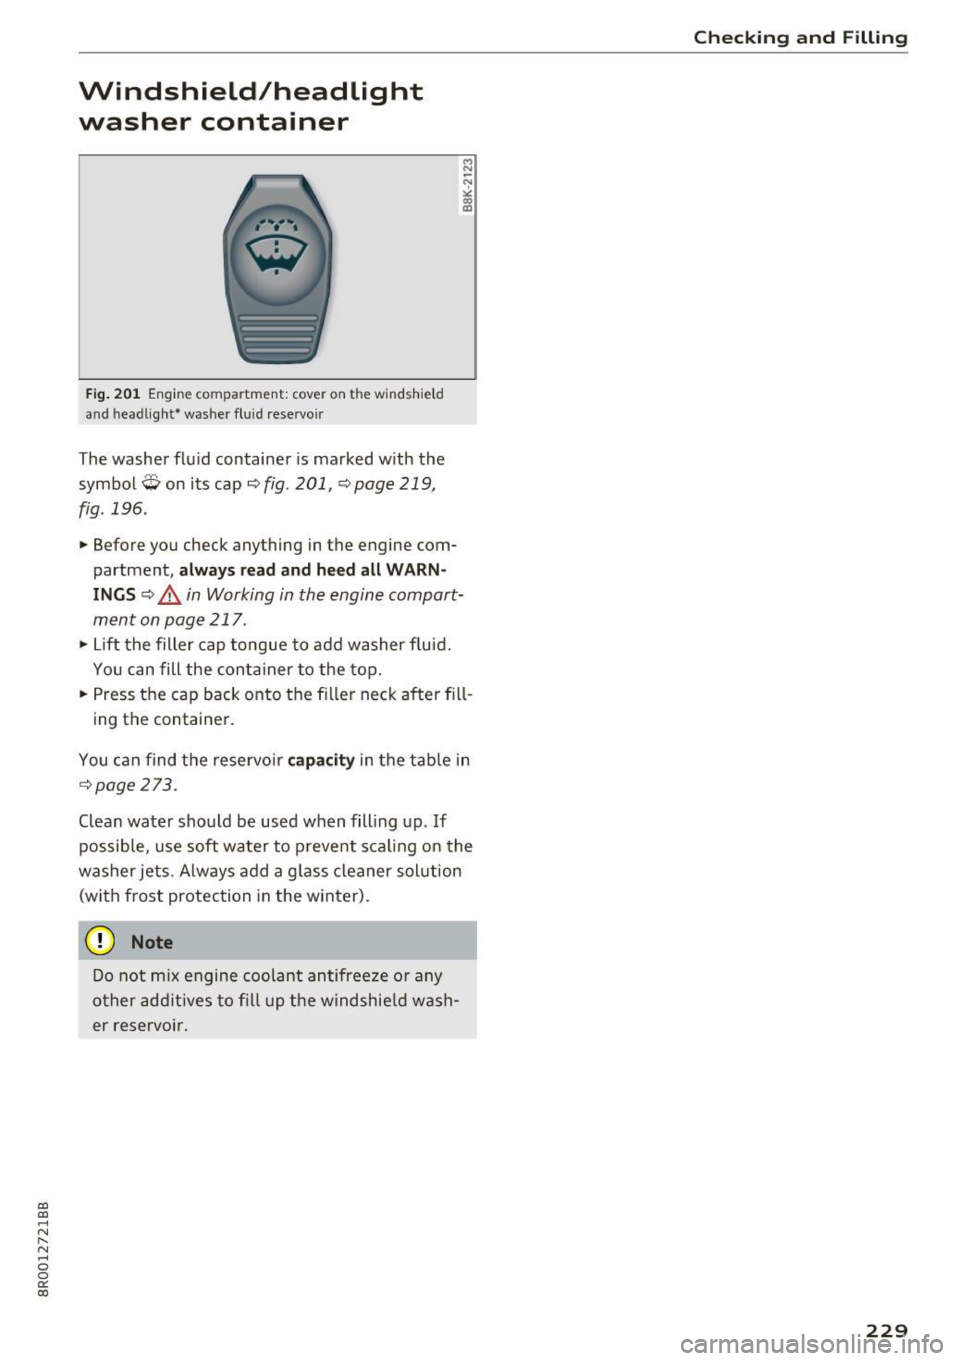
Fig. 201 Engine co mpartment: cover on t he windshie ld
an d h eadligh t* was her fluid reservo ir
The washer fluid container is marked with the
symbol
Q on its cap ¢ fig. 201, ¢ page 219,
fig . 196.
M N
-N ~ a, a,
• Before you check anything in the engine com
partment ,
always read and heed all WARN
INGS ~&, in Working in the engine compart
ment on page 217.
• Lift the filler cap tongue to add washer fluid.
You can fill the container to the top.
• Press the cap back onto the filler neck after fill -
ing the container.
You can find the reservoir
capacity in the table in
¢page 273.
Clean water should be used when filling up. If
possible, use soft water to prevent scaling on the
washer jets . Always add a glass cleaner solution
(with frost protection in the winter).
(D Note
Do not mix engine coolant antifreeze or any
other additives to fill up the windshield wash
er reservoir.
Checking and Filling
229
Page 244 of 296
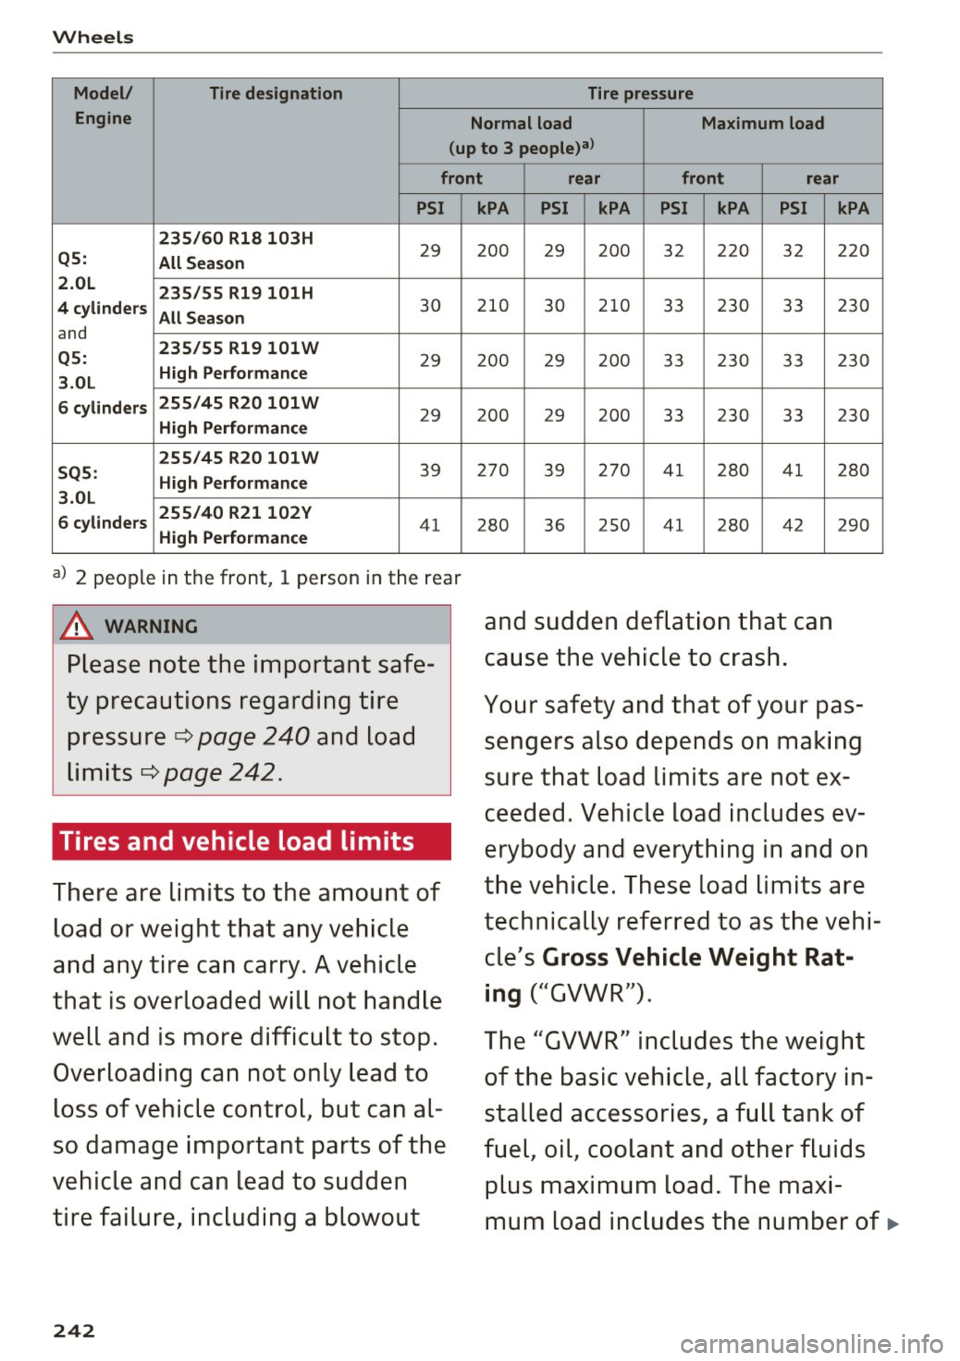
Wheels
Model/ Tire designation Tire pressure
Engine Normal load
Maximum load
(up to
3 people)a)
front rear front rear
PSI
235/60 Rl8 103H
29 Q5:
All Season
2.0L 235/55 Rl9 101H
4 cylinders
All Season
30
and
Q5: 235/55 Rl9
101 W 29 High Performance
3.0L
6 cylinders 255/45 R20 101W
29 High Performance
255/45R20101W
39 SQ5:
High Performance
3.0L
6 cylinders 255/40
R21102Y
41 High Performance
a) 2 people in the front, 1 perso n in the r ear
A WARNING
Please note the important safe
ty precautions regarding tire pressure ¢
page 240 and load
limits ¢
page 242.
Tires and vehicle load limits
There are limits to the amount of
load or weight that any vehicle
and any tire can carry . A vehicle
that is overloaded will not handle
well and is more difficult to stop.
Overloading can not only lead to
loss of vehicle control, but can al
so damage important parts of the
vehicle and can lead to sudden
tire failure, including a blowout
242
kPA PSI kPA PSI kPA PSI
200 29 2 00 32 220 32
210 30 210 33 230 33
200 29 200 33 230 33
2 00 29 2 00 3 3 230 33
270 39 270 41 280 41
2 80
36 2
50 41
28 0 42
and sudden deflation
that can
cause the vehicle to crash.
kPA
220
230
230
230
280
2 9 0
Your safety and that of your pas
sengers also depends on making
sure that load limits are not ex
ceeded. Vehicle load includes ev
erybody and everything in and on
the vehicle. These load limits are
technically referred to as the vehi
cle's
Gross Vehicle Weight Rat
ing
("GVWR") .
The "GVWR" includes the weight
of the basic vehicle, all factory in
stalled accessories , a full tank of
fuel, oil, coolant and other fluids
plus maximum load. The maxi
mum load includes the number of
11-
Page 274 of 296
Technical data
Technical data
Vehicle identification
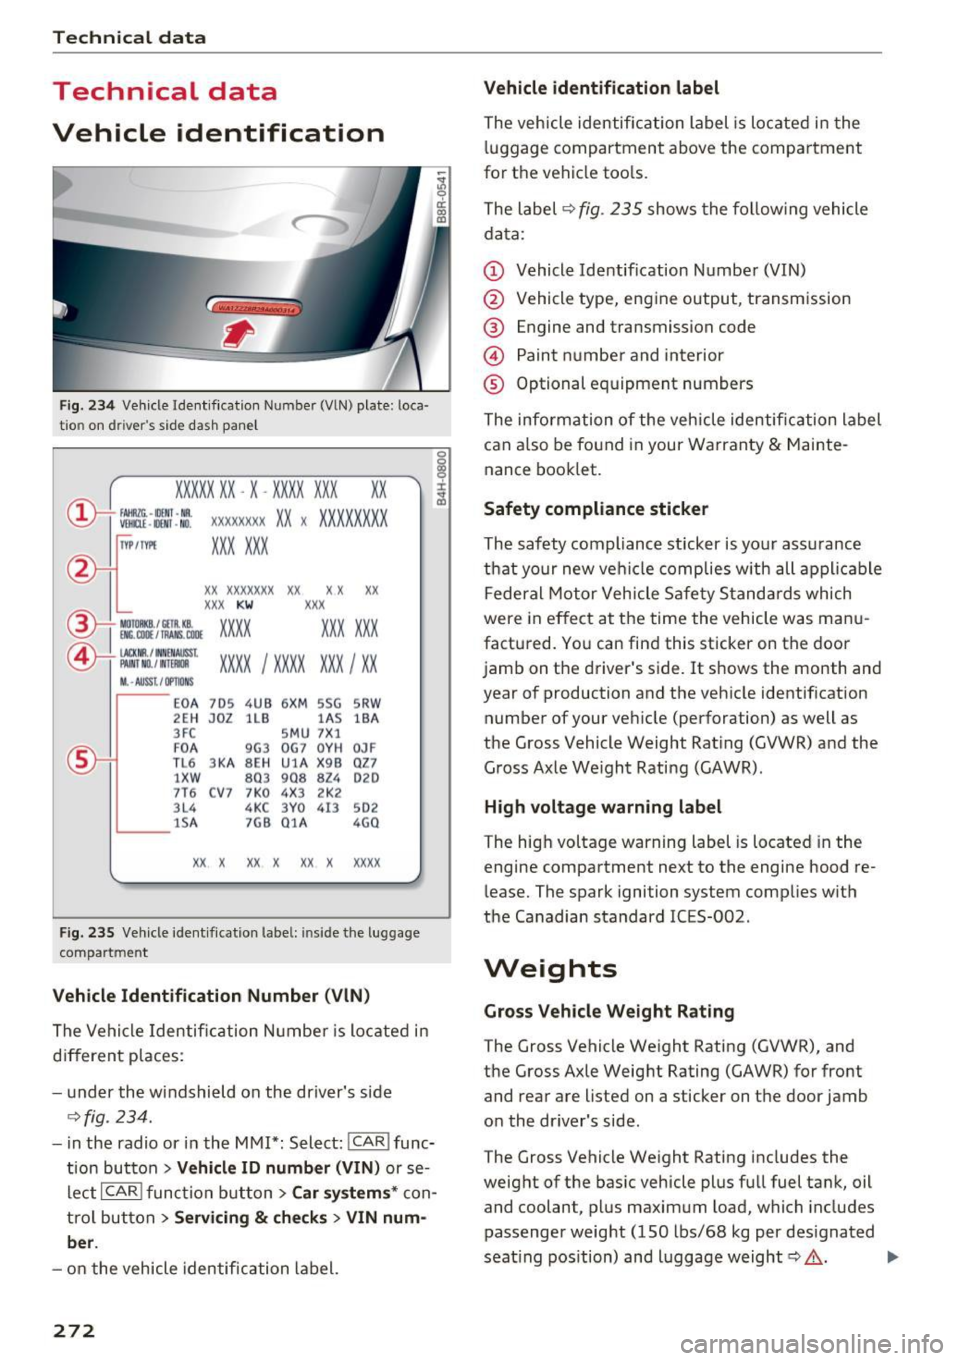
Fig. 234 Vehicle Ident if ication Numbe r (VlN) plate : loca·
tio n on d river 's side dash panel
XXXXX XX -X -XX XX XXX XX
@-+ ~J:~t::1 ::: xxxxxxxx xx x xxxx xxx x
IYP lf'VPE XXX X XX
xx xxxxxxx xx xx xx
XXX KW
XXX
EM:. COil / fAANS , COOE xxxx XXX XXX ®i MOIOlll
©-+ IAC KIIR . / tN NEN AIJSSt
XXXX I XXXX XXX I XX PAI NT NO./ WT£Jldl
II. -AUSST . / OPTIO NS
E0 A 7D5 4UB 6X
M SSG SR W
2EH JOZ lLB lAS
lBA
3FC SM U 7 X1
F0 A
9G3 0
G7 0Y H
0JF
TL 6 3 KA 8EH UlA X 9B Q
Z7
1 XW
803 908
824 020
7T6 C V7 7 K0 4X3 2K2
3L4 4KC 3Y0 413
502
lS A 7GB 01A
4G0
XX X XX X
XX X xxxx
Fig. 235 Vehicle identificat ion labe l: in side the luggage
compart ment
Vehicle Identification Number (VlN)
The Vehicle Identification Number is located in
different places :
- under the windshield on the driver's side
¢fig . 234.
-in the radio or in the MMI*: Select: !CAR i func·
tion button
> Vehicle ID number (VIN) or se·
Leet
I CAR ! function button > Car systems* con·
trol button
> Servicing & checks > VIN num
ber .
-on the vehicle identification label.
272
Vehicle identification label
The vehicle identification label is located in the
luggage compartment above the compartment
for the vehicle tools.
The label ¢
fig. 235 shows the following vehicle
data:
(D Vehicle Identification Number (VIN)
@ Vehicle type, engine output, transmission
® Engine and transmission code
@ Paint number and interior
® Optional equipment numbers
The information of the vehicle identification label
can also be found in your Warranty
& Mainte·
nance booklet.
Safety compliance sticker
The safety compliance sticker is yo ur ass urance
that your new vehicle complies with all applicable
Federal Motor Vehicle Safety Standards which
were in effect at the time the vehicle was manu
factured. You can find this sticker on the door
jamb on the driver's side. It shows the month and
year of production and the vehicle identification
number of your vehicle (perforation) as well as
the Gross Vehicle Weight Rating (GVWR) and the
Gross Axle We ight Rating (GAWR).
High voltage warning label
The high voltage warning label is located in the
engine compartment next to the engine hood re·
lease. The spark ignition system complies w ith
the Canadian standard ICES-002 .
Weights
Gross Vehicle Weight Rating
The Gross Vehicle Weight Rating (GVWR), and
the Gross Axle Weight Rating (GAWR) for front
and rear are listed on a sticker on the door jamb
on the dr iver's side .
The Gross Vehicle Weight Rating includes the
weight of the basic vehicle plus full fuel tank, oil
and coolant, plus maximum load, which includes
passenger weight (150 lbs/68 kg per designated
seat ing position) and luggage weight¢,&. .
Page 279 of 296
CD
CD
.... N ,-... N ..... 0 0 C<'. 00
today's automobiles, have steadily reduced the
scope of maintenance and repairs which can be
carried out by vehicle owners.
Also, safety and
environmental
concerns place very strict limits
on the nature of repairs and adjustments to en
gine and transmission parts which an owner can perform .
Maintenance, adjustments and repairs usually re
quire special tools, testing devices and other
equipment available to specially trained work
shop personnel in order to assure proper per
formance, reliability and safety of the vehicle and
its many systems.
Improper maintenance, adjustments and repairs
can impair the operation and reliability of your
vehicle and even void your vehicle warranty .
Therefore, proof of servicing in accordance with
the maintenance schedule may be a condition for upholding a possible warranty claim made within
the warranty period.
Above all , operational safety can be adversely af
fected, creating unnecessary risks for you and
your passengers.
If in doubt about any servicing, have it done by
your authorized Audi dealer or any other properly equipped and qualified workshop. We strongly urge you to give your authorized Audi dealer the
opportunity to perform all scheduled mainte nance and necessary repairs. Your dealer has the
facilities, original parts and trained specialists to keep your vehicle running properly .
Performing limited maintenance yourself
The following pages describe a limited number of
procedures which can be performed on your vehi
cle with ordinary tools, should the need arise and
trained personnel be unavailable. Before per
forming any of these procedures, always thor
oughly read all of the applicable text and careful ly follow the instructions given . Always rigorously
observe the
WARNINGS provided .
Before you check anything in the engine com
partment, always read and heed all WARNINGS
c::> .&. and c::> .&. in Working in the engine compart
ment on page 217 .
Consumer information
A WARNING
-Serious personal injury may occur as a result
of improperly performed maintenance, ad
justments or repairs .
- Always be extremely careful when working
on the vehicle. Always follow commonly ac
cepted safety practices and general com
mon sense. Never risk personal injury.
- Do not attempt any of the maintenance,
checks or repairs described on the following pages if you are not fully familiar with these
or other procedures with respect to the ve hicle, or are uncertain how to proceed.
- Do not do any work without the proper tools
and equipment. Have the necessary work
done by your authorized Audi dealer or an
other properly equipped and qualified work
shop.
- The engine compartment of any motor vehi cle is a potentially hazardous area. Never
reach into the area around or touch the radi
ator fan.
It is temperature controlled and
can switch on suddenly - even when the en
gine is off and the ignition key has been re
moved . The radiator fan switches on auto
matically when the coolant reaches a certain
temperature and will continue to run until
the coolant temperature drops.
- Always remove the ignition key before any
one gets under the vehicle.
- Always support your vehicle with safety
stands if it is necessary to work underneath
the vehicle . The jack* supplied with the vehi
cle is not adequate for this purpose and
could collapse causing serious personal in
jury.
- If you must work underneath the vehicle
with the wheels on the ground, always make
sure the vehicle is on level ground, that the
wheels are always securely blocked and that the engine cannot be started.
- Always make sure the transmission selector
lever (automatic transmission) is in P (Park
position) and the park brake is applied.
277
Page 280 of 296
Consumer inf orm ation
@ For the sake of the env ironment
- Changing the engine settings wi ll adversely
affect emission levels. Th is is detrimental to
the environment and increases fuel con
sumption.
- A lways observe environmental regu lations
when disposing of old engine o il, used brake
fl ui d, d irty engine coolant, spent batteries
or worn out tires.
- Undeployed airbag modules and pretension
ers mig ht be classified as Perchlorate Mate
rial -special handl ing may apply, see
www.dtsc .ca.gov/hazardouswaste/perchlo
r ate. When the vehicle or parts of the re
straint system including airbag modu les
safety be lts wi th pretensioners are scrap
ped, all applicab le laws and regulations
must be observed. Your authorized Audi
dealer is familiar with these requirements
and we recommend that you have your deal er perform this service for you.
Accessories and technical changes
Additional accessories and parts replacement
Always consult an authorized Audi dealer before
purchasing accessories.
Your vehicle incorporates the latest safety design
features ensuring a high standard of active and passive safety.
This safety could be comp romised by non-ap
proved changes to the vehicle . For this reason, if
parts have to be replaced, please observe the fo l
lowing points when insta lling addit ional accesso
ries:
Approved Audi accessories and genuine Audi parts are available from author ized Audi dealers.
These dealers also have the necessary facilities,
too ls and trained specialists to install the parts
and accessories properly.
278
A WARNING
-
Using the wrong spare parts or using non-ap-
proved accessories can cause damage to the
vehicle and serious personal injury.
- Use only accessories expressly approved by
Aud i and genuine Audi spare parts
- These parts and accessor ies have been spe
cially designed to be used on your vehicle.
- Never install accessor ies such as telephone
cradles or beverage holders on airbag covers
or w ith in the airbag deployment zones. Do
ing so will increase the risk of injury if a ir
bags are triggered in an accident!
- Before you check anything in the eng ine
compartment, always read and heed all
WARN INGS
Qpage 217.
(D Note
-If items other than genu ine Audi spare
parts, add-on equipment and accessory
items are used or if repair wor k is not per
formed a ccording to specified methods, this
c an resul t in severe damage to you r vehi
cle's eng ine and body (such as corrosion)
and adve rsely af fect your vehicle's war ranty.
- I f emergency repai rs must be performed
elsewhere, have the vehicle exam ined by an
authorized A udi dealer as soon as possib le .
- T he manuf acture r ca nnot be held liable for
damage which occurs d ue to failure to com
ply with these stipulations.
Technical Modifications '
Our guidelines must be complied with when tech
nical modifications are made .
Always consult an a uthorized Audi de aler bef ore
sta rt ing work on any modifica tions.
This will help ensure that vehicle fu nction, per
fo rmance and safety are not impaired
Q ,& .
Attempting to work on electronic components
and the software used with them can cause mal
funct io ns. Because of the way elect ronic compo
nen ts a re interconnected with each othe r, such
malfunc tions c an also have an adverse affect on
othe r systems that are not d irectl y involved. This ..,.
Page 284 of 296
Index
Child safety . . . . . . . . . . . . . . . . . . . . . . . . . . 168
Important safety instructions for using child
safety seats . . . . . . . . . . . . . . . . . . . . . . . .
171
Installing a child restraint using the LATCH
system . . . . . . . . . . . . . . . . . . . . . . . . . . . .
182
Mounting and releasing the anchorage
hook
. ... .. .. .. ... ... ... .... .. .. .. . 182
Tether anchors .. ................ ... . 183
Tether straps ... .... ......... .... .. . 183
Child safety locks
Rear doors . . . . . . . . . . . . . . . . . . . . . . . . . . 42
Child safety seats
Booster seats . . . . . . . . . . . . . . . . . . . . . . .
176
Convertible child seats . . . . . . . . . . . . . . . 175
Danger of using child restraints in the front
seat ..... .. .... .......... ...... ... .
149
How do I properly install a child safety seat
. h' l ? in myve 1c e .... ................ ... . 171
Infant seats . . . . . . . . . . . . . . . . . . . . . . . . 17 4
L ATCH system . . . . . . . . . . . . . . . . . . . . . .
182
Lower anchorages ............ .... .. .
Safety instructions .................. .
Unused safety belts on the rear seat ... .
Ch ild seats 182
171
173
174
Securing . . . . . . . . . . . . . . . . . . . . . . . . . . . 178
Cigarette lighter . . . . . . . . . . . . . . . . . . . . . . . 73
Cleaning . . . . . . . . . . . . . . . . . . . . . . . . . . . 204
Cleaning/removing ice from windows . . . . .
206
Cleaning Alcantara . . . . . . . . . . . . . . . . . . . . 207
Clean ing artificial leather. . . . . . . . . . . . . . . 207
Cleaning carbon parts . . . . . . . . . . . . . 206, 207
Cleaning controls . . . . . . . . . . . . . . . . . . . . . 206
Clean ing decorative parts/trim . . . . . . . . . . 206
Cleaning displays . . . . . . . . . . . . . . . . . . . . . 206
Cleaning exhaust tail pipes . . . . . . . . . . . . . 205
Cleaning plastic parts . . . . . . . . . . . . . . . . . . 206
Cleaning rims 205
Clean ing textiles . . . . . . . . . . . . . . . . . . . . . . 207
Climate control
Air vents . . . . . . . . . . . . . . . . . . . . . . . . . . . .
79
Automatic recirculation . . . . . . . . . . . . . . . . 79
Operation . . . . . . . . . . . . . . . . . . . . . . . . . . . 78
Setup . . . . . . . . . . . . . . . . . . . . . . . . . . . . . . 79
Supplementary . . . . . . . . . . . . . . . . . . . . . . . 80
Synchronizing . . . . . . . . . . . . . . . . . . . . . . . . 79
Climate control system . . . . . . . . . . . . . . . . . 77
Climatized cupholder . . . . . . . . . . . . . . . . . . .
72
282
Clock 10
Closing
Panoramic sliding sunroof. . . . . . . . . . . . . . 44
Coat hooks . . . . . . . . . . . . . . . . . . . . . . . . . . .
76
Compass mirror . . . . . . . . . . . . . . . . . . . . . . . 58
Compliance . . . . . . . . . . . . . . . . . . . . . . . . . . 279
Consumer information . . . . . . . . . . . . . . . . . 276
Consumer Information . . . . . . . . . . . . . . . . . 138
Contacting NHTSA . . . . . . . . . . . . . . . . . . . . 138
Convenience
Closing . . . . . . . . . . . . . . . . . . . . . . . . . . . . . 44
Opening . . . . . . . . . . . . . . . . . . . . . . . . . . . . 44
Convenience key . . . . . . . . . . . . . . . . . . . . . . . 3 7
Indicator lights . . . . . . . . . . . . . . . . . . . . . .
85
Locking and unlocking vehicle . . . . . . . . . . . 37
Starting engine (START ENGINE STOP but-
ton) . . . . . . . . . . . . . . . . . . . . . . . . . . . . . . . .
84
Stopping the engine (START ENGINE STOP
button) . . . . . . . . . . . . . . . . . . . . . . . . . . . . .
85
Switching on ignition . . . . . . . . . . . . . . . . . . 84
Convertible child safety seats . . . . . . . . . . . 175
Convertible locking retractor
Activating . . . . . . . . . . . . . . . . . . . . . . . . . .
180
Deactivating . . . . . . . . . . . . . . . . . . . . . . . . 180
Using to secure a child safety seat . . . . . . 180
Cooled cupholder . . . . . . . . . . . . . . . . . . . . . . 72
Cooling box in glove compartment . . . . . . . . 75
Cooling mode (climate control) . . . . . . . . . . . 78
Cooling system
Adding coolant . . . . . . . . . . . . . . . . . . . . . .
223
Coolant . . . . . . . . . . . . . . . . . . . . . . . . . . . . 223
Coolant level checking . . . . . . . . . . . . . . . . 223
Cornering light . . . . . . . . . . . . . . . . . . . . . . . . 51
Cruise control
Changing speed . . . . . . . . . . . . . . . . . . . . . .
93
Preselect speed . . . . . . . . . . . . . . . . . . . . . . 93
Switching off . . . . . . . . . . . . . . . . . . . . . . . . 93
Switching on . . . . . . . . . . . . . . . . . . . . . . . . . 92
Warning/indicator lights . . . . . . . . . . . . . . . 14
Cruising range . . . . . . . . . . . . . . . . . . . . . . . . . 19
(upholders . . . . . . . . . . . . . . . . . . . . . . . . 71, 73
Heated and cooled . . . . . . . . . . . . . . . . . . . . 72
D
Data recorder
Date display 188
10
Page 286 of 296
Index
Electronic Stabilization Control (ESC) Hill descent assist . . . . . . . . . . . . . . . . . . .
188
Offroad mode . . . . . . . . . . . . . . . . . . . . . . . 187
Warning/indicator lights . . . . . . . . . . . . . . . 13
Emergency braking . . . . . . . . . . . . . . . . . . . . . 88
Emergency flasher . . . . . . . . . . . . . . . . . . . . . S 1
Warning/indicator lights . . . . . . . . . . . . . . .
14
Emergency key . . . . . . . . . . . . . . . . . . . . . . . . 33
Starting engine . . . . . . . . . . . . . . . . . . . . . . 83
Emergency locking of the doors. . . . . . . . . . . 39
Emergency operation
Luggage compartment lid . . . . . . . . . . . . . .
42
Emergency release
Selector lever . . . . . . . . . . . . . . . . . . . . . . . .
99
Emergency starting . . . . . . . . . . . . . . . . . . . 266
Emergency unlocking
Ignition key . . . . . . . . . . . . . . . . . . . . . . . . .
35
Energy management . . . . . . . . . . . . . . . . . . 192
Engine
Compartment ................... ... .
219
Coolant . . . . . . . . . . . . . . . . . . . . . . . . . . . . 223
Hood ...... .. ................... ... 217
Jump starting . . . . . . . . . . . . . . . . . . . . . . . 107
Starting ... .. ................ 81, 84 , 101
Starting with jumper cables . . . . . . . . . . .
266
Stopping ... .. .. ... .... ...... . 83, 85, 101
Engine compartment ........... .... .. . 219
Safety instructions . . . . . . . . . . . . . . . . . . . 217
Working the engine compartment ...... 217
Engine coolant system
Malfunction . . . . . . . . . . . . . . . . . . . . . . . . .
26
Engine coolant temperature
Temperature gauge . . . . . . . . . . . . . . . . . . . . 8
Engine hood
Closing . . . . . . . . . . . . . . . . . . . . . . . . . . . .
217
H ow to release the hood . . . . . . . . . . . . . . 217
Engine oil . .. .. ................... ... 219
Adding . . . . . . . . . . . . . . . . . . . . . . . . . . . . 221
Additives. .. .. .. ... .. ..... ..... .. .. . 221
Changing . . . . . . . . . . . . . . . . . . . . . . . . . . 222
Check oil level . . . . . . . . . . . . . . . . . . . . . . 221
Consumption . . . . . . . . . . . . . . . . . . . . . . . 221
Level . . . . . . . . . . . . . . . . . . . . . . . . . . . . . . . 30
O il consumption . . . . . . . . . . . . . . . . . . . . . 220
Pressure malfunction . . . . . . . . . . . . . . . . . 27
Sensor defective . . . . . . . . . . . . . . . . . . . . . . 30
Specification and viscosity......... ... . 219
284
Engine speed limitation . . . . . . . . . . . . . . . . . 30
Environment
Catalyt ic converter . . . . . . . . . . . . . . . . . . .
194
Diesel particulate filter . . . . . . . . . . . . . . . 195
Dispos ing of your veh icle battery . . . . . . . 228
Driving at high speeds . . . . . . . . . . . . . . . . 196
Fuel......... ... .. .. ............... 212
Leaks under your vehicle . . . . . . . . . . . . . . 217
Letting the vehicle stand and warm up. . . 196
Proper disposal of drained brake fluid 224
Proper disposal of drained engine oil 221,222
Recycling used engine o il . . . . . . . . . . . . . 221
Roof rack . . . . . . . . . . . . . . . . . . . . . . . . . . . 71
Unleaded fuel . . . . . . . . . . . . . . . . . . . . . . . 209
What shou ld I do with an old battery? 228
EPC
refer to Electronic power control . . . . . . . . 12
ESC
refer to Electronic Stabilization
Control (ESC) . . . . . . . . . . . . . . . . . . . . . . . .
13
Ethyl alcohol (Fuel) . . . . . . . . . . . . . . . . . . . . 210
Event Data Recorder (EDR) . . . . . . . . . . . . . 188
Explanation of some technical terms . . . . . 198
Exterior lighting . . . . . . . . . . . . . . . . . . . . . . . 49
Exterior mirrors Adjusting . . . . . . . . . . . . . . . . . . . . . . . . . . .
56
D ' . rmmrng ...... .. ... .... ....... .... .. 57
Heating . . . . . . . . . . . . . . . . . . . . . . . . . . . . . 56
Eyeglasses compartment . . . . . . . . . . . . . . . . 75
F
Fall line 198
Fastening
Booster seats . . . . . . . . . . . . . . . . . . . . . . .
176
Convertible child safety seats . . . . . . . . . . 175
Infant seats . . . . . . . . . . . . . . . . . . . . . . . . 174
Flexib le fue l . . . . . . . . . . . . . . . . . . . . . . . . . 210
Floor mats . . . . . . . . . . . . . . . . . . . . . . . . . . . 136
Fog lights . . . . . . . . . . . . . . . . . . . . . . . . . . . . 50
Folding chocks . . . . . . . . . . . . . . . . . . . . . . . 250
Folding the rear seat forward . . . . . . . . . 66, 67
Foot pedals . . . . . . . . . . . . . . . . . . . . . . . . . .
135
For the sake of the environment
Environmentally -friendly driving . . . . . . .
195
Gasoline fumes and the environment .. .. 212
Letting the engine warm up . . . . . . . . . 81 , 84