tow AUDI Q5 2017 Owners Manual
[x] Cancel search | Manufacturer: AUDI, Model Year: 2017, Model line: Q5, Model: AUDI Q5 2017Pages: 296, PDF Size: 74.43 MB
Page 5 of 296
CD
CD
.... N ,-... N ..... 0 0 C<'. 00
Storing cargo correctly . . . . . . . . . . . . . . . 136
R epo rting Safety Defects . . . . . . . . . . . . . . 138
Safety belts . . . . . . . . . . . . . . . . . . . . . . 14 0
General information . . . . . . . . . . . . . . . . . 140
Why use safety belts? . . . . . . . . . . . . . . . . 141
Safety belts . . . . . . . . . . . . . . . . . . . . . . . . 143
Belt tensioners . . . . . . . . . . . . . . . . . . . . . . 146
Airbag system . . . . . . . . . . . . . . . . . . . . 148
Important information . . . . . . . . . . . . . . . 148
Front airbags . . . . . . . . . . . . . . . . . . . . . . . 1S2
Monitoring the Advanced Airbag System . 158
Side airbags . . . . . . . . . . . . . . . . . . . . . . . . 162
Side curtain airbags . . . . . . . . . . . . . . . . . . 165
Child safety . . . . . . . . . . . . . . . . . . . . . . 168
Important information . . . . . . . . . . . . . . . 168
Ch ild seats . . . . . . . . . . . . . . . . . . . . . . . . . 174
S ecur ing ch ild seats . . . . . . . . . . . . . . . . . . 178
L ATCH system (lower anchorages and
tethers for chi ldren) . . . . . . . . . . . . . . . . . 181
Additional in fo rma tion
185
Driver messages . . . . . . . . . . . . . . . . . 186
Intelligent Technology . . . . . . . . . . 186
Elect ronic Stabilization Control (ESC) . . . . 186
Notice about data recorded by the Event
Data Recorder and vehicle control
modules . . . . . . . . . . . . . . . . . . . . . . . . . . . 188
B rak ing . . . . . . . . . . . . . . . . . . . . . . . . . . . . 190
E lect romechanical power assist, Dynamic
steering . . . . . . . . . . . . . . . . . . . . . . . . . . . 191
Dri ving with your quattro . . . . . . . . . . . . . 192
En erg y management . . . . . . . . . . . . . . . . . 192
Driving and the environment . . . . 194
Br eak ing in . . . . . . . . . . . . . . . . . . . . . . . . . 194
Catalytic converter . . . . . . . . . . . . . . . . . . . 194
Di ese l particulate filter . . . . . . . . . . . . . . . 195
Avoid damaging the vehicle . . . . . . . . . . . 195
Economical and environmentally-friendly
driving . . . . . . . . . . . . . . . . . . . . . . . . . . . . 195
Table of contents
Offroad driving . . . . . . . . . . . . . . . . . . .
198
Driving under difficult conditions and off-
ro ad . . . . . . . . . . . . . . . . . . . . . . . . . . . . . . 198
Trailer towing . . . . . . . . . . . . . . . . . . . . 200
Driving with a traile r . . . . . . . . . . . . . . . . . 200
Trailer towing information . . . . . . . . . . . . 202
Operating instructions . . . . . . . . . . . 204
Care and cleaning . . . . . . . . . . . . . . . . 204
Genera l information . . . . . . . . . . . . . . . . . 204
Car washes . . . . . . . . . . . . . . . . . . . . . . . . . 204
Cleaning and care information . . . . . . . . . 205
Plac ing your vehicle out of service . . . . . . 208
Fuel and Refueling . . . . . . . . . . . . . . . 209
Fuel .. .. .. .. .. .. .. ... .. ..... ... .. .. 209
Refueling ... .. .. .. .... .. ... .... .. .. 211
Selective catalytic reduct ion (Ad Blu e/
DEF) . . . . . . . . . . . . . . . . . . . . . . . . . . . . . . 214
Checking and Filling ........... .. 2 17
Hood ..... .. .. .. ................. .. 217
Eng ine compartm ent . . . . . . . . . . . . . . . . . 219
Eng ine oil . . . . . . . . . . . . . . . . . . . . . . . . . . 219
Cooling system . . . . . . . . . . . . . . . . . . . . . . 223
Brake fluid . . . . . . . . . . . . . . . . . . . . . . . . . 224
Battery . . . . . . . . . . . . . . . . . . . . . . . . . . . . 225
Windshield/headlight washer container
229
Wheels ........................... 230
Wheels and Tires . . . . . . . . . . . . . . . . . . . . 230
Tire pressure monitoring system 247
Do It Yourself . . . . . . . . . . . . . . . . . . . . 250
Emergency assistance . . . . . . . . . . . 250
Vehicle jack, vehicle tool kit and
collapsible spare tire . . . . . . . . . . . . . . . . . 250
T ire mobility kit . . . . . . . . . . . . . . . . . . . . . 253
Replacing wheels . . . . . . . . . . . . . . . . . . . . 255
Fuses and bulbs . . . . . . . . . . . . . . . . . . 261
Fuses . . . . . . . . . . . . . . . . . . . . . . . . . . . . . . 261
Bulbs . . . . . . . . . . . . . . . . . . . . . . . . . . . . . . 264
Emergency situations . . . . . . . . . . . . 266
General . . . . . . . . . . . . . . . . . . . . . . . . . . . . 266
Starting by pushing or tow ing . . . . . . . . . . 266
3
Page 6 of 296
Table of content s
Starting with jumper cables . . . . . . . . . . . 266
Use of jumper cables . . . . . . . . . . . . . . . . . 267
Towing with a tow tr uck . . . . . . . . . . . . . . 268
Ra is ing the vehicle . . . . . . . . . . . . . . . . . . . 270
Techni cal Data . . . . . . . . . . . . . . . . . . . 272
Te chnical data . . . . . . . . . . . . . . . . . . . . 272
Veh icle identification . . . . . . . . . . . . . . . . . 272
We ights . . . . . . . . . . . . . . . . . . . . . . . . . . . 272
Dimensions . . . . . . . . . . . . . . . . . . . . . . . . . 273
Capac ities . . . . . . . . . . . . . . . . . . . . . . . . . . 273
Gasoline engi nes . . . . . . . . . . . . . . . . . . . . 274
D iese l eng ine . . . . . . . . . . . . . . . . . . . . . . . 275
Consumer information ....... .. . 276
Wa rranty cover ages . . . . . . . . . . . . . . . . . . 276
Operating your veh icle outs ide the U.S.A.
or Canada . . . . . . . . . . . . . . . . . . . . . . . . . . 276
Audi Service Repair Man ua ls and
Literature . . . . . . . . . . . . . . . . . . . . . . . . . . 276
Maintenance . . . . . . . . . . . . . . . . . . . . . . . . 276
Accessories and technical changes . . . . . . 278
Declarat ion of Complia nce,
Telecommun ications and Electro nic
Sys tems . . . . . . . . . . . . . . . . . . . . . . . . . . . 279
Index .............. ............. .. 280
4
Page 16 of 296
Instruments and indicator lights
¢ Q Turn signals
The indicator light blinks when you use either
turn signal.
Whenever you use the left B or the right.
turn signal, the indicator l ight blinks. When you
use the emergency flashers, both indicator lights
flash.
If one of the turn s ignal light bulbs burn out, the
turn signal w ill blink twice as fast as normal.
This does not apply, however, in towing mode .
The indicator light does not flash if a turn s ignal
is out on the tra iler or the towing vehicle. Addi
tional informat ion on the turn s ignals
c::> page52.
¢1.~ Trailer turn signal assembly
Appl ies to: ve hicles w ith towing hitch
The indicator light also blinks if the turn signal is
operated when towing a trailer .
The indicator light . blinks when the turn sig
na l is used, if a trailer has been p roperly connect
ed to the vehicle .
If one of the turn signal bulbs on the trailer is burned out or defective, the indicator light will
not blink when you use the turn s ignals.
@ Tips
For vehicles with a factory installed towing
hitch or a tra ile r hitch that was installed later
according to factory specif ications, the trailer
turn signa l assembly is actuated.
~ Safety belts
This warning/indicator light reminds you to put
on your safety belt.
The . warning/indicator light illuminates when
the ignition is switched on to remind the dr iver
and (on USA models only) any front passenger to put on the safety belt. Add itionally, an audible
warn ing tone w ill also sound .
For more Information
c::> page 140, Safety belt
warning light.
14
o Malfunction Indicator Lamp (MIL)
The Malf u nction Indicator Lamp ( MIL) is pa rt of
t h e On-Boar d Diagnos tic ( OBD II) sys tem . T he
symbol
('4 li ghts up when the ignit io n is t urned
on and will turn off after the engine has s tarted
and has settled at a constant idle speed. This in
dicates that the MIL is work ing properly.
The warning light ill uminates w hen the re is a
malfunction in the engine electronic system.
Contact your authorized Audi dea ler and have the
malfunction corrected .
An improperly closed fuel filler cap may al so
cau se the MIL light to illuminate (only vehicle s
with gasoline engine )
c::> page 212.
For more info rm ation c::> page 23 .
l[D High beam
The SI warning/ indica to r li ght illum ina tes when
the high beams are on or when you use the head
li ght f lasher. Fo r more information about using
the high beams, see
c::> page 52.
CRUISE/"(') Cruise control
The lij;\1)~14 (USA mode ls) 1B (Canada mode ls)
warning/indicator light illuminates when the
c ruise contro l is activated .
ABS/(8) Anti-lock brake system (ABS)
This warning/indicator light monitors the ABS
and the electronic differential lock (EDL) .
The rJln (USA models) lri] (Canada models)
warning/indicator light will come on for a few
seconds when the ignit ion is switched on . The
li ght w ill go out after an automatic check se
quence is comp leted.
There i s a malfunction in the ABS when:
-The warning/ indicator light does not illum inate
when you sw itch on the ign ition.
- The warning/ indicato r light does not go o ut af
ter a few seconds .
- The warning/ indicator light illum inates while
driving. ..,.
Page 29 of 296
CD
CD
.... N ,-... N .... 0 0 C<'. 00
(D Note
Do not continue d riving if the. sym bol ill u
m inates . There is a mal function in the en gine
coo ling system -you could damage your en
gi ne.
't=?: Engine oil pressure malfunction
The red engine oil pressure warning symbol re
quires immediate service or repair. Driving with a
low oil pressure indication is likely to cause se
vere engine damage .
If the . symbol on the display flashes, the en
g ine oi l pressure is too low. A d river message ap
pears as well to explain t he malfunction in mo re
deta il. Th e d river war ning goes ou t afte r abo ut 5
s econds, but it can be b ro u gh t up at any time by
p ressing the
ISET I button again.
Turn off engine! Oil pressure too low
• Stop t he ve hicle .
• Turn the eng ine
off.
• Check the eng ine oi l level ¢ page 221.
• Co ntact yo ur autho rized Aud i dea le r for assis-
tance if necessary.
Engine oil level too low
If the engine o il level is too low, add eng ine oi l
¢page 221.
Engine oil level correct
If th e sym bol. flashes even thoug h the en gin e
oil leve l is correct, p lease contact your nea rest
author ized Audi Dealer for assistance. Do not
continue dr iv ing .
Do not leave the eng ine running
idle, either .
@ Tips
- The engine oil pressure symbol. is not
an indicator for a low engine oil level. Do
not rely on it. Instead, check the oil level in
your engine at regular intervals, preferably
each time you refuel, and always before
going on a long trip.
- The yellow oil level warning indication
Ill
requires oil refill or workshop service with
out delay. Do not wait until the red oil
Driver information system
pressure warning. starts to flash before
you respond to the low oil level warning
II. By then, your engine may already have
suffered serious damage .
~ ""' Fill engine oil now
WARNING : Please add oil immediately
If the. sym bo l lights up, then t he oi l has to be
r ep le ni shed right now
¢page 221.
@-Steering malfunction
If there is a malfunction in the electronic steer
ing column lock, the steering cannot be un
locked.
If the . symbo l in the disp lay bli nks, t here is a
malfunction in t he electronic stee ring col umn
l ock. A driver message appears as we ll to exp la in
t h e malfunction i n mo re detail. The dr ive r warn
ing goes out afte r about 5 seconds , but it can be
broug ht up a t any time by press ing the
ISETI but
ton aga in.
Steering defective! Do not drive vehicle!
• Contact your nea rest a uthorized Audi dea ler .
• Do
not tow your ve hicle.
A WARNING
Your ve hicle m ust not be towed in t he event
of a ma lfunction in t he e lectron ic stee ring
col um n loc k becaus e it can not be st ee red due
to the loc ked steering . If i t is towed w ith th e
st eer ing lo cked , the re is the r isk o f an acci
d en t.
©-Ignition lock malfunction
A malfunction in the ignition lock must b e re
paired immediately .
If the . symbo l in the display b links , there is a
malfu nction in t he e lectron ic ignition lock. A d riv
er m essage a ppears as well to expla in the ma l
f unct ion in mo re det ail. The driv er warning go es
out a ft er abou t 5 se cond s, but it can b e broug ht
up at an y ti me by pressing the
!SE T! bu tt o n ag ain .
Ignition lock defective. Contact dealer! .,.
27
Page 33 of 296
the driver information system. Keep in mind that
the engine speed will not exceed the value dis
p layed in the driver information system, for ex
ample when downshifting.
Please go to an autho rized Audi dea ler o r other
qua lified workshop to have the malfunction re
pa ired .
~ Diesel particulate filter clogged
Applies to: ve hicles with diesel eng ine and diesel part iculate
filter
11!1 Particul ate filt er S ee ow ner's manual
When the II symbol illum inates, you can a lter
your d riving style to assist the fi lter self-cleaning
process . Dr ive for approx imately 15 minutes with
the selector leve r in the S position at a minimum
speed of 37 mph (60 km/h) and an engine speed
of approximate ly 2,000 RPM. The temperature
increase that will result from this can burn off
the soot in the filter. The symbol will switch off
when the clean ing is successful. After a success
ful cleaning, there is no need to br ing the car to
a n author ized dealer or qualified workshop be
cause this is part of no rmal veh icle operat ion.
If the symbol
II does not switch off, see your
author ized dealer or other qualif ied workshop to
have the prob lem corrected.
For more information on the diesel particulate
filter, refer to
<=:>page 195.
A WARNING
Always adapt your speed to the current
weather, road and traffic conditions. You
should never disobey traffic laws in orde r to
follow driving recommenda tions.
{0 Headlight range control defective
II Headlight range cont rol defe cti ve !
If the symbol II ill uminates, the dynamic head
l ight range control is no longer wo rking prope rly.
H ave the sys tem checked and repaired at yo ur au-
CD thor ized Audi dealer. CD .... N ,-... N .... 0 0 c:<: 00
Dri ver informa tion system
~O Adaptive light defective
Applies to: vehicles with adaptive light
Efl Audi adapt ive light : defe ctiv e
When this symbol Efl illuminates, it means that
adaptive light is defective. Go to an authorized
Audi dealer to have the head lights or the contro l
u nit for the adapt ive lig ht repaired.
~ - Steering malfunction
El! Steering lo ck : Con tact deale r!
If the m symbol in the d isplay comes on, there
is an e lectronic stee ring column lock malfunc
t ion.
Drive to your author ized Audi dealer immed iately
to have the malfunction cor rected .
A WARNING "--
Your vehicle m ust not be towed in the event
of a malfunction in the e lectronic steering
column loc k bec ause i t cannot be stee red due
to the loc ked steering. If it is towed w ith the
steering locked, there is the risk of an acc i
dent .
~ Ignition lock malfunction
m Ignition lock defective
If the l3 symbo l in the d isplay comes on, the re is
a malfunction in the electronic ignition lock .
Please go to an authorized Audi dealer or other
qualified workshop to have the malfunction re
paired.
Q Adaptive dampers
Applies to: vehicles with Audi drive select
R Suspension: System fault!
If the R symbo l in the disp lay comes on, the re is
a malfunction in the adaptive dampers. Please go
to an authorized Audi dealer or other qualified
workshop to have the ma lfunction repaired.
~ Windshield wipers faulty
El Windshield wiper s defective
31
Page 44 of 296
Opening and closing
-Always ensure that no one is within range of
the rear lid when it is moving, in particular
close to the hinges and the upper and lower
edges -fingers or hands can be pinched.
- To help prevent poisonous exhaust gas from
being drawn into the vehicle, always keep
the rear lid closed while driving. Never
transport objects larger than those which fit
completely into the luggage area, because
then the rear lid cannot be fully closed.
- Never leave your vehicle unattended espe
cially with the rear lid left open. A child
could crawl into the car through the luggage
compartment and pull the lid shut, becom
ing trapped and unable to get out. To re
duce the risk of personal injury, never let
children play in or around your vehicle. Al
ways keep the rear lid as well as the vehicle doors closed when not in use.
- If there is a luggage rack or bicycle rack
mounted on the rear lid, it may not be able
to open completely or an opened rear lid may close by itself because of the added
weight. So the open rear lid must be sup
ported or the weight must be removed from
the luggage rack first.
(D Tips
-As soon as the electrical connection to the
trailer socket is completed on vehicles with
a factory installed towing hitch, or a trailer
hitch that was installed later according to
factory specifications, the automatic rear lid
funct ion can only be operated via the handle
in the rear lid.
- If the vehicle battery charge drops below a
certain level, you can still open or close the
rear lid manually, however, you will need to
apply more force to close it.
- If the rear lid on a locked vehicle is unlocked
with the middle button
.::::::5 on the remote
key, the rear lid is automatically locked
again immediately after closing. This is indi
cated by the turn signals blinking.
- The following applies to vehicles equipped
with the Convenience key* feature: if the re
mote control key is left in the luggage com
partment, luggage compartment will auto-
42 matically unlock
itself after you lock the ve
hicle. This prevents you from unintentional
ly locking your key in the luggage compart
ment.
Emergency unlocking of
the luggage compartment lid
The luggage comportment lid con be released in
on emergency from the inside.
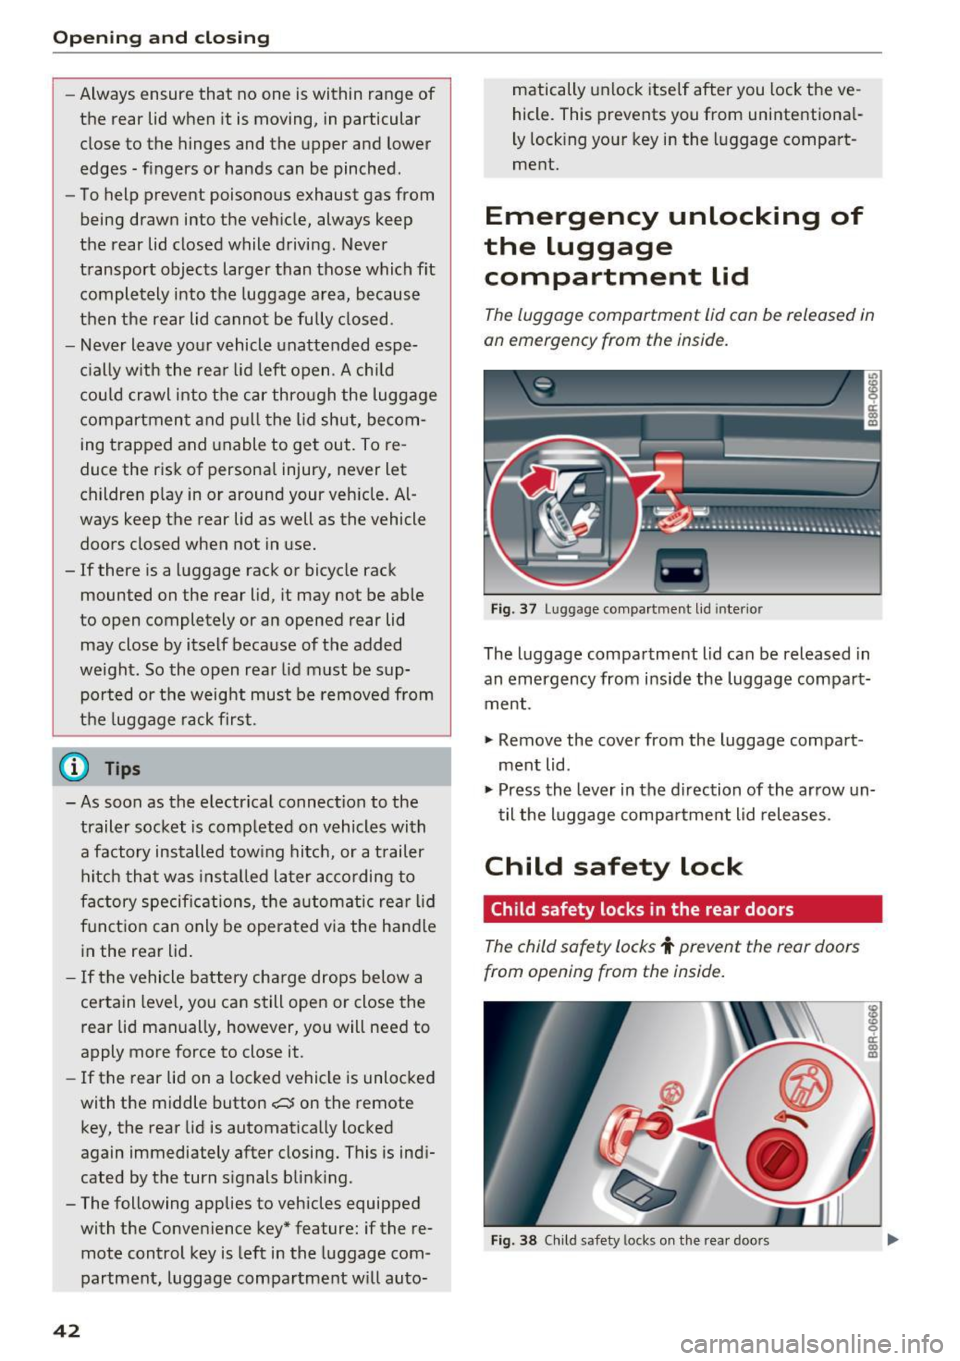
Fig . 37 Lugg age compartment lid interio r
The luggage compartment lid can be released in
an emergency from inside the luggage compart
ment .
"" Remove the cover from the luggage compart
ment lid.
""Press the lever in the direction of the arrow un
til the luggage compartment lid releases.
Child safety lock
Child safety locks in the rear doors
The child safety locks t prevent the rear doors
from opening from the inside.
Fig. 38 Child safety locks on the rear doors
Page 54 of 296
Lights and Vision
-yo ur vehicle is being towed by a tow truck or
if you are towing another vehicle behind
you.
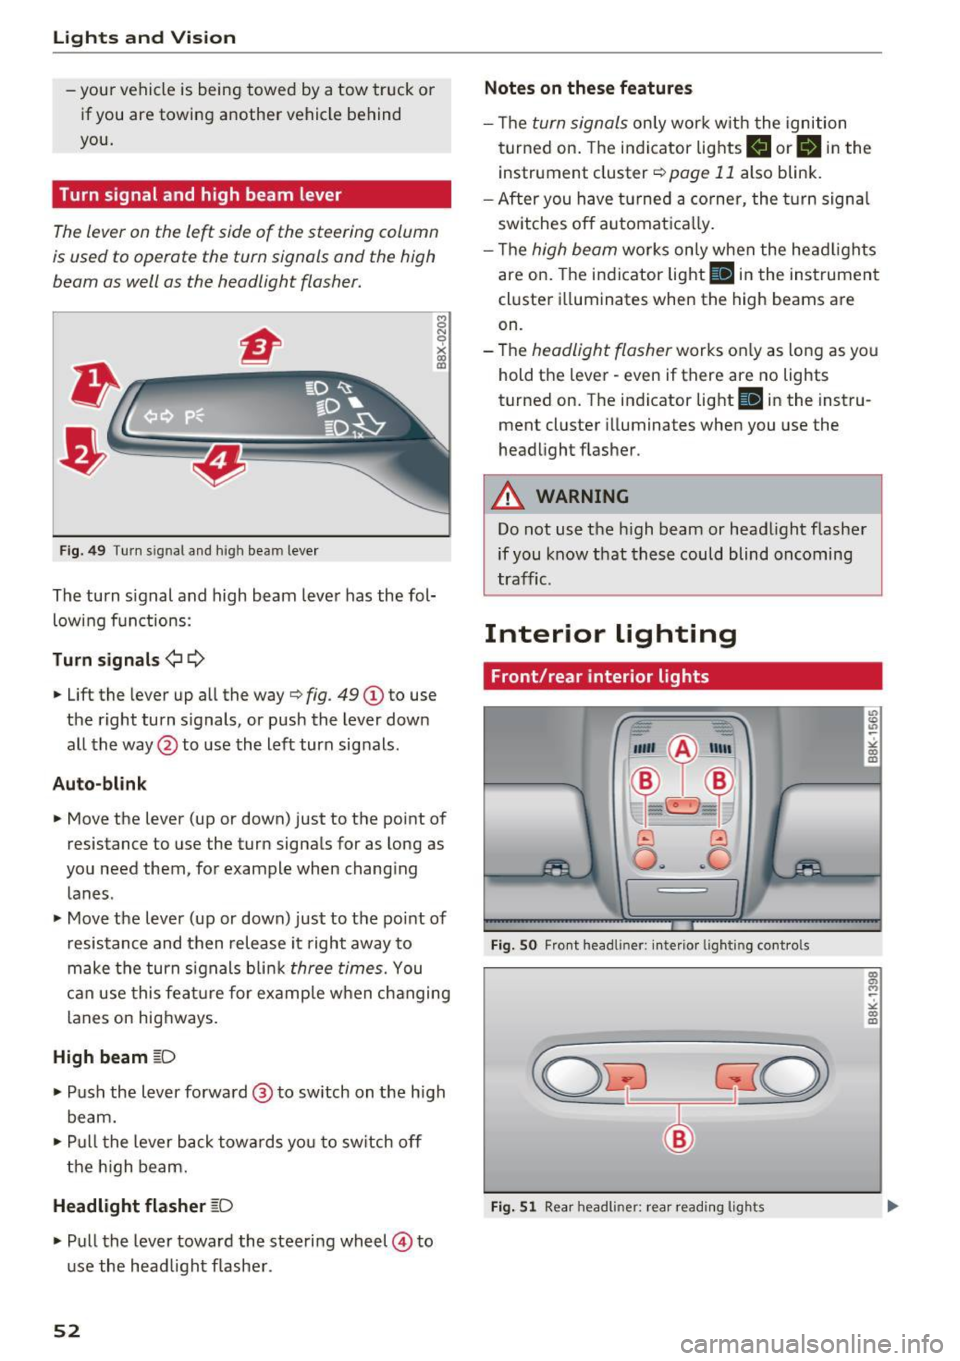
Turn signal and high beam lever
The lever on the le~ side of the steering column
is us ed to operat e the turn signals and th e high
beam as well as the headlight flasher.
F ig . 4 9 Tu rn s ig na l a n d h ig h beam leve r
The turn signal and high beam leve r has the fol
low ing f unctions :
Turn signals ¢¢
8 N 'i'
~ (0
• Lift the lever up al l the way c> fig . 49 (D to use
the right turn s ignals, or push the lever down
all the way@to use the left turn signals .
Auto-blink
• Move the lever (up or down) just to t he point of
resistance to use the turn signals for as long as
yo u need them, for example when chang ing
lanes .
• Move the lever (up or down) just to the point of
resistance and then release it right away to
make the turn signals b li nk
three times. You
can use this fea ture for example when ch anging
lanes on hig hways.
High beam ~D
• Push the l ever forward @ to sw itch on the h igh
beam.
• Pull t he lever back towa rds you to sw itch off
t he hig h beam.
Headlight flasher ~D
• Pu ll the lever toward the steering wheel © to
u se the head light f lashe r.
52
Notes on these features
- Th e turn signals on ly work w it h the ignition
t urned on. The indi cator lights
B or B in the
instrument cluster¢
page 11 also blink .
- After you have turned a co rner, the turn signa l
sw itches o ff automat ica lly.
- Th e
high beam works only when the head ligh ts
are on. The indicator light
Bl in the instrumen t
cl uster illuminates when the high beams are
on.
- The
headlight flasher works o nly as long as yo u
hold t he lever - even if there are no lights
turned on. T he indicator light
Bl in the inst ru
ment cluster illuminates when you use the
headlight flas her .
A WARNING
Do not use the h igh beam or head light flasher
if you know that these could blind oncoming
tra ffic.
Interior lighting
Front/rear interior lights
Fig. SO Fro nt headl iner: interio r li gh tin g cont ro ls
Fig. 51 Rear h eadli ner: rea r read ing ligh ts
" co (0
co a, M ~
"' co (0
Page 55 of 296
a,
a,
..... N
" ('I ..... 0 0
0:
co
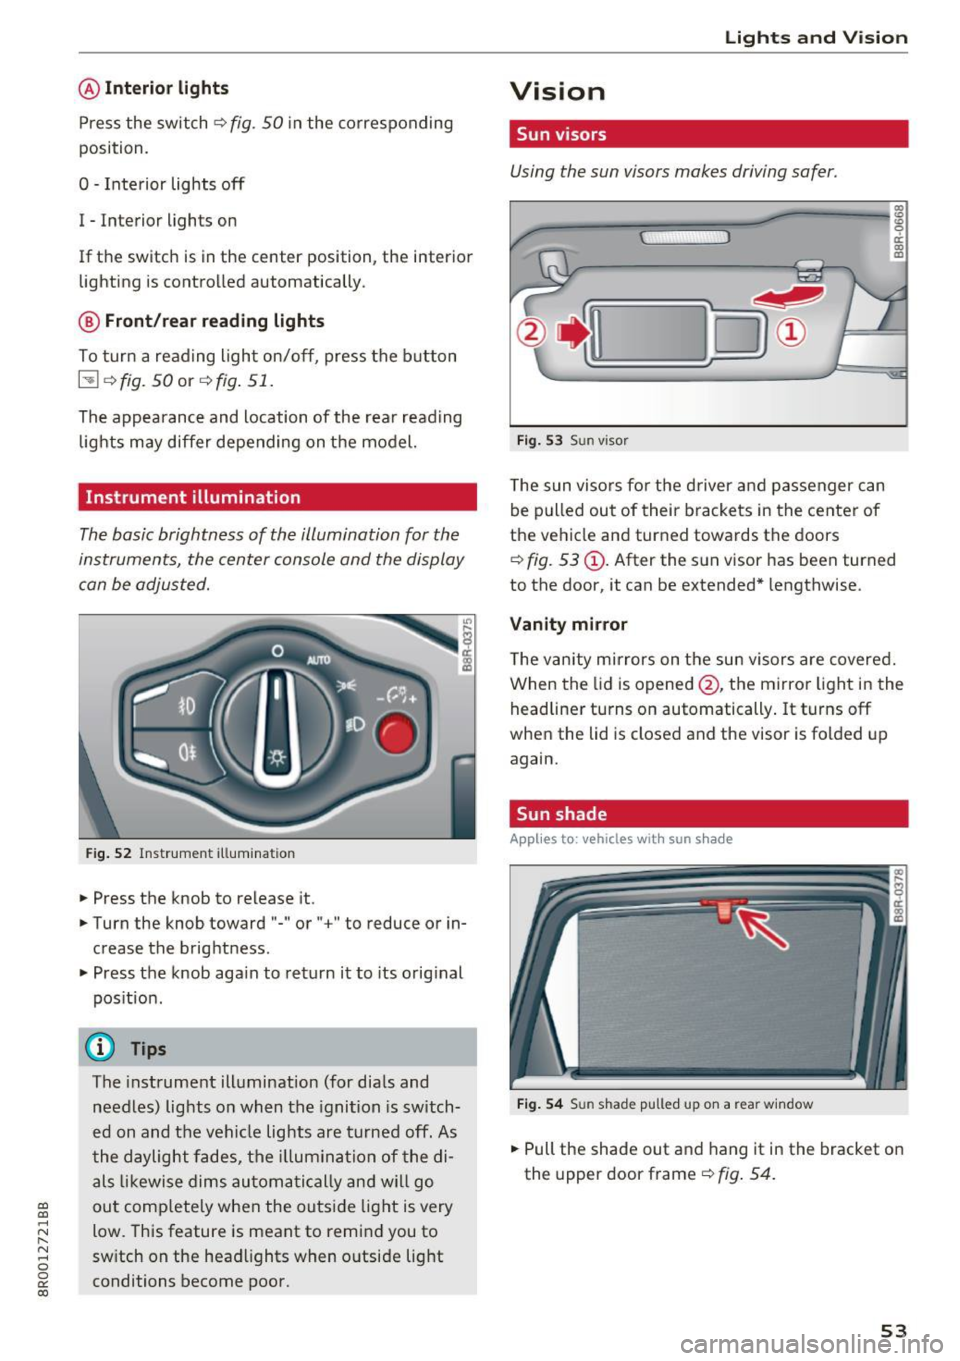
@Interior lights
Press the sw itch q fig . 50 in the co rresponding
position.
0 -Inte rior lights off
I -Interior lights on
If the switch is in the center position, the interior lighting is controlled automatically .
@ Front/rear reading lights
To tur n a read ing ligh t on/off, press the b utton
I::!! q fig. 50 or q fig . 51.
The appearan ce and location of the rear read ing
lig hts may differ depending on the model.
Instrument illumination
The basic brightness of the illumination for the
instruments, the cen ter console and the display
c an be a djusted.
F ig. 5 2 Instr ume nt ill um inatio n
• Press the knob to release it.
• Turn the knob toward "-"or" +" to reduce o r in
crease the brightness .
• Press the knob aga in to ret urn i t to its orig inal
pos it ion .
@ Tips
The inst rument ill umination (for dia ls and
needles) lig hts o n when the ignition is switch
ed on and t he vehi cle lights are turned off . As
t he daylight fade s, the illum ina tio n of the di
a ls li kewise dims au toma tically a nd wil l go
ou t com plete ly when the outs ide light is very
low. This feature is meant to remi nd you to
sw itch on the headlights when o utsi de light
conditions become poor.
Lights and V ision
Vision
Sun visors
Using the sun visors makes driving safer .
~
i:--o J®
Fig. 53 Sun visor
T he sun viso rs fo r the d river a nd passenger c an
be p ulled out of their brackets in the center of
the ve hicle and turned towards the doors
q fig. 53 @. After the s un visor has been turned
to the door, it can be extended* lengthwise .
Vanity mirror
The v anity mirrors on the sun visors are covered.
When the lid is opened @, the mirro r light in the
head line r turns on automatically . It turns off
when the lid is closed and the visor is fo lded up
again.
Sun shade
Applies to : vehicles with sun shade
Fi g. 54 Sun shade p ulle d up on a rea r w indow
• Pull the shade out and hang it in the bracket on
the upper door frame
q fig . 54.
53
Page 71 of 296
a,
a,
..... N r-N ..... 0 0
0:
co
Removing the cargo floor , installing
• To remove, lift t he cargo floor folded together
and pull it toward the rear lid .
• To install, place the folded cargo floor into
both retainers and unfold it.
Grab the protective tray on the ha ndles and pu ll
it out. You can also install a divider to divide @
the storage area. Depending on the vehicle
equipment level, the protective tray can have dif
ferent sizes and shapes .
Cargo net and storage hooks
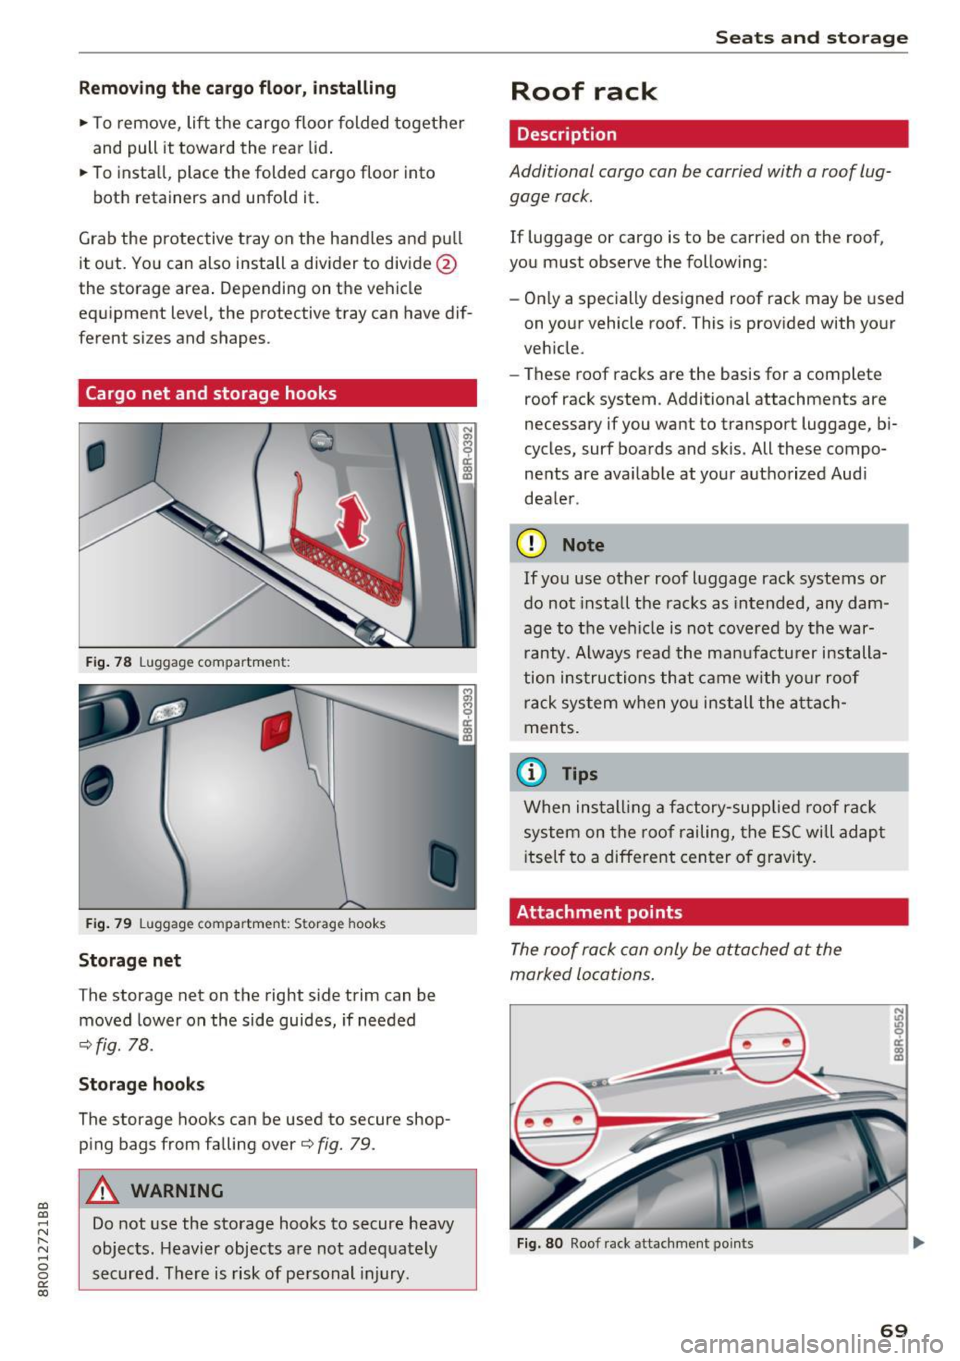
Fig. 78 Luggage compartment:
F ig . 79 Luggage compartment: Storage hooks
Storage net
The storage net on the right side trim can be
moved lower on the side guides, if needed
c:>fig. 78.
Storage hook s
The storage hooks can be used to secure shop
ping bags from falling over
c:> fig. 79.
A WARNING
Do not use the storage hooks to secure heavy
objects. Heavier objects are not adequately
secured. There is risk of pe rsonal injury.
Seats and storag e
Roof rack
Description
Additional cargo can be carried with a roof lug
gage rack .
If luggage or cargo is to be carried on the roof,
you must observe the following:
- On ly a specially designed roof rack may be used
on your vehicle roof. This is provided with your
veh icle .
- These roof racks are the basis for a complete
roof rack system . Additional attachments are
necessary if you want to transport luggage, bi
cycles, surf boards and skis. All these compo
nents are ava ilable at your a uthorized Aud i
dea le r.
(D Note
If you use other roof luggage rack systems or
do not install the racks as intended, any dam
age to the vehicle is not covered by the war
r anty. Always read the ma nufactu rer installa
tion ins tructions that came with yo ur roof
rack system when yo u install the atta ch
ments.
(D Tips
When ins tall ing a factory-supp lied roof rac k
system on the roof railing, the ESC will adapt
i tself to a differe nt center of gravity .
Attachment points
The roof rack can only be attached at the
marked locations .
Fig . 80 Roof rack attachment points
69
Page 81 of 296
![AUDI Q5 2017 Owners Manual CD
CD
.... N ,-... N .... 0 0 C<. 00
[i] Adjusting seat heating*
Pressing the button switches the seat heating on
at the highest setting (level 3) . The LEDs indicate
the temperat AUDI Q5 2017 Owners Manual CD
CD
.... N ,-... N .... 0 0 C<. 00
[i] Adjusting seat heating*
Pressing the button switches the seat heating on
at the highest setting (level 3) . The LEDs indicate
the temperat](/img/6/57633/w960_57633-80.png)
CD
CD
.... N ,-... N .... 0 0 C<'. 00
[i] Adjusting seat heating*
Pressing the button switches the seat heating on
at the highest setting (level 3) . The LEDs indicate
the temperature level. To reduce the tempera
ture, press the button again. To switch the seat heating off, press the button repeatedly until the
LED turns off.
After 10 minutes, the seat heating automatically
switches from level 3 to level 2.
lil Adjusting seat ventilation*
Pressing the button switches the seat ventilation
on at the highest sett ing (level 3). The LEDs indi
cate the venti lation level. To reduce the ventila
tion level, press the button again. To switch the
seat v entilation off, press the button repeatedly
until the LED turns off.
I ..., FRONT I Switch the defroster on/off
The windshield and side windows are defrosted
or cleared of condensation as quickly as possib le.
The maximum amount of air flows mainly from
the vents below the windshield. Recirculation
mode switches off. The temperature should be
set to 72 °F (22 °() or higher. The temperature is
controlled automatically .
T he
IAUTOI button switches the defroster off.
llliil REARI Switching rear window heater on/
off
The rear window heater on ly operates when the
engine is running. It switches off automatica lly
after a few minutes, depending on the outs ide
temperature.
To prevent the rear window heater from switching off automatically, press and hold the
!llil> REAR I
button for more than 2 seconds . This remains
s tored until the ignition is switched off .
Air vents
You can open and close the center and rear air
vents using the thumbwheels . The levers adjust
the direction of the airflow from the vents.
You can adjust the air temperature in the rear by
turning the thumbwheel toward the red side to
Warm and cold
make it warmer or toward the blue s ide to make
it coo ler.
A WARNING
-~
- Do not use the recirculation for extended
periods of time. The windows could fog up
since no fresh air can enter the vehicle . If
the windows fog up, press the air rec ircula
tion button again immed iately to switch off
the air rec irculat ion function or select de
frost.
- Individuals with reduced sensit ivity to pain
or temperature could develop burns when
using the seat heating* function. To reduce
the risk of injury, these individua ls should
not use seat heating.
(D Note
To avoid damage to the heating elements* in
the seats, do not kneel on the seats or place heavy loads on a small area of the seat.
Setup
The basic climate control settings can be adjust
ed in the radio or MMI*.
"'Select: !CAR I function button> A/C control but
ton. Or
"' Select:
!CAR ! function button> Car systems*
control button >
A/C.
Automatic recirculation
When switched on, automat ic rec irculat ion con
trols the recirculation mode automatically. If the
windows fog up, press the
I@ F RON T I button.
Synchronization
When synchronization is switched on, the same
settings are appl ied to both the driver and front
passenger , except for the seat heating/ventila
t ion* . Synchronization switches off when you ad
just the settings on the front passenger's sid e.
You can also sw itch synchronizat ion on by press-
i ng and holding the knob on the driver's side. ..,.
79